Decades ago, Ford made the jump from four-speed manual transmissions to five-speeds. Newer Cobras even feature six-speeds, so it’s natural that those who own earlier Mustangs with four-speed manuals now feel a little gear envy. Many people love the feel of having a manual transmission, but if you’re still using a four-speed, you’re missing out on a lot of performance and economy potential. Adding a transmission with additional gears places your gears closer together for better acceleration and gives you more gears to choose from for easier cruising. But which transmission is right for your Mustang? You need one that’s strong, smooth and capable of bolting to your engine, and it’s not easy to find all three attributes in the same gearbox.
Drag Race

Gary Moore is no stranger to hot rods; he has owned literally dozens of them over the years. Past rods include no fewer than seven Deuces, a couple of altered drag roadsters, three ’40 coupes, three woodies…well, you get the idea. Like many hot rodders, Moore has an eye for the unique, and while his current stable holds a Deuce highboy roadster, a ’27 roadster pickup and a ’51 Ford woody, a couple of years ago he contracted “straight-axle fever.”

In the world of high-performance builds, attention to detail sets great cars apart from the rest. That’s why Factory Performance™ Parts, a division of PROFORM® Parts, has taken a fresh approach to a time-tested workhorse with the launch of the new Slant-Edge 100 Amp Alternators—a stylish, high-output evolution of the iconic GM 10SI. Designed for those who care as much about what’s under the hood as how it looks when the hood is up, the Slant-Edge delivers form and function in equal measure.
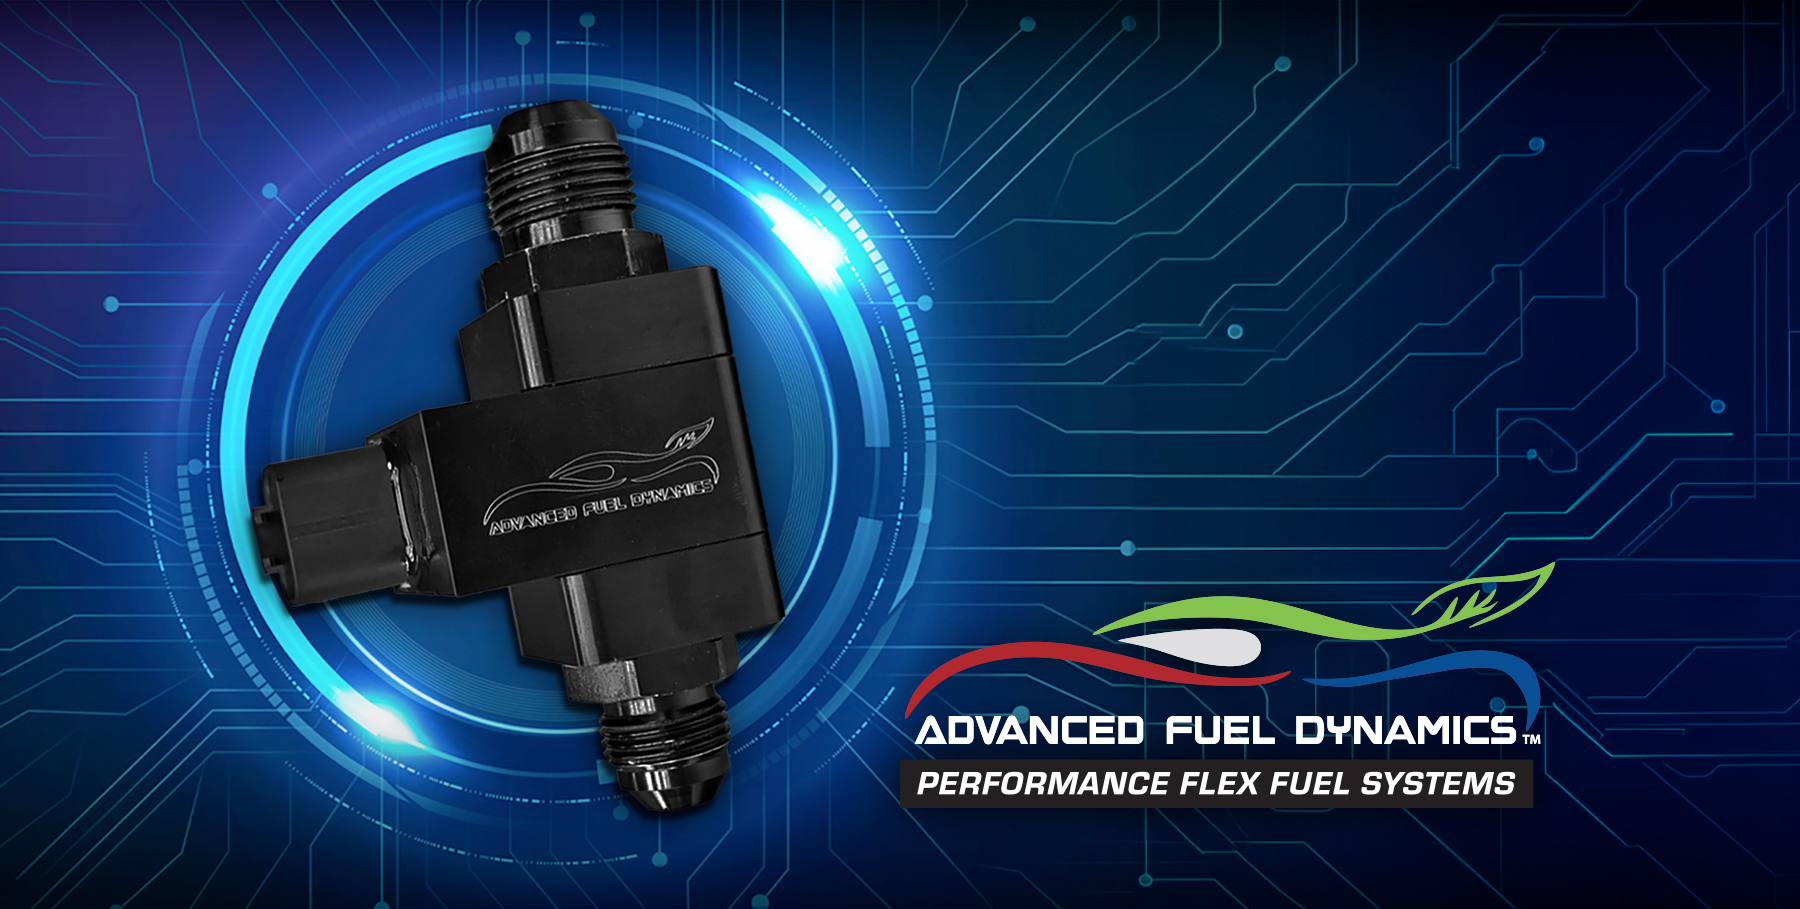
Advanced Fuel Dynamics is set to revolutionize the fuel sensor market with their new E-Sense high-flow performance-grade fuel content sensor. This sensor offers a competitively priced, top-tier alternative to the GM/Continental sensor, designed with cutting-edge technology to provide enhanced performance for high-flow fuel systems. It is an essential upgrade for enthusiasts and professionals alike.

Whether you’re in the driver’s seat or looking underneath the hood, it’s the first place enthusiasts come to find out what a car is all about. After all, without the right engine package, everything we long for in our cars would be nothing more than static displays of creative artistry.

When a good portion of your life has been immersed in Pro Mod, Pro Stock, Top Sportsman and other forms of drag racing, it’s likely those interests will carry over to other, similar interests. And so it is that many legendary racers end up building what often turns out to be milder versions of the vehicles and engines that were so instrumental in their lives. Just imagine the knowledge they could apply.

Back in the ’60s, a youthful Barry Wallner was well known in and around Illinois for his modified ’57 sedan delivery. It was a tough competitor at the local dragstrips, but time took its toll, and most of the dragstrips have disappeared, giving way to housing and shopping-center developments and industrial complexes. But this hasn’t stopped Wallner, who was an adept restorer. So, from the late-’60s through the mid-’90s, he has gone on with other ’57 Chevys to win top show awards.

Once a West Coast gasser, this ’55 Chevy made its way to Lebanon, Ohio, thanks to longtime Chevy enthusiast Freddie Green. That was back in 1978, when his son Jason was just four years old. Fast forward a few years, and Jason, professing to be a Chevy man since birth, took ownership of the car from his father at the age of 10.

At first, it appeared as though the bright red Mustang didn’t have an engine in it, but once the seller, Eric Rizner, opened the hood, Holden and Wunsch could plainly see that the engine had been set back in the chassis. Was this the elusive Mustang “racecar” that Holden had been looking for?
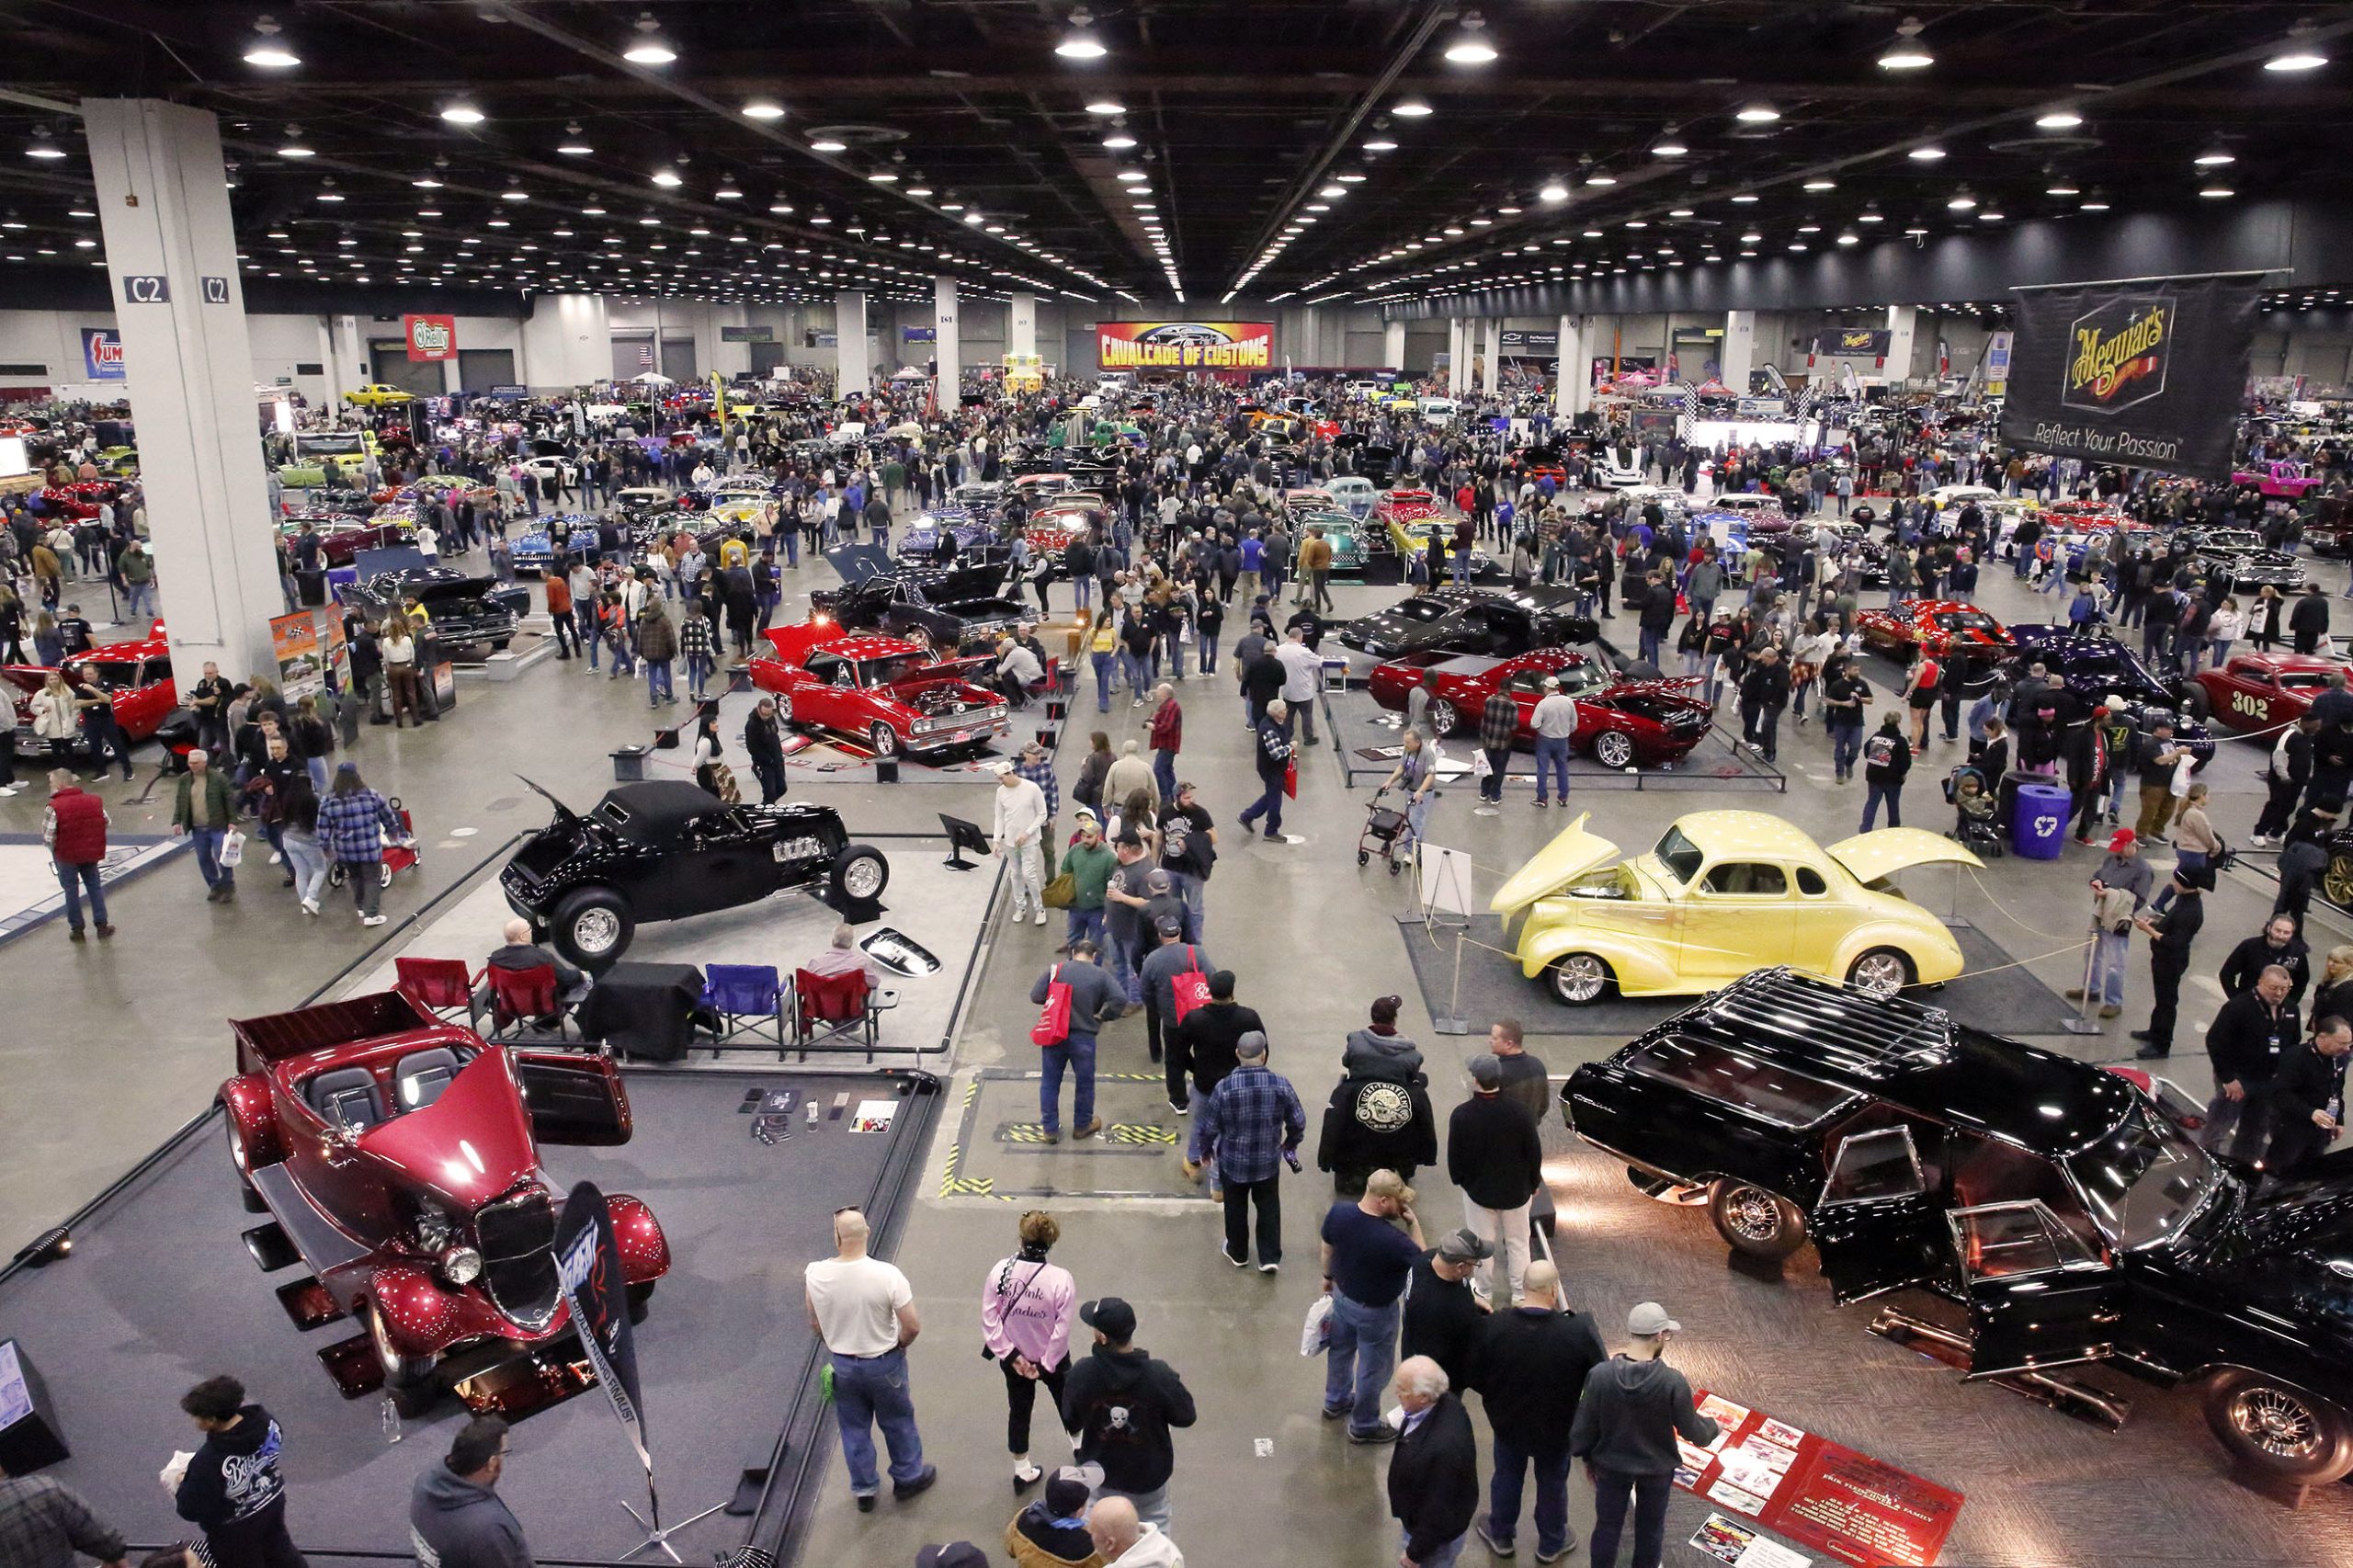
A Celebration of Automotive Passion Author Walking into the Madness Step through the doors, and bam—you’re hit with row after row of mind-blowing builds. Right off the bat, Barbie’s pink Cadillac Convertible was stealing the show, proving that even a toy-inspired cruiser can have serious presence. Then there was the Mega Morph Giant Transforming Robot Car—because why not? Nothing says Autorama like a car that can shape-shift. The 2025 Ridler Award Winner and the Great 8 The 2025 Ridler Award went to a beast of a build—Gray Madder, a killer 1955 Chevy Nomad that took things to a whole new level. Built by Southern Comfort Customs, this thing is pure automotive perfection, with flawless bodywork, a rowdy LS3 engine, and custom details that had the crowd losing their minds. But don’t get it twisted—the rest of the Great 8 weren’t exactly slouches. We’re talking about high-end restorations and wild, out-of-this-world customs that brought serious heat, proving once again that if you want to make it in this game, you better bring everything you’ve got. History, Horsepower, and Pure Creativity One of the coolest things about Autorama is the mix of styles, and this year was no different. A 1941 Buick Special, complete with a bullet hole from Pearl Harbor—yeah, you read that right—brought some serious history to the show floor. Then there was the 1951 Mercury done up like a NASCAR stocker, making the trek all the way from Austria just to drop jaws. Why Autorama is Pure Magic Detroit Autorama isn’t just another car show—it’s a full-blown tribute to the obsession, creativity, and hardcore wrenching that makes car culture what it is. Whether you’re into pristine classics, wild customs, or off-the-wall builds that make zero sense but totally work, this show had it all. And as the doors closed on another epic year, one thing was clear: 2025 was a banger, and we’re already counting the days ‘til next year.