TheAutoBuilder.com

QUIET DOWN

Installing Dynamat Xtreme for a Cool and Quiet Ride

Author

Picture of Josh Kaylor

Josh Kaylor

Story & Photography

Why Classic Trucks Are Louder and Hotter

If you’ve ever hopped out of a classic pickup into a modern daily driver pickup, you have probably noticed the startling difference in noise and heat levels within and throughout the interior. This is because some time in the mid-’80s, pickups began receiving the same noise and heat control attention as auto manufacturers spent on cars, as they filled every nook and cranny with noise cancellation foam, sealant and padding. These insulations greatly helped cancel out noises and improved temperature control, as well as help dampen vibrations.

The Problem with Older Classic Trucks

Older classic trucks are among the worst in all these areas. They squeak, they are noisy, and do little to control heat buildup inside the cab, especially around the floorboard. Since all these trucks were originally workhorses, not much attention was paid to these areas, but this problem is easily solved. Whether you are just beginning your interior and building from scratch or retrofitting your existing truck, Dynamat offers a wide selection of noise and sound cancellation products. Dynamat engineers have designed a complete line of products, ranging from speaker kits to complete sound and noise cancellation solutions from the floor to the roof.

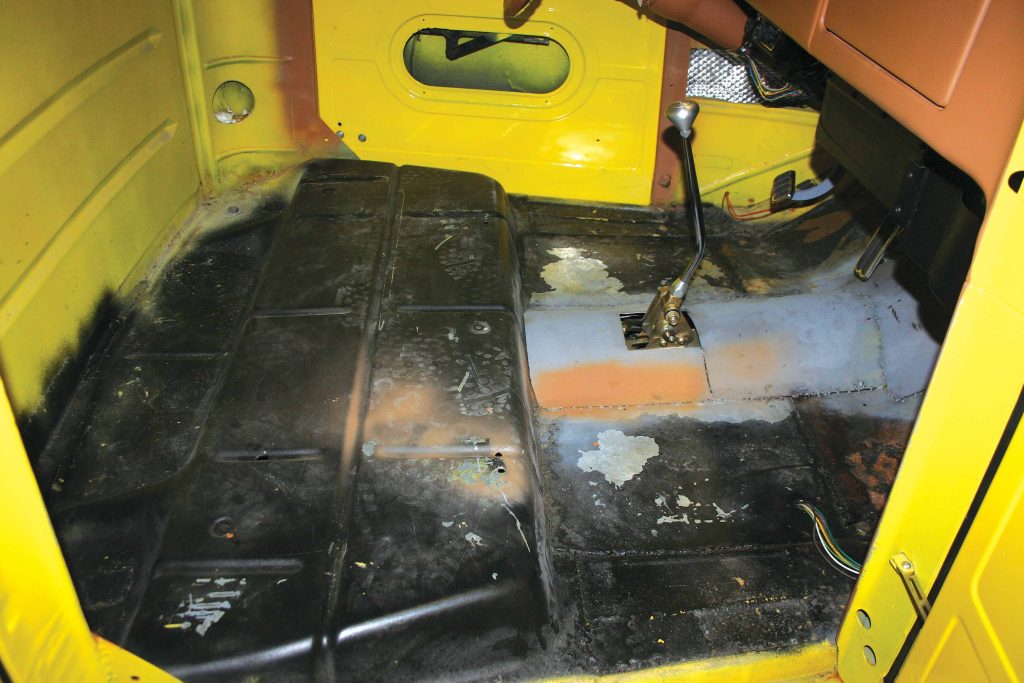
The Test Vehicle and Its Challenges

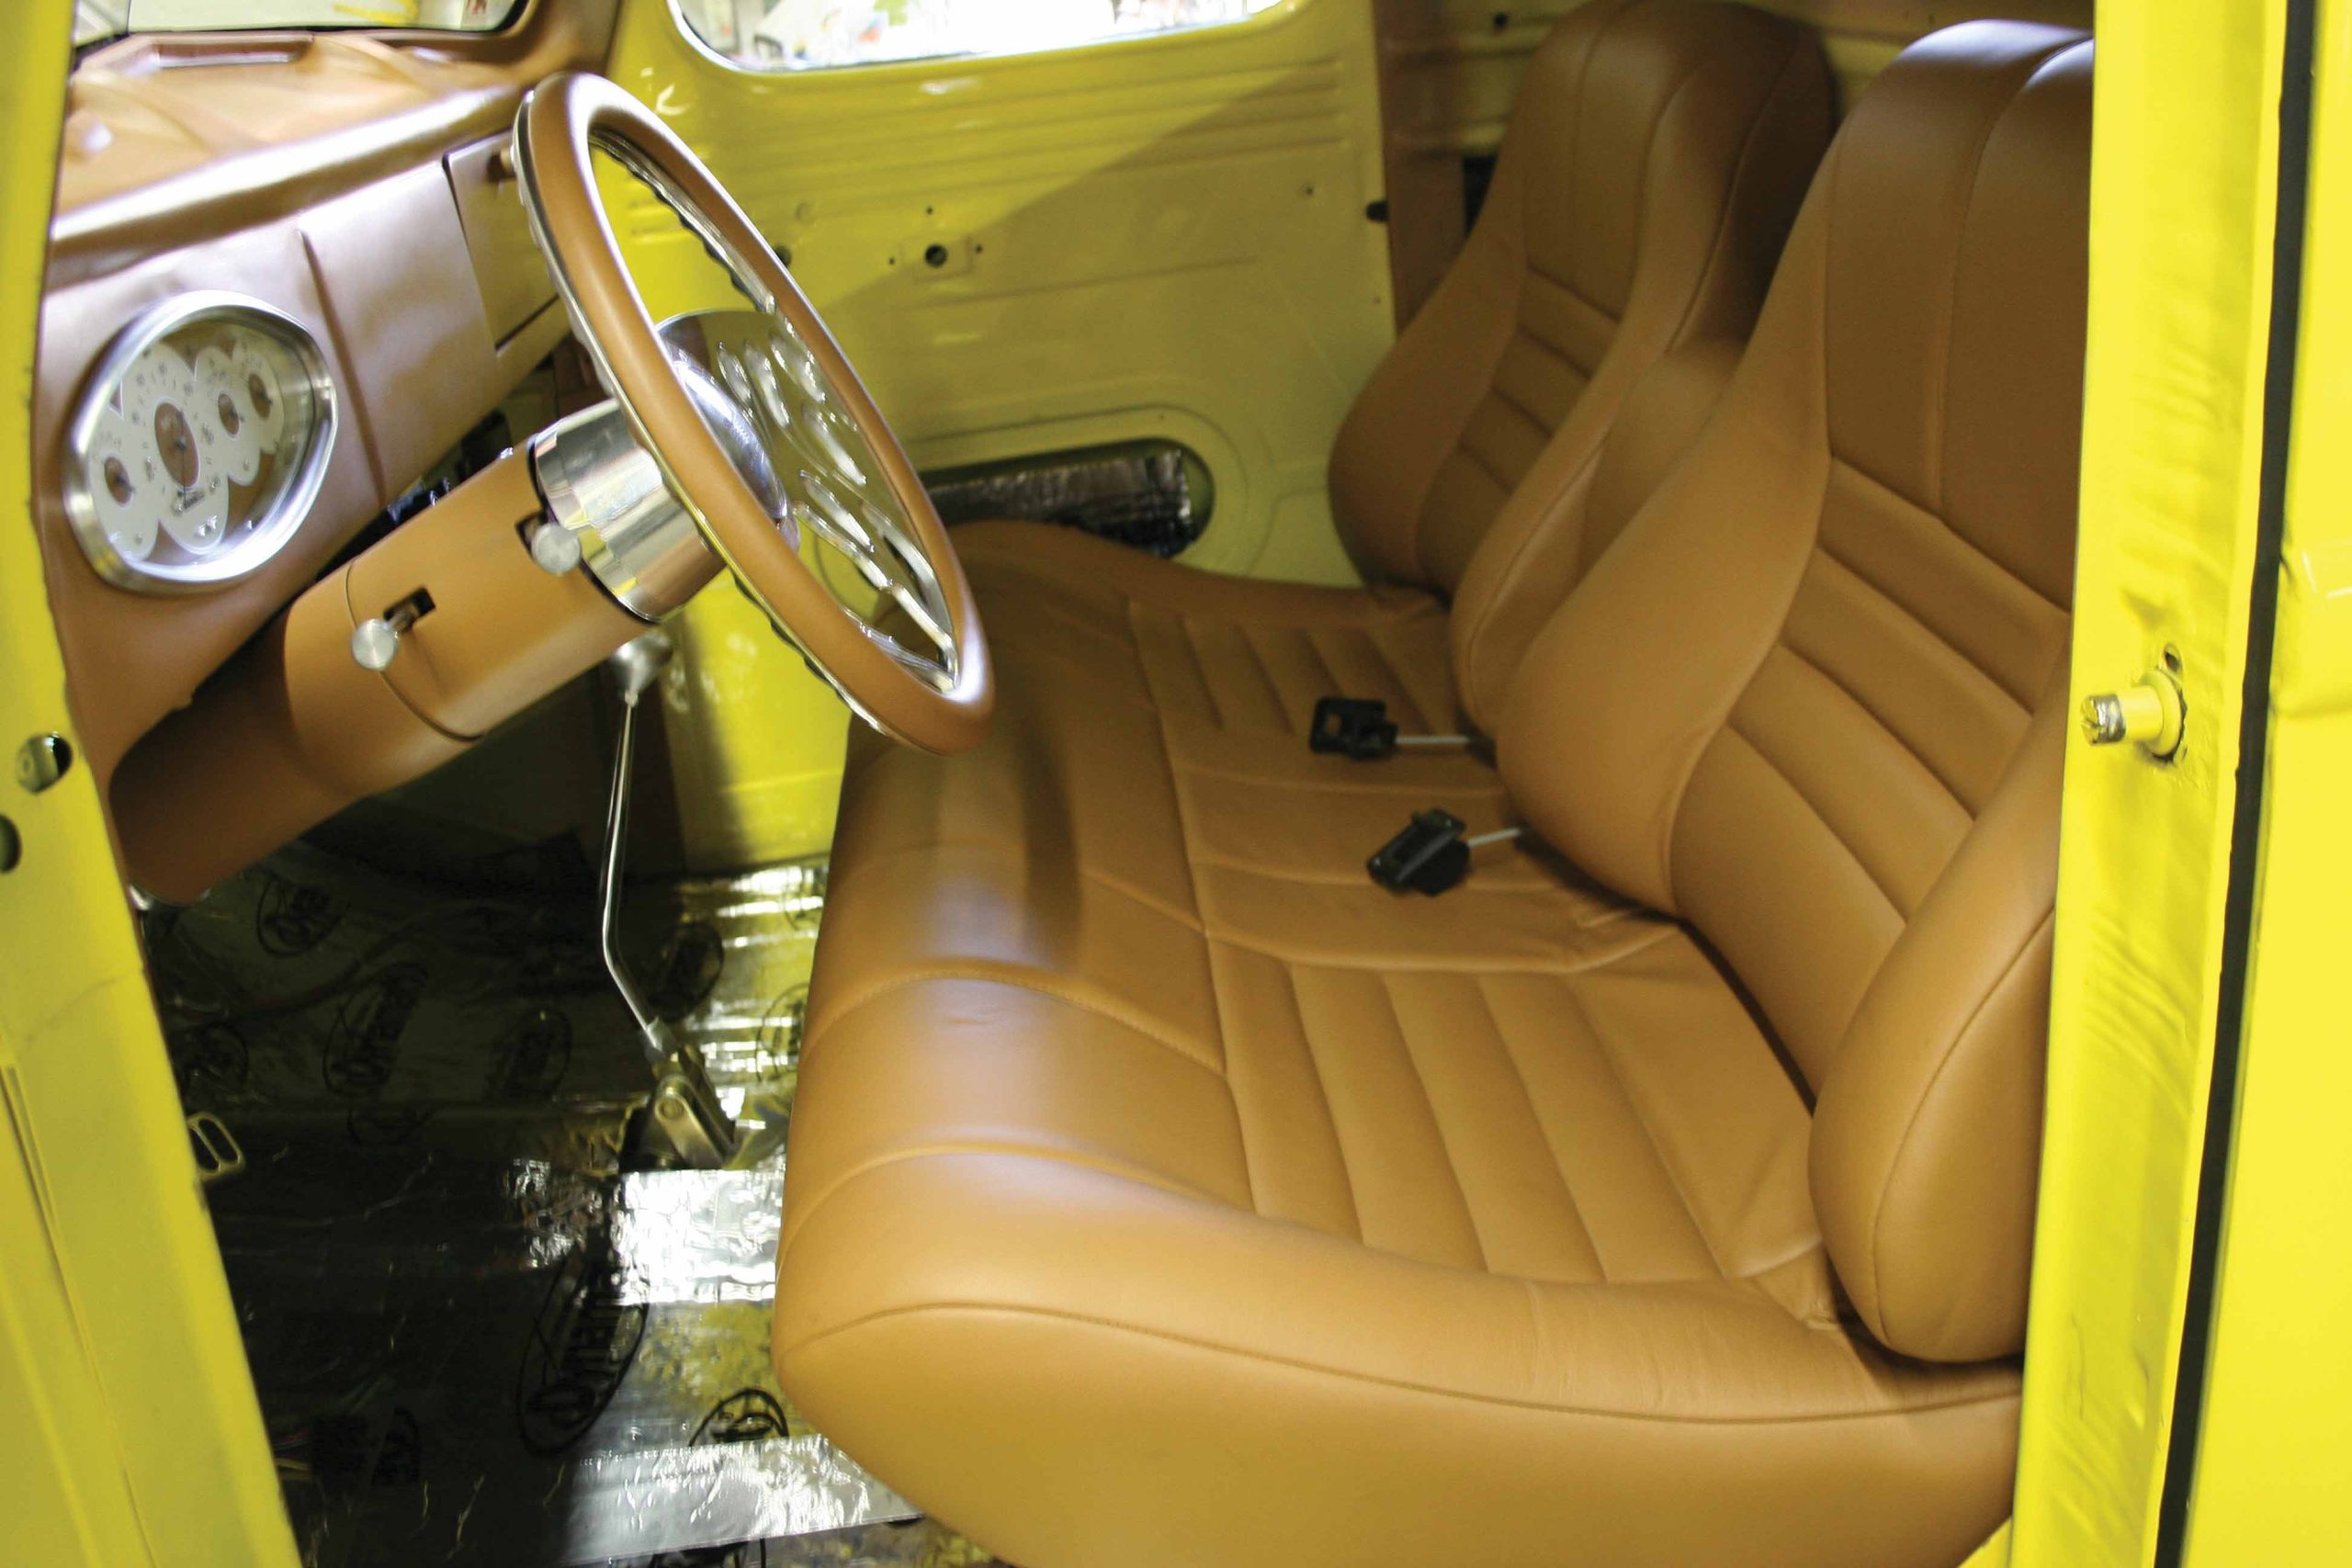
This International pickup is in the process of receiving a new interior, which is being done in stages, allowing it to be driven while parts of the interior are being done, as budgets permit. The truck squeaks and rattles, and the A/C fights to cool the cabin. Heat buildup can be bad, and this doesn’t begin to mention the excessive noise and oil canning throughout the interior. This problem has persisted, but now it’s time to do something about it.

Learning the Proper Dynamat Installation Process

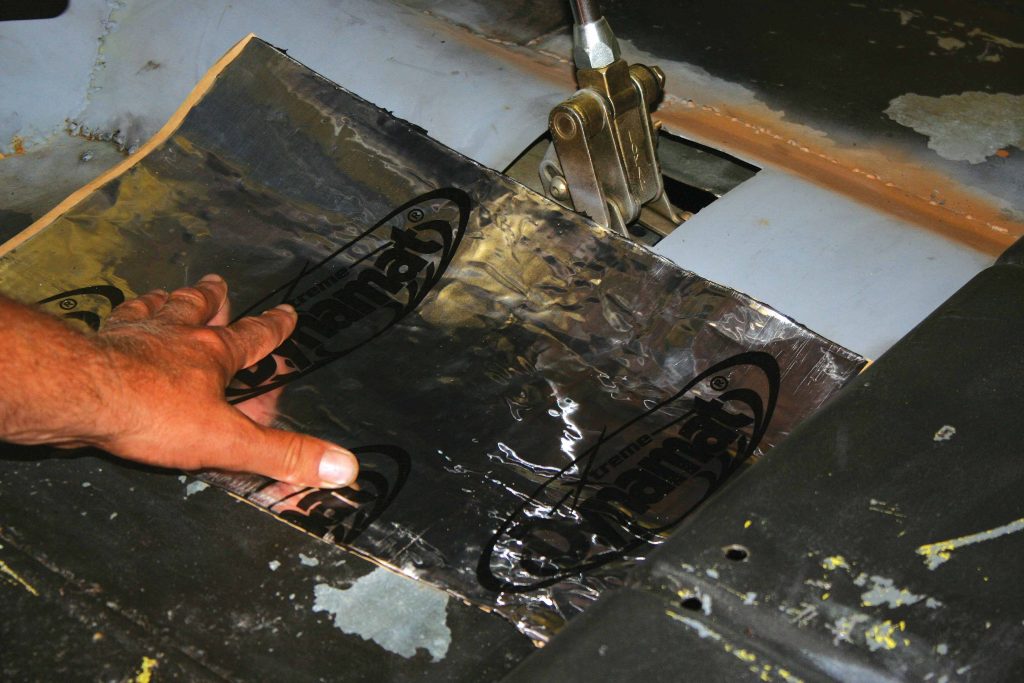
While visiting M&M Hot Rod Interiors, we had the opportunity to speak with Wayne and Pam McGriff about the proper procedure for installing Dynamat in the cab of a pickup or any car for that matter. M&M stresses to all of its customers the importance of installing noise, heat and sound canceling material, such as Dynamat Xtreme, into the interior of their cars. After deciding that Dynamat Extreme was right for us, we purchased the Dynamat Extreme Bulk Kit from M&M, which includes nine 18×32-inch squares. The precut squares allow you to cover 36 sq ft, which is plenty for most classic trucks.

About Dynamat Extreme

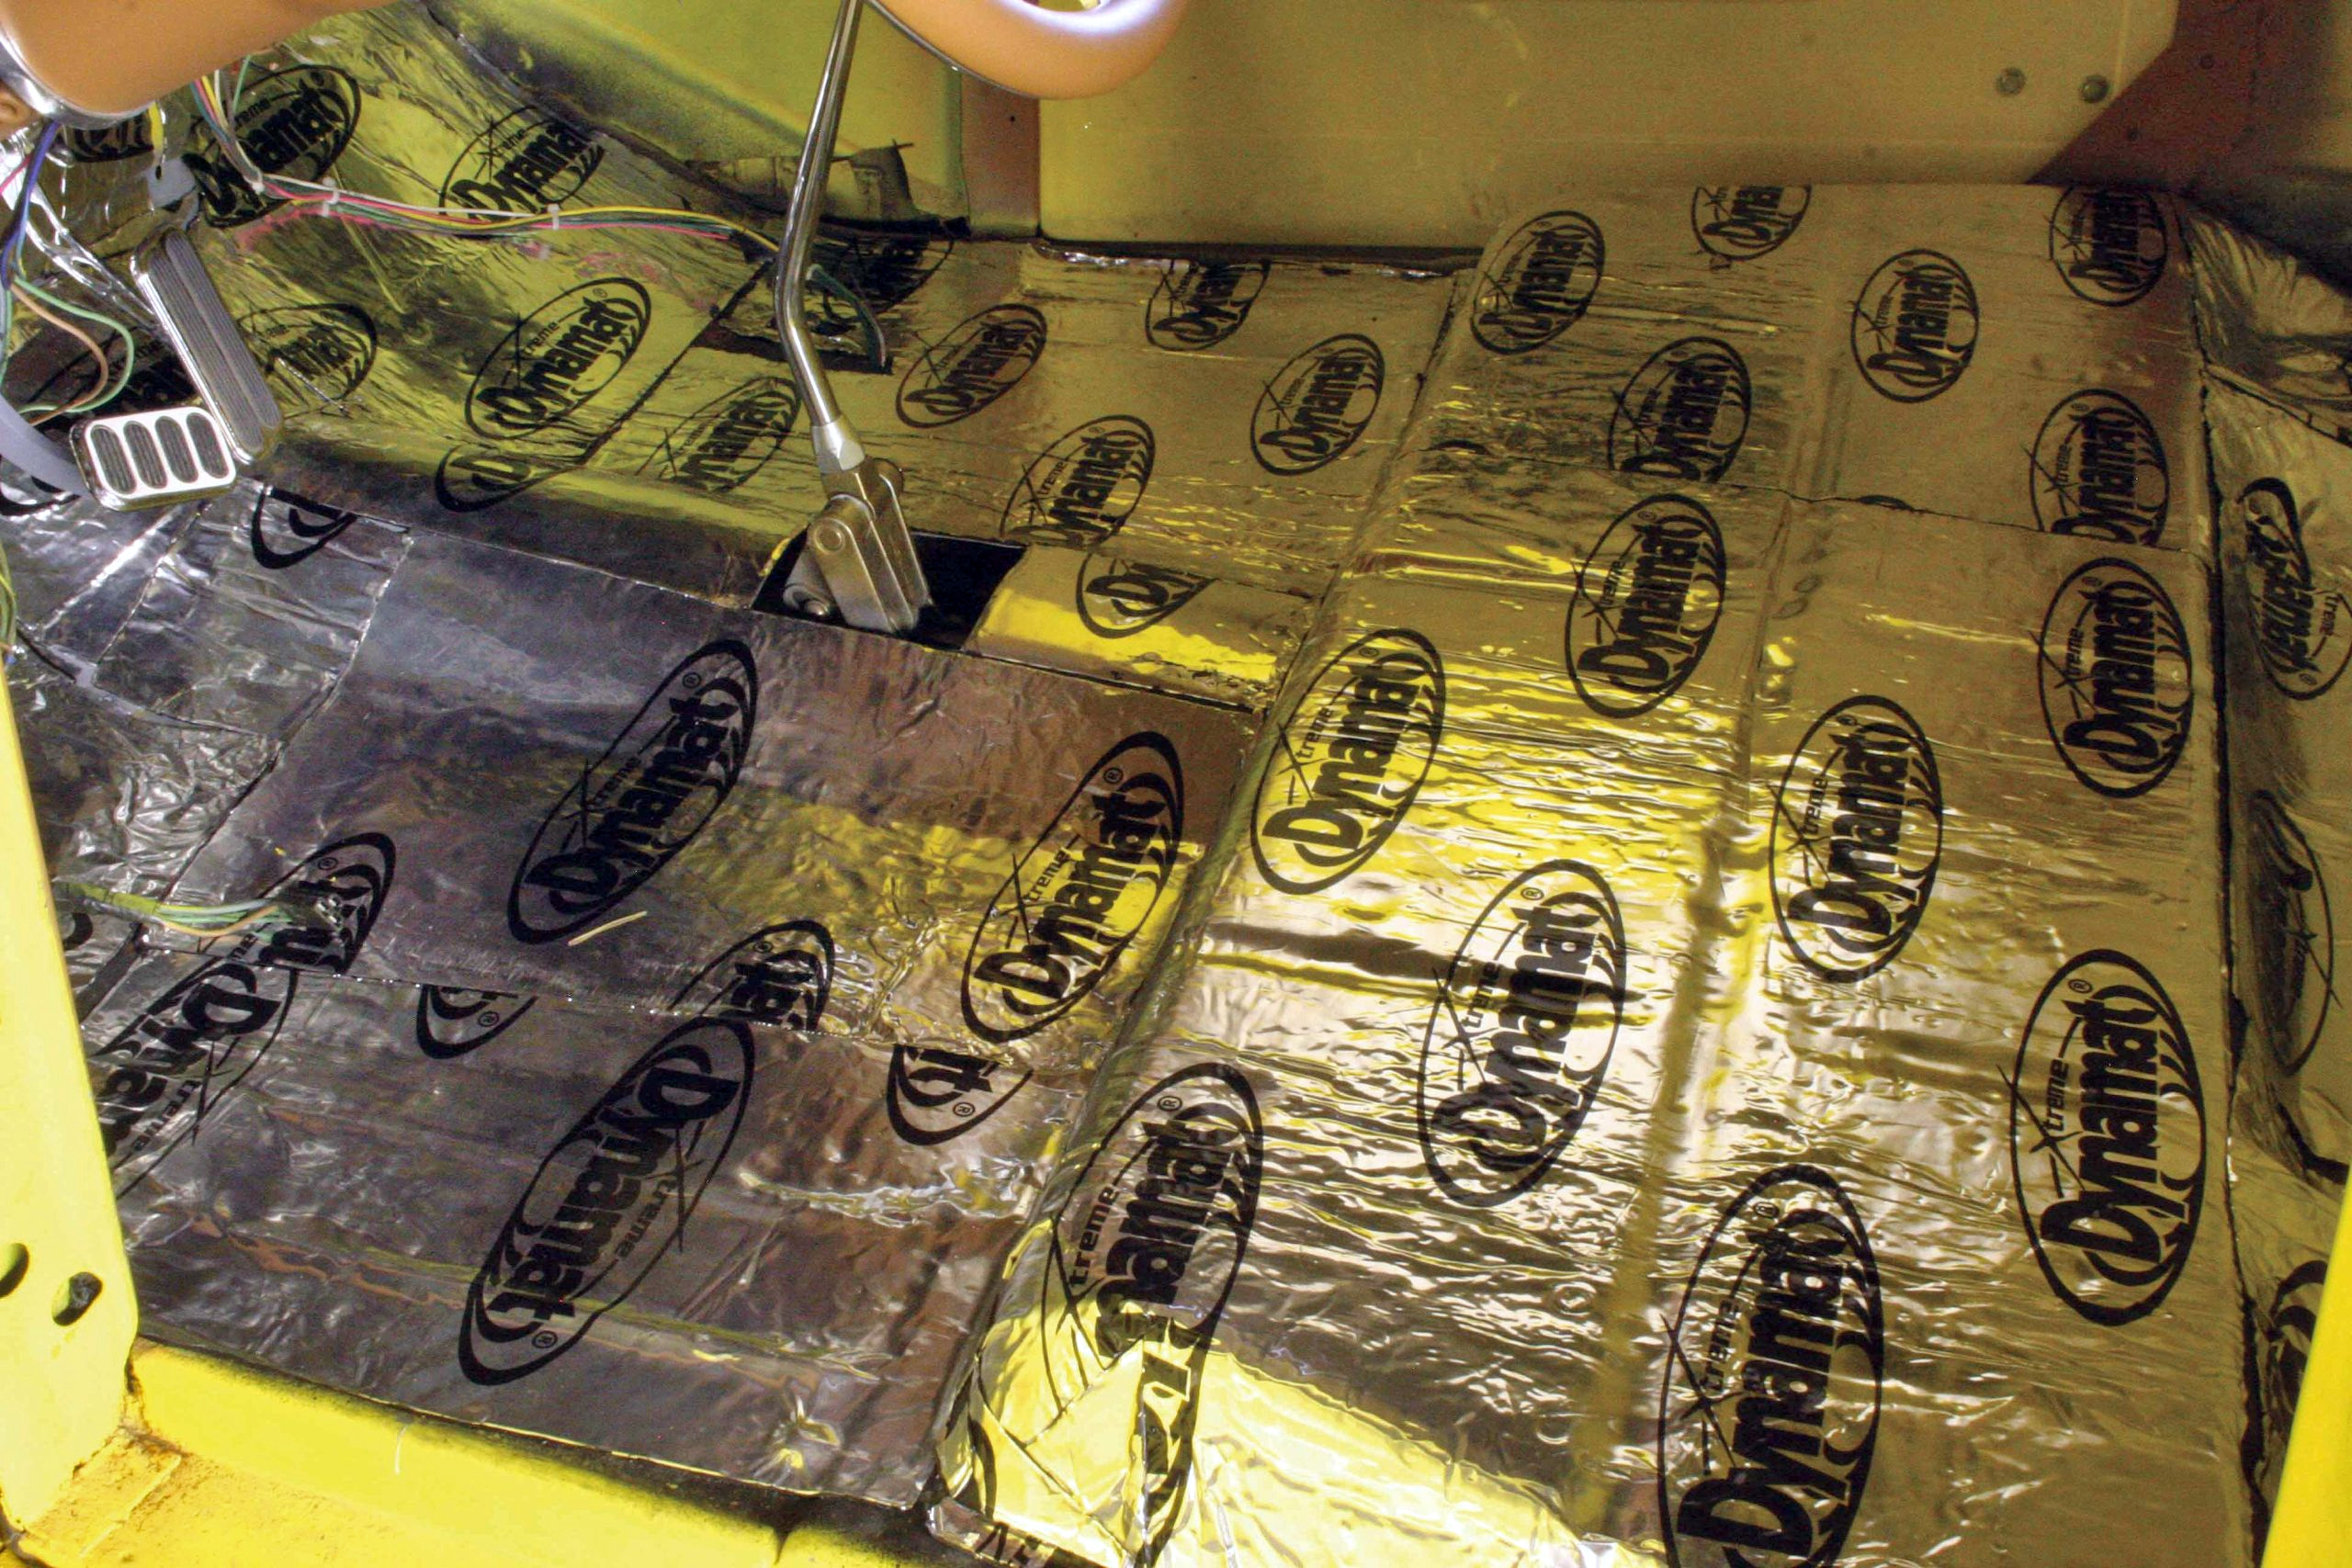
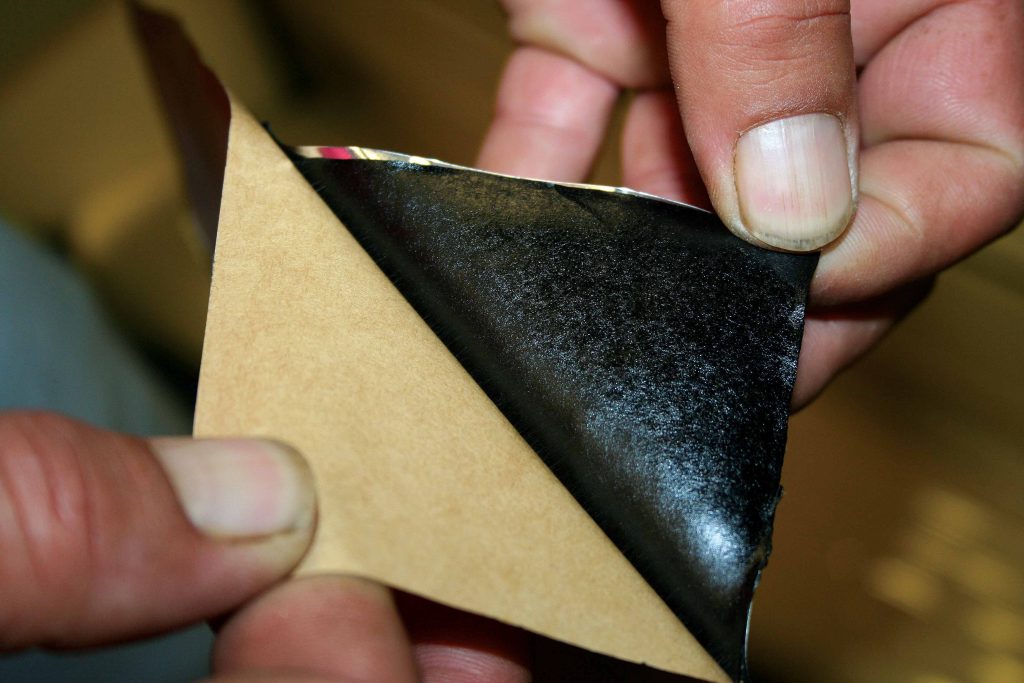
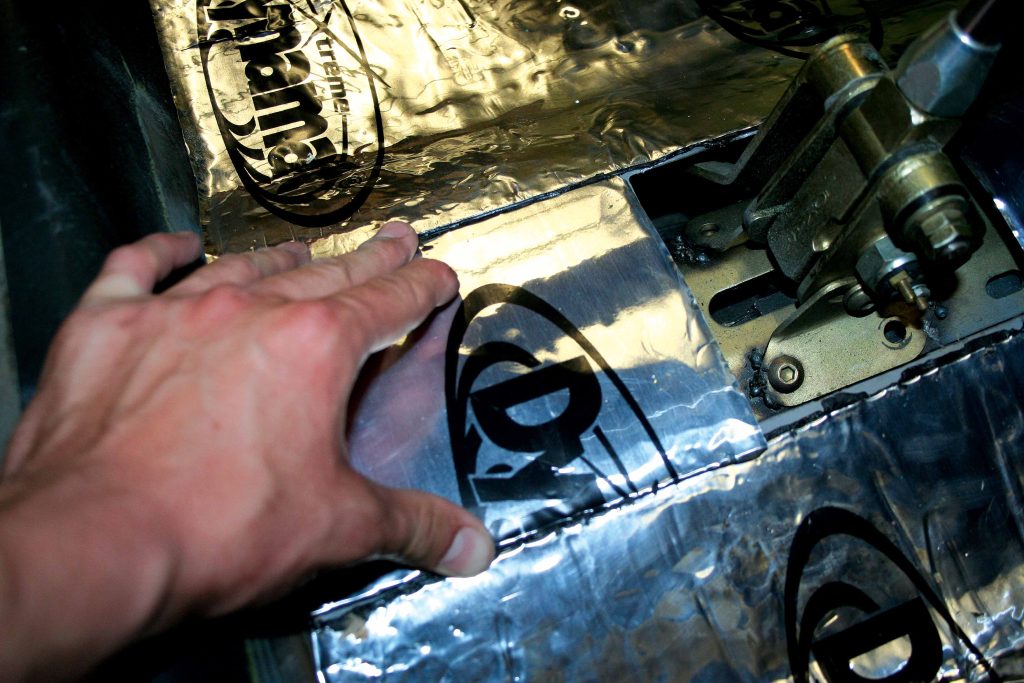
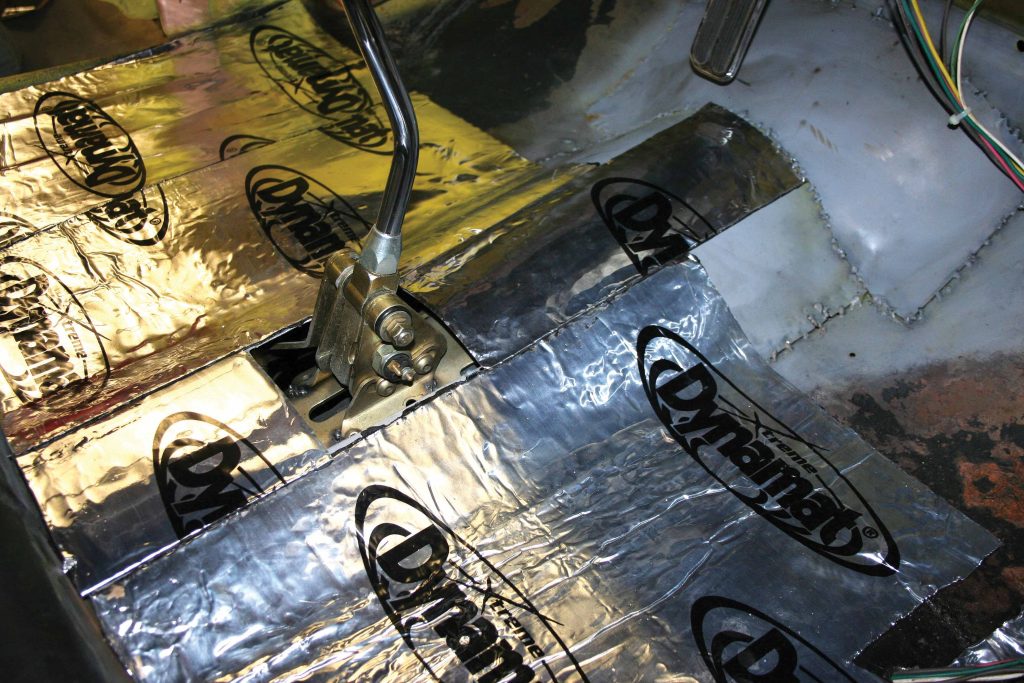
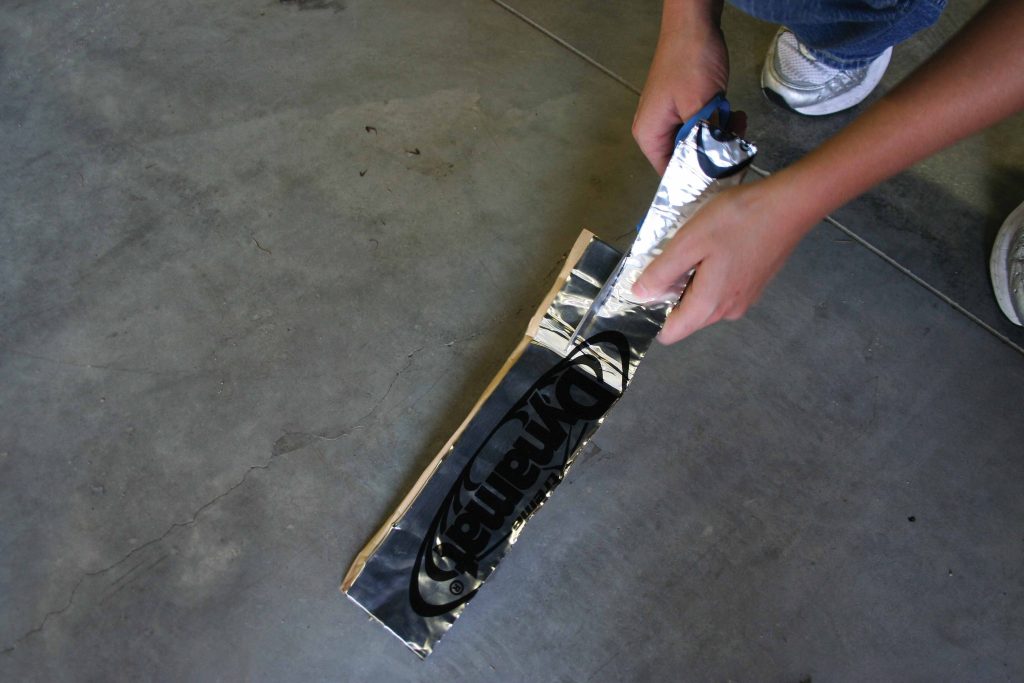
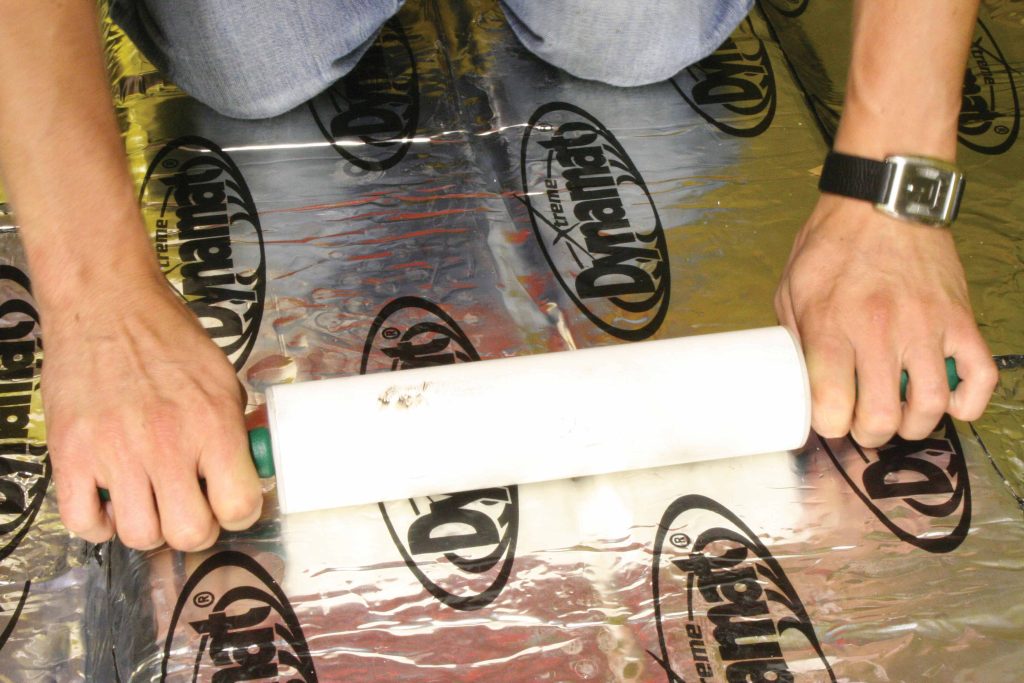
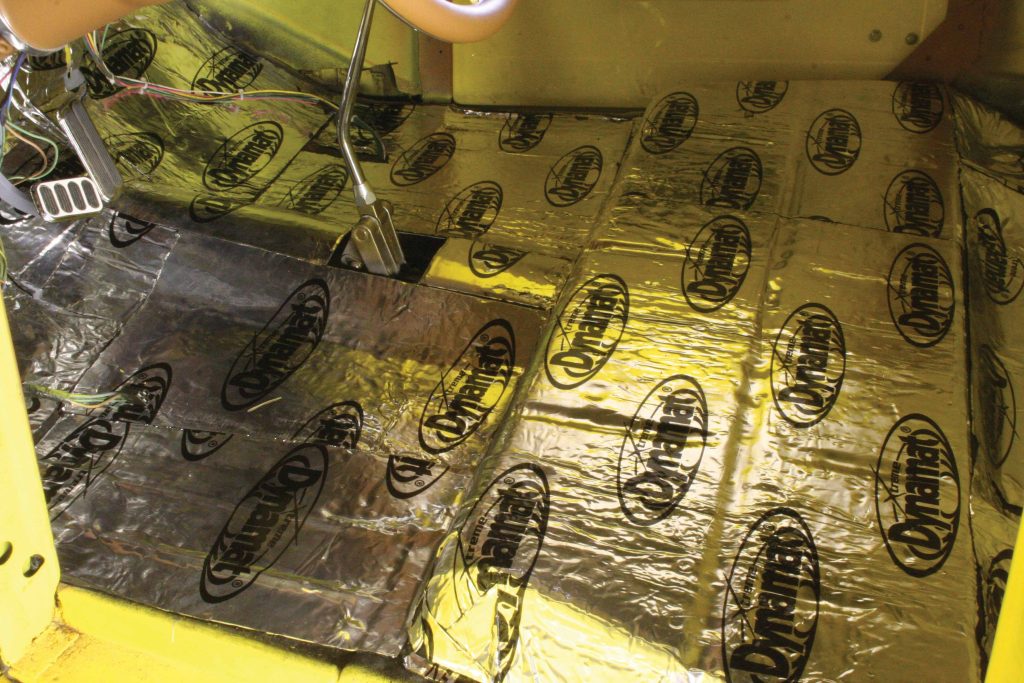
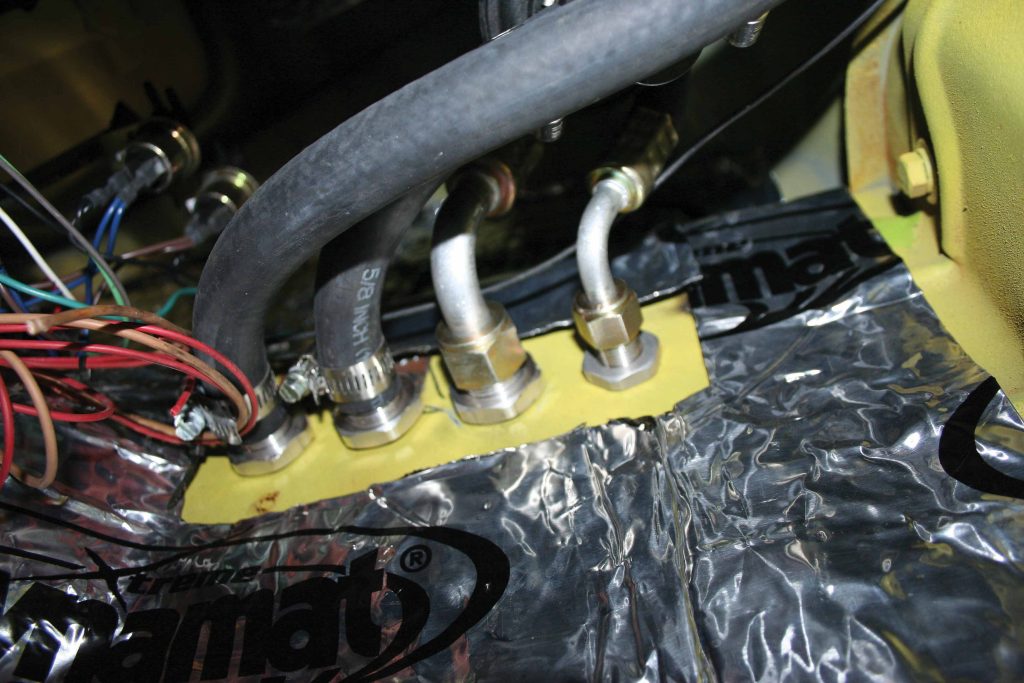
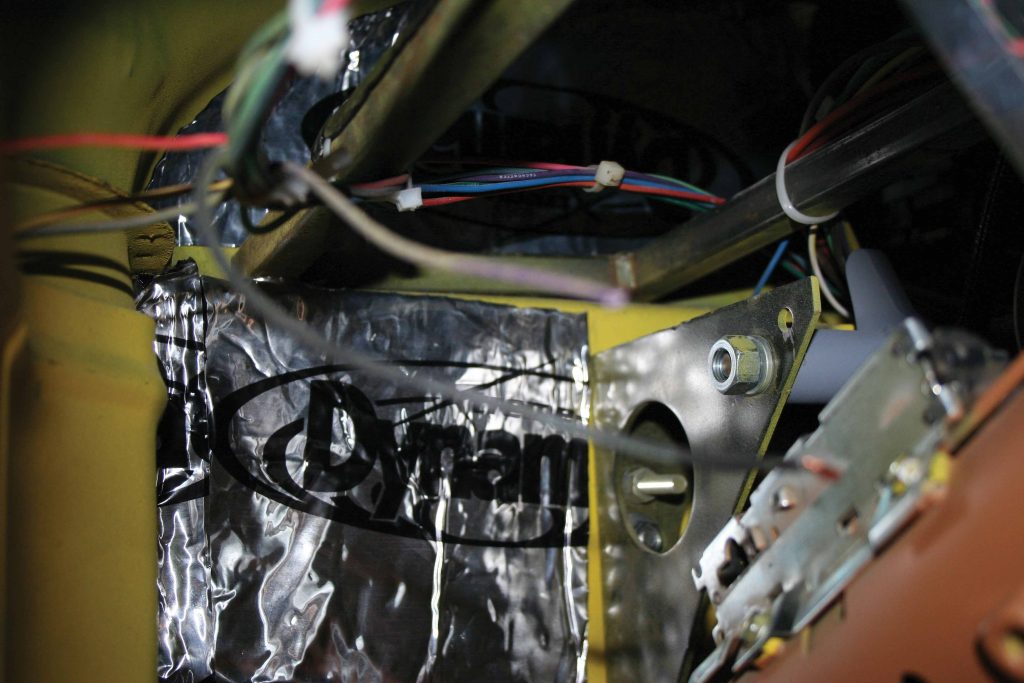
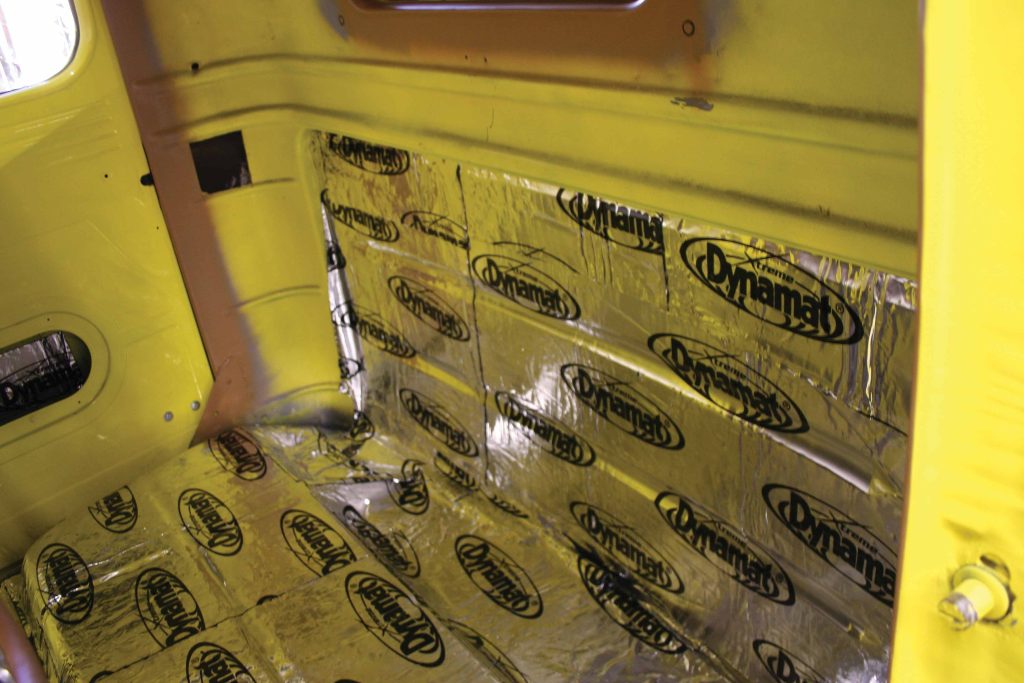
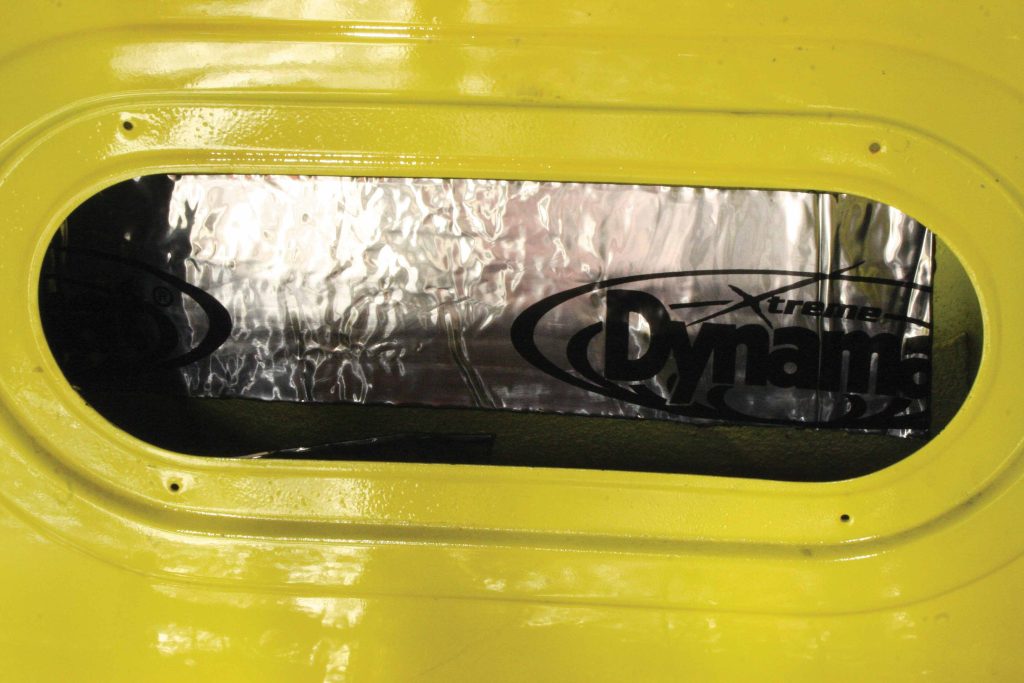
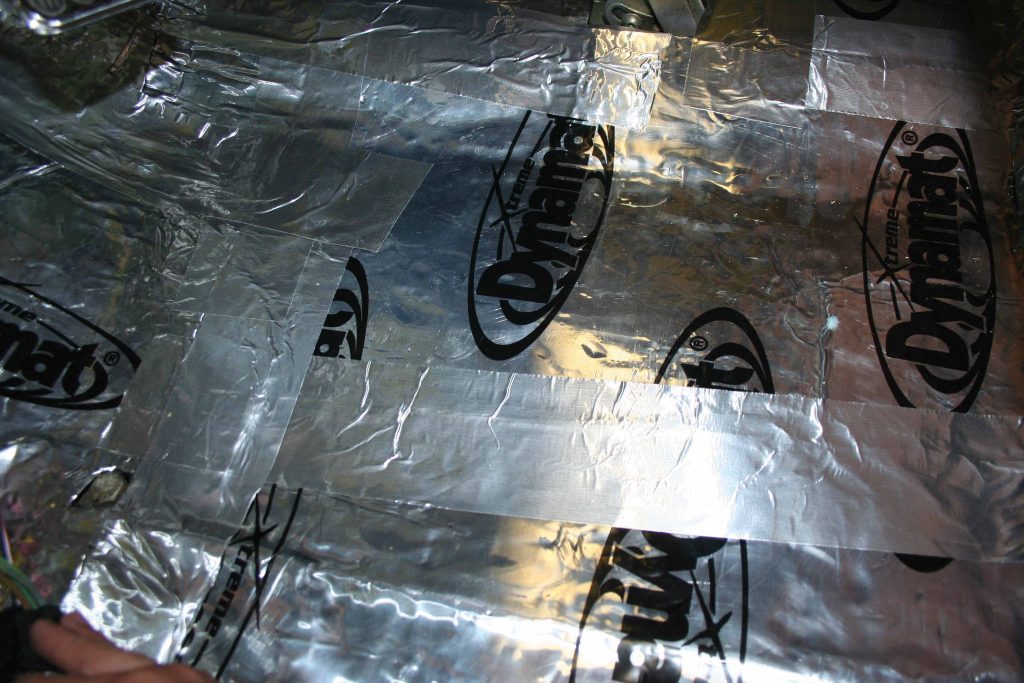
Dynamat Extreme is designed to be installed on the headliner and inside the doors, firewall, floorboard and rear of the cab. Dynamat Extreme is only about 1.7mm thick, which allows door panels and carpet to be installed over the Dynamat, without causing unsightly humps or other problems associated with thicker sound deadeners. Dynamat Extreme features a black butyl-based core with an aluminum liner designed to block against heat. The Dynamat features an adhesive back that provides a simple measure, cut, peel and stick procedure. This can be done at home with a pair of scissors, a box cutter and a small rolling pin.

Installation and Preparation

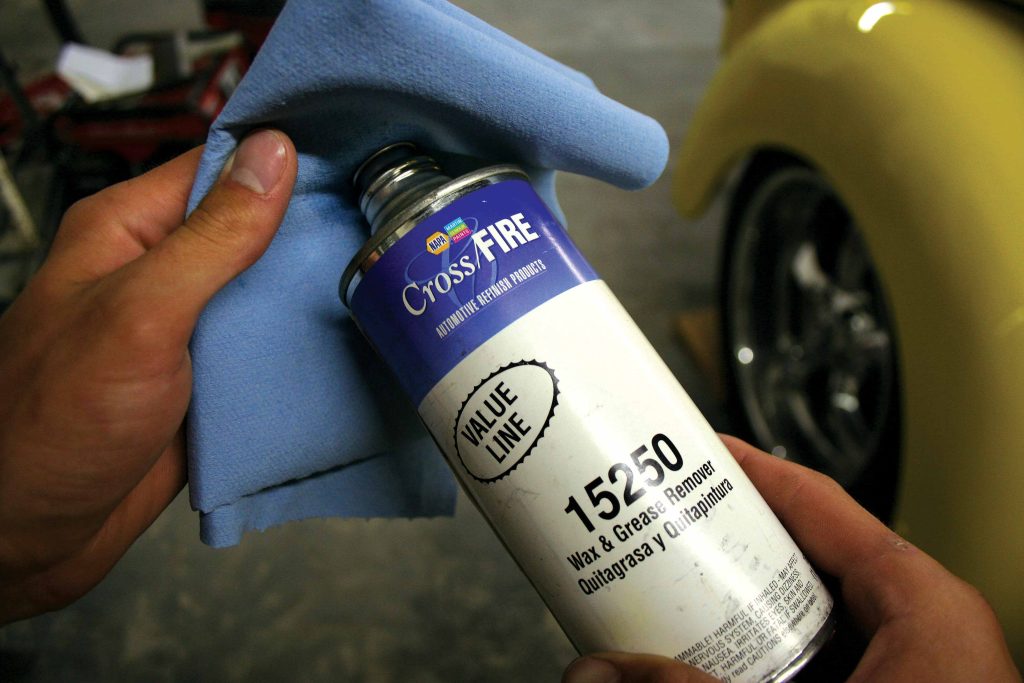
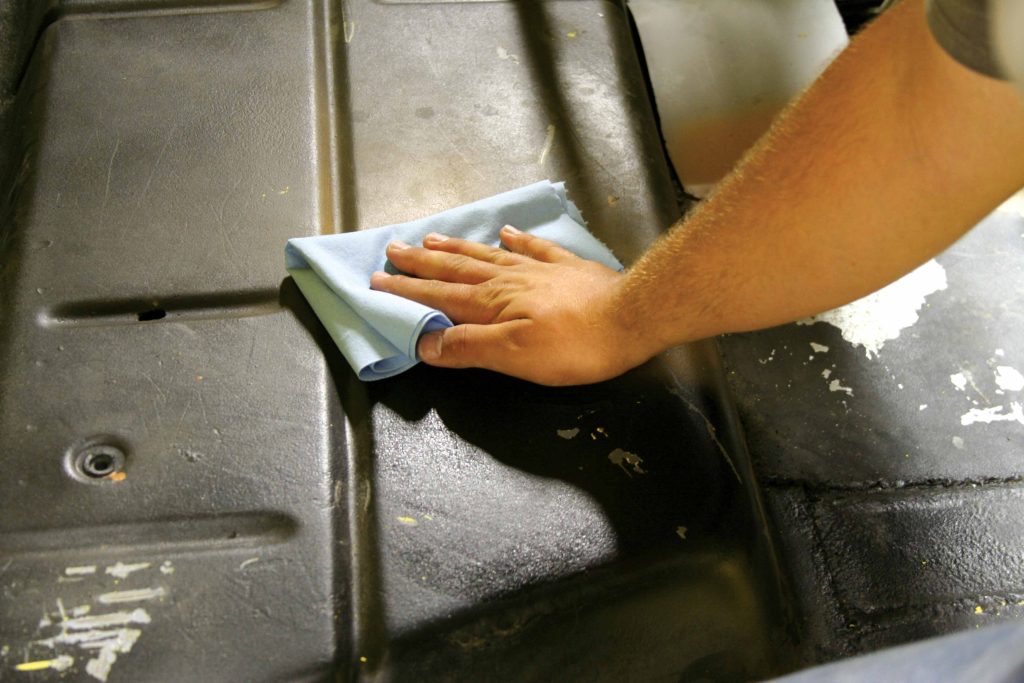
Since this truck interior had yet to be completed, the seat was removed, and interior panels thoroughly cleaned. In order to clean the steel panels, use wax and grease remover. Prepping the panels was not difficult, as Dynamat Extreme can be installed over painted surfaces that are properly cleaned of contaminants and residue. After about three hours of work, the entire interior of the truck was thoroughly lined with Dynamat Extreme.

Results and Final Impressions

During our initial road test, and without a completed interior, we instantly noticed a difference in the lack of vibration, reduced sound and lower heat inside the cabin. Follow along with us to see how it was done.

1. Here is the heat and sound culprit. Before beginning the insulation of the Dynamat, the floorboard of the truck is emptied and vacuumed to remove all loose objects before cleaning.
2. A simple cleaning agent, such as wax and grease remover, will remove any chemicals,such as oil, from the metal surface. This will ensure proper adhesion to the panels.
3. The first step is to properly wipe down all of the surfaces. This will remove all dirt and oil from the sheetmetal for proper adhesion.
4. The installation was started by cutting a few of the 18x32-inch strips in half and test-fitting them individually. It is much easier to work with the smaller cut pieces than with the larger size pieces.
5. Once you test-fit the Dynamat and have made sure it fits properly, the adhesive backing is peeled back about an inch on the backside. This way you can begin sticking the Dynamat to the floor, and pull against the backside as you press the exposed adhesive to the panel, carefully applying it to reduce wrinkles.
6. Small pieces are cut to fill all areas that may exist in between sheets, around the shifter and seat base or anywhere the panels do not cover the sheetmetal. When applying the Dynamat, you can overlap the separate pieces or use aluminum tape, so you can tape between each of the seams. Either way the goal is to keep as much heat as possible from entering the cabin with no raw material exposed.
7. As you can see, the Dynamat lies right down onto contours, such as the transmission tunnel and floorboard. Care should be taken as you decide which size panel fits where.
8. In order to fill the more difficult areas and folds, cut small filler pieces. Use these to fill any areas that remain bare. The goal is to cover every possible square inch of the floorboard.
9. Dynamic Control offers two rollers (economy with a 1.125-inch wood roller and professional with a 2-inch solid rubber roller) specifically designed for applying Dynamat with proper adhesion. We used an old rolling pin, which is difficult to get into tight spots, so we suggest purchasing one of the Dynamic Control rollers for your installation.
10. It’s a good idea to remove the gas pedal as well as other small miscellaneous items from the interior of the truck that might get in the way of an easy install. After installing the Dynamat, holes that needed opening were opened from the backside using a small screwdriver.
11. After a few short hours, the floorboard was completed front-to-rear, including the lower portion of the firewall. The Dynamat looks great and will improve the quality of the interior significantly. From here, the rear of the cab and the upper firewall areas were addressed.
12. For the upper portion of the firewall, cut small pieces and patch them in between the tough-to-reach areas. Each of these seams will need to be taped to prevent heat bleed through. You can also overlap the Dynamat for increased effectiveness.
13. After cutting several small pieces, the upper firewall was completed. This will keep unwanted engine heat and noise out of the interior.
14. The area behind the seat is made out of much thinner sheetmetal than the remainder of the cab and is located directly above the mufflers. In order to quiet down this noisy area, a layer of Dynamat was cut to fit the area and carefully installed.
15. After completing this installation, a few small pieces were left. In order to reduce noise and vibration in the doors, the Dynamat was cut and installed into the doors.
16. With the Dynamat completely installed, you can use a roll of aluminum tape to cover all of the seams to keep the exposed adhesive from sticking to everything and prevent any additional heat from entering the truck.
17. The seat can now be reinstalled, and the Dynamat will provide a cool, quiet ride for many years to come.

ARTICLE SOURCES

Picture of Dynamat, LLC

Dynamat, LLC

Dynamat is recognized around the world as quality solutions to unwanted noise & heat. Dynamat makes sound deadening and thermal insulation products for automotive, car audio, home, RV, marine and more. Dynamat is 100% proudly made in the USA.

Facebook
Picture of M&M Hot Rod Interiors

M&M Hot Rod Interiors

13875 US Hwy. 278 E.
Holly Pond, AL 35083
(256) 796-7443

mmhotrodinteriors1982@gmail.com

Scroll to Top