
THE AUTO BUILDER
Menu
Featured


Broncos Storm Pigeon Forge
The 3rd Annual Great Smoky Mountain Bronco® Stampede thundered into Pigeon Forge, Tennessee, on August 15–16, 2025, and for two days straight the LeConte Center was wall-to-wall Broncos. Old, new, stock, modified, lifted—if it had a Bronco badge, it had a place in the herd.

INSIDIOUS
David Salvaggio at Perfection Autosport says the intent behind its latest project, “Insidious,” was to do as Dodge is about to: rework an original ’70 Dodge Challenger with a range of insightful alterations intended to build on a solid resume.

SMOKIN’
Allen Cornelius wanted to make a statement that his shop, AC Customs in Shreve, Ohio, could blend old-school Ford muscle-car performance with a new style truck, giving it the performance and looks to match.


Spotlighter
POPULAR READS
-
Product Spotlight: Bill Mitchell Products Aluminum LS Engine Block
-
PRODUCT SPOTLIGHT: 60-66 Chevy C10 Fresh Air Vent Block Off Plate
-
Product Spotlight: Pyramid Optimized Design Sequential Aurora Taillight for 1964½–1966 Mustang
-
PRODUCT SPOTLIGHT: Cam Covers for GEN/3 Coyote from Pyramid Optimized Design


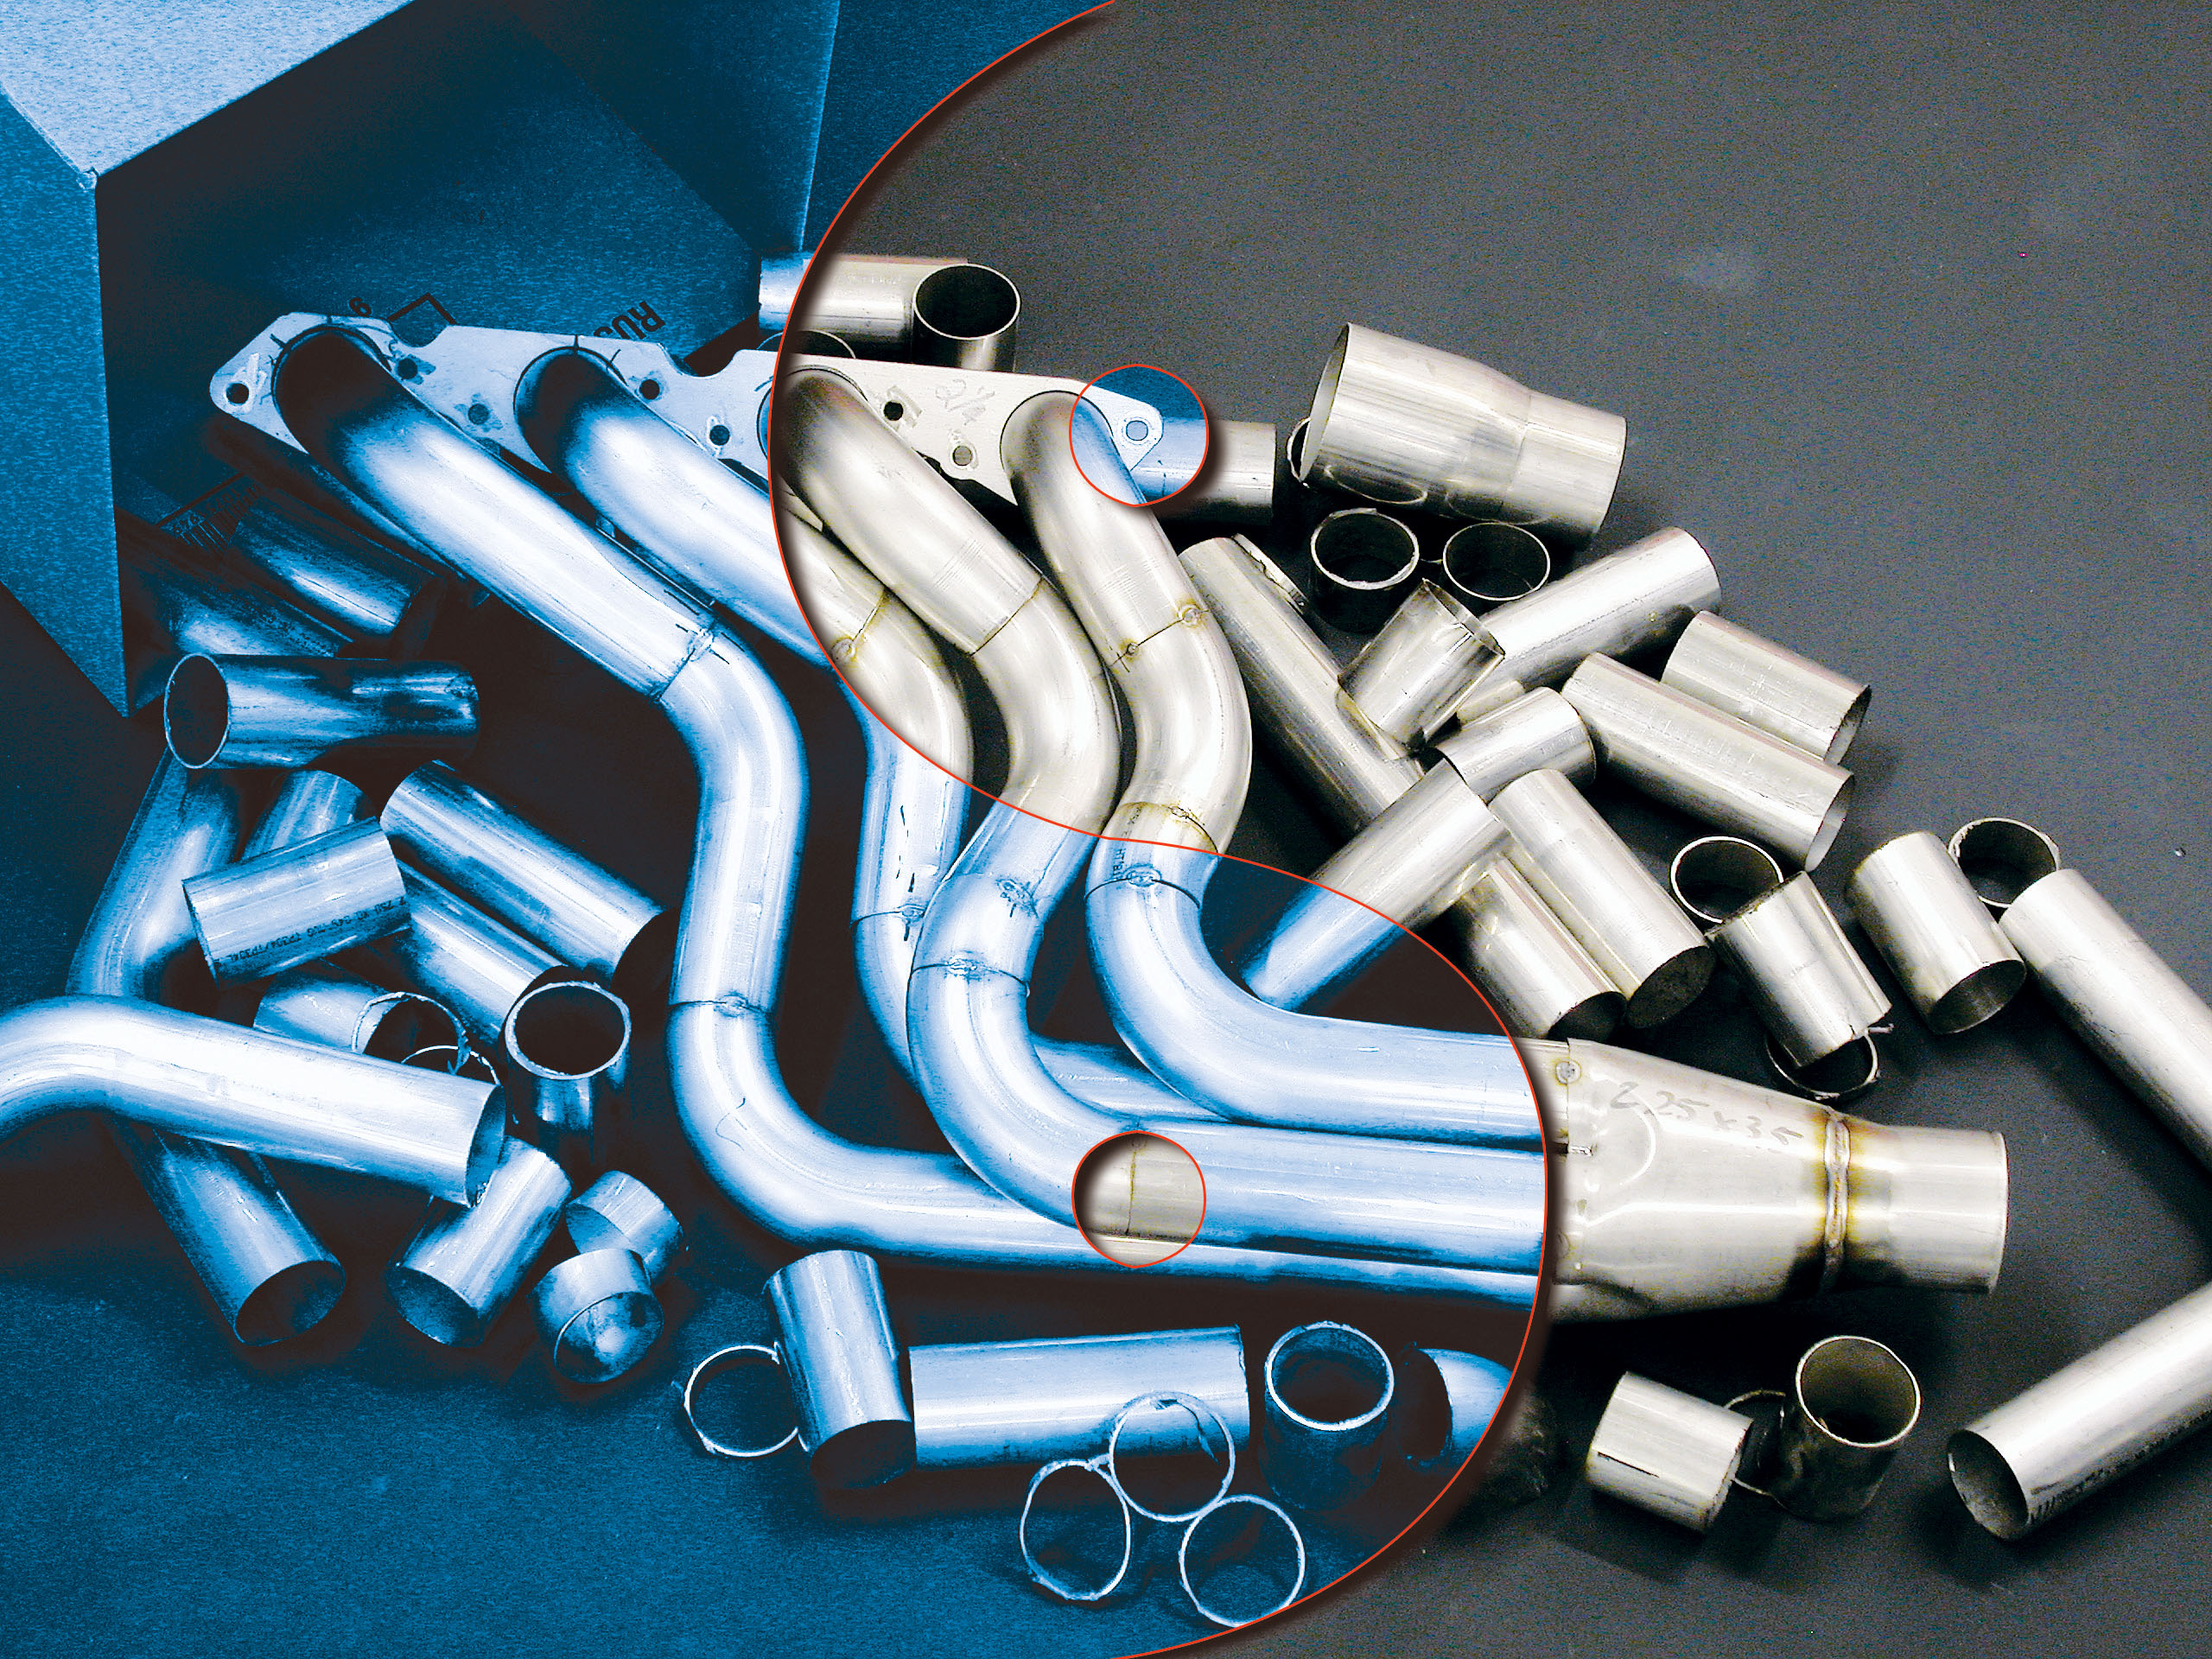
Zen and the Art of Building Headers
Building Headers from a Box of Tube Sections Begins One Bend at a Time
Author
Brad Ocock
Story & Photography
Bending up a set of headers
Bending up a set of headers is one of those fabrication jobs that seem to intimidate most builders, regardless of their skill level. We’ve seen guys who can fabricate full chassis systems balk at taking a box of tubing and mandrel-bent segments to build a set of headers.
Tackling the challenge
Where most people are completely overwhelmed is when they first see that pile of bent tubing segments, and they can’t imagine cutting and assembling them into single, flowing lengths of header pipe. The key is to look at the small picture rather than the big picture. A great analogy we once heard was an Eskimo in his kayak on the ocean when a horrible storm came up. He survived the storm by taking it on one wave at a time, conquering it and moving to the next wave, rather than fighting the entire ocean in an effort to get back to land.
Building custom headers
Custom building a set of headers relies on the same principle. If you think about how all the tubes need to be cut, fit, where each of the bends goes, etc., you’ll quickly be overwhelmed and the project will go nowhere. However, if you simply start at the first bend and build from there, you’ll have a good-looking set of headers before you know it.
Specialized jobs
To be honest, we’ve also considered it one of those “specialized” jobs that get farmed out. But after watching Jeff Georges at Year One weld a set of big tubes for its ProMax Nova project, we found out that fabricating custom headers is more time-consuming than difficult. It’s a pretty straightforward process; it just takes a lot of time and patience. If you can tack-weld, operate a chop saw and have the patience to measure, mark and cut with a high degree of accuracy, creating a set of headers is something well within the grasp of most any builder.
Welding skills
In fact, we’d go so far as to say you don’t even have to have welding skills past tack-welding. If you can’t make a pretty, high-quality weld bead, you can simply tack the pieces in place and then drop the headers off with a professional for final welding.
Power increase with headers
It’s common knowledge that headers are an easy power increase, and a lot has been written over the years on maximizing that power potential. The biggest bit of information most people grab onto and don’t let go of is that equal-length header tubes will make the most power. As a result, everyone wants equal-length tubes. While it’s true equal-length headers will make more power, it’s totally unnecessary on a street car. Bolting a simple set of headers in place of cast-iron exhaust manifolds is an easy power gain. Bolting a set of equal-length headers in place is a huge hassle and frankly, a waste of time and effort.
The math and measuring involved
From a fabrication standpoint, there’s a whole lot of math and measuring involved to get tubes to be all the same length. They require a lot of additional bending in several directions in order for the tube at the rear of the block to terminate at the same place as the tube that starts at the front cylinder. This almost always limits access to spark plugs, steering linkage and boxes, starters and oil filters, not to mention the simple nightmare of bolting up the headers in the first place. On a dedicated Stock-class racer, yeah, they’re mandatory. But for the rest of us? Hardly. As the Buddha says: “Keep it simple, stupid.”
Optimizing the engine
There is a lot of power to be found in the average street engine before an owner needs to start worrying about maximizing his headers. For instance, have you completely blueprinted the entire valvetrain? Rocker arm geometry, valve springs and degreeing the camshaft will give you extra power before headers come into play. How about really tuning your carb? Have you adjusted the curve of your distributor, changed when the advance kicks in? How about tuning your chassis? High-temp coatings? The list goes on.
Racecar versus street car
If you’re building a dedicated racecar, the steps we’ve just listed are part and parcel to building a contender. But on a street car, equal-length headers are nothing more than bragging rights—which are quickly forgotten the first time you have to change an oil filter or spark plugs.
The problem with custom-built headers
Another common problem with custom-built headers is the “bigger equals better” line of thinking. In practice, the opposite is usually the case. If the headers are too large, you’ll actually lose power.
Choosing the right size
So how much is too much? For a small-block street engine, a generally accepted size for primary tubes is 1-5/8 inches to 1-3/4 inches. Obviously, nitrous, superchargers and RPM are going to play factors, and on race engines the size could increase from 1-7/8 inches all the way up to 2 inches for a monster small block. But here again, we’re talking about maximum-effort engines, not your crate engine or hot small block.
Big-block applications
For big-block applications, 1-7/8 inches is typically a good size, with 2 inches at the boundaries of a street application, while 2-1/8 inches to 2-1/4 inches would be normal for a race application. Now again, we’re not talking about monster displacement, forced-induction or huge shots of nitrous. There are always going to be different circumstances and these can’t possibly all be taken into account for a simple magazine article. We’re just throwing these numbers out there so you have a starting point, and so that when you see a warmed-over small block with a single Holley on a dual-plane intake, you’ll recognize that the 2-1/4-inch ceramic-coated headers are more show than go.
Seeking advice
The very best bit of advice we can give in selecting a tube size is to seek the wise man on the mountain. Call the company that’s supplying your segments and ask what it recommends for your particular combination. The next best piece of advice we have is that you listen! The company’s business is headers, so it isn’t going to give you bad advice. There’s no benefit in customer dissatisfaction, and it doesn’t want or need it compounded with bad word-of-mouth that comes from recommending the wrong-sized header tubes.
Year One and Stainless Works
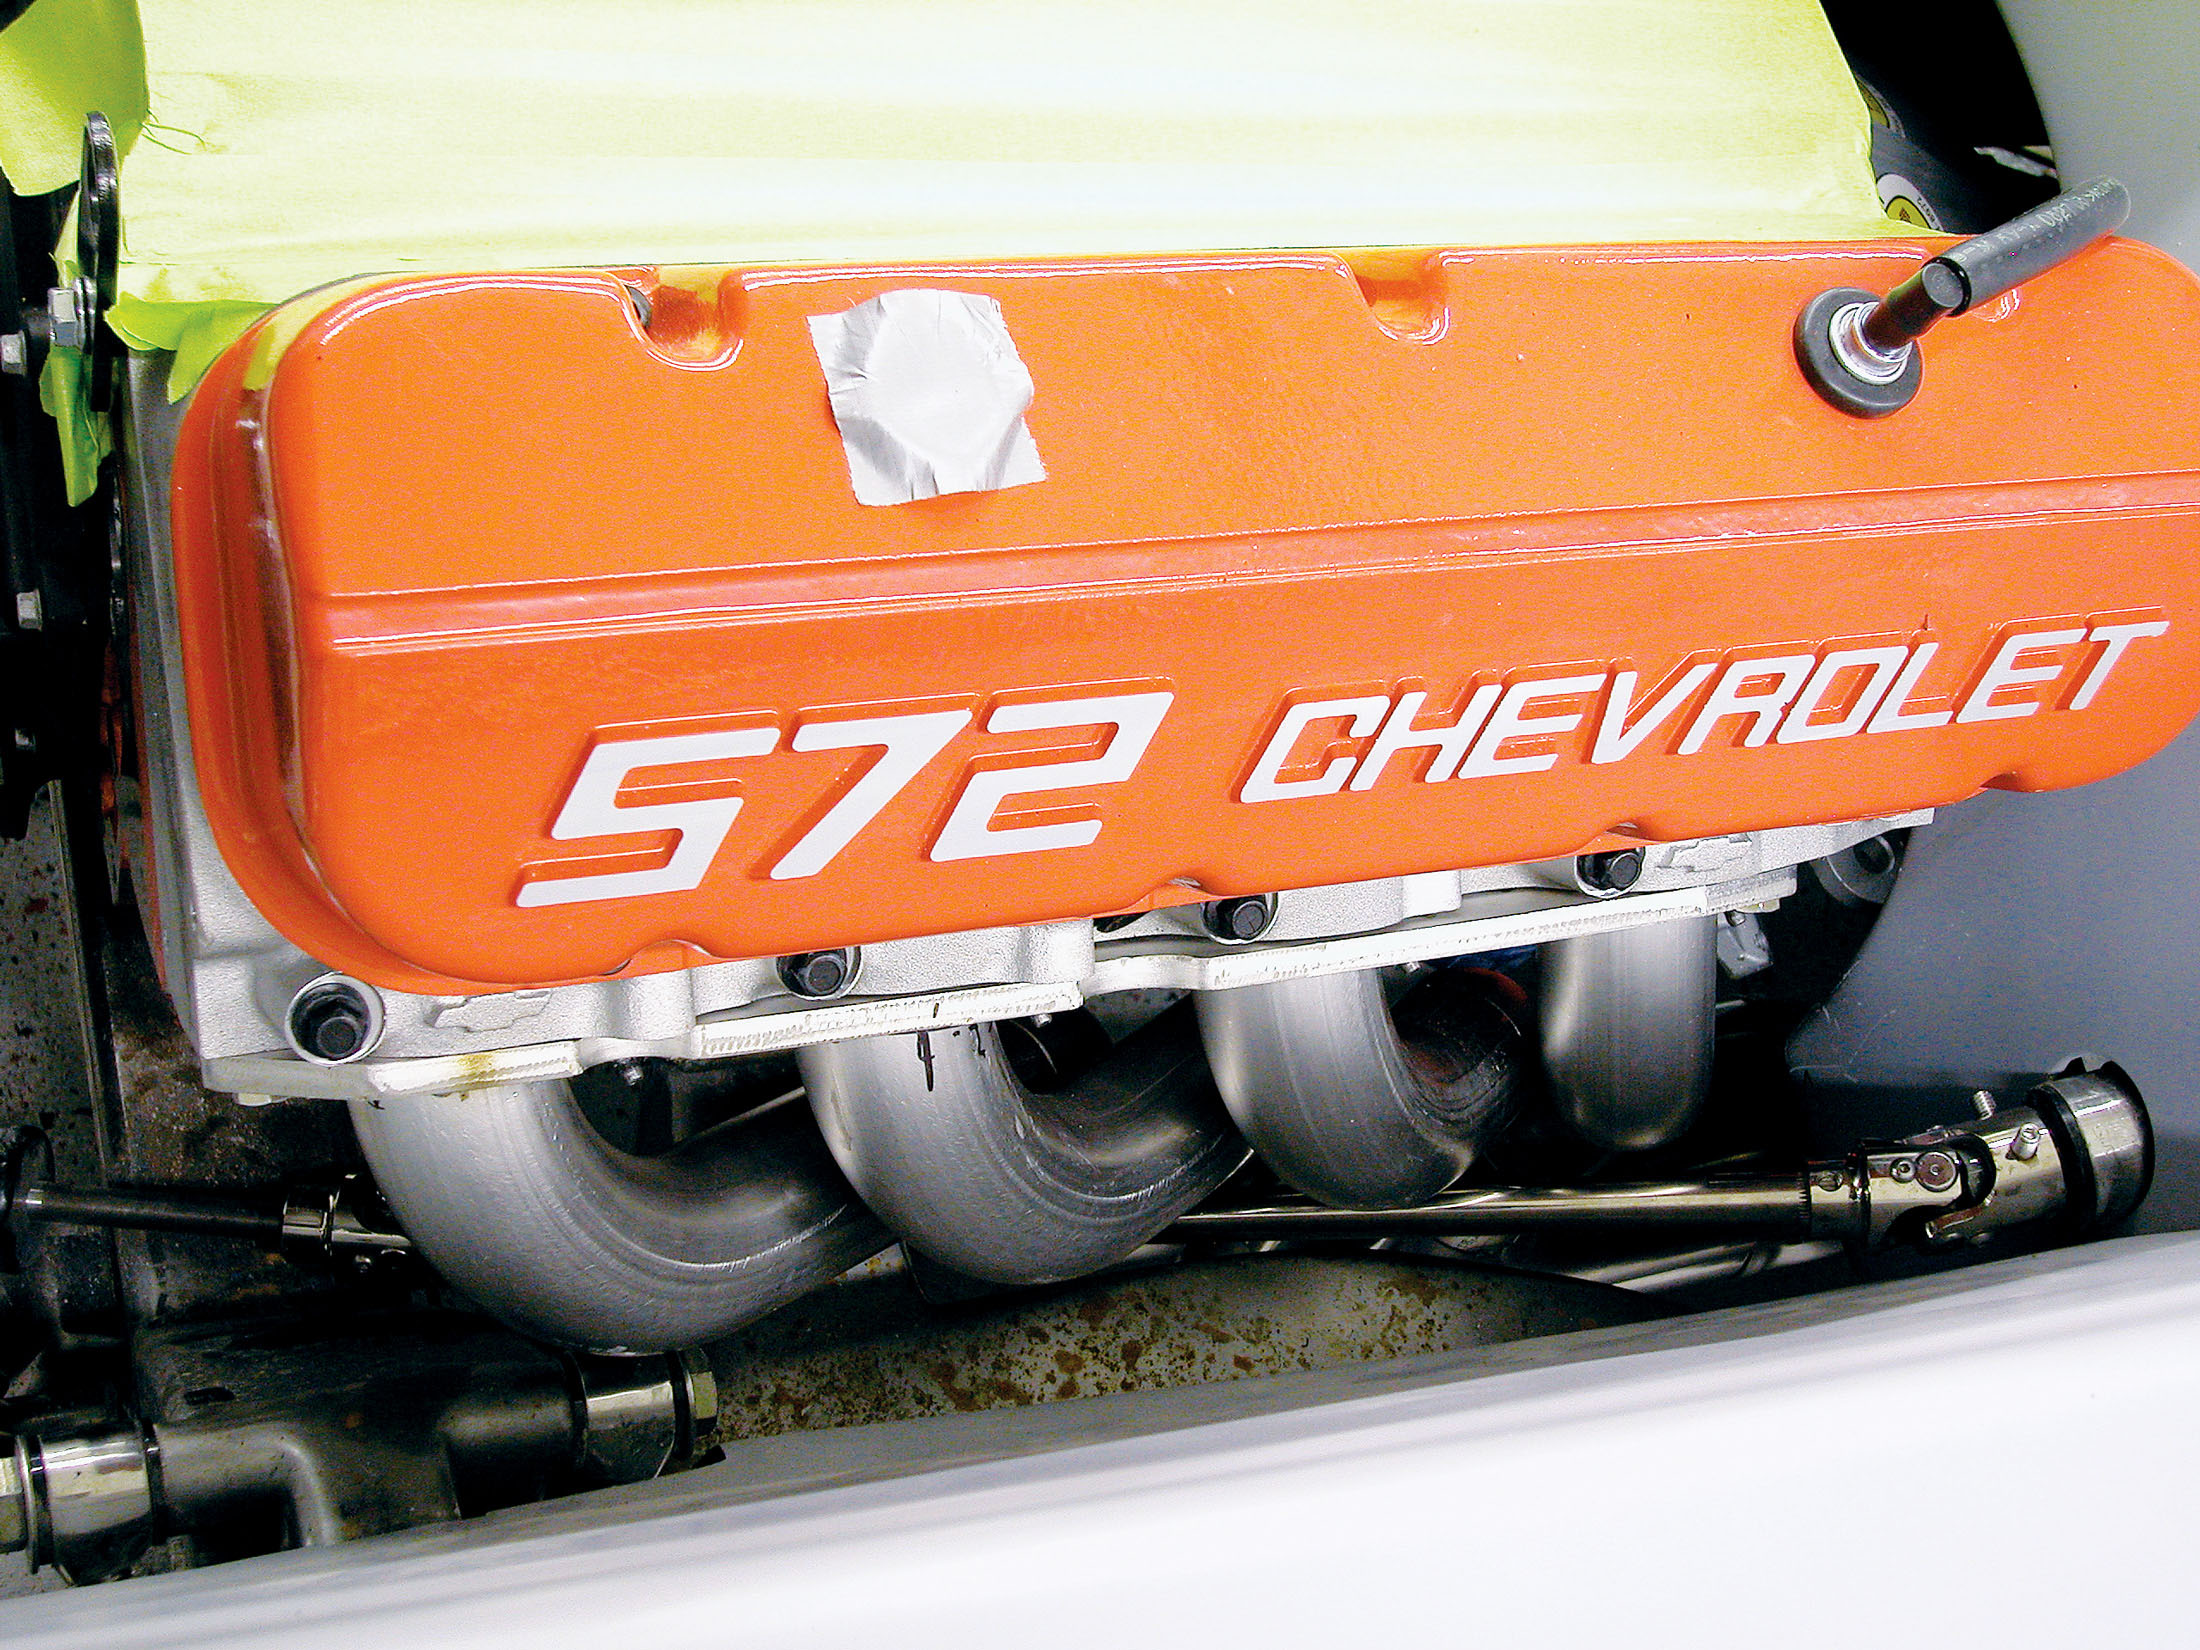
So with all that being said, the guys at Stainless Works had more than a little angst when Year One decided to fab up a set of 2-1/4-inch primary tube headers for the 572ci GM Performance Parts crate engine, knowing full well it was going to be set up for street driving rather than Pro-Mod. However, the whole car is being built with an over-the-top mentality, so the really big header tubes will look right at home with the rest of the really big hardware. Year One’s Jeff “Hollywood” Georges was responsible for the fabrication of the headers; one was assembled for the “Rides” television show, the other for us to photograph and show the construction in greater detail.
Building confidence and learning tricks
In addition to this job being a real confidence-builder, we also learned a couple of very cool tricks for building headers. After watching Georges, I wouldn’t hesitate in building a set in the future. My welding skills aren’t past being able to tack something together, but between that, running a chop saw and attention to detail, it’s not something that’s beyond someone with a medium skill level. Follow along, Grasshopper.

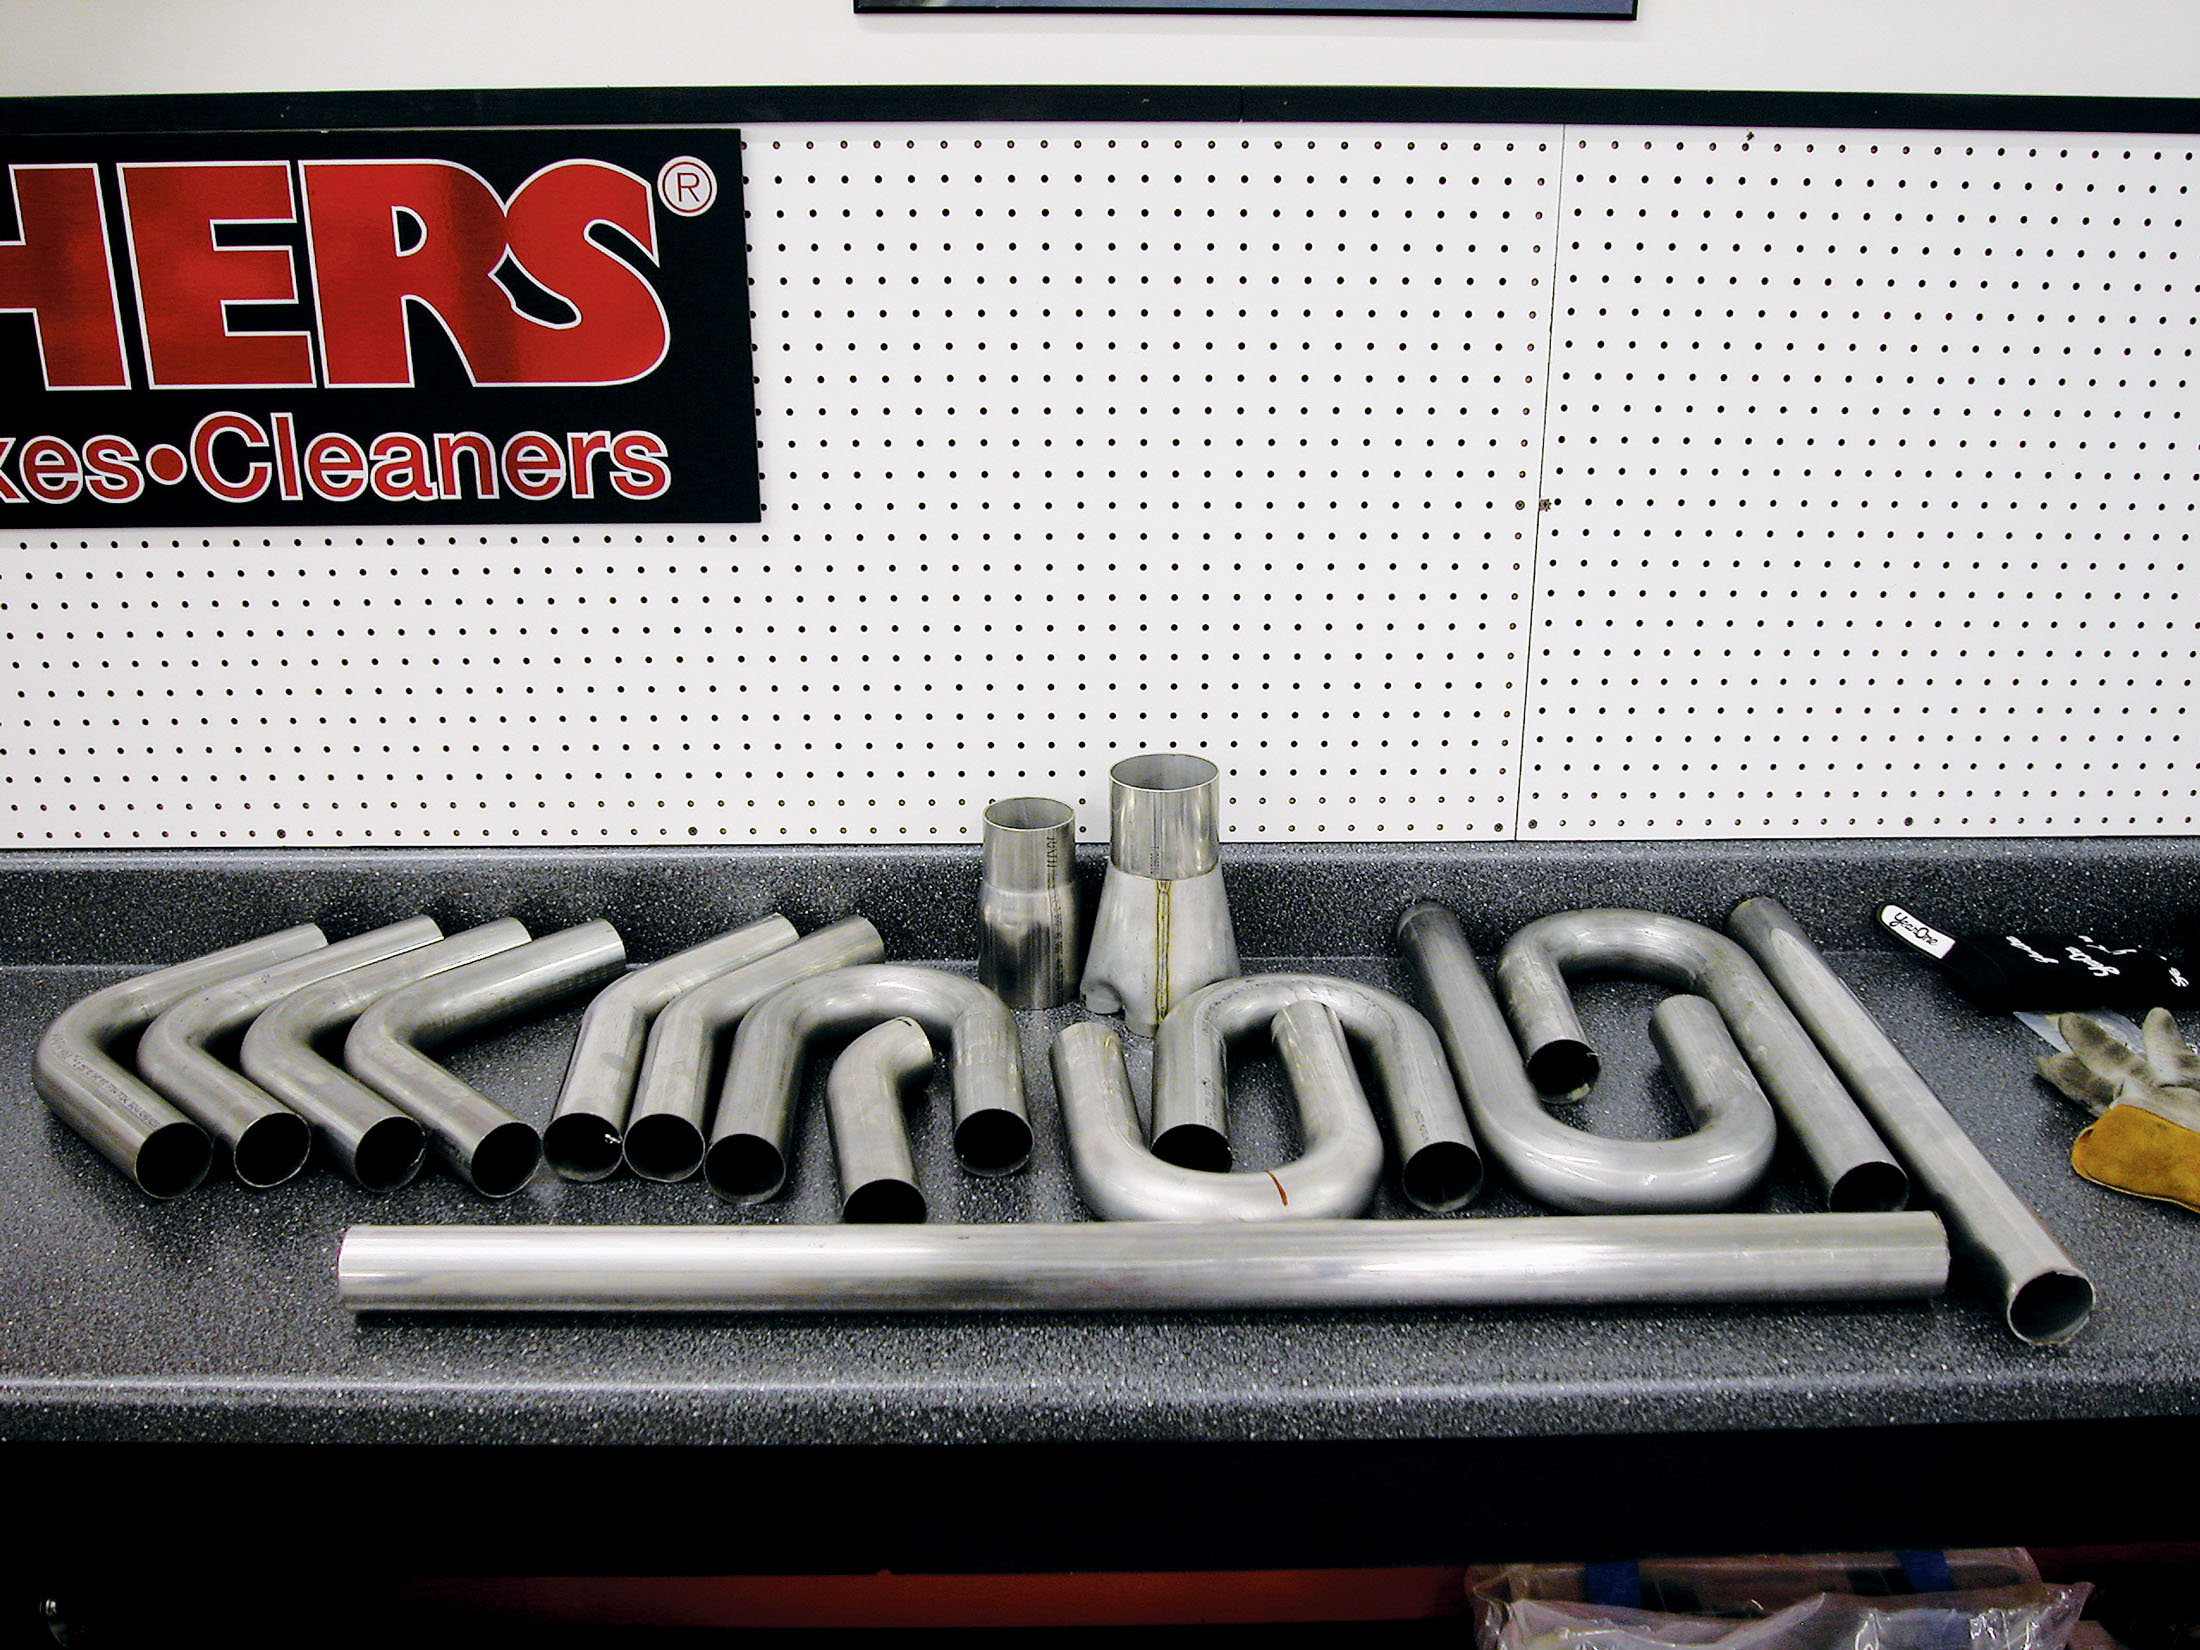
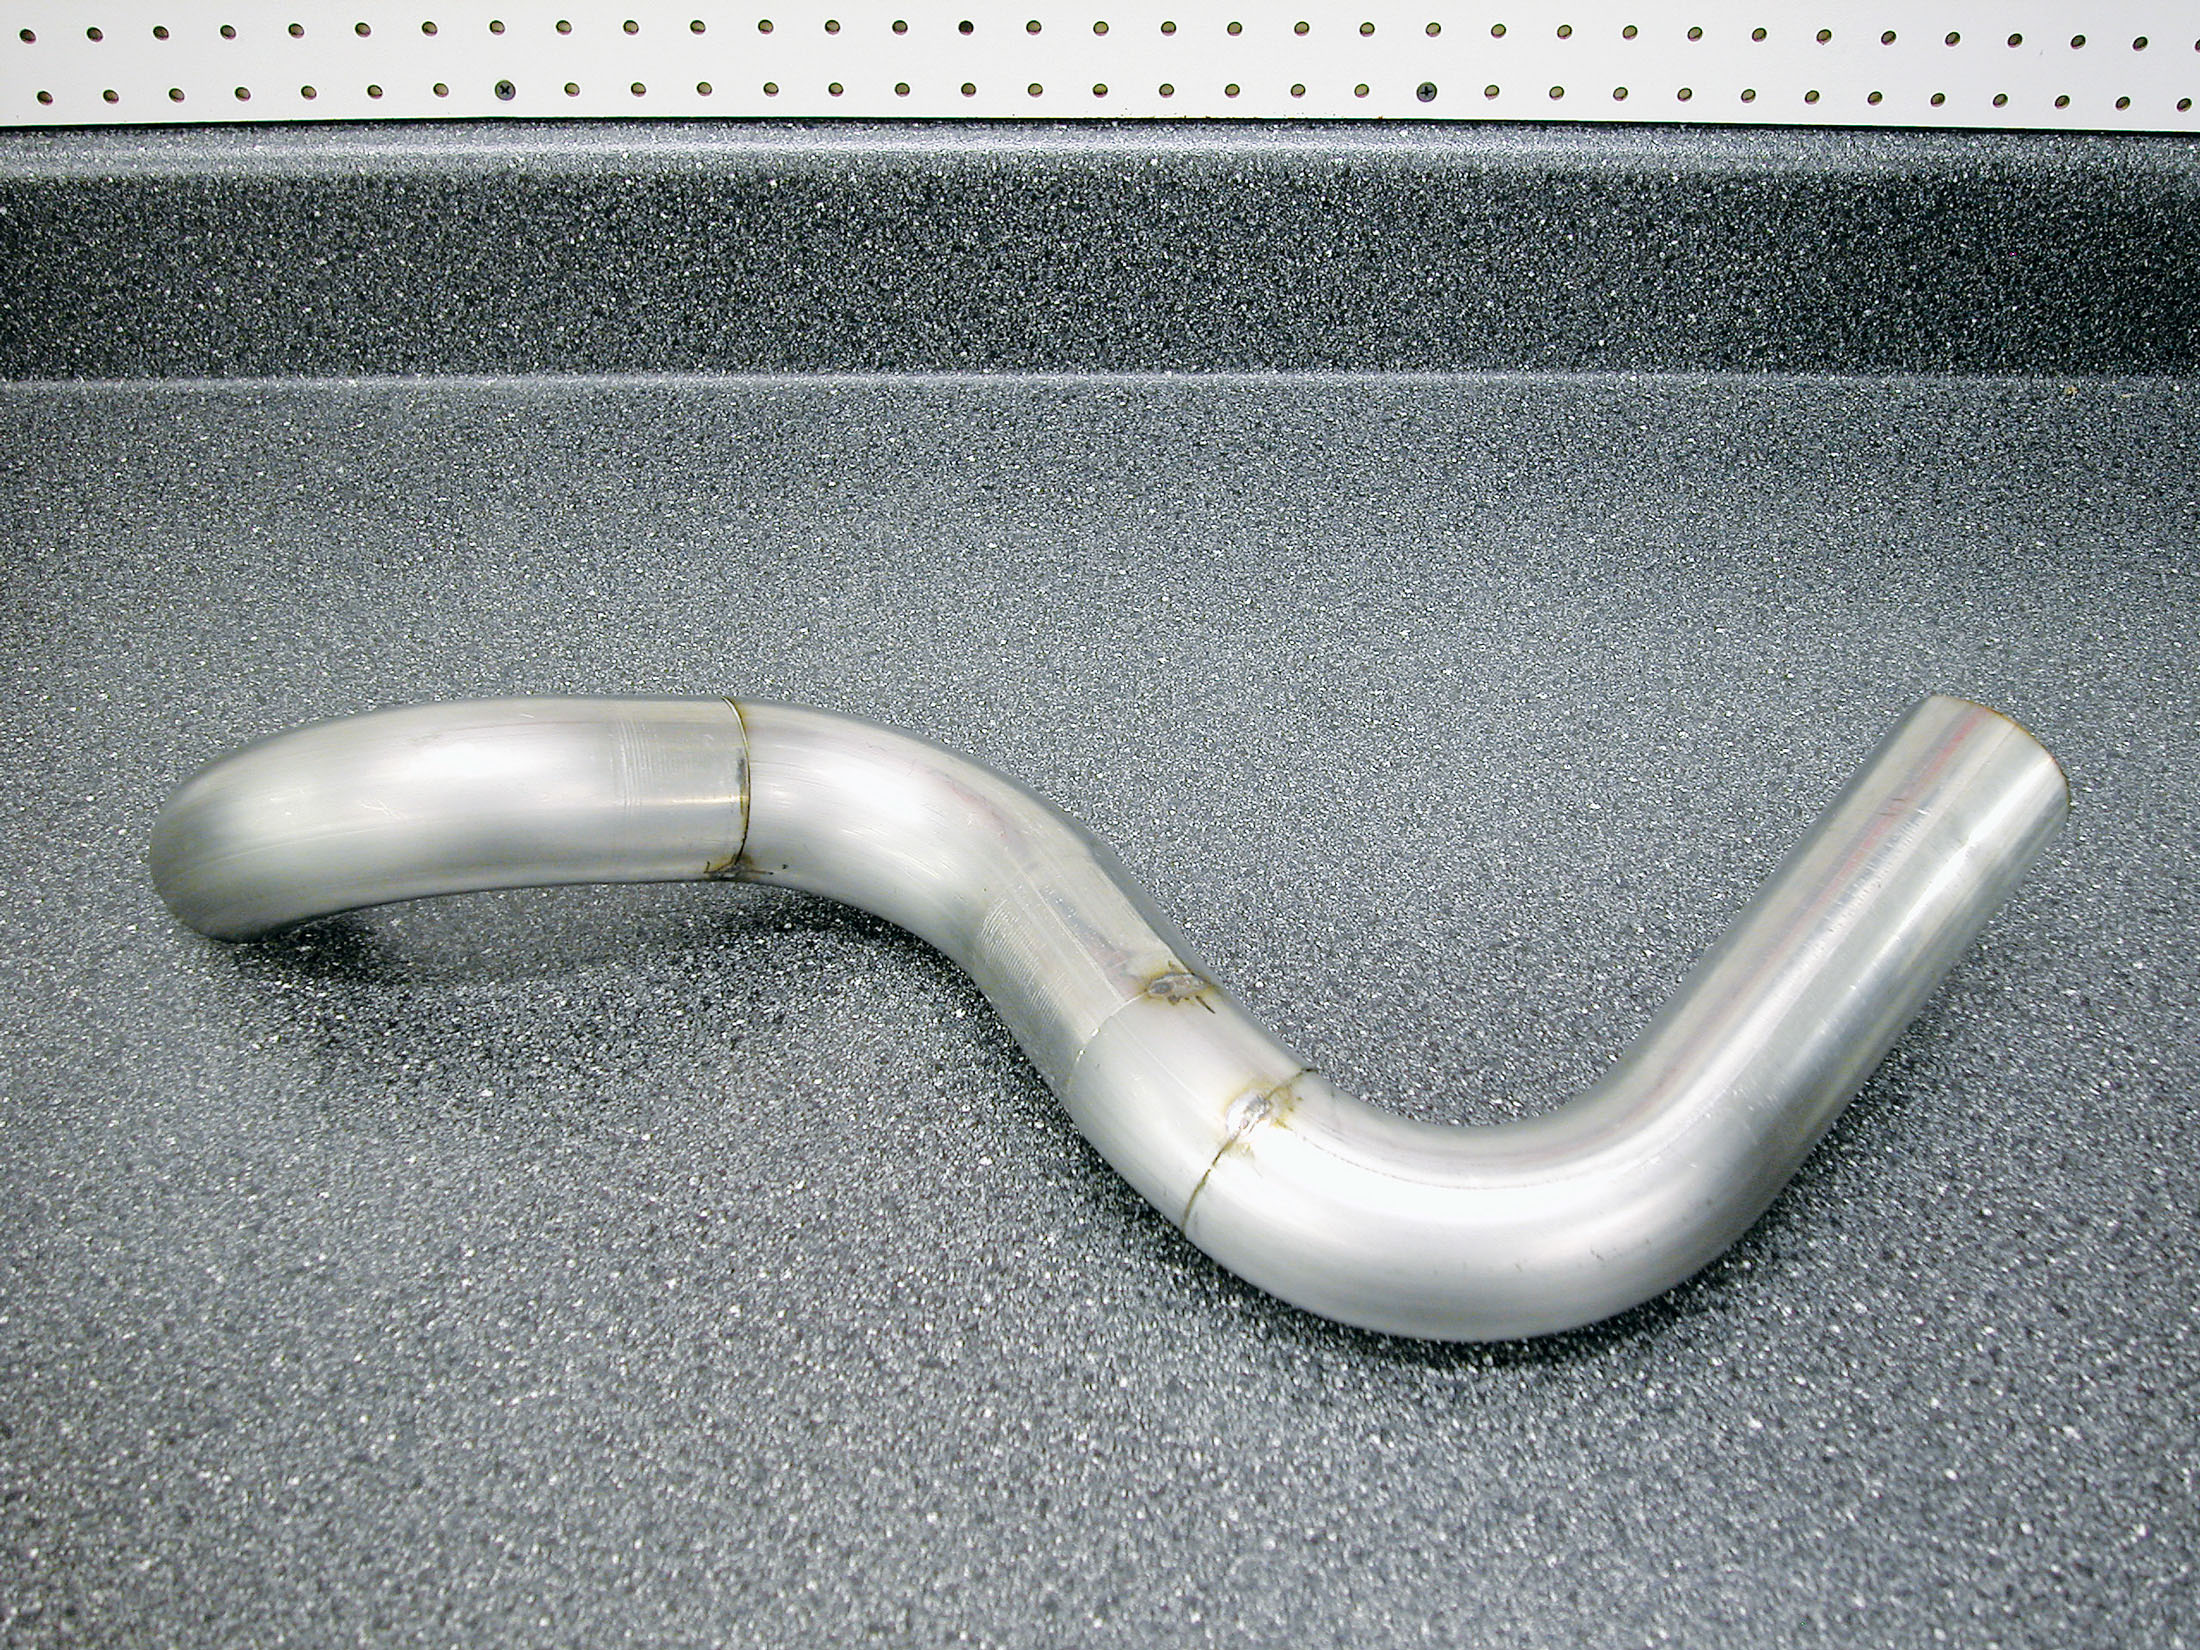
1. The box o’ tubes. There’s one complete header here—these tube segments just don’t know it yet. This is where the project is most intimidating; however, if you look at the whole project one bend at a time rather than trying to figure out exactly how you’re going to turn this pile of tubing into a finished header, you’ll have no problems.
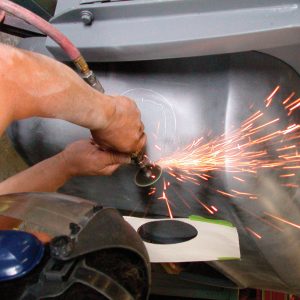
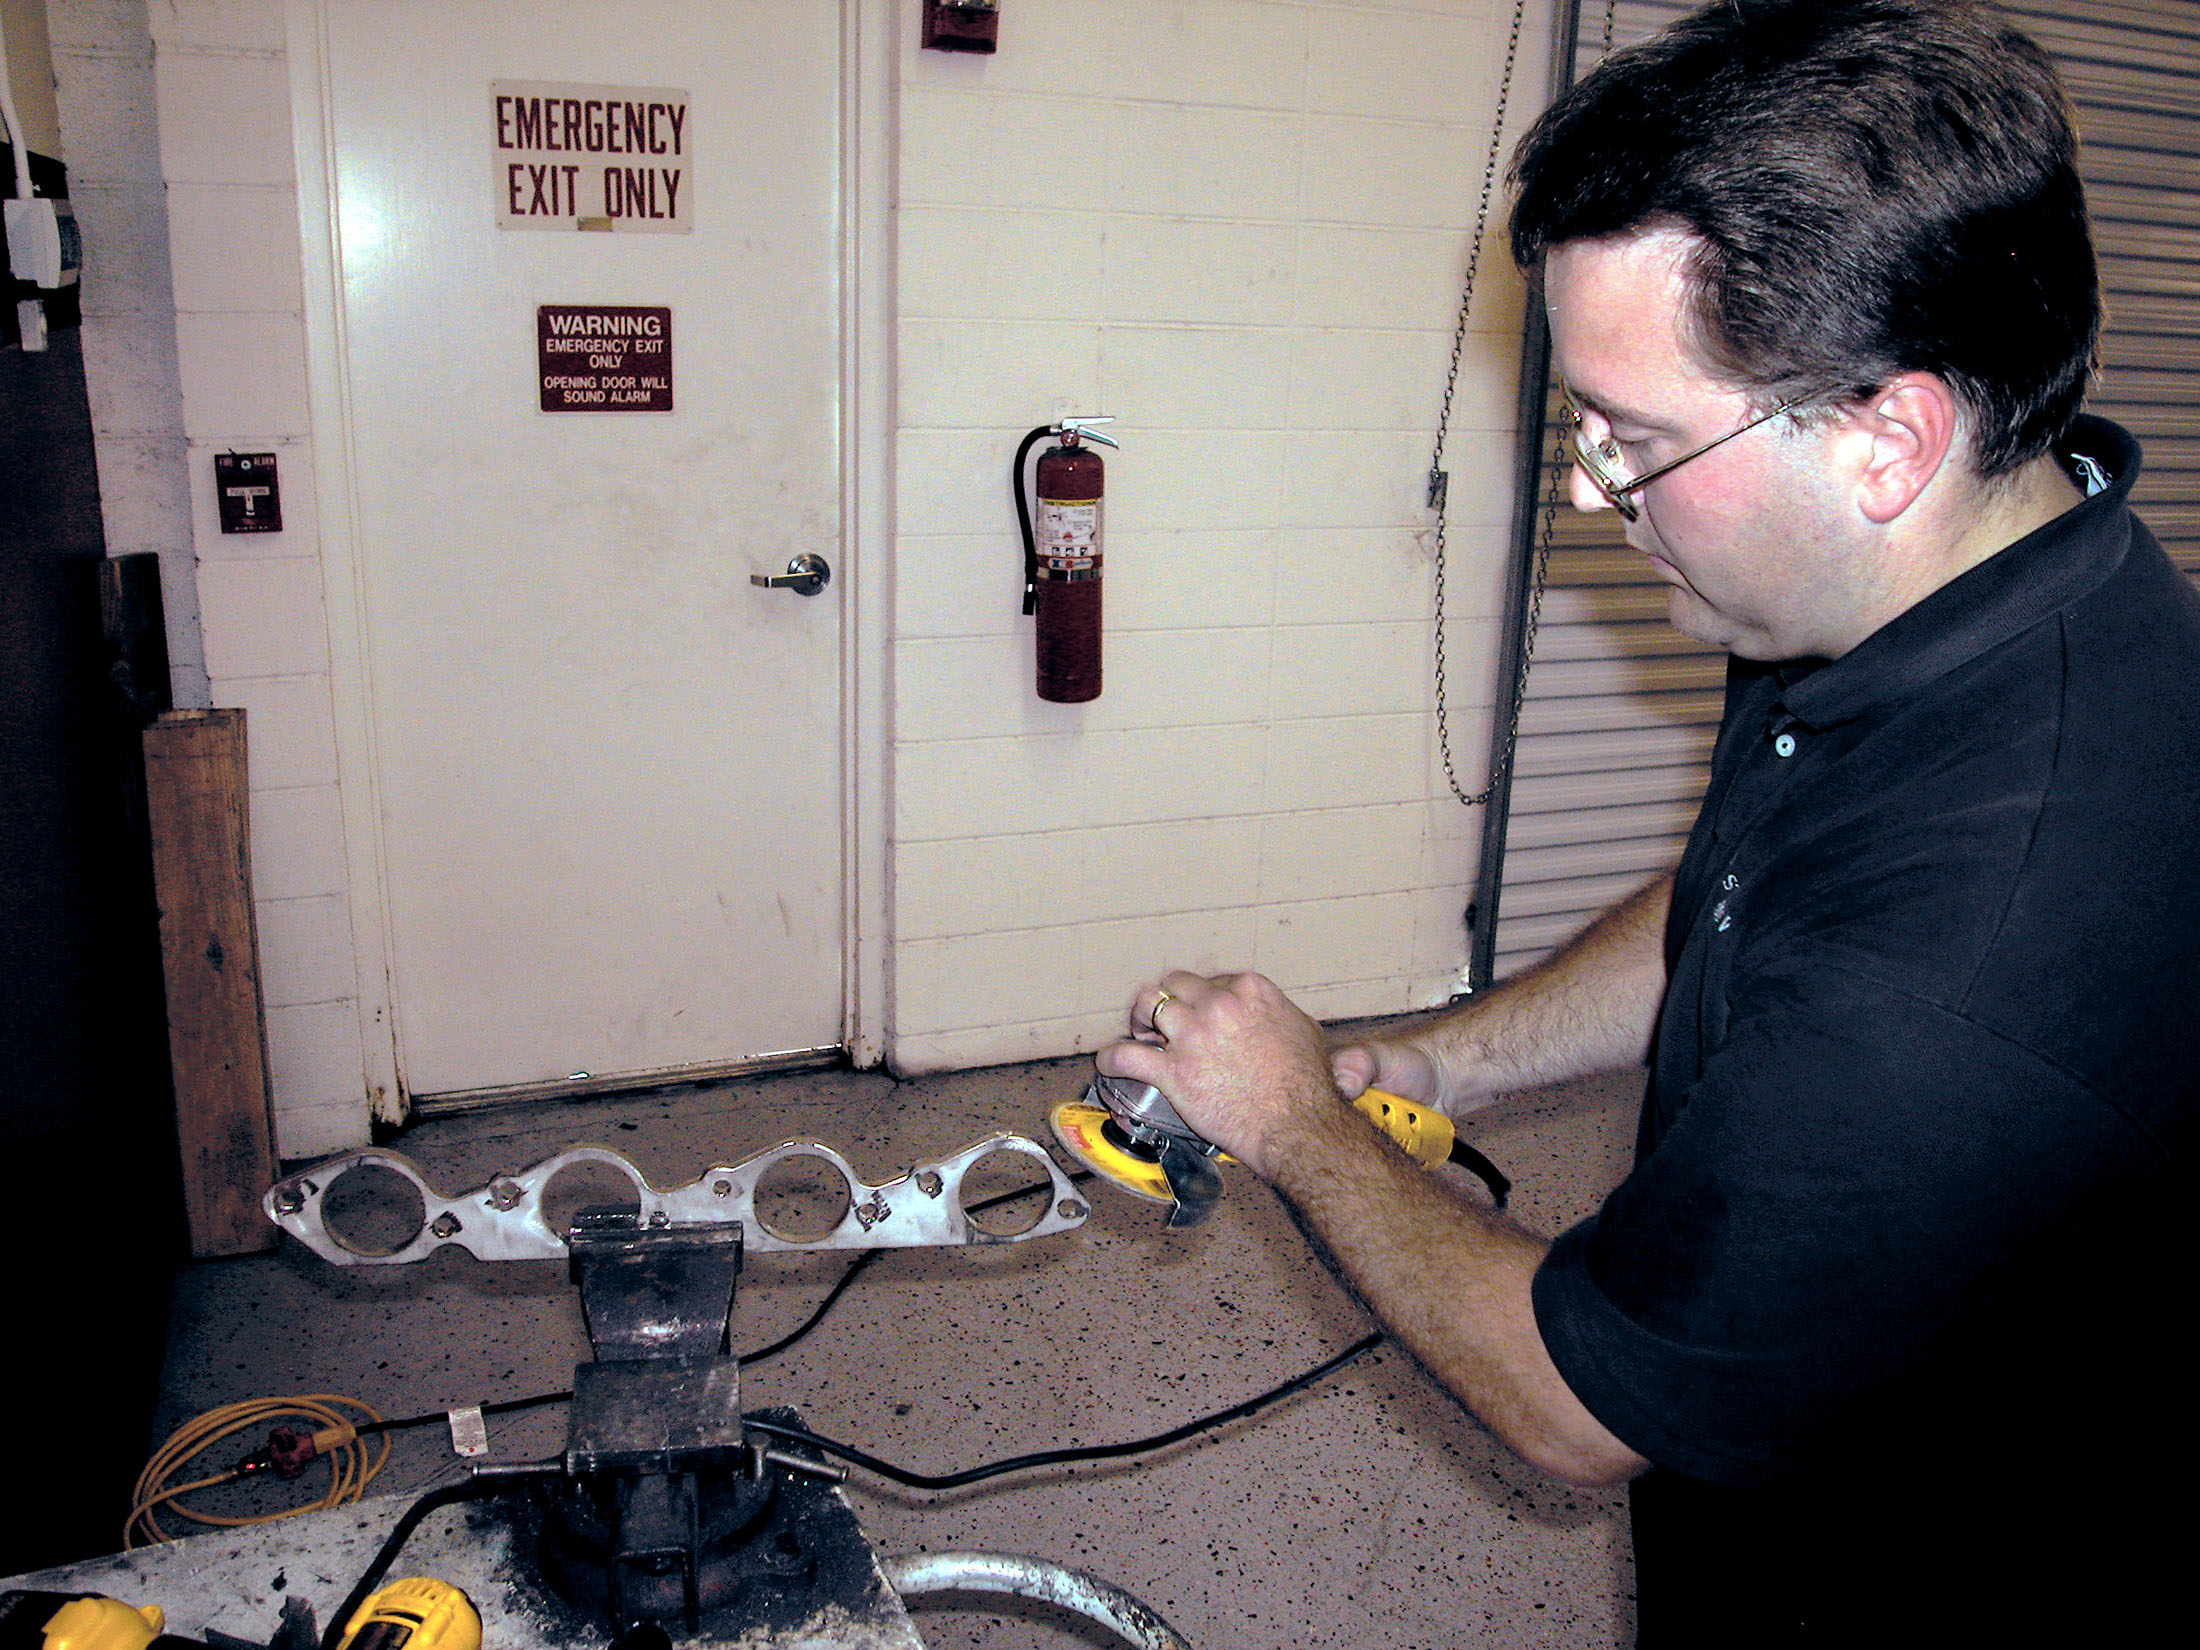
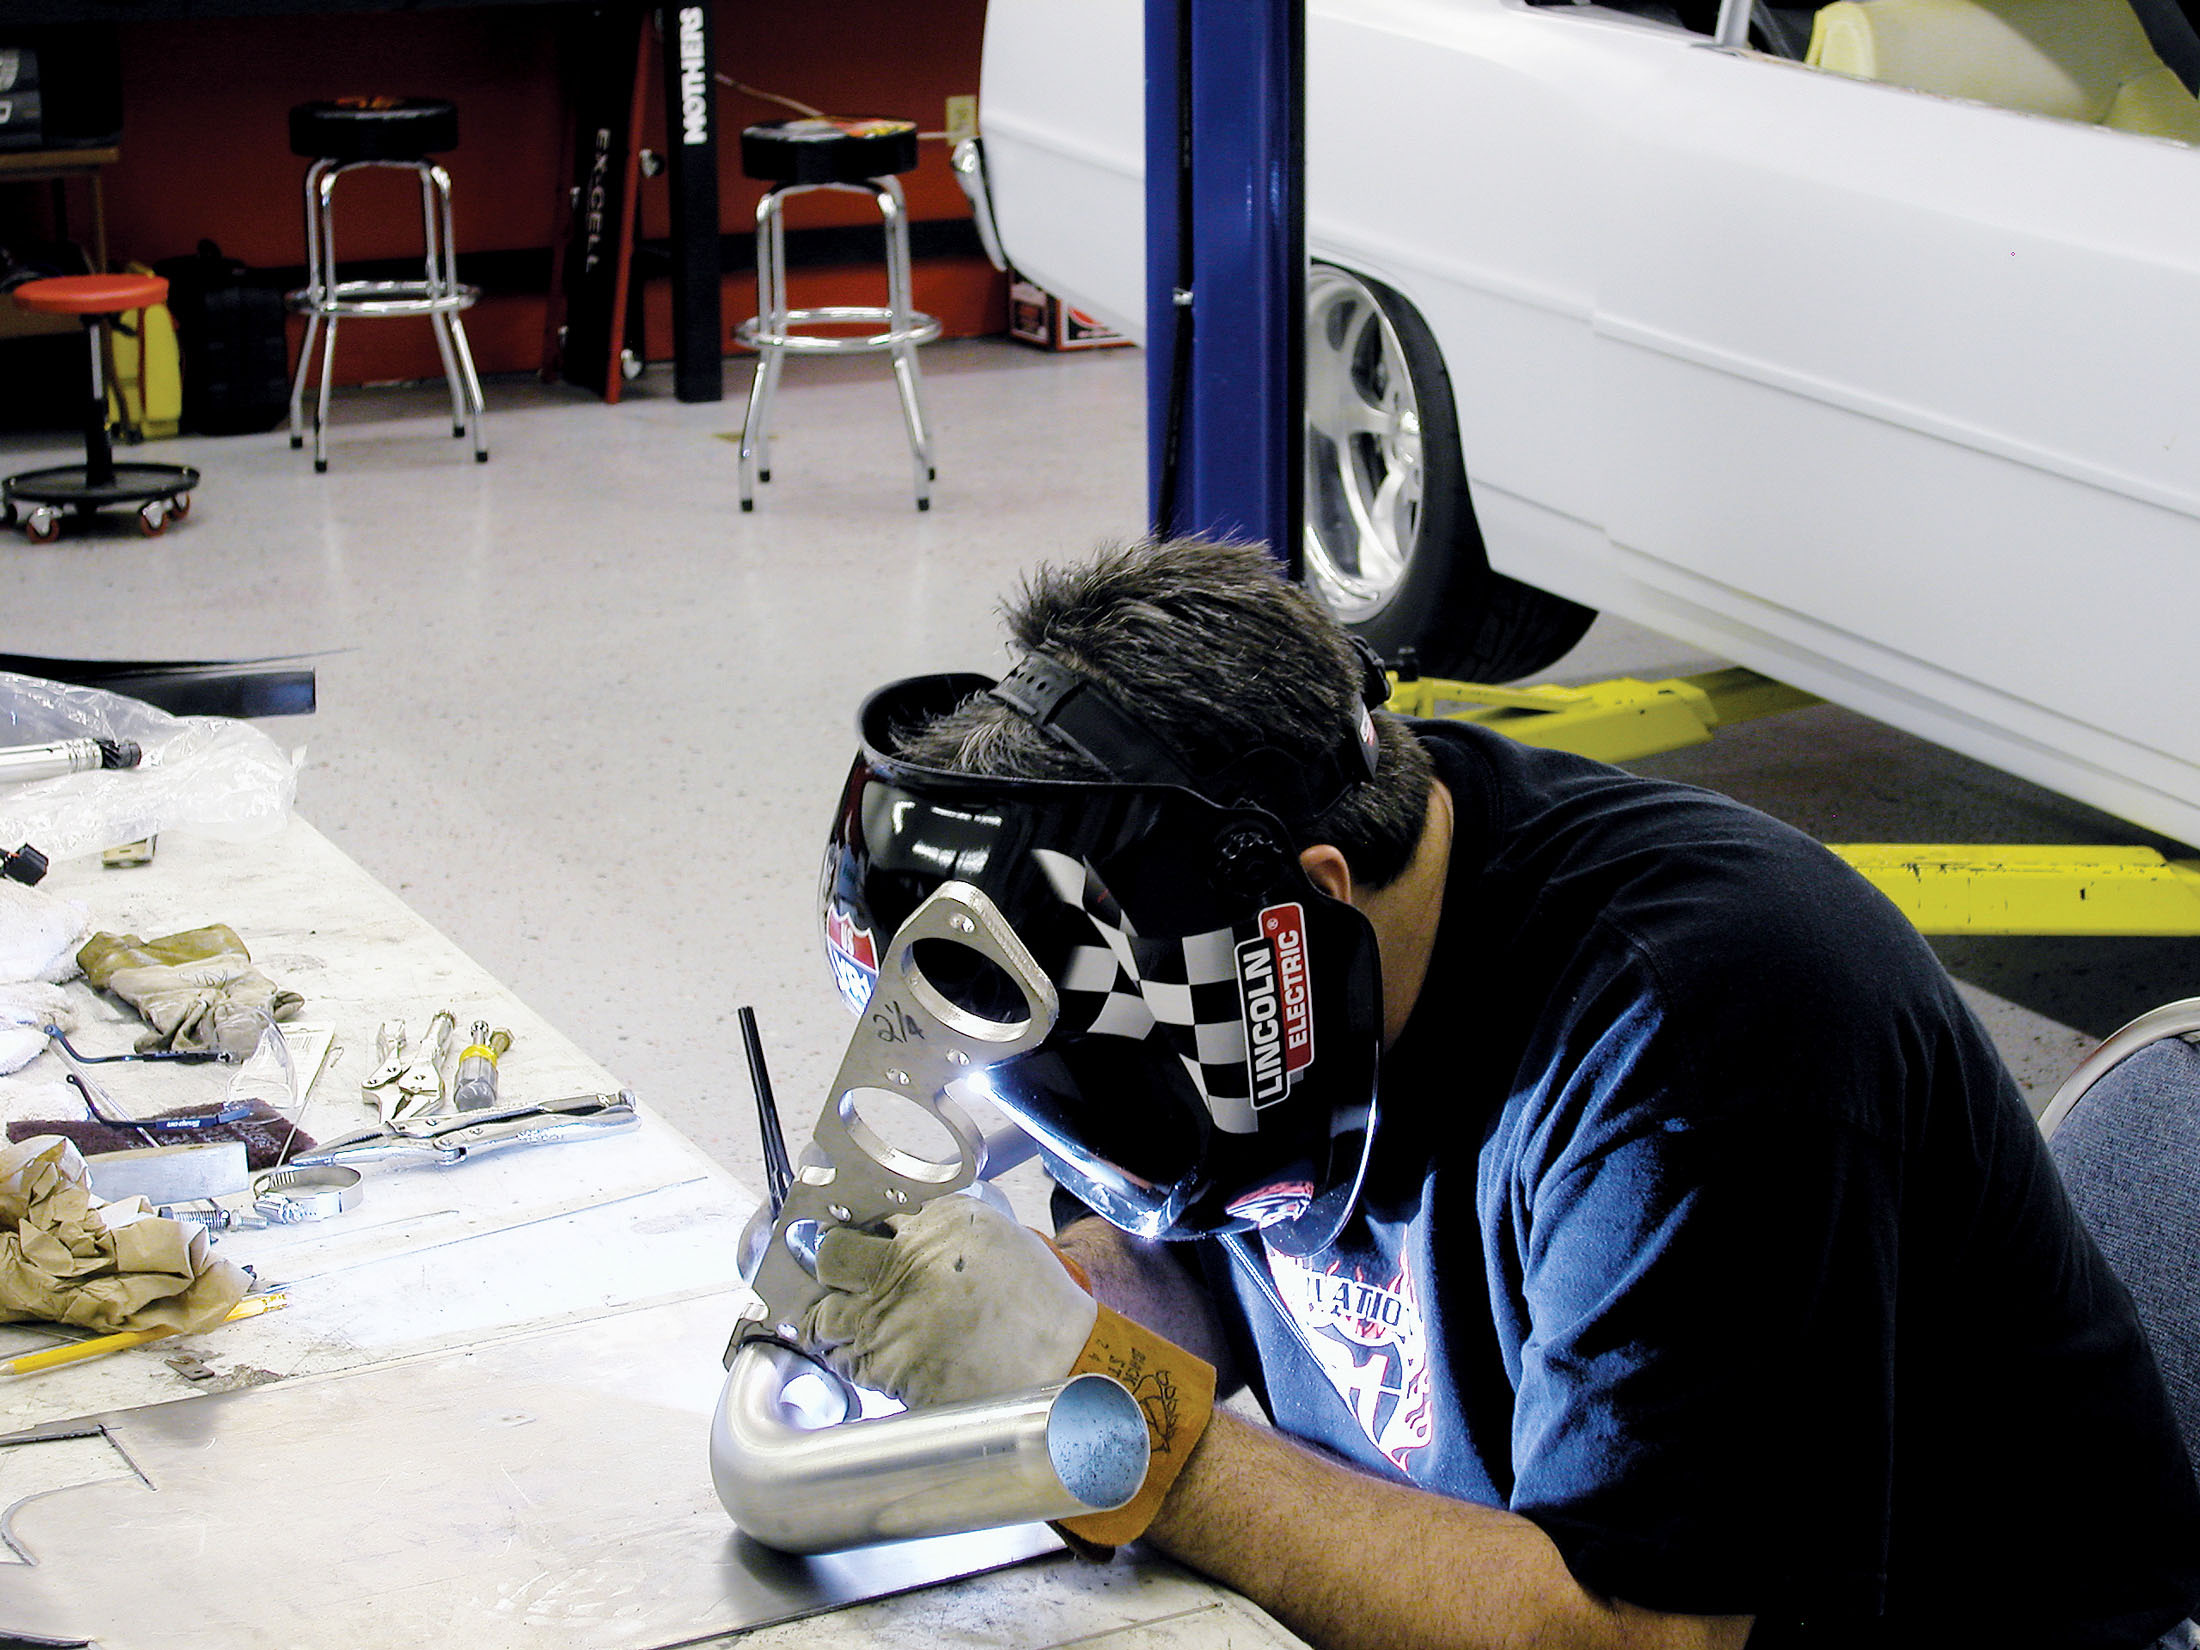
2. The first step is to deburr the header flange around its edges and at the ports.
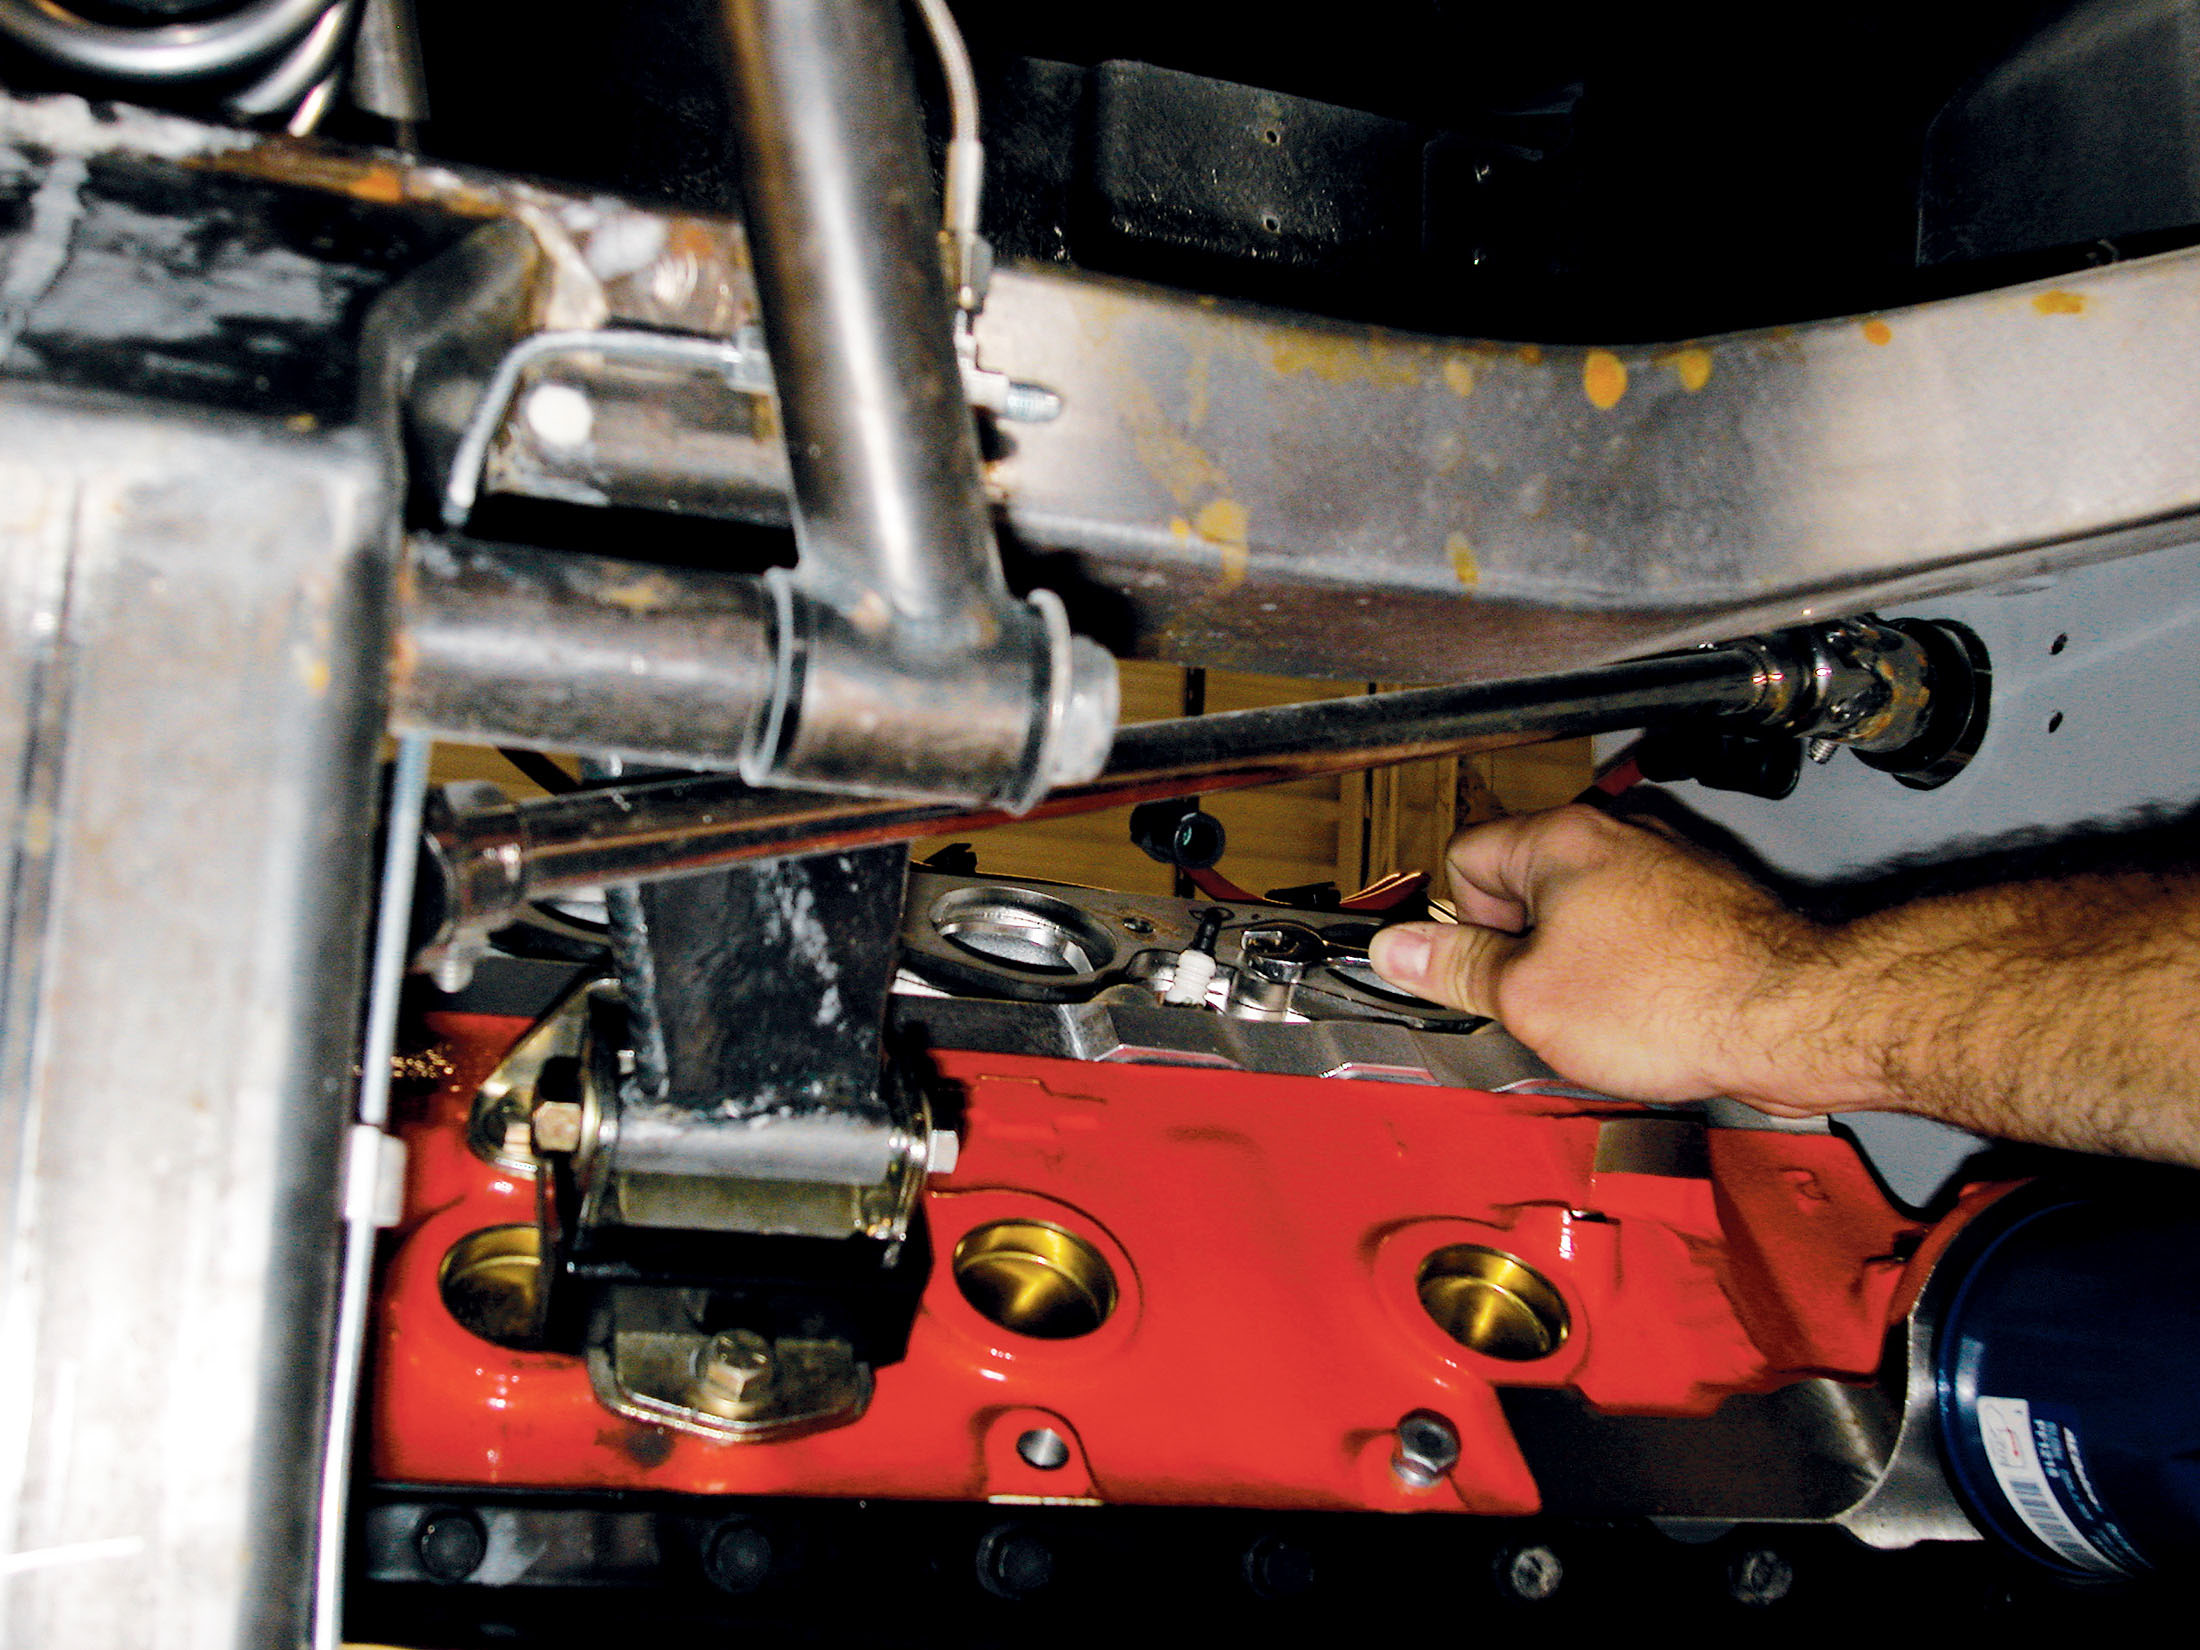
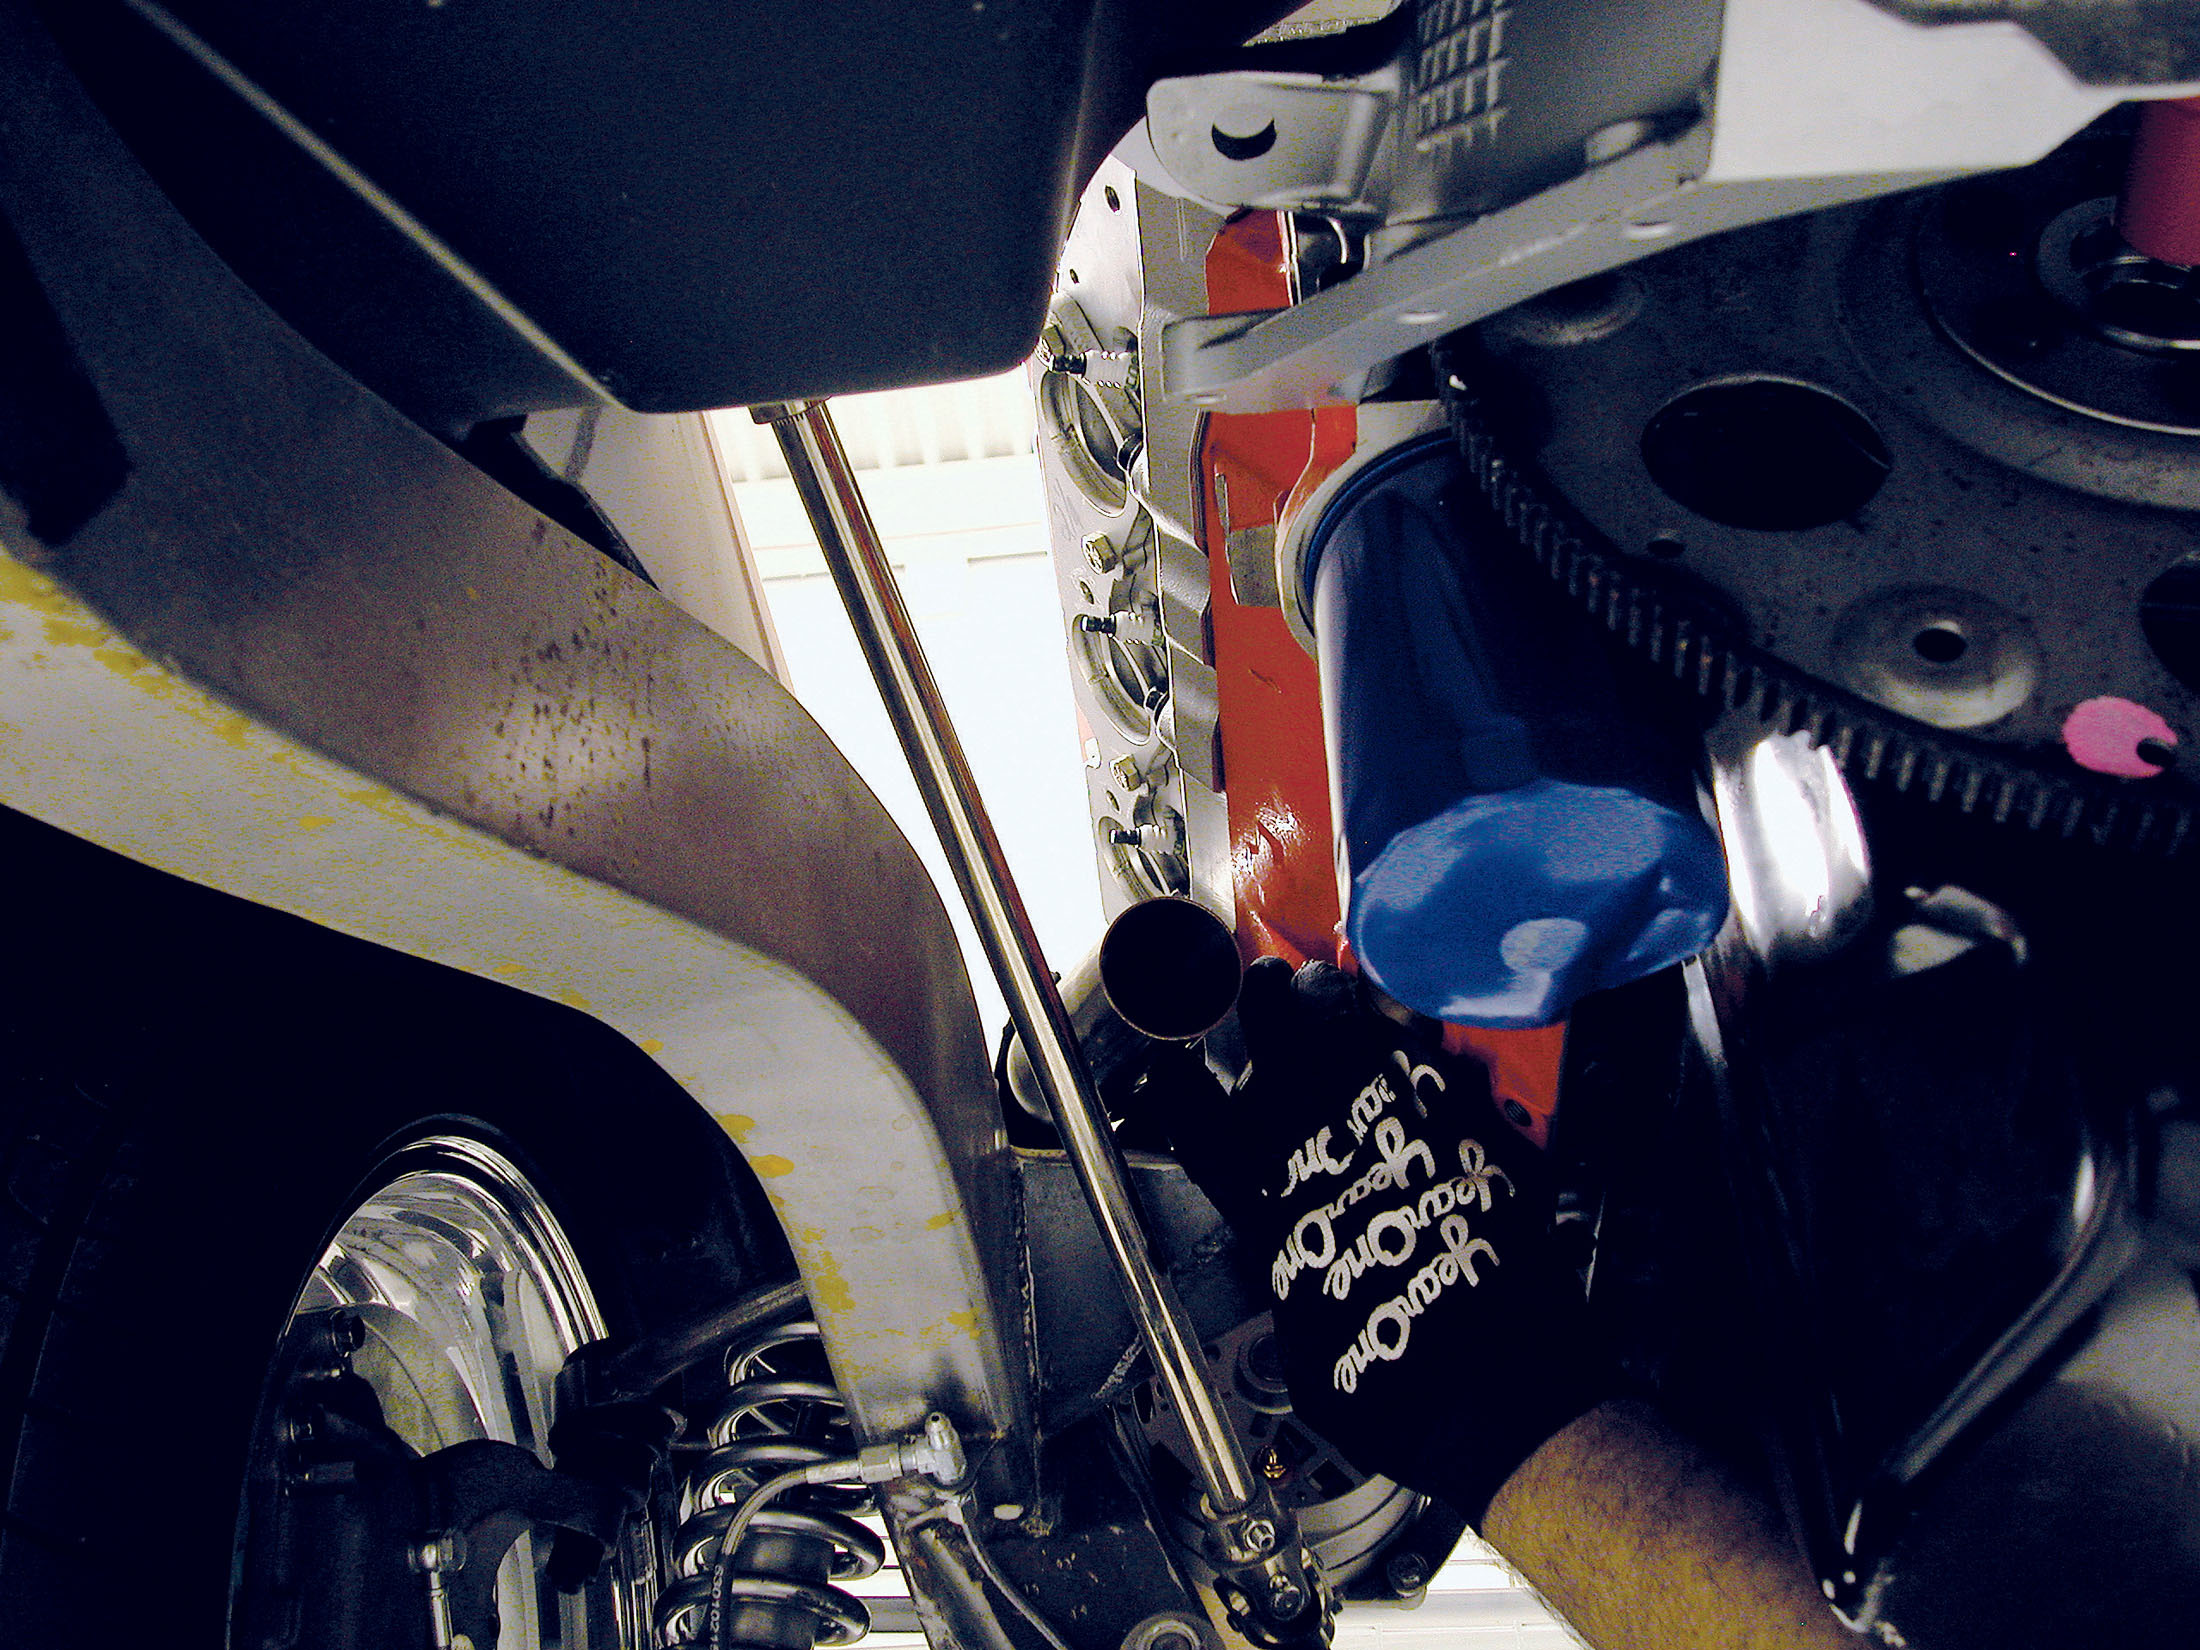
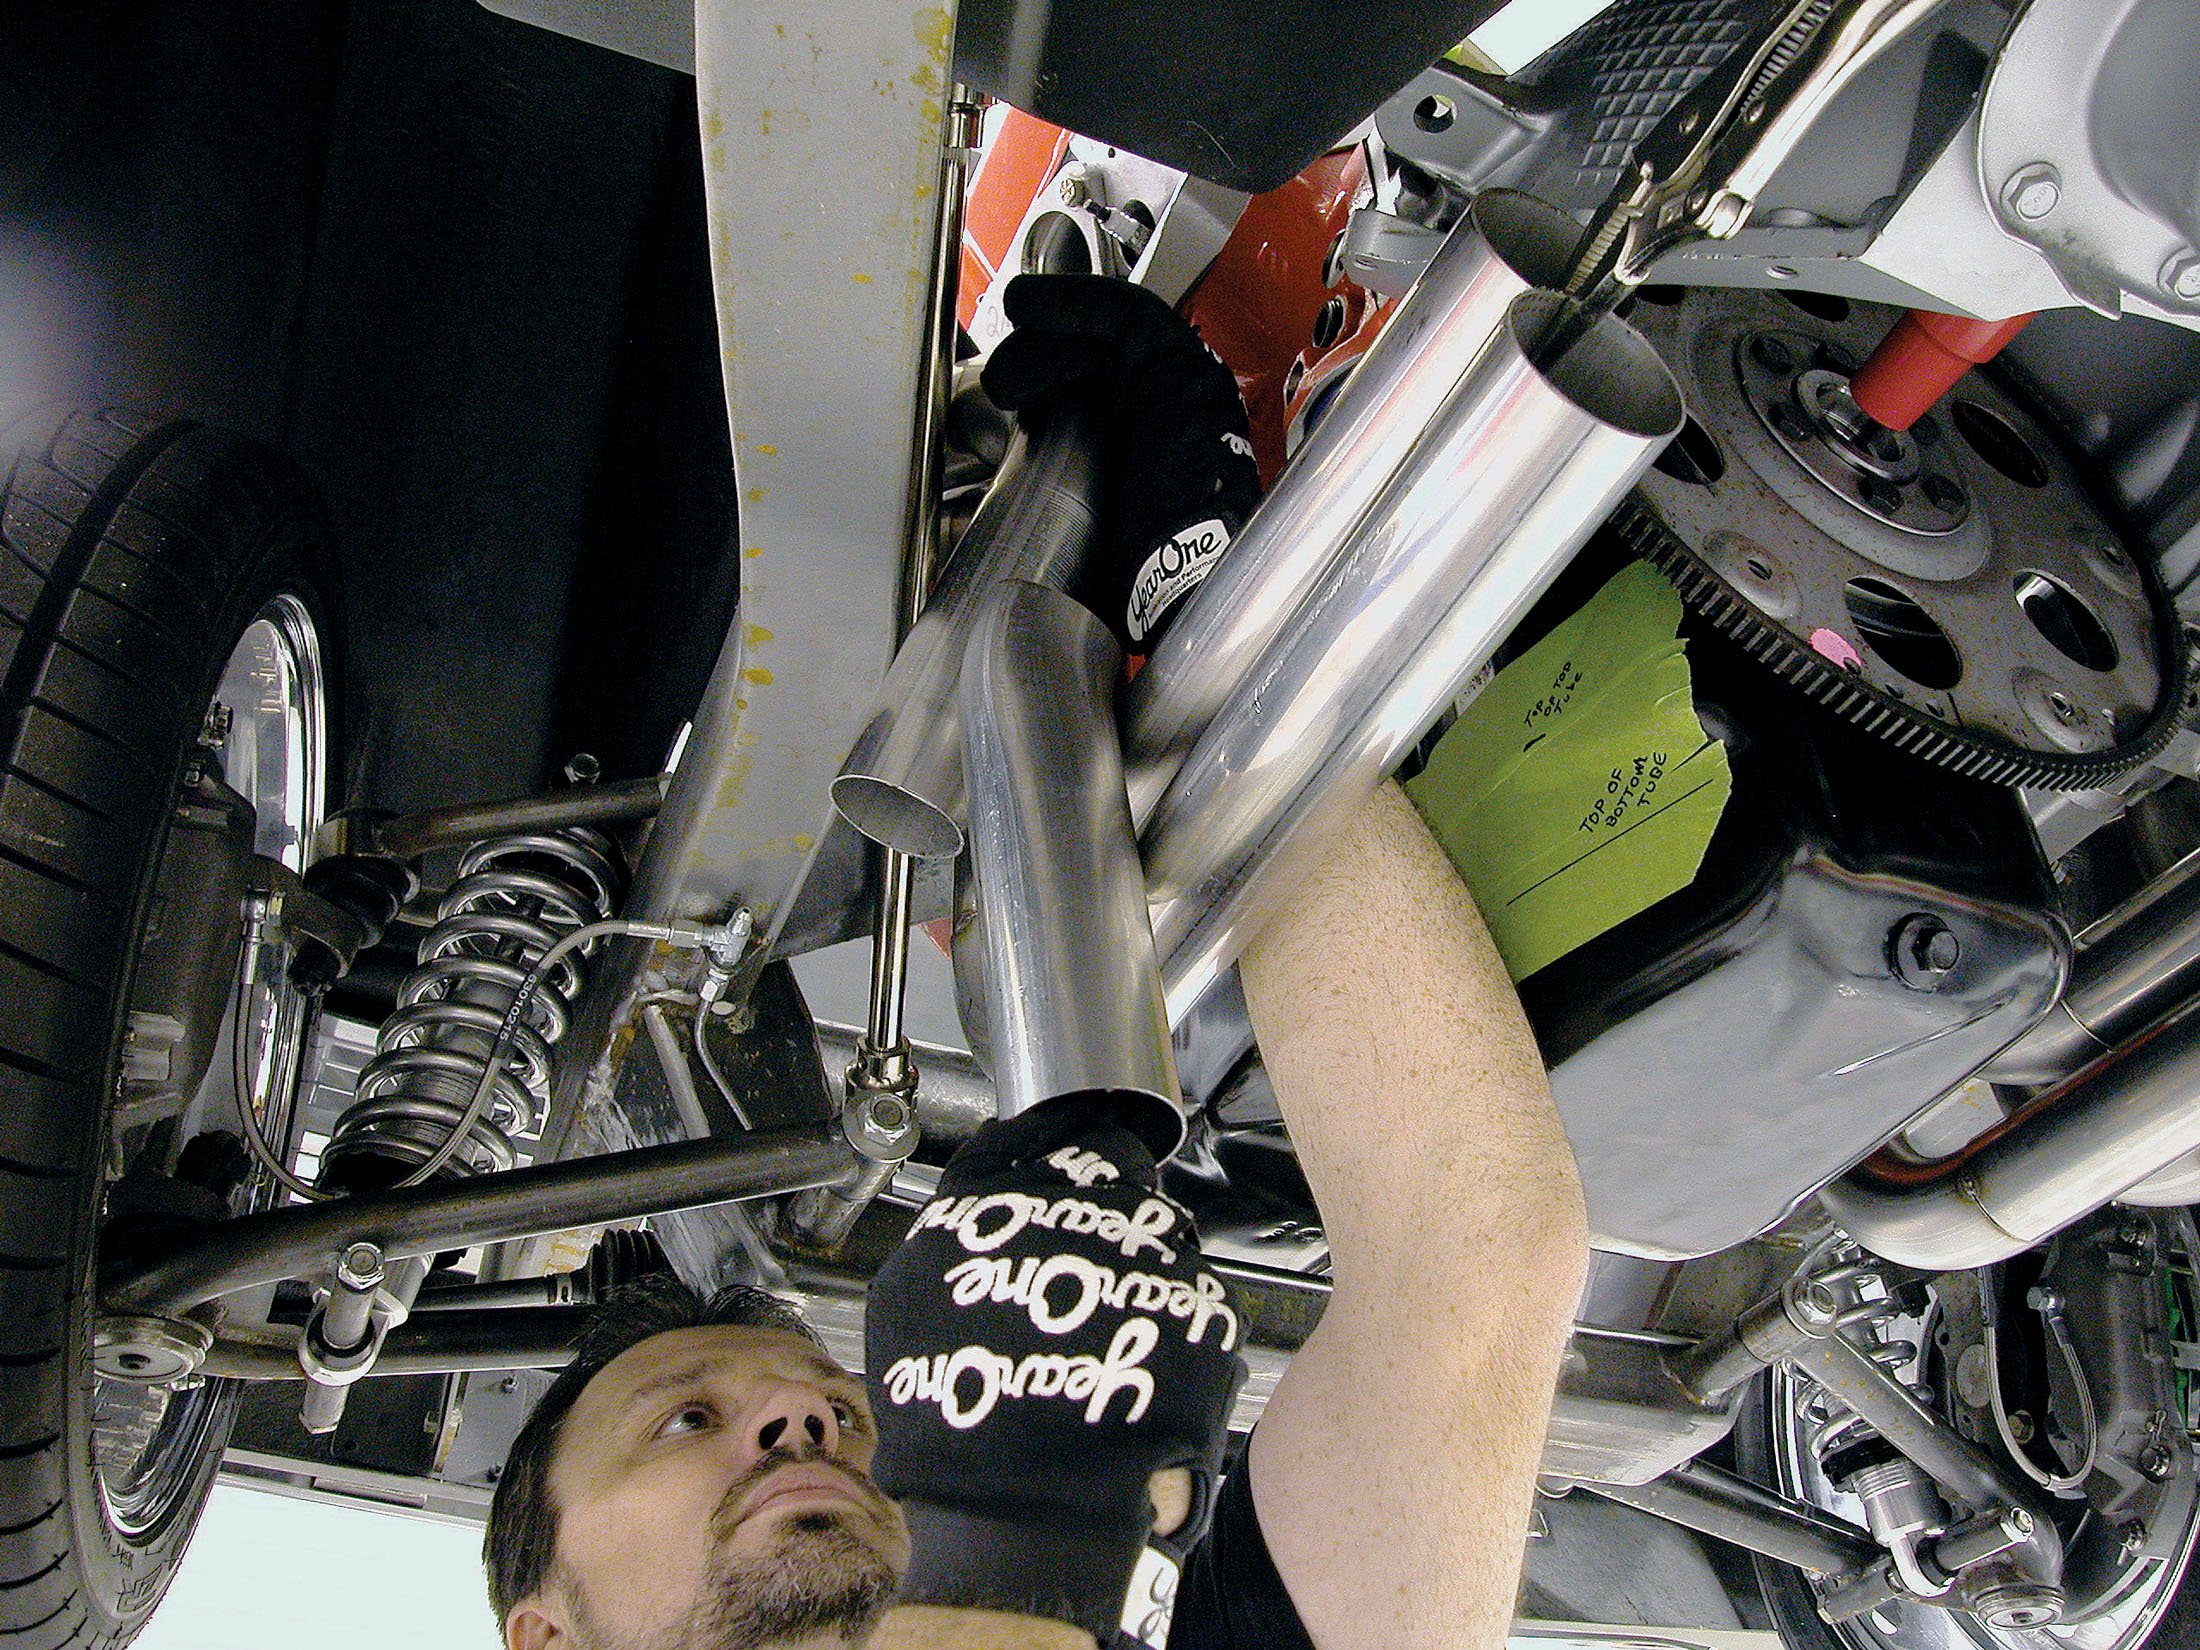
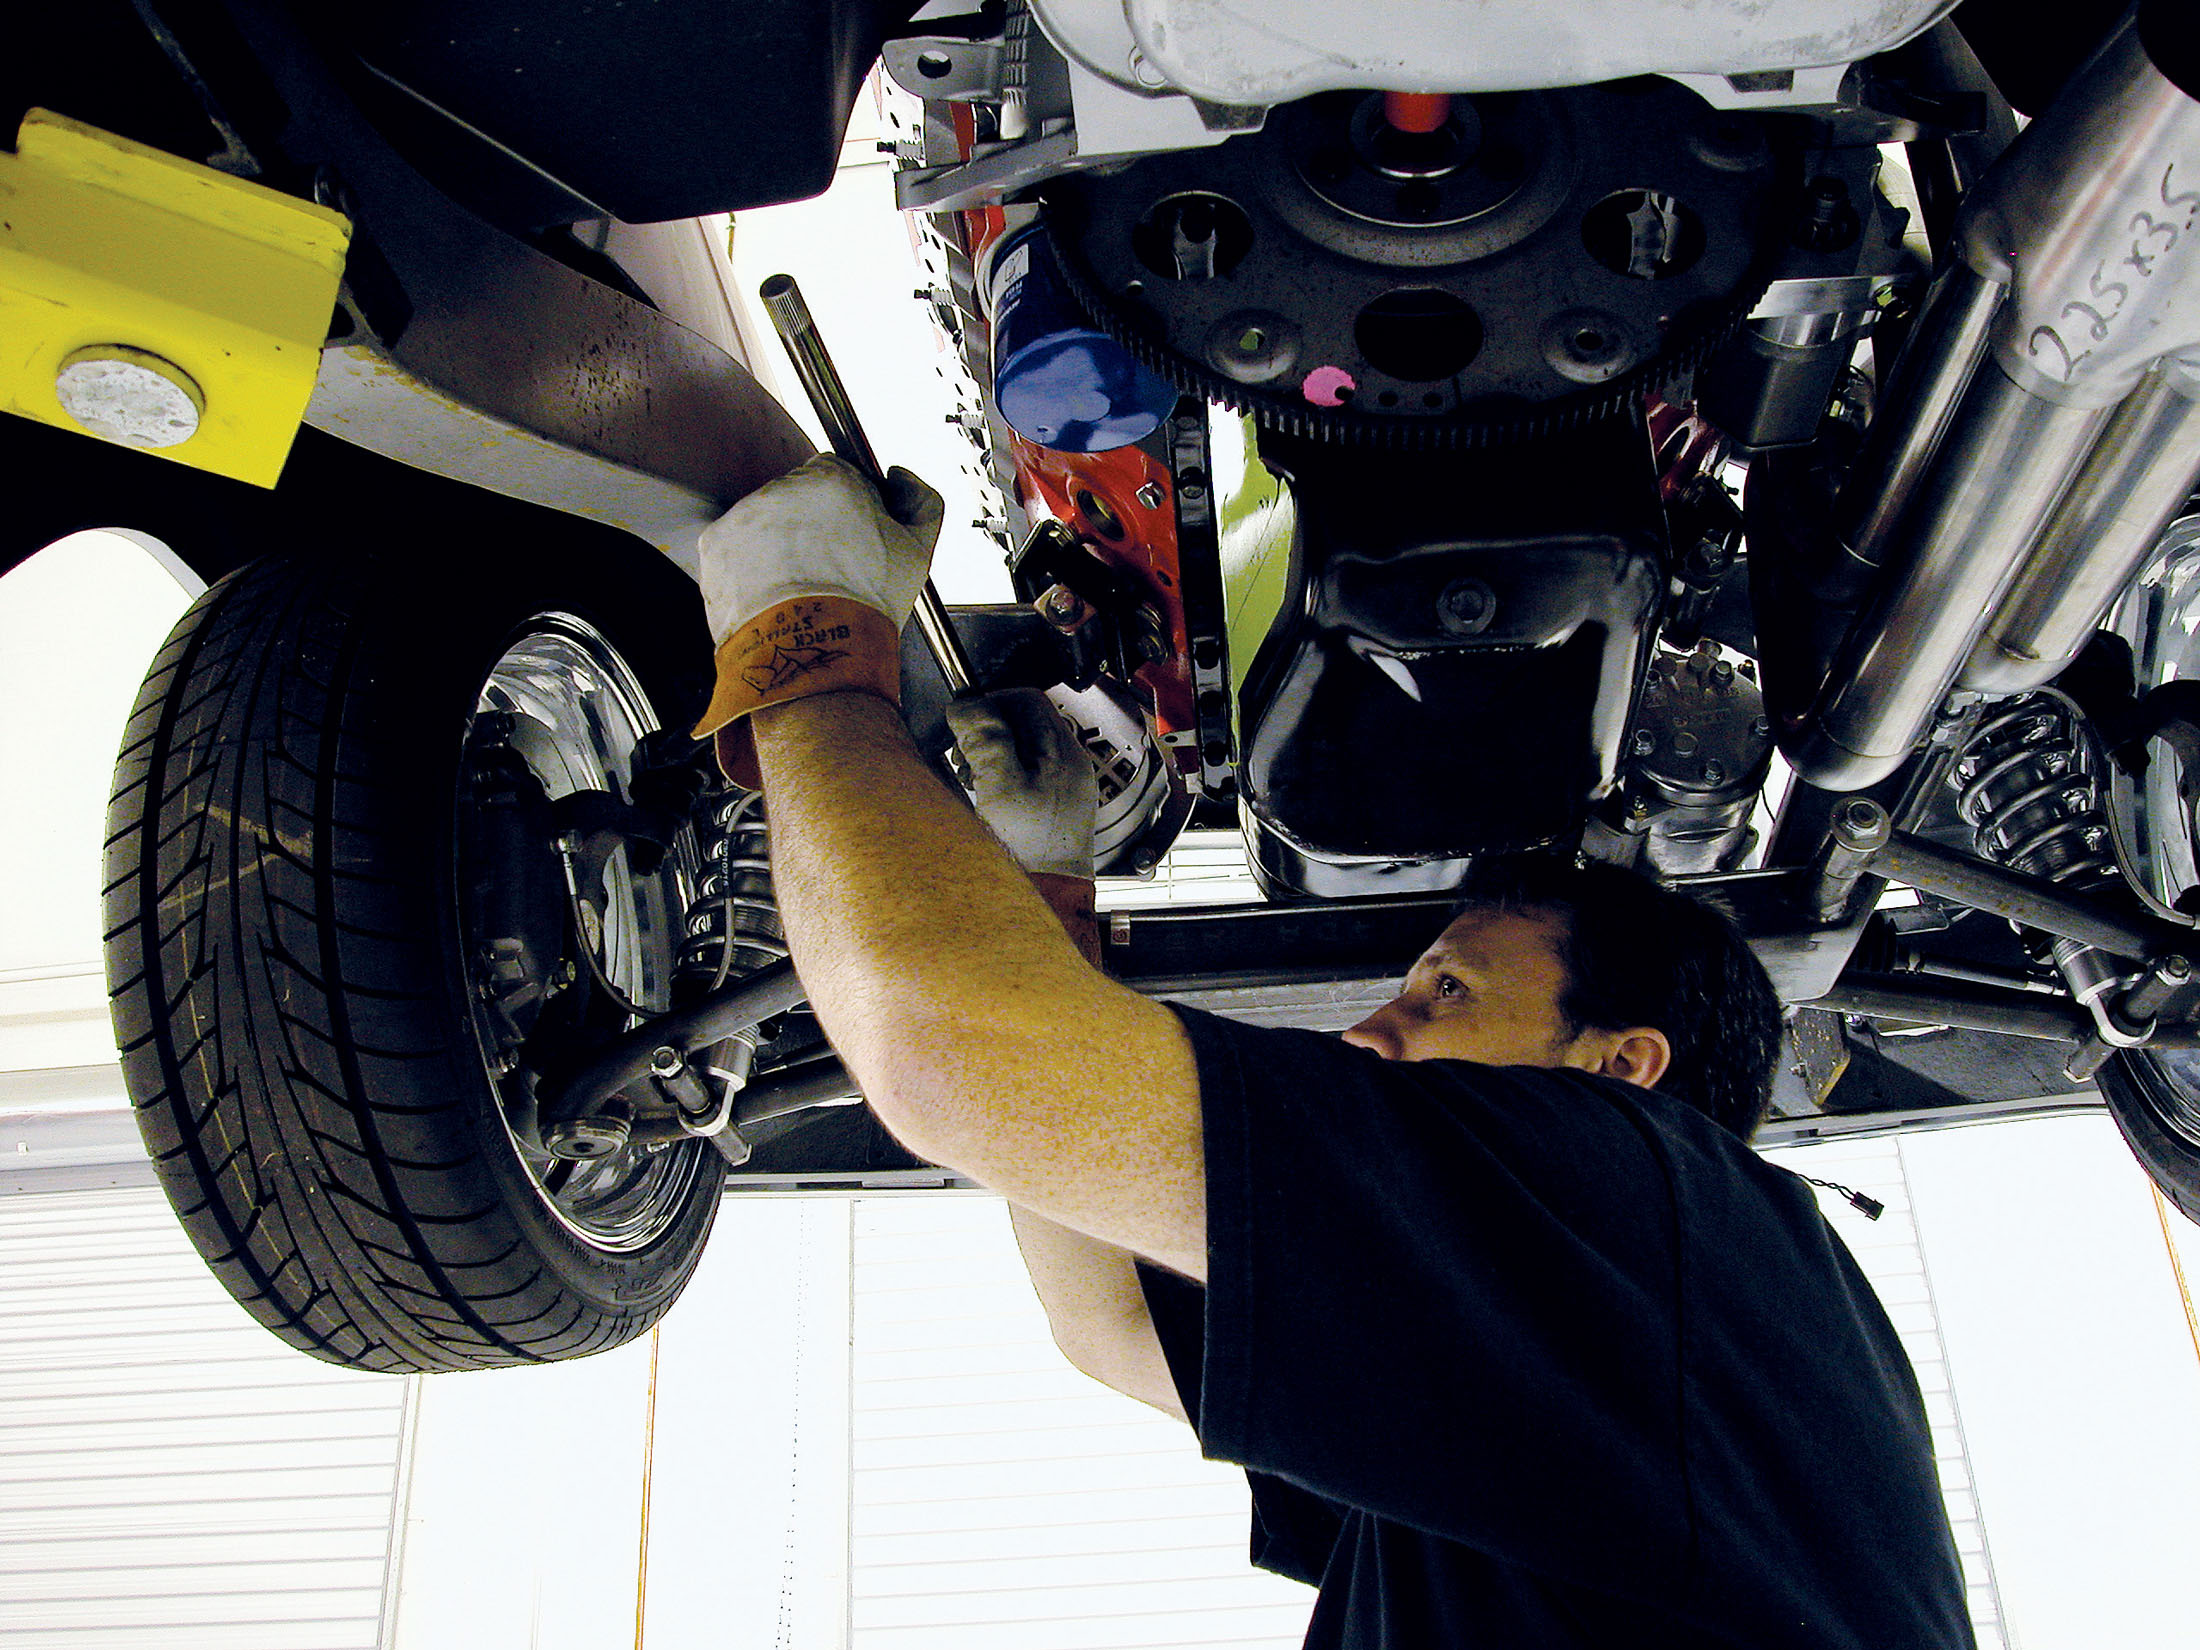
3A. Construction begins by putting the flange on the engine. Notice the spark plugs are in place here as well. It’s not to keep the plug hole clean, but to make sure that as you’re fabbing the tubes, you’ll have clearance for the plugs. This set of headers was built the hard way, with the whole front clip in place. That way, Year One’s Jeff Georges was absolutely sure everything would fit.
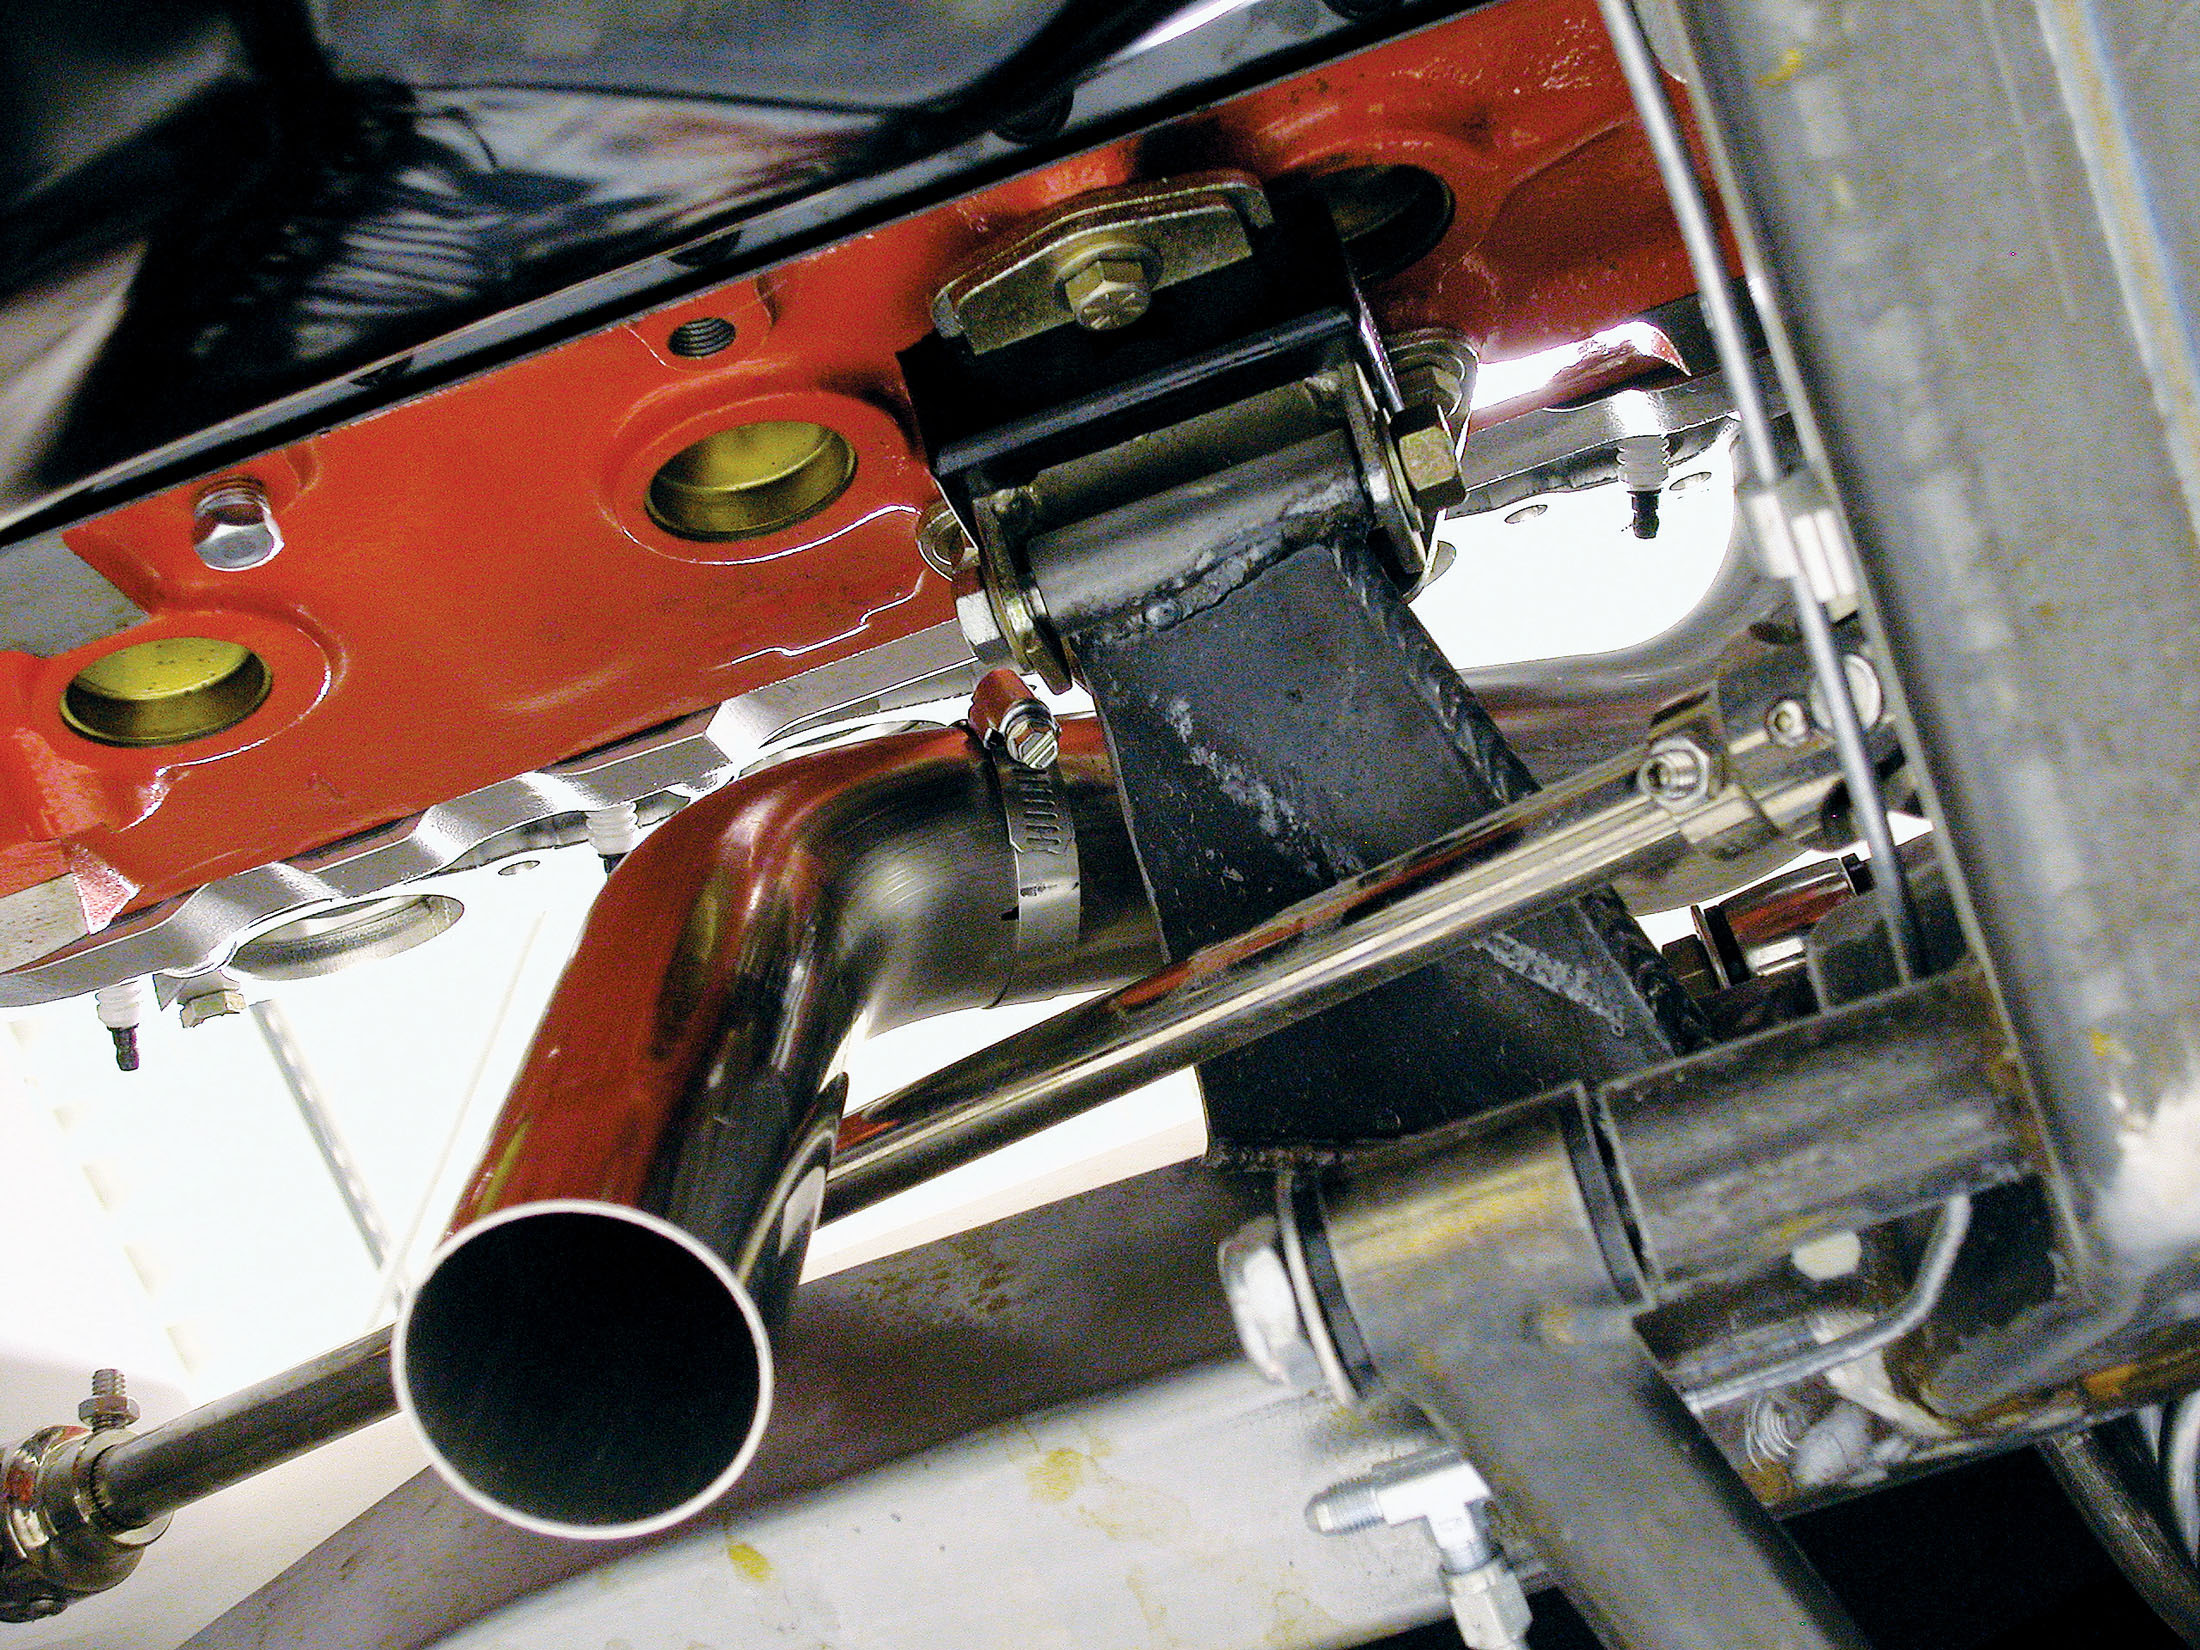
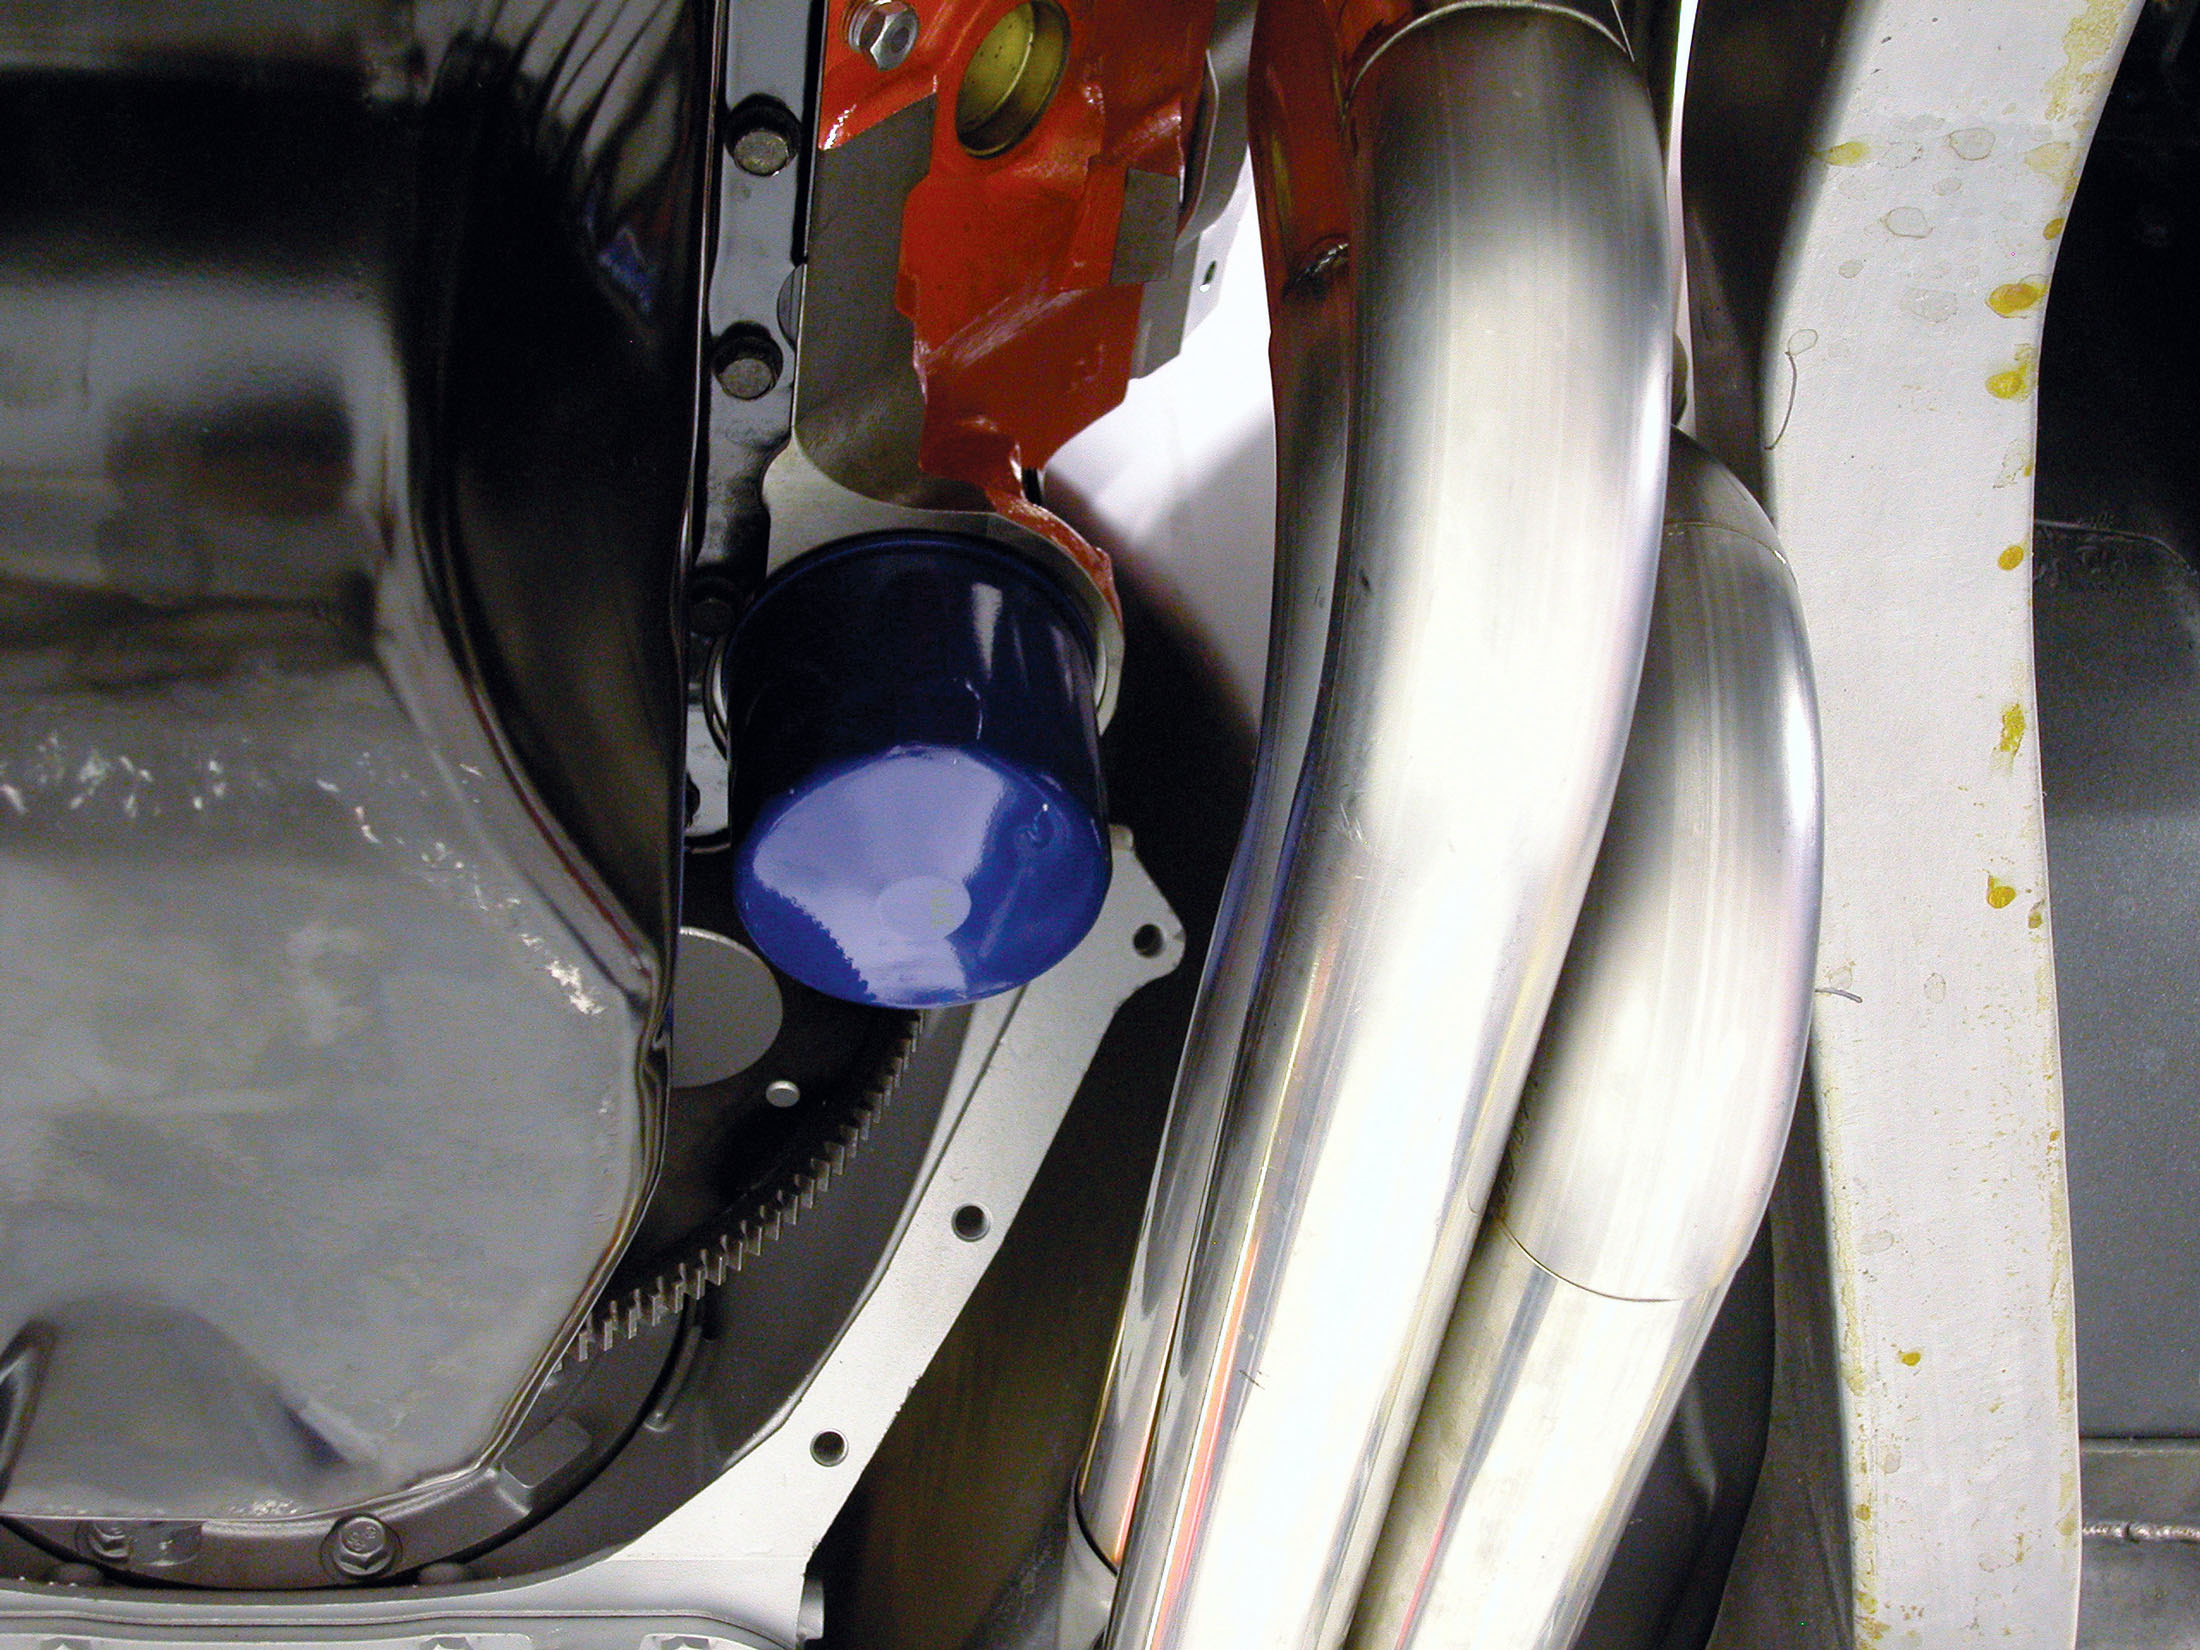
3B. The steering column was left in place for most of the fabrication and a tall oil filter was also installed. The tall filter being in place during construction is an excellent idea, as it ensures future ease of maintenance. A lot of builds overlook these tips, resulting in remote filters and burnt plug wires.
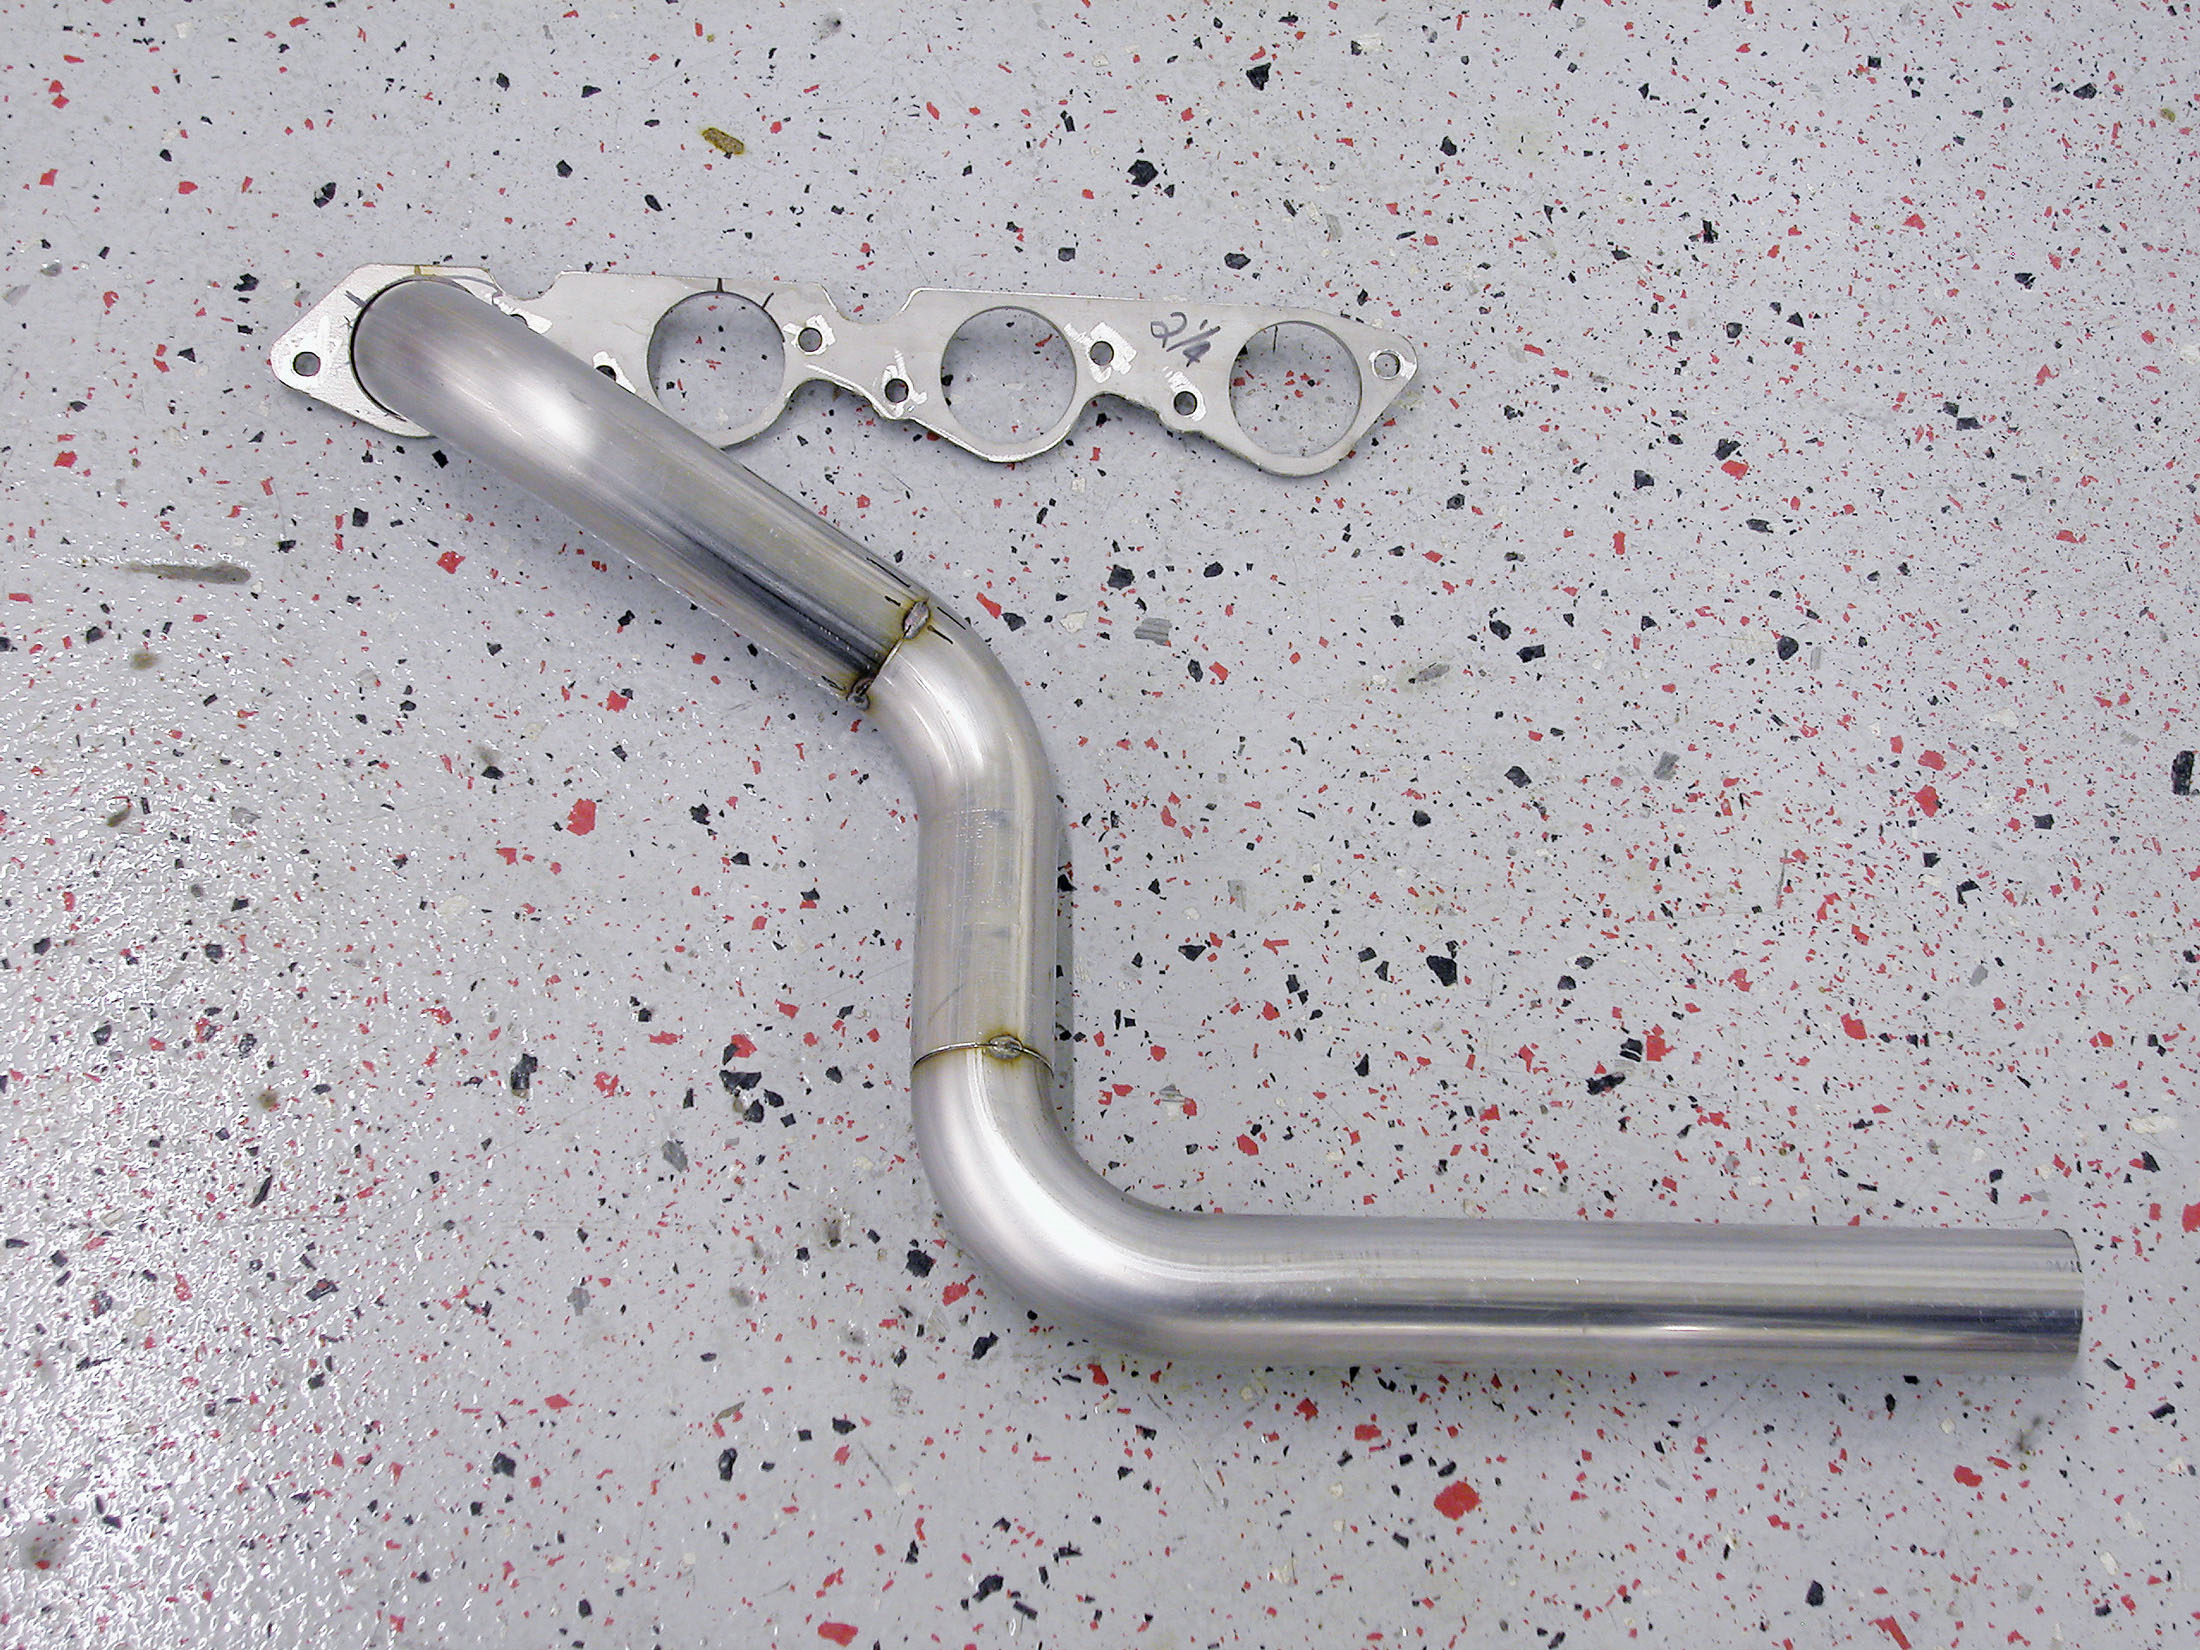
4A. Once the flange is attached to the engine, you can begin cutting the tubes to fit, starting with the first bend at the first port. This piece is a 180-degree bend that was cut in half and then trimmed some more until it came out of the port at the desired angle.
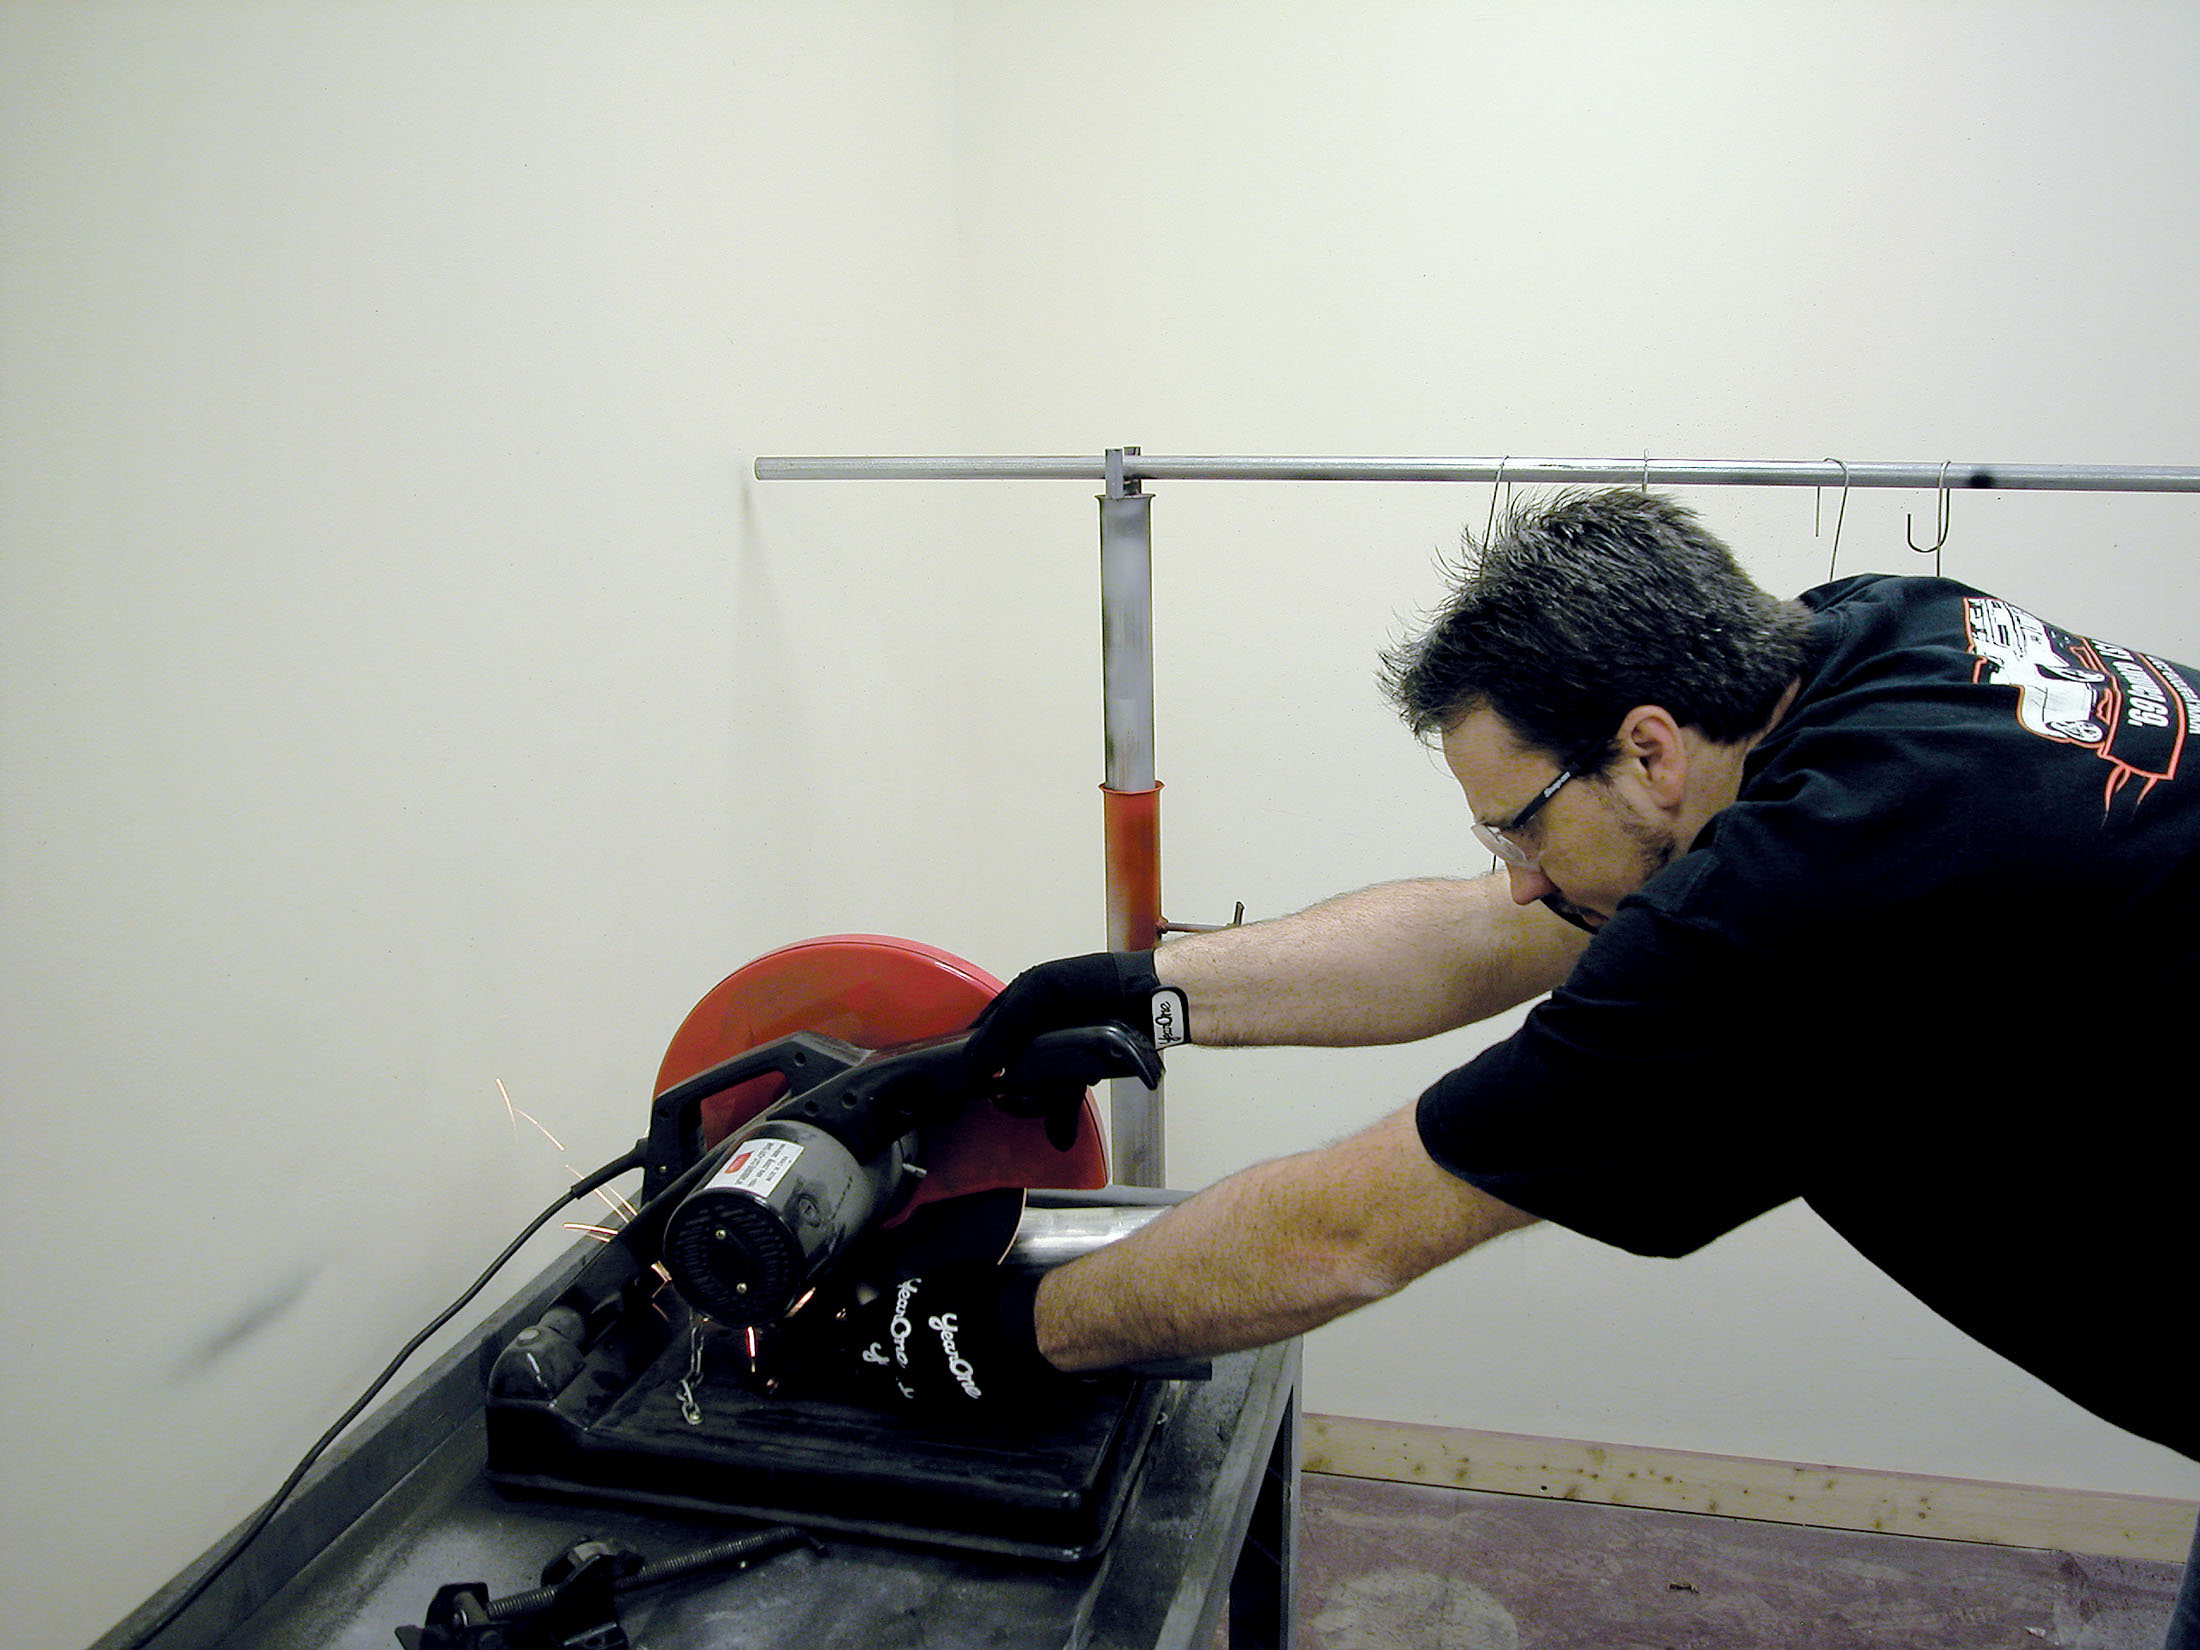
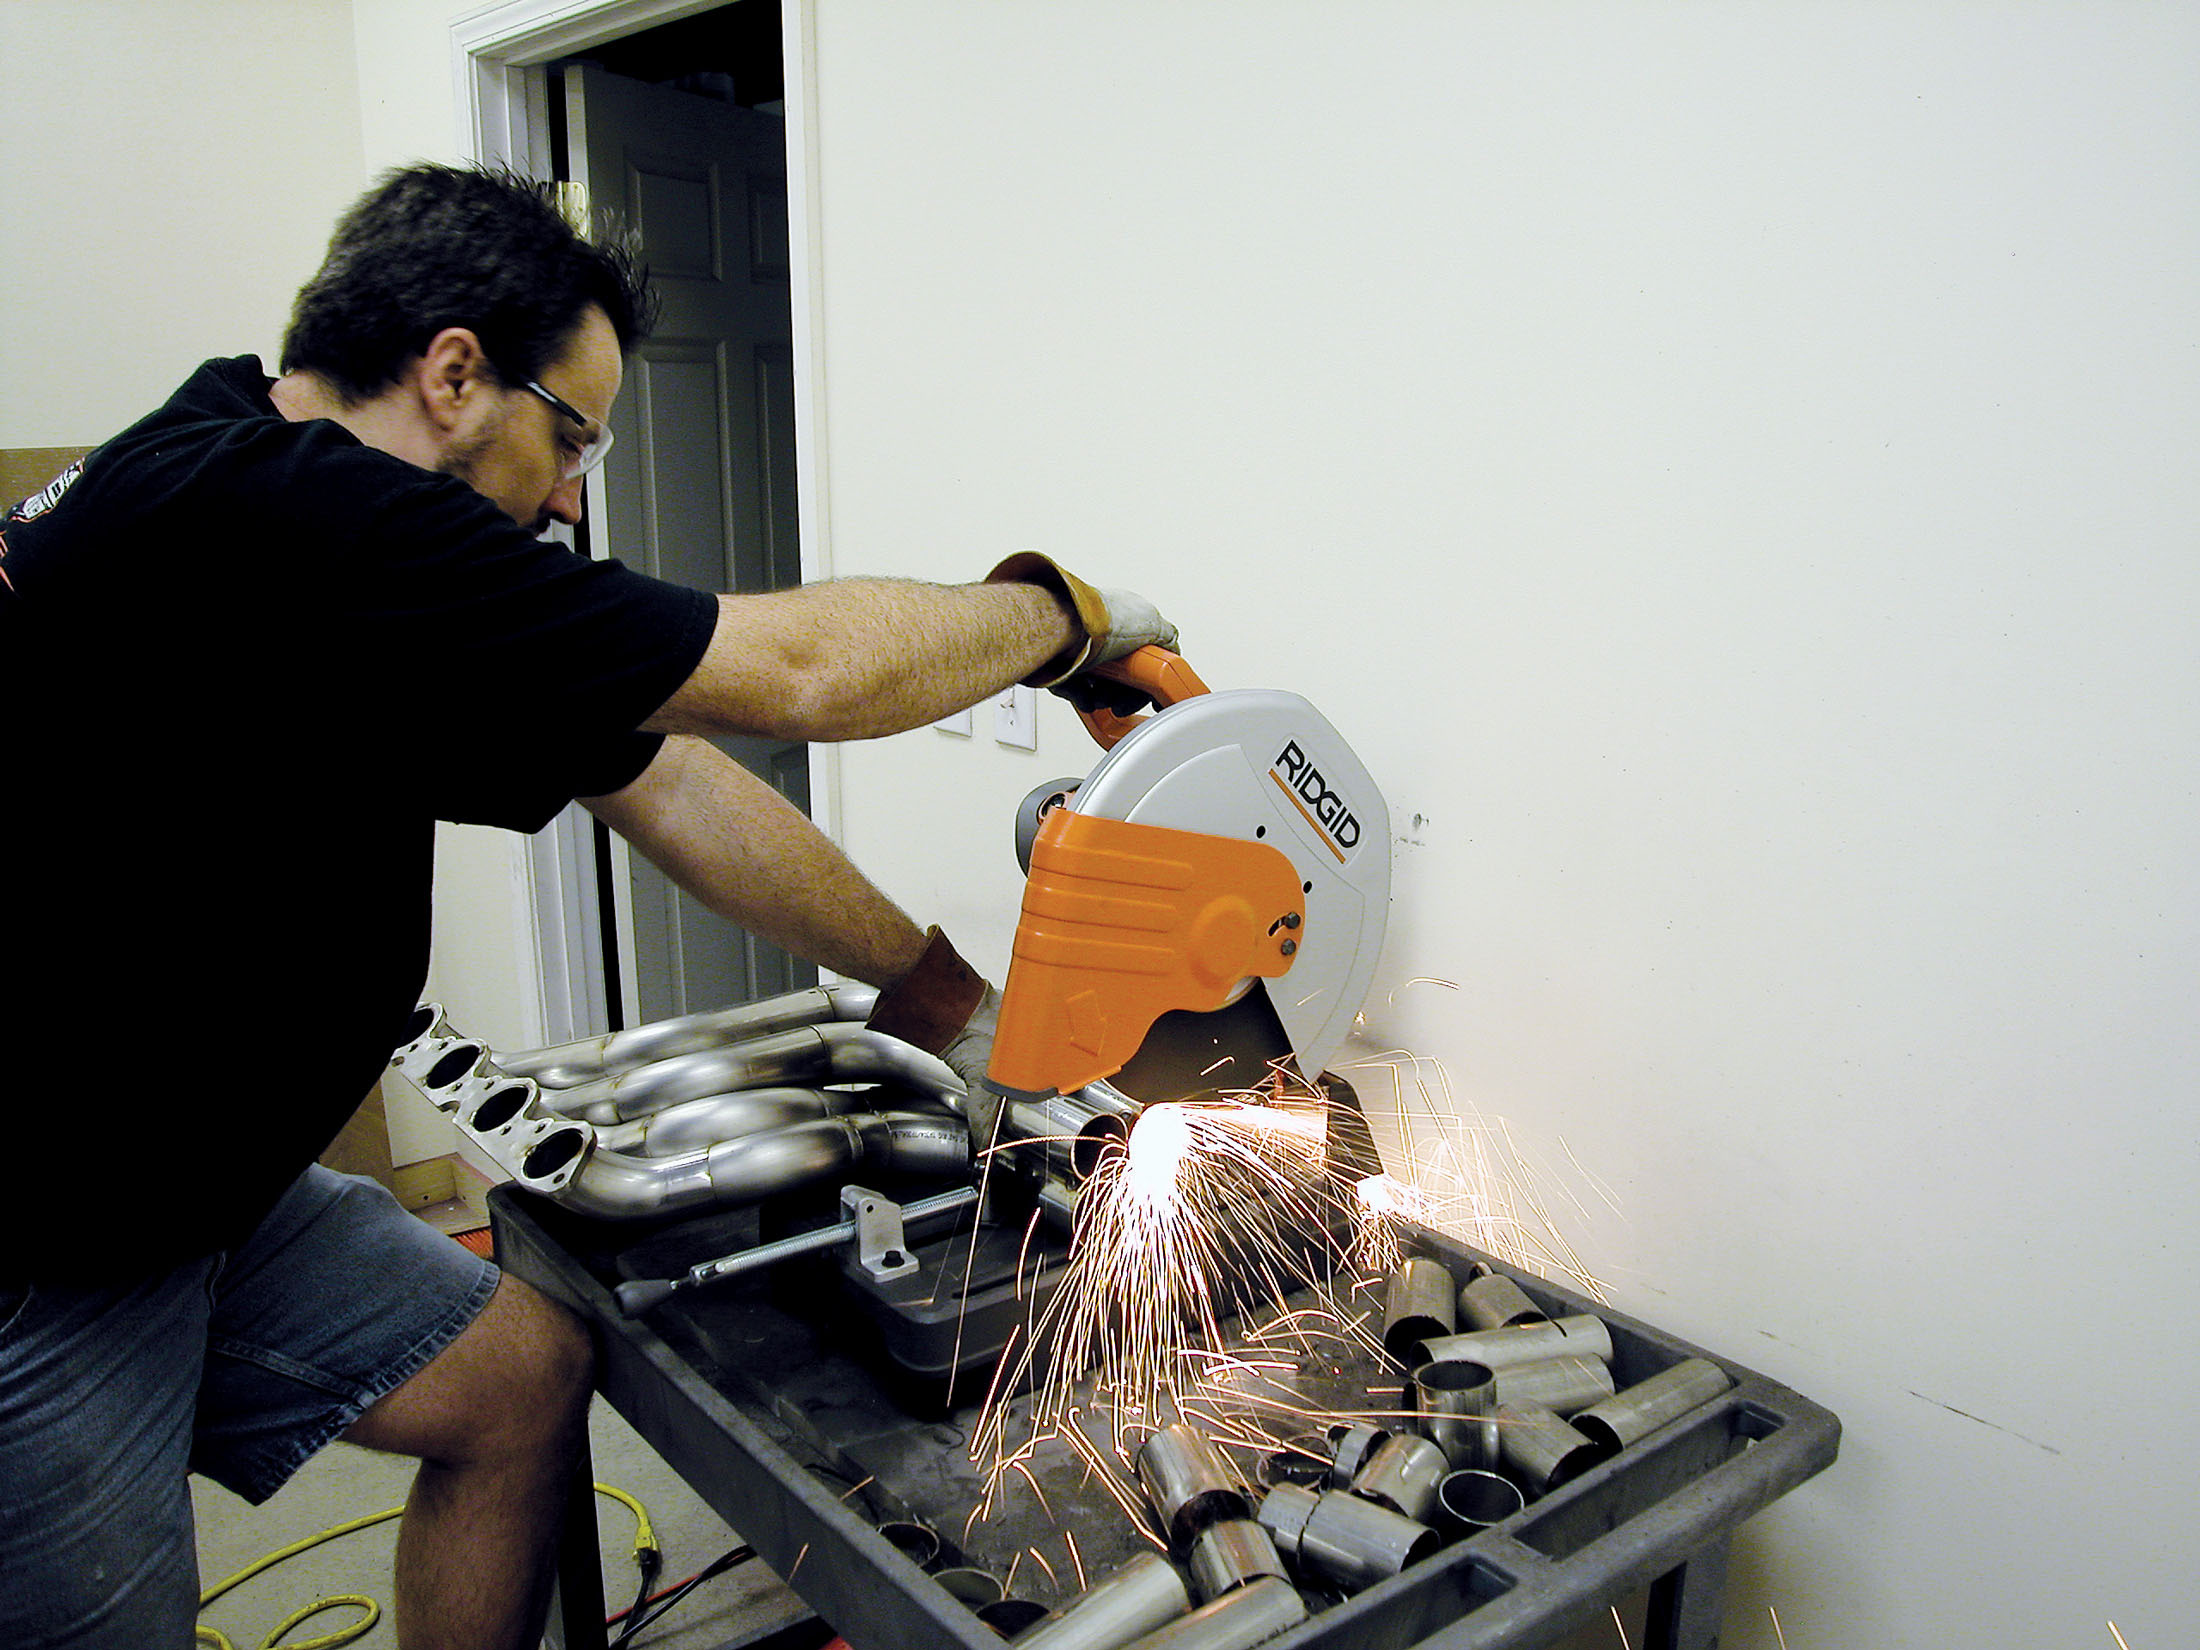
4B. Cutting was done on a chop saw. If you don’t own a chop saw, you can rent one for the weekend. Because we’re doing this one with the front of the car in place, the car was put on a lift and all the work was done from below. It makes for a long project, but the result will be headers that install easier and actually fit.
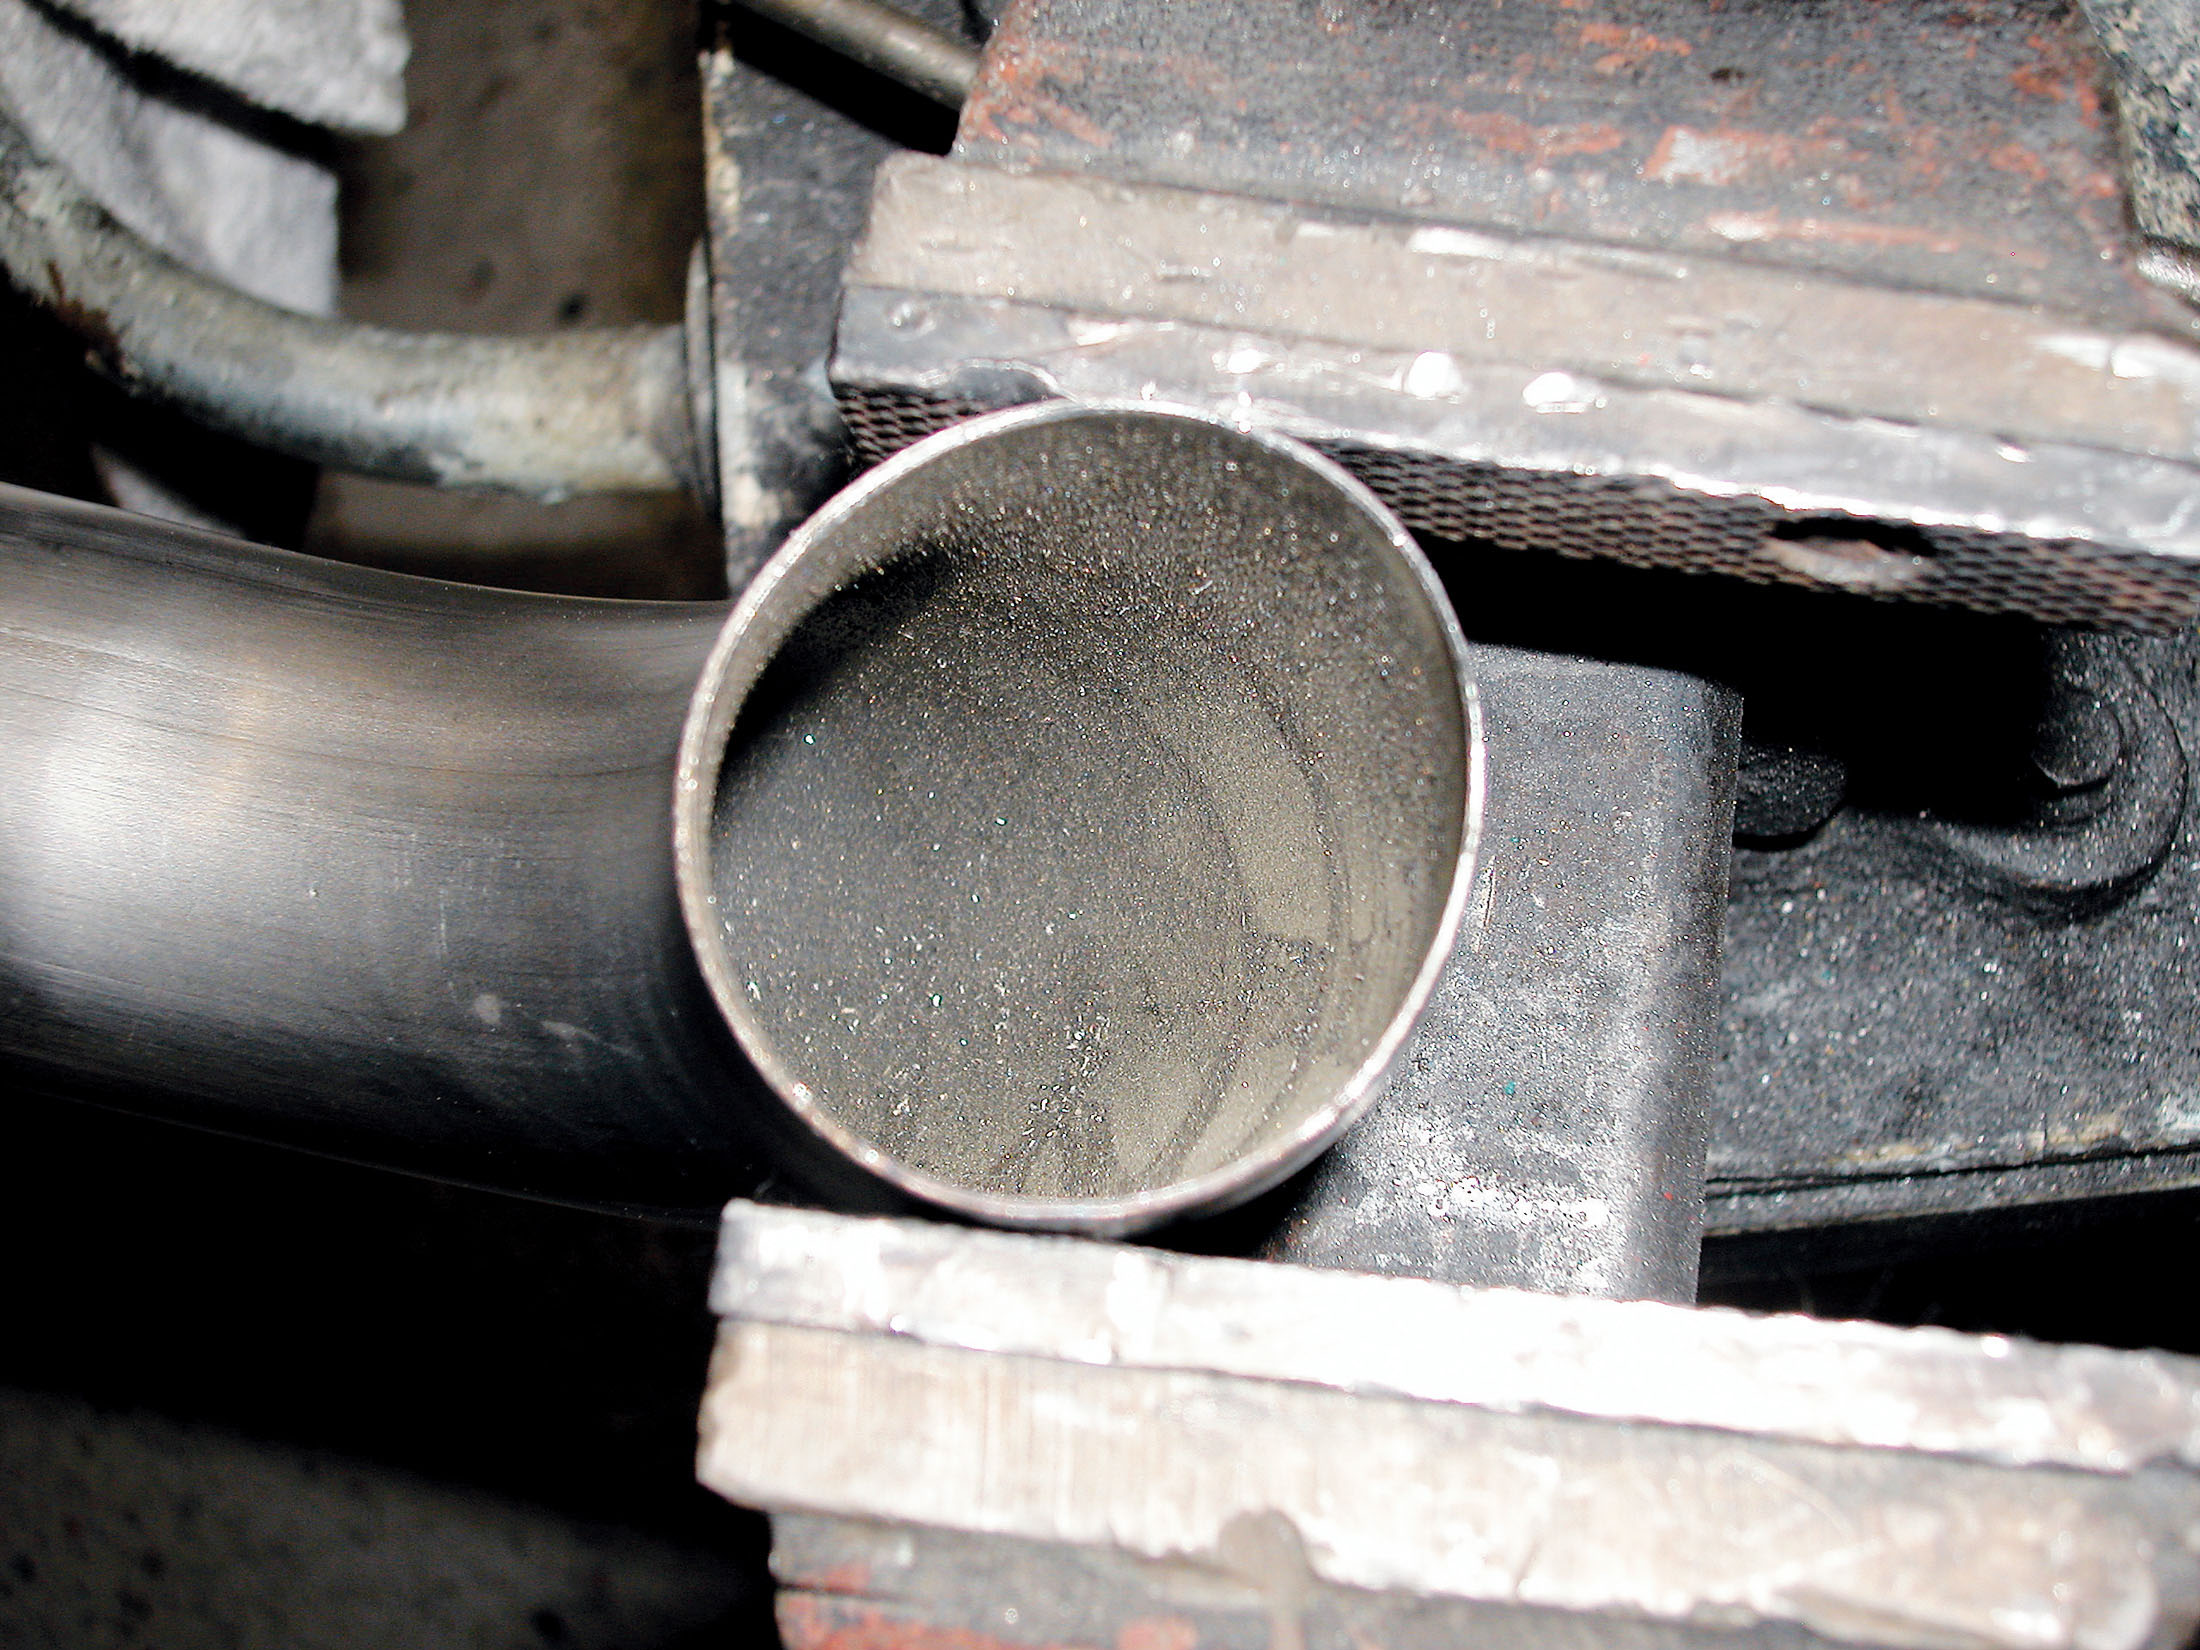
5A. After coming off the chop saw, the inside diameter of the tube has to be deburred where the cut was made. Also, though the mandrel-bend tubes are uniform in diameter throughout the entire curve, they can be slightly distorted, either during the manufacturing process or as a result of the chop saw.
5B. Georges puts it back in round with the help of some gentle pressure in a vise.
6. The first tube is then fit in the port on the flange and it is marked with a Sharpie marker two different ways. The first mark is along the circumference of the tube in the port, indicating how far into the flange the tube goes. Then, a pair of alignment marks is made on the tube, extending onto the flange, to properly orient the direction of the tube as it comes out of the port. Georges likes to make two register marks about 90-degrees apart from one another. It makes for more precise alignment and it’s also a fail-safe mark; in case one gets obliterated, you don’t necessarily have to redo all of your marking.
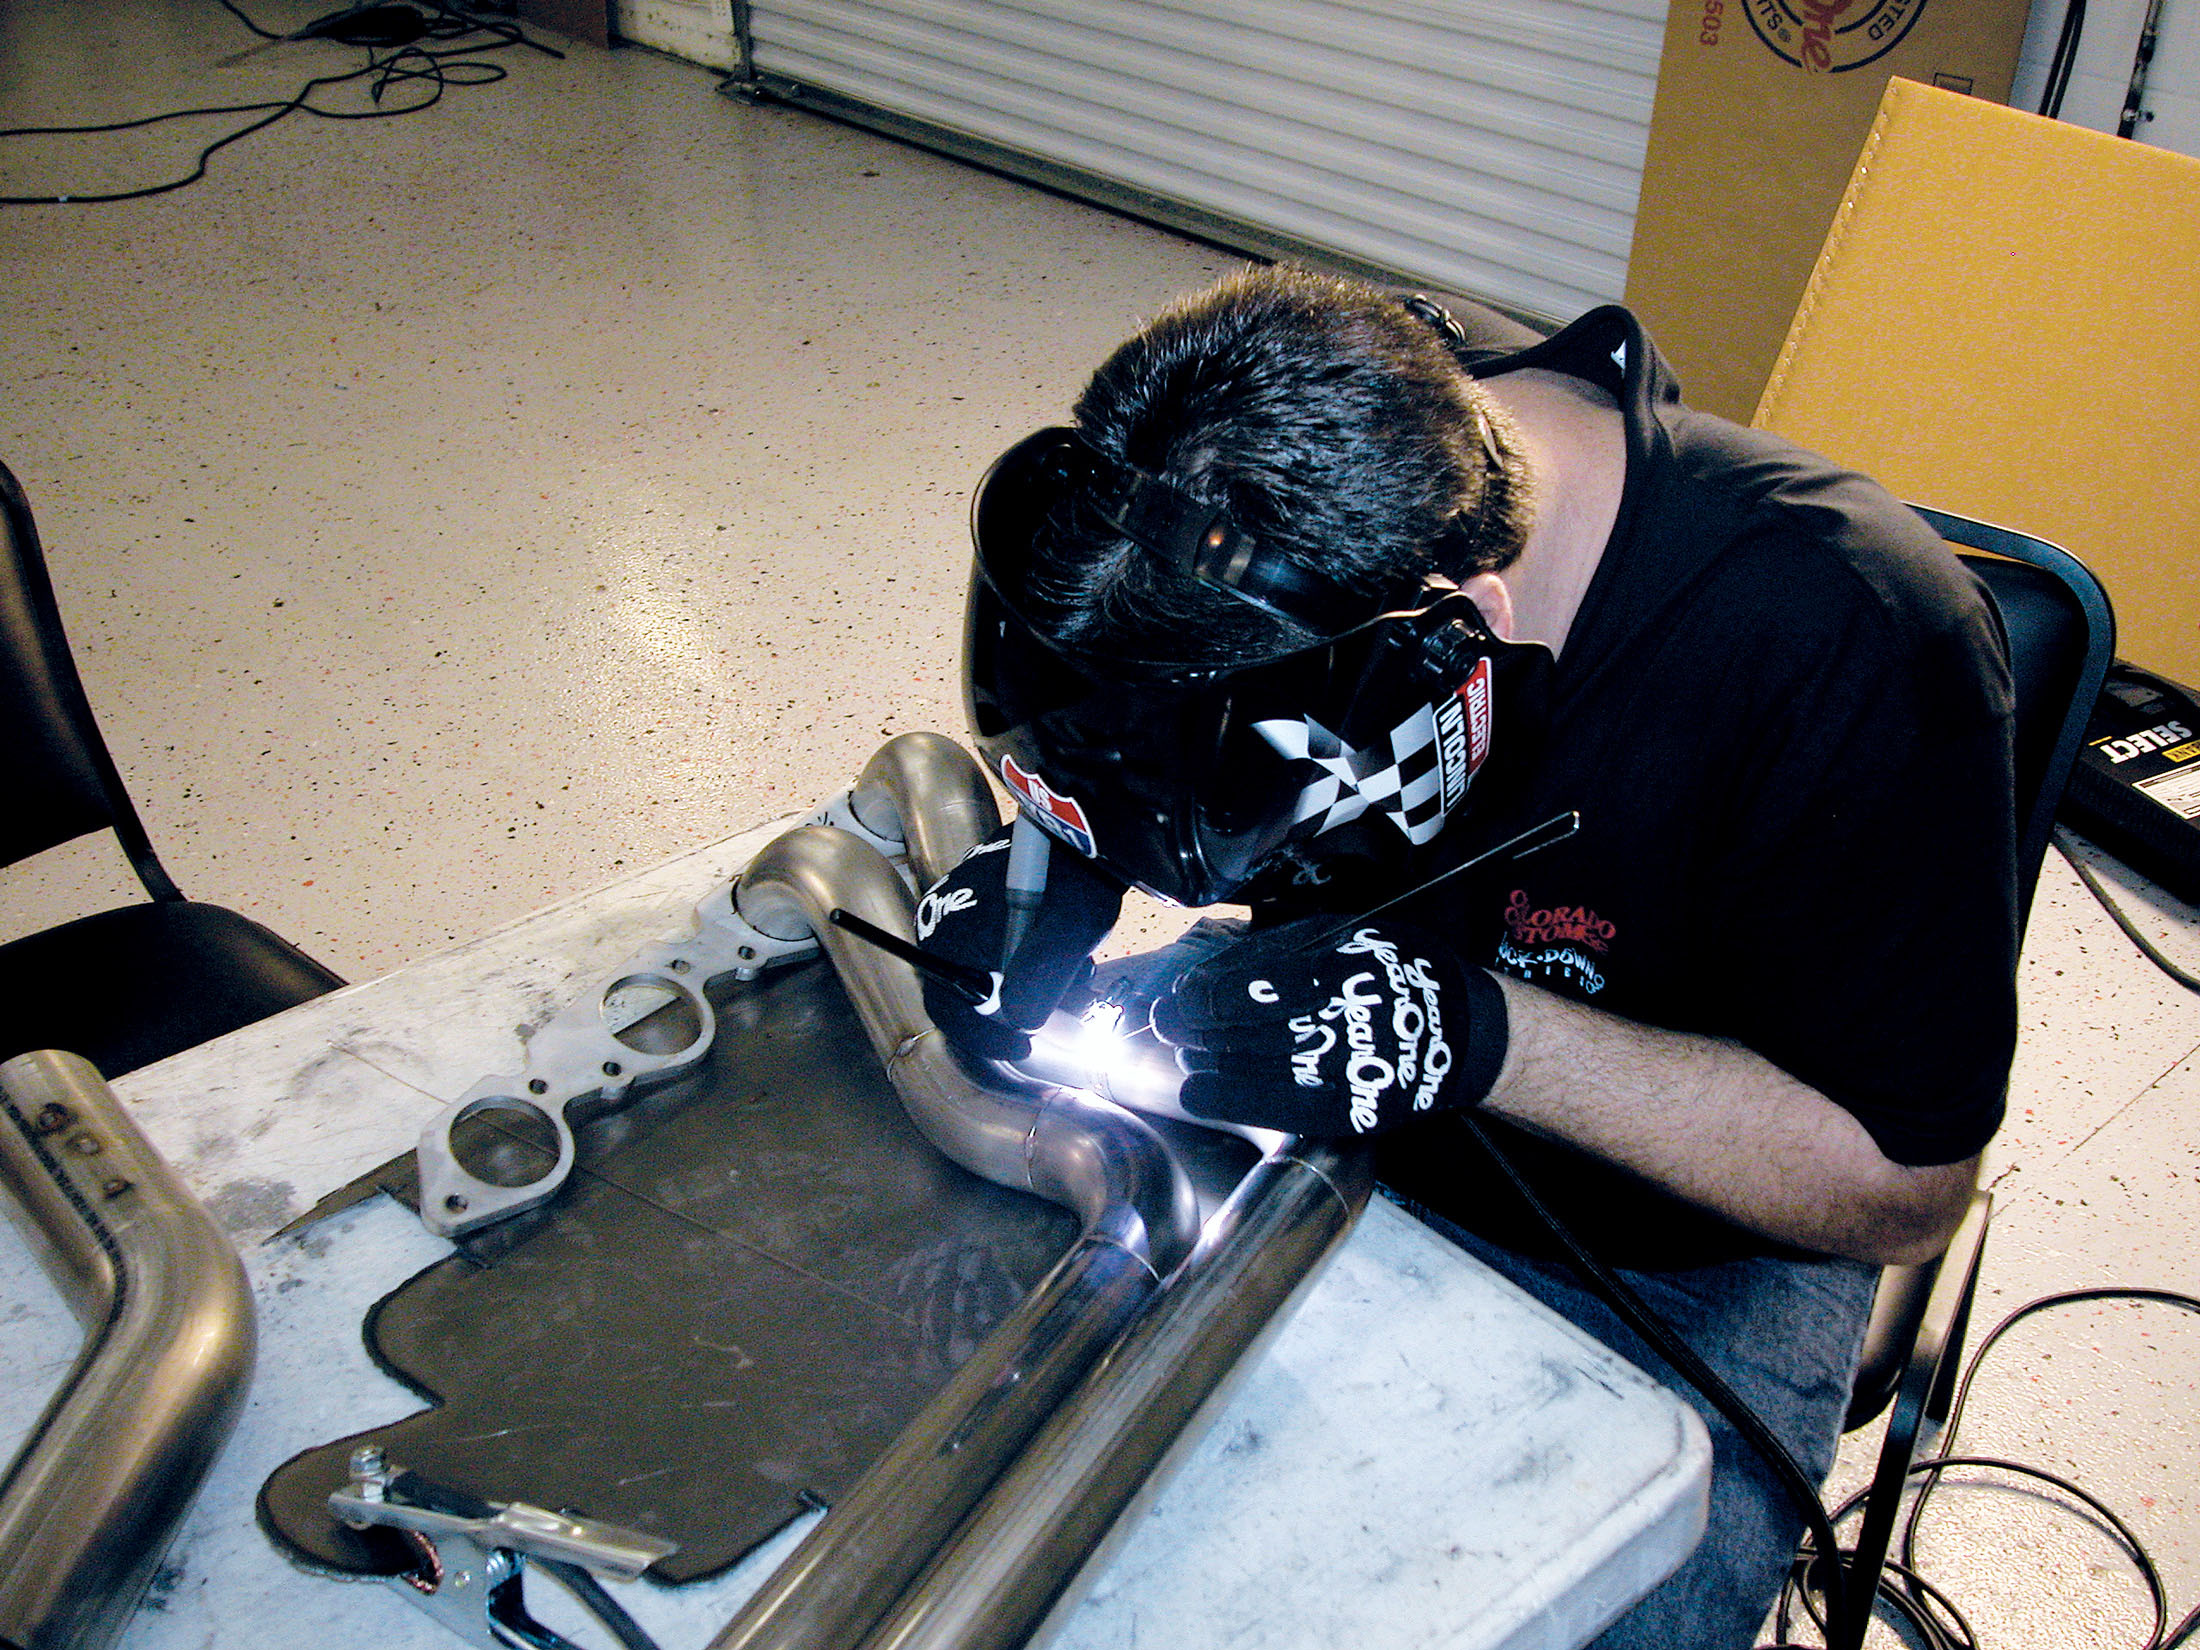
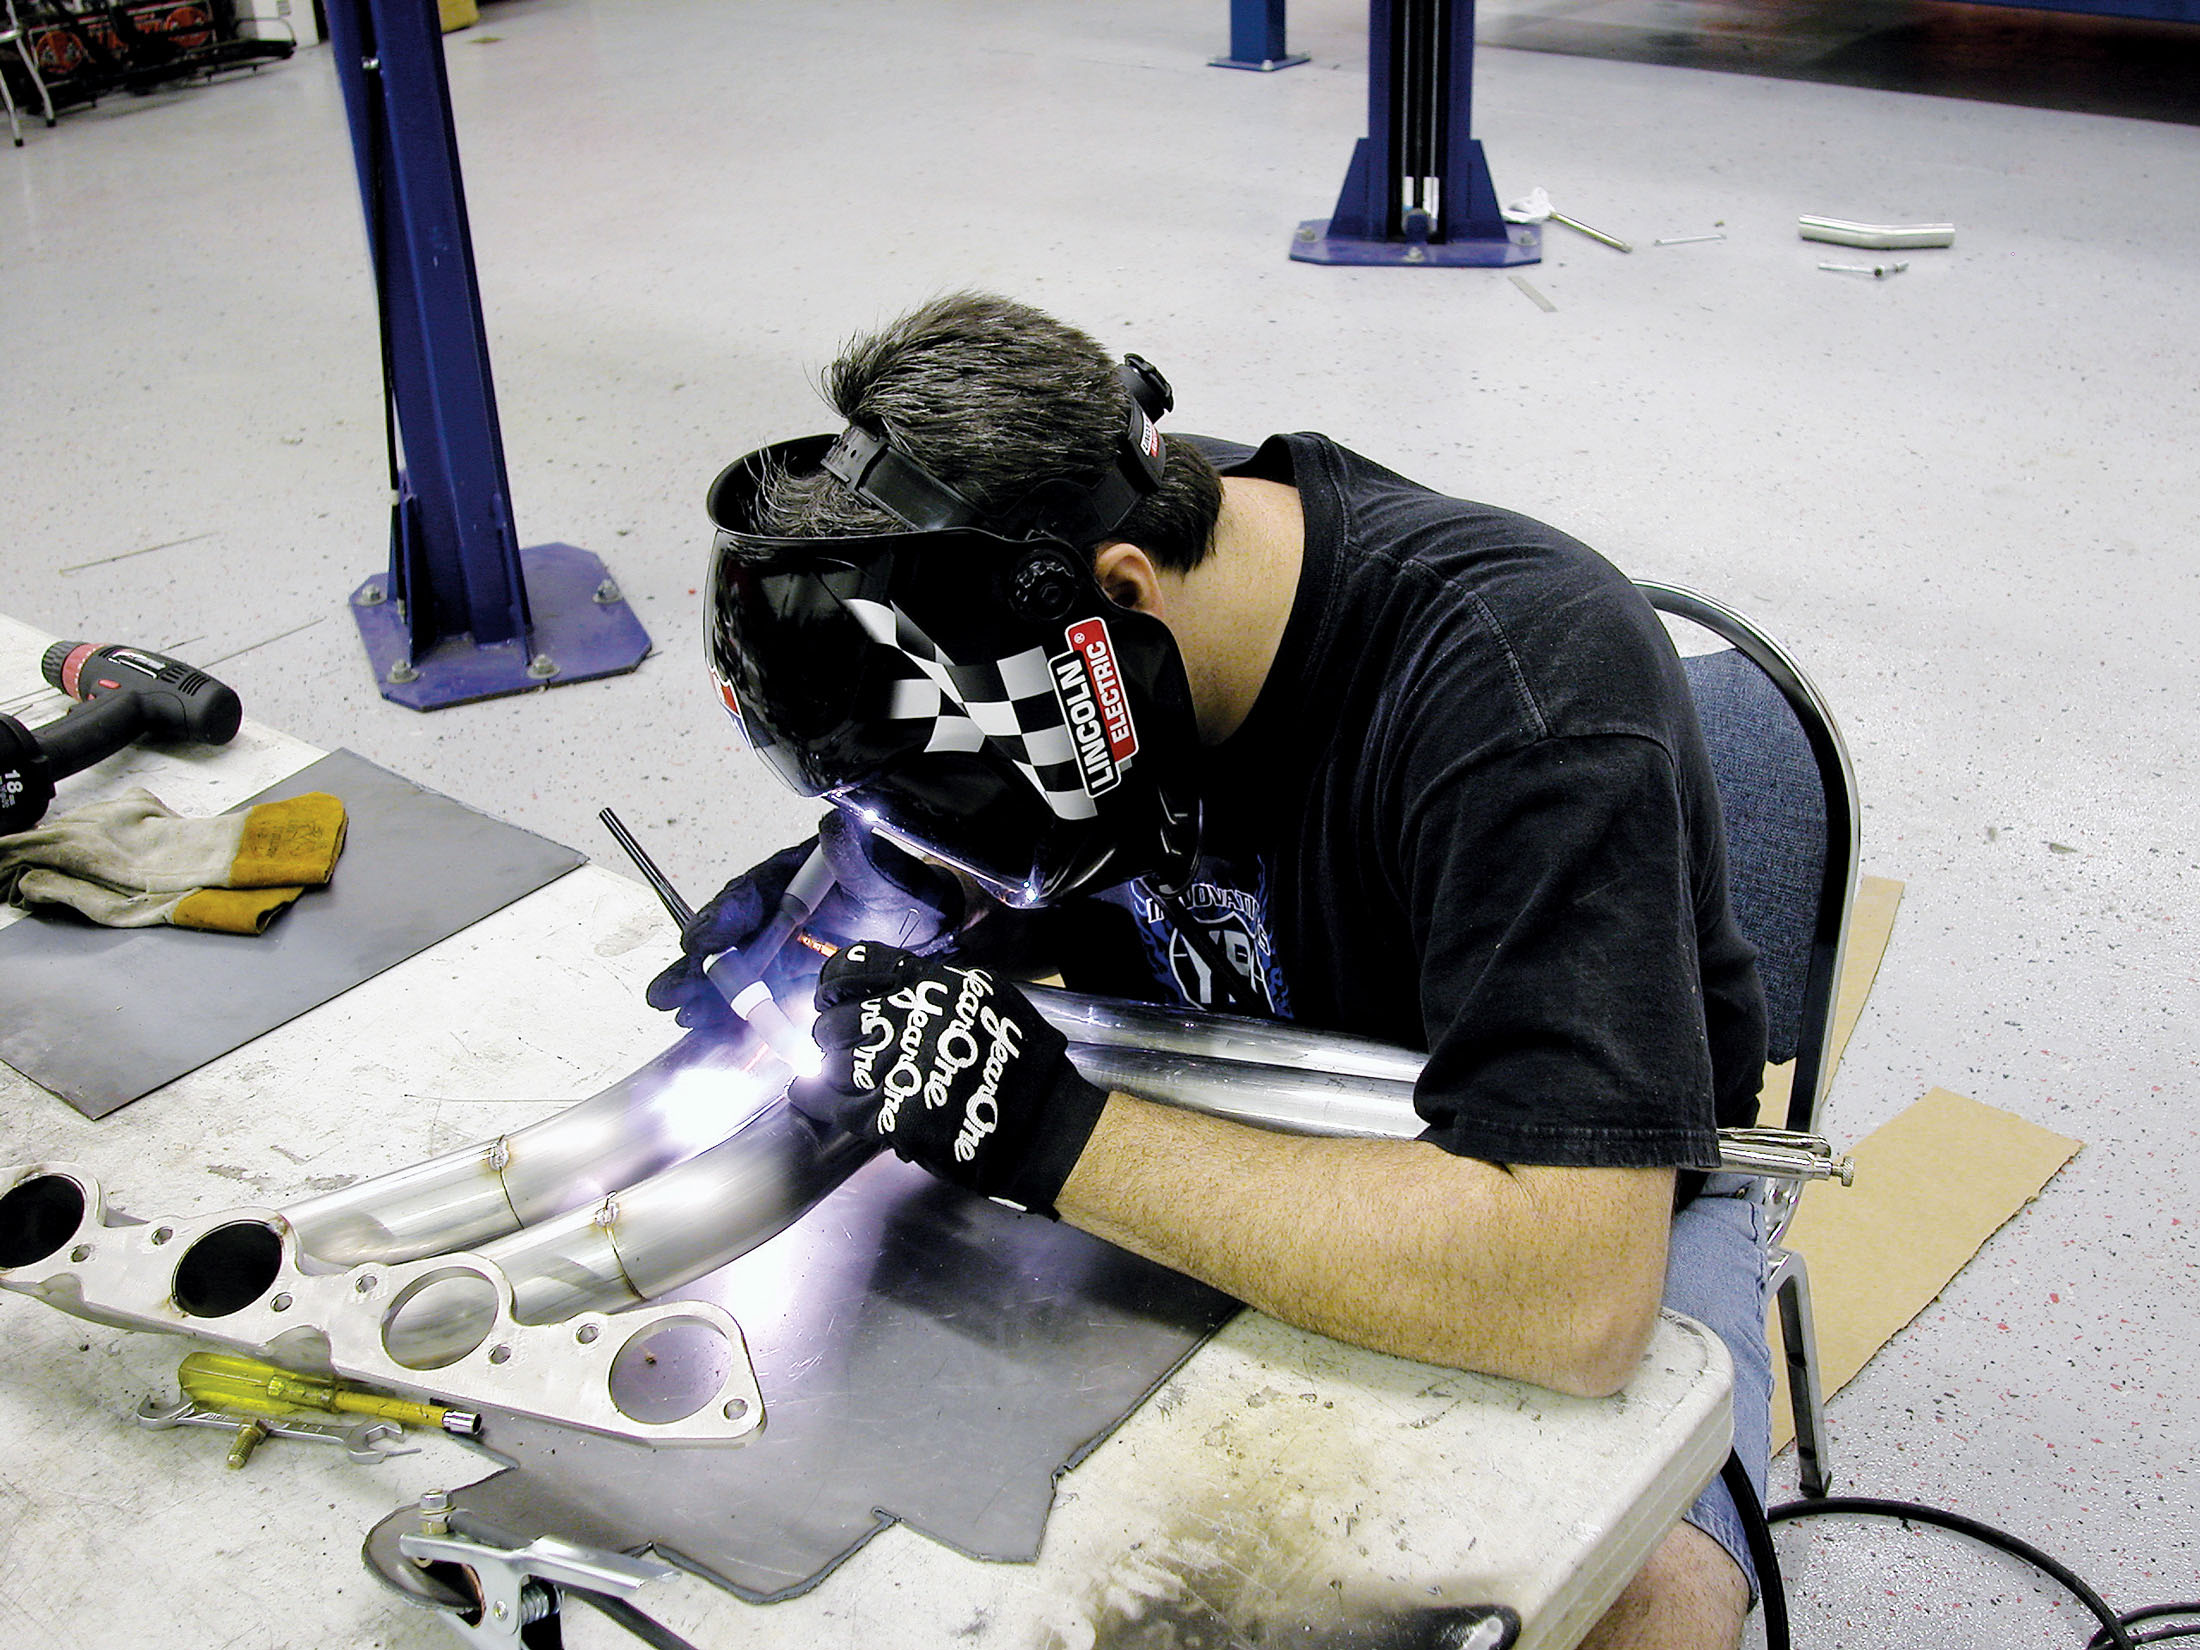
7A. Before Georges starts tack-welding, he sets the machine up for the particular material that he’s fusing. He tests a couple of beads on a piece of extra tubing from the kit until he gets the color and penetration he’s looking for. This way, the first tack-welds will be good and he won’t have any problems with ugly tack-welds or tacks that won’t hold during construction.
7B. Georges is TIG-welding these headers together, but he has used a MIG-welder to construct headers in the past. Again, if you aren’t comfortable with your skills, dial in your tack-welds and have a pro do the finish welding.
8. After the first bend is worked out and you’re pleased with it, the flange comes off the engine, the tube is re-aligned in the port (using the marks made previously), and the tube is tack-welded in from behind.
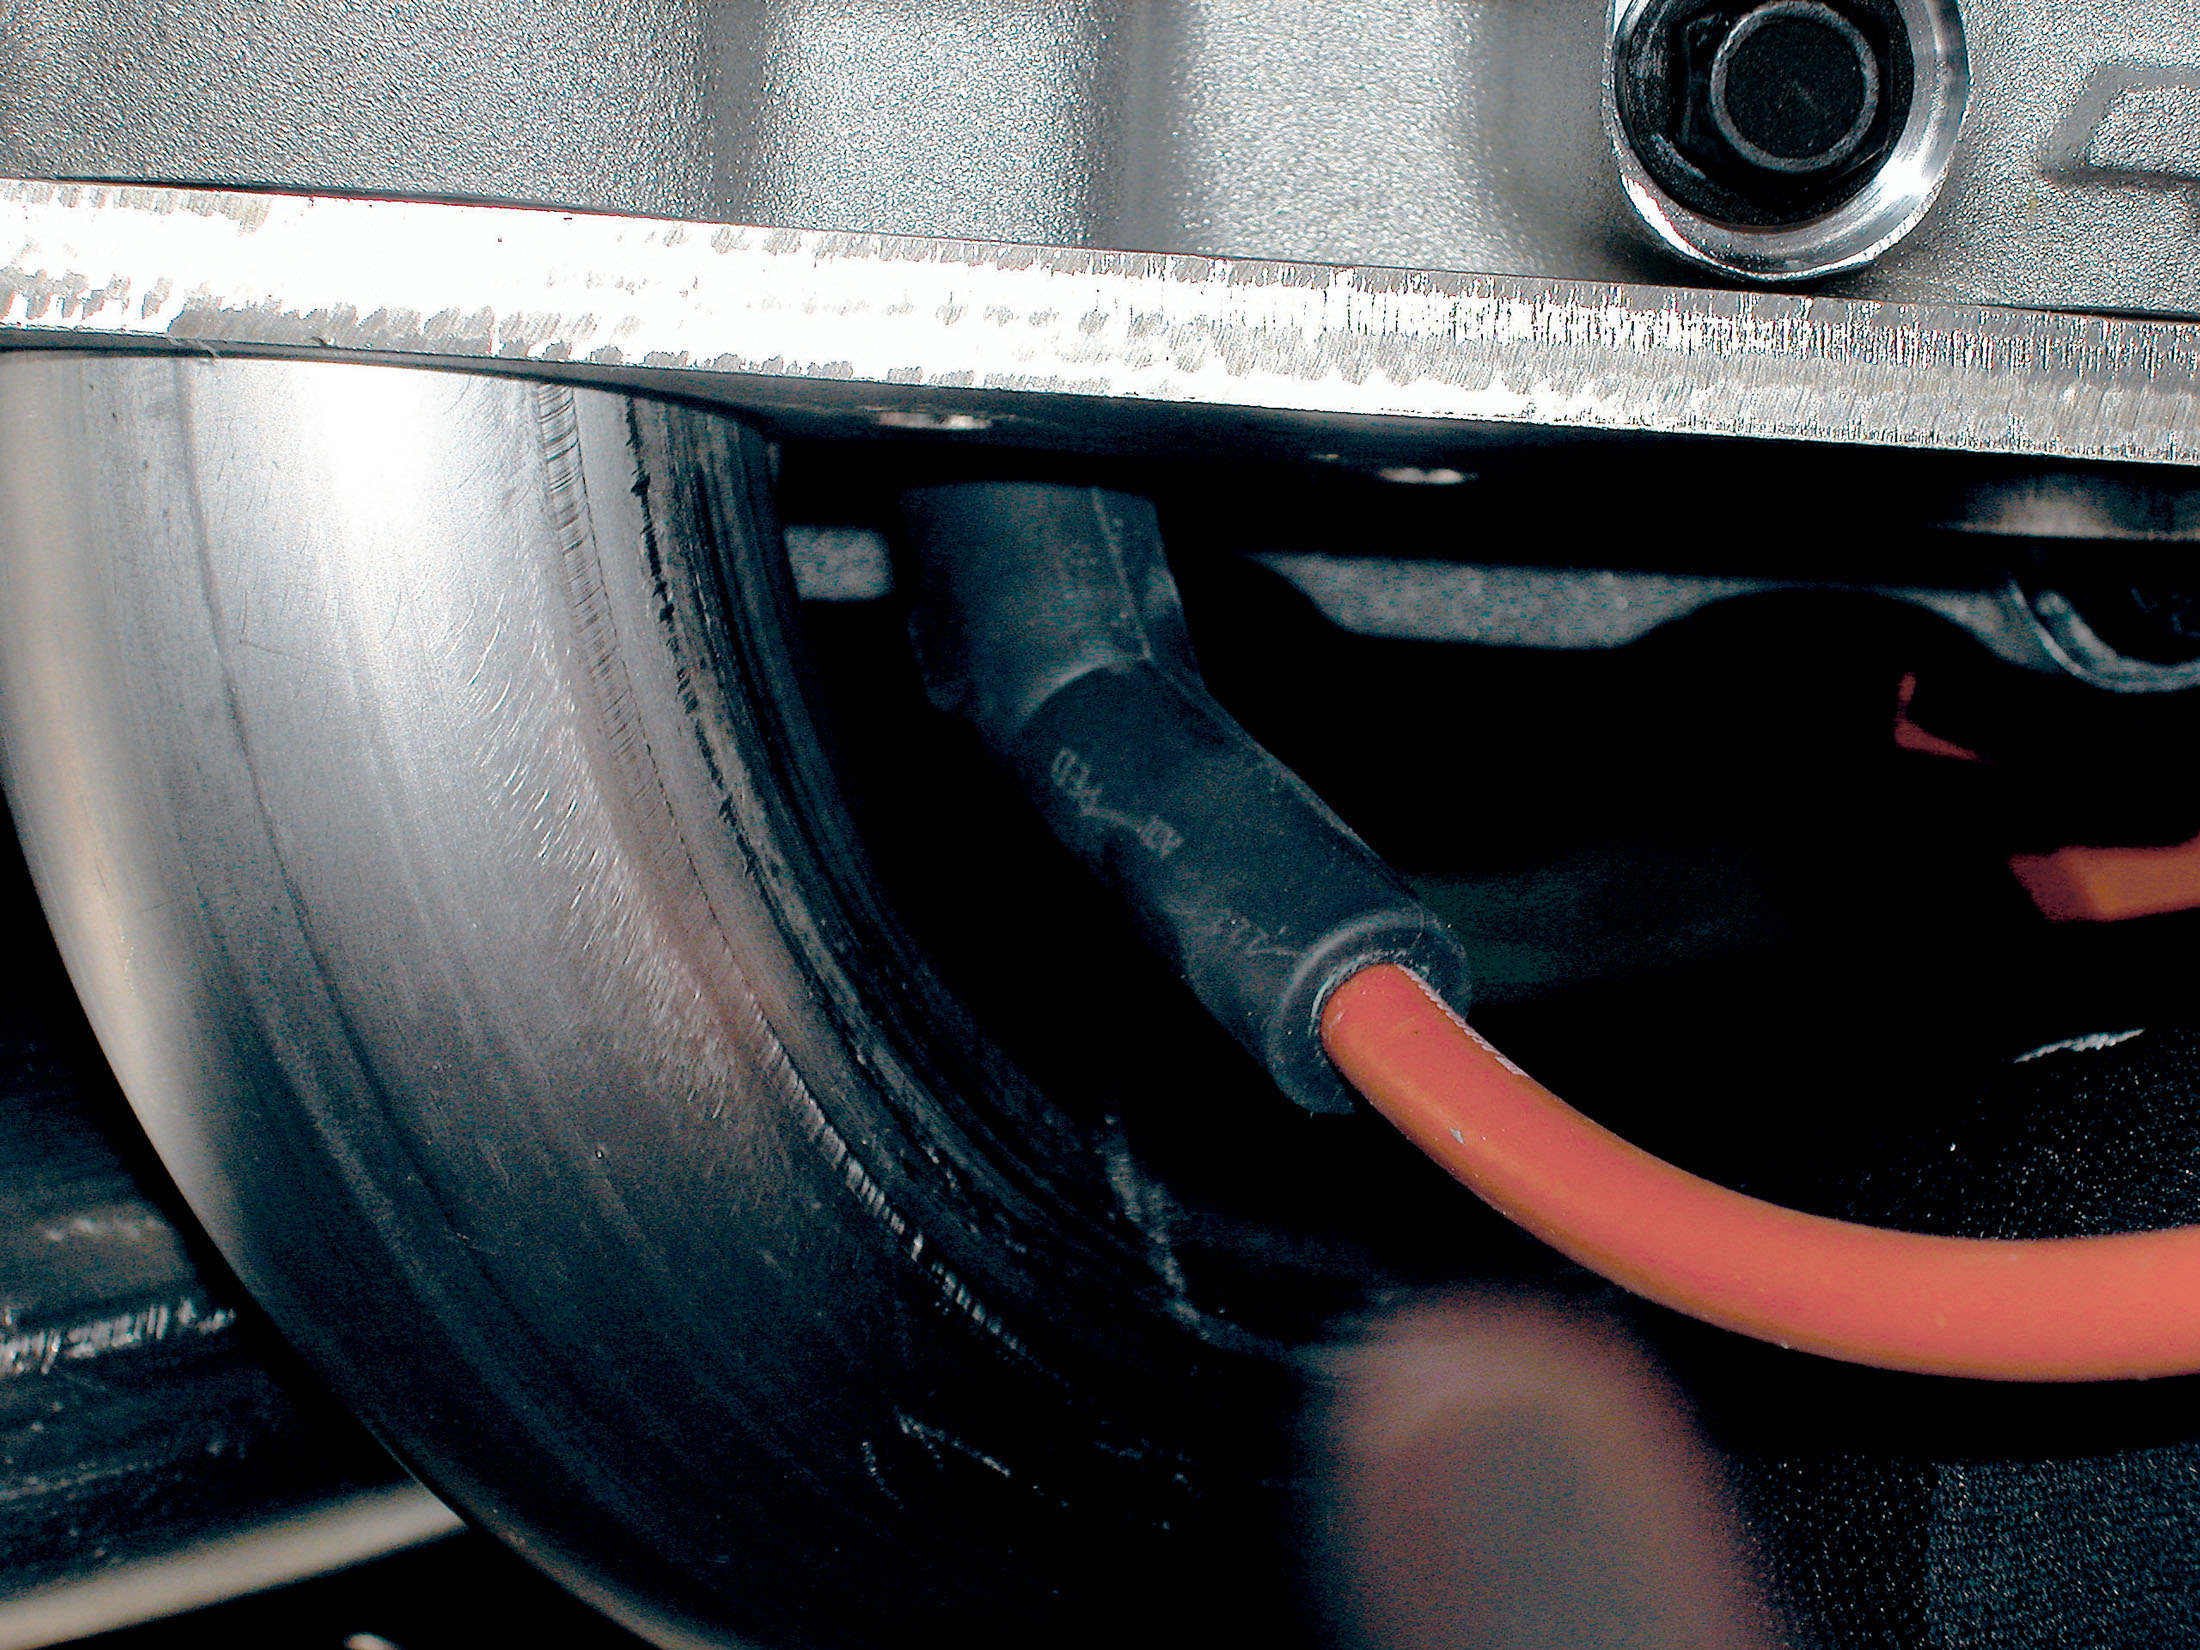
9. At this point it’s a good idea to check the fitment of the spark plug boot at the first port. Since you’re fabricating your own headers, there’s no reason to compromise on spark plug fitment.
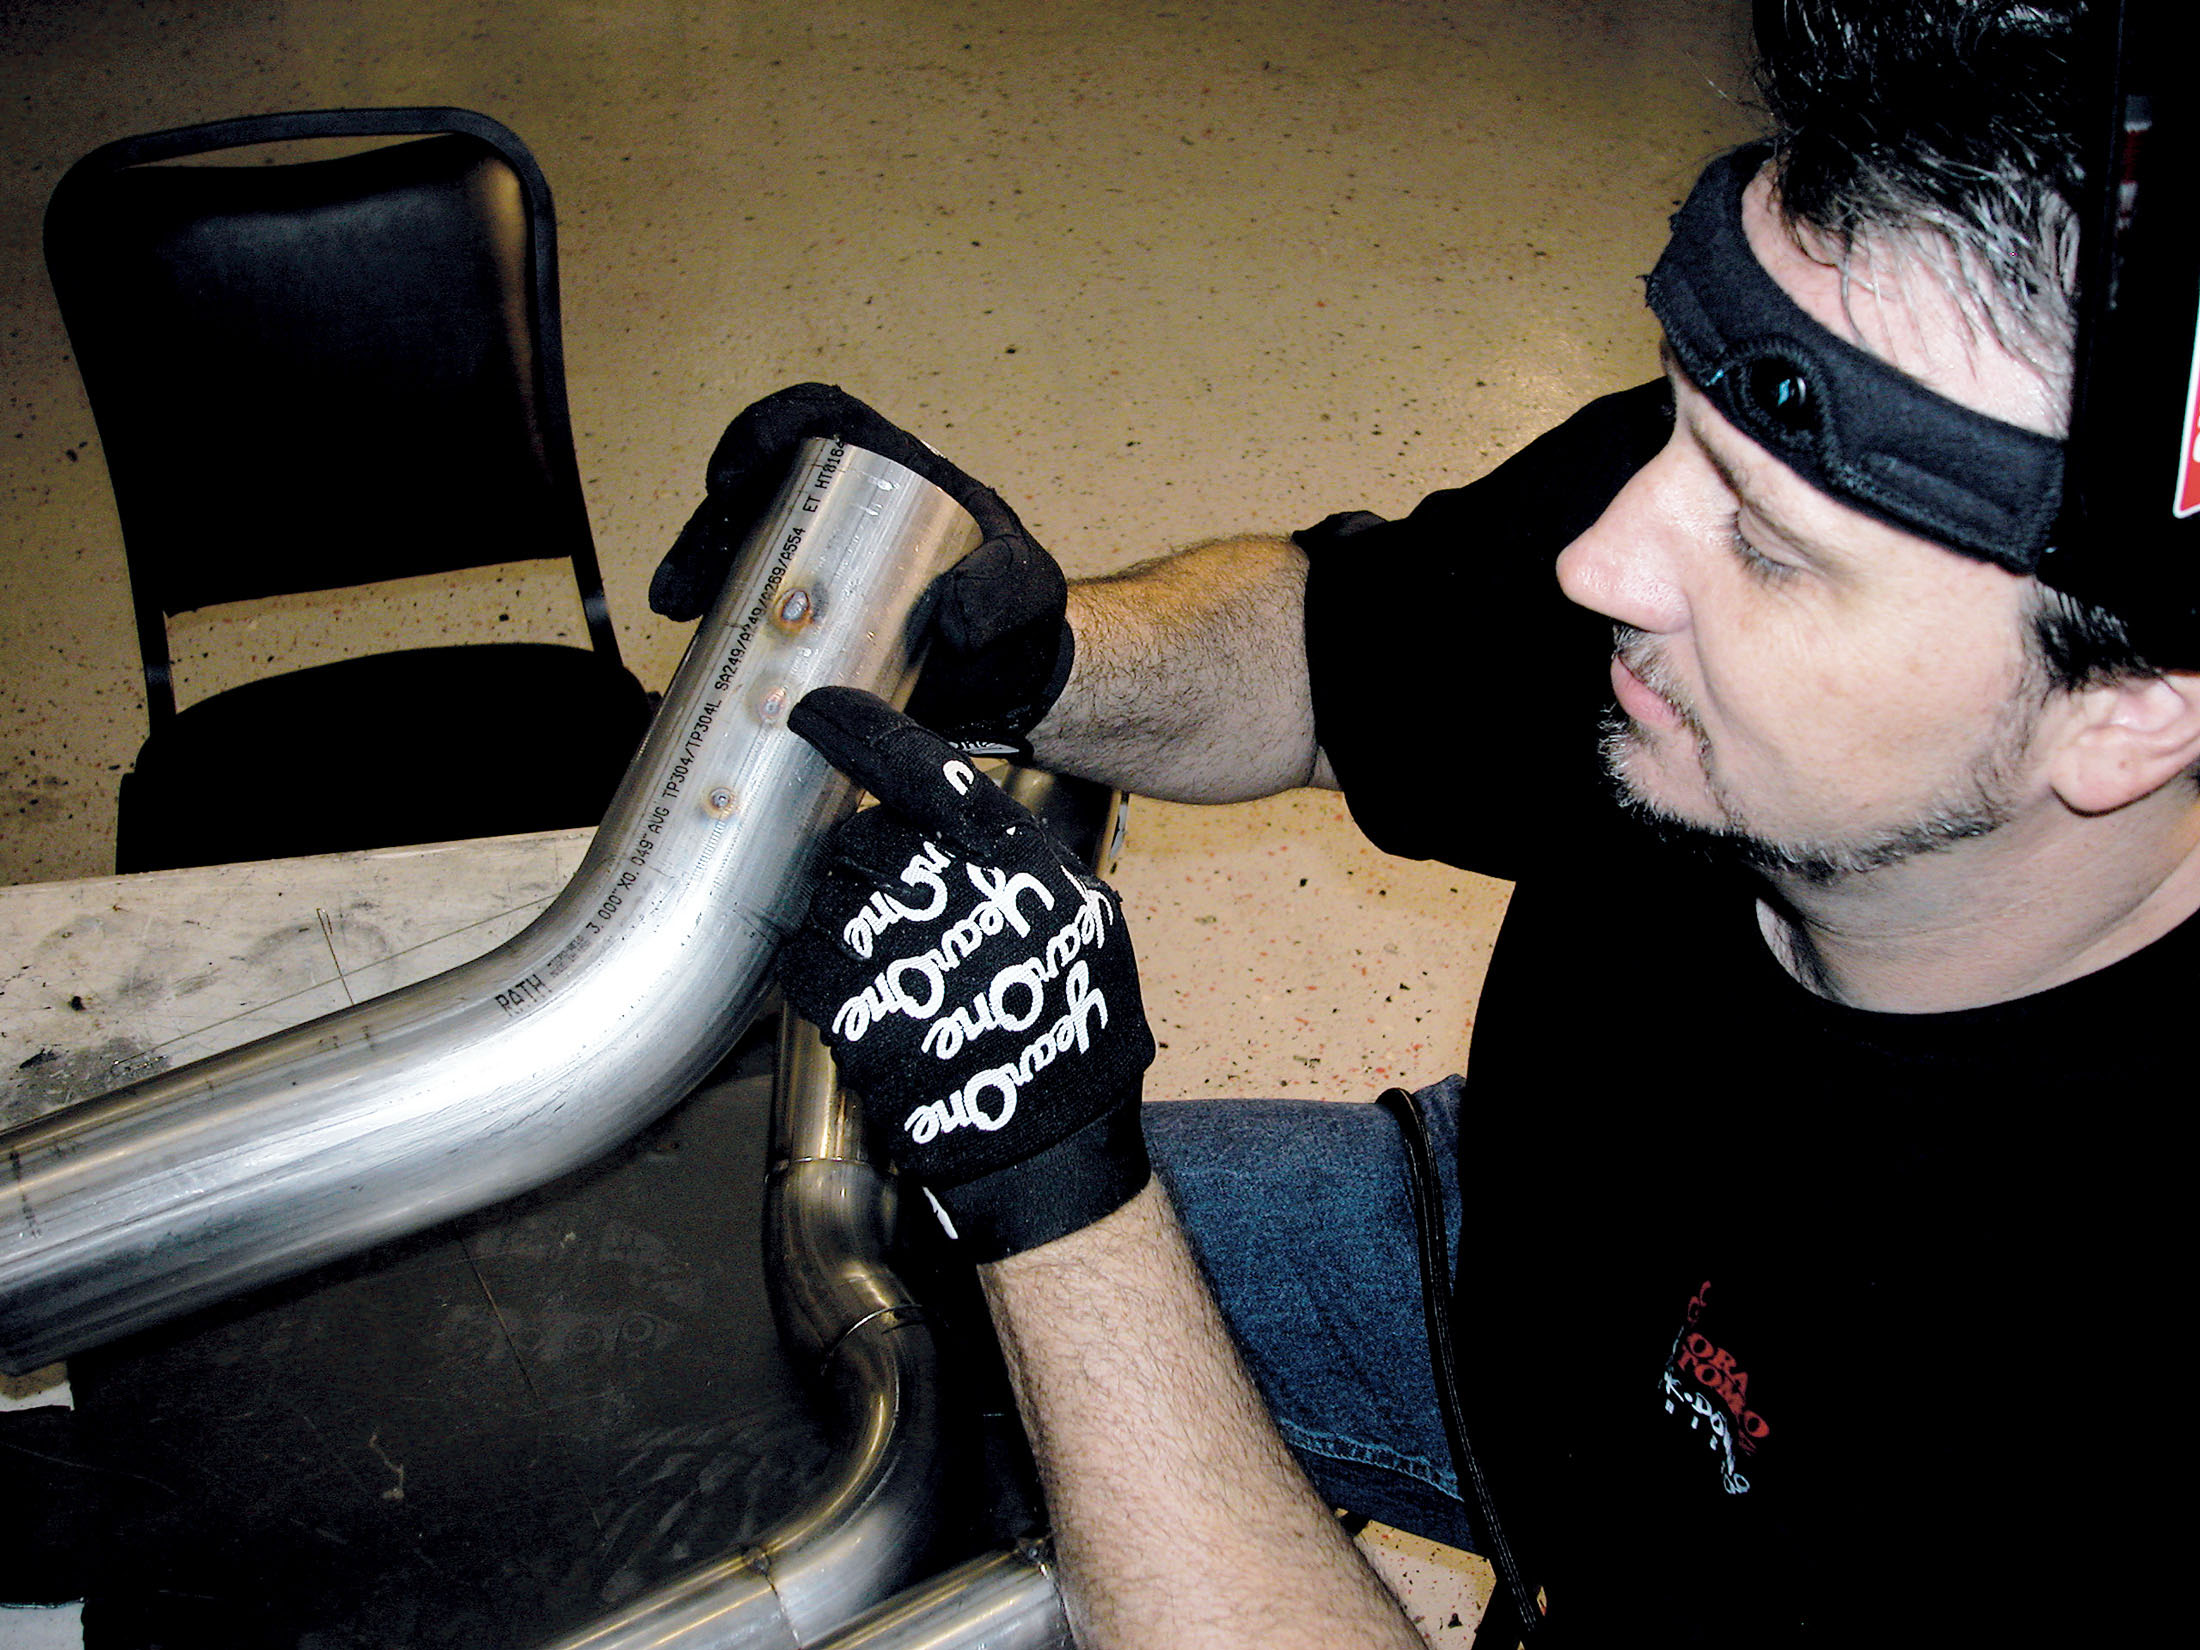
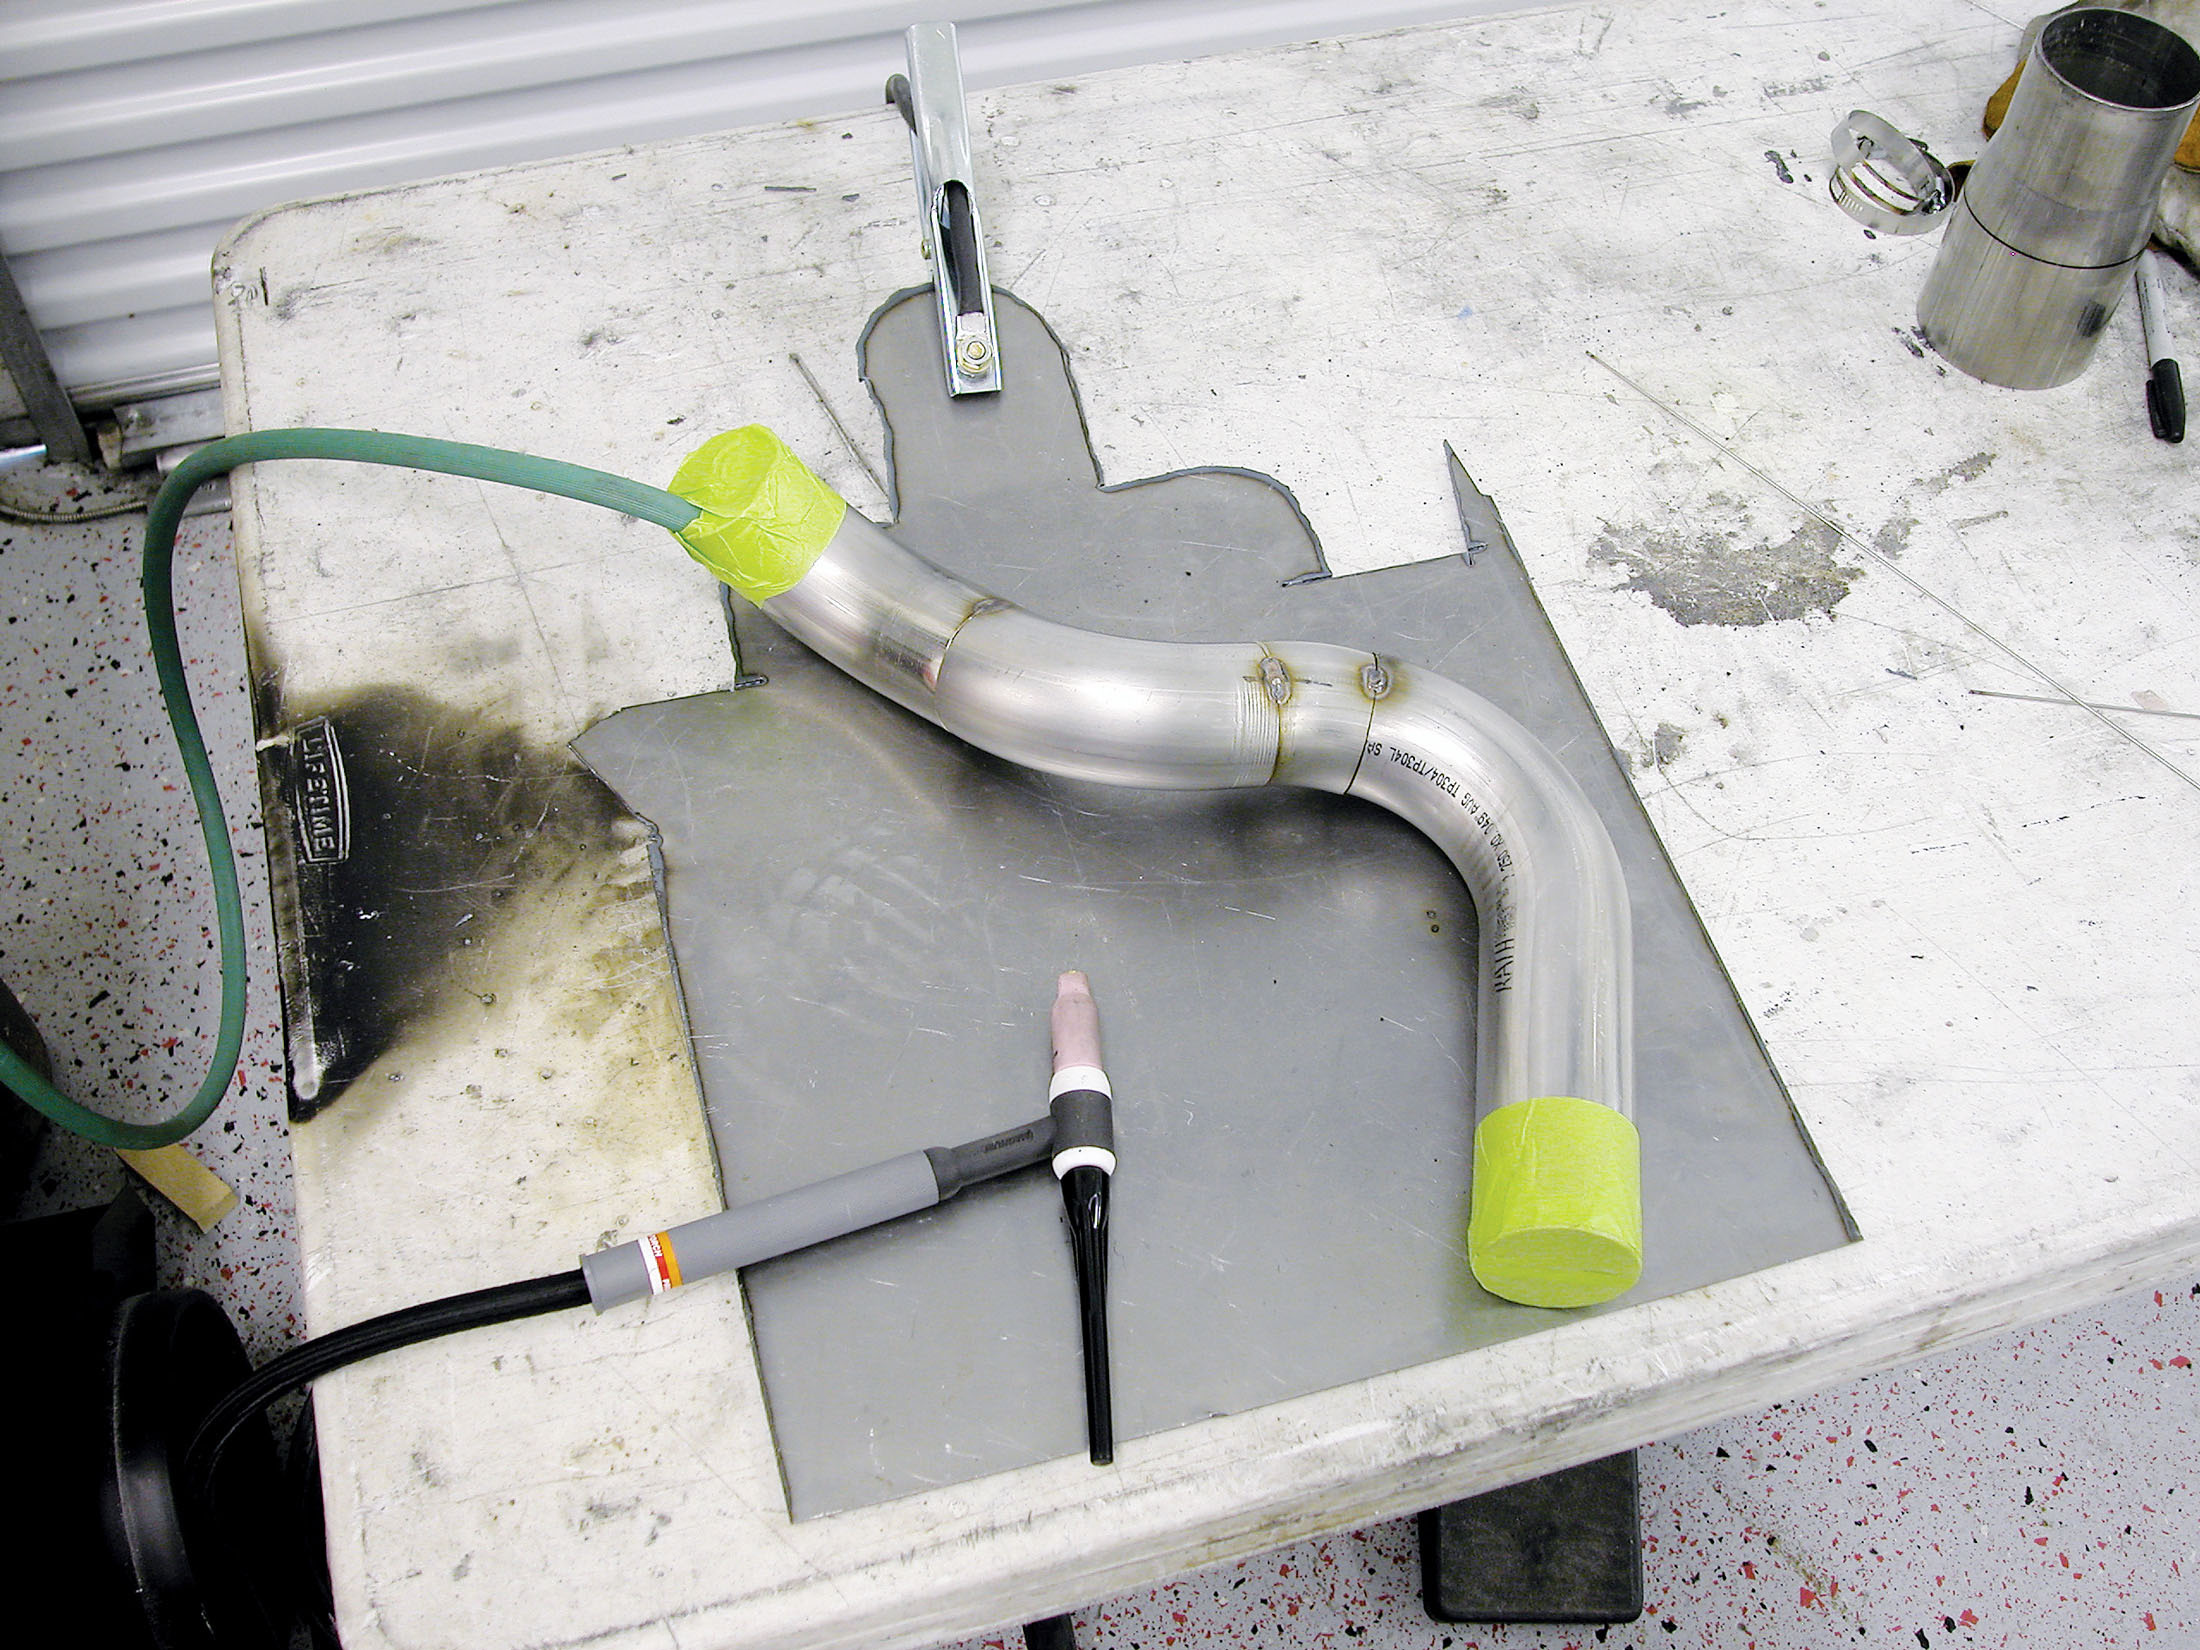
10. After the first bend is secured, the flange goes back on the block and the next bend is cut and fabricated. There’s nothing mysterious about this. You simply take a bend and hold it up to the existing piece, cut it at the point in its bend that lines up with the existing piece, and trim it to fit.
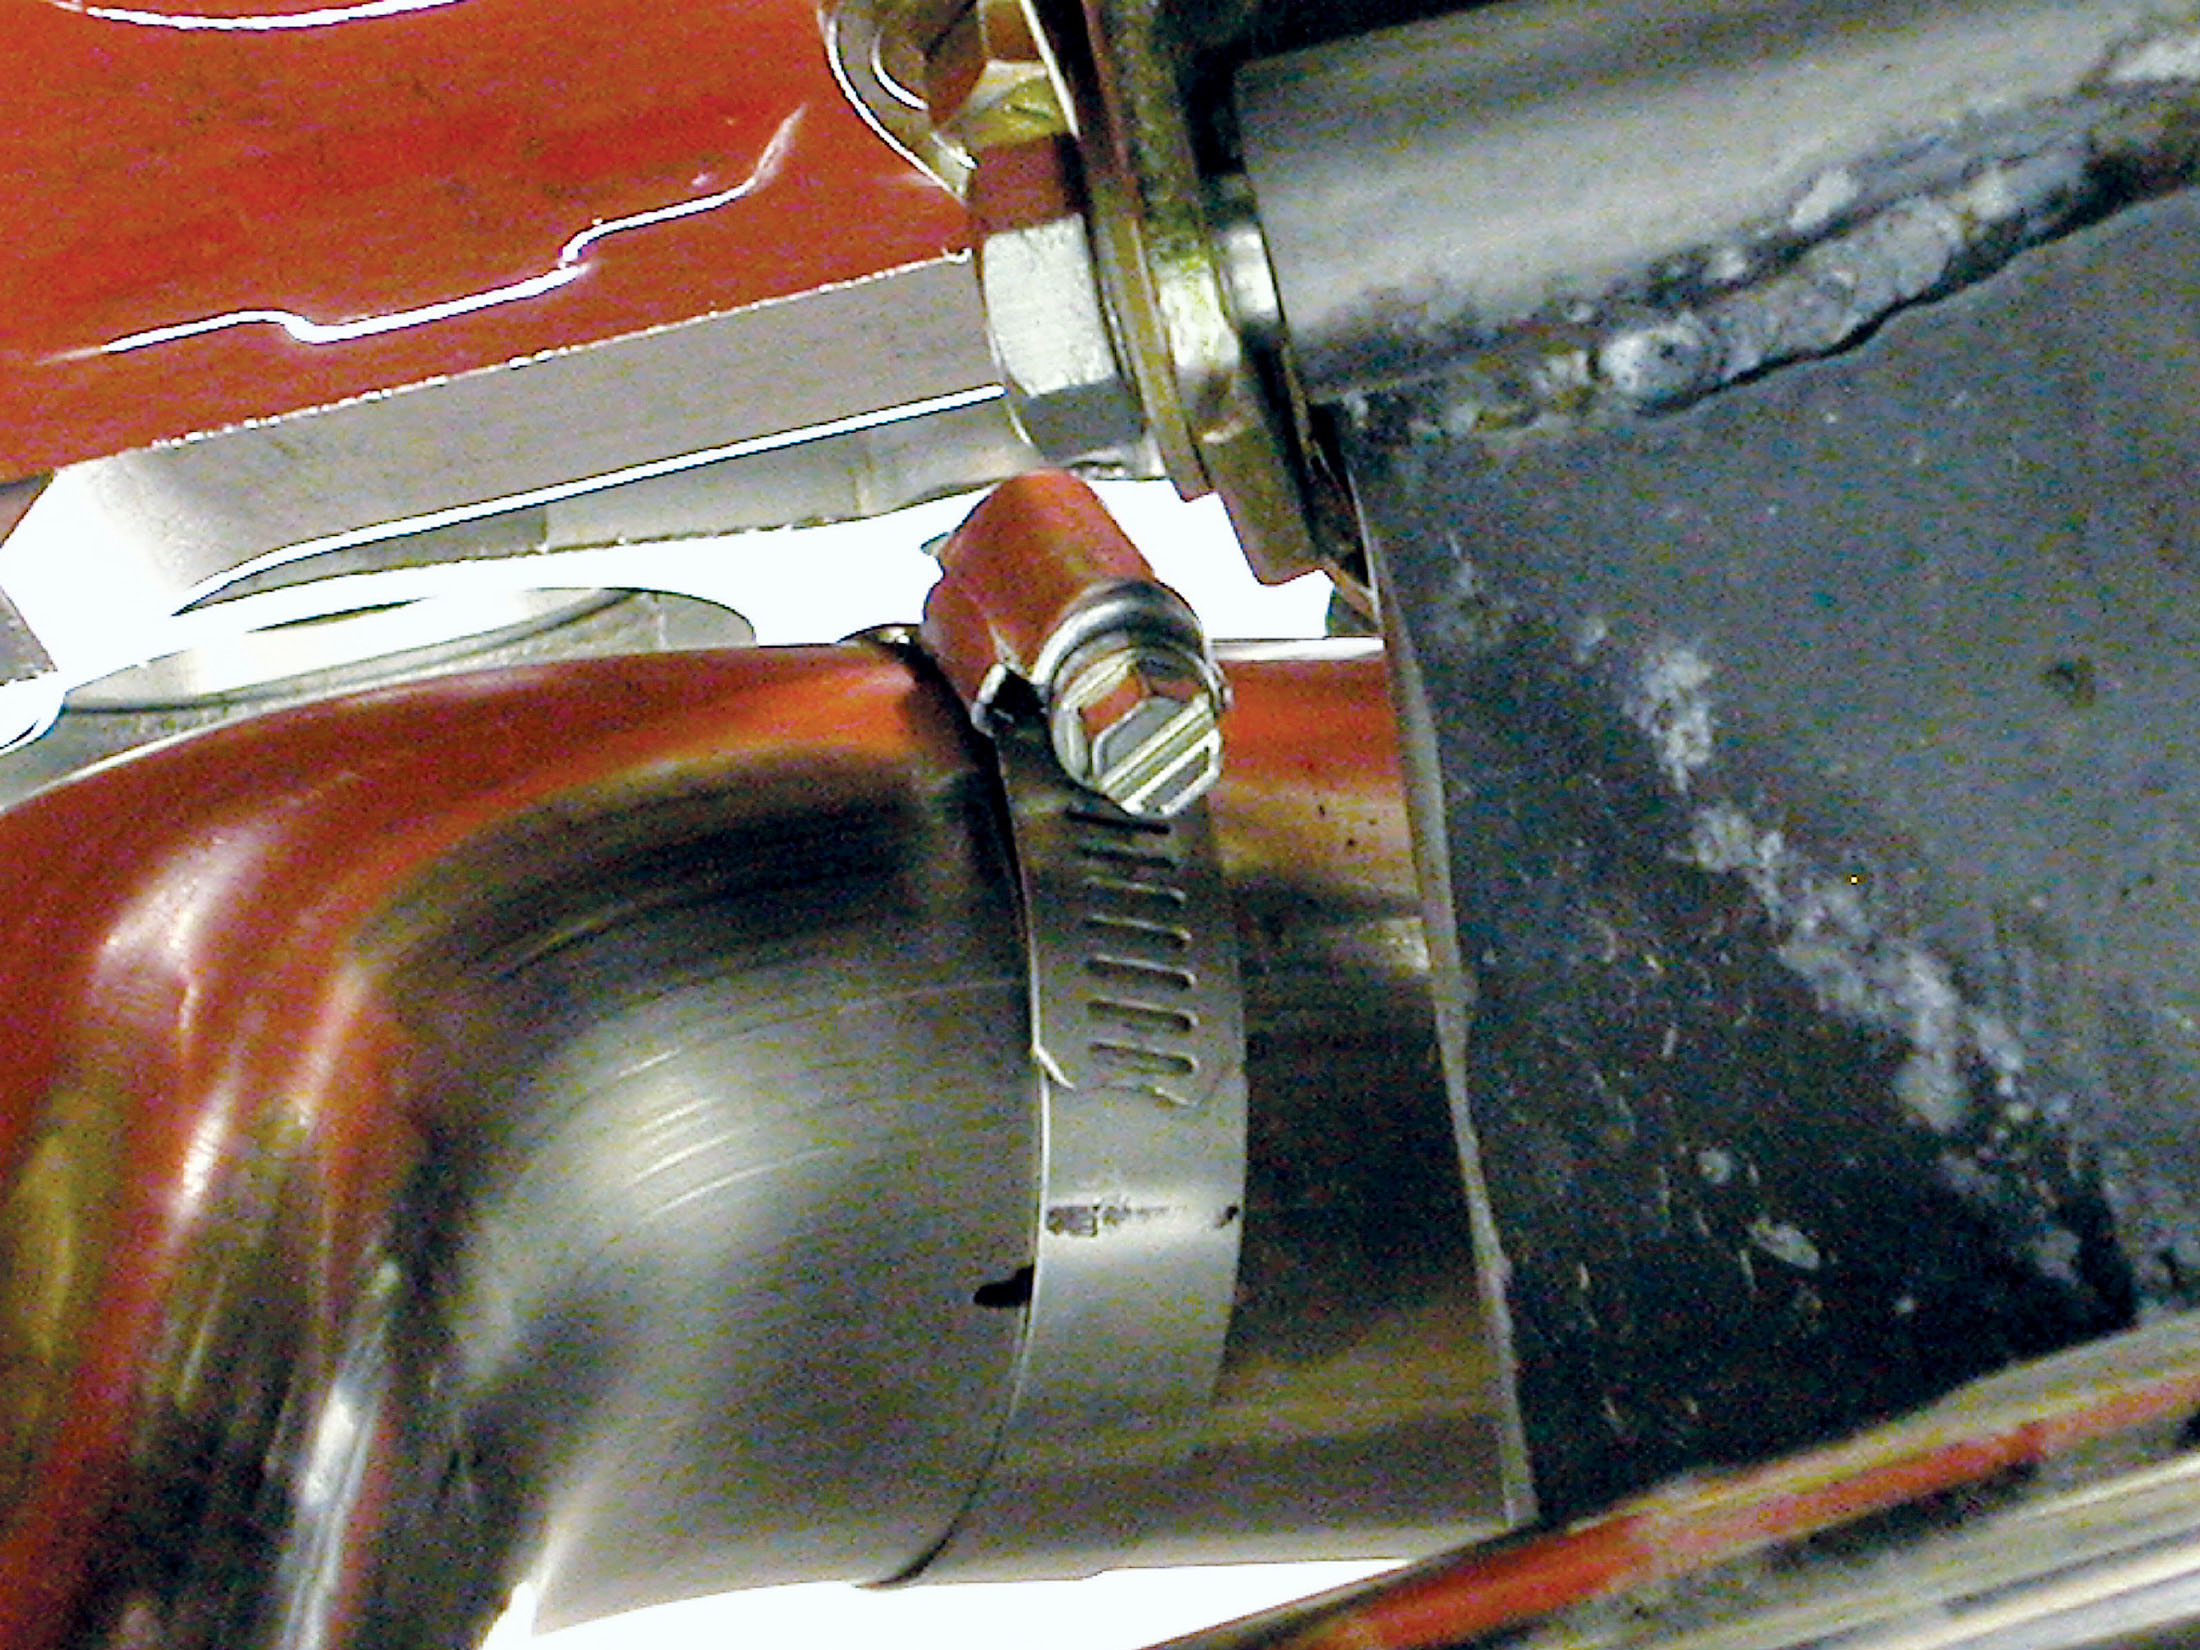
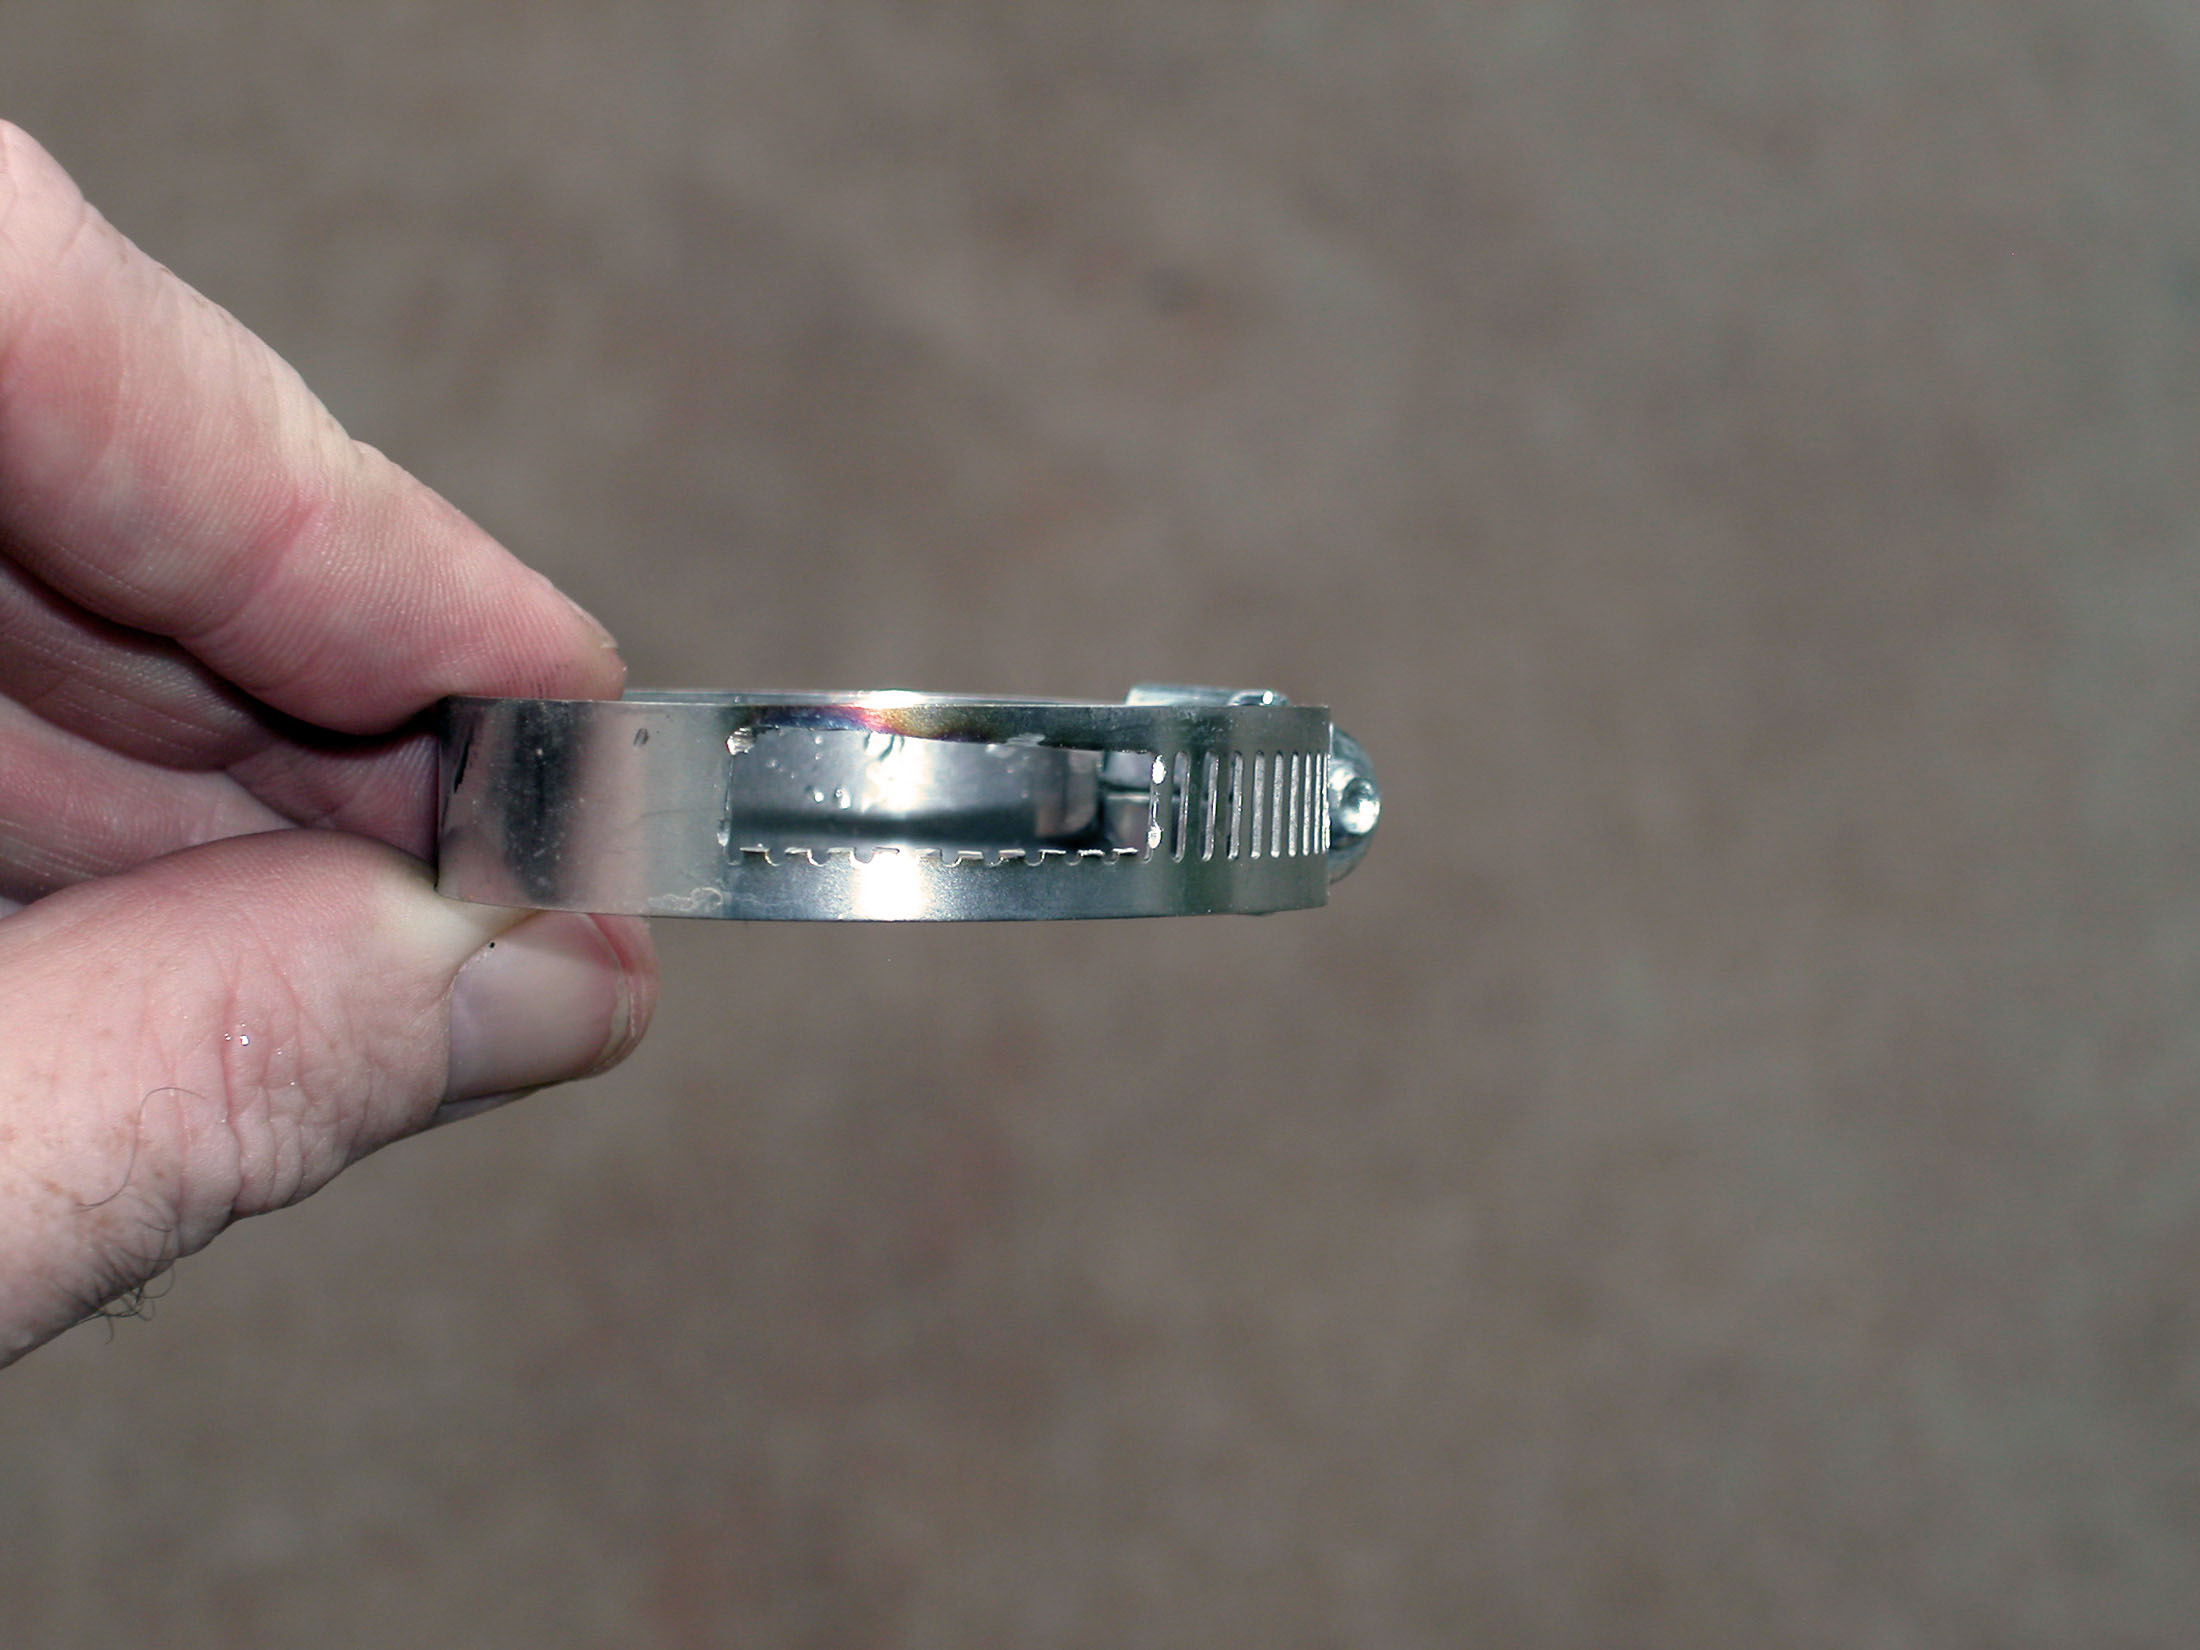
11A. You need a way to hold two segments of tubing together during the mock-up and fitment. Georges showed us this slick trick: he uses a stainless steel hose clamp to hold two pieces of tubing together.
11B. A window cut in the clamp allows him access to the joint between the segments for tack-welding them together. Though the clamp is employed, marking the two halves of the joint with a marker is still important.
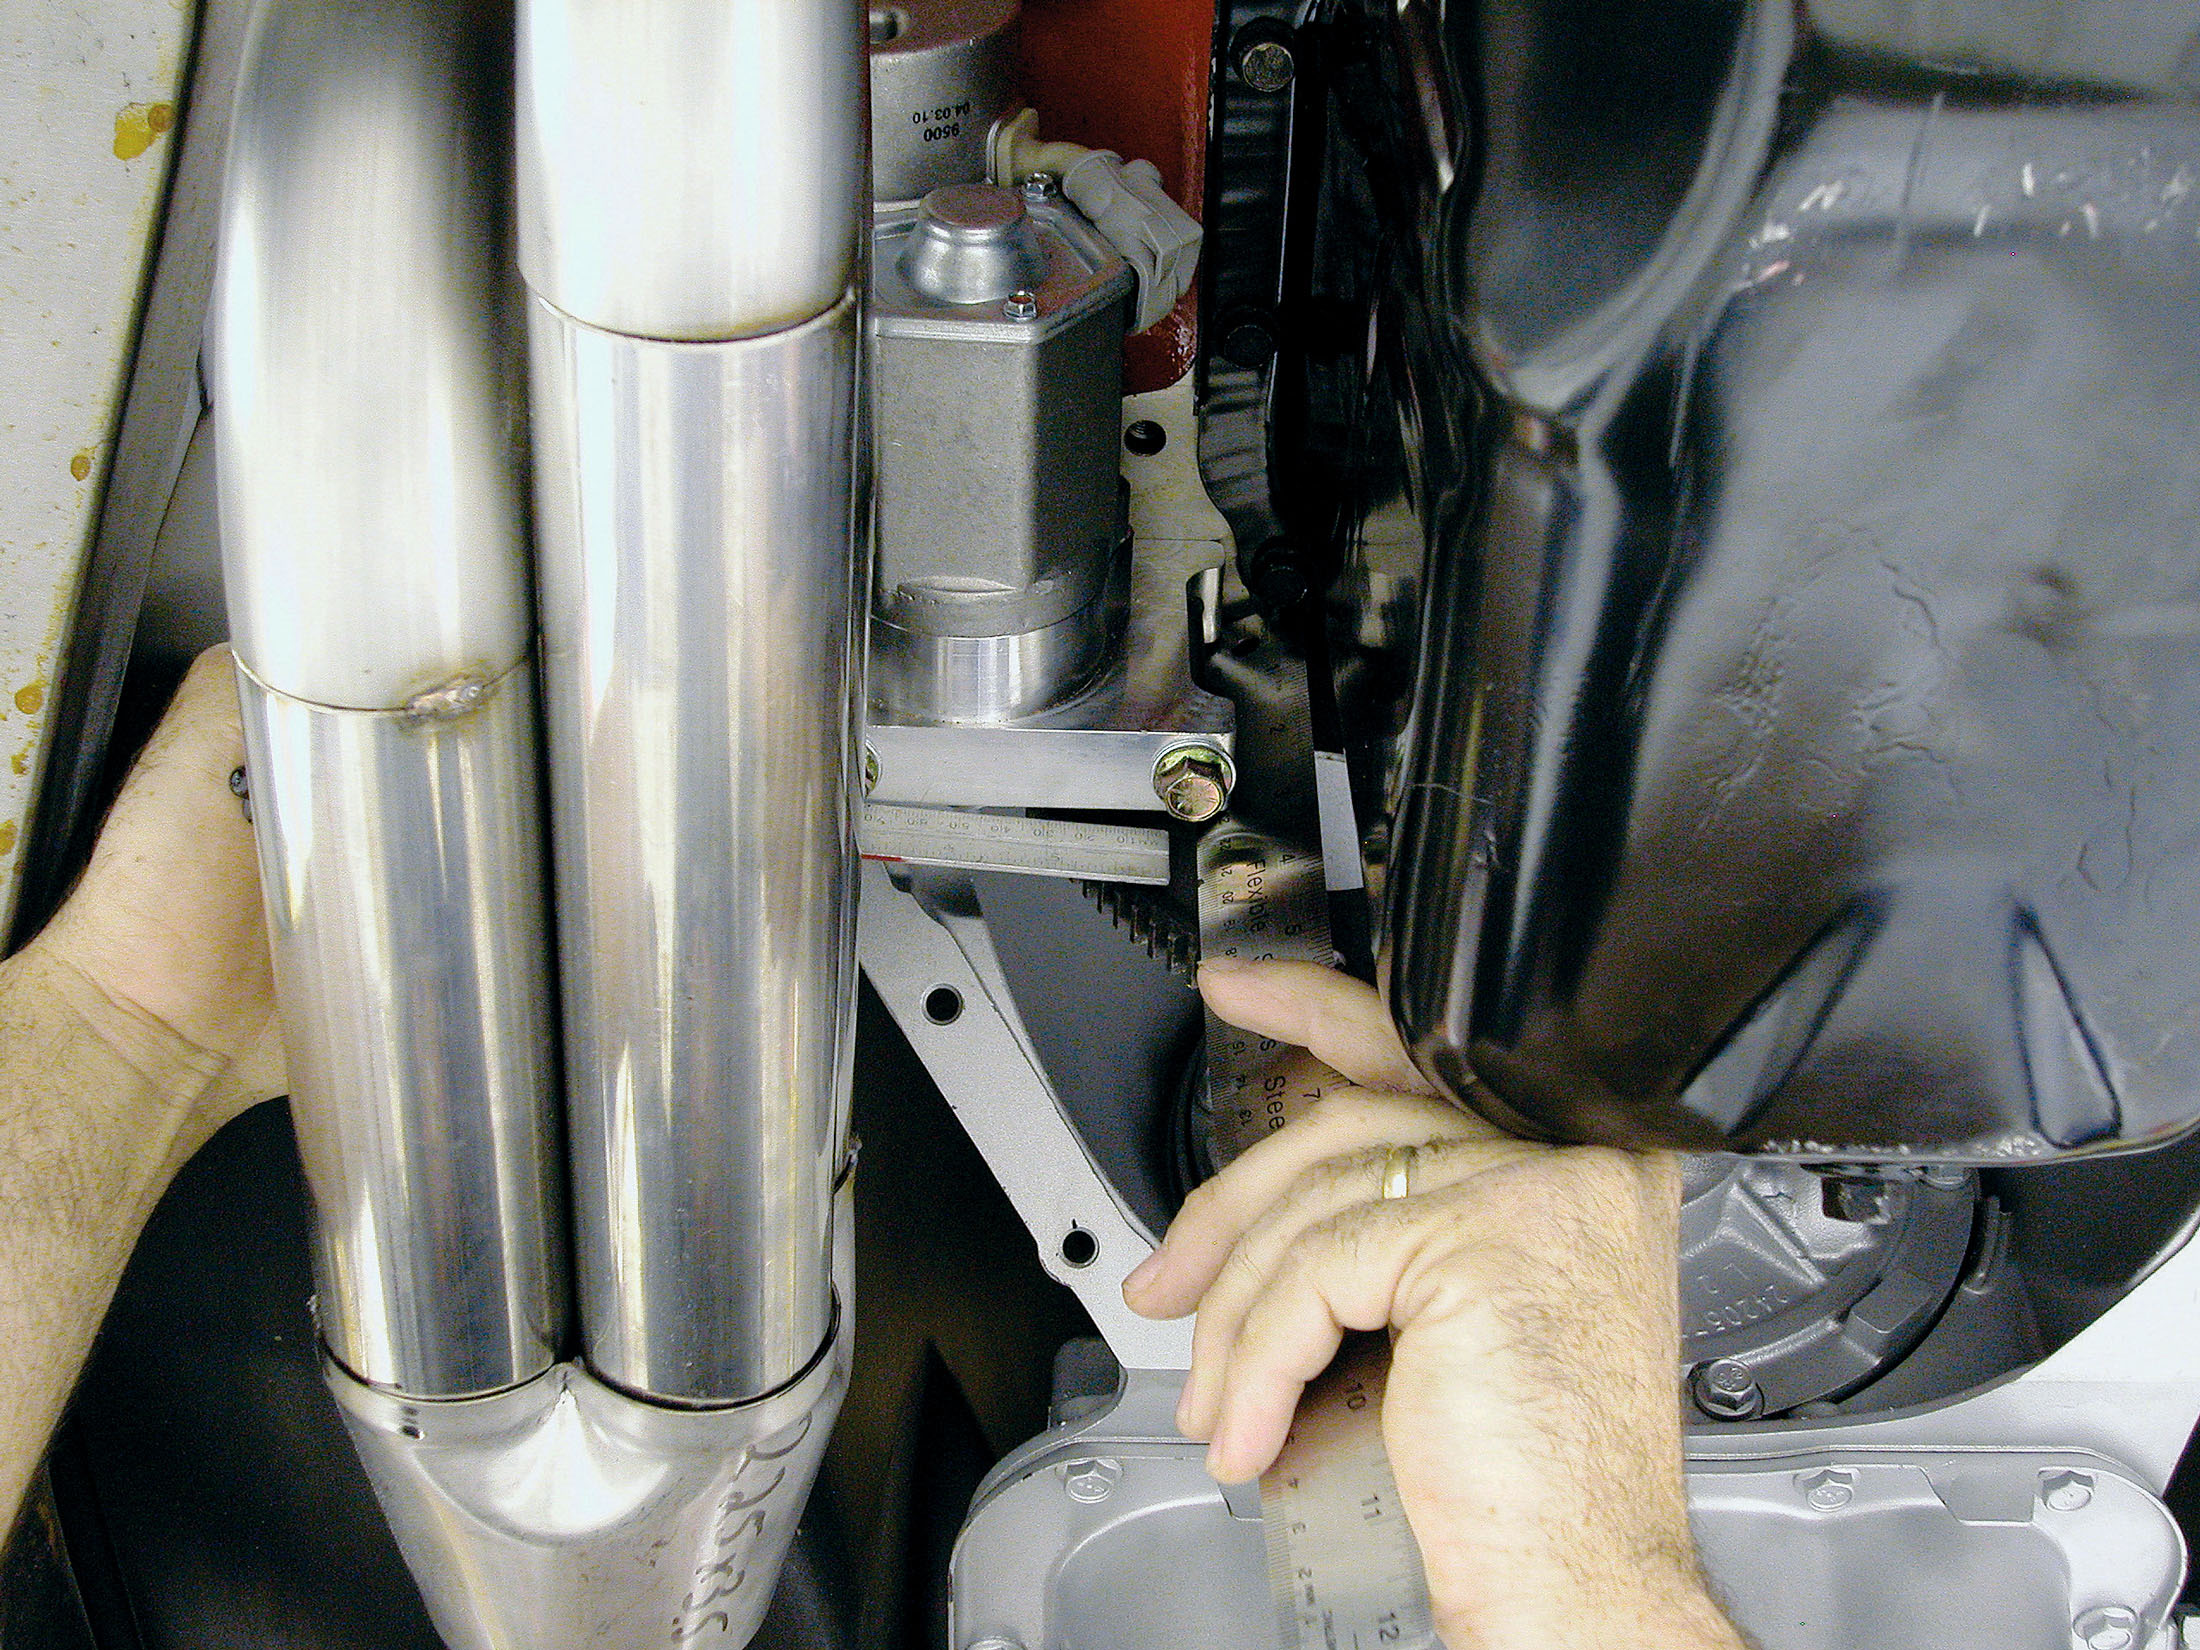
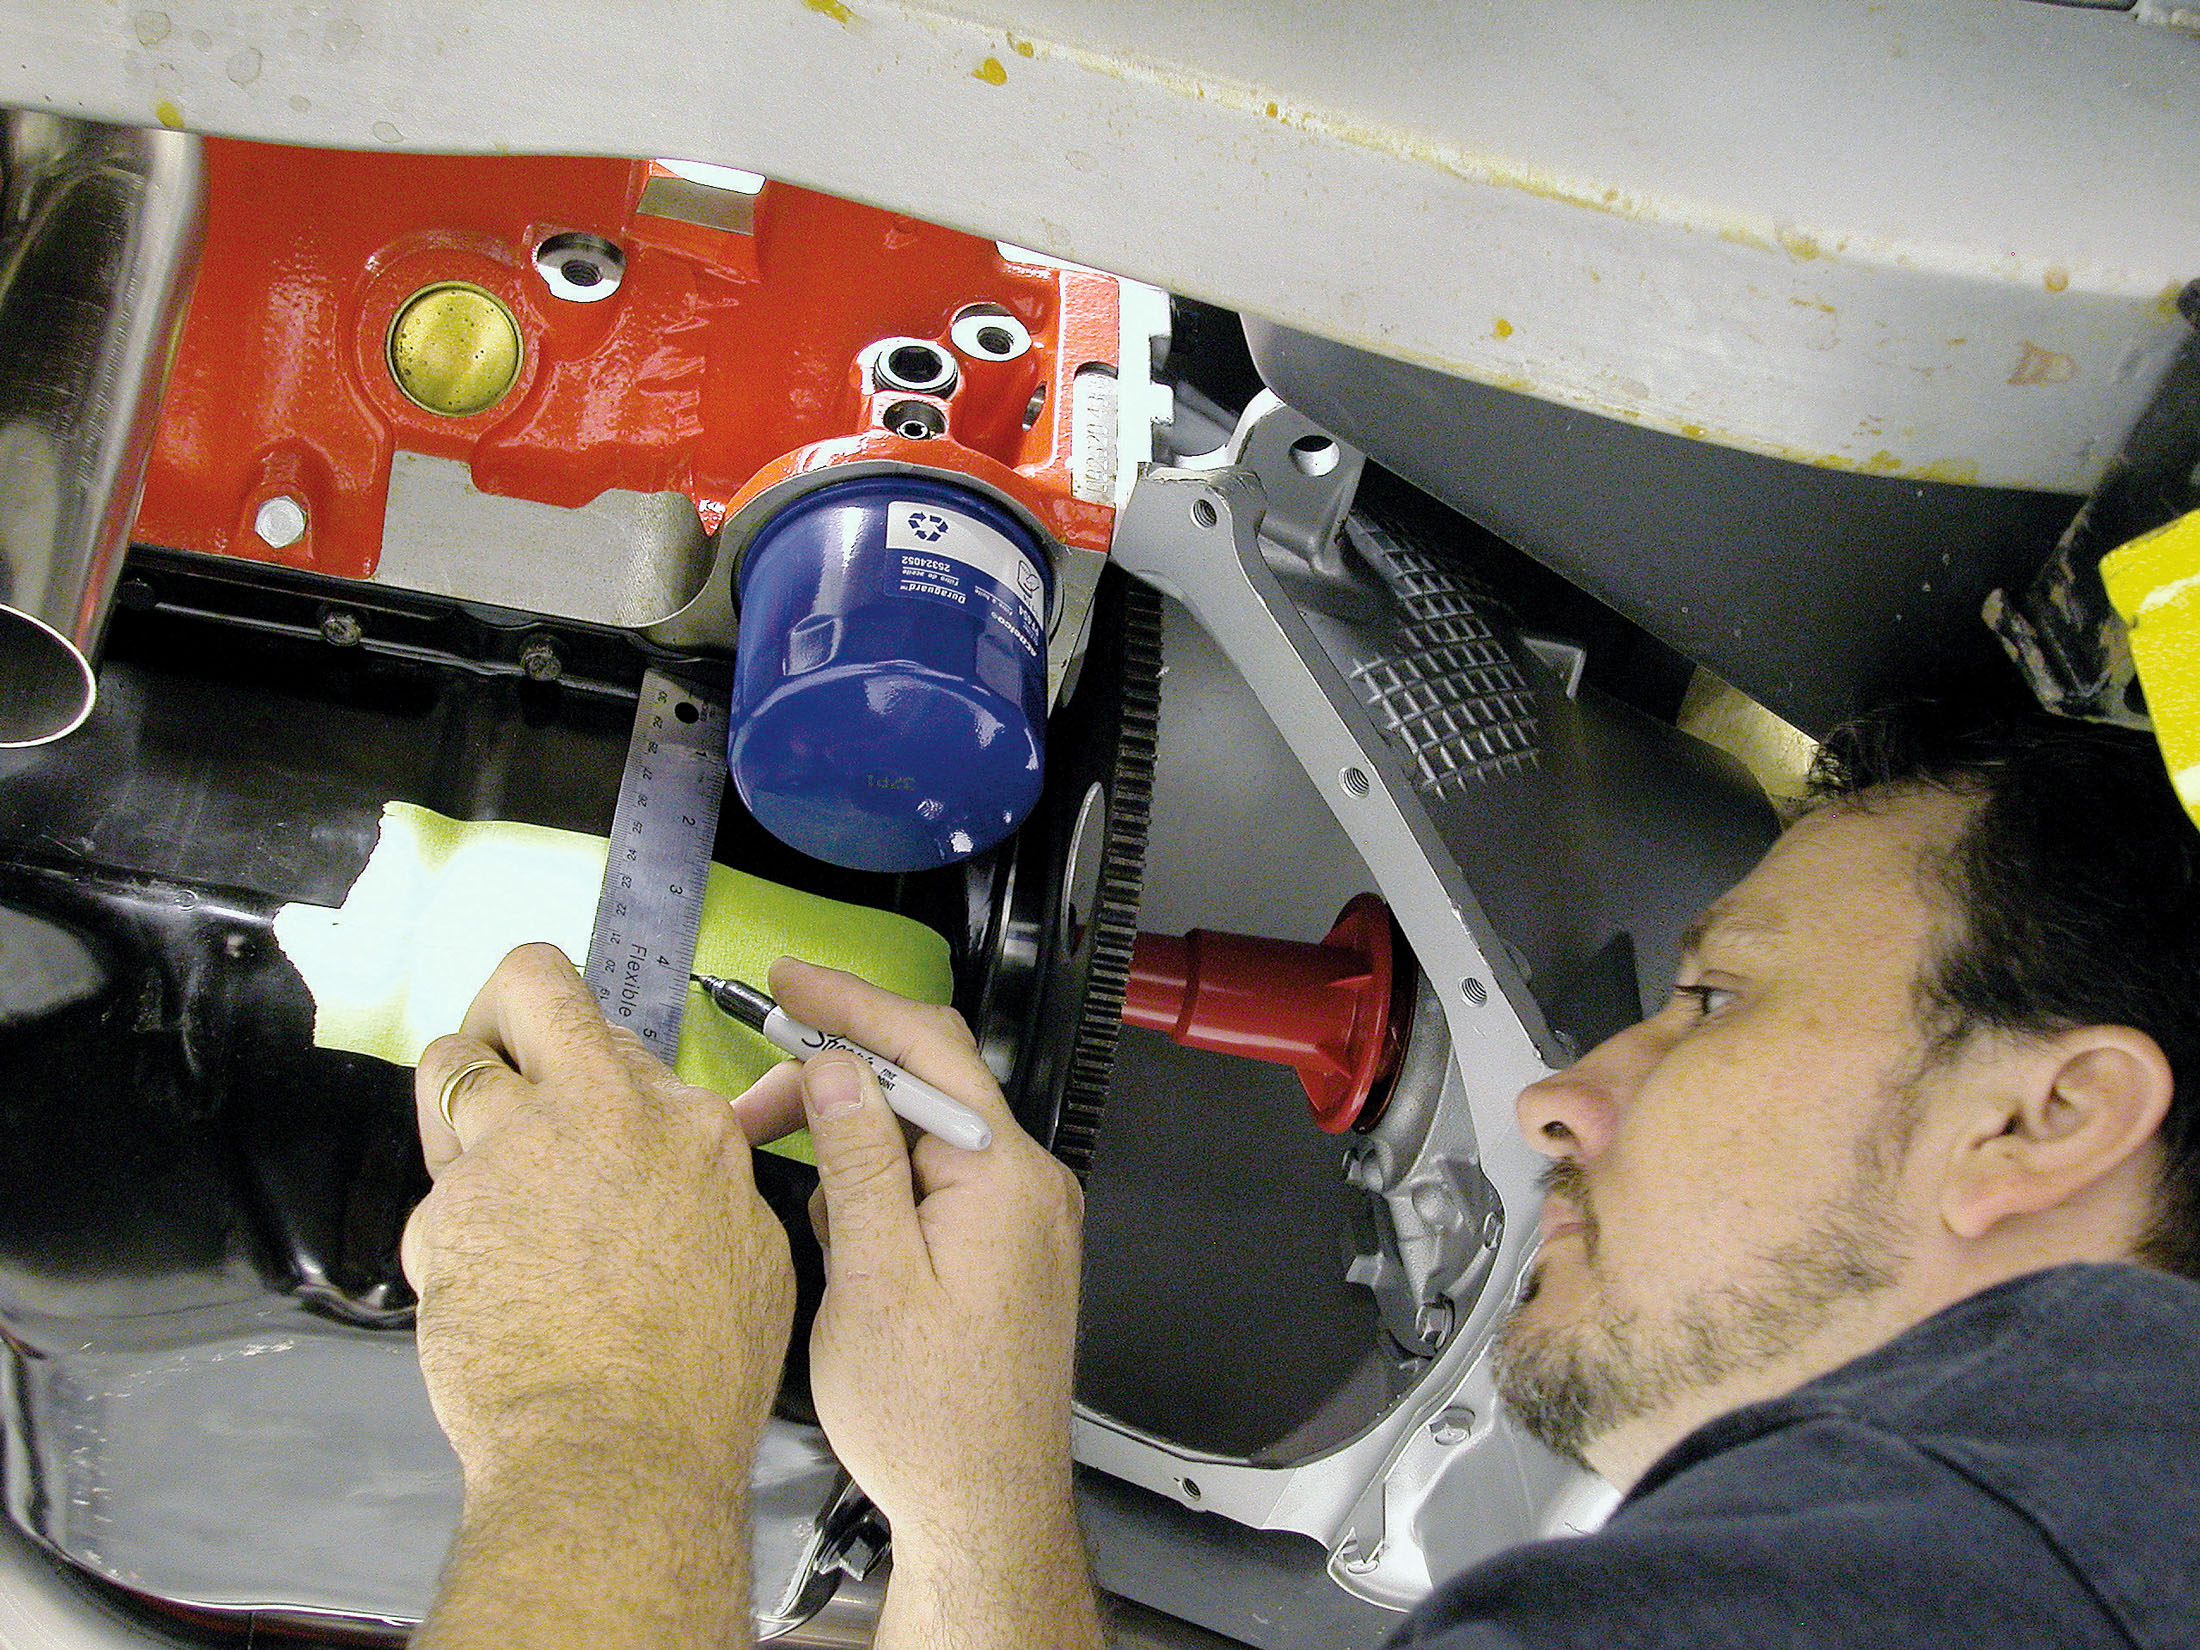
12A. We followed along on the second header (driver’s side), which presents a construction problem you don’t have when building the first, as it has to match the other one. When you build the first header, it’s more or less a freeform exercise, but the second one has to run the same depth down the side of the block, along the oil pan and terminate the same distance back.
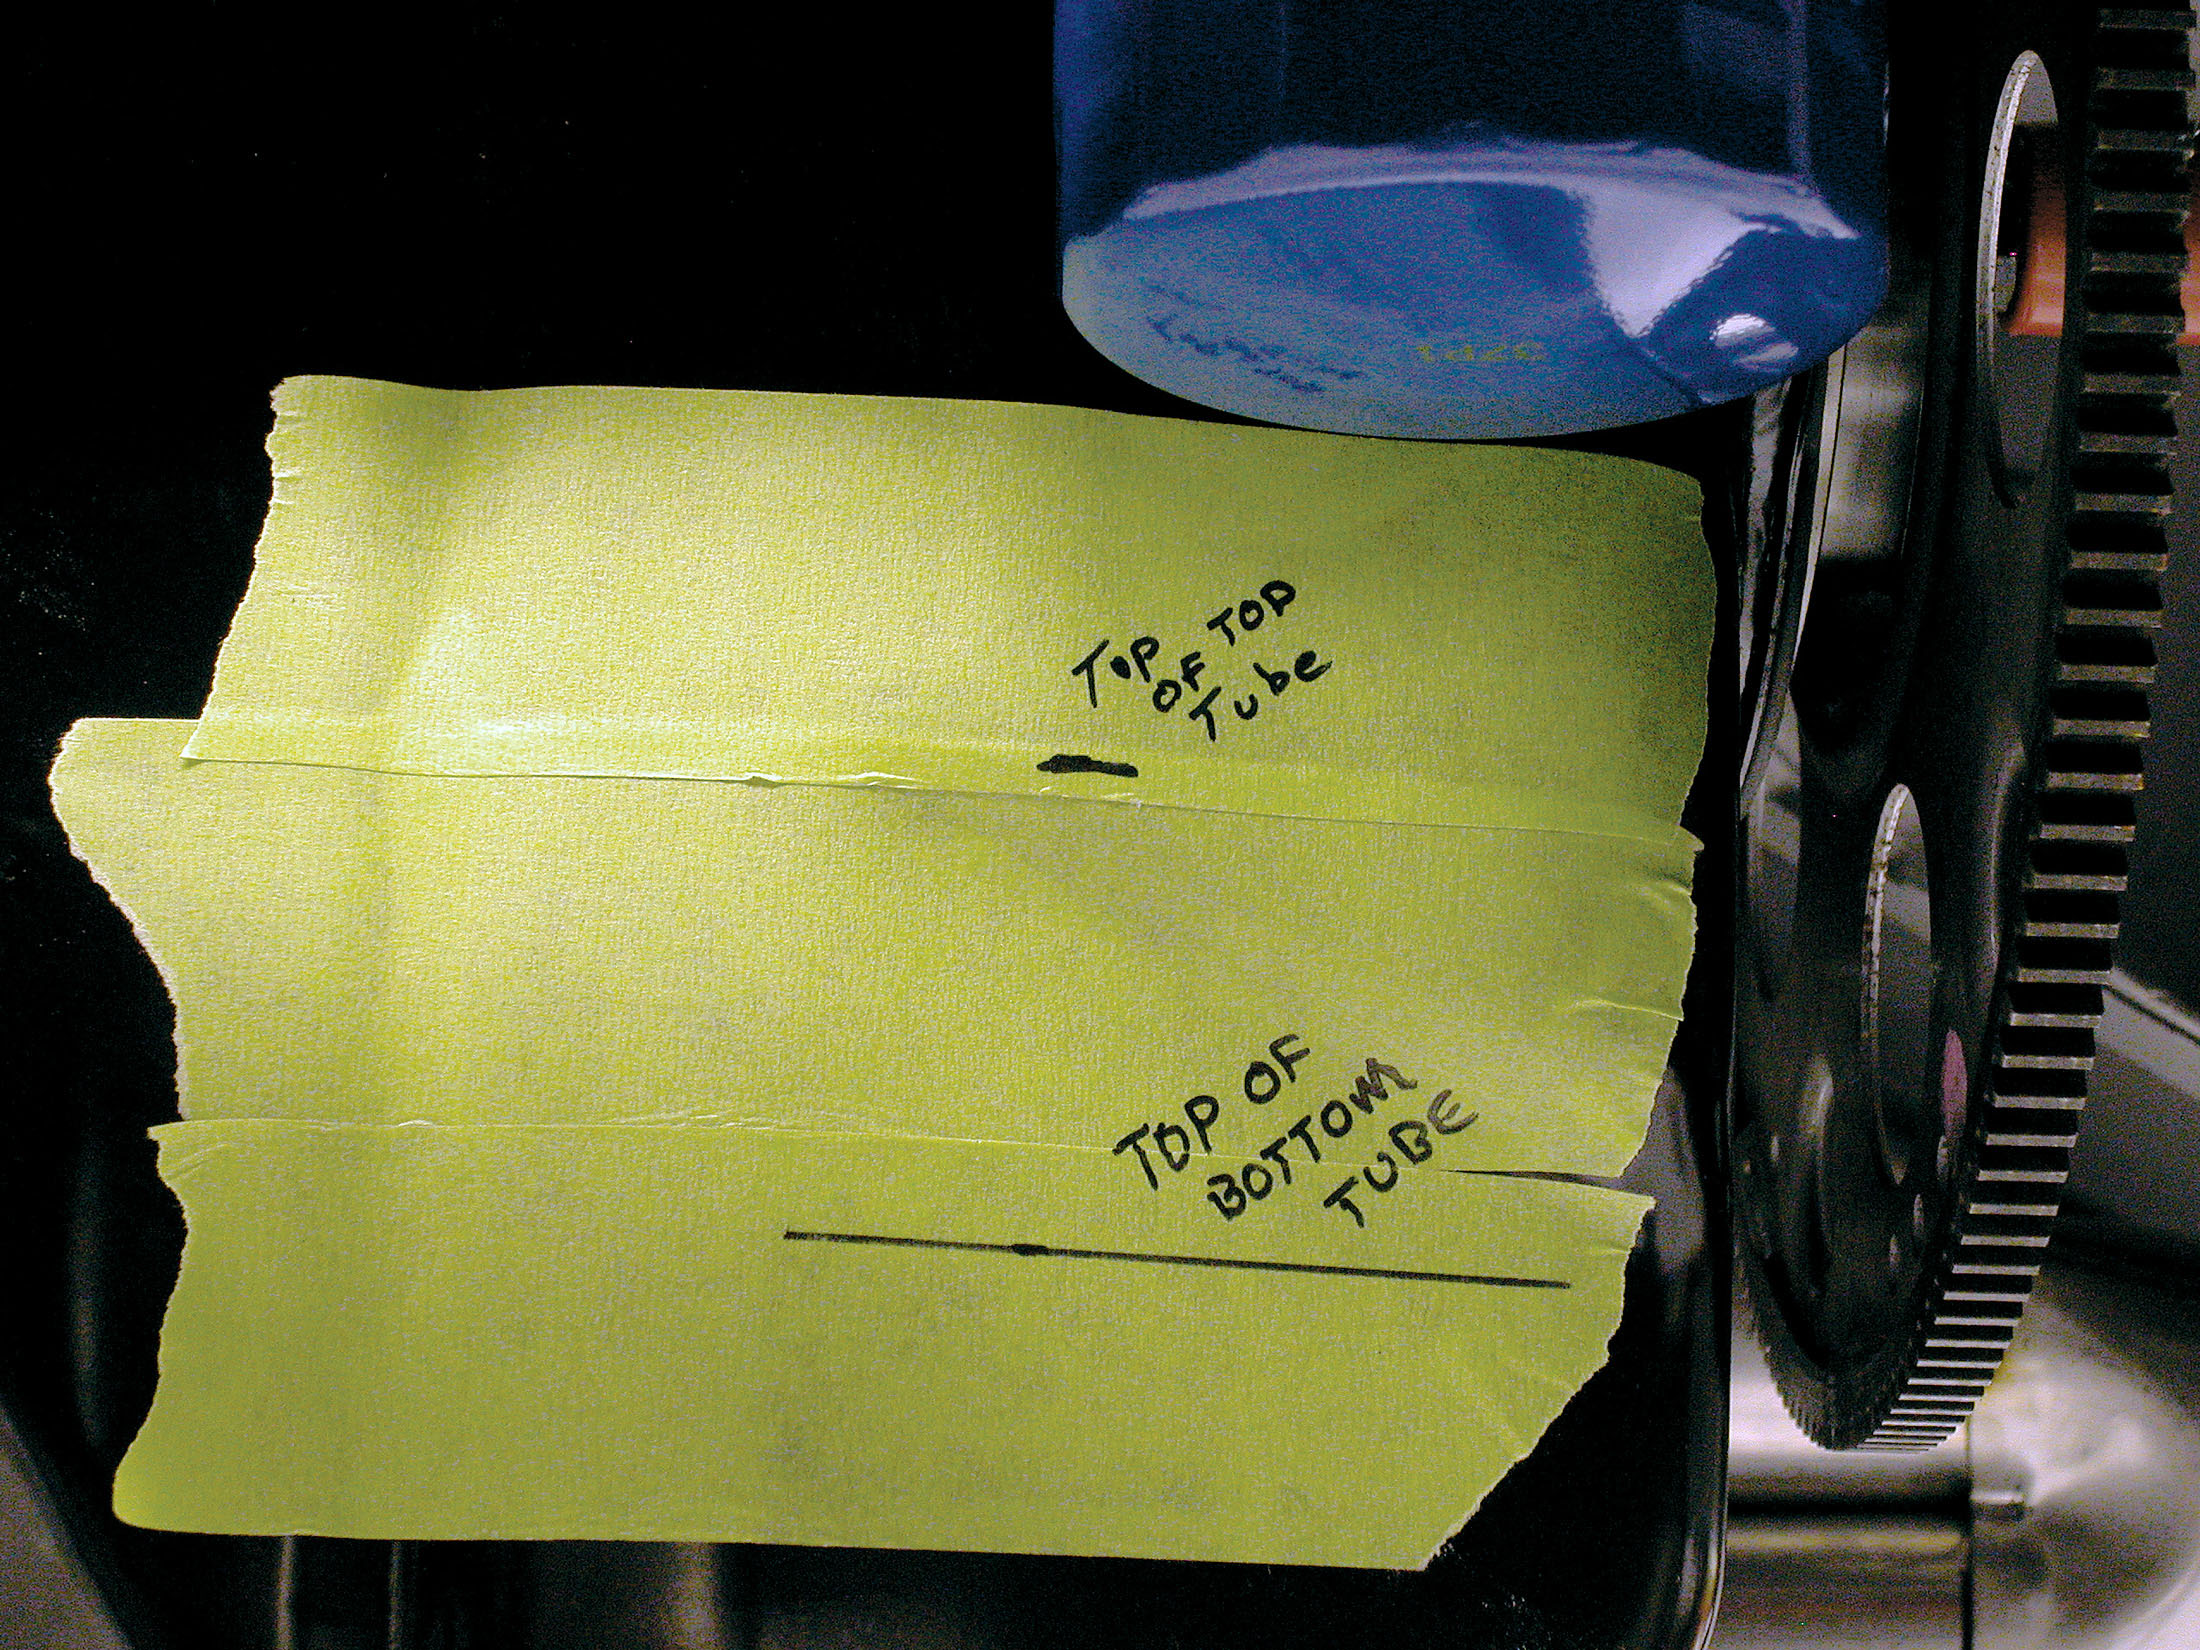
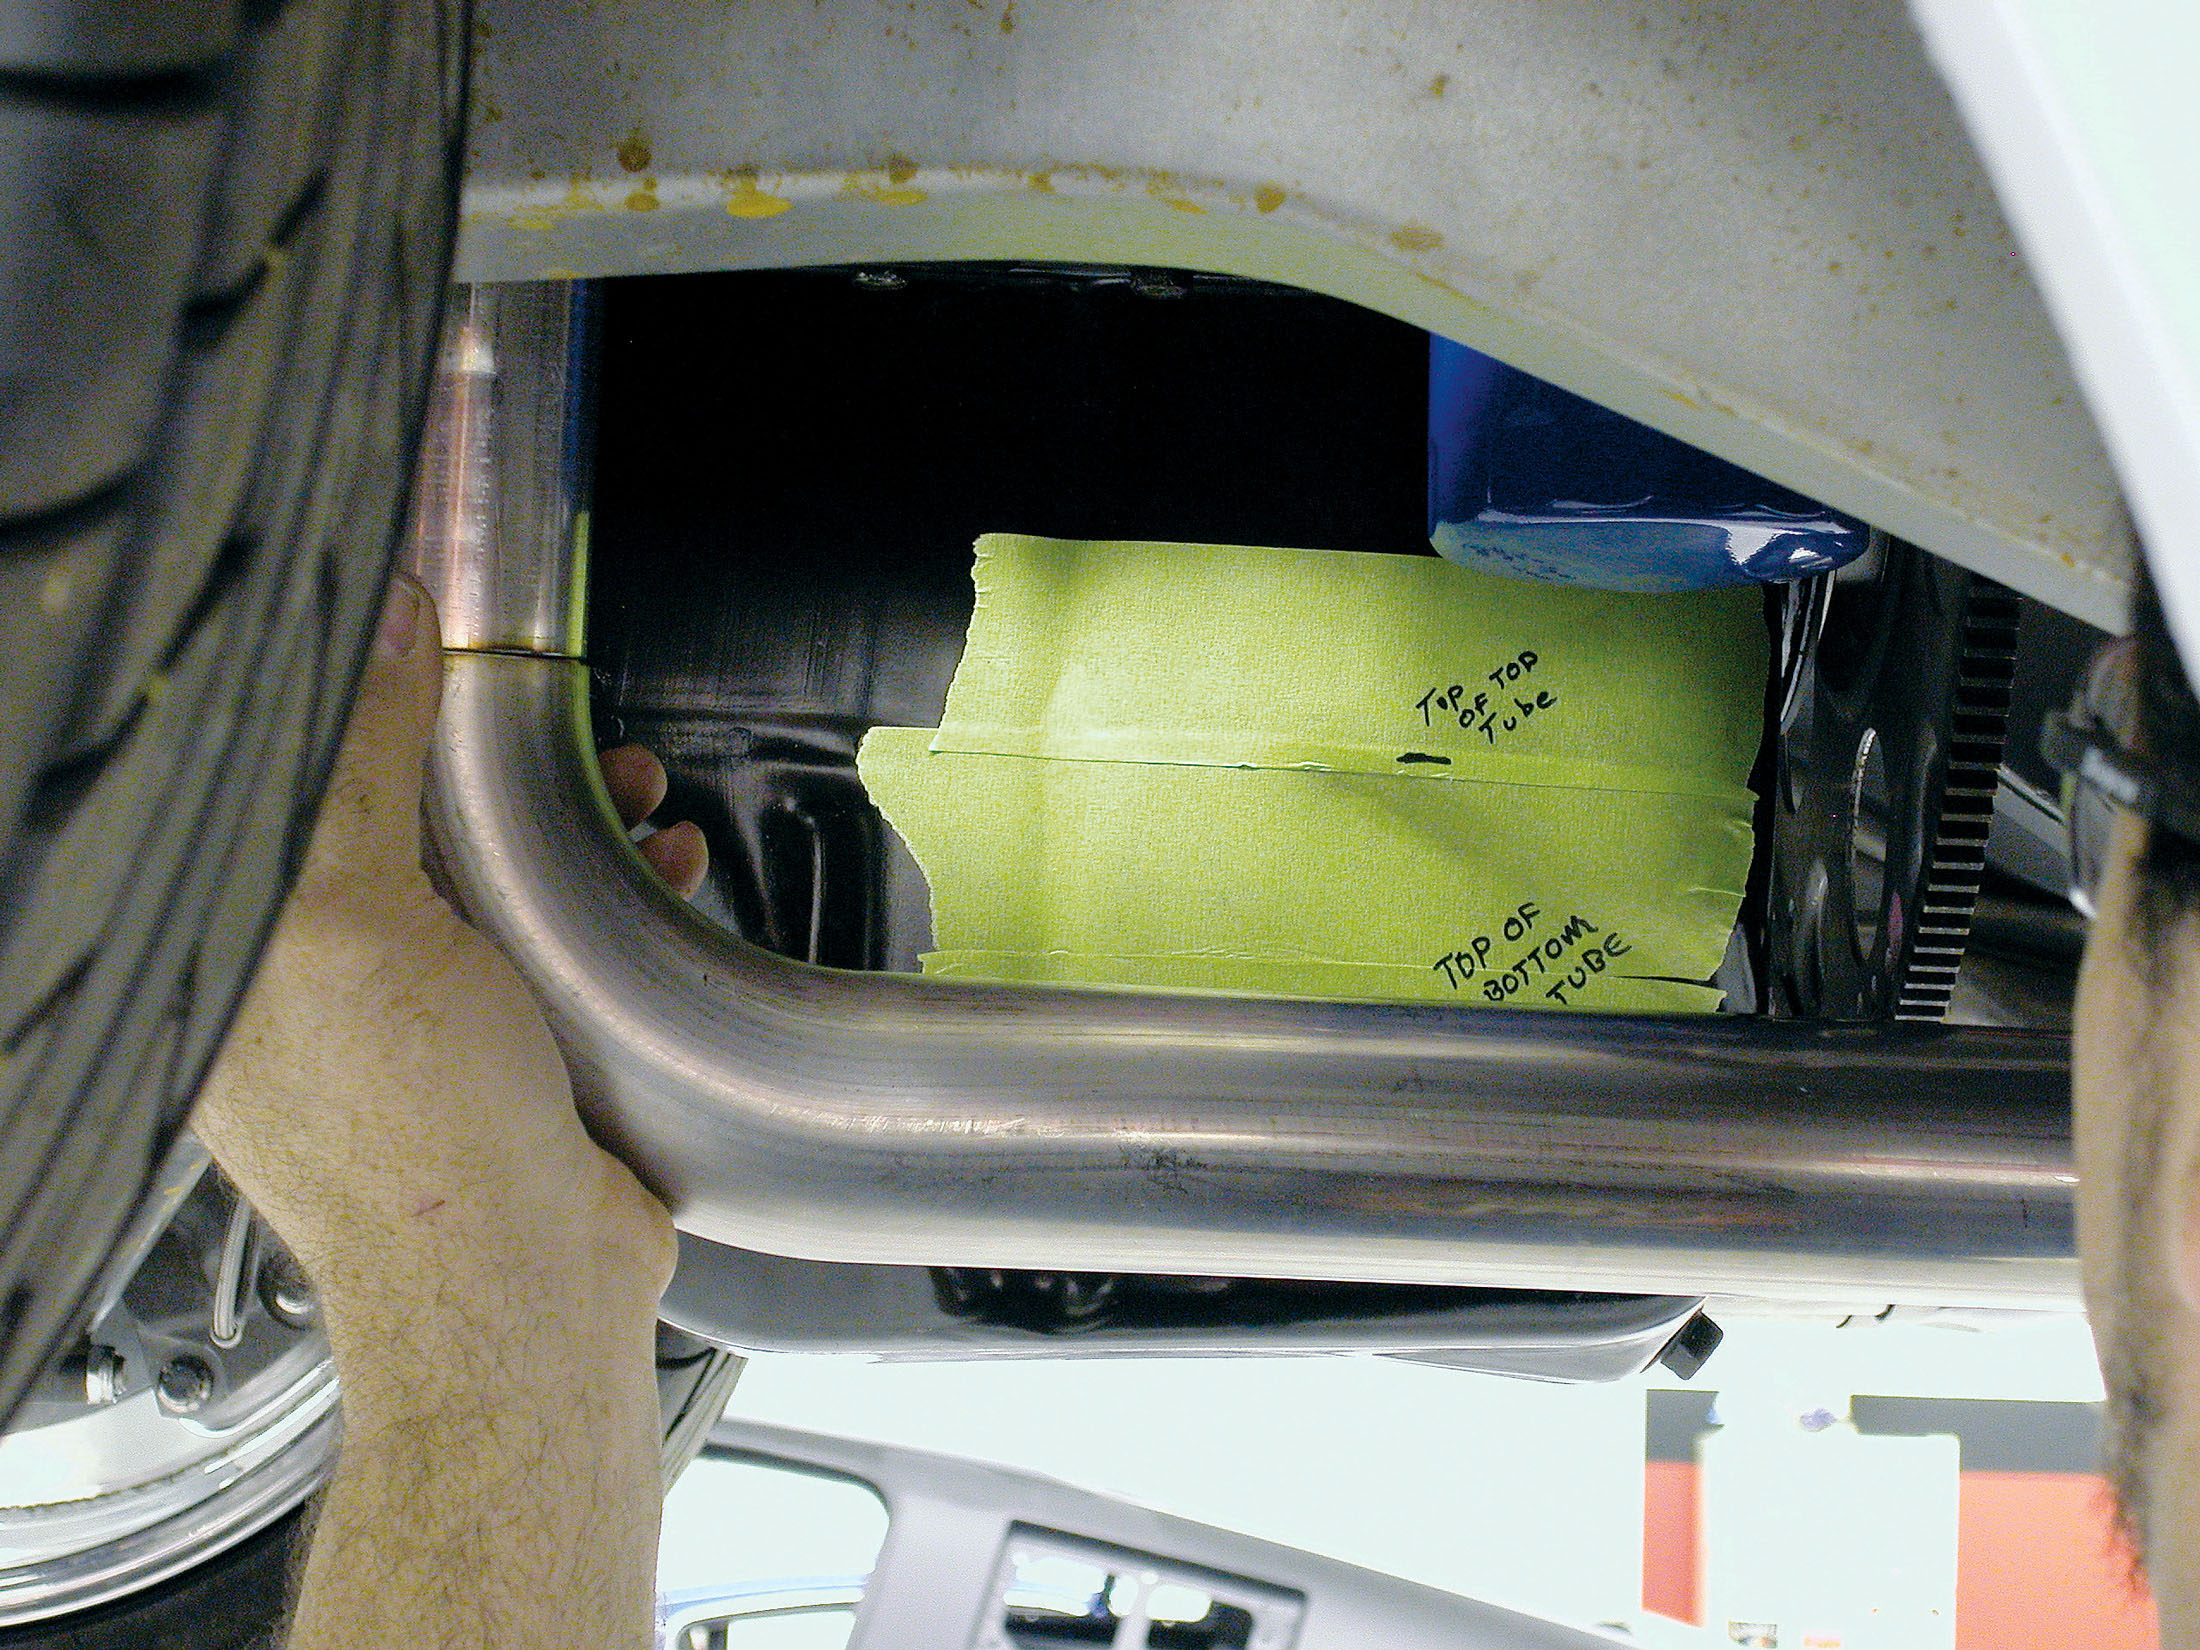
12B-C. Using the pan rail on the block as a reference point, Georges measured the location of the top and bottom of the tubes on the passenger-side header, and transferred those dimensions to reference points on the driver’s side of the oil pan.
12B-C. Using the pan rail on the block as a reference point, Georges measured the location of the top and bottom of the tubes on the passenger-side header, and transferred those dimensions to reference points on the driver’s side of the oil pan.
13. With the reference points on the oil pan, the height of the bottom tube can be determined through the same process as the other cuts. Hold a piece of tubing up, eyeball where a cut needs to be, and then “sneak” up on it with successive cuts on the chop saw. “Measure twice, cut once” was never more important.
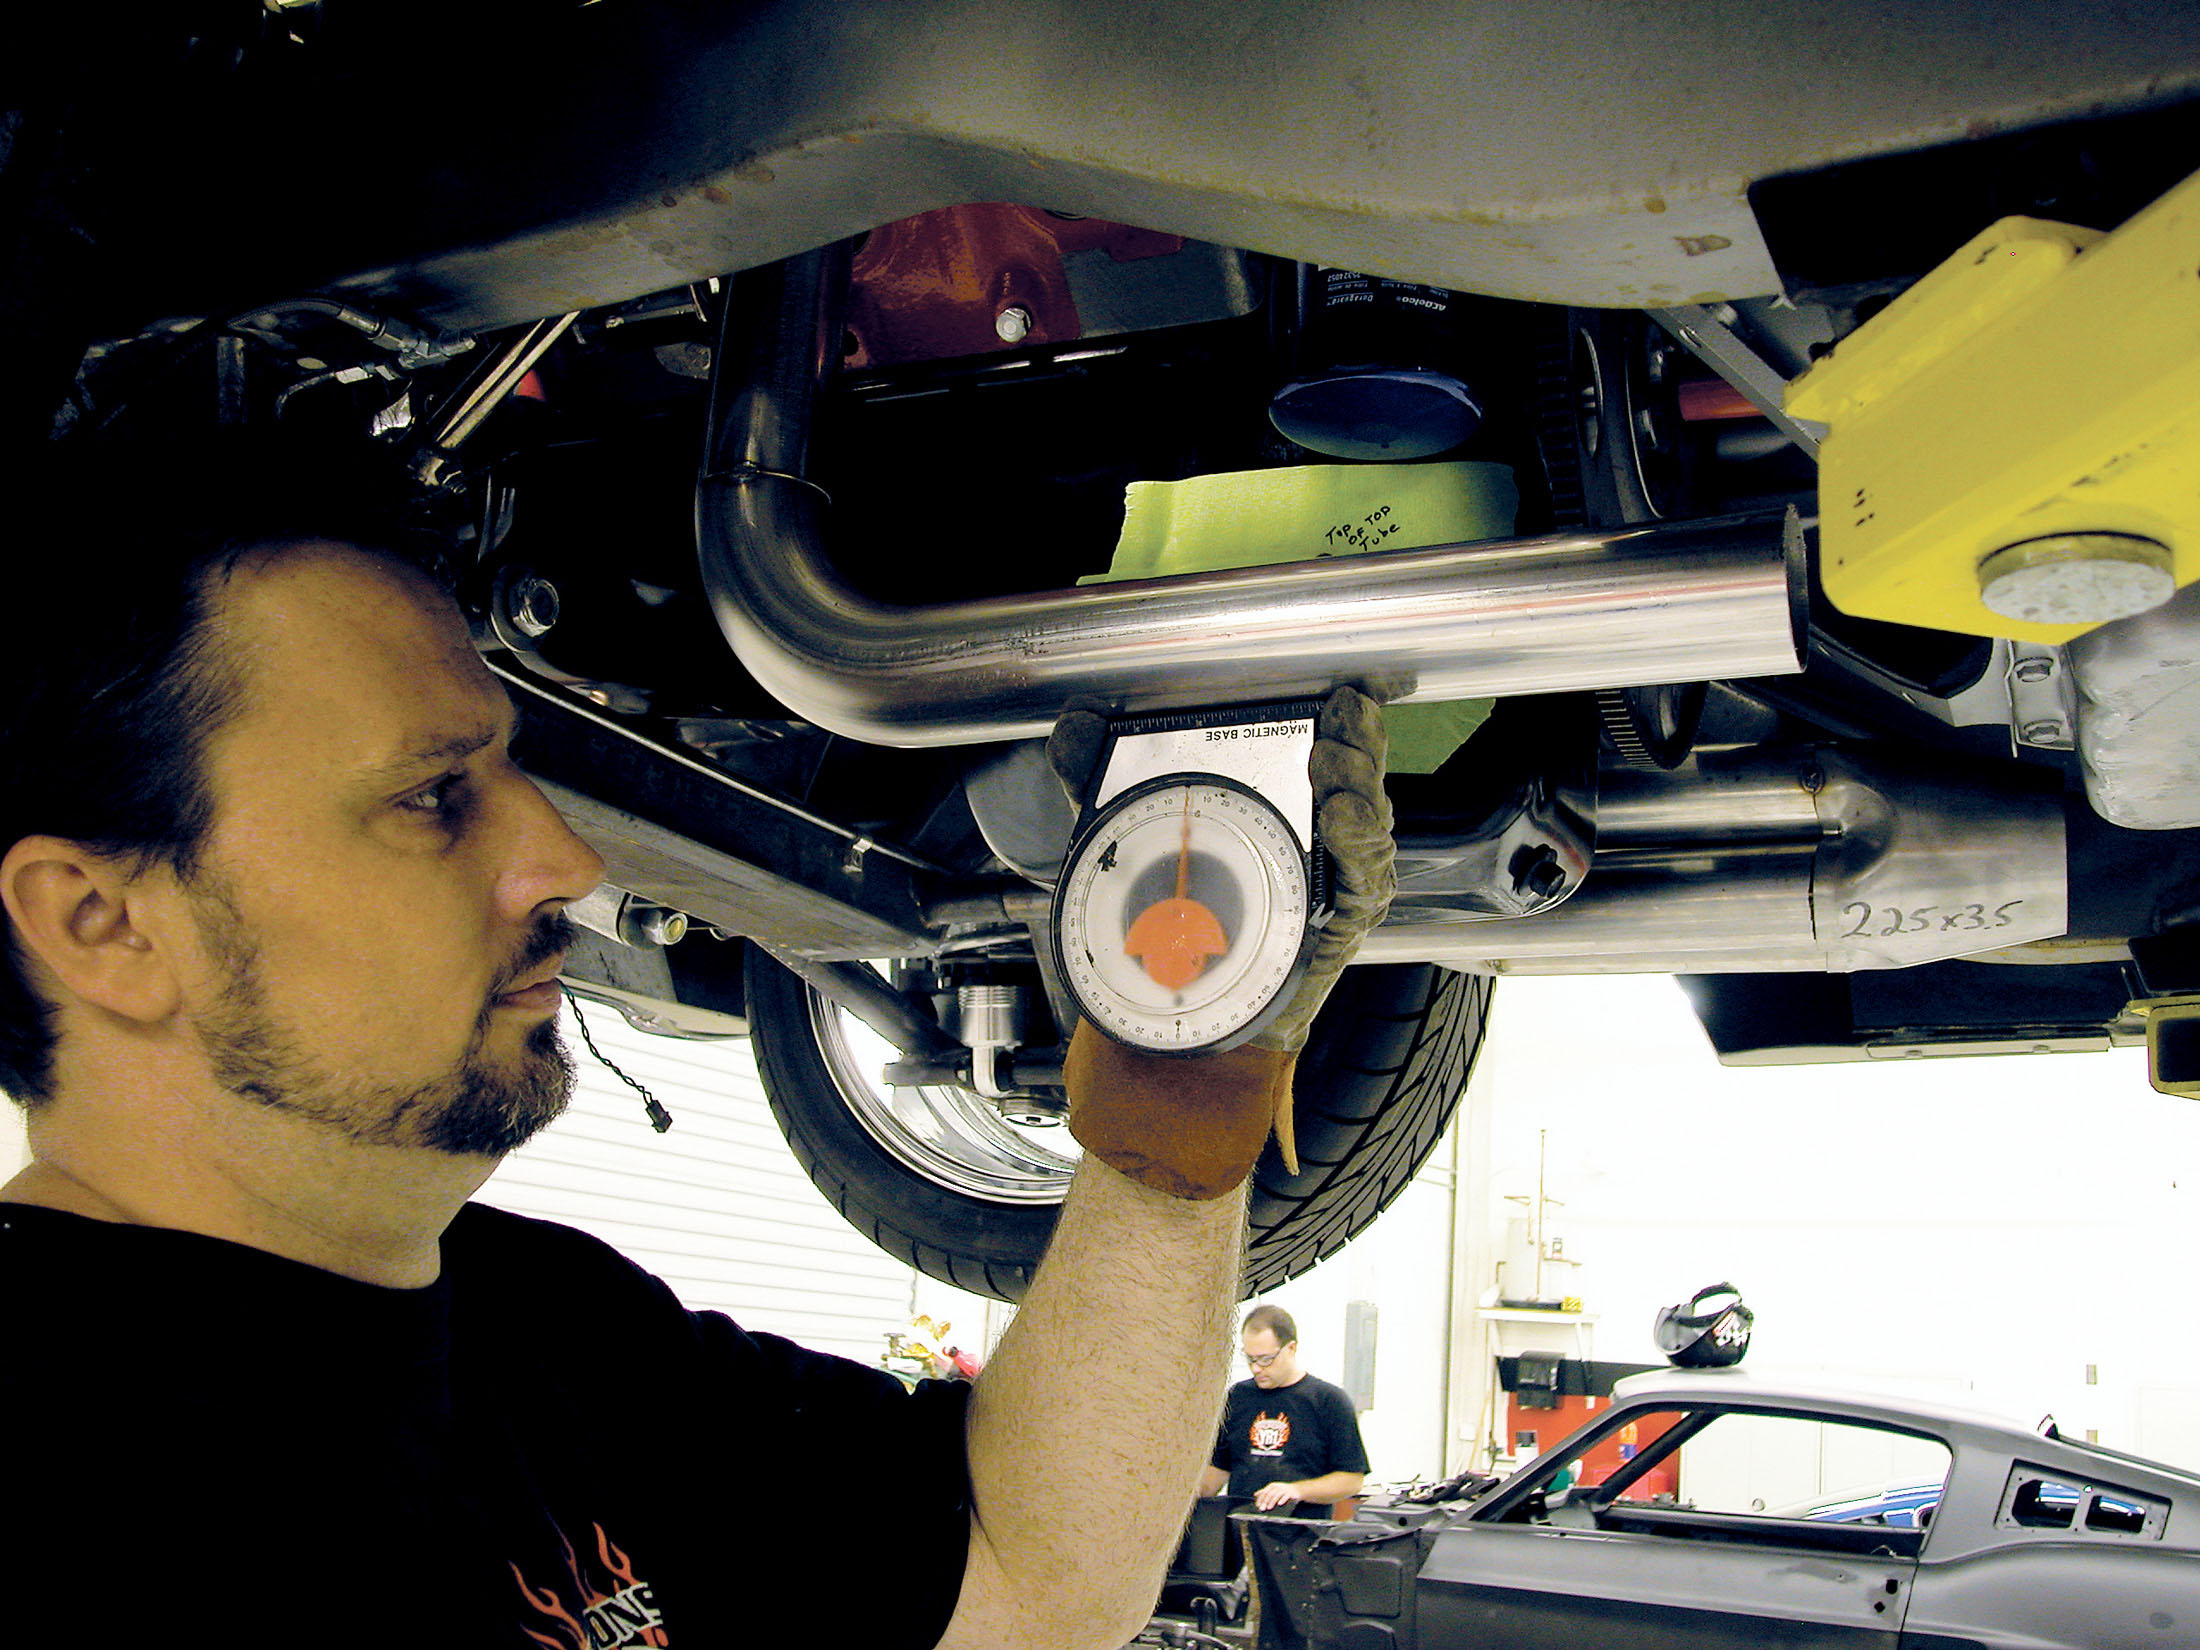
14. Once the height of the tubes relative to the engine is determined, Georges uses a protractor to make sure the tubes line up parallel to the chassis. This requires taking a reading off the framerail and then matching that to the angle of the bottom header tube.
15. The first tube is the most time consuming, as the others will generally follow the path this one takes. For each junction, the flange came off the engine for it to be tacked together on the workbench. At this point, the tacks are reinforced and the assembly is put back in the car for the second tube.
16A-B. With the first tube secured and the flange back on the engine, the second port’s tube is begun in the same fashion as the first was fabricated. Here you can see a perfect example of Georges “eyeballing” where a bend is cut to get the contours he wants. Every bend is determined in the same manner.
16A-B. With the first tube secured and the flange back on the engine, the second port’s tube is begun in the same fashion as the first was fabricated. Here you can see a perfect example of Georges “eyeballing” where a bend is cut to get the contours he wants. Every bend is determined in the same manner.
17A. With the second tube mostly completed, the top and bottom tubes are clamped together and the alignment is dialed in with the protractor so they are stacked directly on top of one another.
17B. When everything is ready, the tube is tacked together.
18A-B-C With the second tube in place, the header flange is once again bolted to the engine. Then the third tube is begun, same as the first two.
18A-B-C With the second tube in place, the header flange is once again bolted to the engine. Then the third tube is begun, same as the first two.
18A-B-C With the second tube in place, the header flange is once again bolted to the engine. Then the third tube is begun, same as the first two.
19A-C. This sequence clearly shows the process of lining up the pre-fabbed tube segments and determining where they will be cut to form the primary tube. It’s time consuming and a pain, but each time the final configuration of a bend segment is determined, the tubes are clamped, marked and the flange removed from the engine to tack-weld it together. Then the flange is reinstalled (at this point with two and a half primary tubes installed), and the next segment of the bend is determined. One step at a time.
19A-C. This sequence clearly shows the process of lining up the pre-fabbed tube segments and determining where they will be cut to form the primary tube. It’s time consuming and a pain, but each time the final configuration of a bend segment is determined, the tubes are clamped, marked and the flange removed from the engine to tack-weld it together. Then the flange is reinstalled (at this point with two and a half primary tubes installed), and the next segment of the bend is determined. One step at a time.
19A-C. This sequence clearly shows the process of lining up the pre-fabbed tube segments and determining where they will be cut to form the primary tube. It’s time consuming and a pain, but each time the final configuration of a bend segment is determined, the tubes are clamped, marked and the flange removed from the engine to tack-weld it together. Then the flange is reinstalled (at this point with two and a half primary tubes installed), and the next segment of the bend is determined. One step at a time.
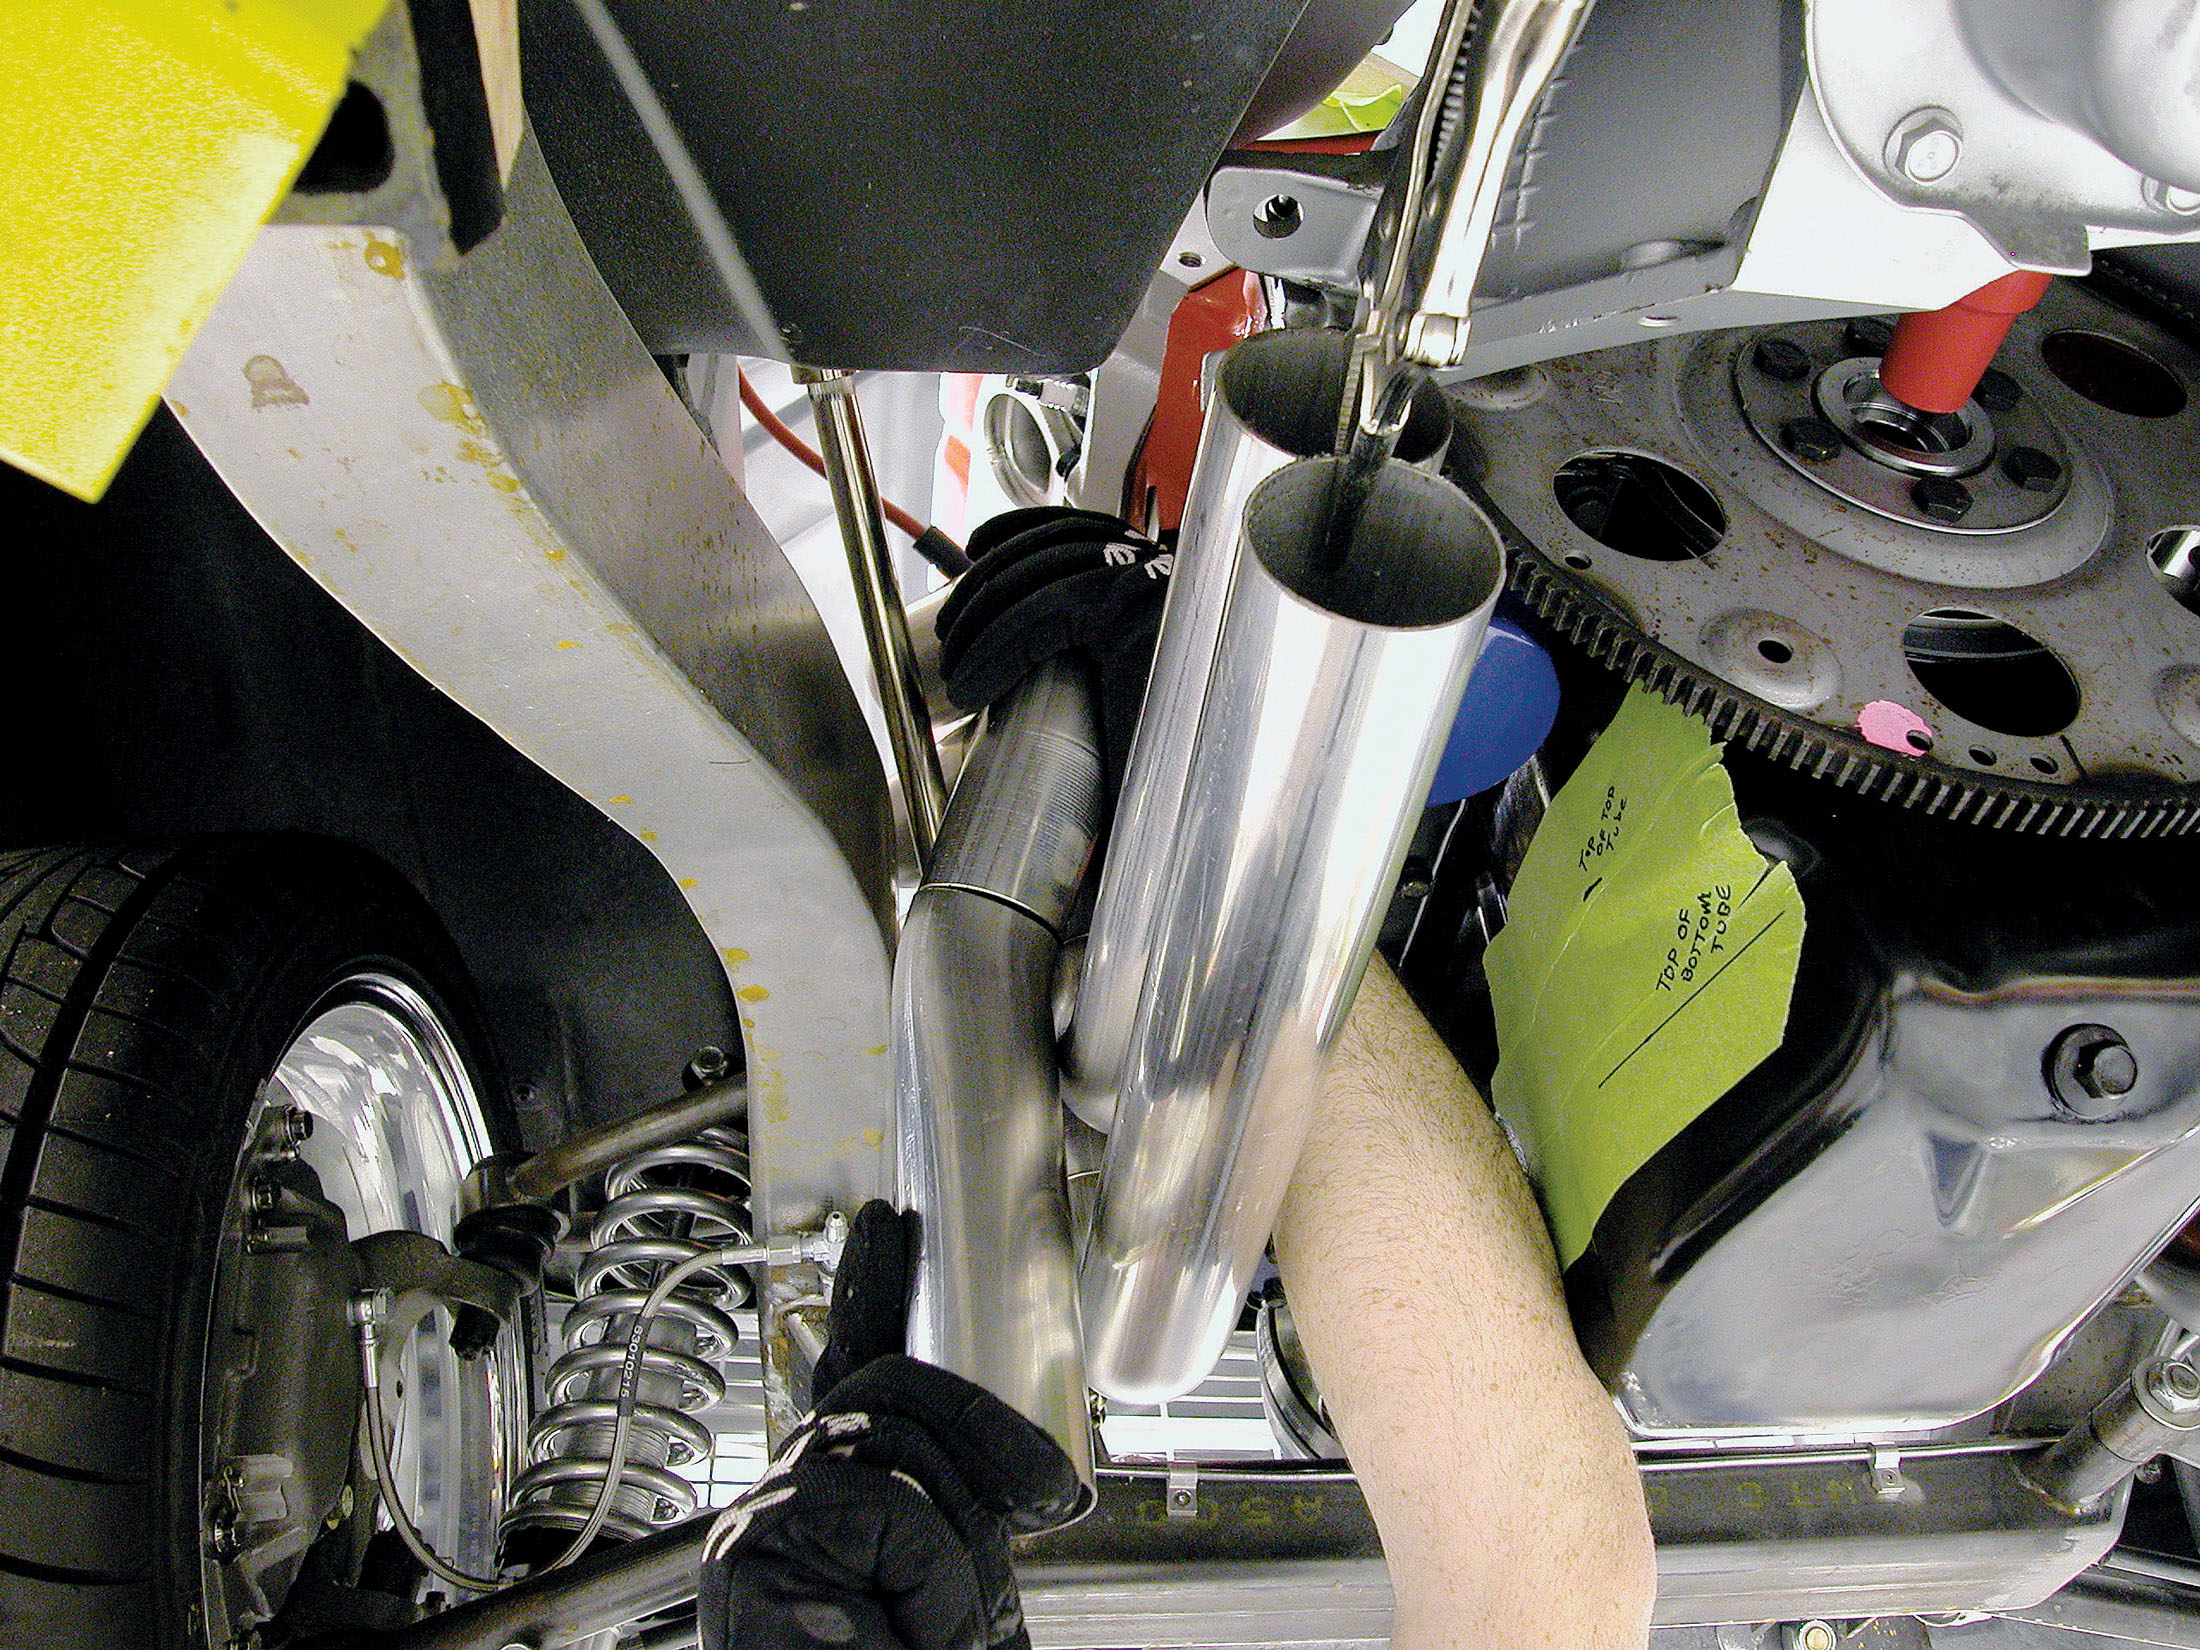
20. Here’s the third primary tube after being tacked together. Notice there are four segments in this tube. By this point, you will be working quicker because you’ll recognize the needed specific areas in the pre-bent segments, and it will become more intuitive as to where you need to make your cuts and how to make things flow.
21. The third tube was squared up with the protractor, tacked in place on the flange, and clamped to the other two tubes at the back where the collector will eventually be.
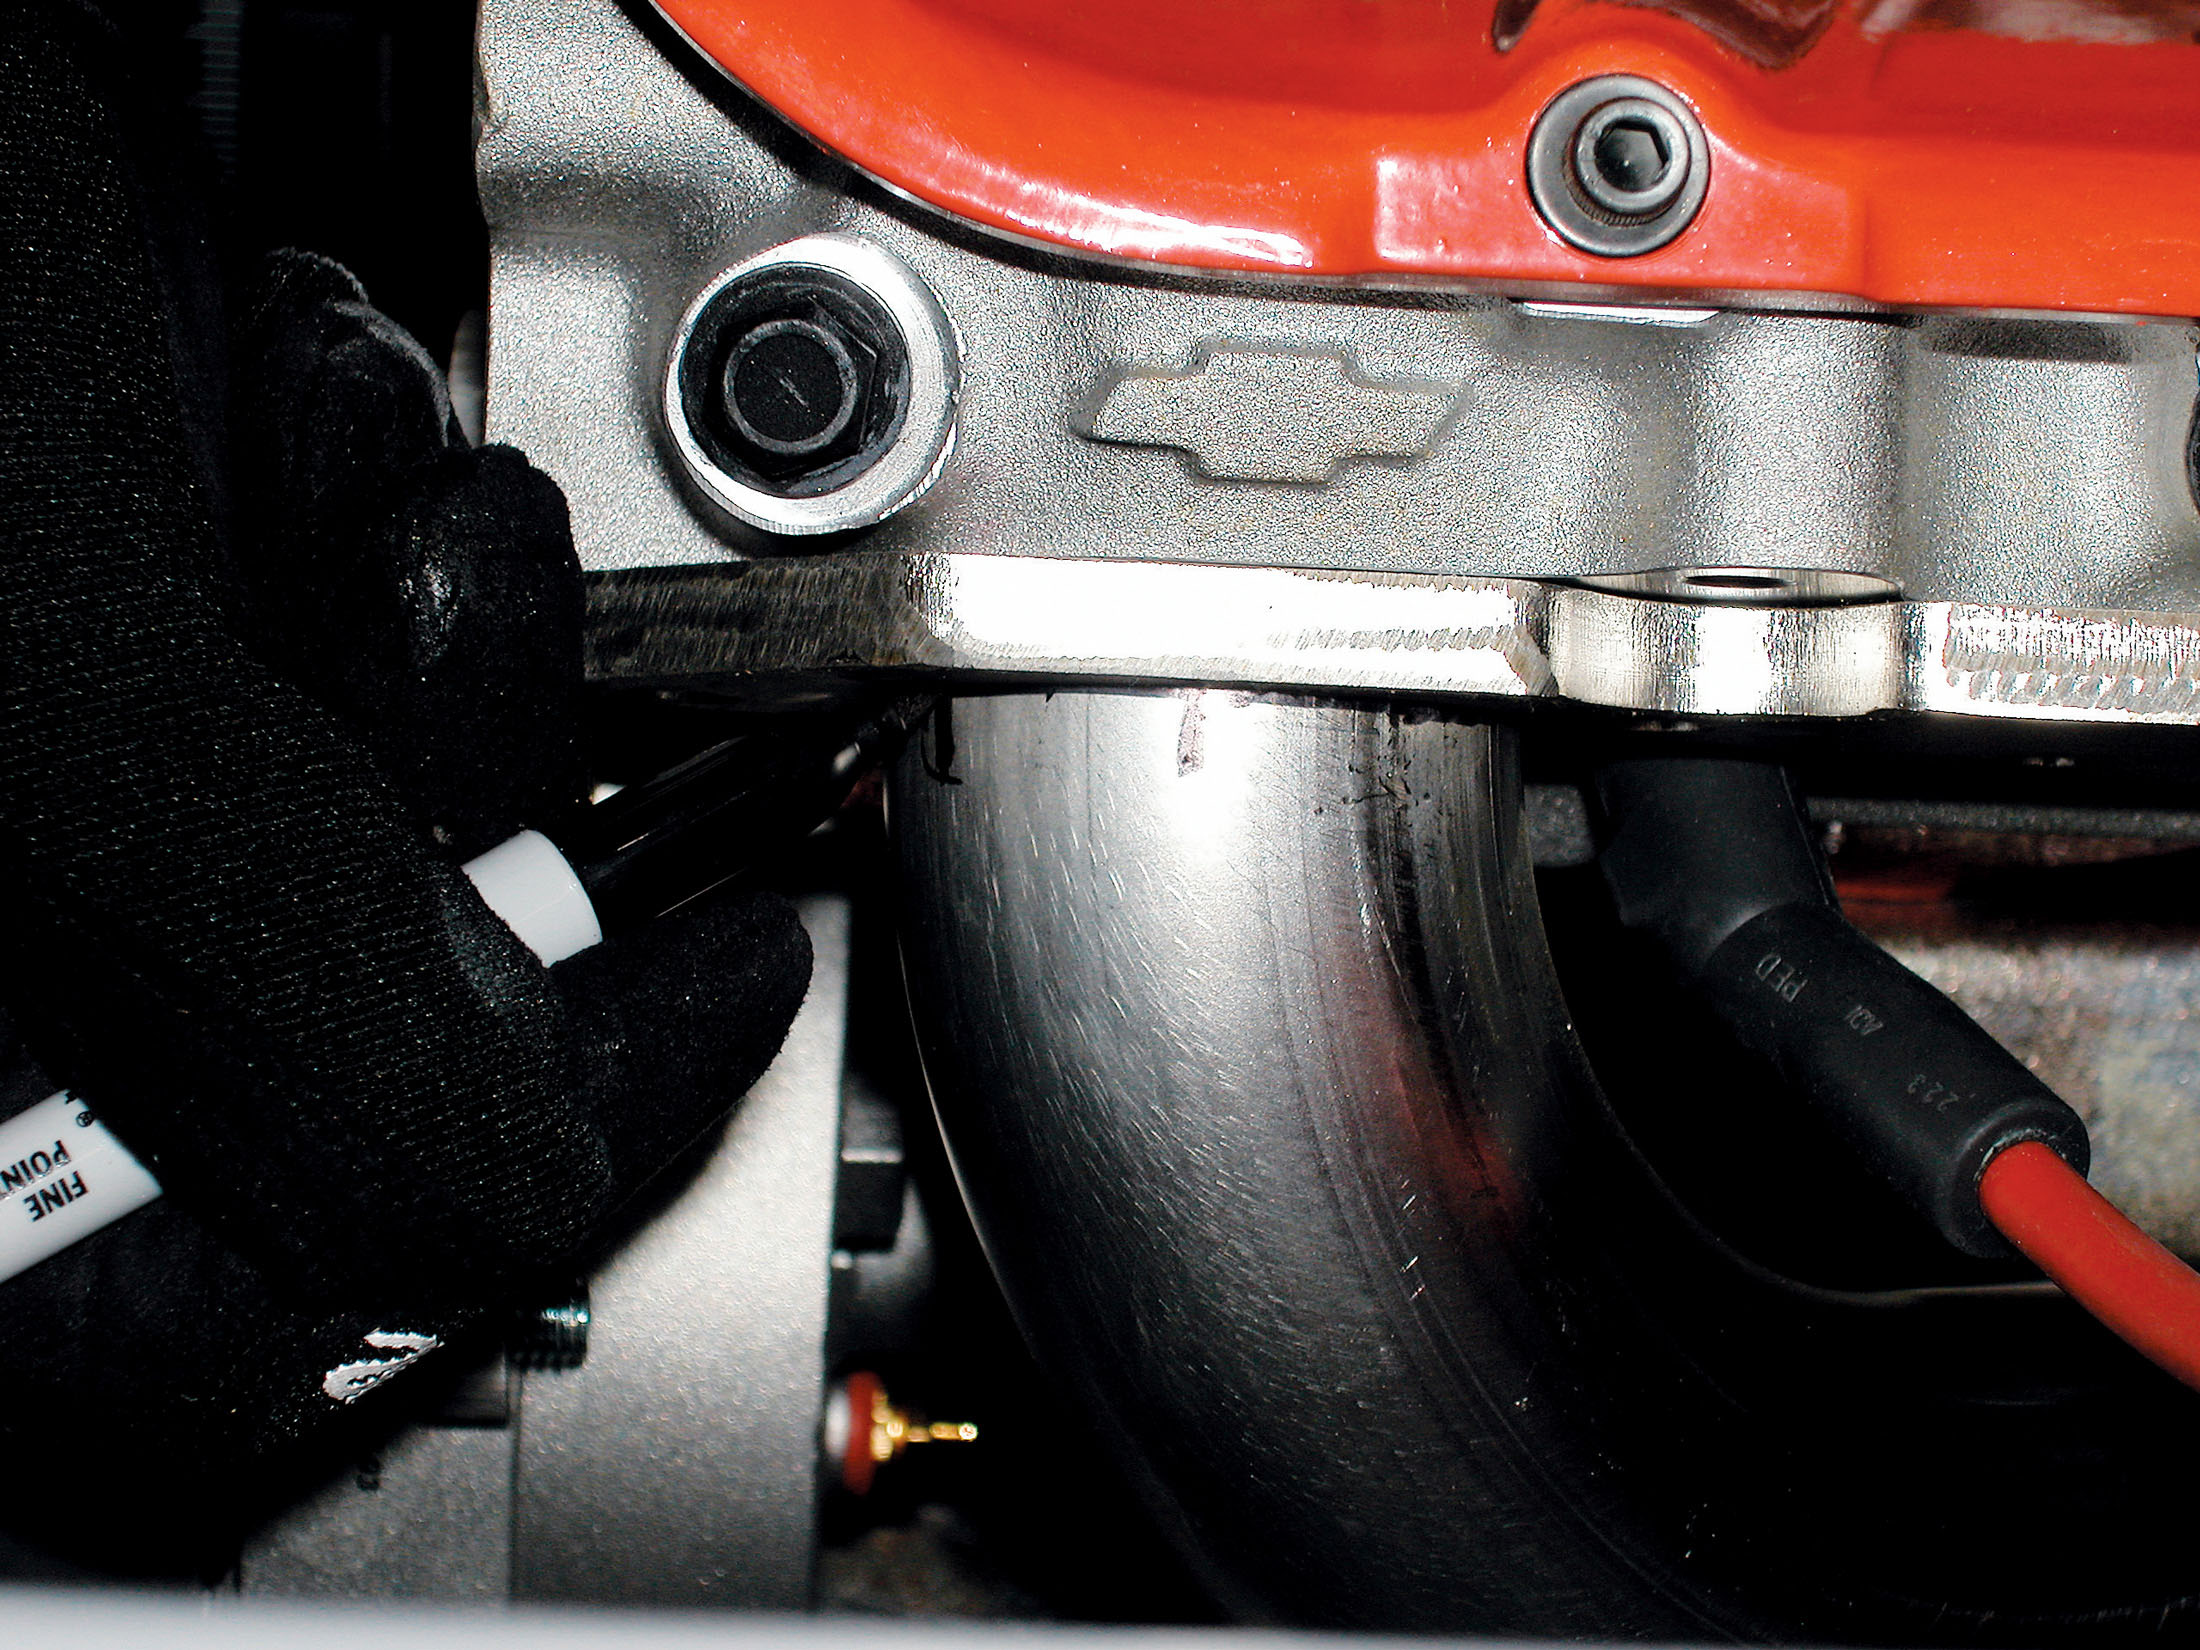
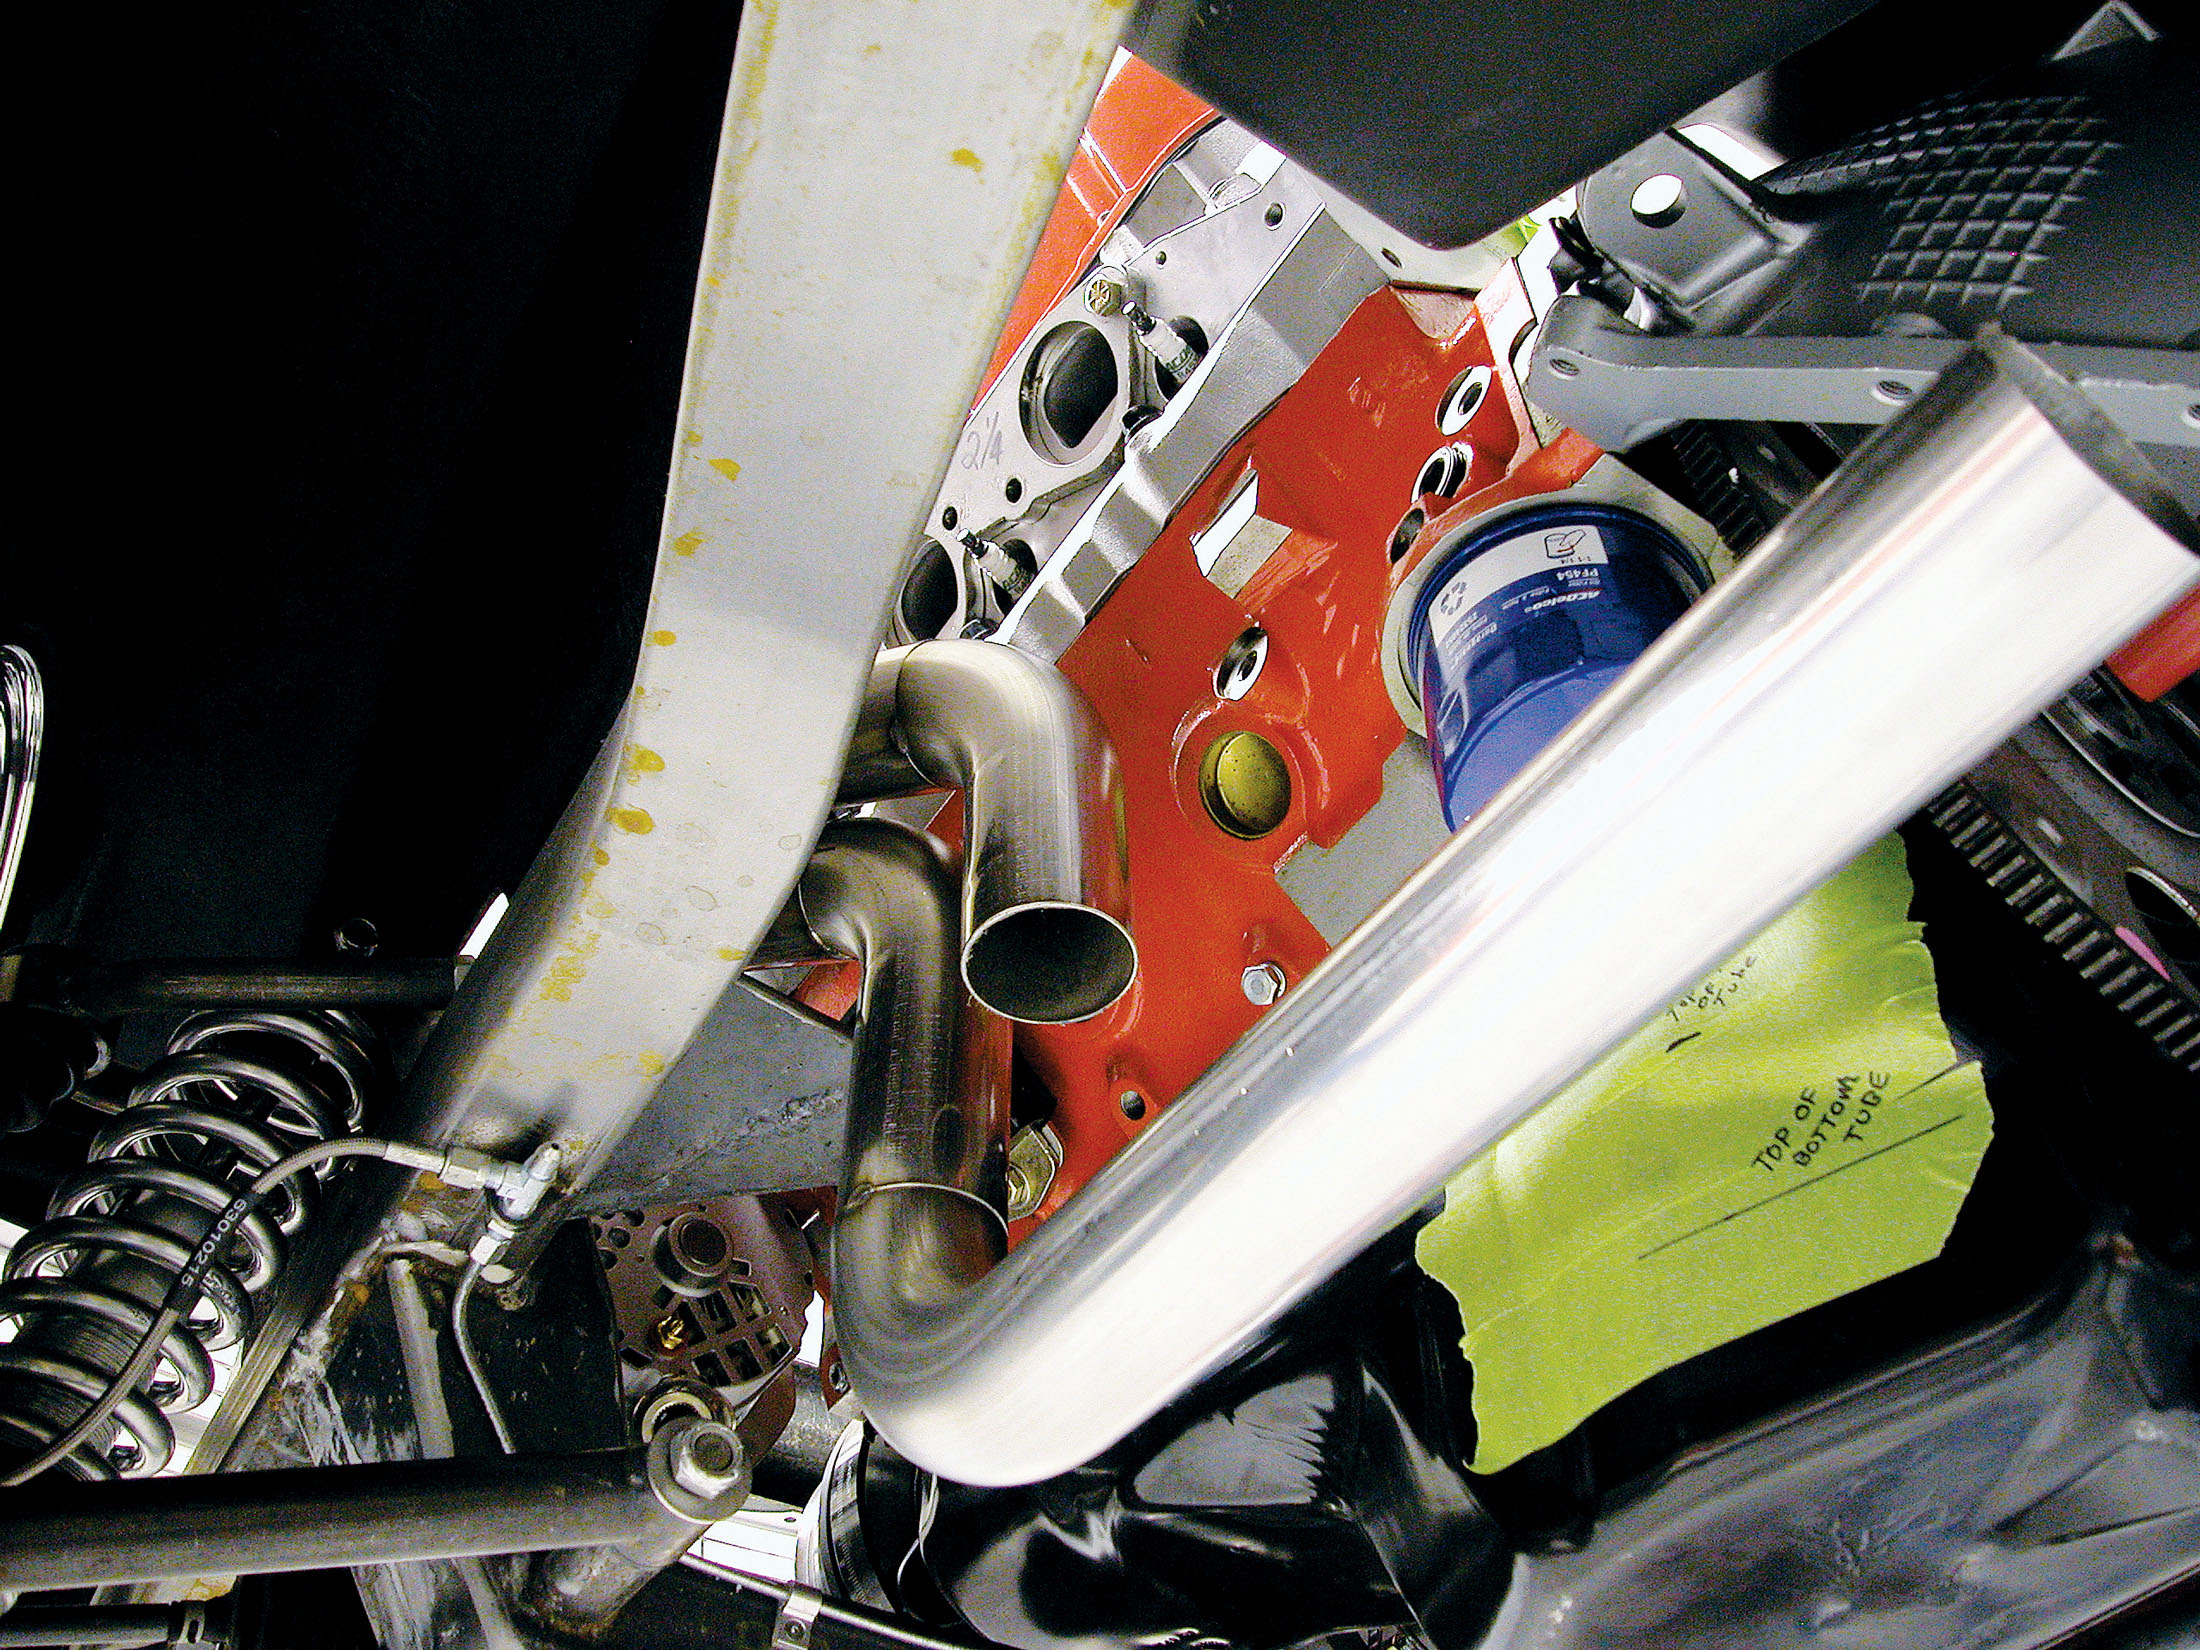
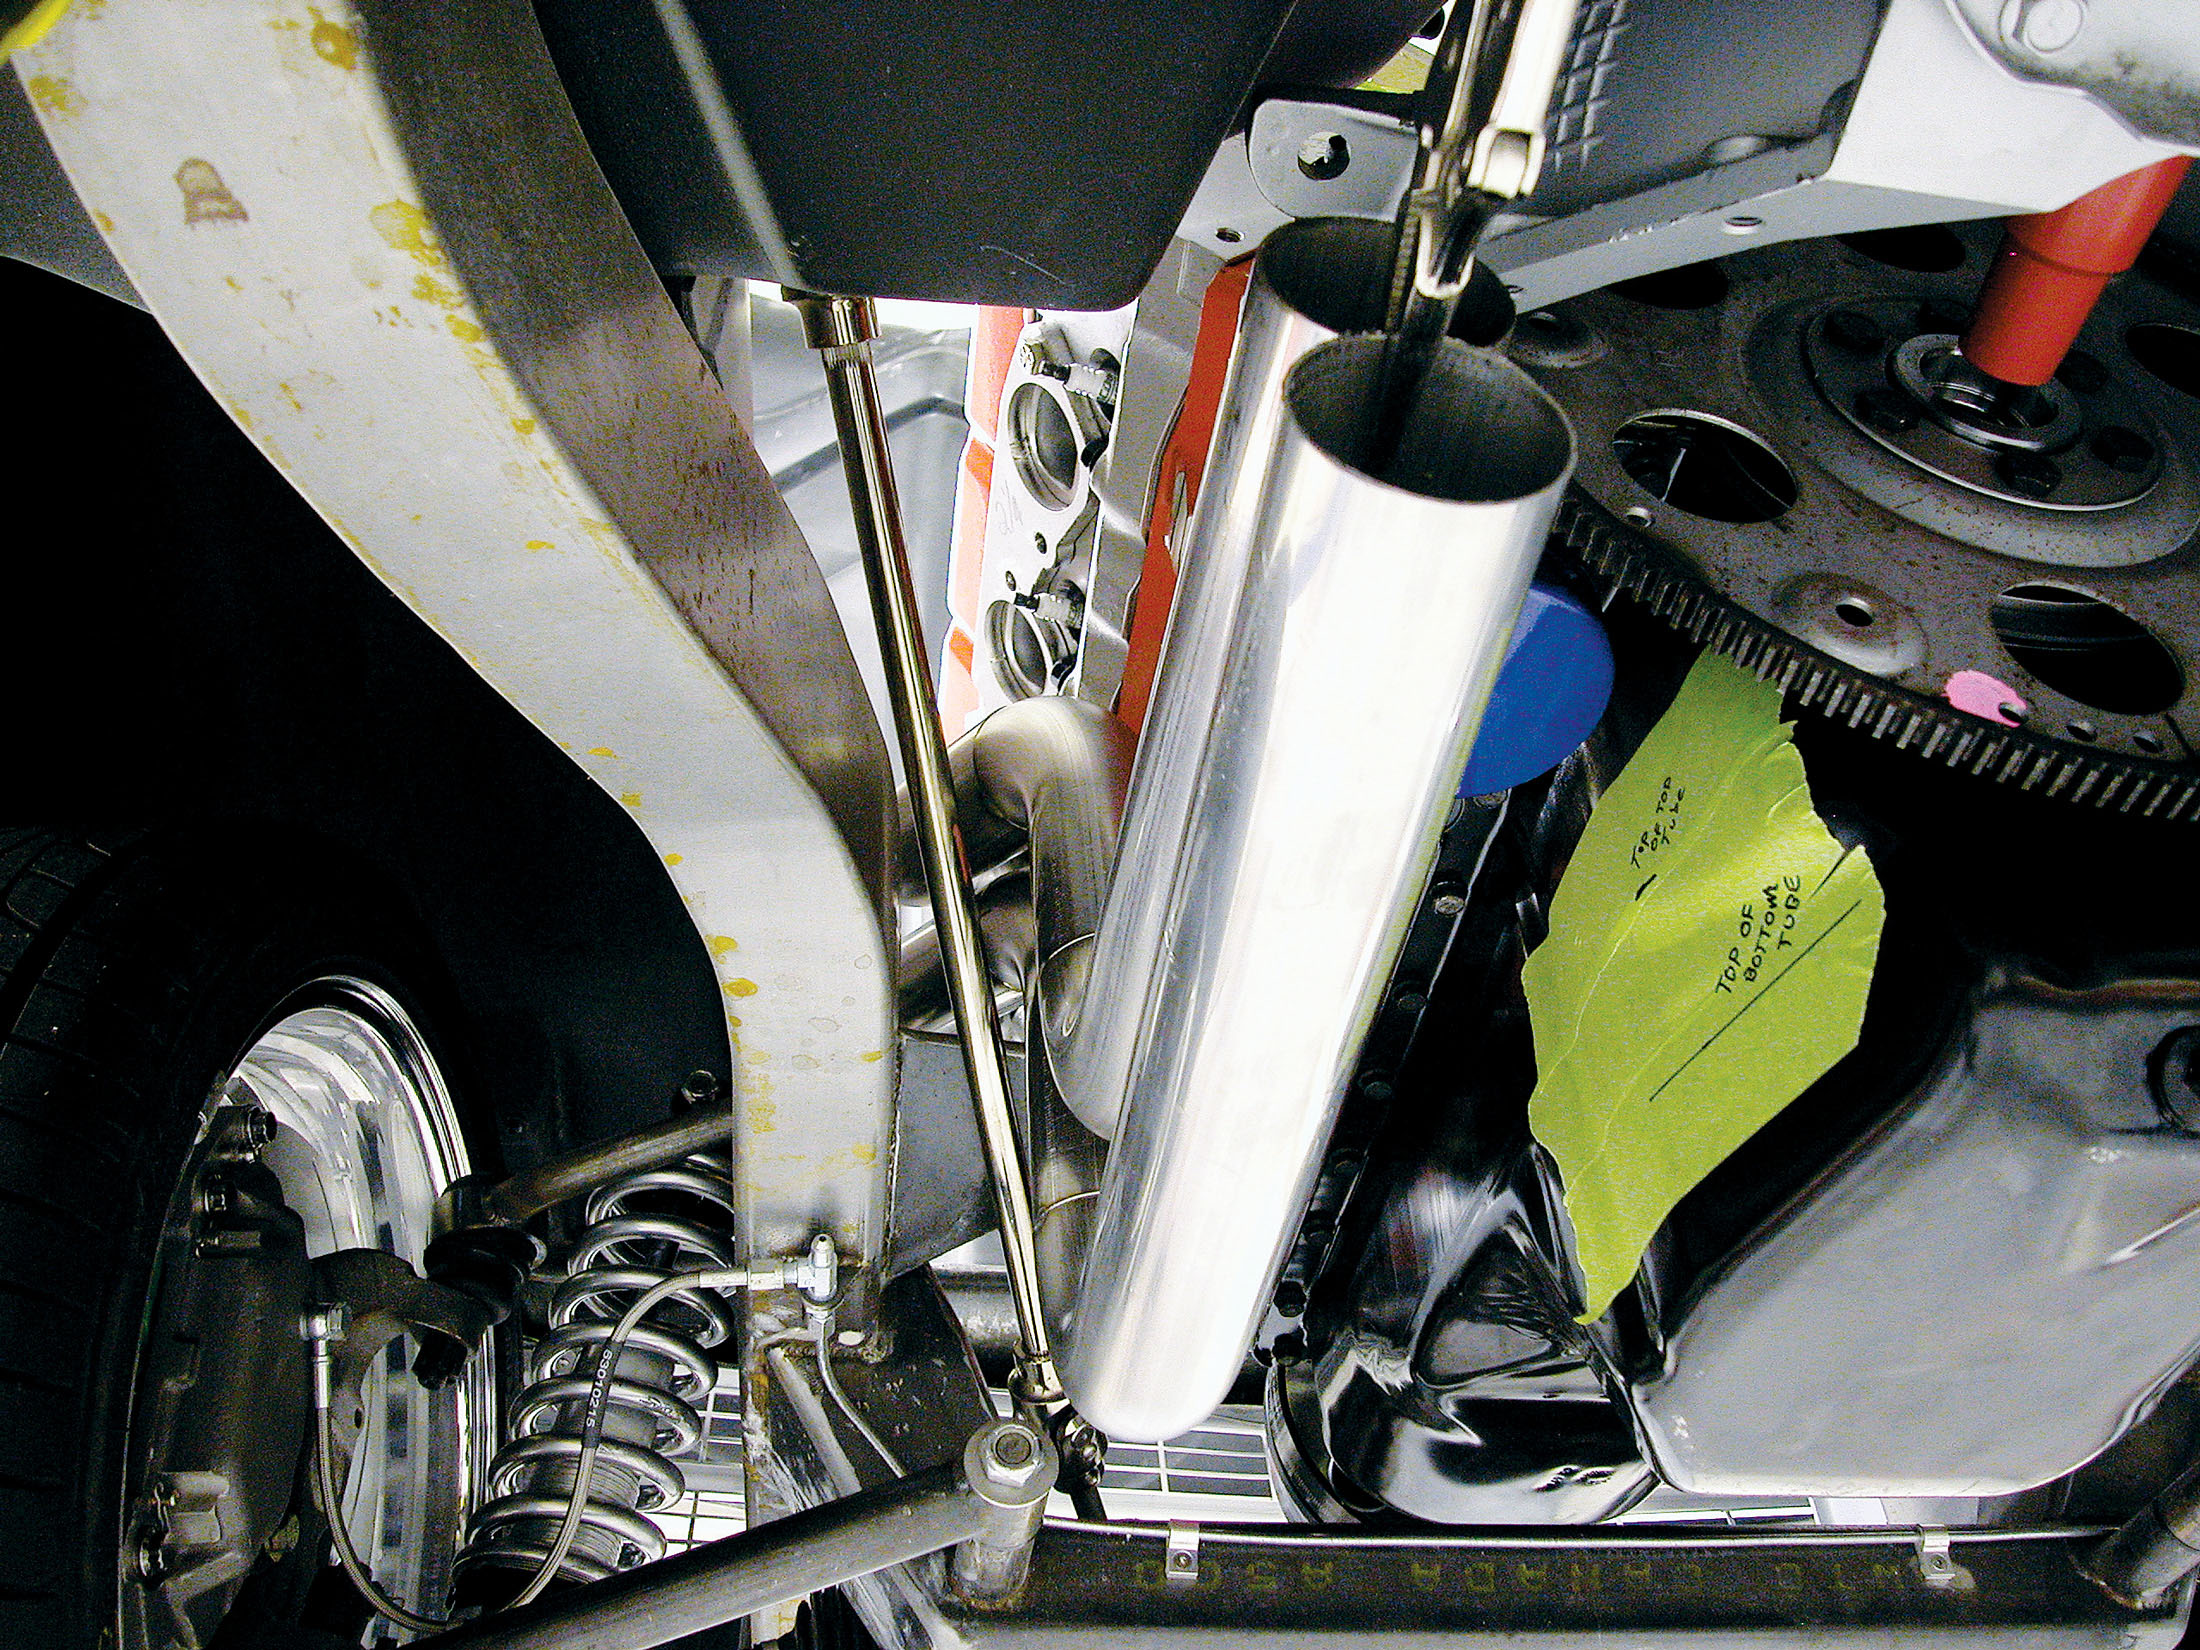
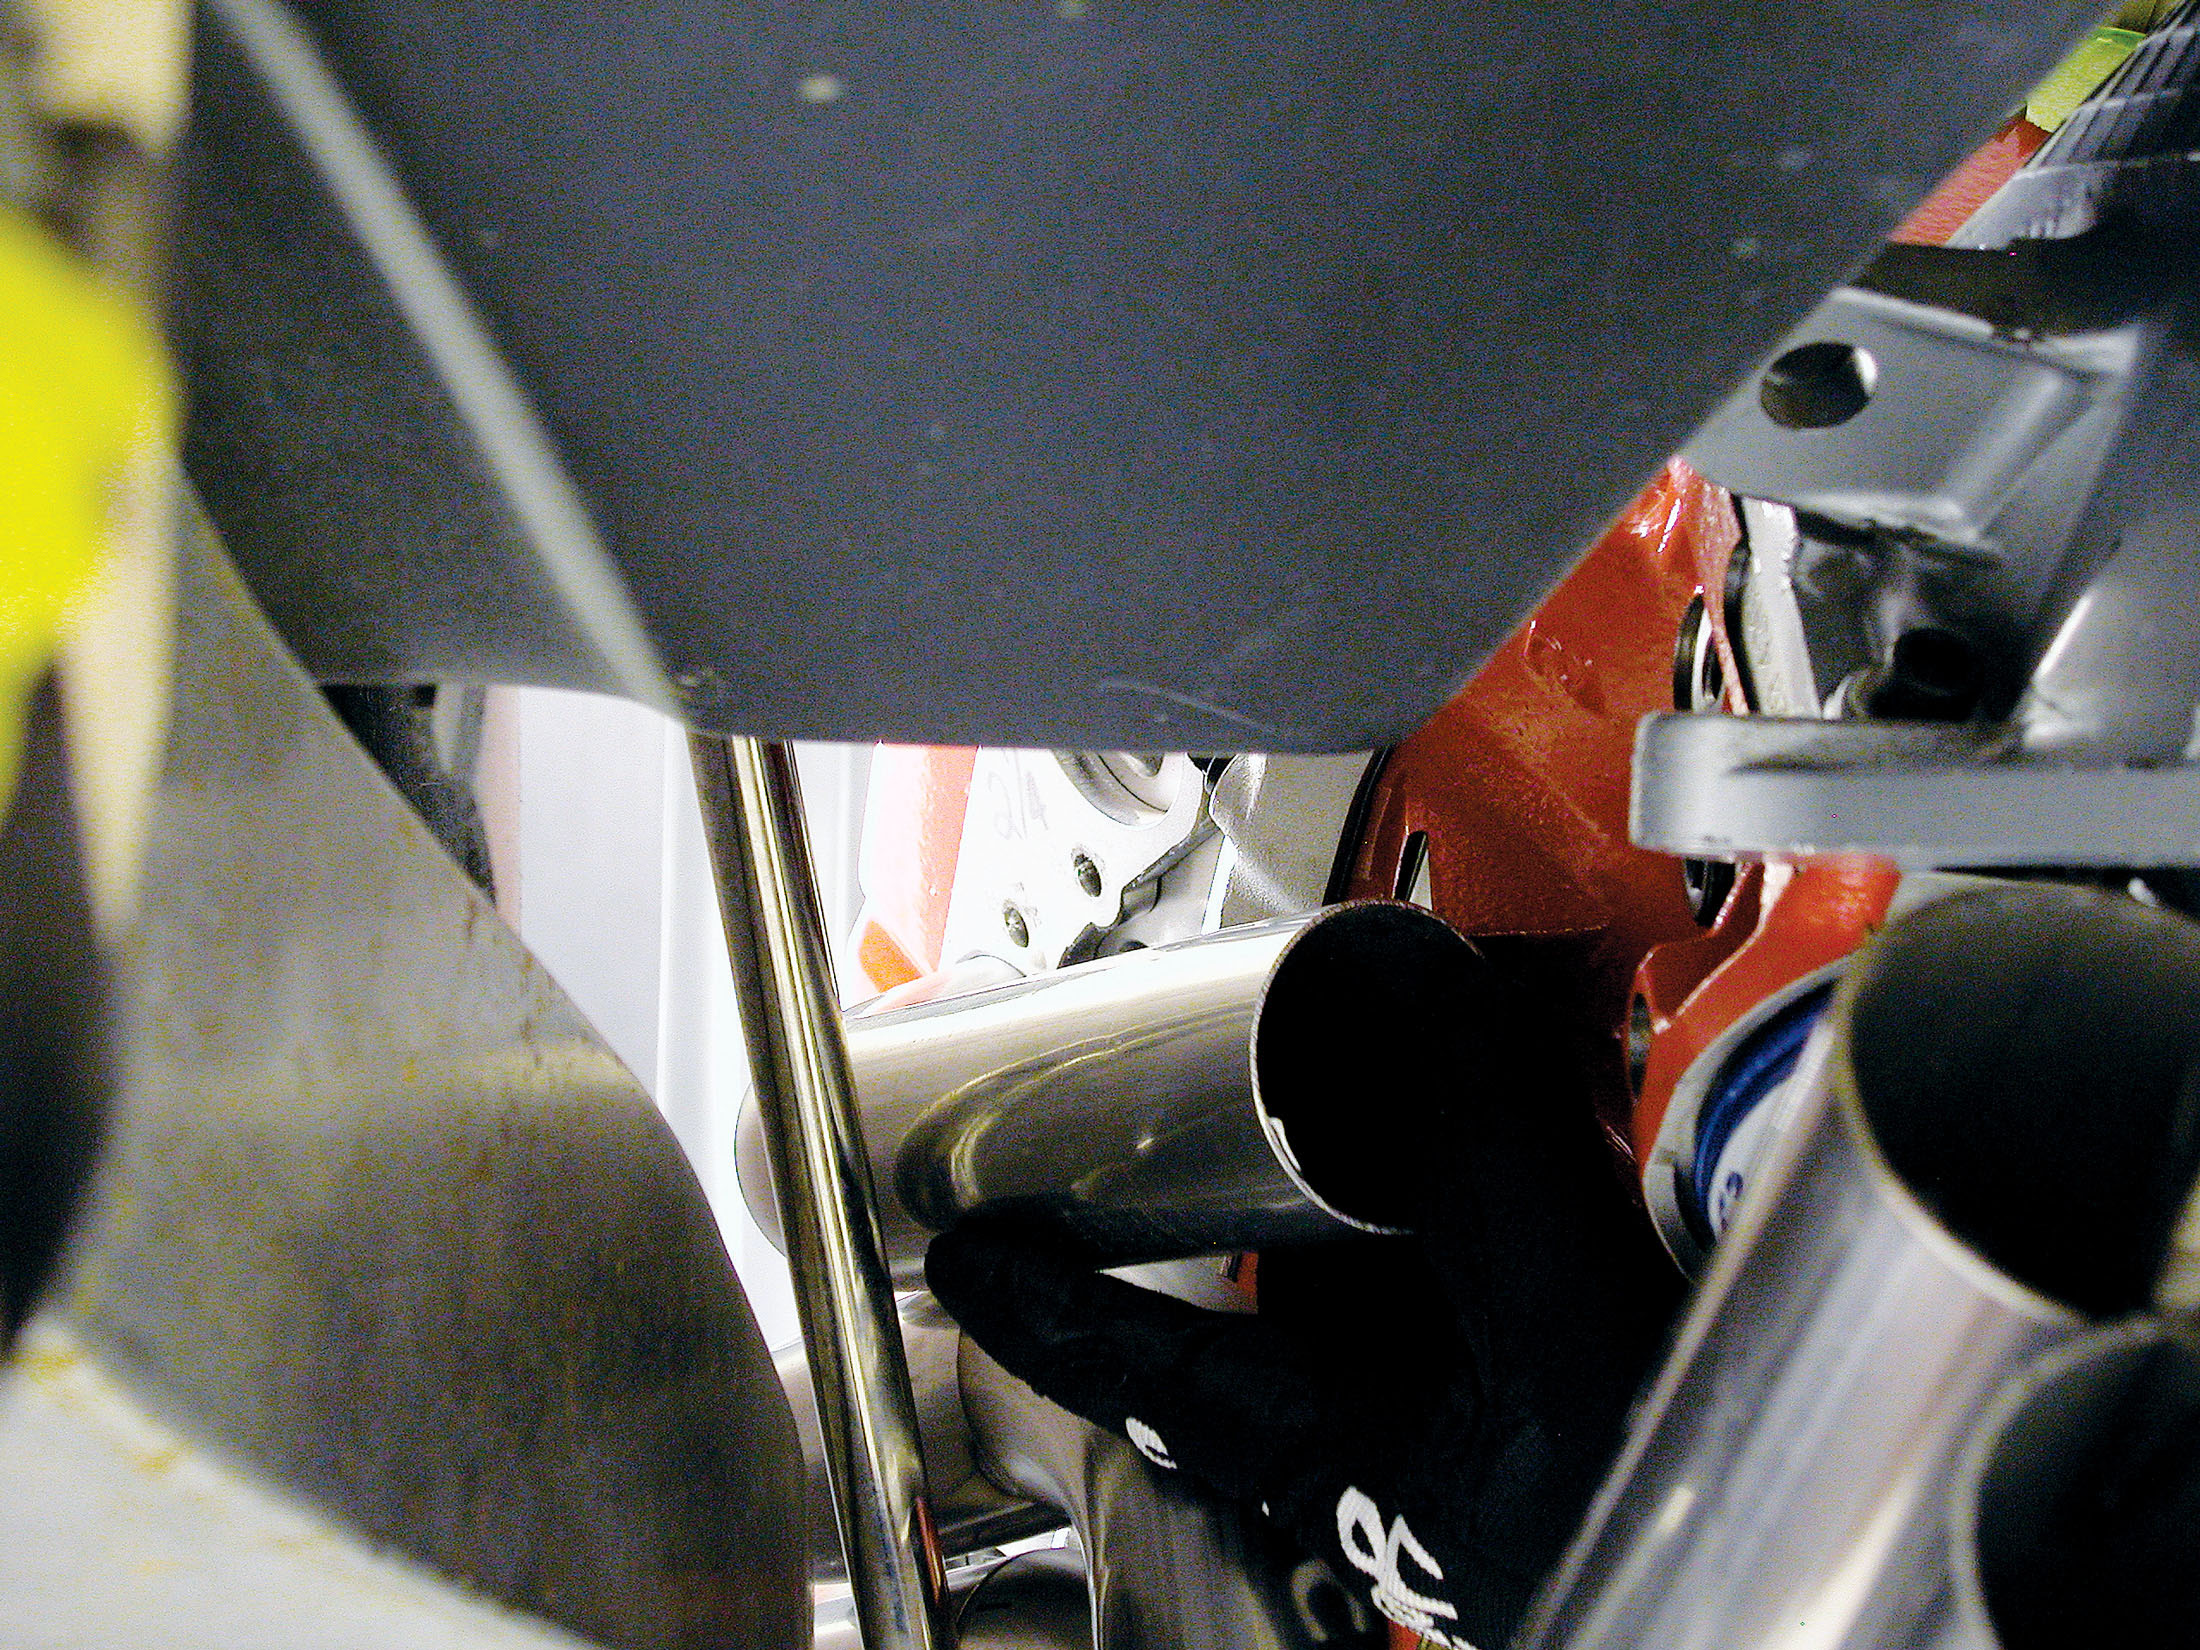
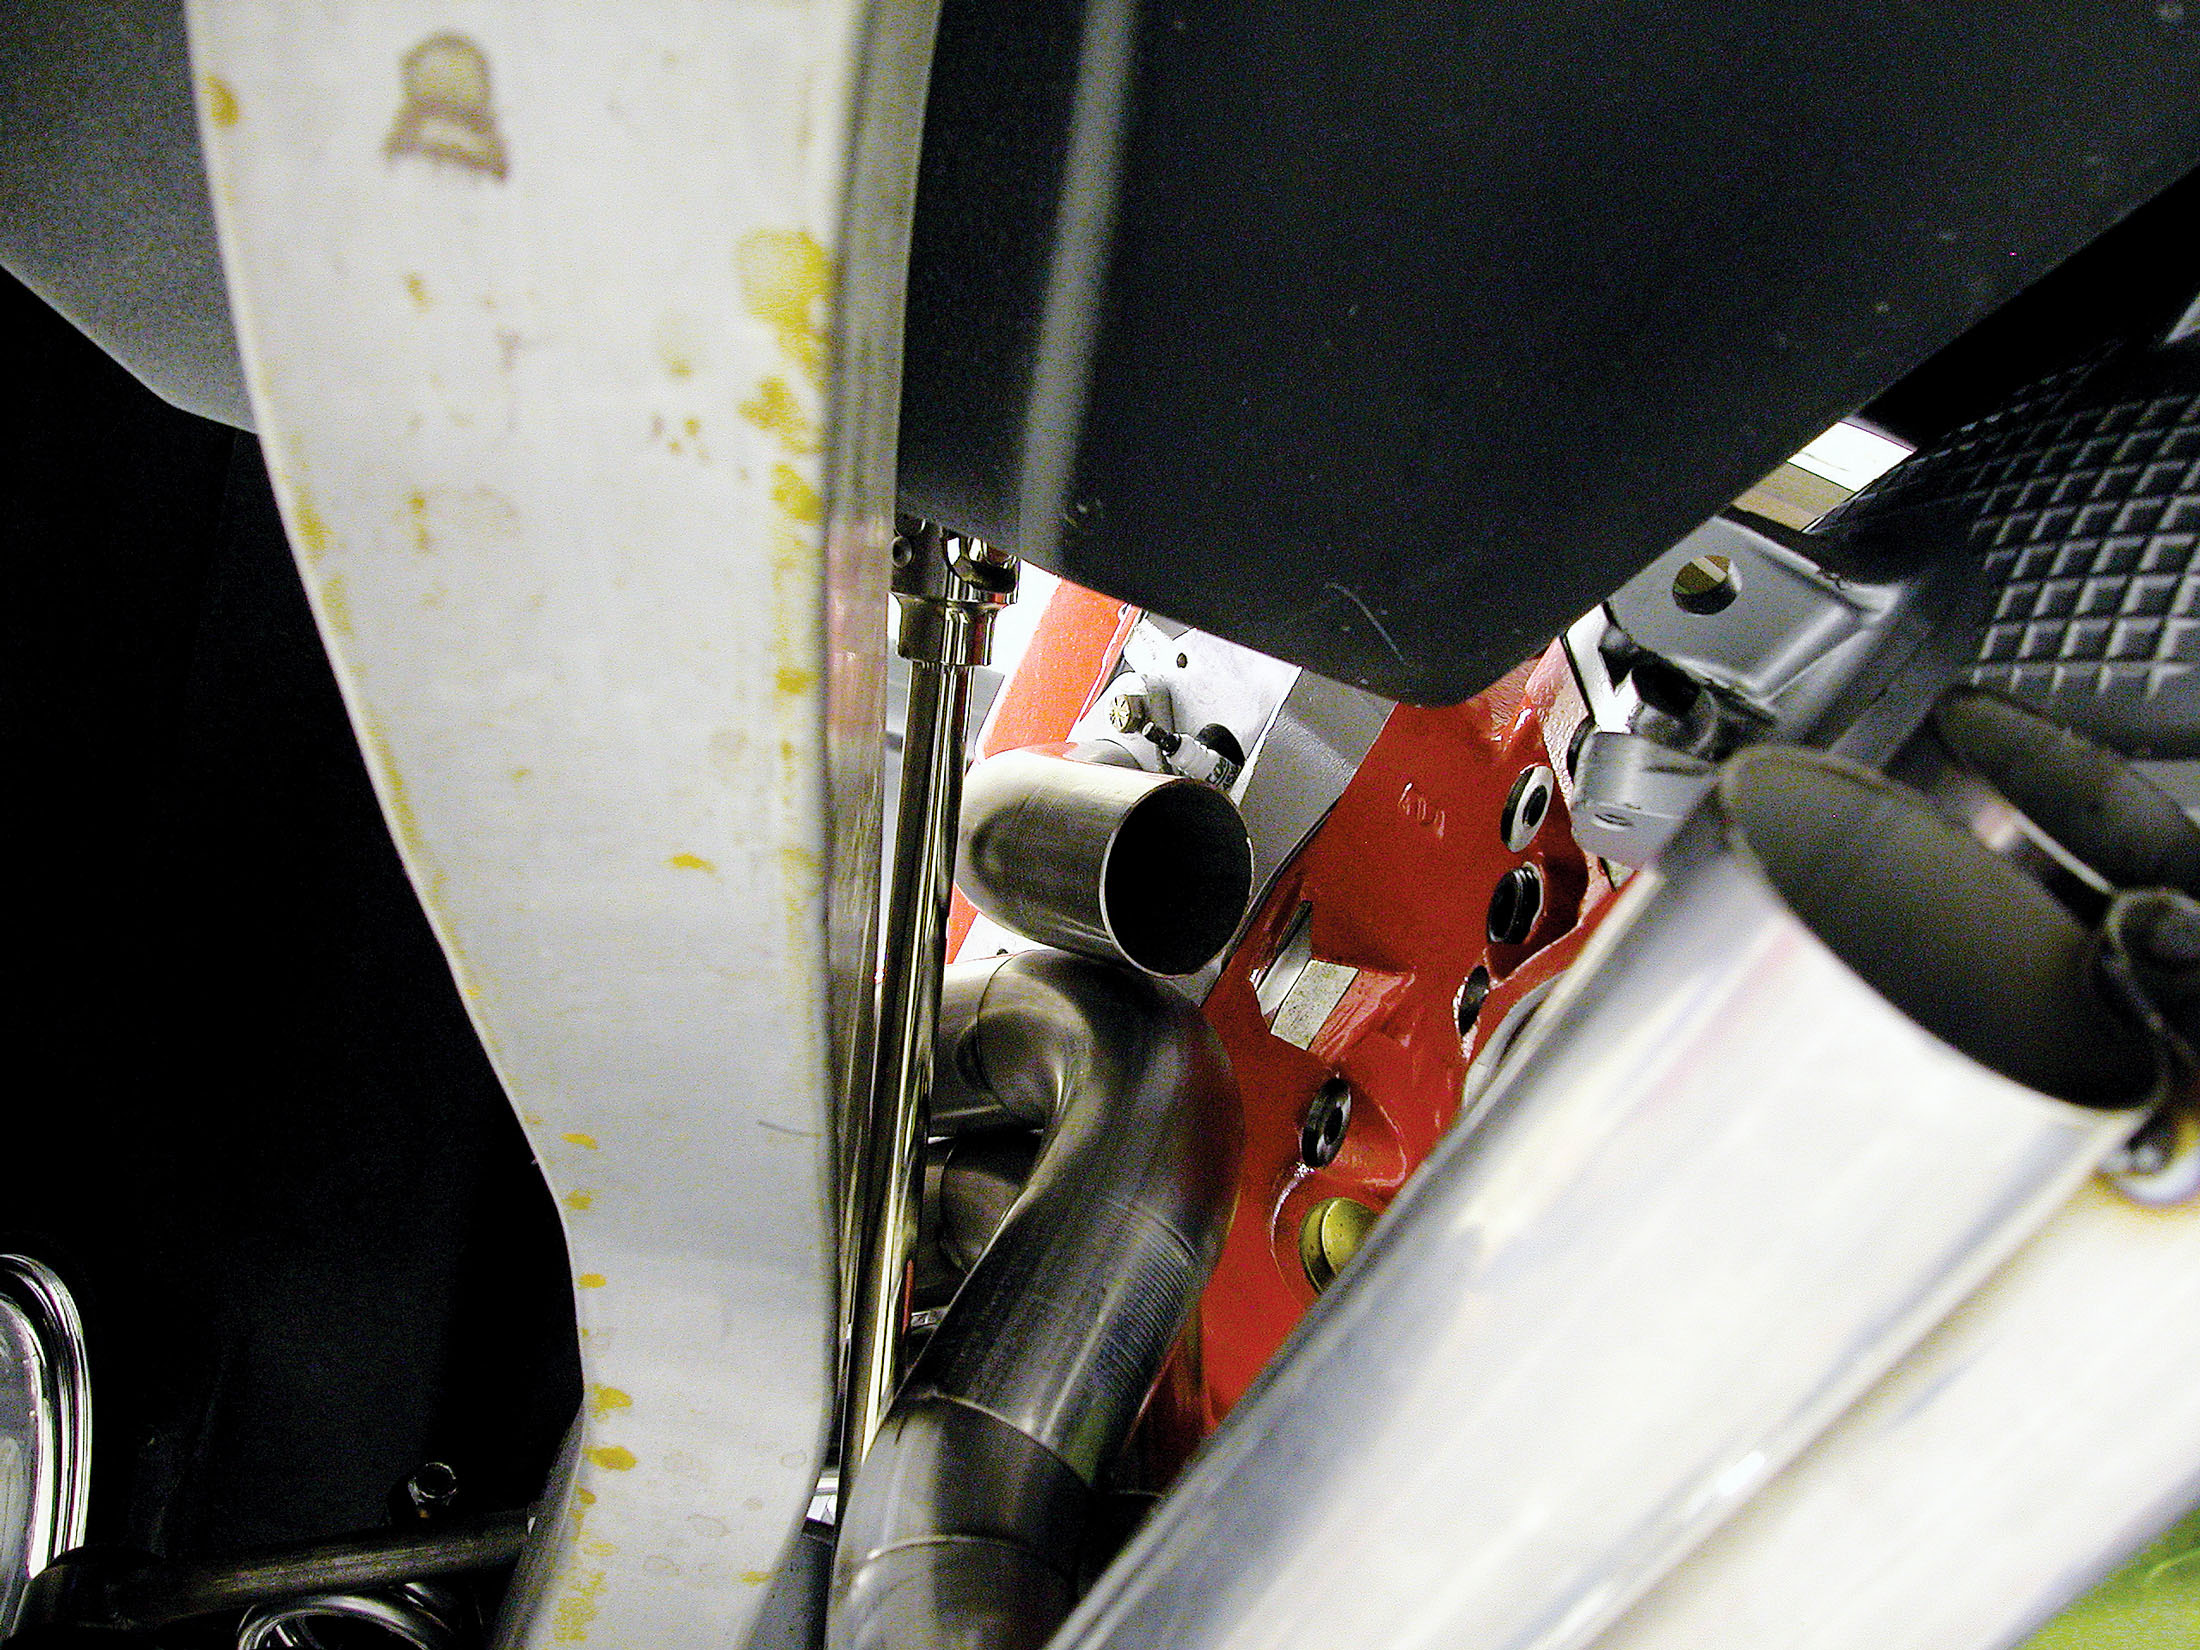
22. The final tube is begun just like the others were. Notice the proximity to the steering column—there’s plenty of room between the column and the tubes.
23. This probably isn’t fair for the majority of builders, but the steering column on the ProMax Nova is fairly easy to remove, which will make getting the completed header in and out much easier. The shaft was left in place when the placement of the tubes was being determined, but it came out a few times to aid in installing and extracting the whole header assembly.
24. Once all four tubes are installed on the flange, they are squared up on the chop saw, cutting through all four at once in preparation for the collector. On the first header, the location of the cut can be eyeballed or it is worked out to clear any under-car obstacles. Trimming the primaries on the second header will be determined by the length of the first header.
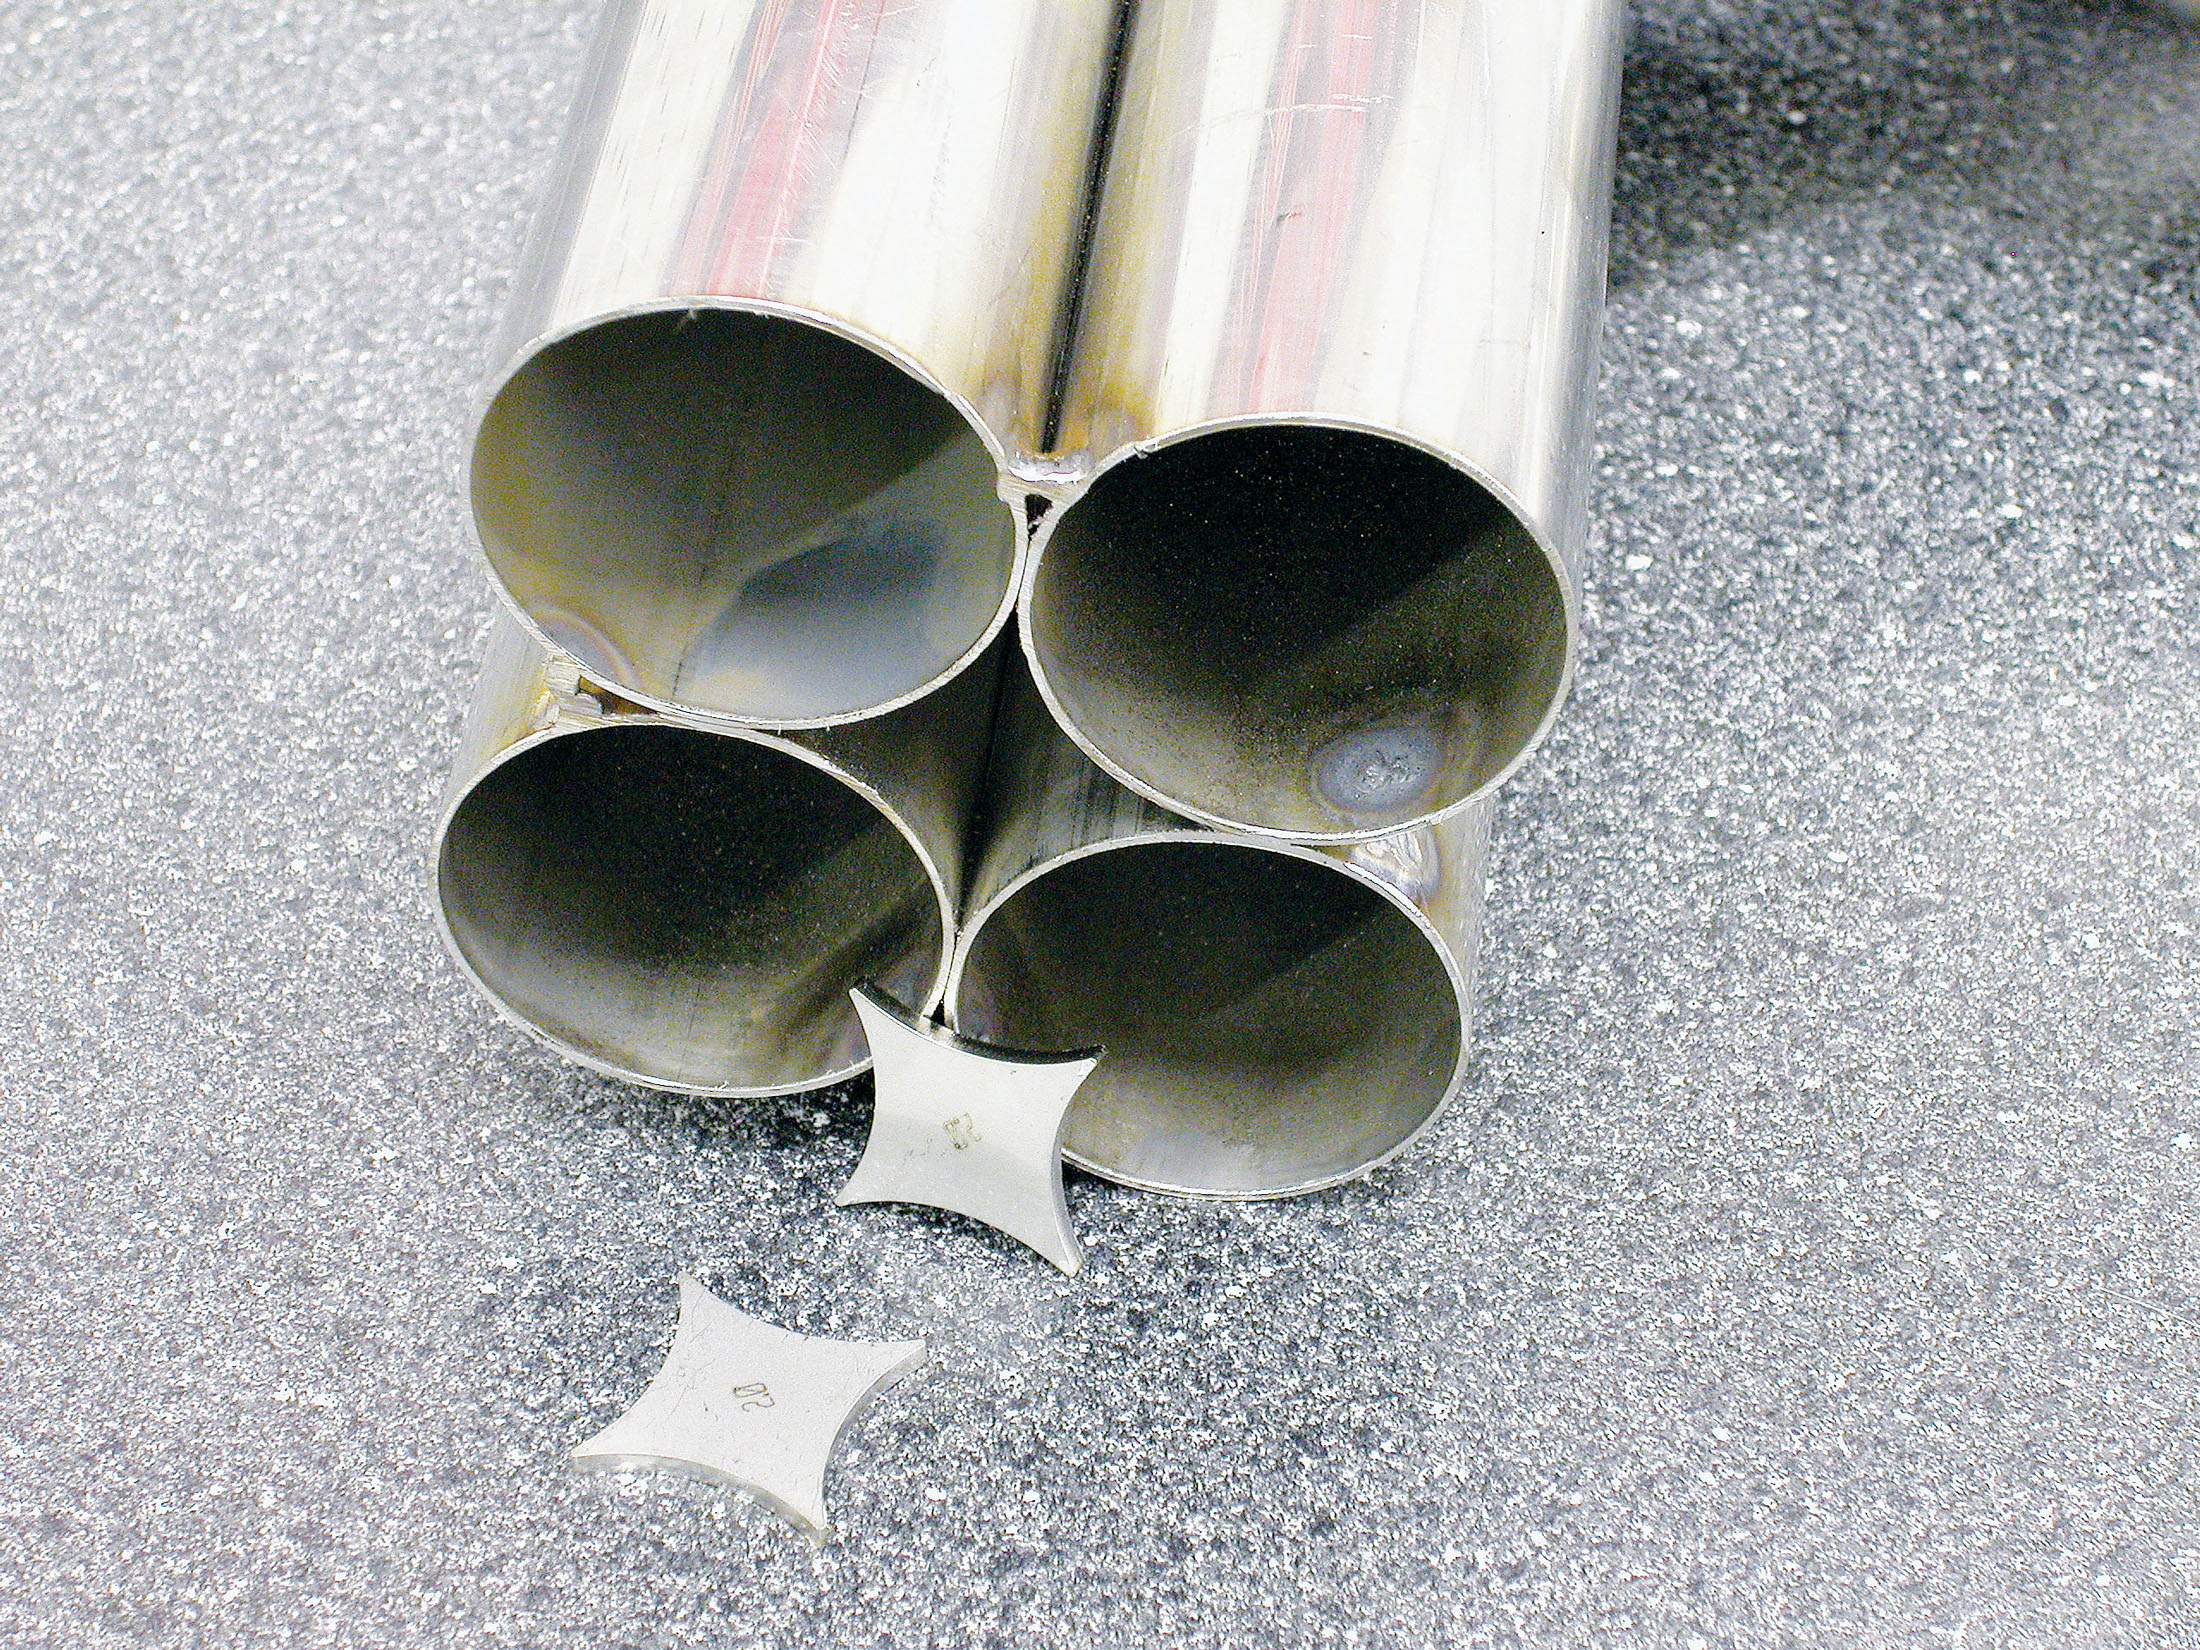
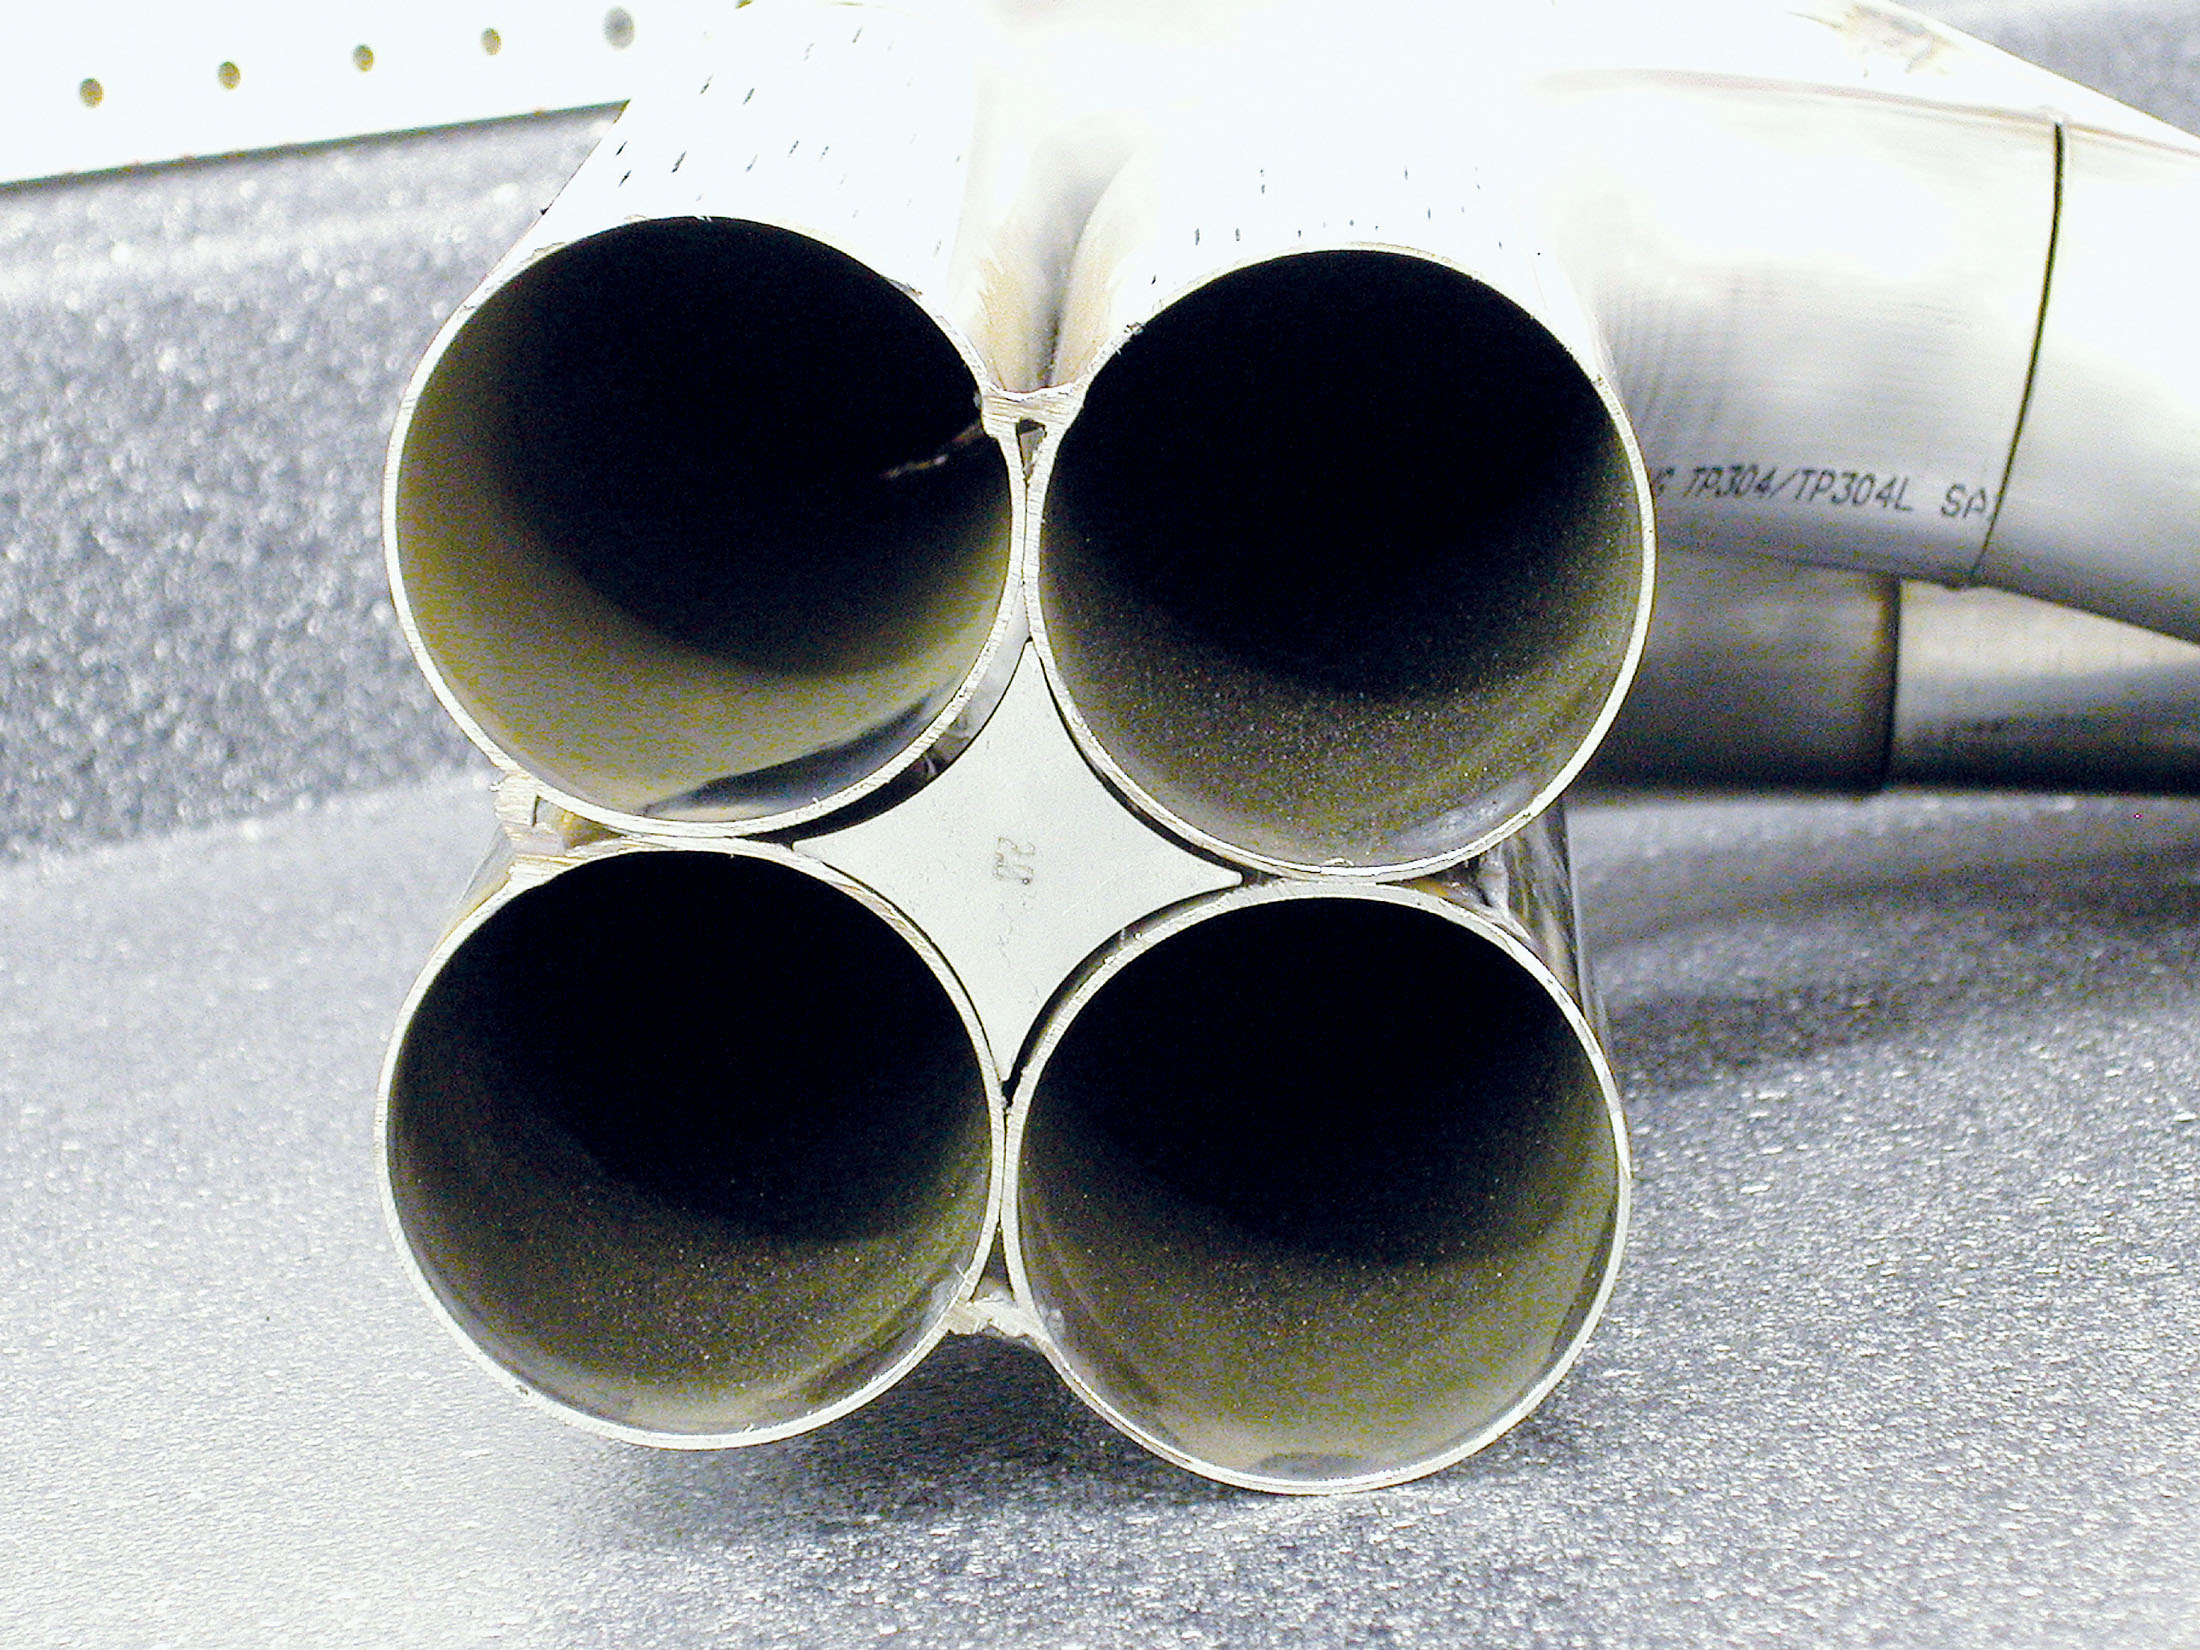
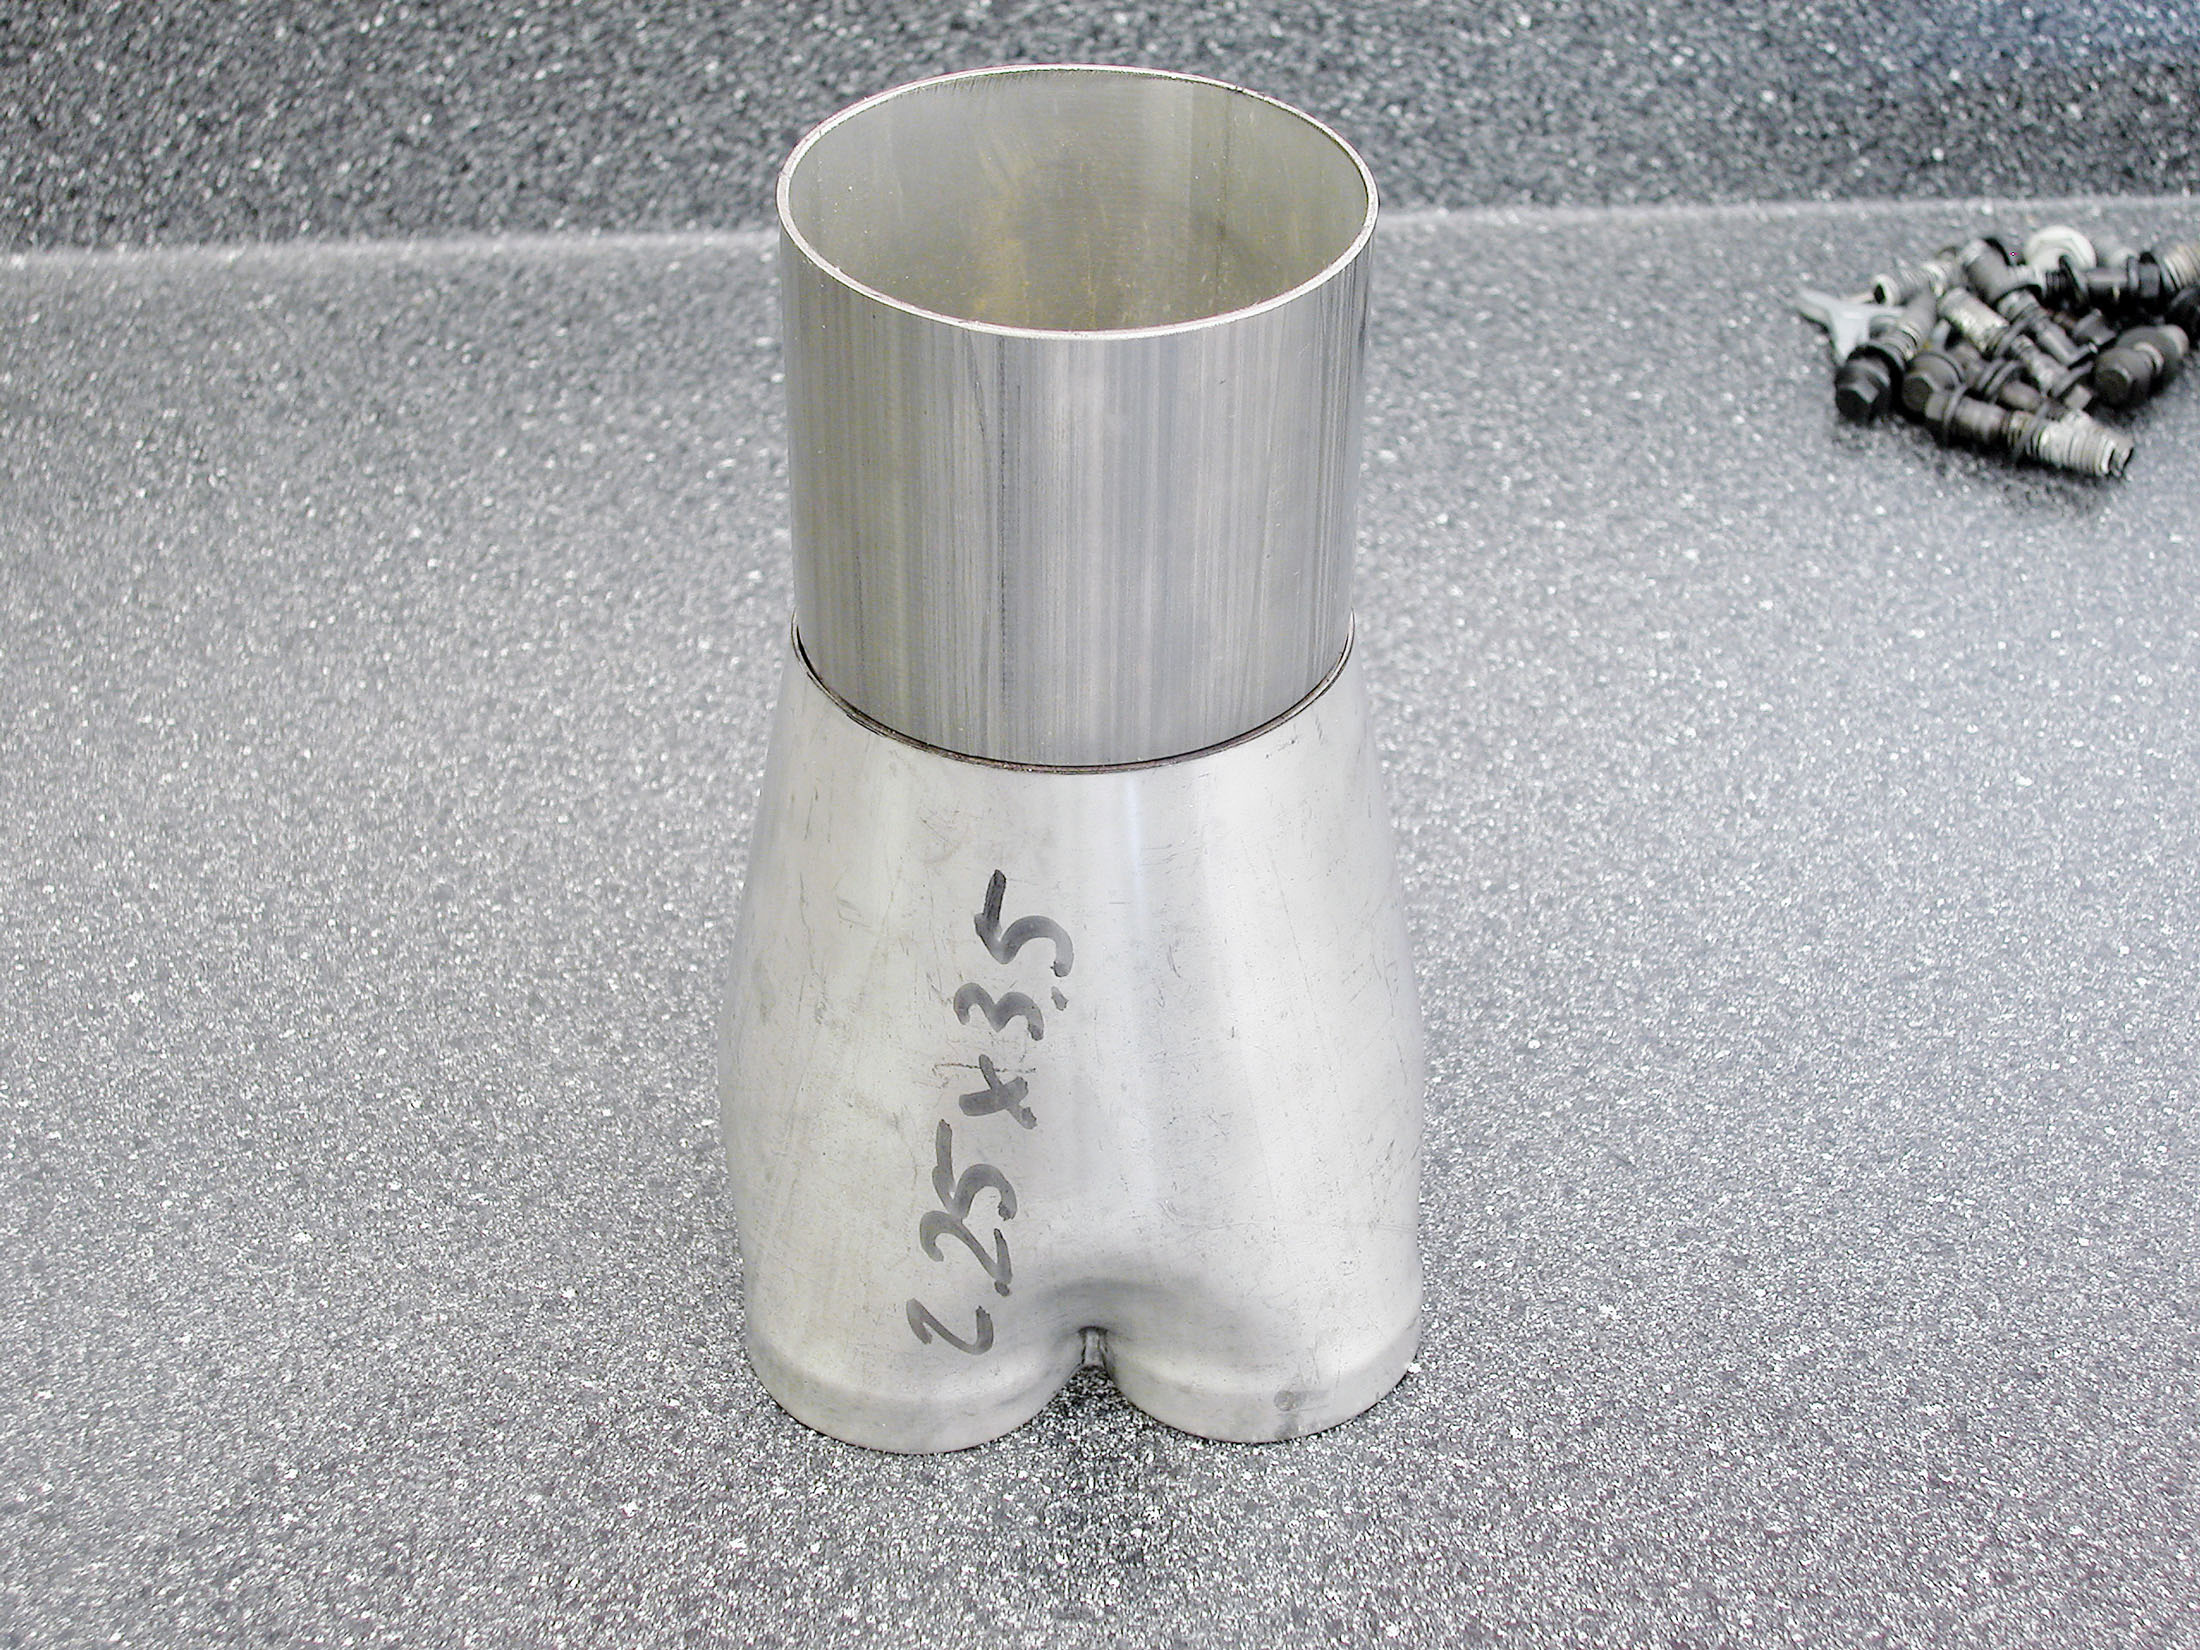
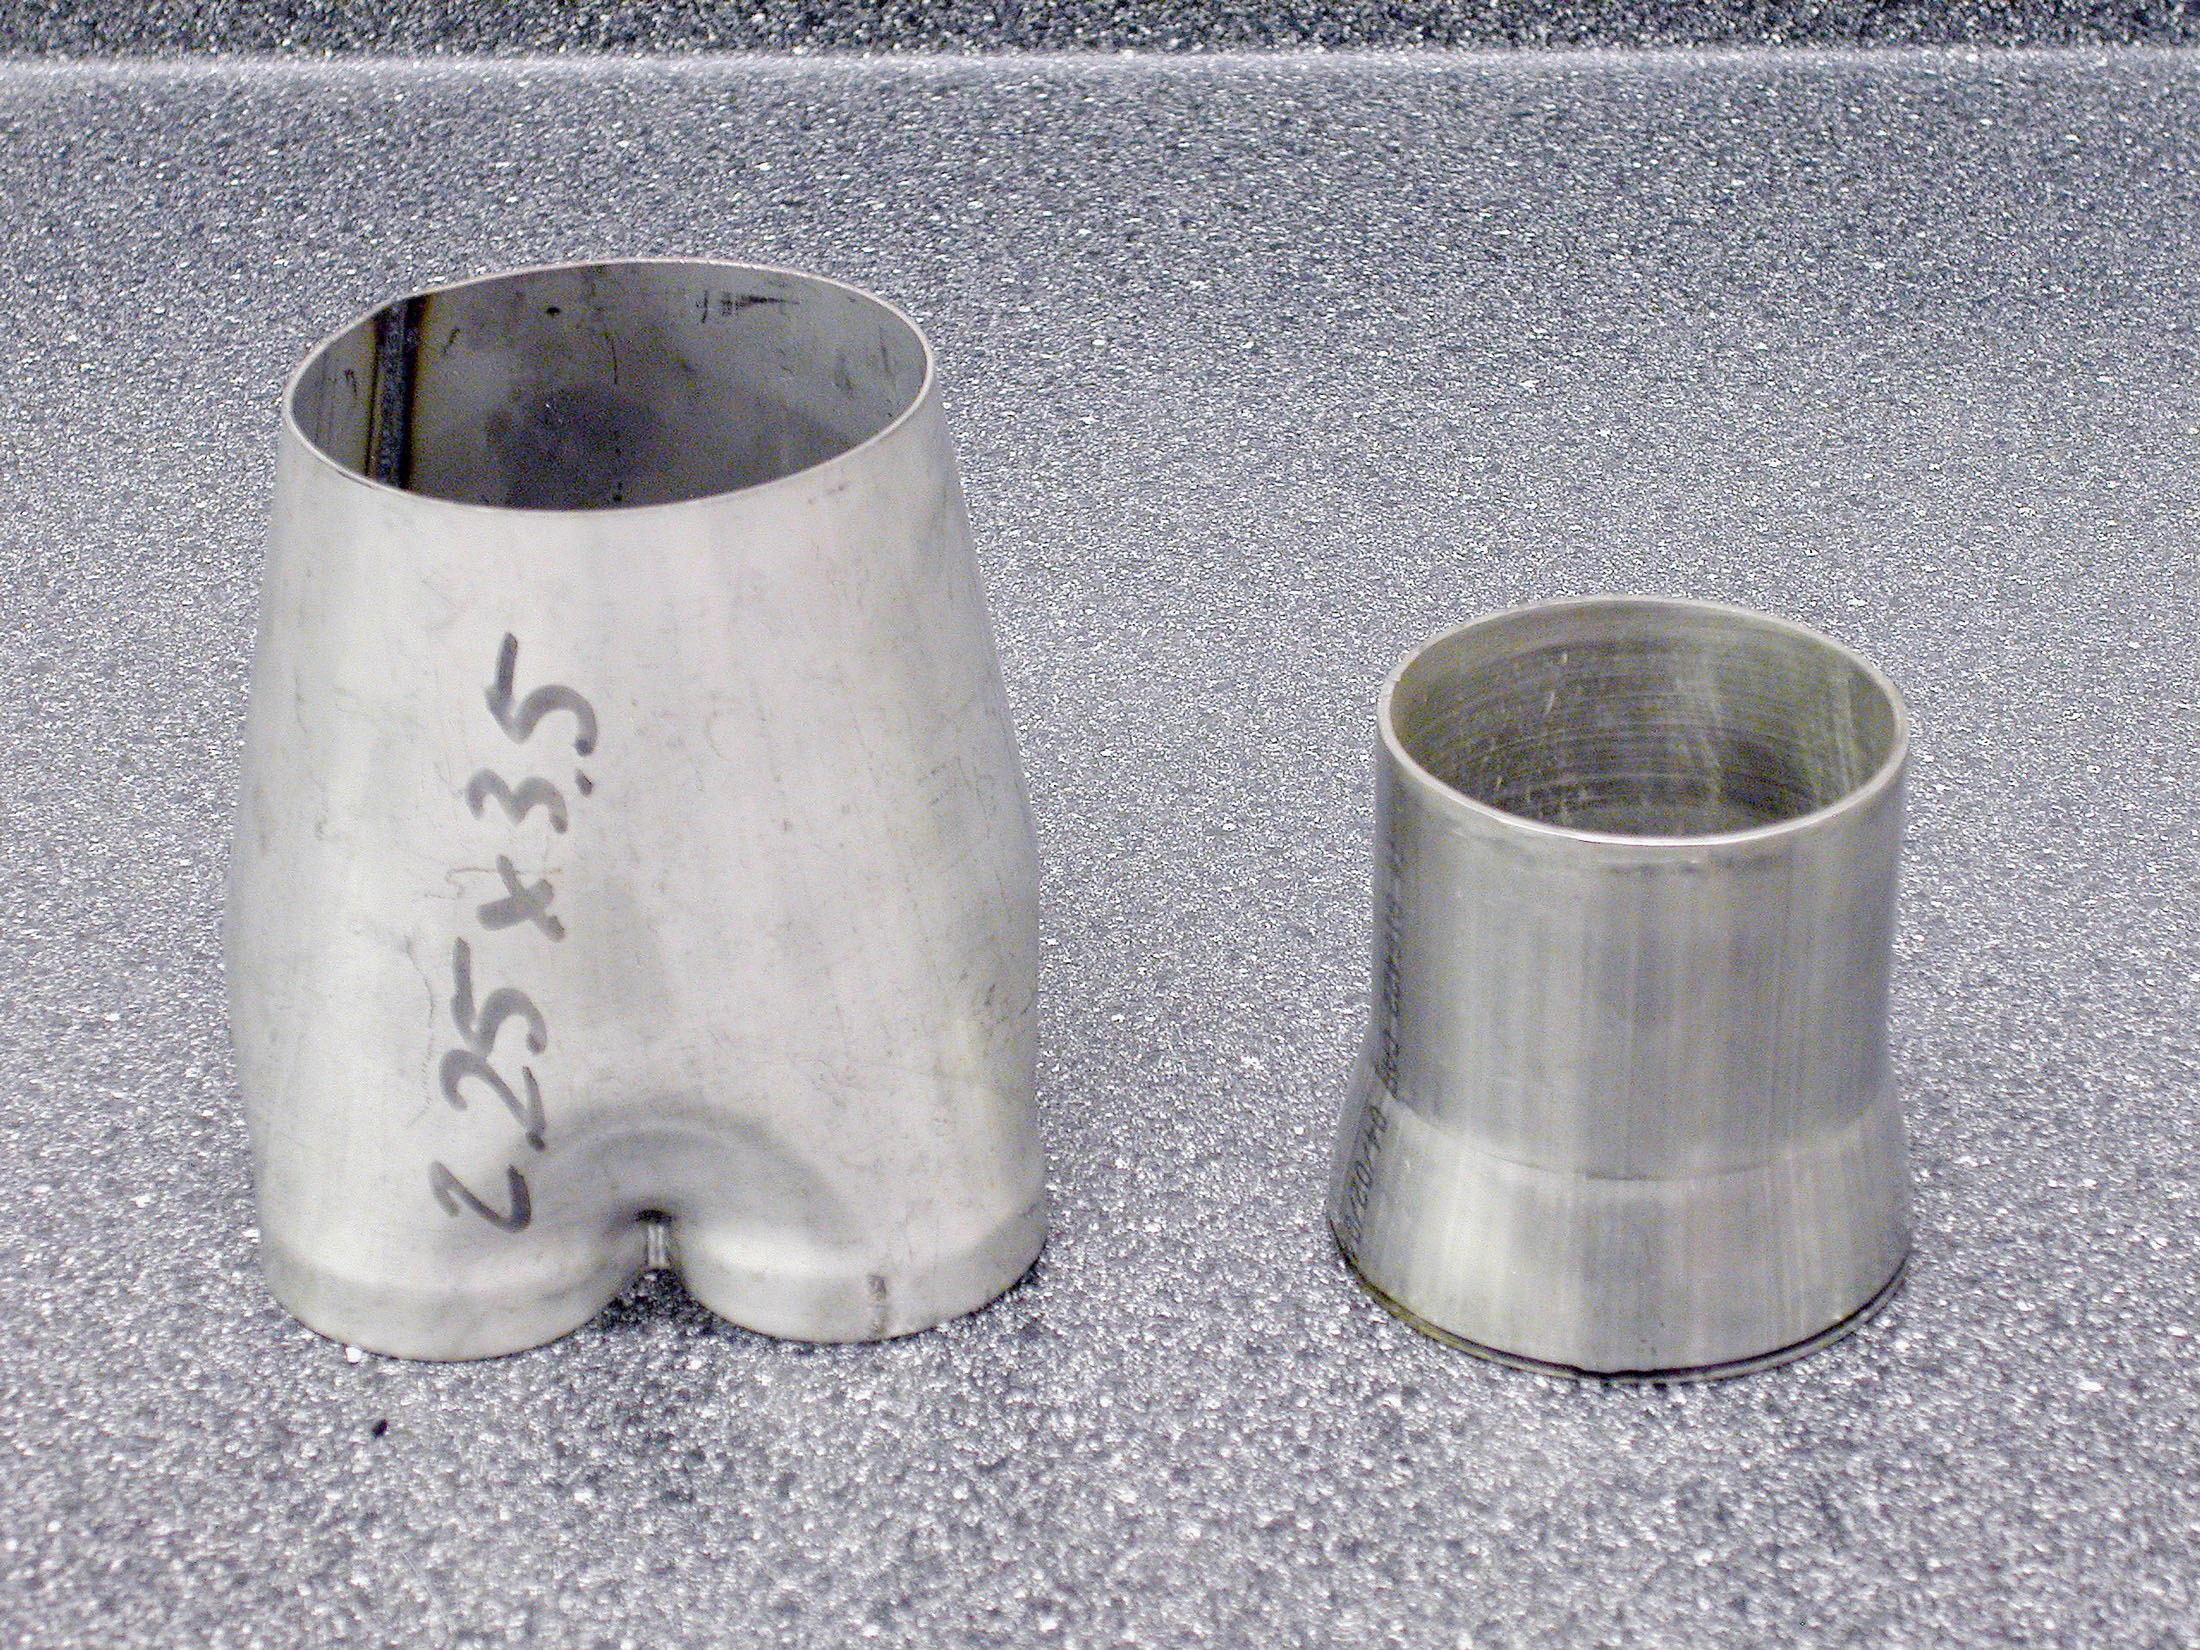
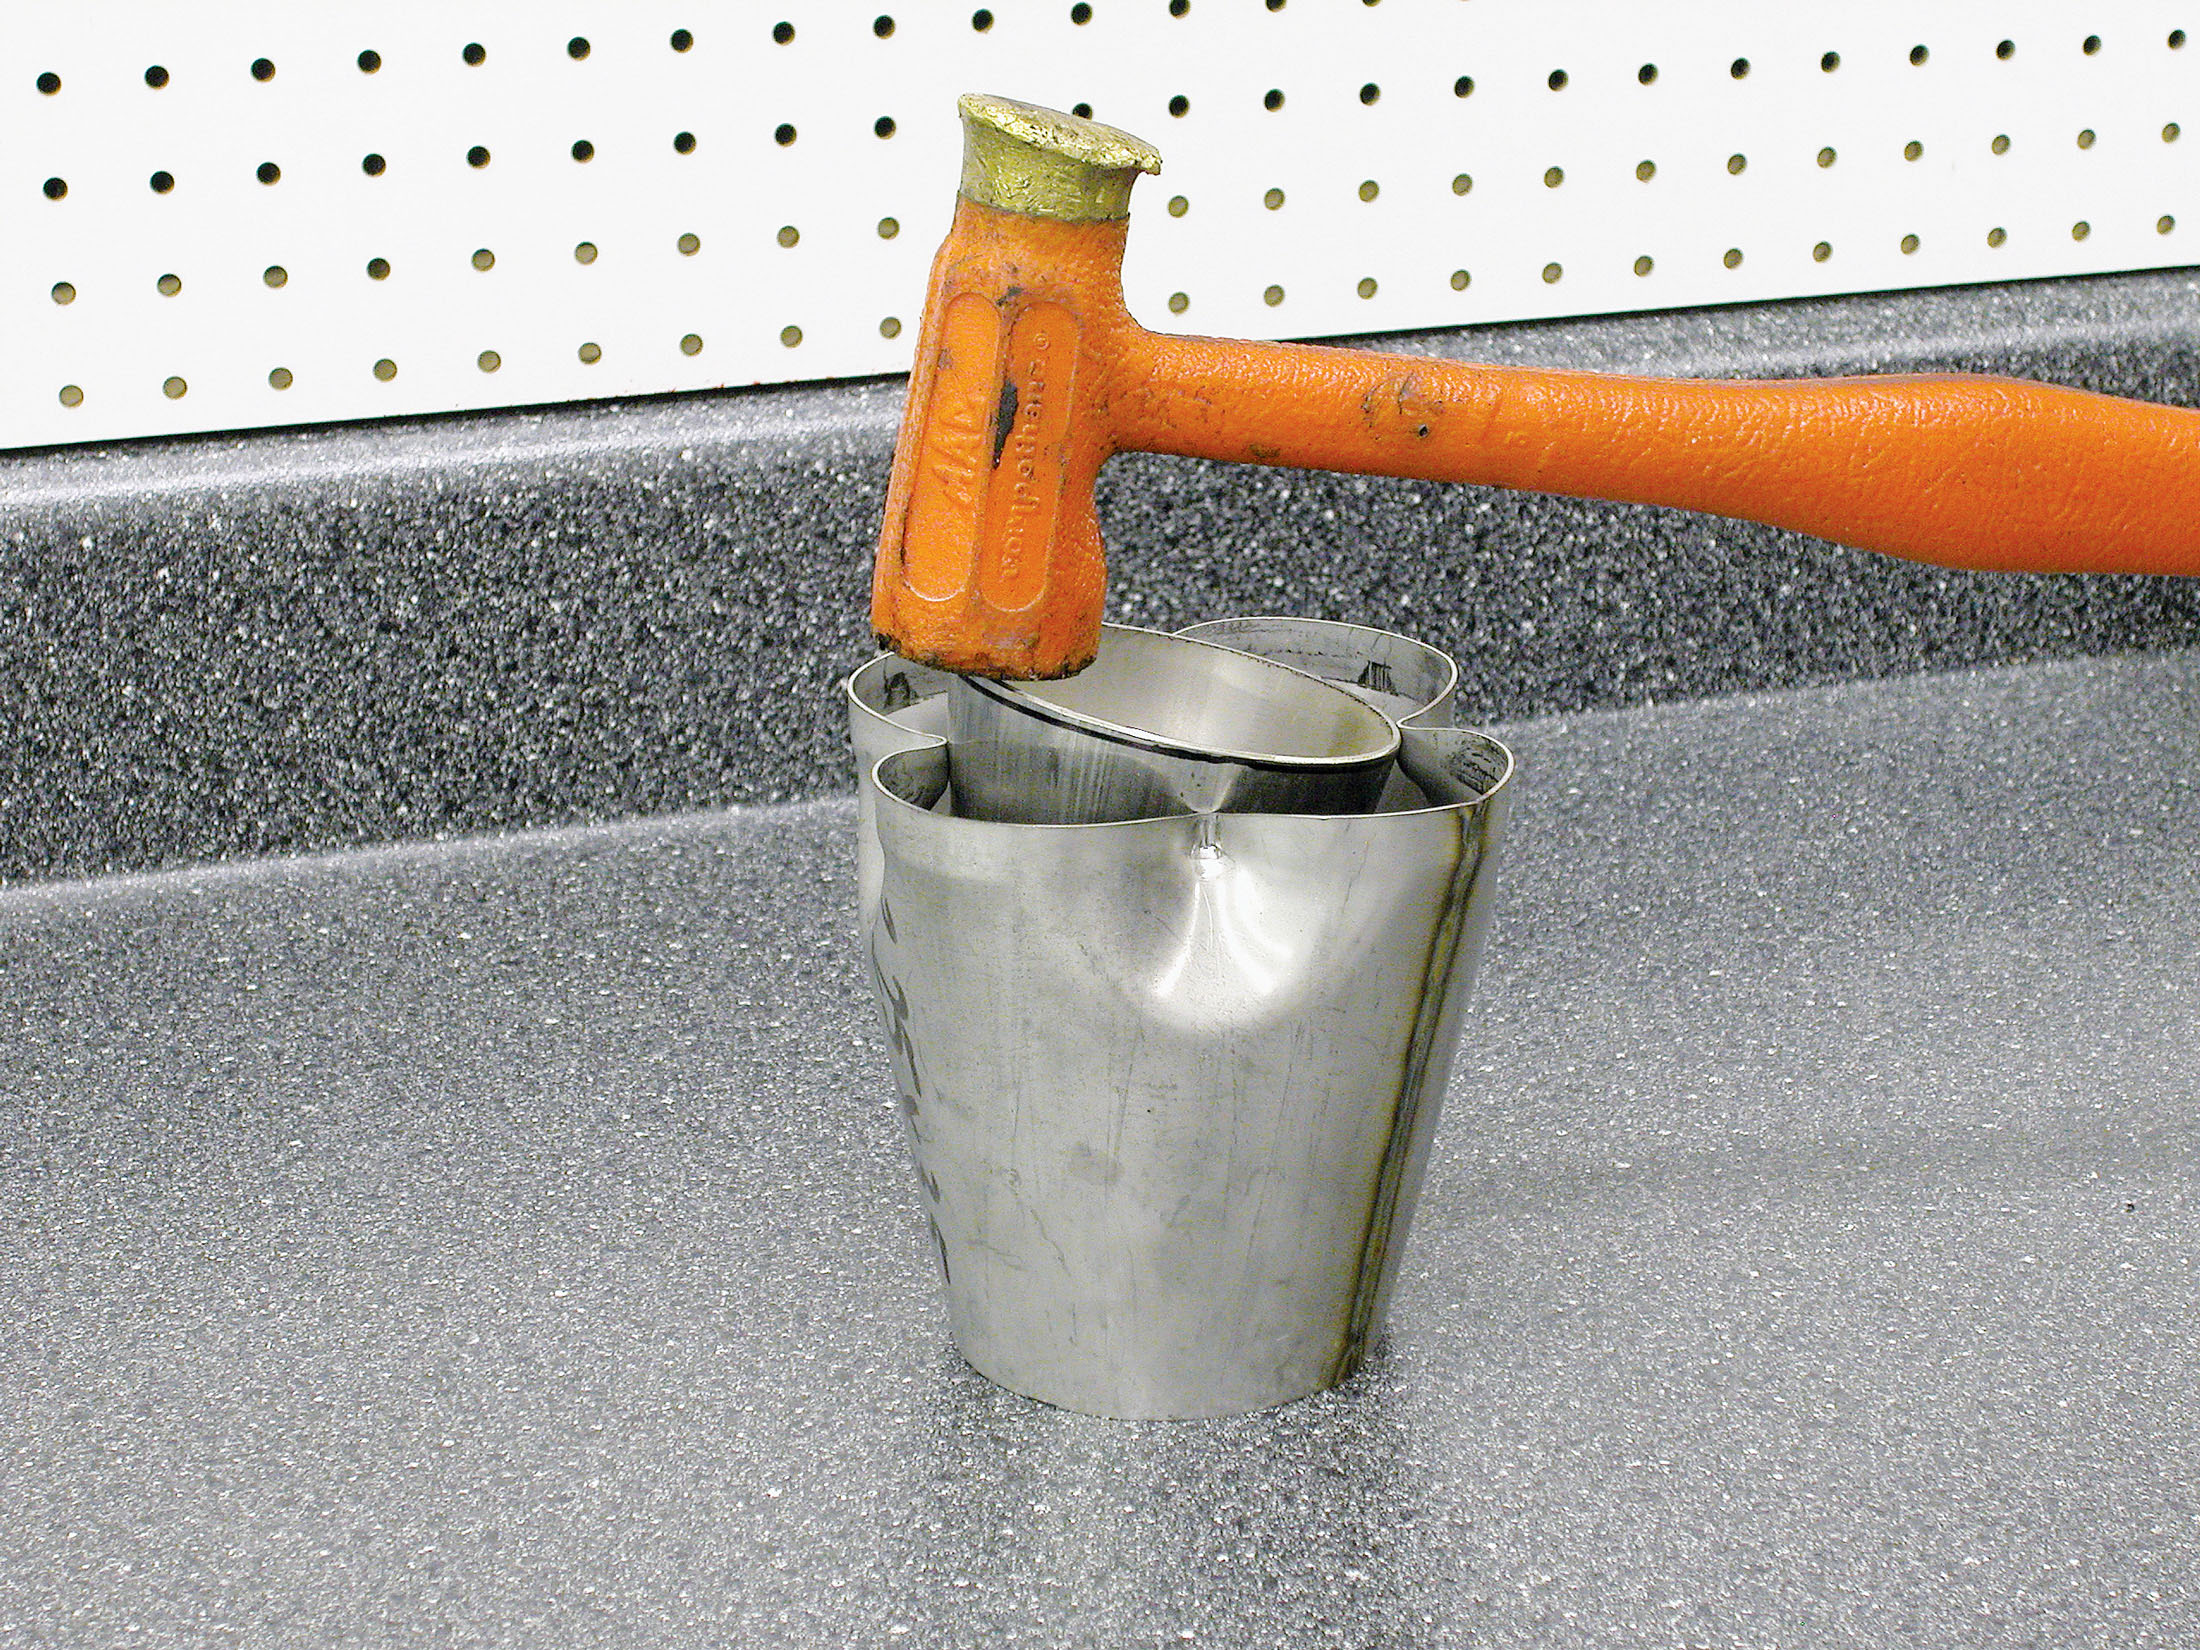
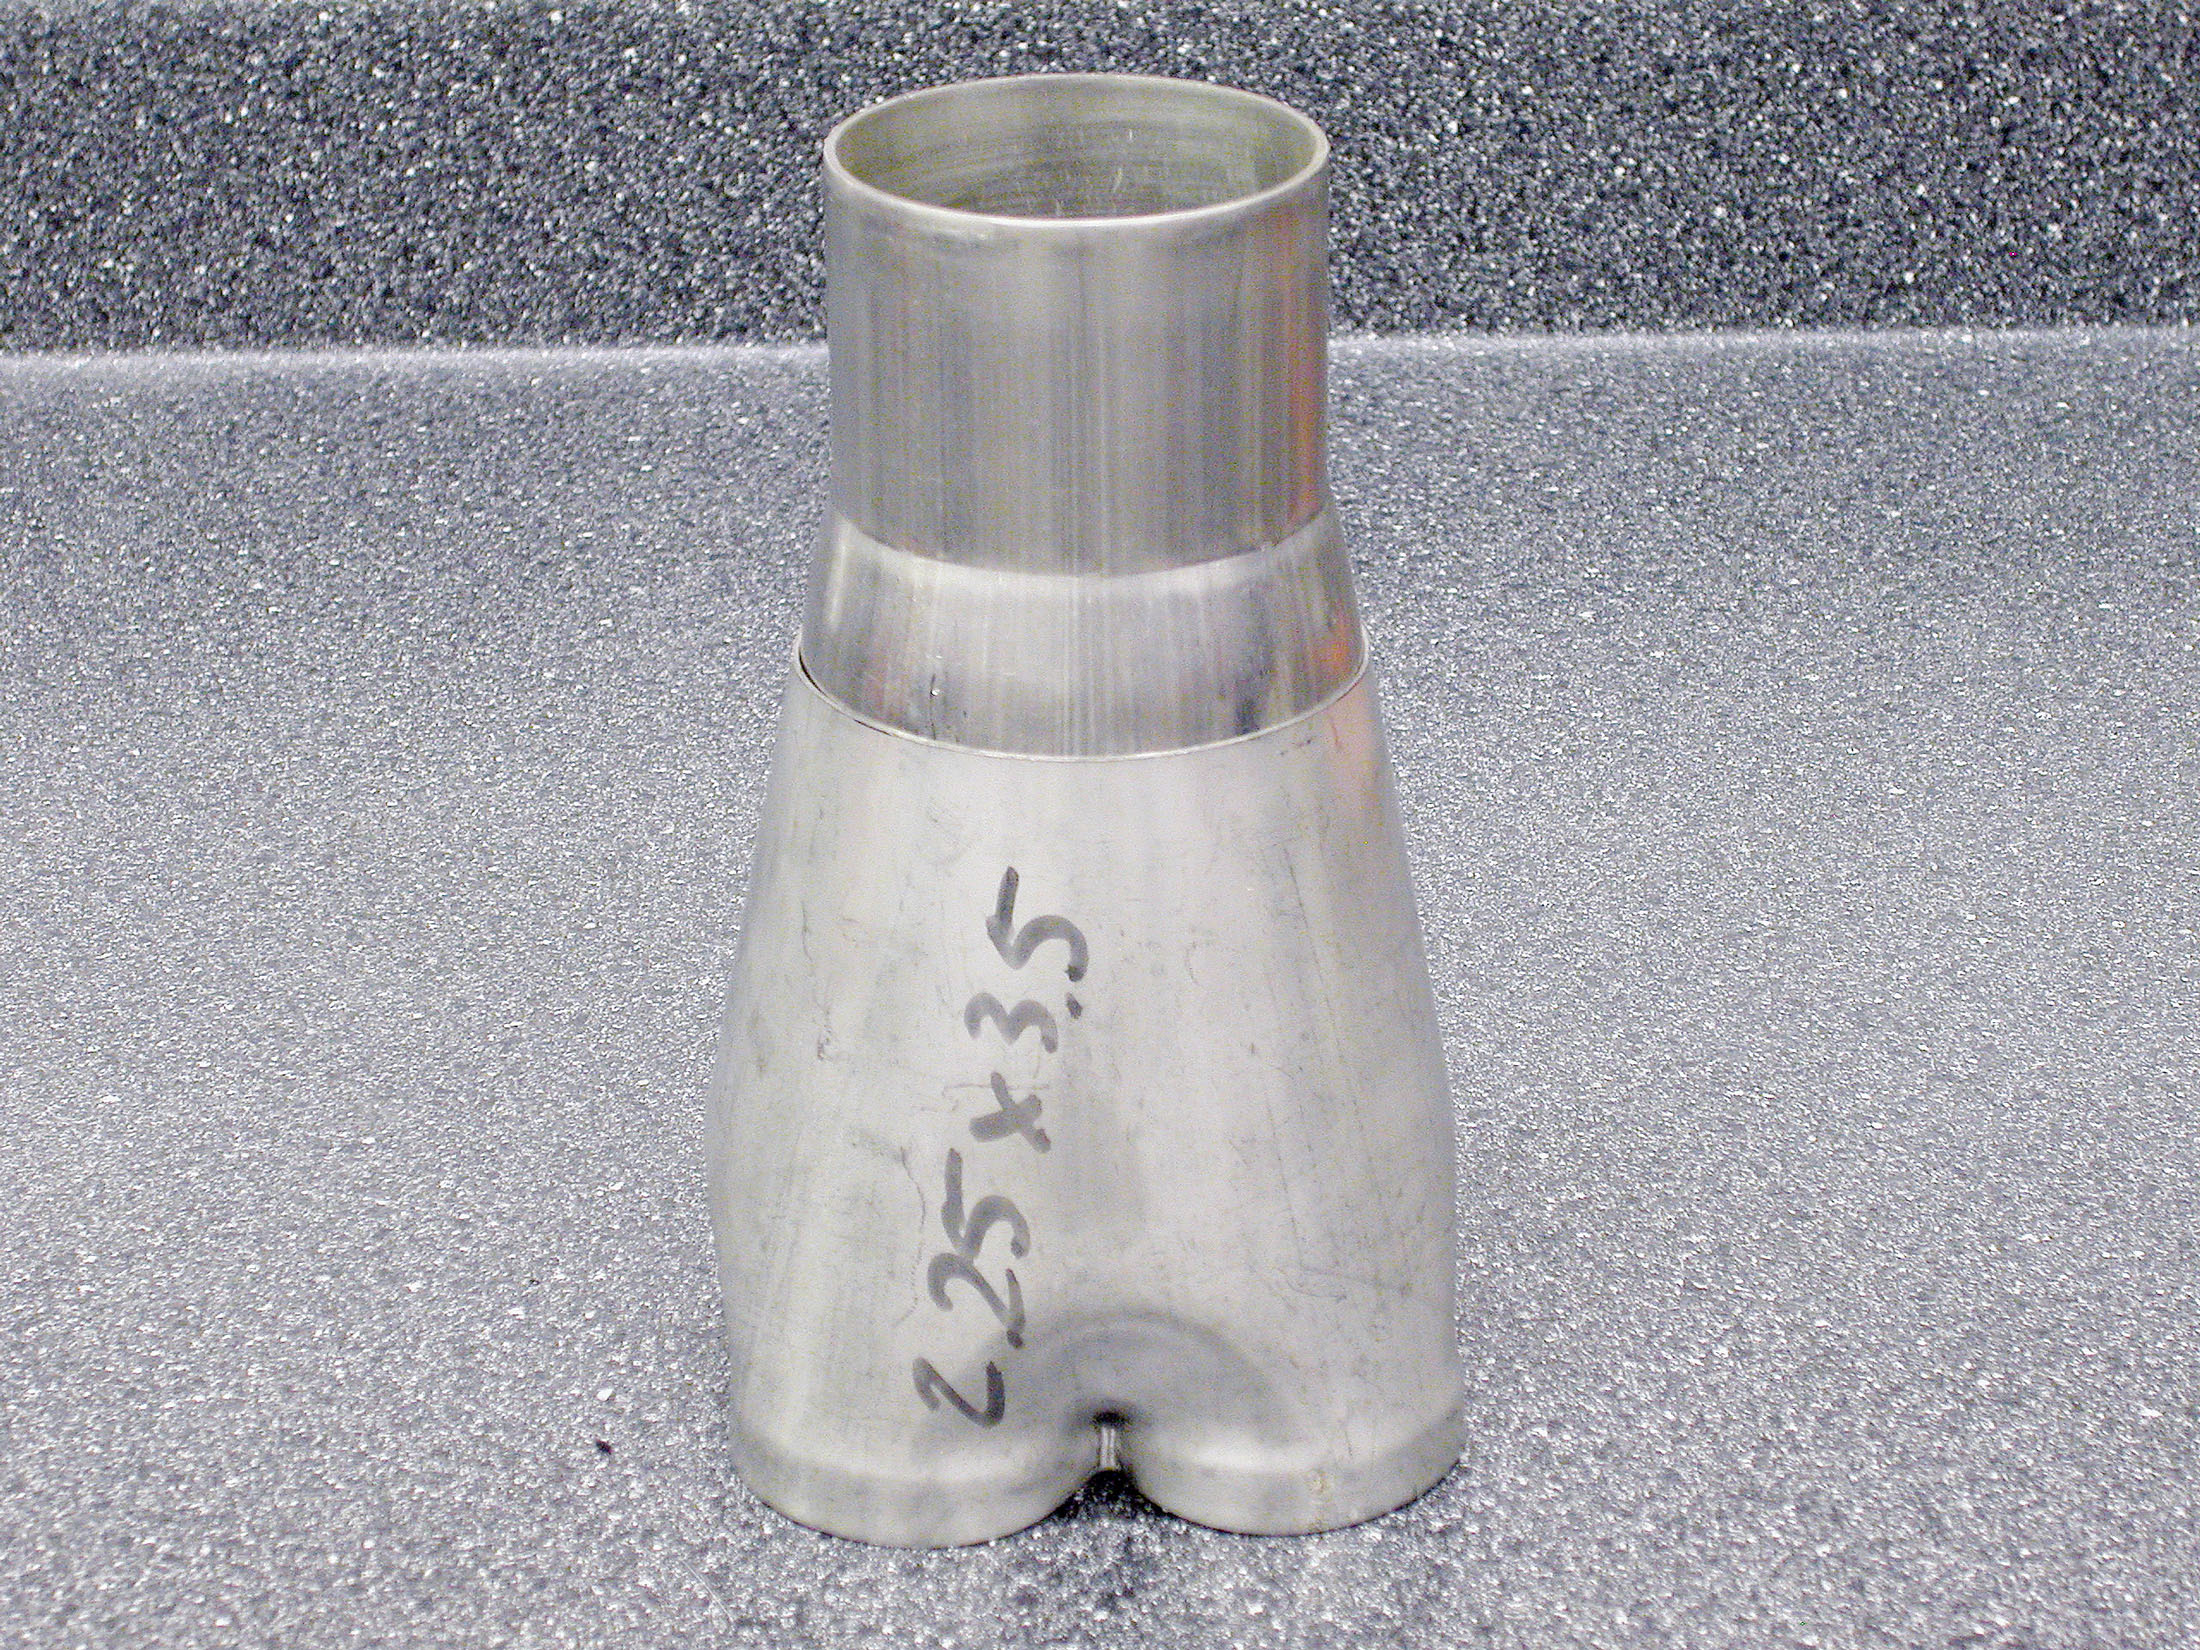
25A-B. Stainless Works includes these “stars” with its kits to dress out the space between the tubes up inside the collector.
25A-B. Stainless Works includes these “stars” with its kits to dress out the space between the tubes up inside the collector.
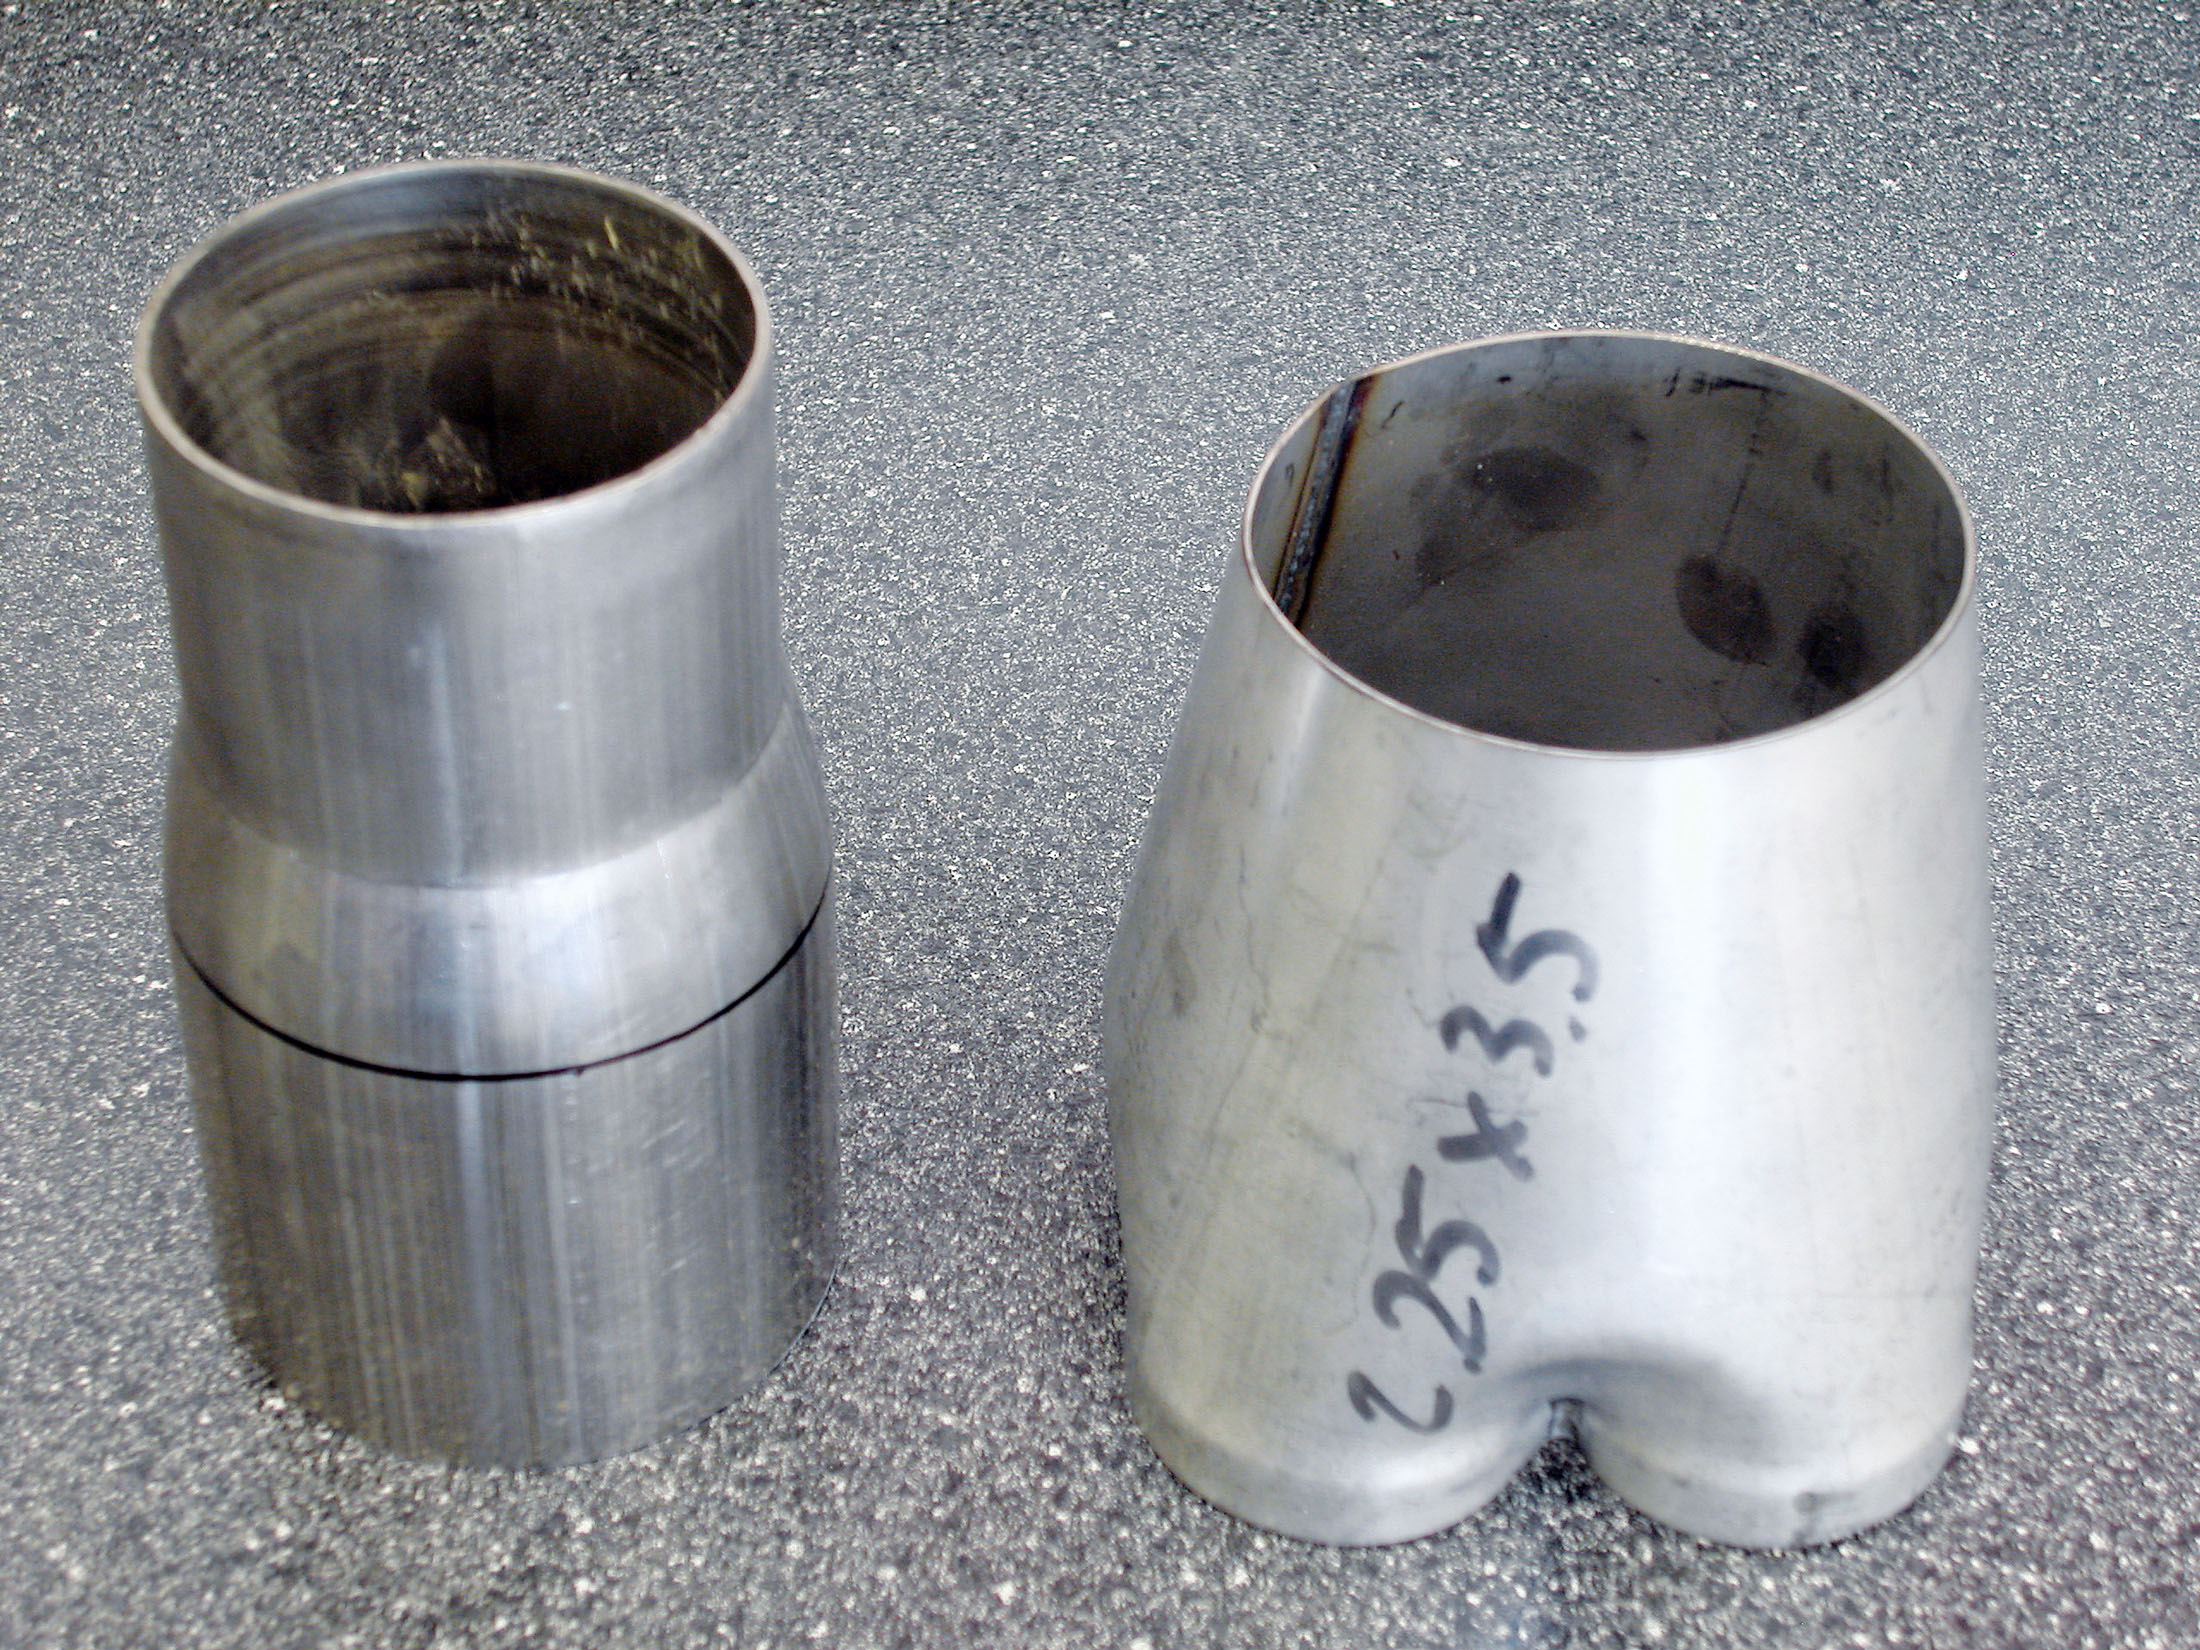
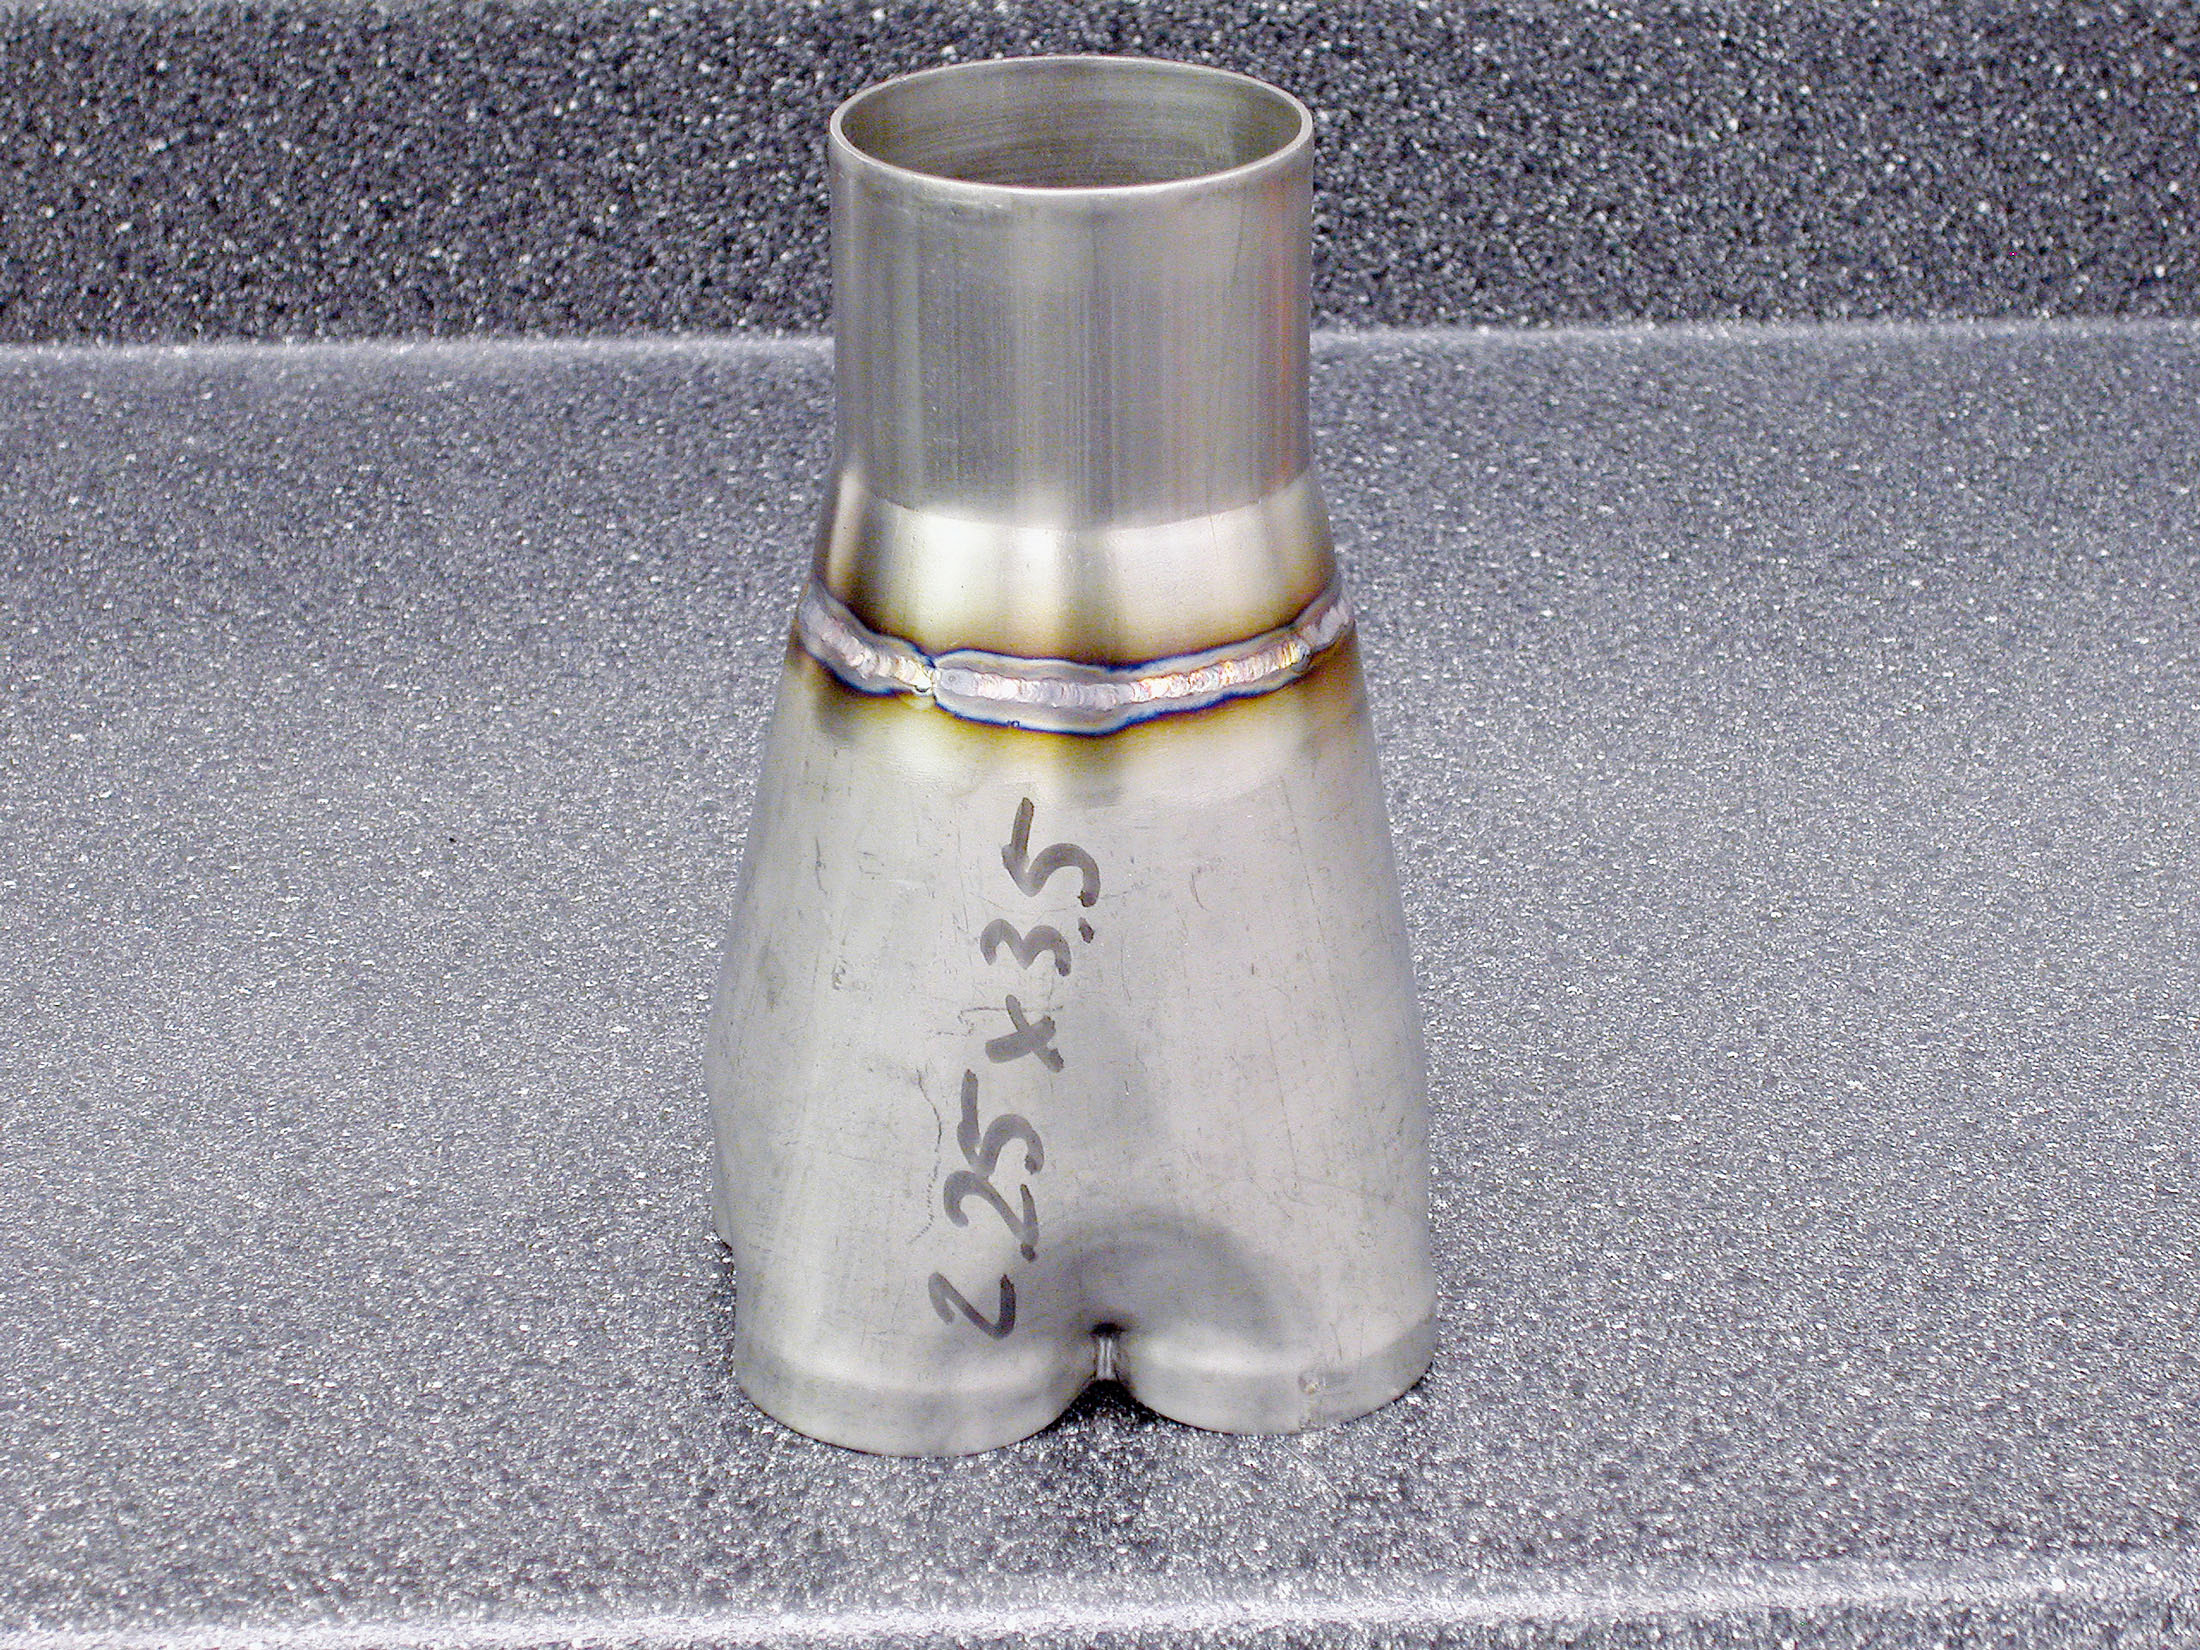
26A-C. The collectors come in two segments that must be welded together. For these show headers, Georges opted for a smooth fit on the exterior, which would leave a little ridge inside the flange where the two pieces join. For optimum performance, this ridge will restrict a little bit of flow; but these headers are more than big enough for the 572ci crate engine, and the car isn’t a max-effort quarter-miler anyway. He began by flipping the end piece upside down and inserting it into the collector to mark the junction. Built the traditional way, you would still do this step.
26A-C. The collectors come in two segments that must be welded together. For these show headers, Georges opted for a smooth fit on the exterior, which would leave a little ridge inside the flange where the two pieces join. For optimum performance, this ridge will restrict a little bit of flow; but these headers are more than big enough for the 572ci crate engine, and the car isn’t a max-effort quarter-miler anyway. He began by flipping the end piece upside down and inserting it into the collector to mark the junction. Built the traditional way, you would still do this step.
26A-C. The collectors come in two segments that must be welded together. For these show headers, Georges opted for a smooth fit on the exterior, which would leave a little ridge inside the flange where the two pieces join. For optimum performance, this ridge will restrict a little bit of flow; but these headers are more than big enough for the 572ci crate engine, and the car isn’t a max-effort quarter-miler anyway. He began by flipping the end piece upside down and inserting it into the collector to mark the junction. Built the traditional way, you would still do this step.
27A-C. Normally, the tail of the collector would be butt-welded at this junction or the end of the collector would slip into the tail cone, rather than installing the tail cone into the collector, as Georges did here. He did this to make the seam look better from the outside. Then, when the headers are ceramic-coated, the collector is going to be nice and smooth.
27A-C. Normally, the tail of the collector would be butt-welded at this junction or the end of the collector would slip into the tail cone, rather than installing the tail cone into the collector, as Georges did here. He did this to make the seam look better from the outside. Then, when the headers are ceramic-coated, the collector is going to be nice and smooth.
27A-C. Normally, the tail of the collector would be butt-welded at this junction or the end of the collector would slip into the tail cone, rather than installing the tail cone into the collector, as Georges did here. He did this to make the seam look better from the outside. Then, when the headers are ceramic-coated, the collector is going to be nice and smooth.
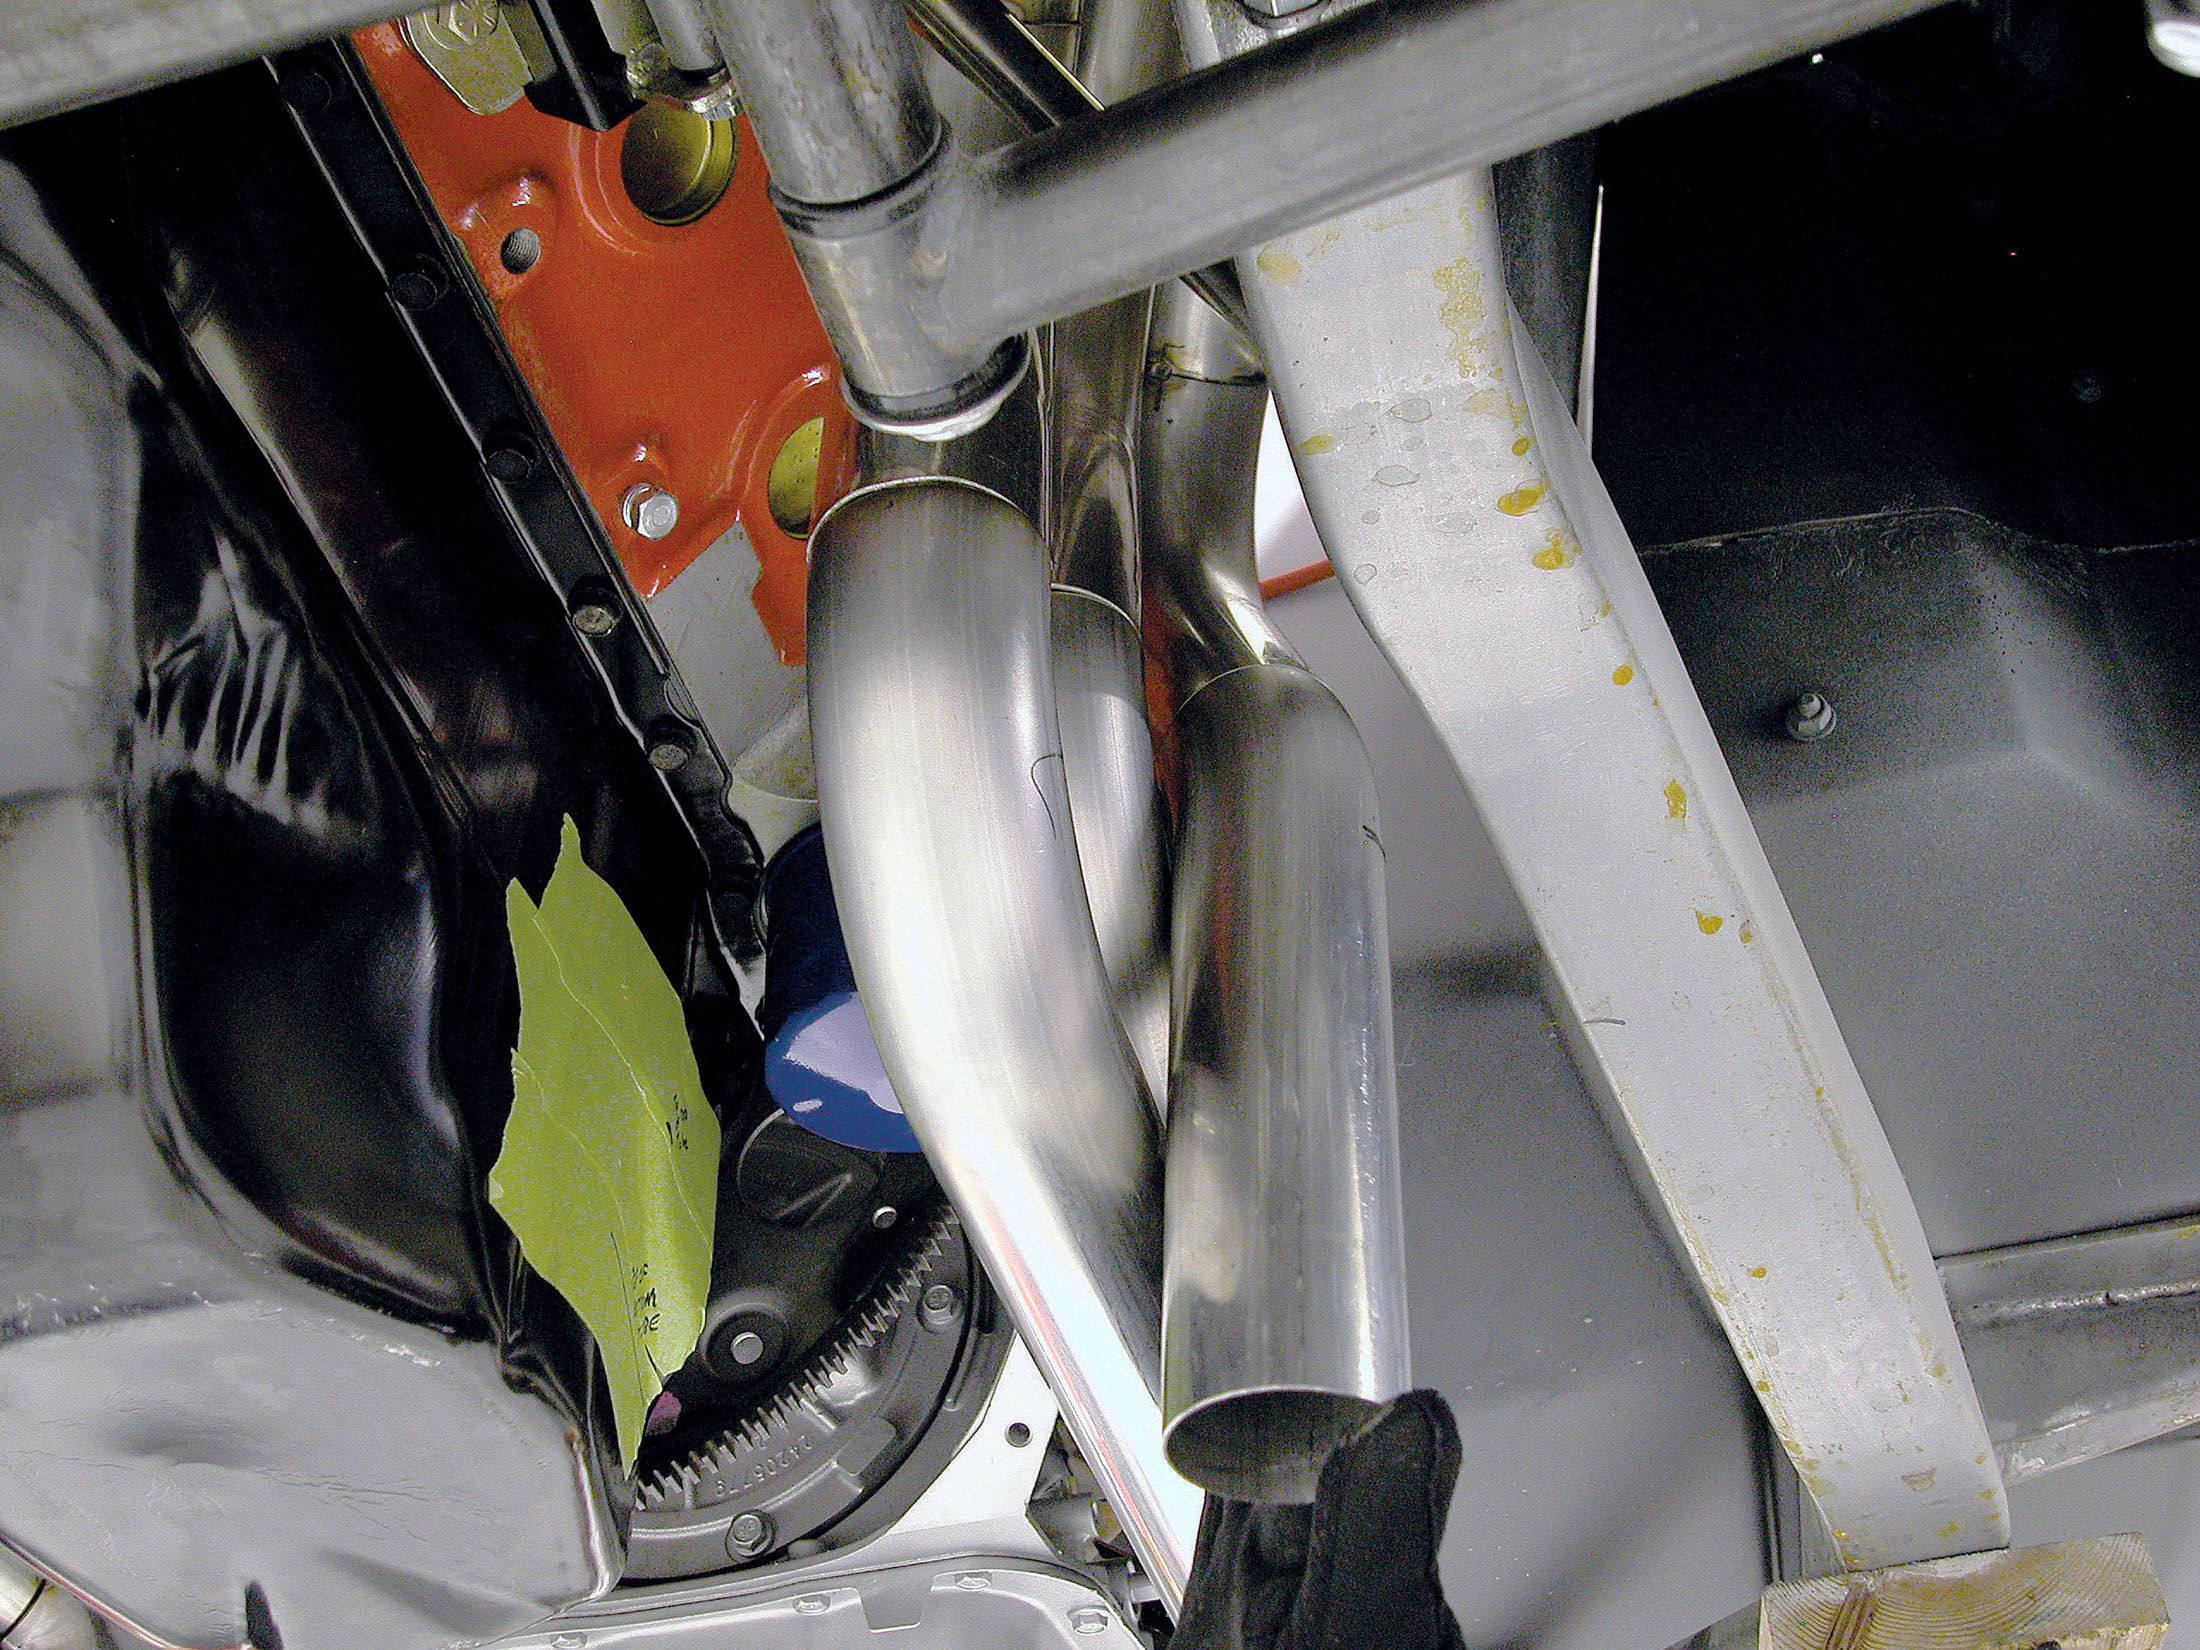
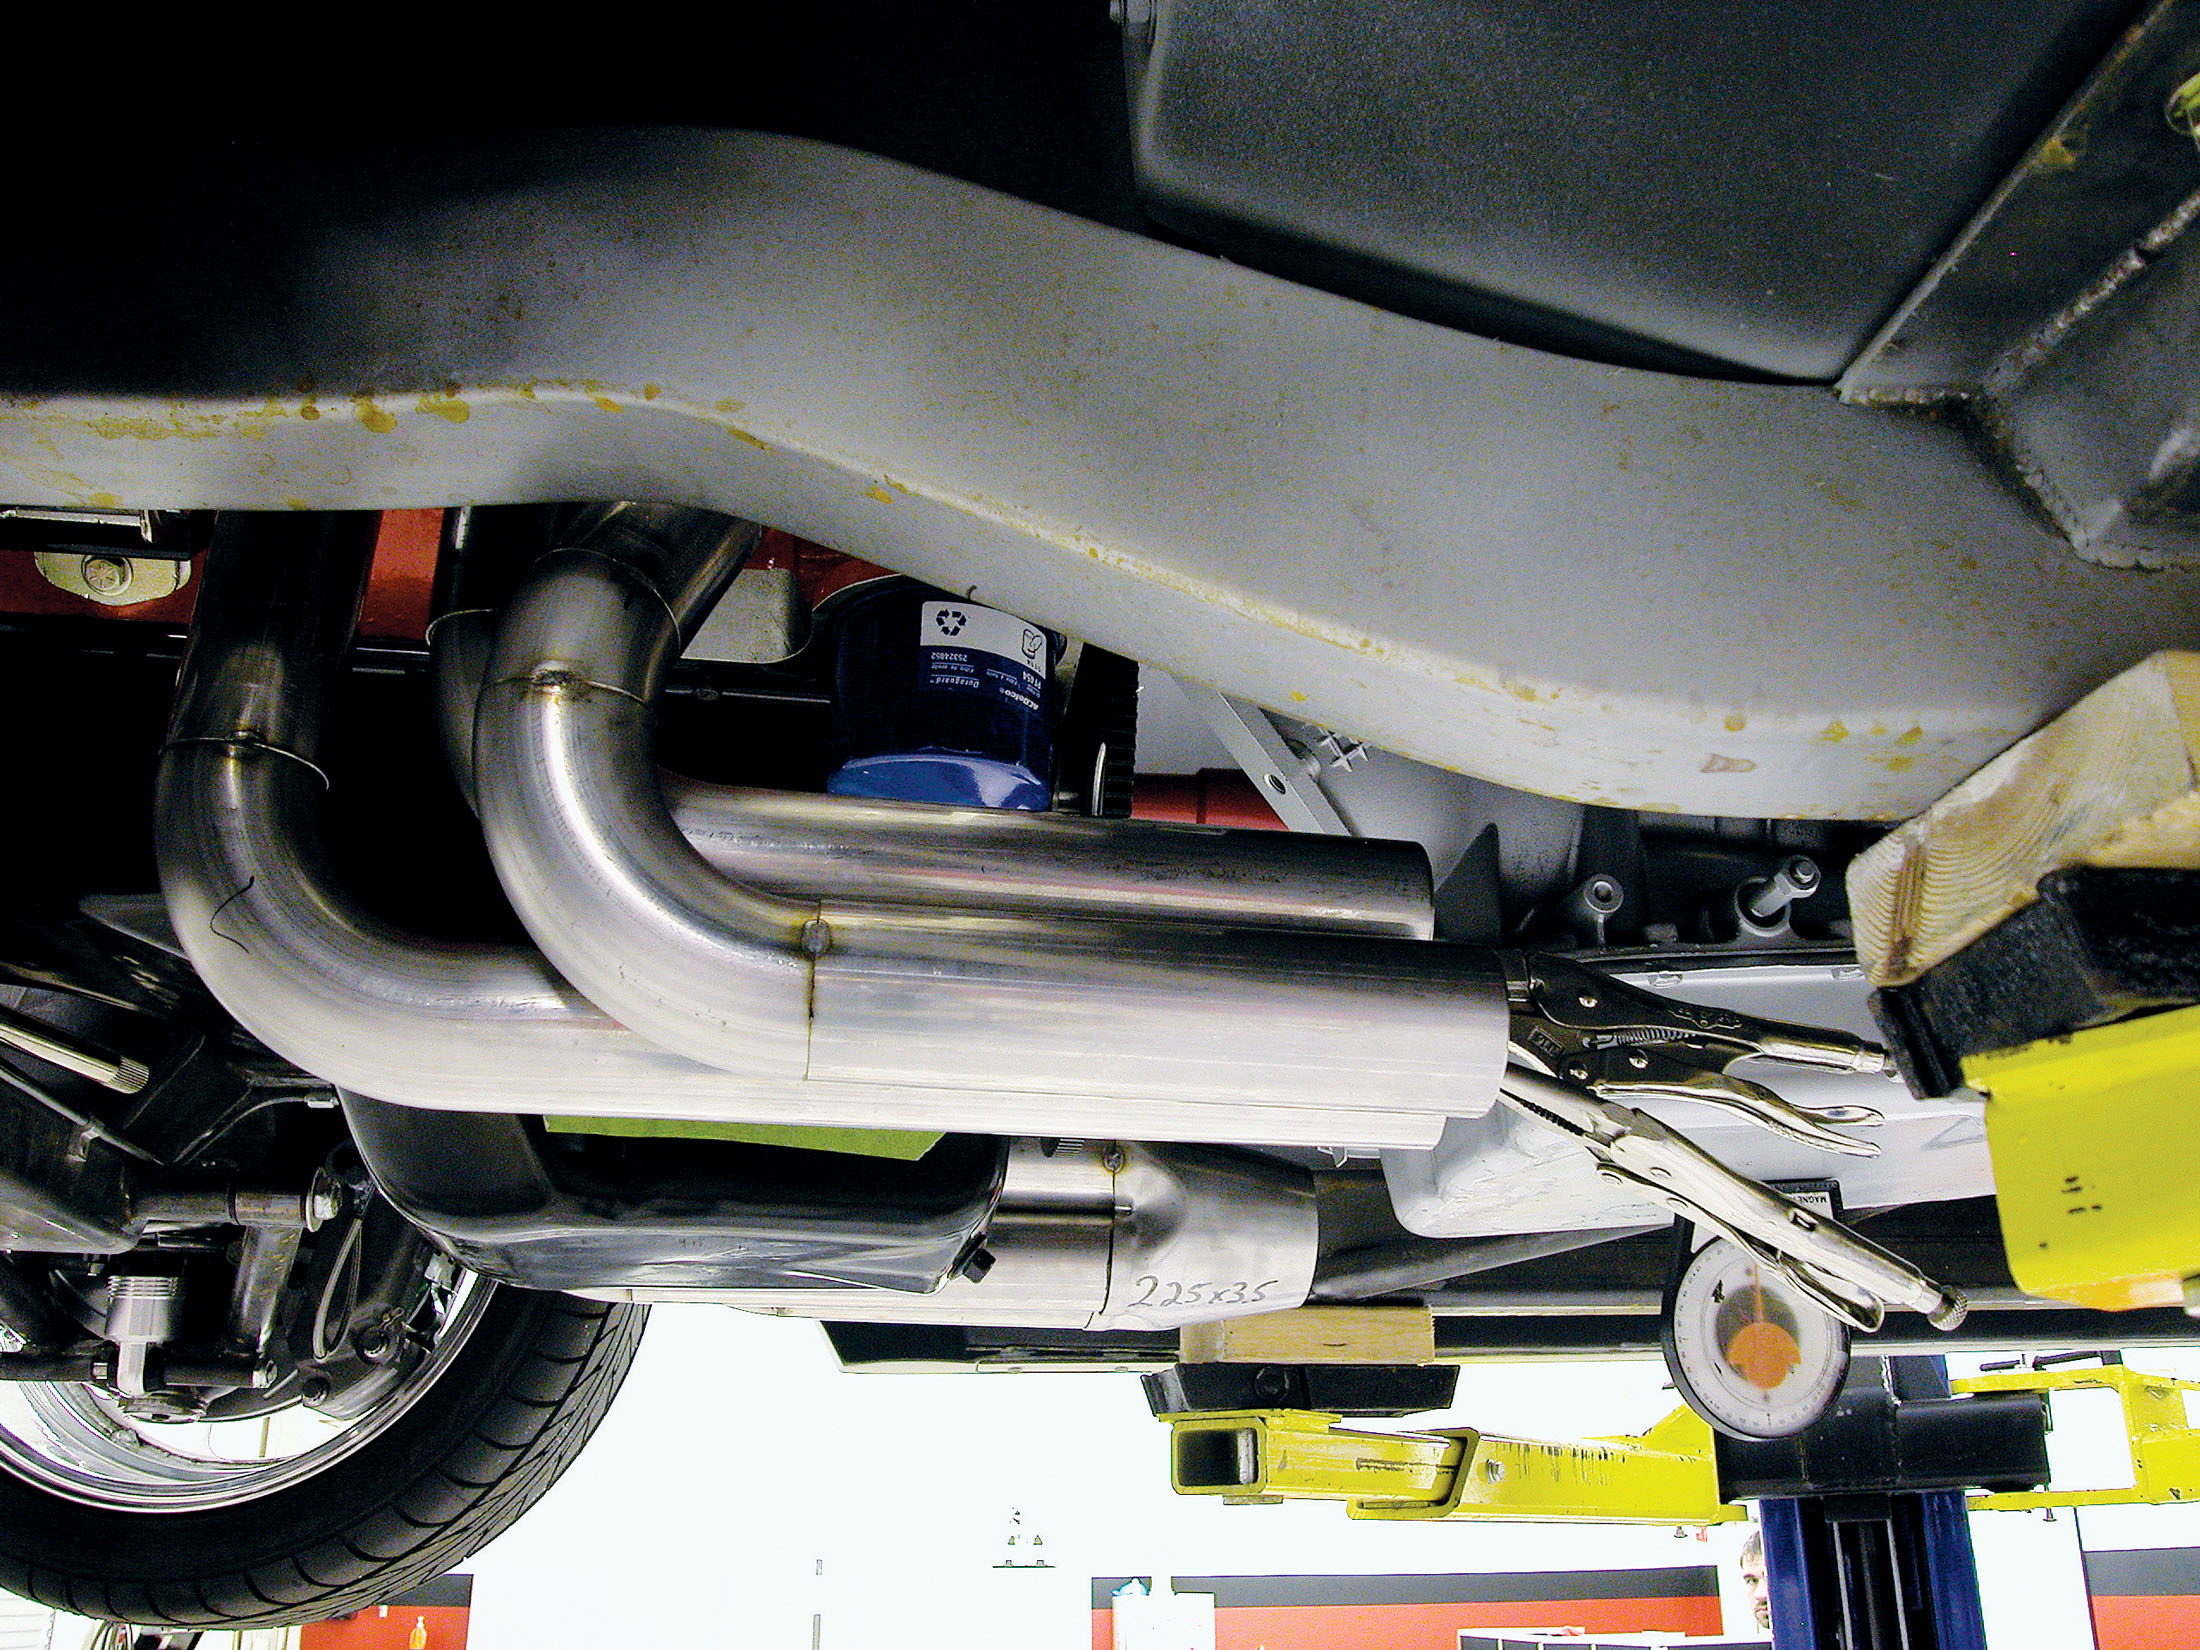
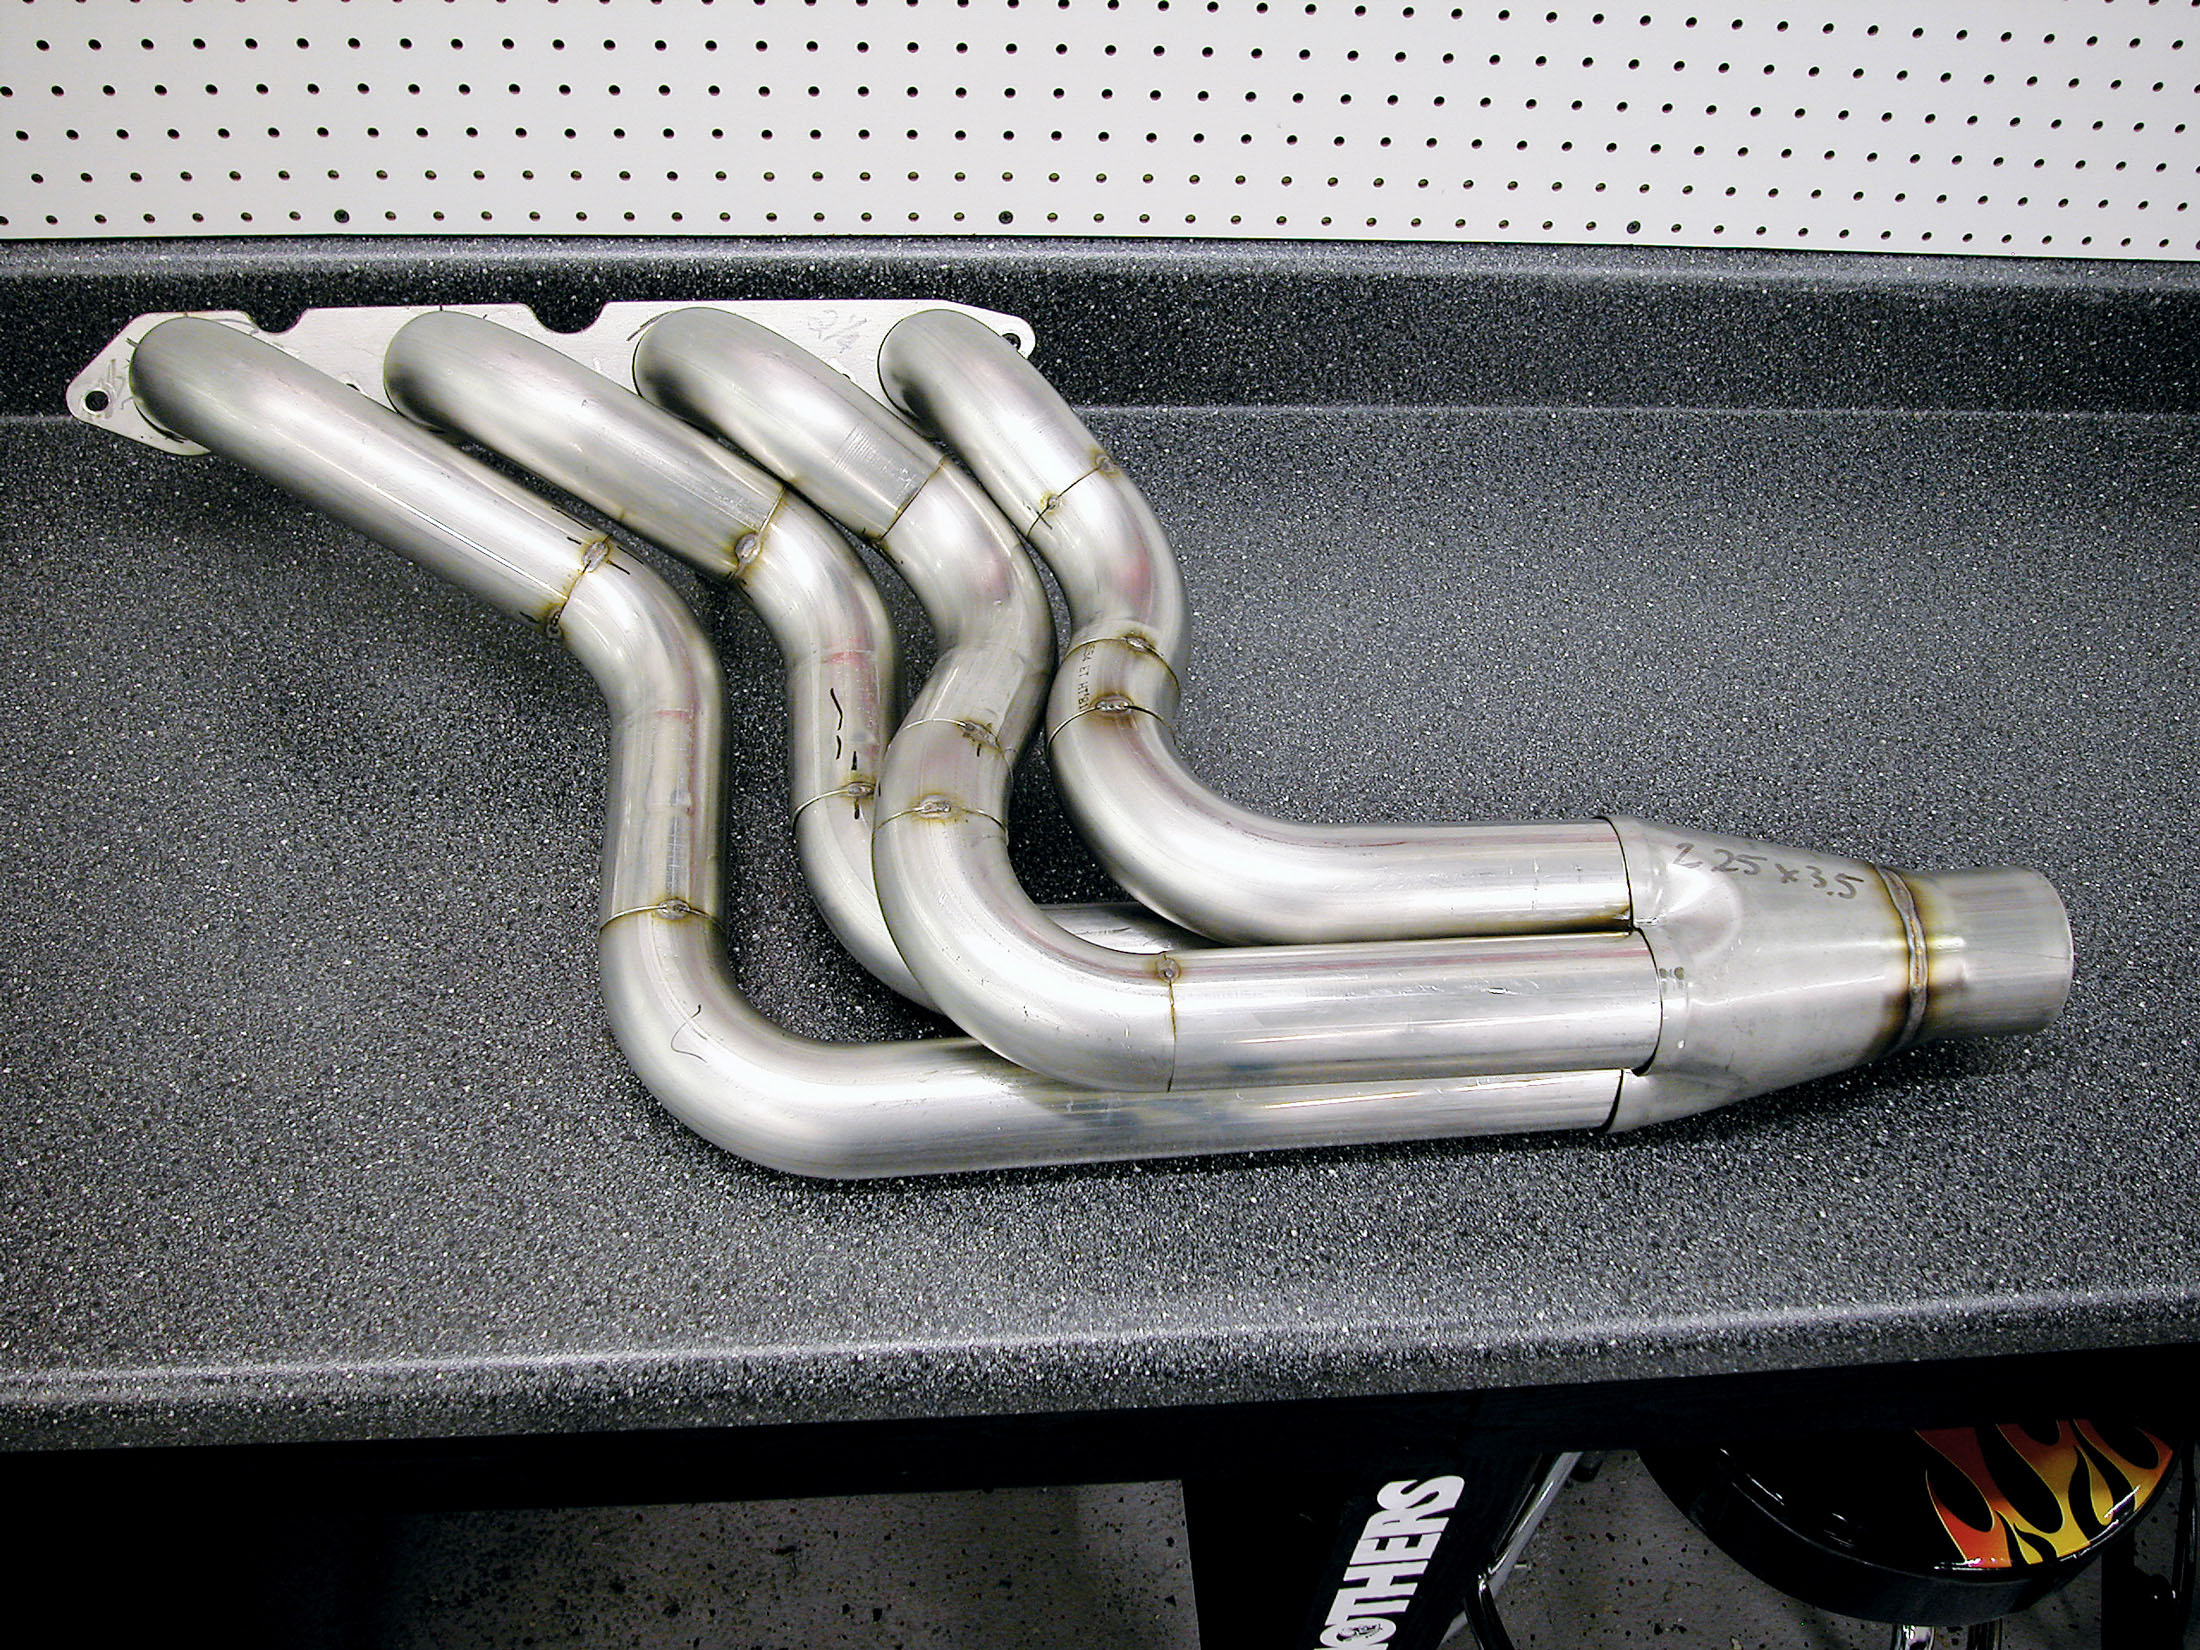
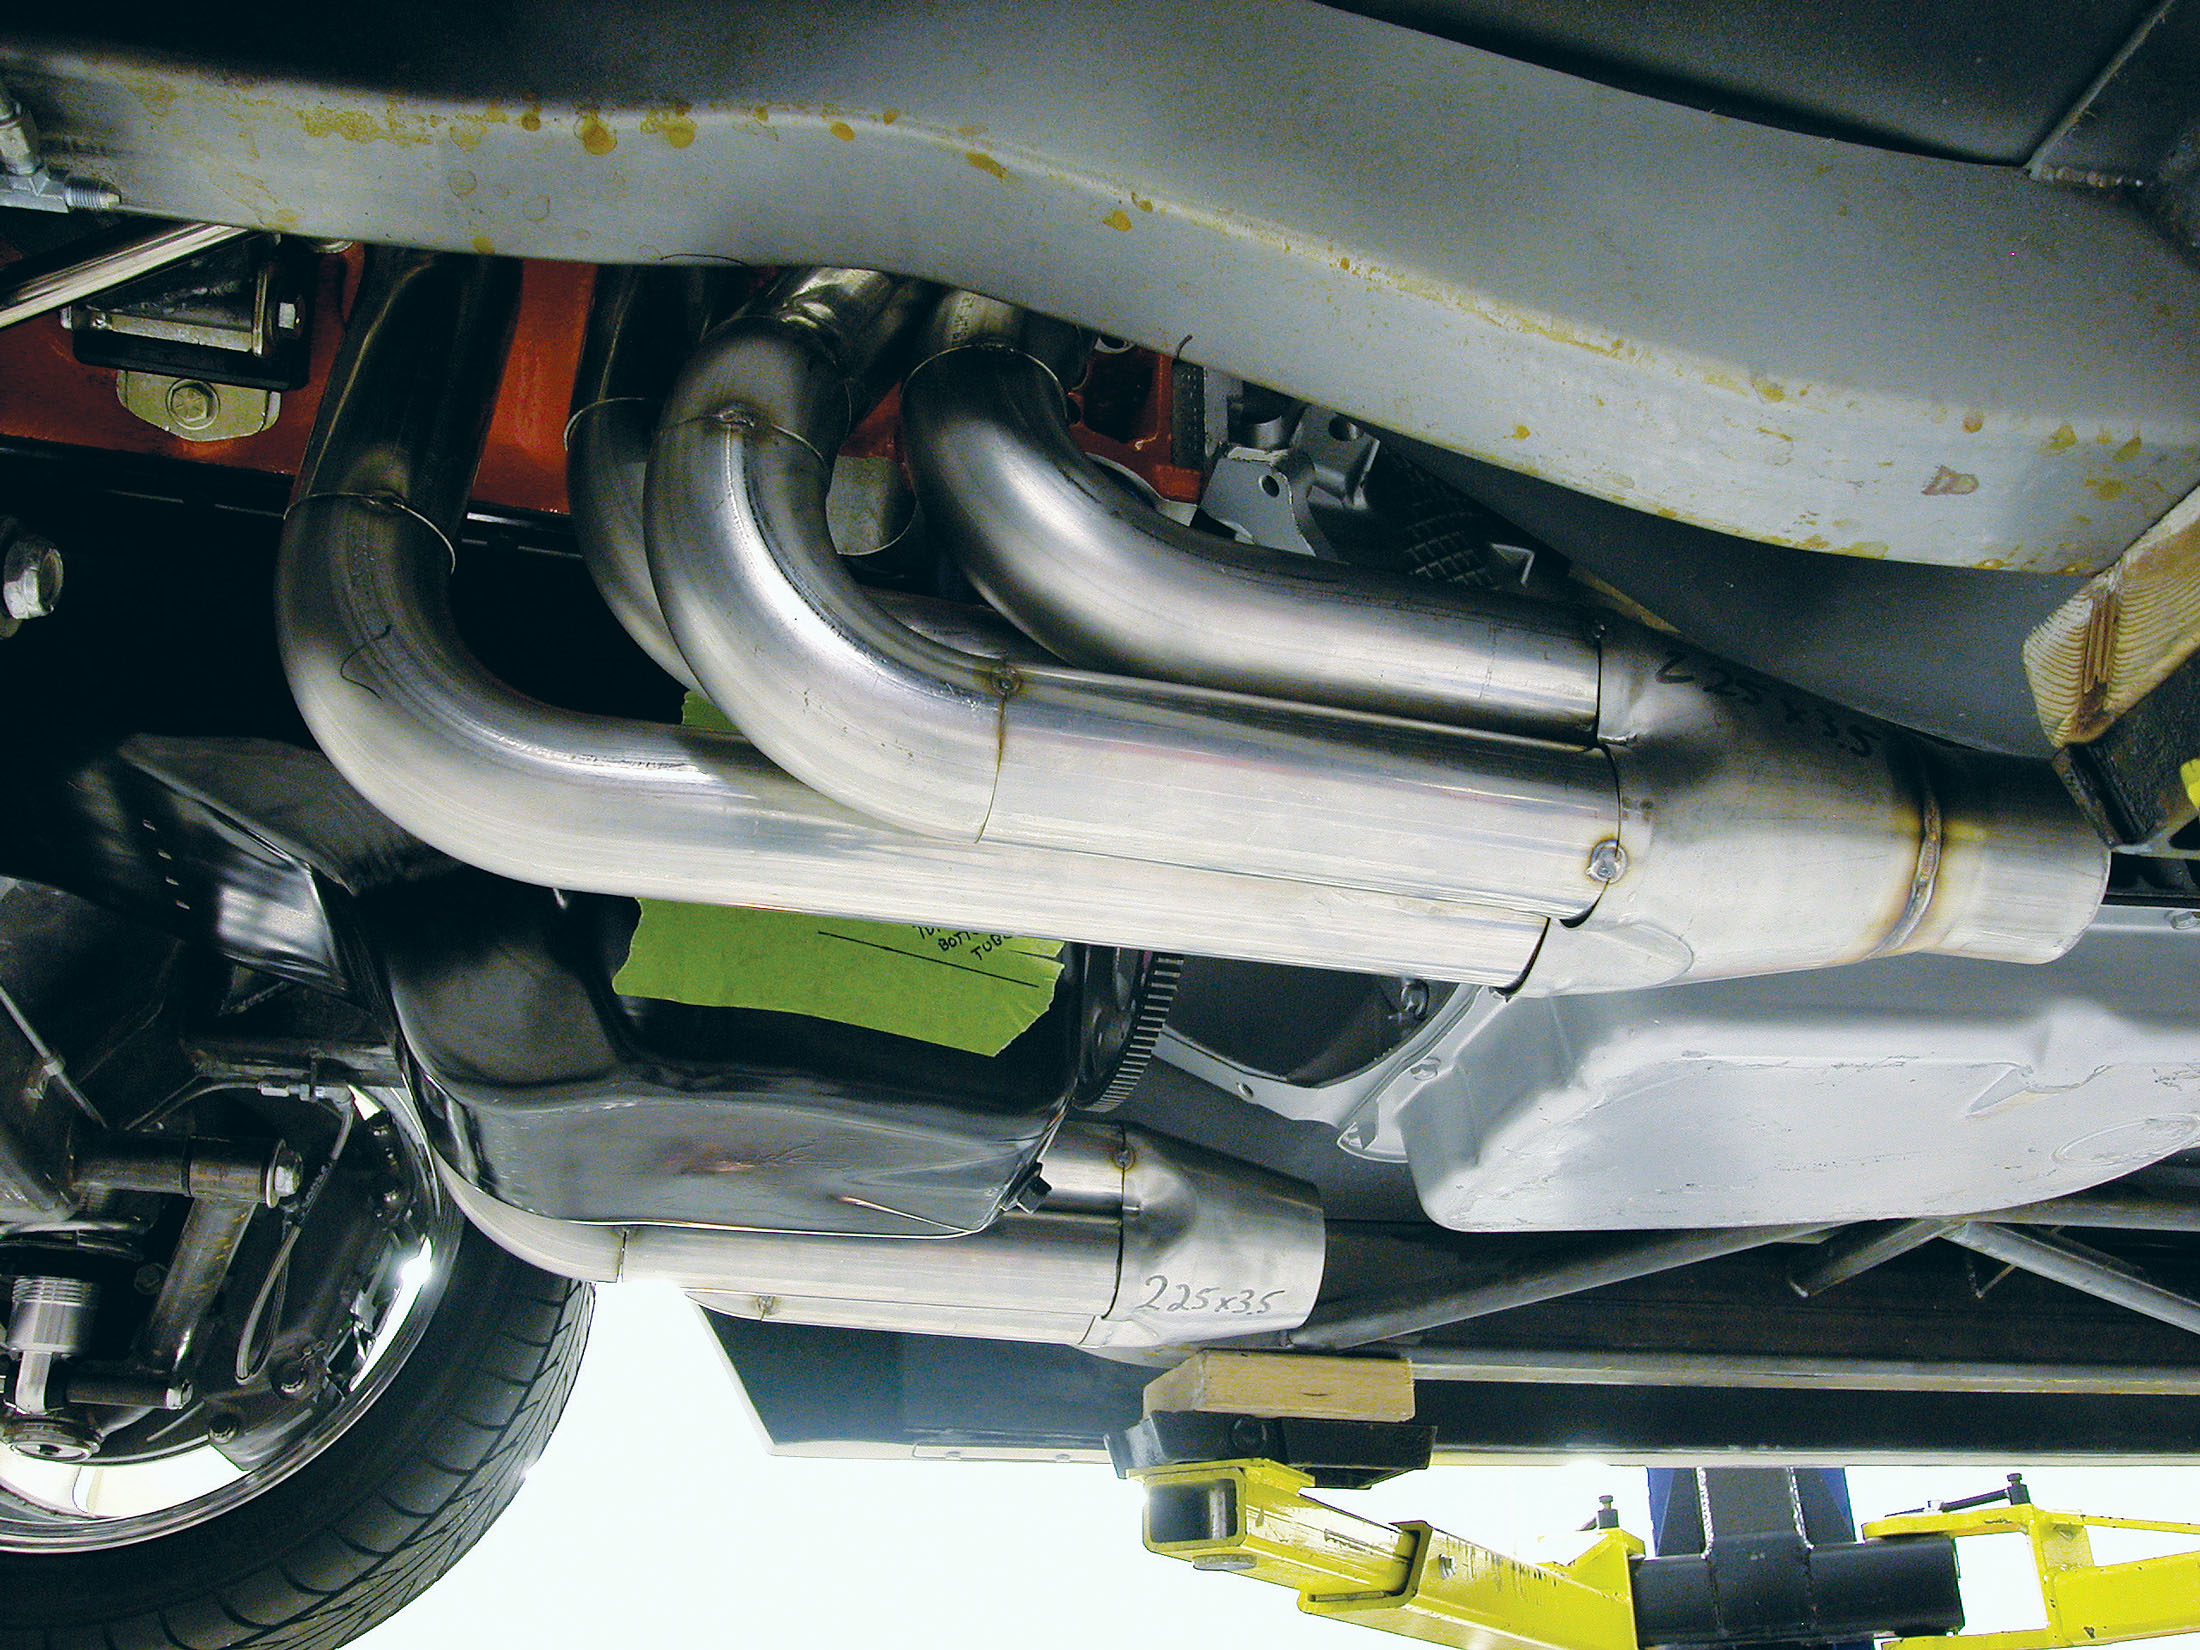
28. Here’s the completed header, prior to fully welding all the tubes. At this point, the whole thing is simply tacked together. One at a time, Georges will cut the tack-weld at the flange and at the collector, removing each tube individually and fully welding the joints. The completed tube will be reinstalled, fully welded at the flange, and then the next tube removed, and so on. If you can’t weld, at this point you could find a professional to do the final welding for a fraction of what he would charge to fully fabricate a set of custom headers.
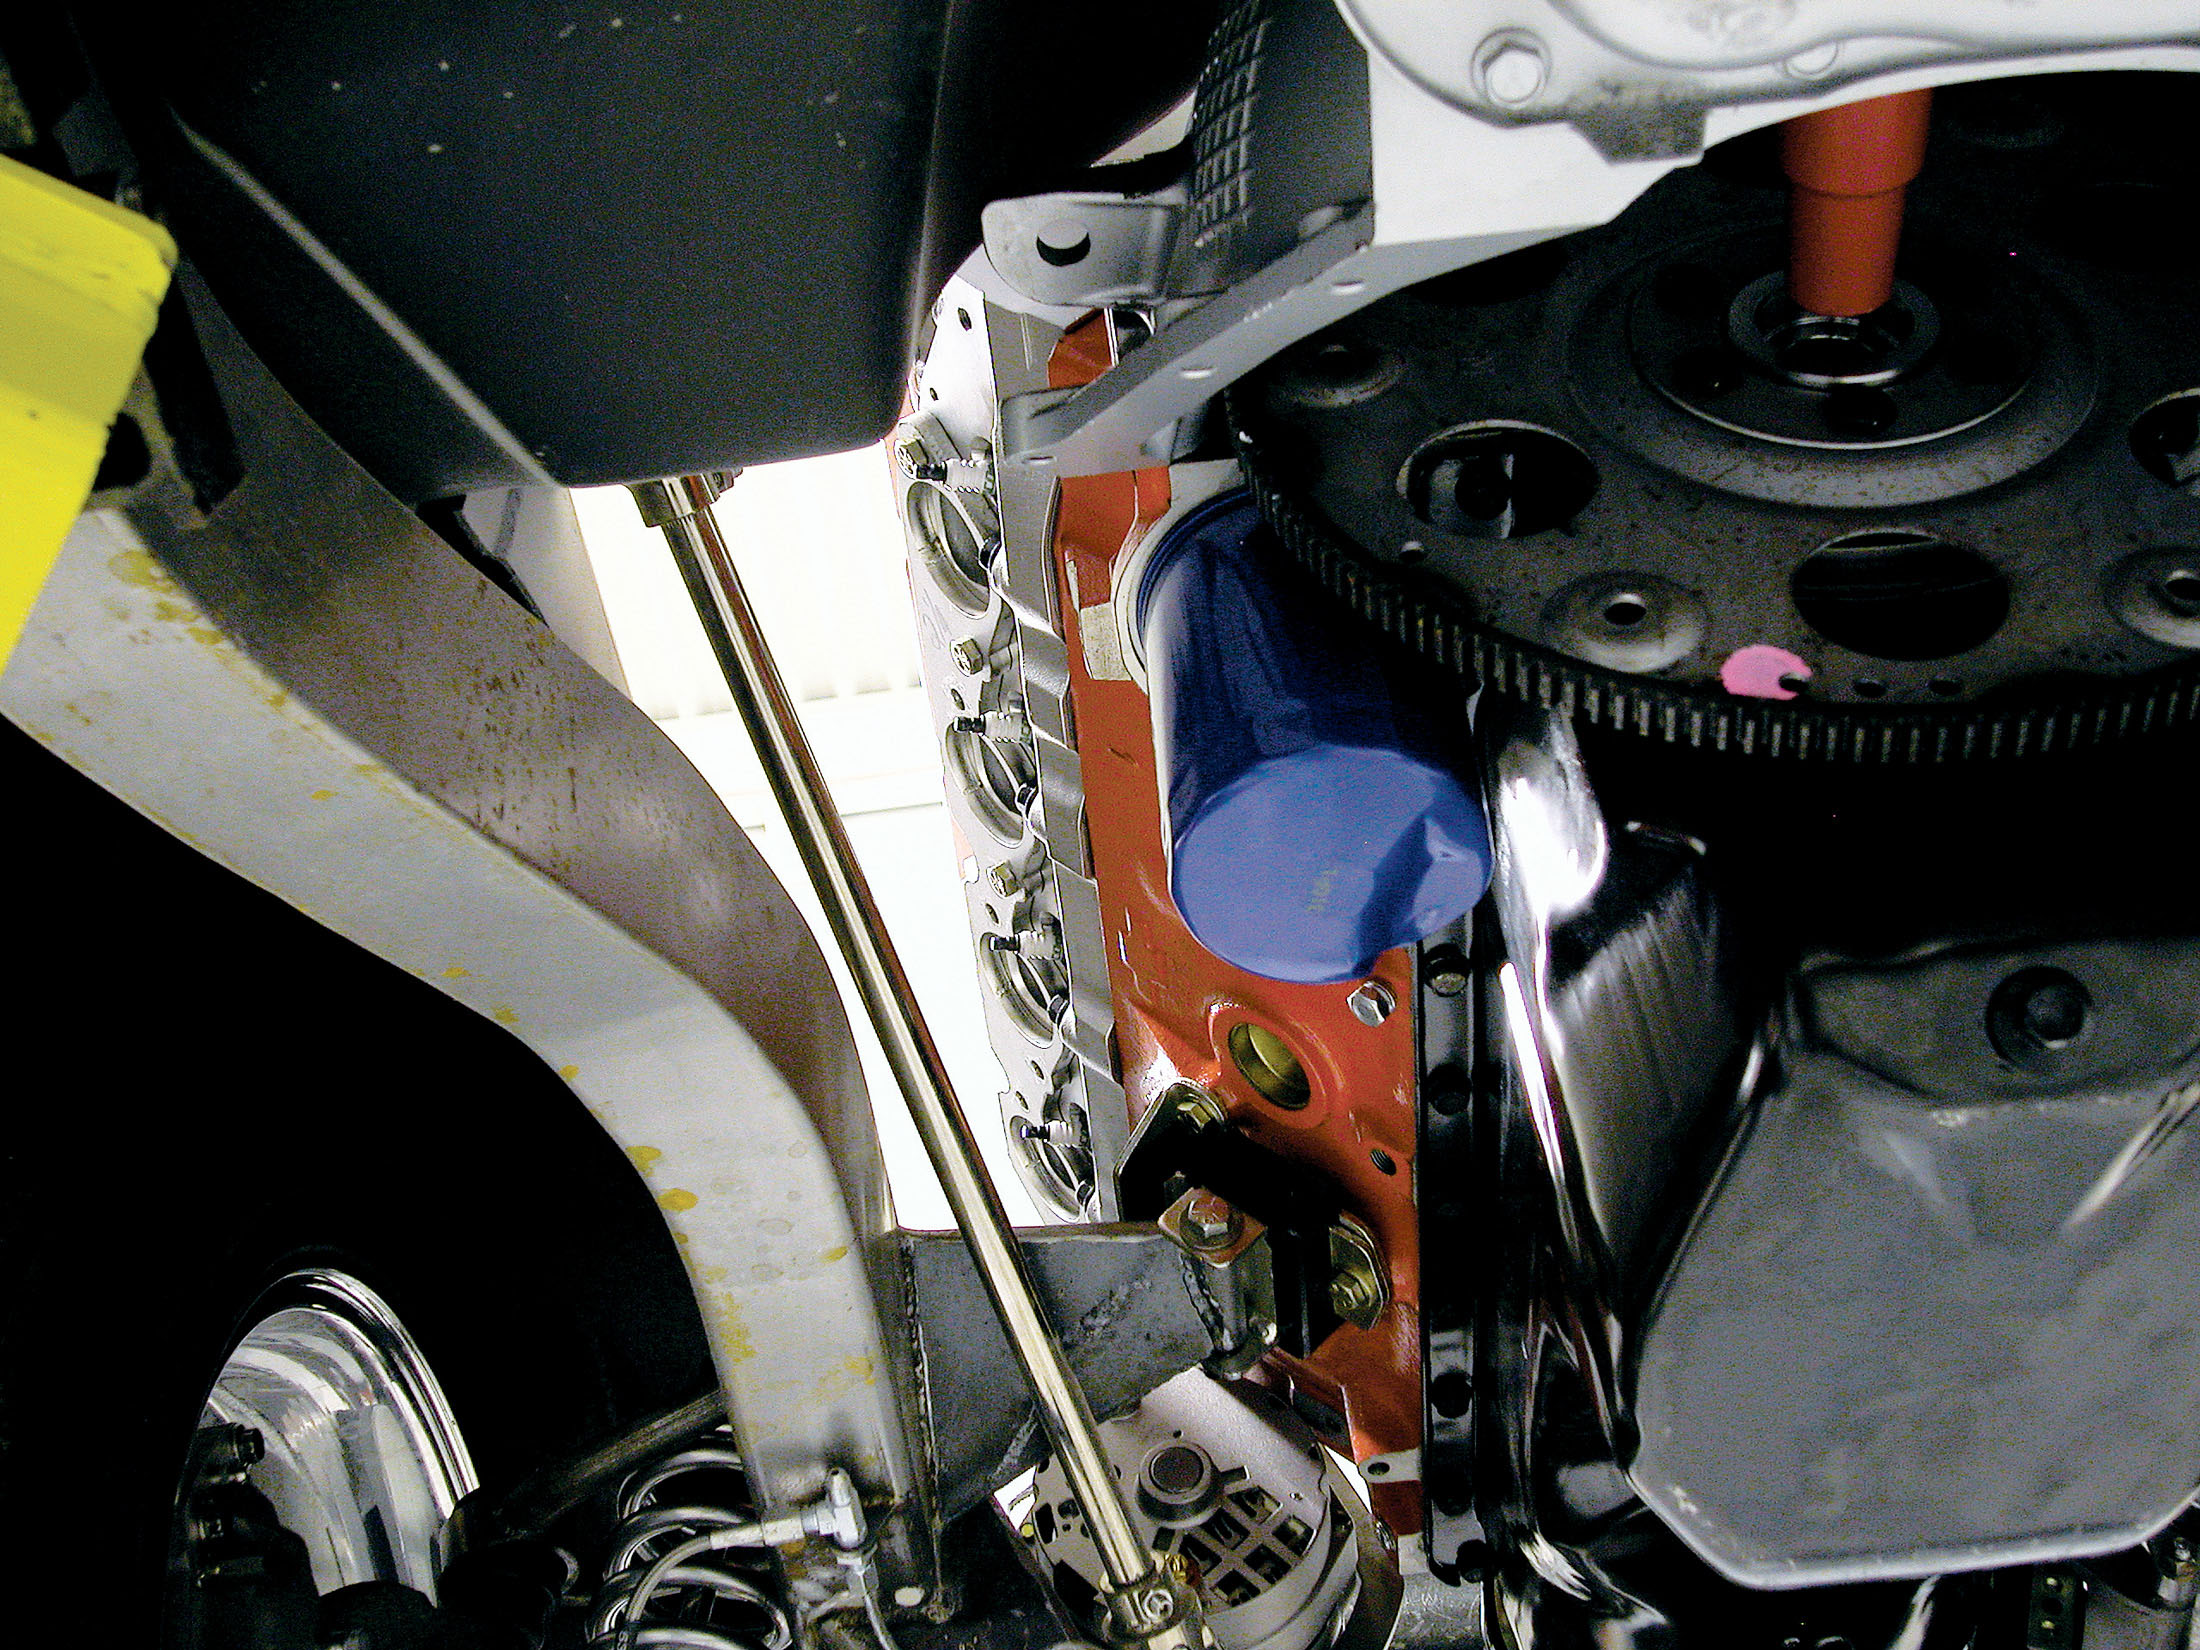
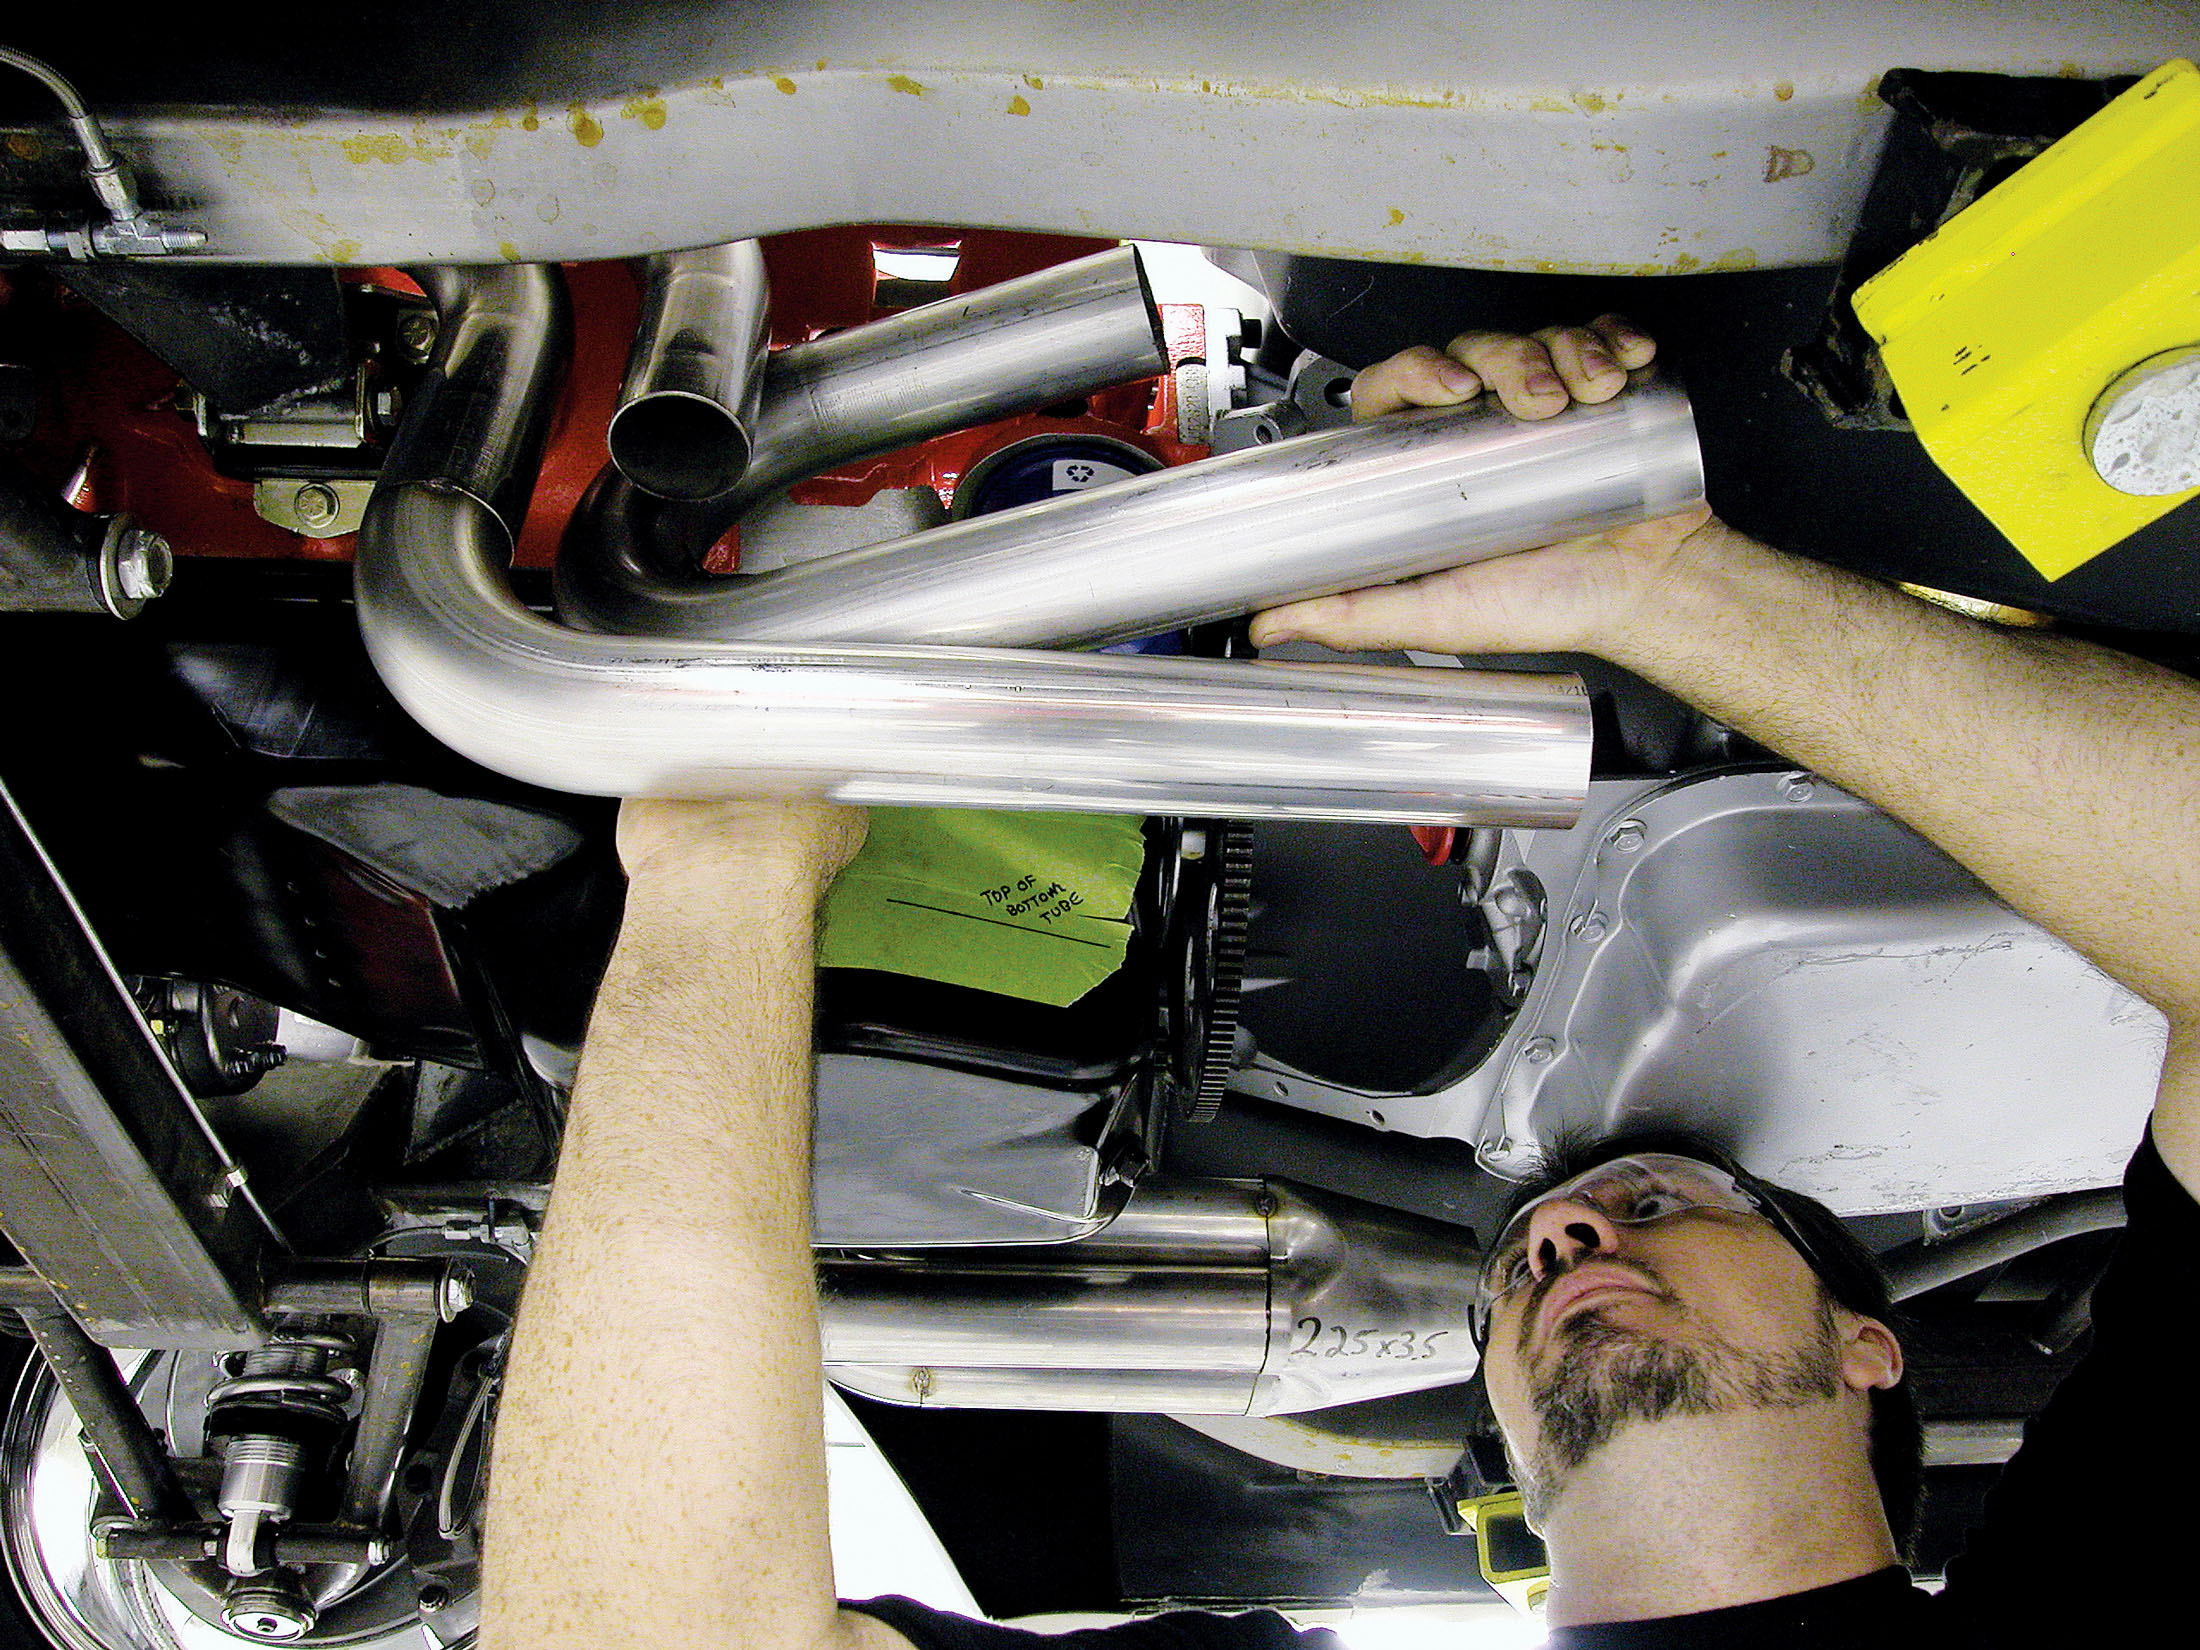
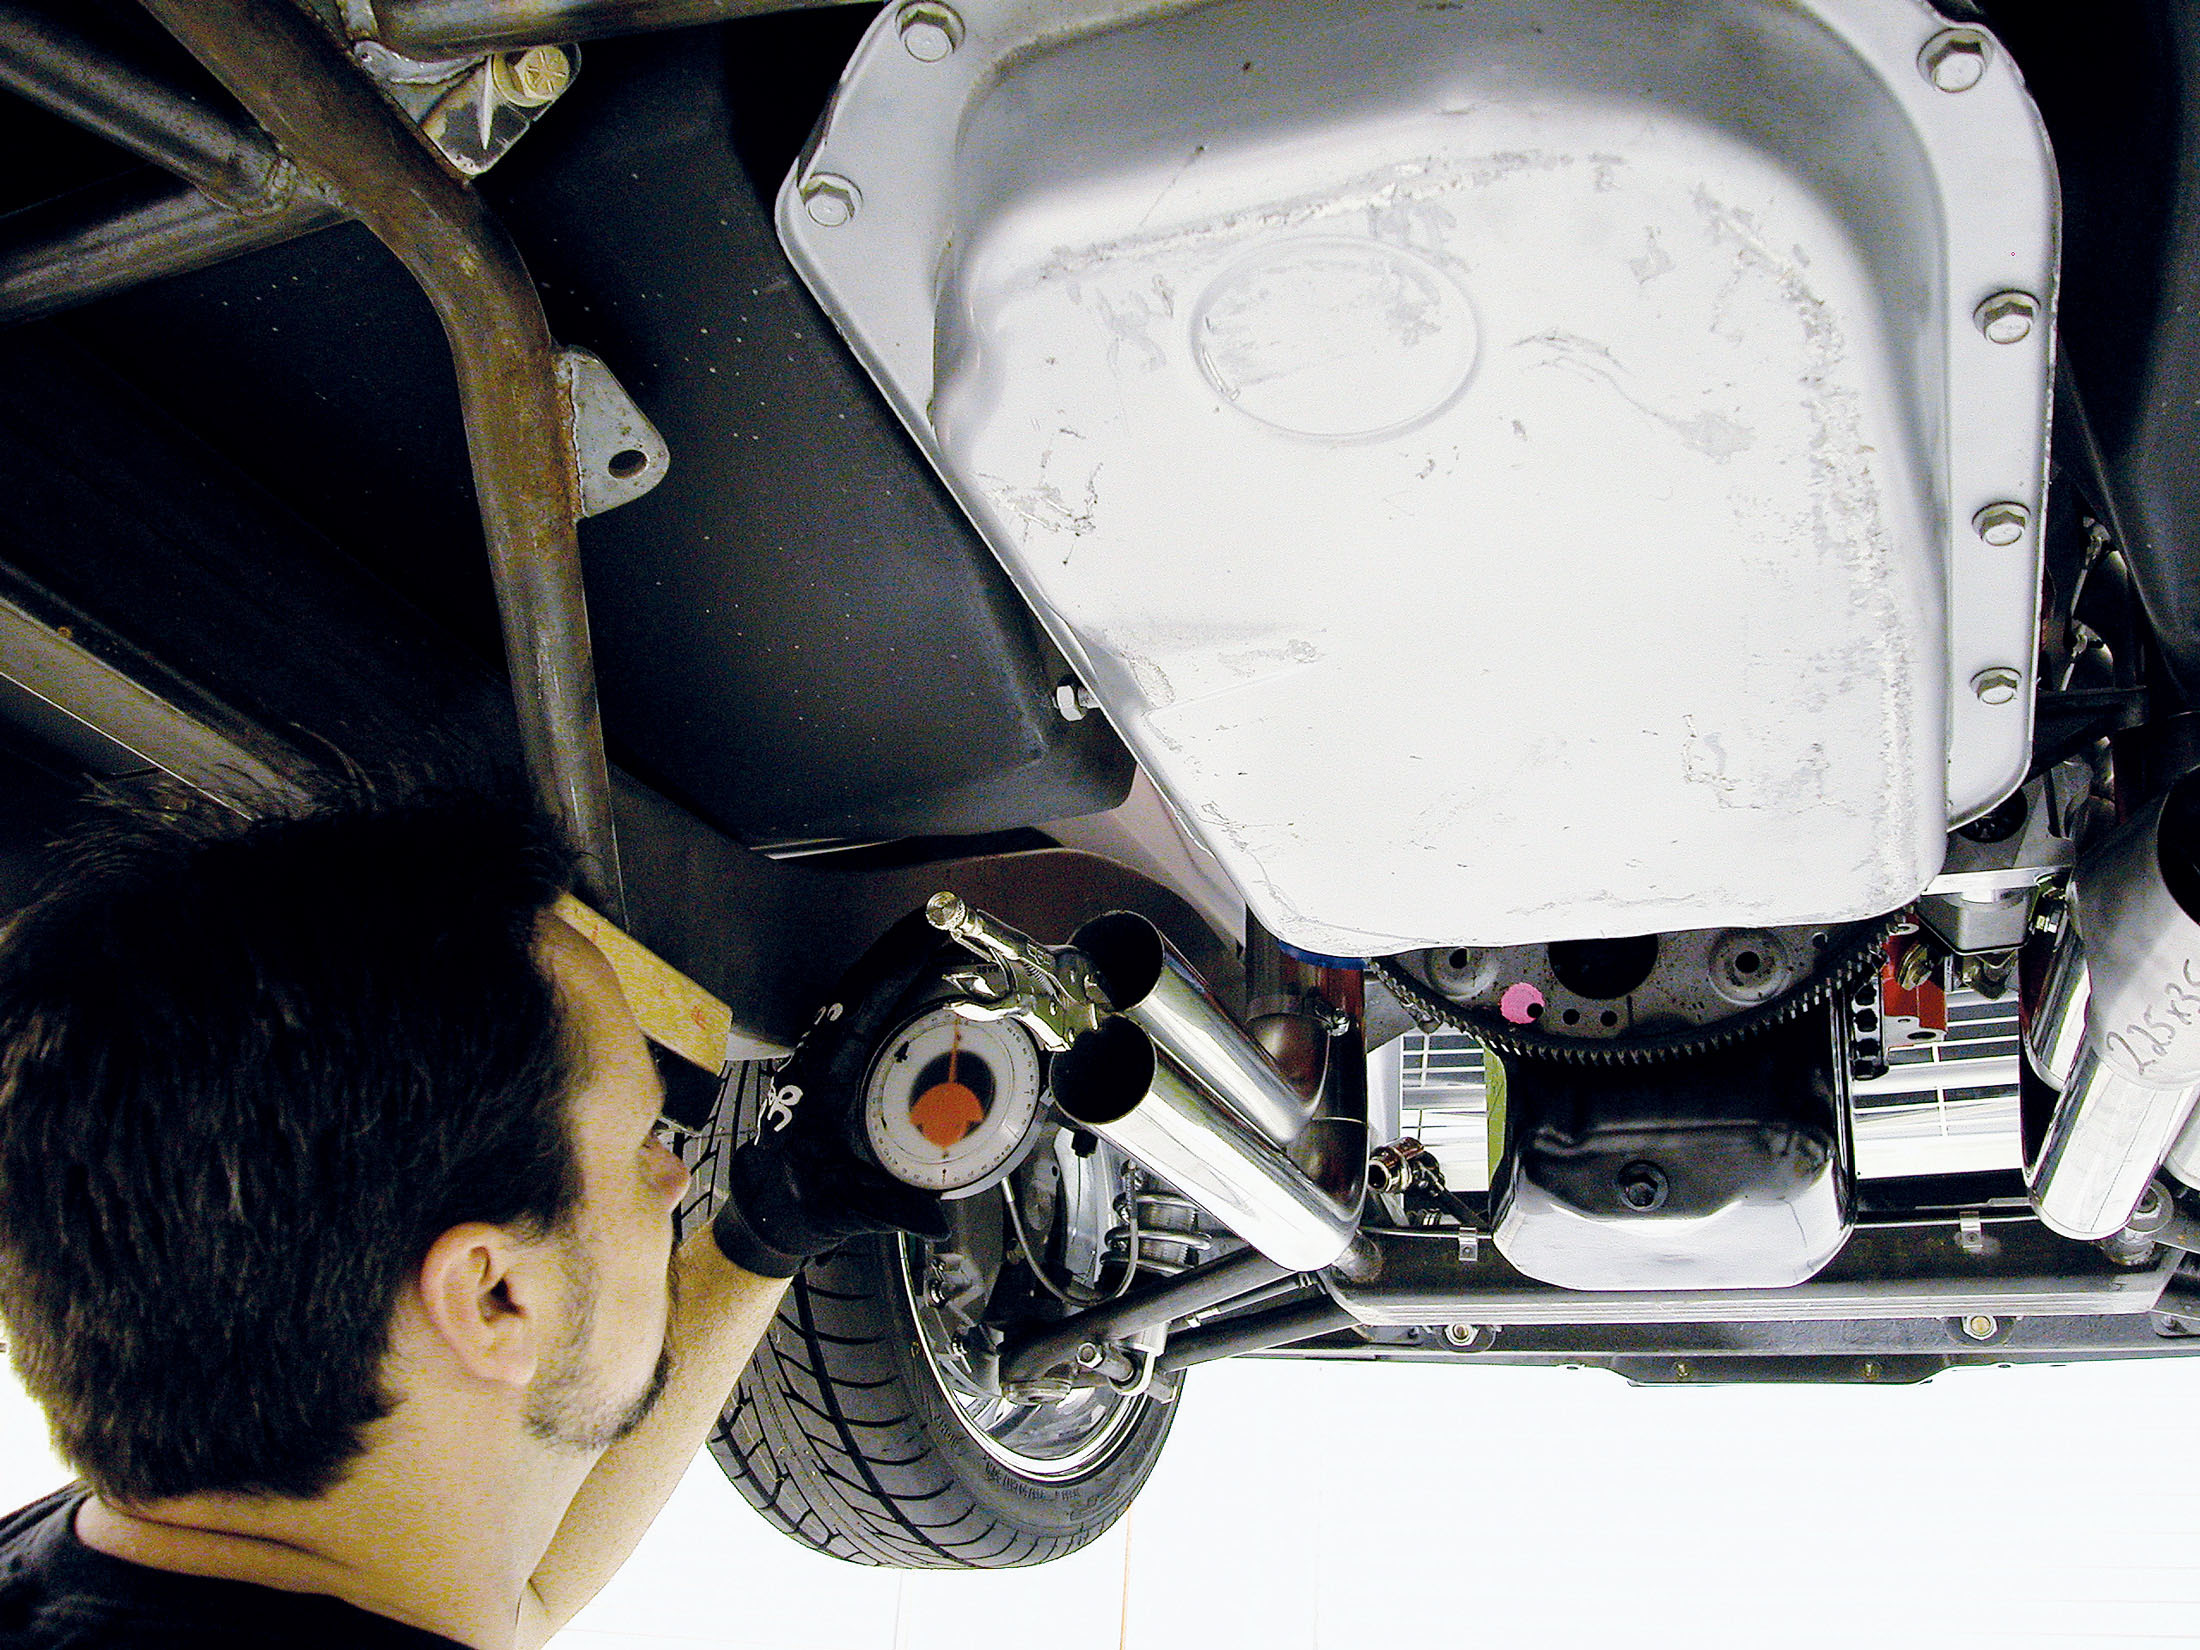
29. Here’s the completed header installed at the top of the engine. Notice there is plenty of clearance around the spark plugs, fastening bolts, steering column and inner fender. If you envisioned the finished header and tried to build to that vision, you’d be lost. But tackling it one bend at a time, front to back, makes the project manageable.
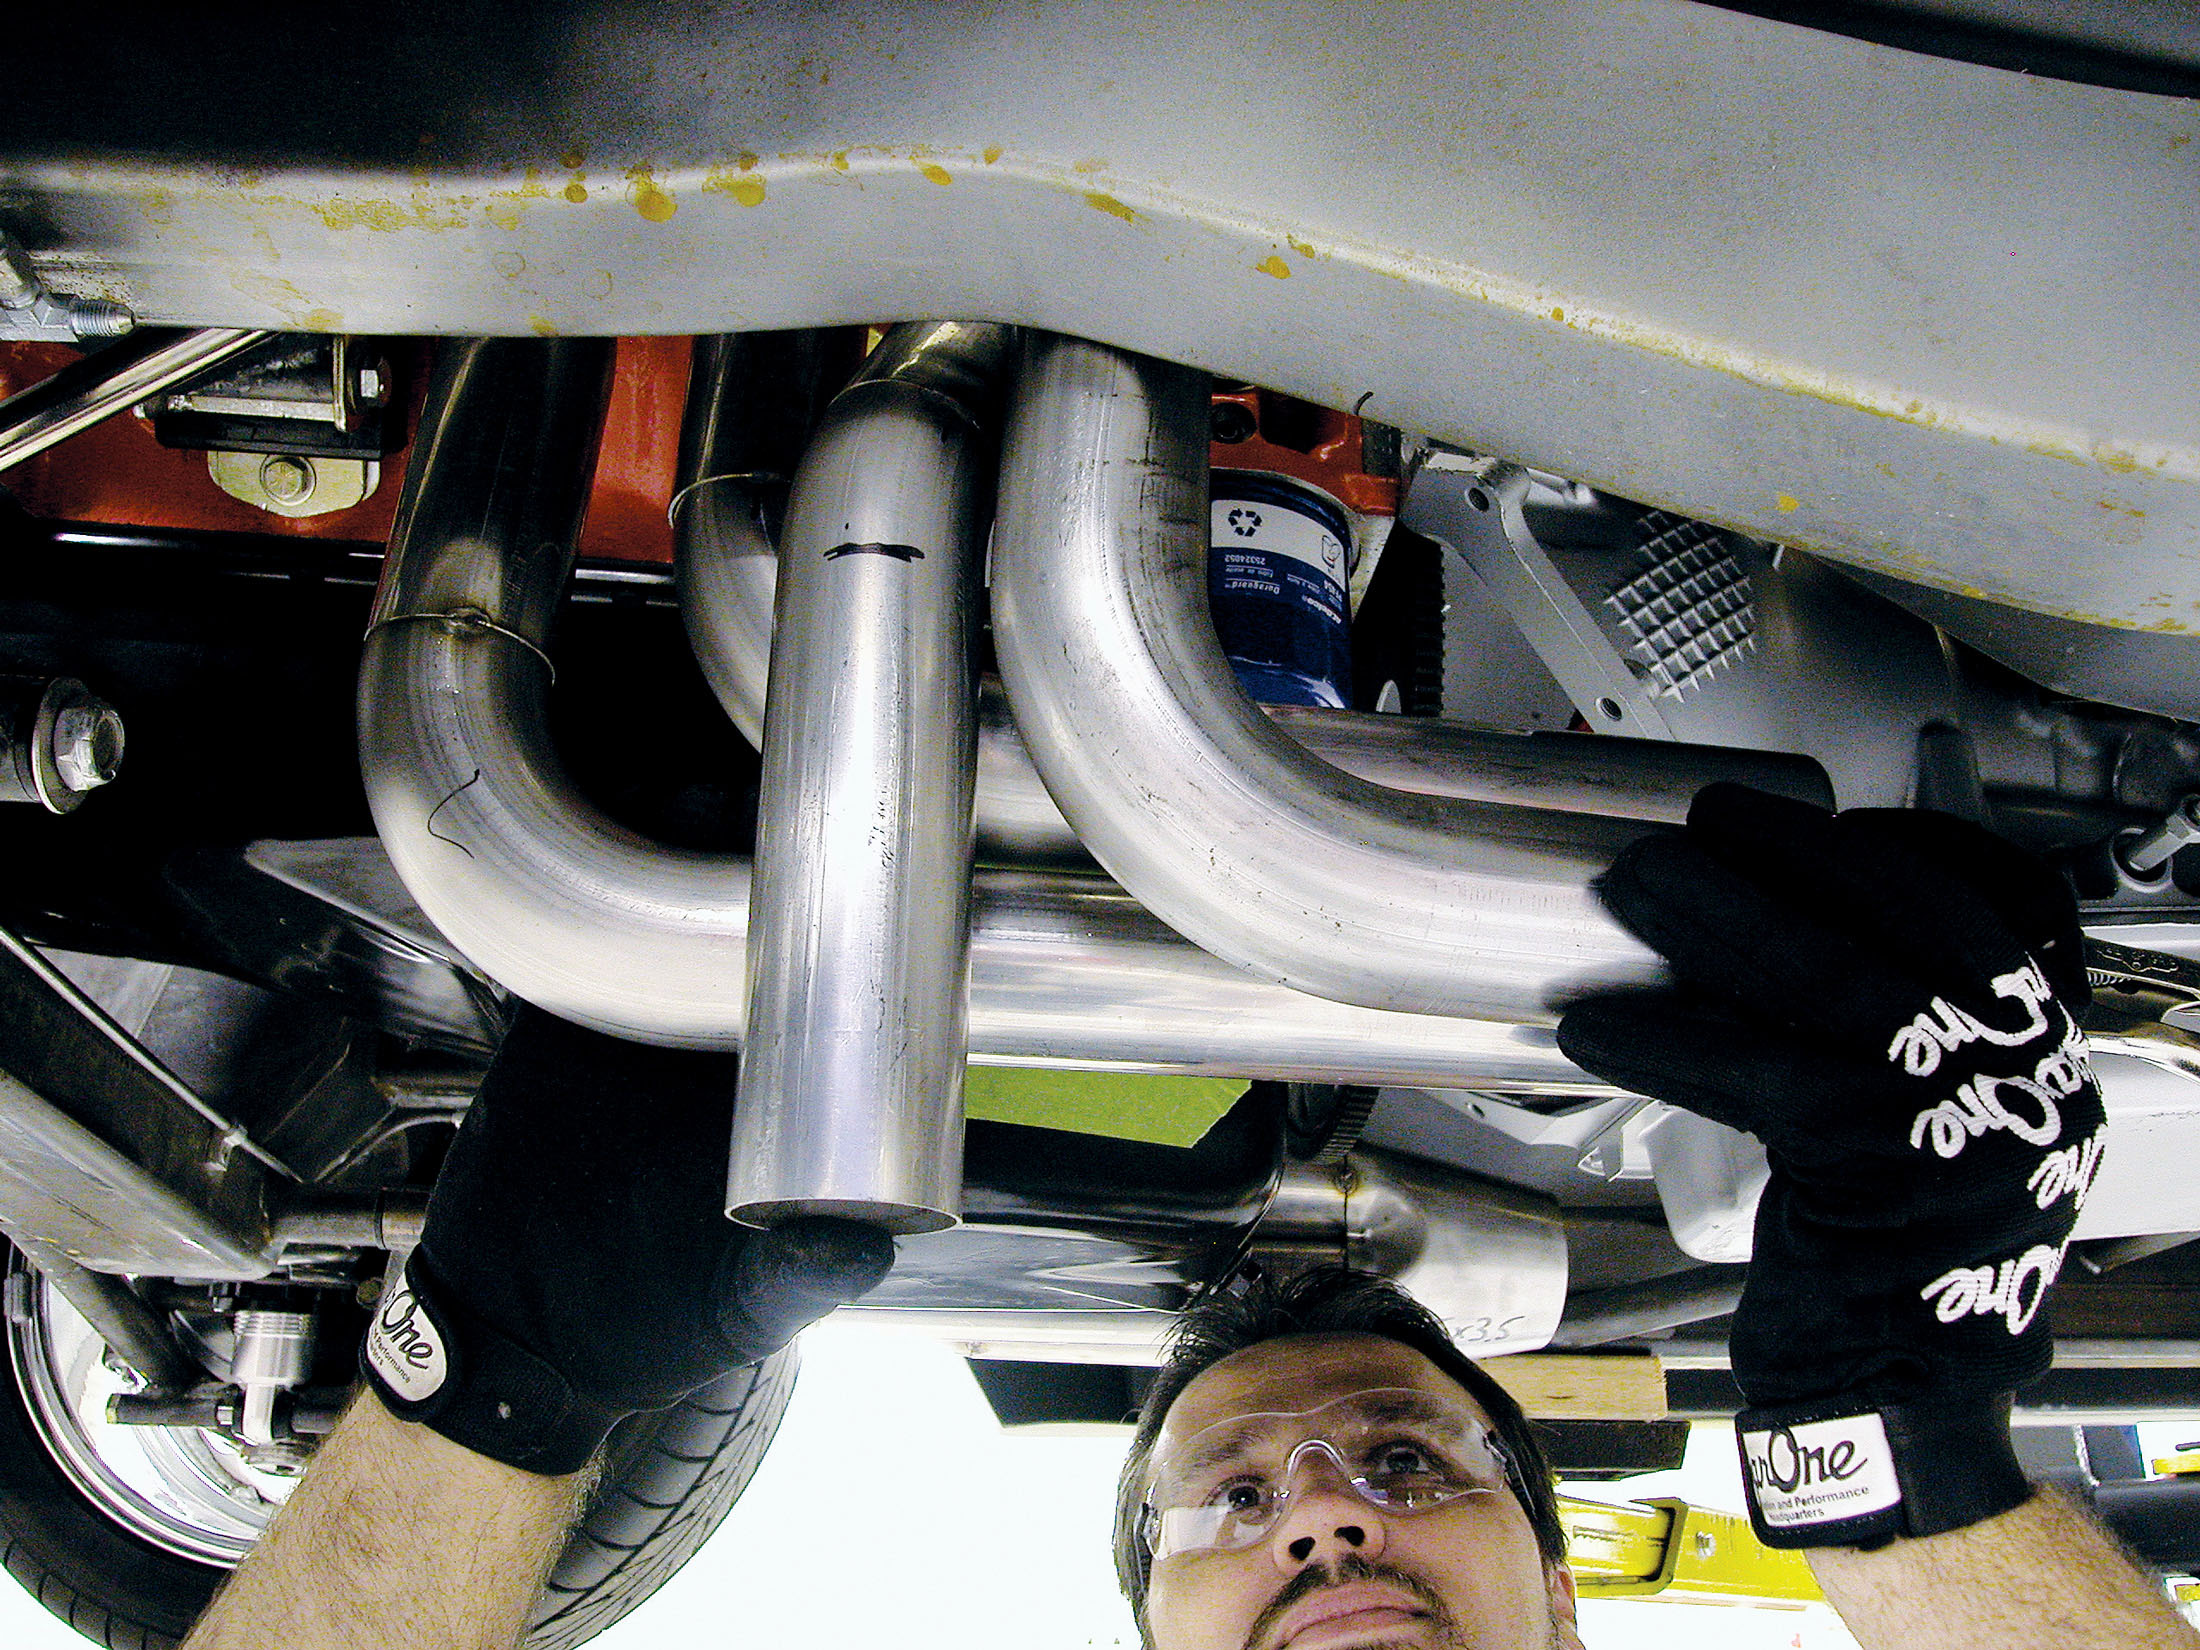
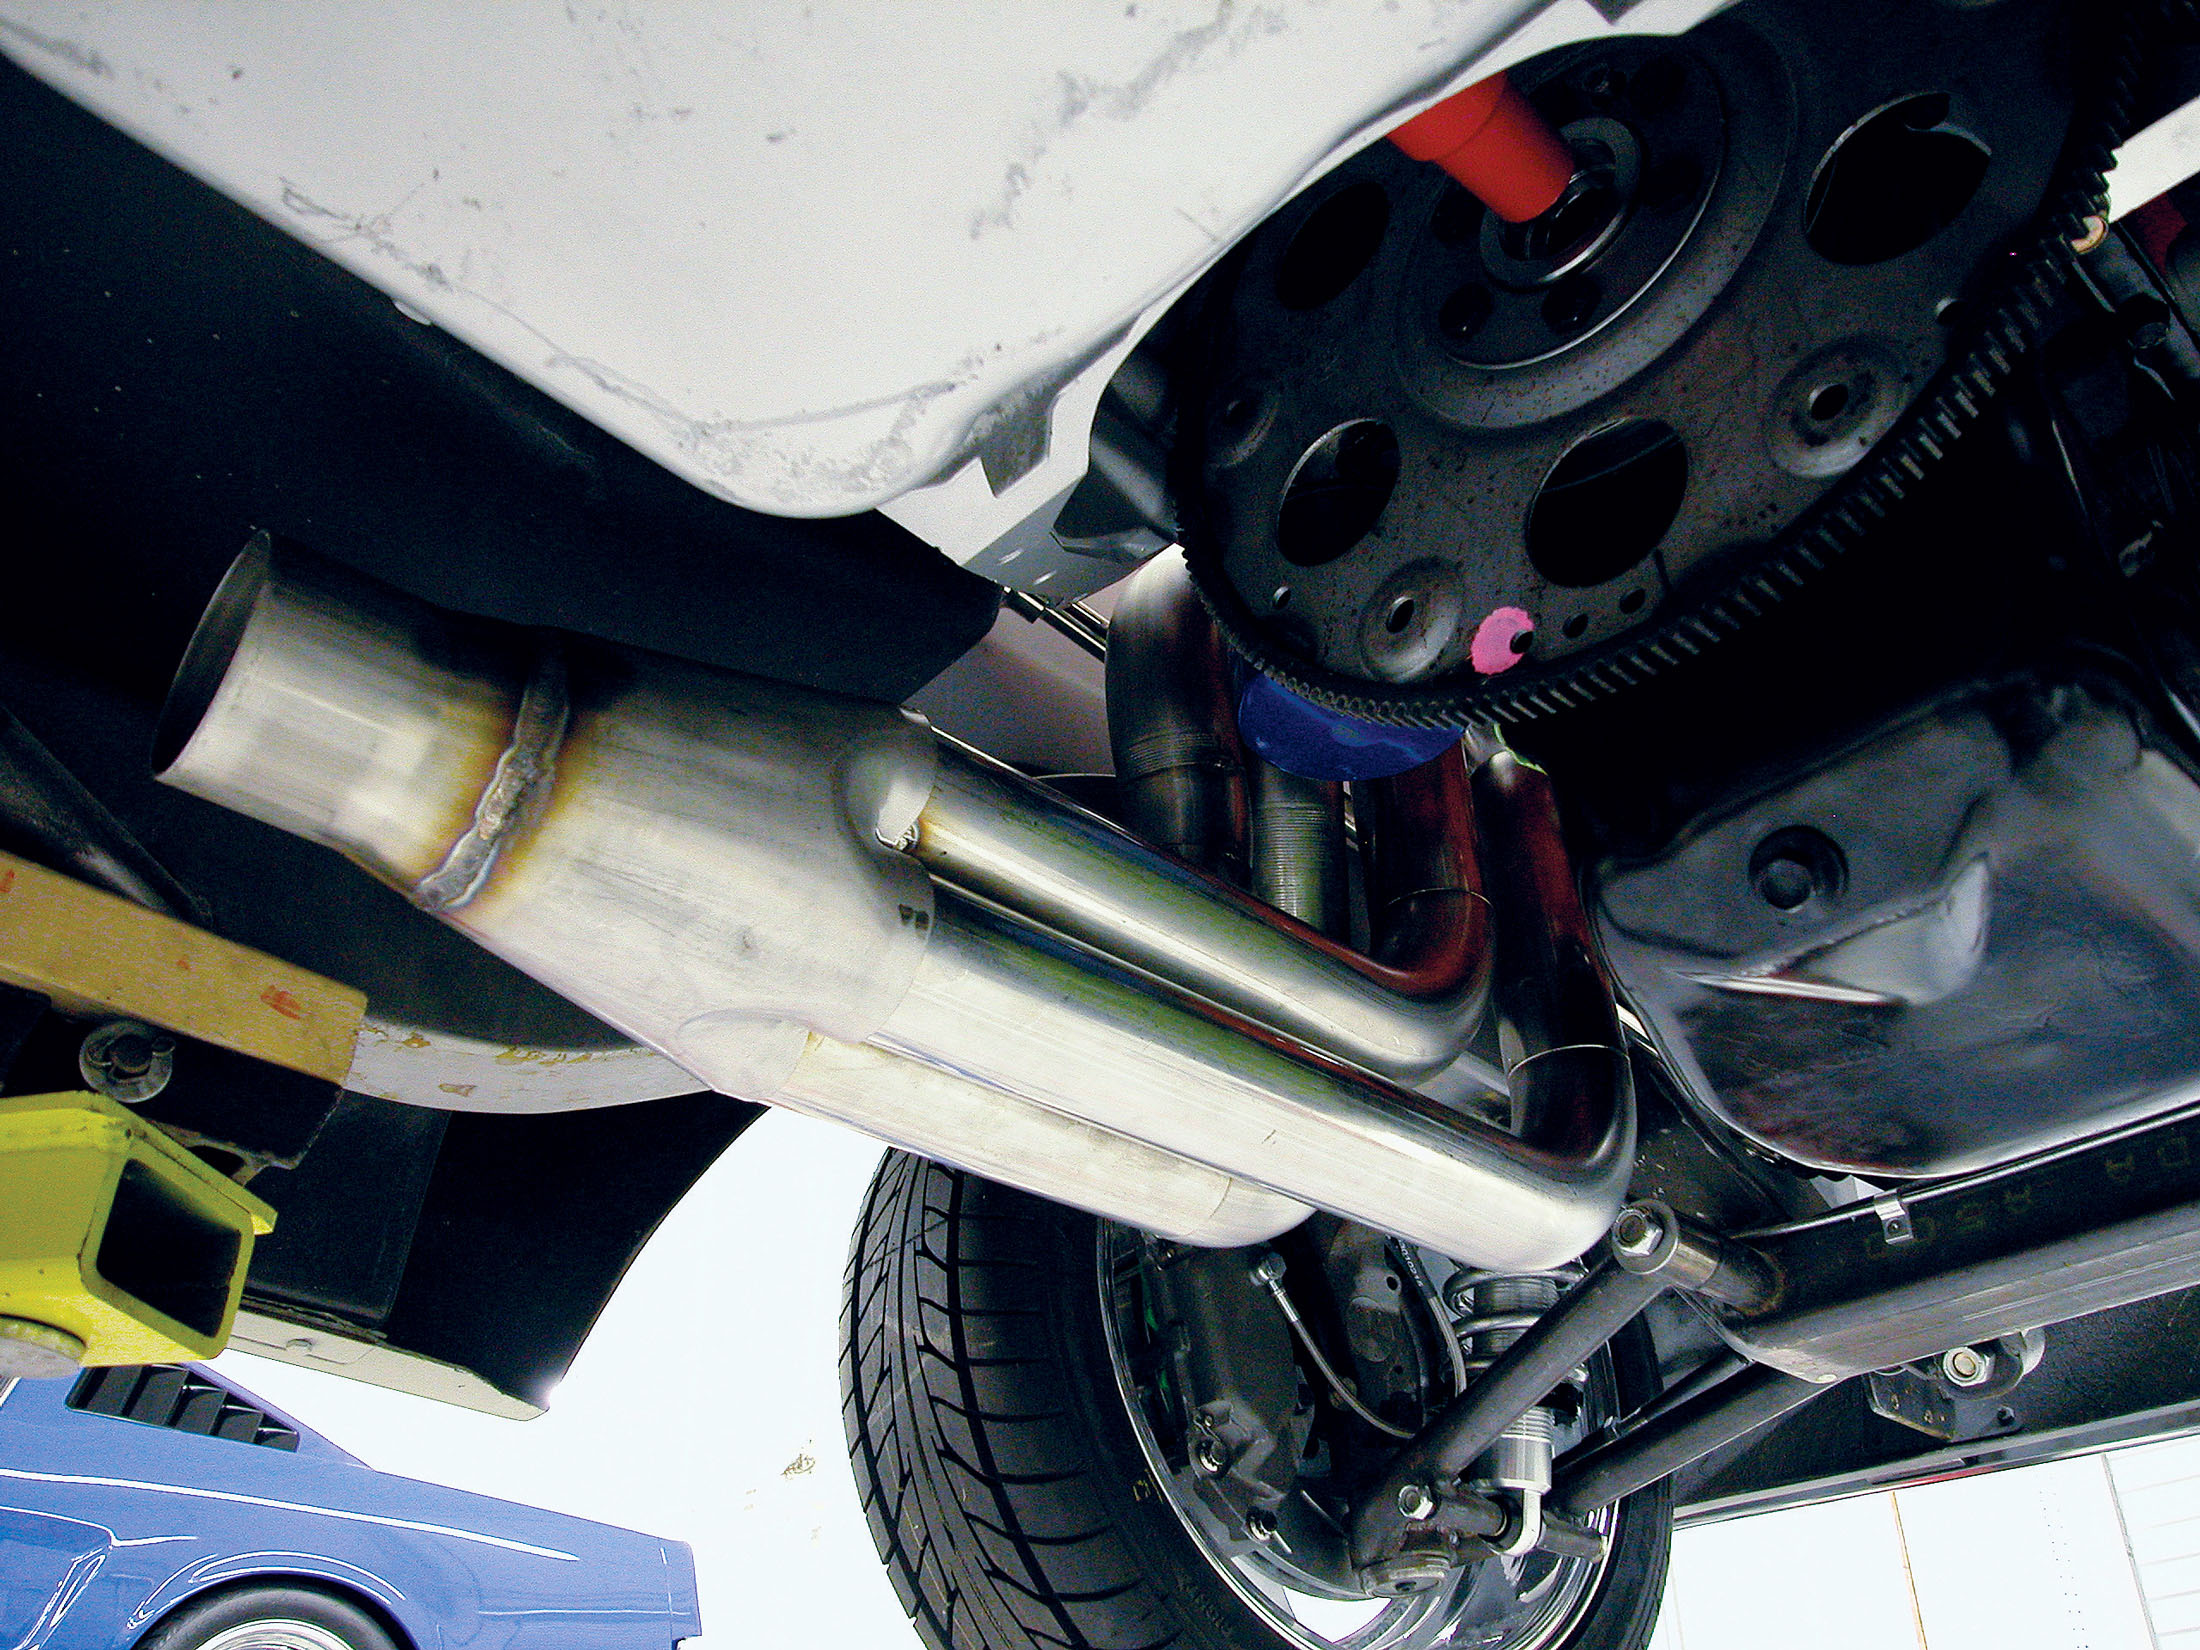
30A-C. These shots show the finished header from the bottom. Notice how well the tubes flow together and how much clearance there is around them. Georges installed a short little oil filter just to demonstrate another option if clearance is really an issue, although the full-sized filter still fits and is easily accessible.
30A-C. These shots show the finished header from the bottom. Notice how well the tubes flow together and how much clearance there is around them. Georges installed a short little oil filter just to demonstrate another option if clearance is really an issue, although the full-sized filter still fits and is easily accessible.
30A-C. These shots show the finished header from the bottom. Notice how well the tubes flow together and how much clearance there is around them. Georges installed a short little oil filter just to demonstrate another option if clearance is really an issue, although the full-sized filter still fits and is easily accessible.
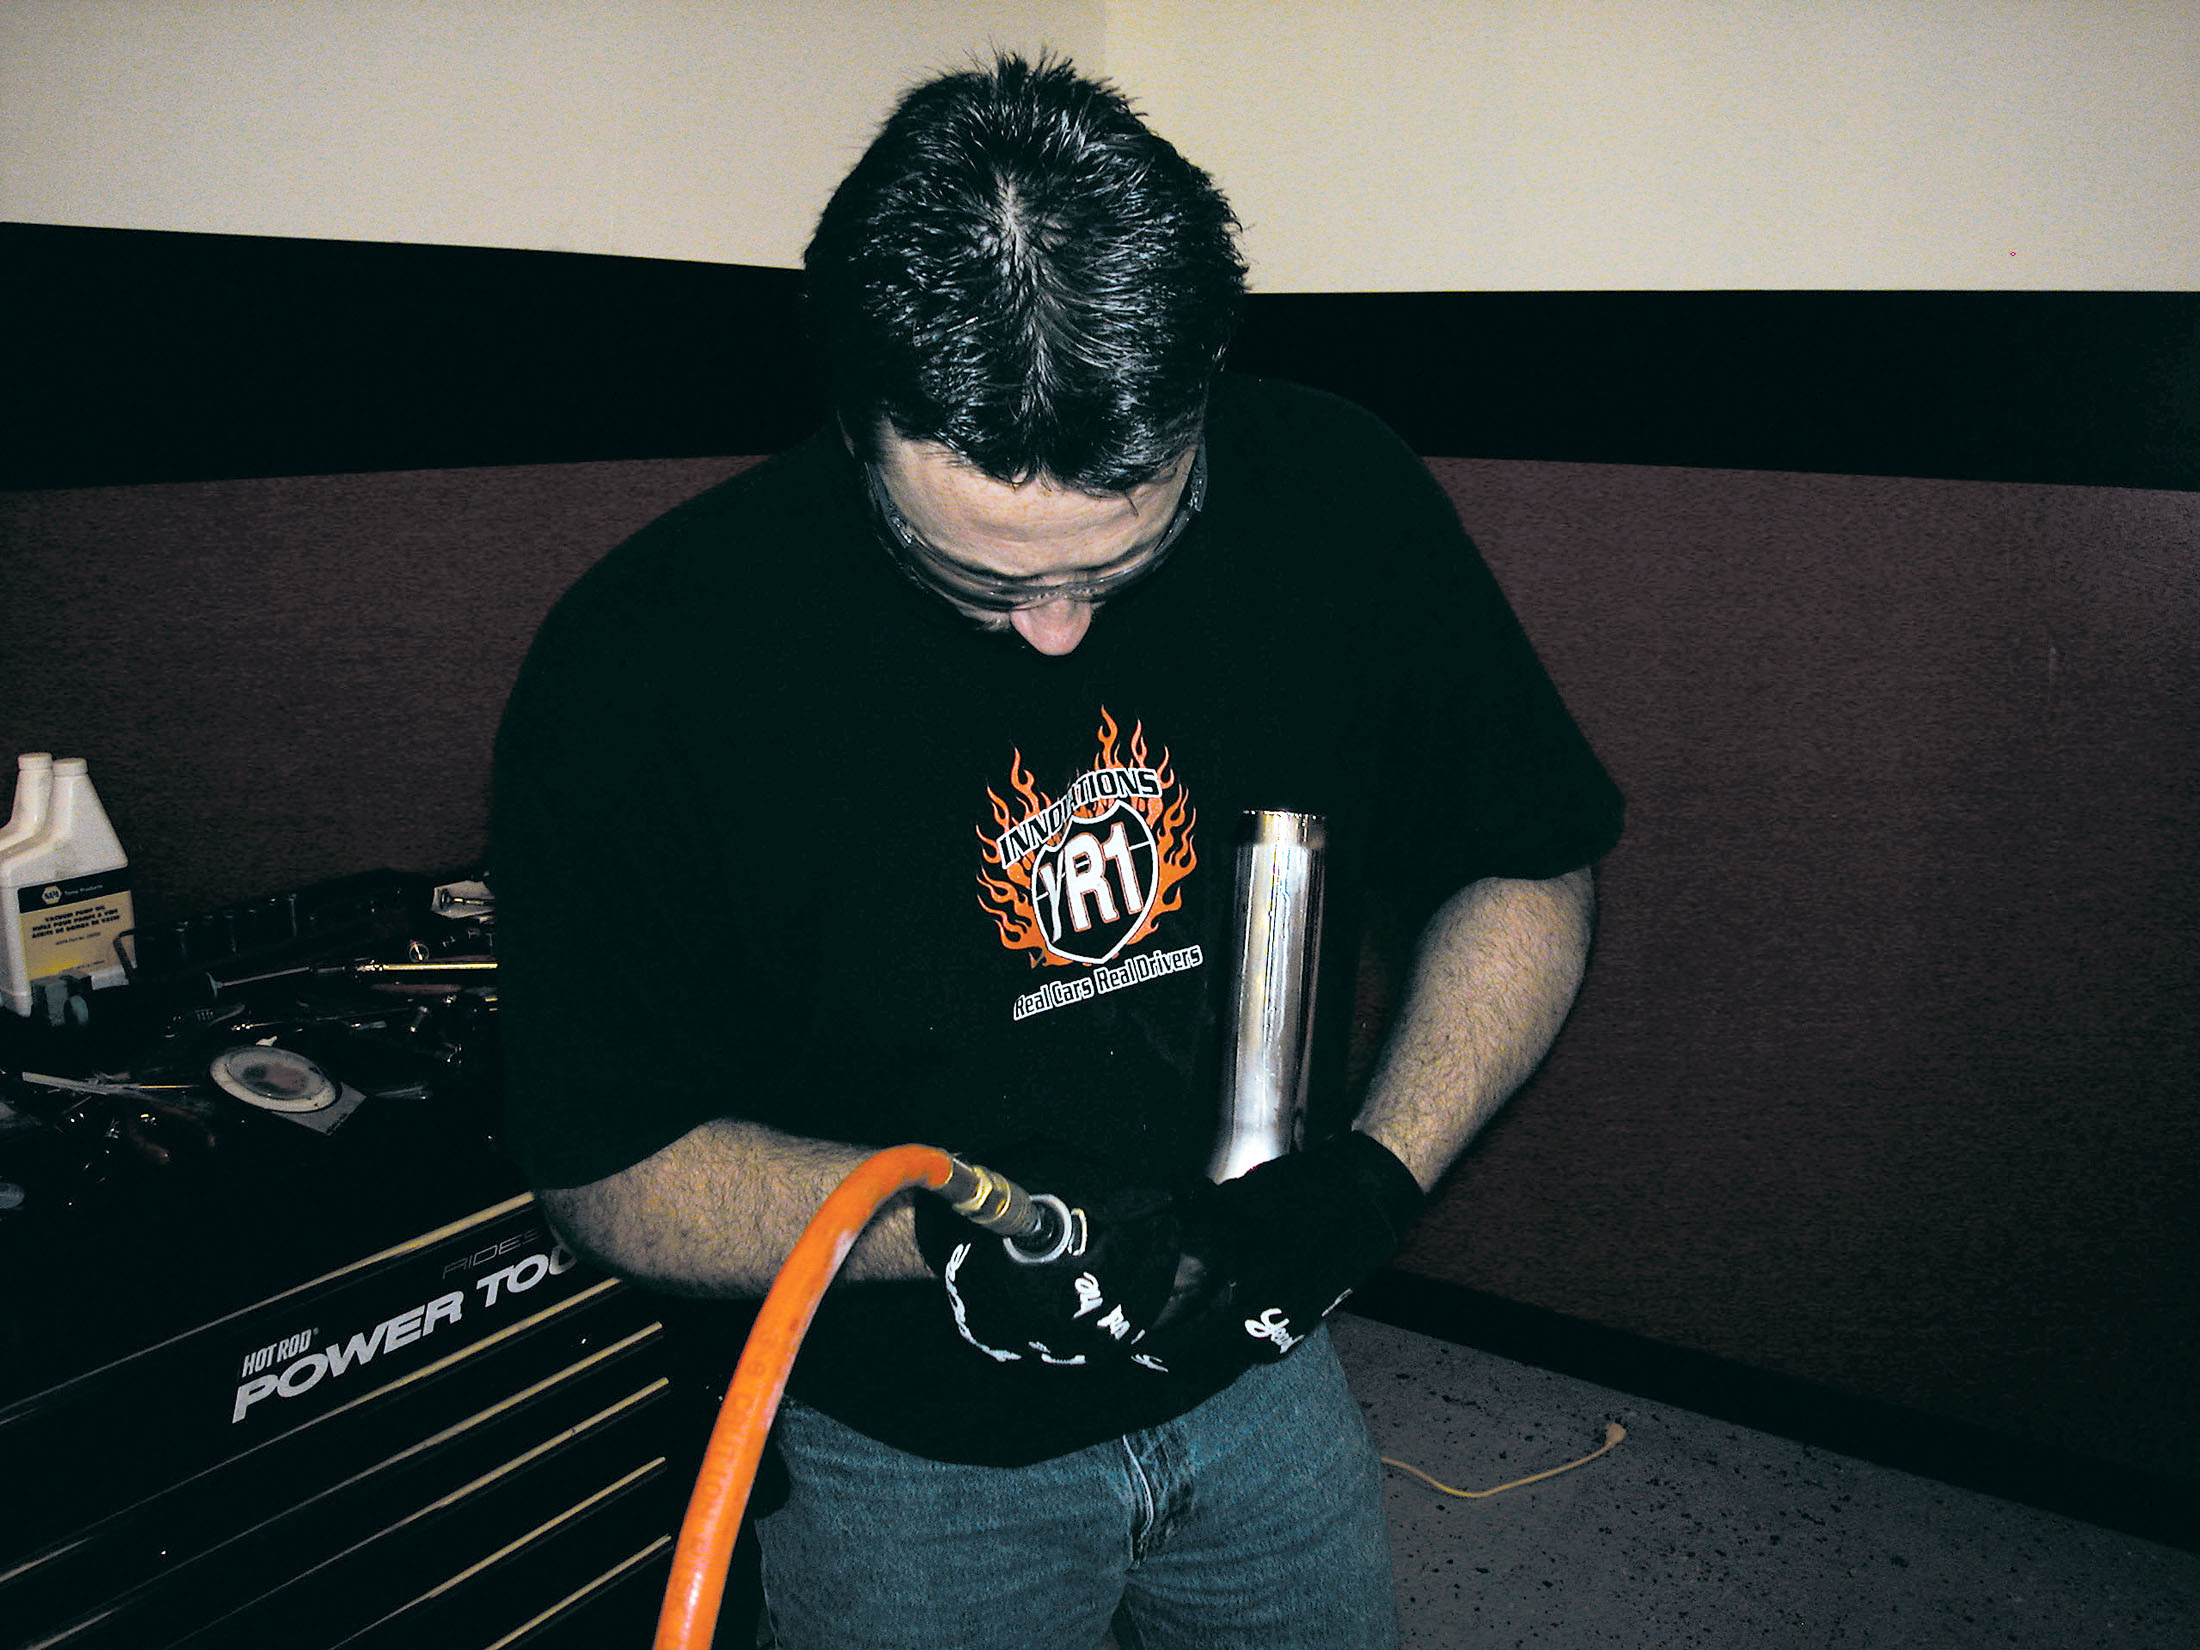
31. Another trick he showed us was back-filling the tubes with argon when he completes the welds. He tapes off the end, installs a hose in the other end and seals it, then turns on the gas. Georges keeps a small tank of argon just for this. This controls the weld area on the back side of the joints, so they’ll be smooth and free of impurities. Argon is used on the front side of the weld (where the torch is) for this reason. But when you’re talking about a closed environment (such as the interior of a tube), an equal amount of prep and care should be taken to keep the back side of the weld clean, too.
ARTICLE SOURCES
Year One
PO Box 1019
Cornelia, GA 30531
800-932-7663
Stainless Works
10145 Philipp Pkwy
Streetsboro, OH 44241
800-878-3635
