TheAutoBuilder.com

Edit Template

Passing The Bar

Building and Installing Your Own Camaro Rollbar

Subheading Goes Here

In the fall of 2003, I wanted to attend an open-track lapping day with my ʼ67 RS/SS Camaro. I have owned the car for several years and have autocrossed and drag raced it, but I never had the opportunity to run it at one of the local tracks, such as Nelson Ledges of mid Ohio, or BeaverRun.

Author

Picture of Al Noe

Al Noe

Photography: Courtesy Stainless Works

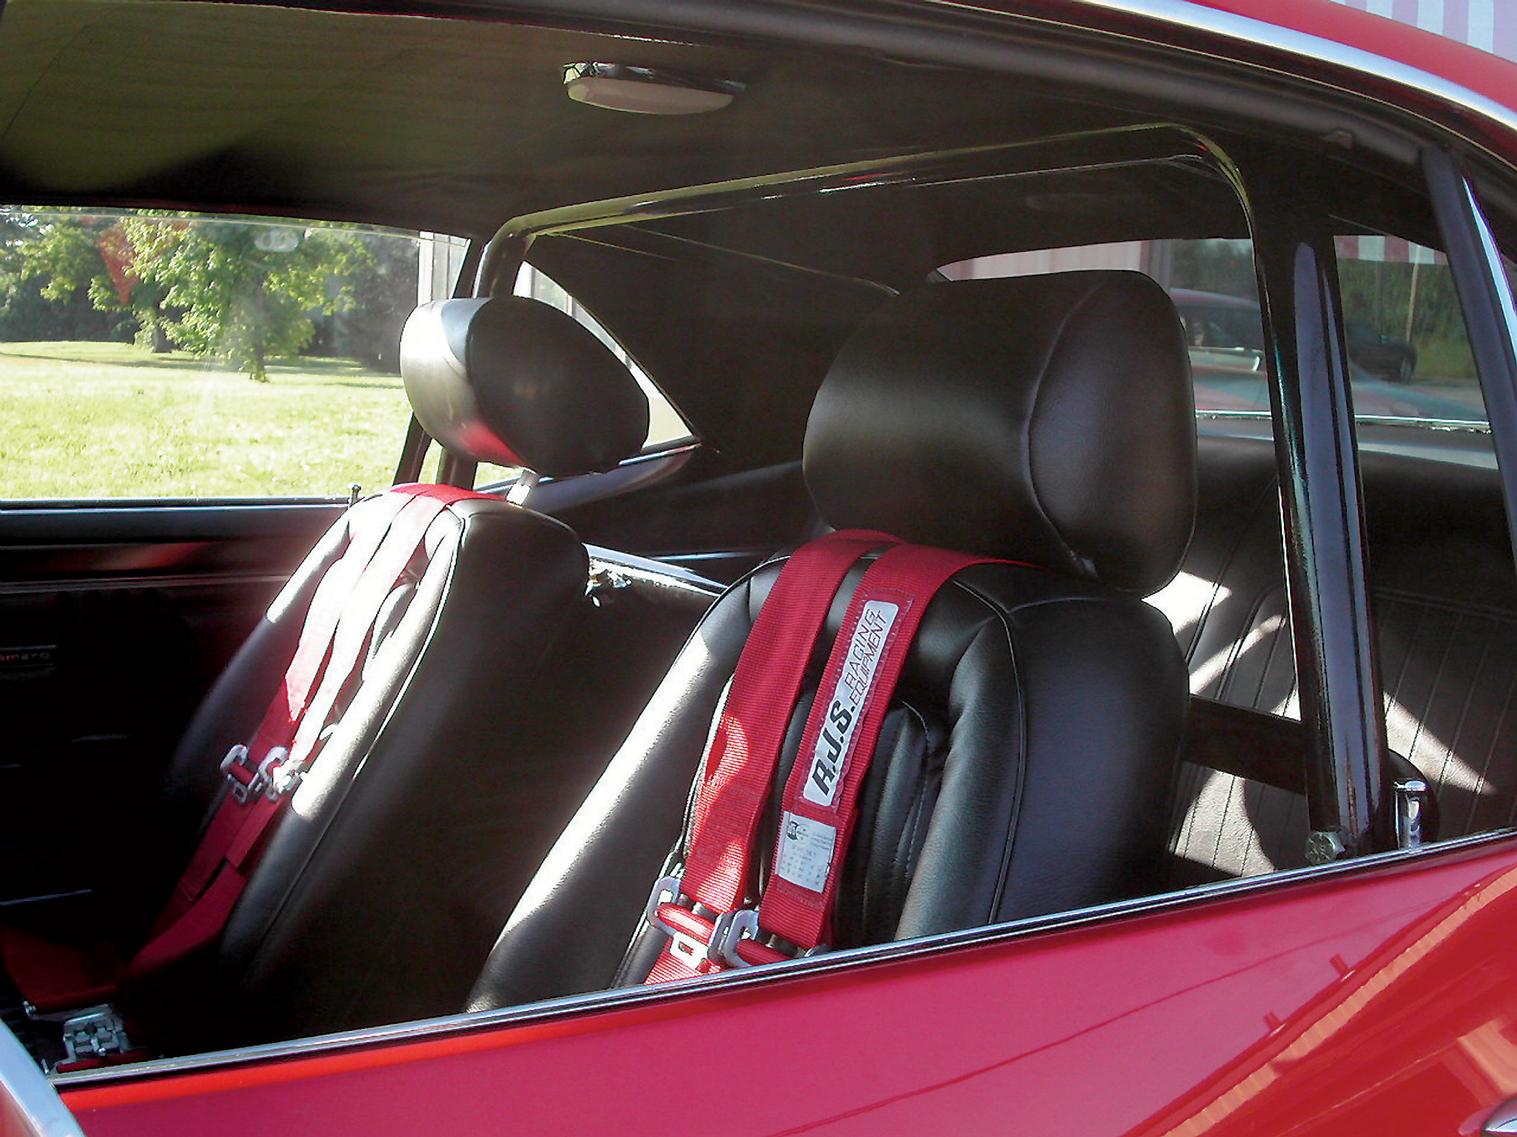
NASA (National Autosport Association) was having an HPDE (High Performance Driving Event) at BeaverRun, so I began to research taking my car to this event, in an attempt to abuse it to the fullest. After asking about the safety requirements, I quickly learned that my car would not pass tech inspection at any of the above tracks, as they require three-point belts (minimum) and my car had only a standard lap belt (standard-issue ’67 safety equipment). I also knew that if I wanted to run my car on a road course, I needed a rollbar, but I didn’t want an intrusive design that I would have to climb over every time I got in and out of the car.

So, as I do with most projects, I began to make a list of what my requirements would be for a rollbar. Everyone will have different requirements, depending upon what you wish to do with your car. I wanted the following:

  1. Maximize vehicle stiffness while meeting all other goals;
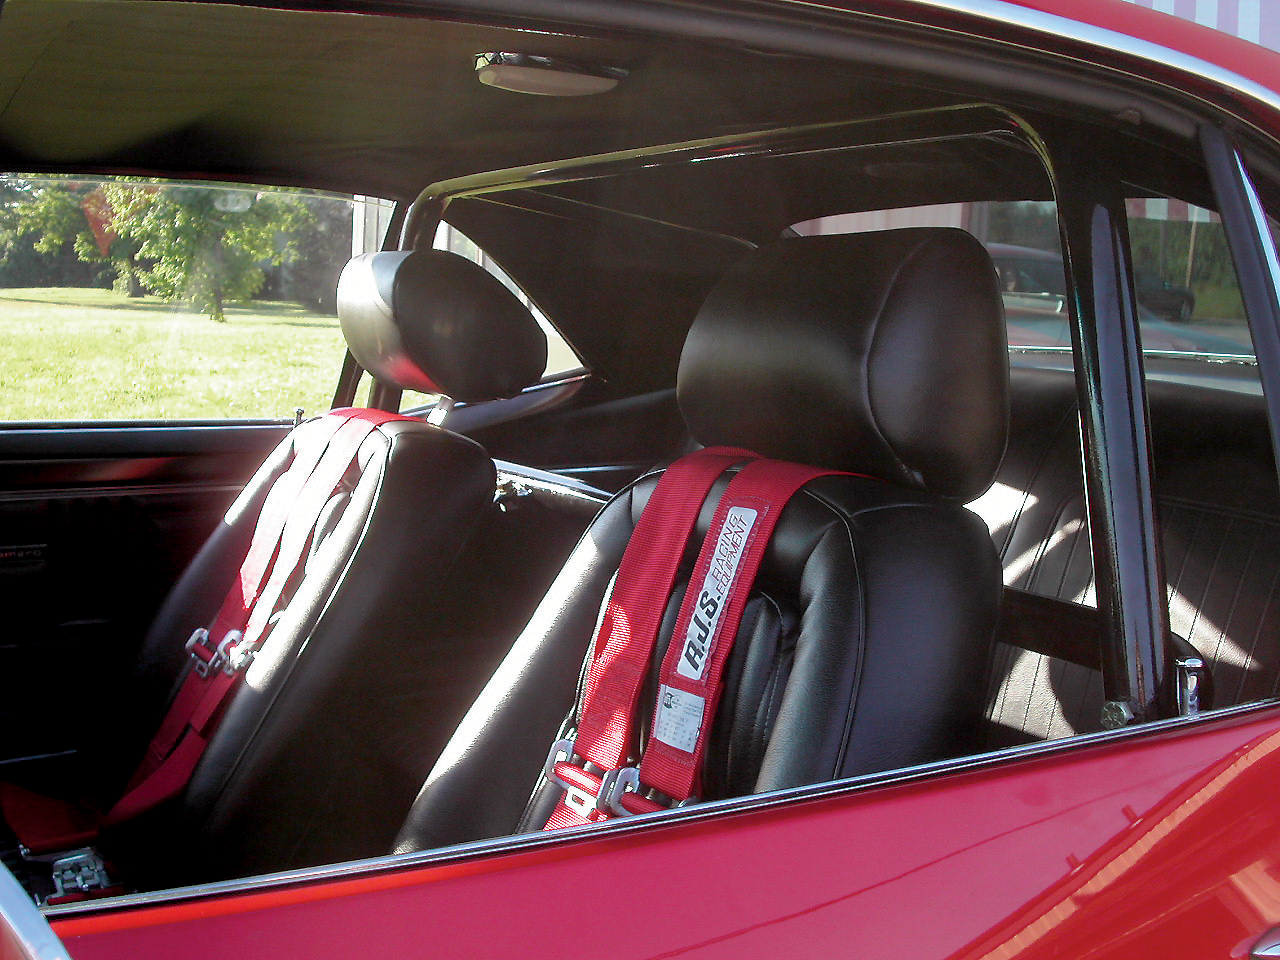
  2. Location for mounting shoulder belts for a five-point harness;
  3. Additional safety protection in the event of an off-track excursion;
  4. Ability to get in and out of the front and rear seat with minimal effort;
  5. Ability to remove the rear cross bar of the main hoop to allow for complete use of the back seat;
  6. Visually “hidden” when looking inside the car; and
  7. Maximize interior room.

You will note that one of my requirements was not to pass any sanctioning-body tech rules for rollbar design. In order to pass, for example, NHRA or IHRA tech, the sidebar has to pass from the main hoop to the floor at an angle that makes getting in and out of the car akin to climbing a jungle gym. Having no desire to do this, and knowing that I will always run my car on treaded DOT tires, it would be hard for my car to go in the 11s, especially with my 3:00 rear gear set. Most tracks that I have been to will not hassle you as long as the bar construction is sound and the car does not dip into the 10-second barrier or faster (even if you have a rollbar like mine, with the front two bars “laid down”).

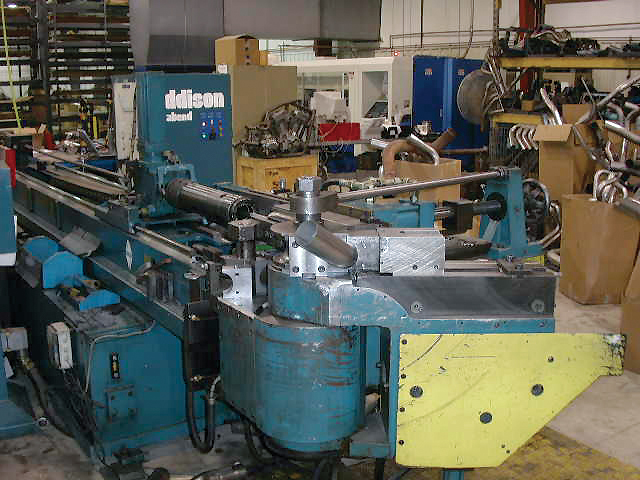
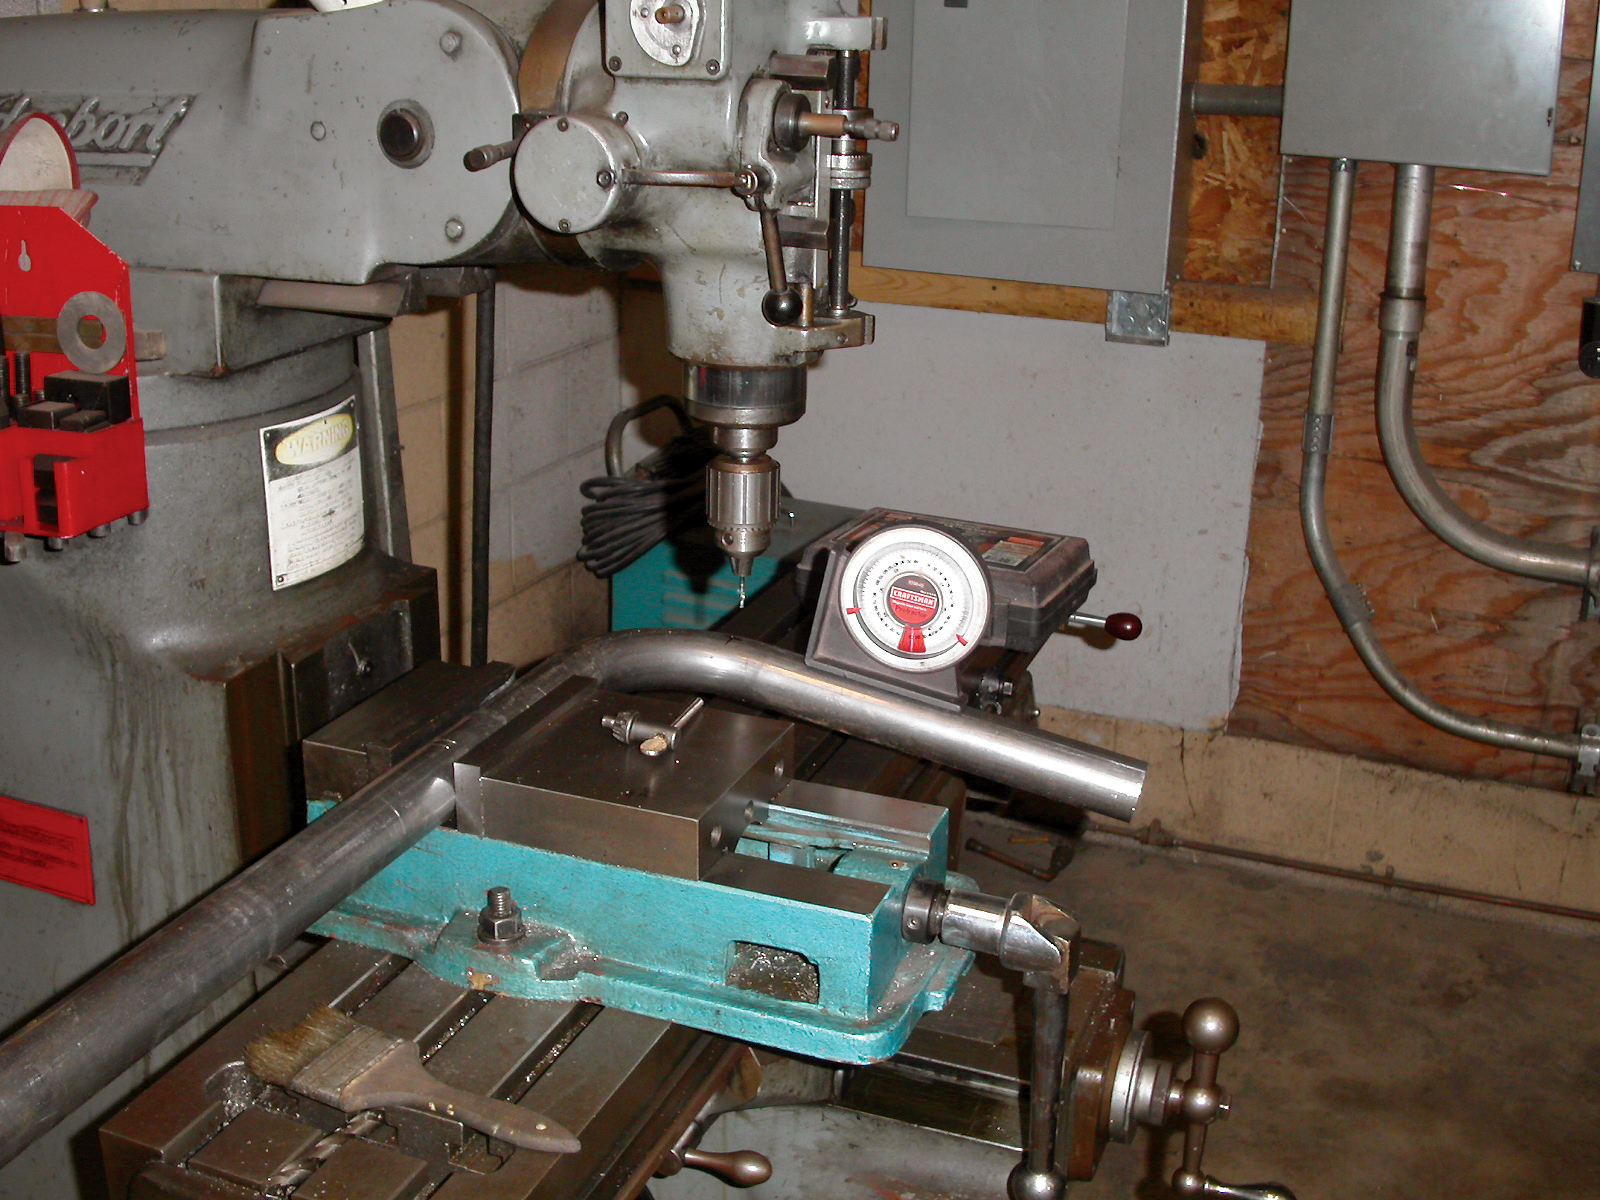
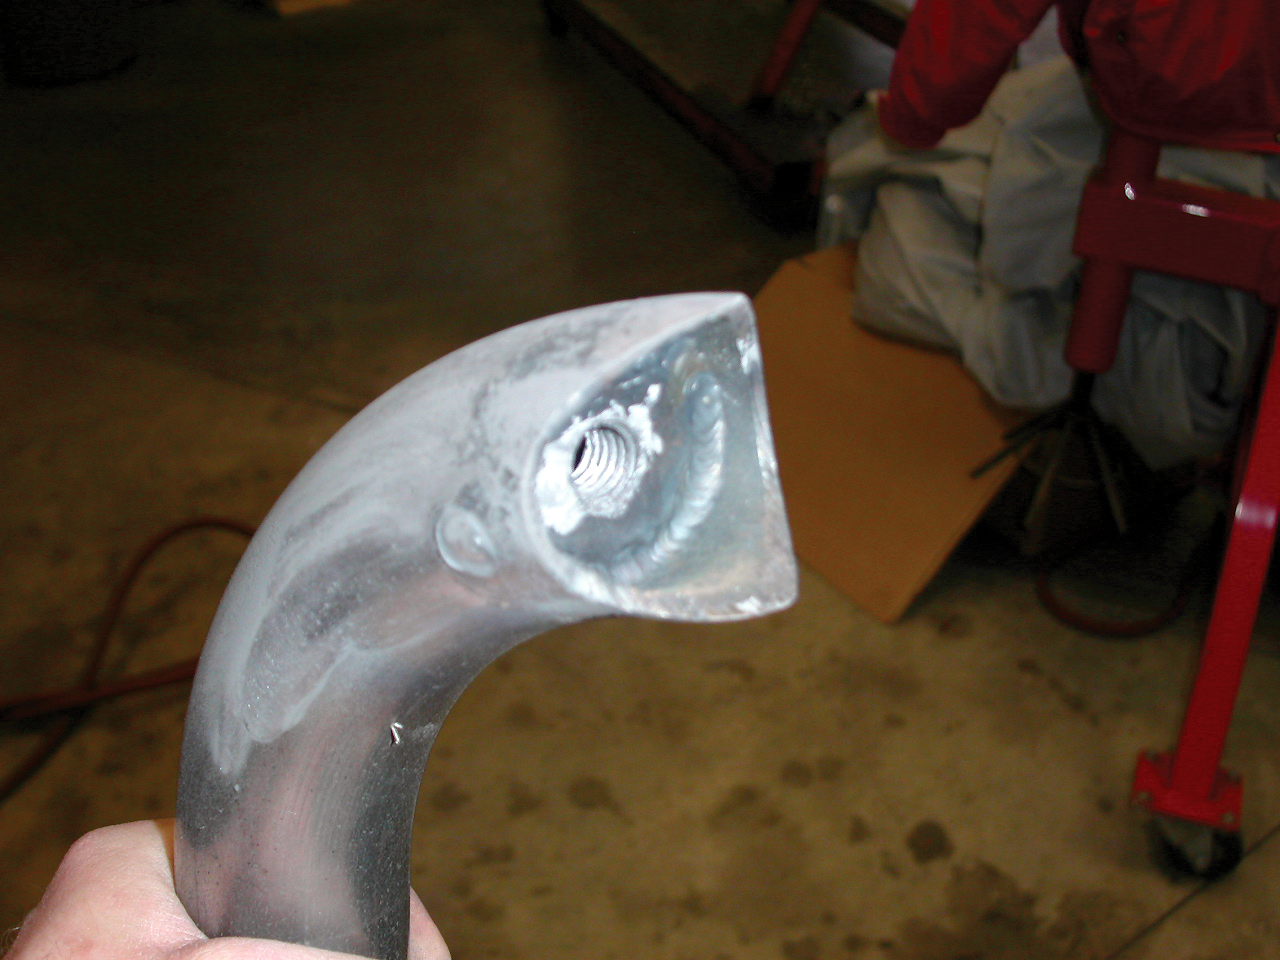
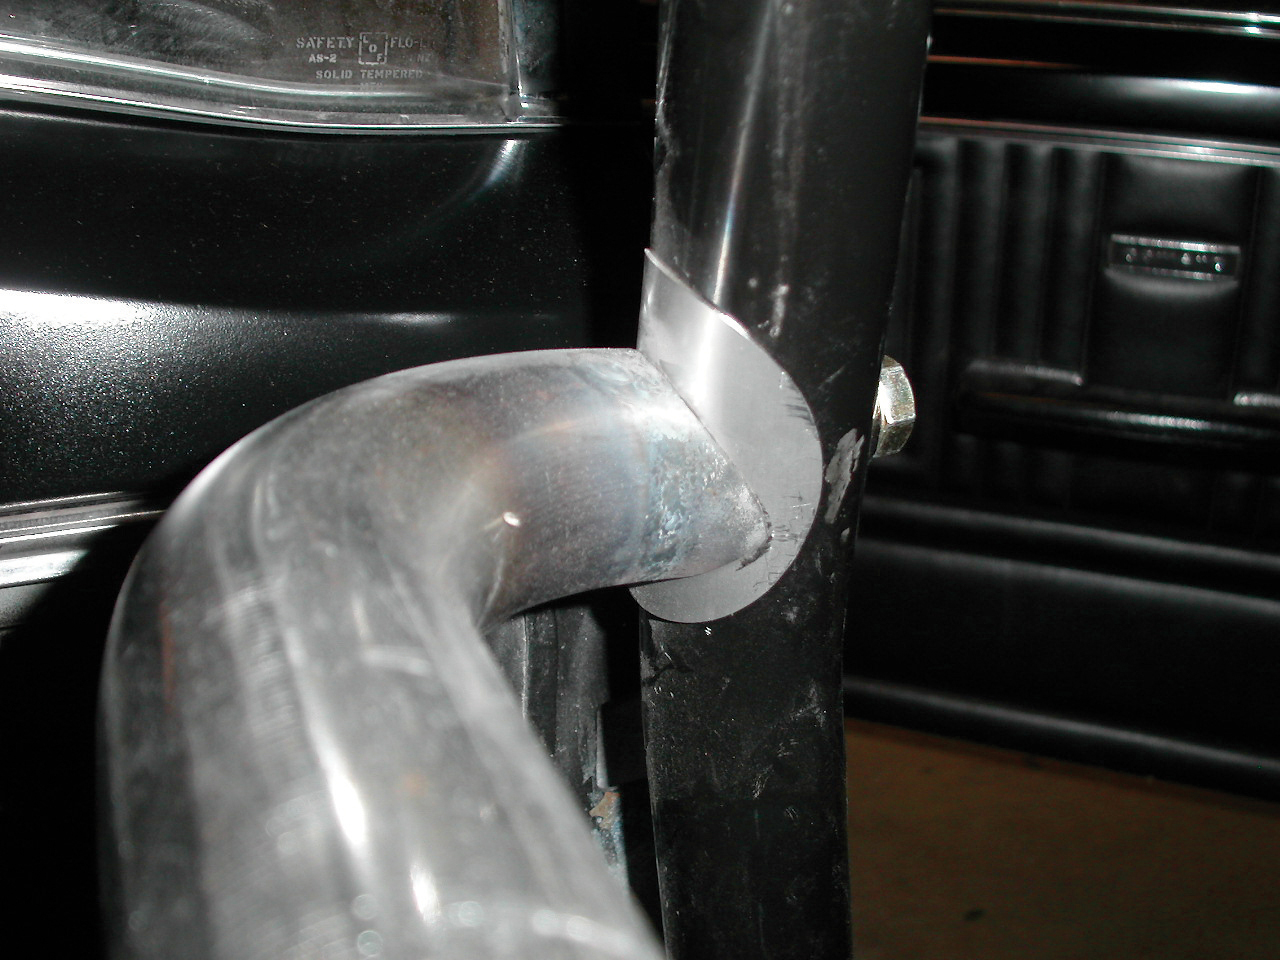
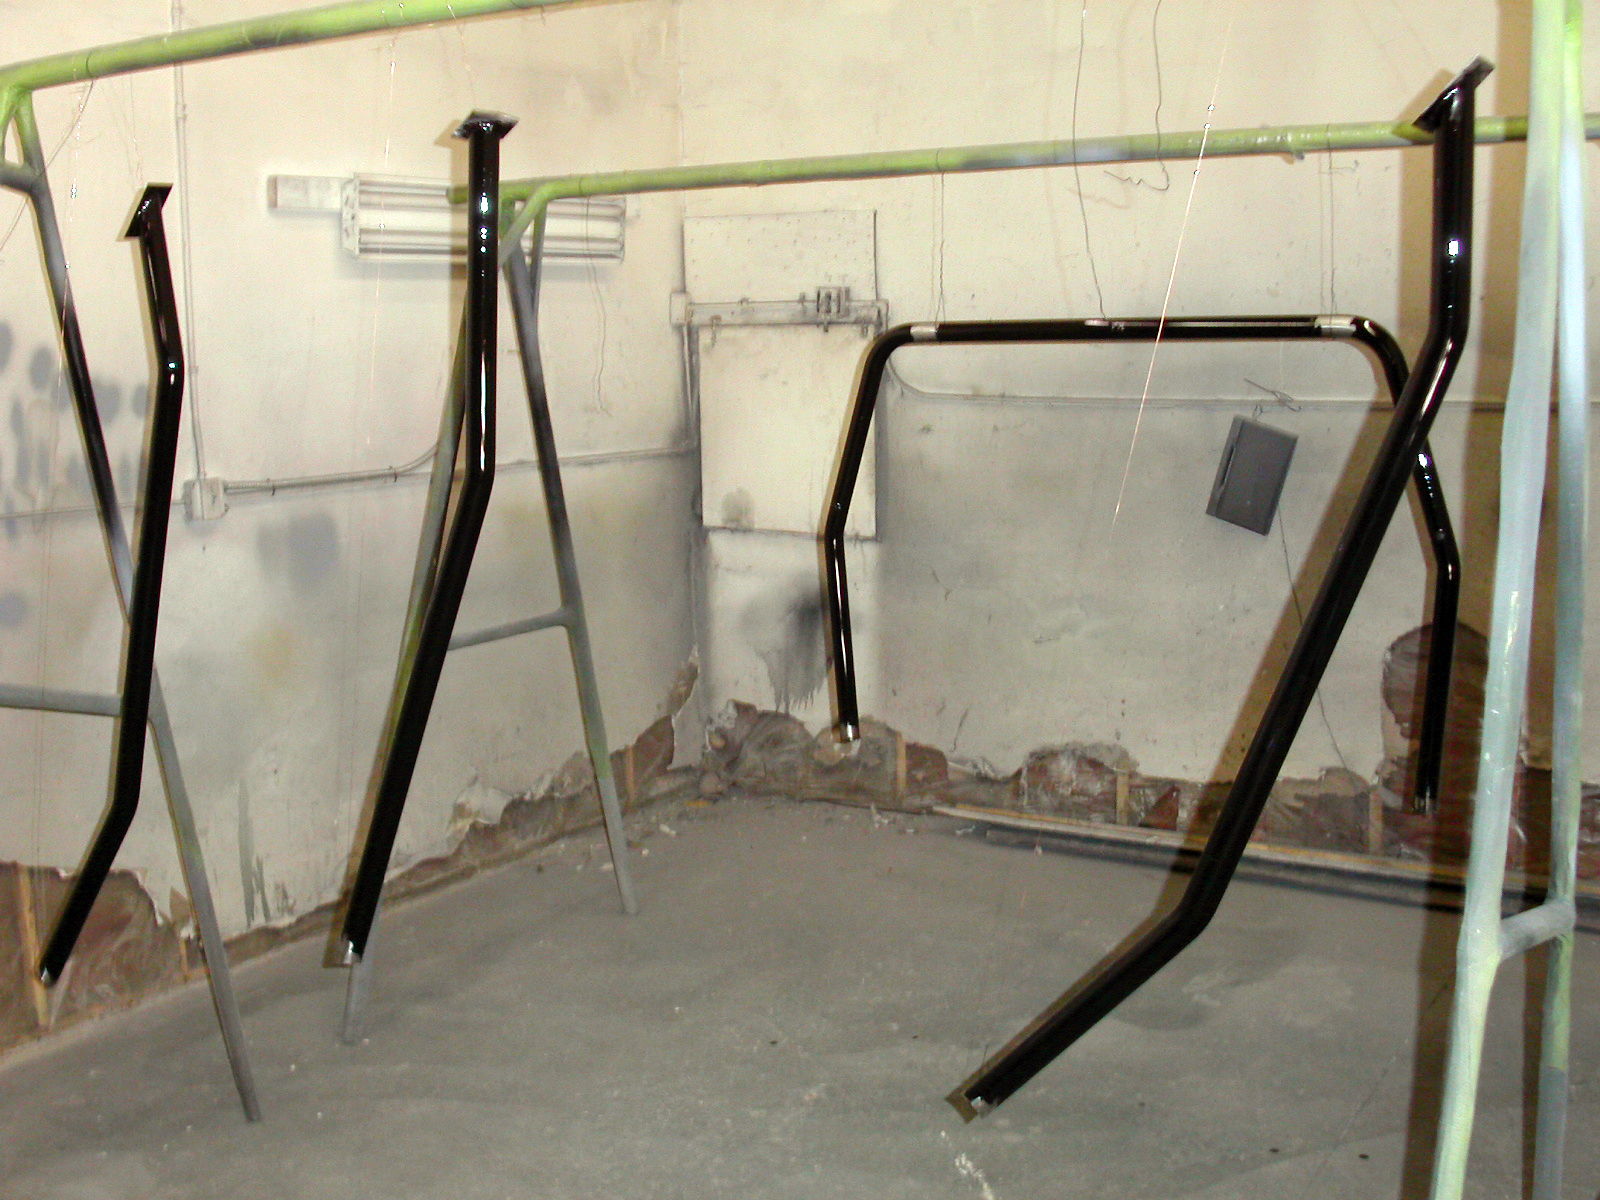
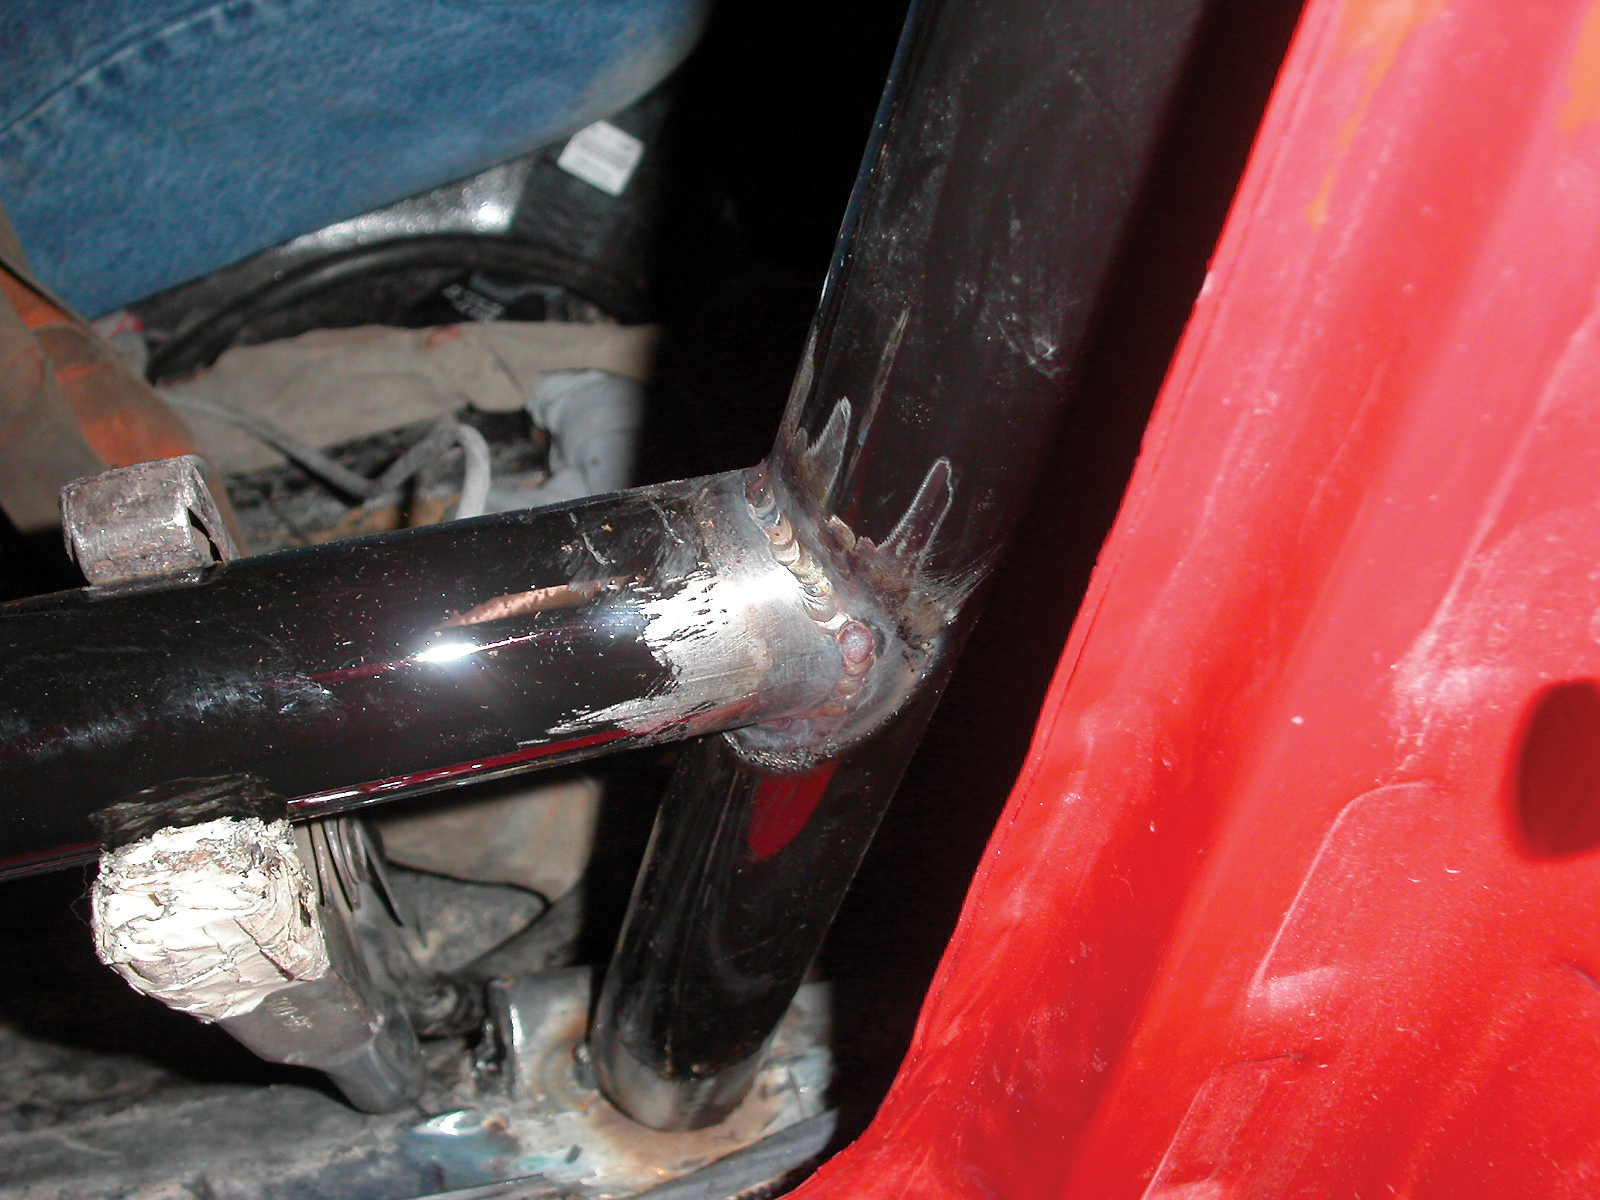
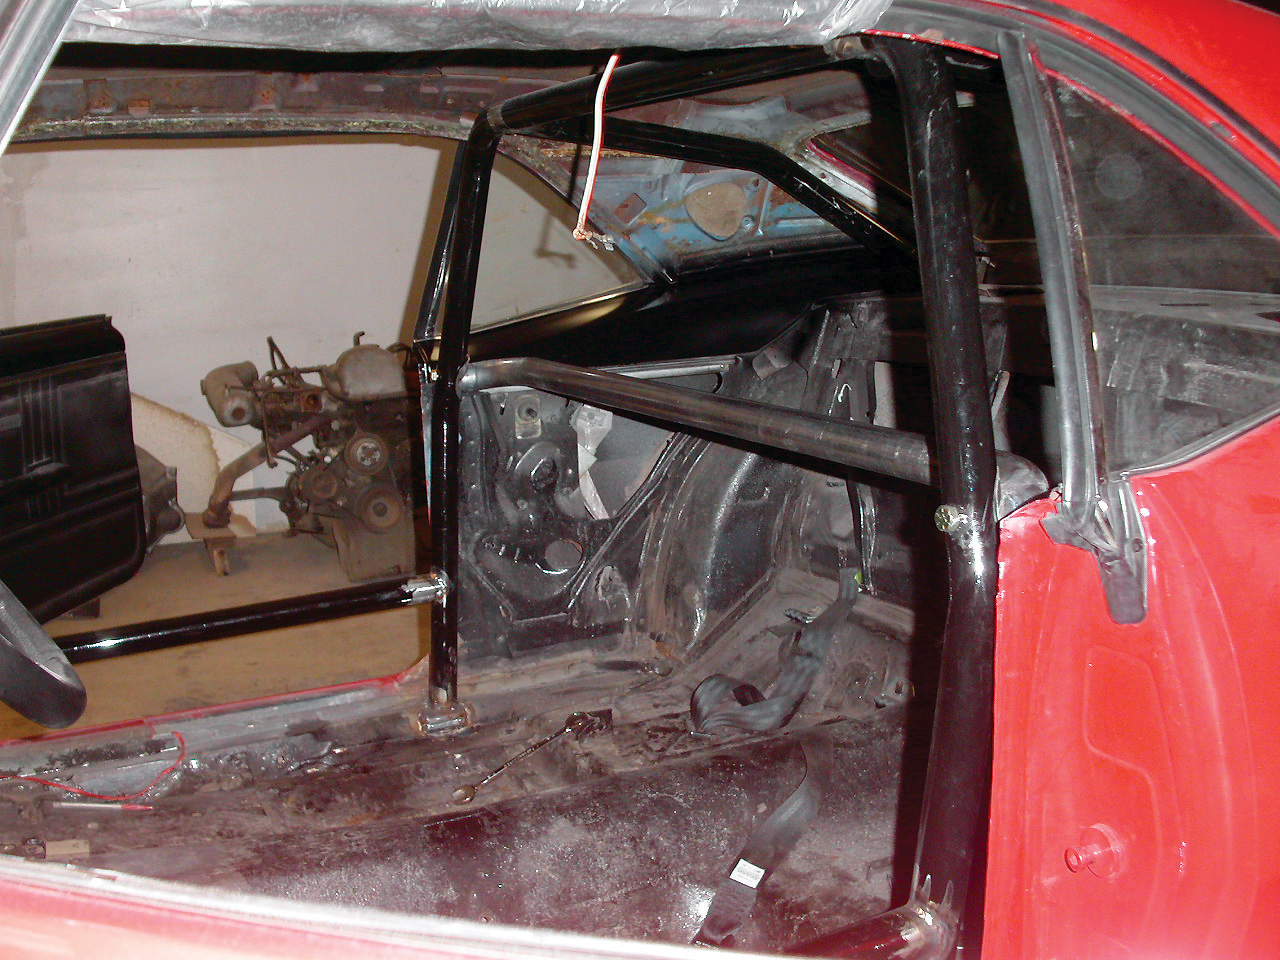
I decided to install a six-point rollbar, but I wanted to fabricate “laid down” front bars that would almost parallel the front floor pan, rear bars that would tuck up tight to the rear window, and a removable cross bar. Detroit Speed and Engineering supplied the main hoop, and I fabricated the front and rear bars. 

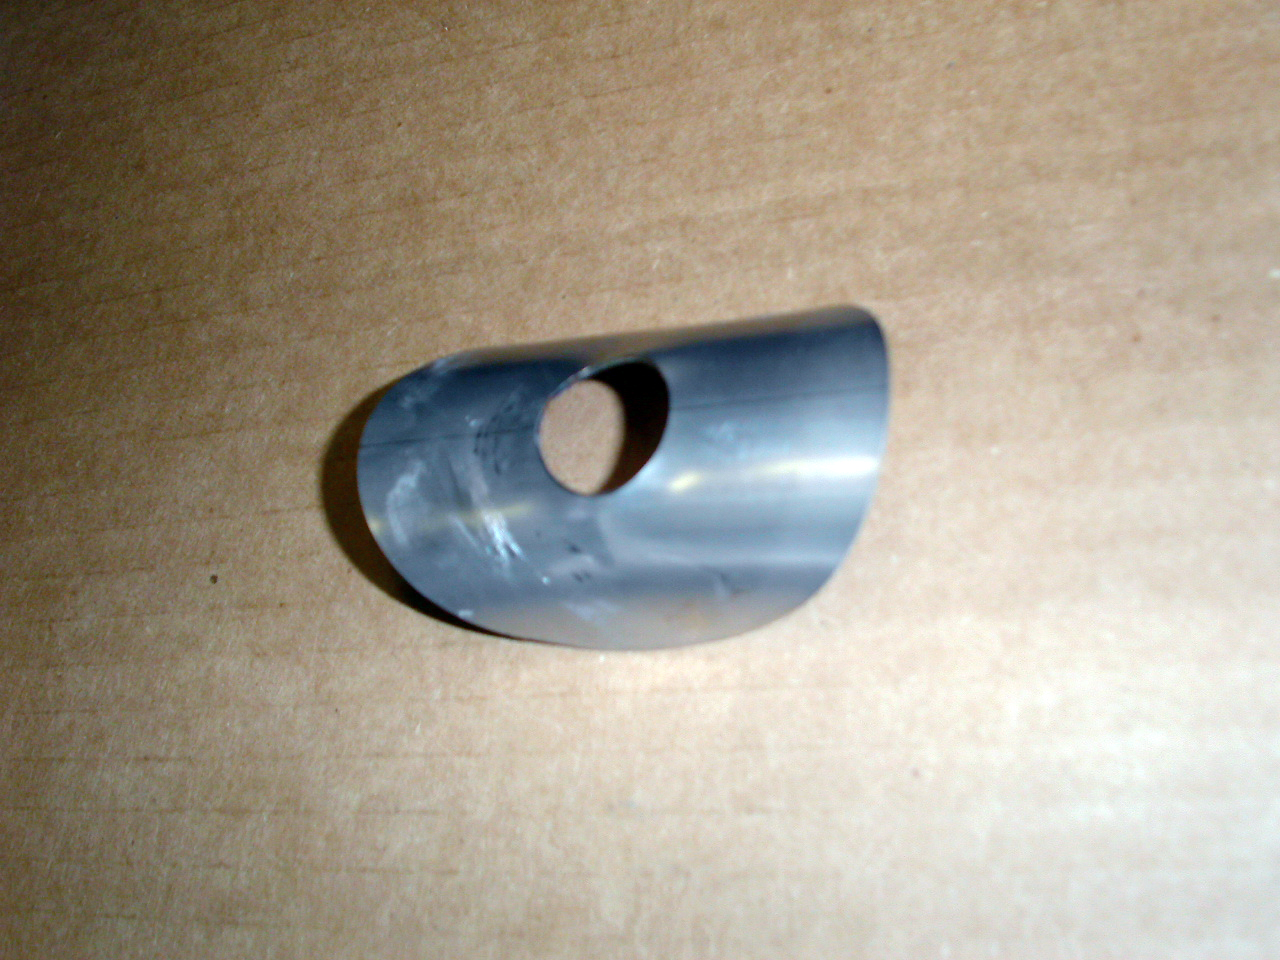
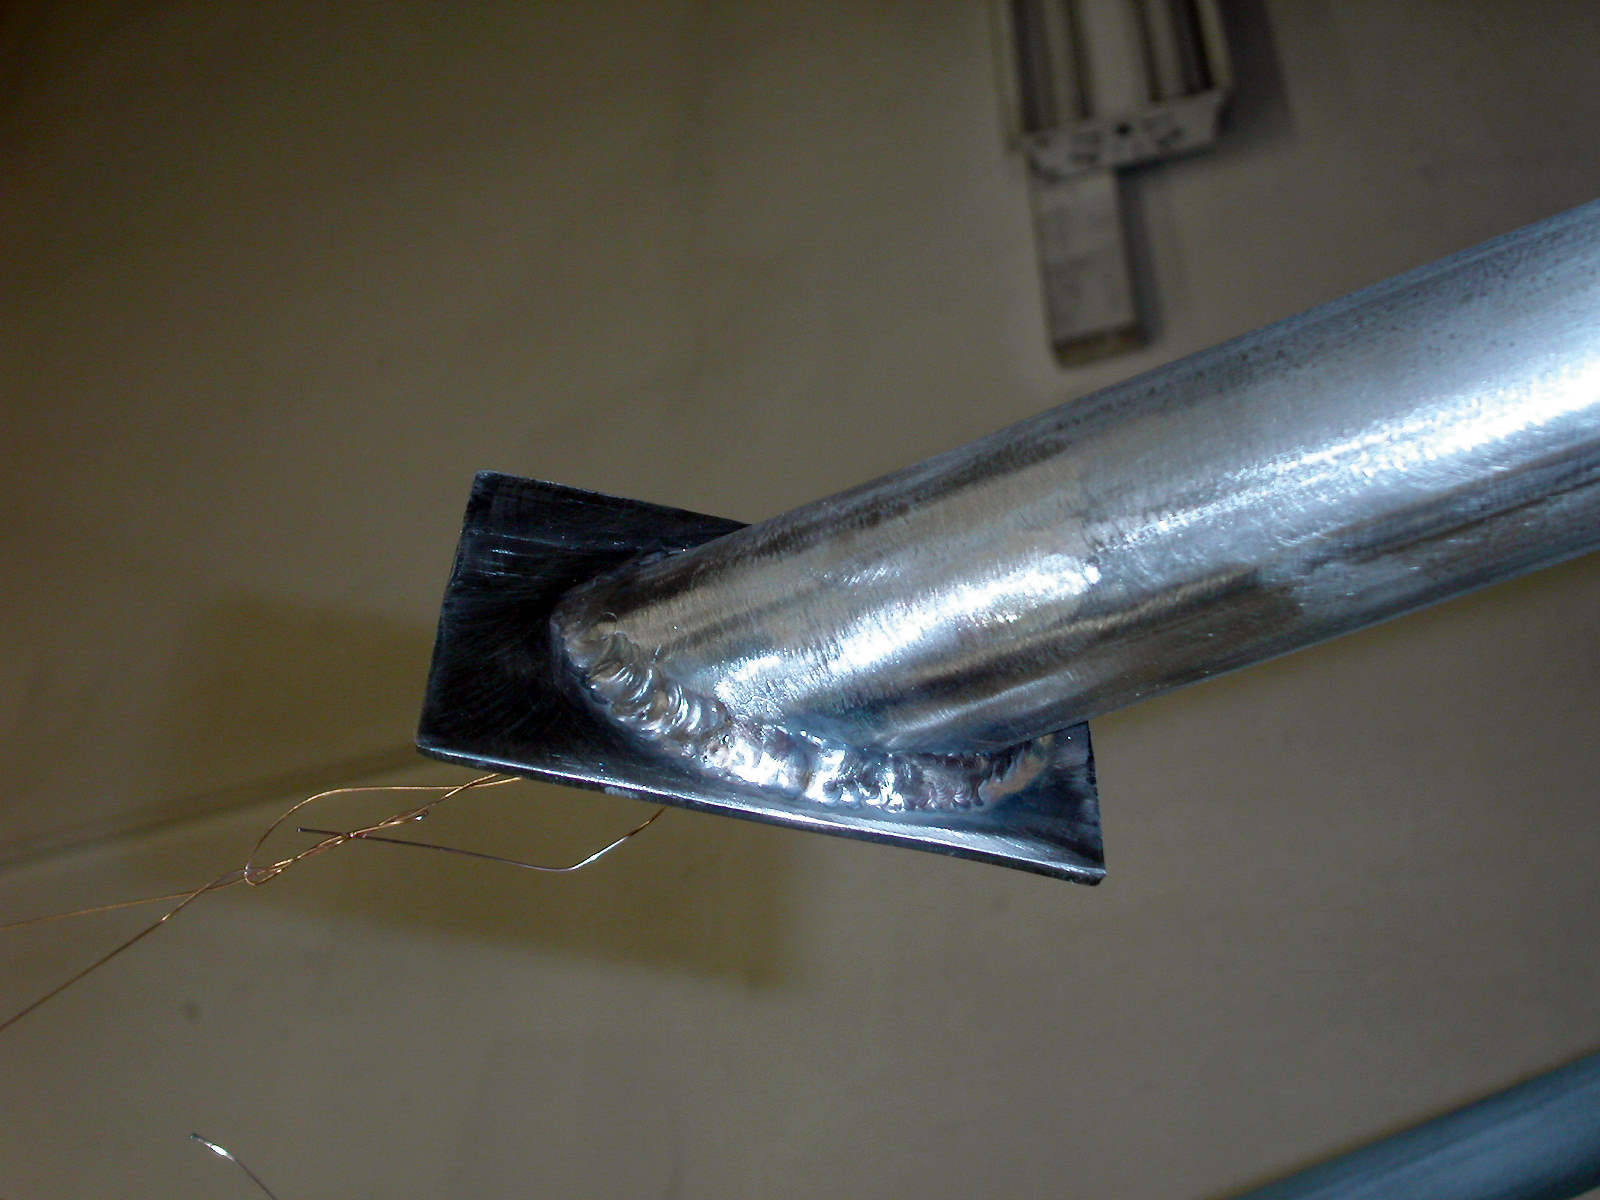
Material selected for my rollbar was A513 1-3/4-inch, 0.134-wall DOM mild steel. The 1-3/4-inch tubing is what is required by most sanctioning bodies for a rollbar (rollcages can use 1-5/8-inch), and the 0.134 wall ensures that, even on bends, the wall thickness will meet the 0.120 minimum. When tubing is bent, even using a mandrel bender, the outside wall thickness of the bend will get thinner and the inside of the bend will get thicker, due to the displacement of the material.  Most rollbar companies start with 0.134-wall tubing. If they started with 0.120-wall, after the material is displaced, it would be too thin and the bar would not pass tech. With these considerations in mind, the installation could start.

01a-b» I began to mock up my front and rear bars using cut and welded scraps of material to get an idea of how I wanted to position it in the car. Doing this allowed me to check my clearances and make any changes before bending tubes. Once I had all the tubes mocked up, I used our shop ROMER coordinate measuring machine to digitize the samples. The ROMER will digitize a sample tube and generate a centerline, which can then be loaded into the mandrel bender. Our CNC mandrel bender is an incredible piece of equipment—once the coordinates are loaded, the machine will tell you how long a piece of material to cut. Cut the material to length, clean it and load it into the bender. Press one button and the machine will index the pipe and make all bends and rotations exactly as you programmed it. We use the ROMER to duplicate tubes  that customers send to us mocked up from scrap bends, PVC tubing and others—as long as it is a hard sample that will not bend, flex or get damaged in shipping, we can duplicate it. I used our CNC Trumpf laser cutter to cut the seat-belt mounting brackets and rear cross bar stainless oval plates.

02» One issue I ran into was how to mount the main hoop to the rocker sills and floor pan. On the ’67-’69 Camaros, the edge of the floor pan meets the inner rocker panel exactly where I wanted to mount the main hoop. Rather than cutting the main hoop to meet the floor pan, I made a pair of small triangle-shaped boxes from 0.125-thick steel plate and welded them to the floor pan, and the main hoop to the boxes. 

03» The reason was to spread the load from the main hoop to a larger area on the floor. It also made it easier to get the main hoop level in the car, as I would be cutting a flat surface rather than a compound angle.

04-a-b» The hardest part of the entire job was making the main hoop cross bar removable. I spent a lot of time determining how I wanted to do this. I have seen many cars where they use two shear plates and a clevis pin or some type of arrangement similar to removable door bars. I chose not to go this route because they always rattle and I hate rattles inside the car. Rather, I decided to bolt the cross bar onto the main hoop. I began by welding a pair of tubes (one on each side) into the main hoop, which two 1/2-inch bolts would pass through, and laser-cutting two 1/2-inch-thick rings, which I drilled and tapped and then welded into the cross bar. To prevent the cross bar from scratching the main hoop when removing and reinstalling it, I cut two oval plates from 18-gauge 2b finish stainless steel sheet, rolled them to match the contour of the main hoop, and bonded them with adhesive to the rear of the main hoop. The stainless will stay unpainted and will not chip or flake as a painted surface would. 

05a-b» Cutting the fishmouth on the cross bar was difficult. Not only did I have to match the side angle of the rollbar (looking at the bar from the front to the rear of the car), but the main hoop also is laid back about 11 degrees to match the rake of the quarter-window weatherstrip. Cutting the compound angle was accomplished using a Bridgeport mill, checking twice and cutting once. I used a Sears magnetic angle finder to set the appropriate angle in both directions and then used a 1-3/4-inch hole saw to cut both ends. I did destroy two hole saws in the process, but the result fits nice and tight with no rattles.

06a-b»  I cut and fit the tubes to both the front and rear mounting plates and fishmouthed all the tubes before painting. This allowed me to paint the bars out of the car for complete paint coverage, and it also kept me from getting overspray everywhere.

07a-b» I used POR-15 paint for the rollbar and all mounting surfaces, and applied it with a brush. Believe it or not, when this dries, you could never tell—there are no streaks or drips, and it dries to a nice glossy finish. Best of all, it is incredibly durable and chip resistant, and I can touch it up with a brush when needed. I painted all the bars by hanging them with coat hangers and painted them to within 6 inches of the welded joints.

08a-b» I asked my good friend Ed Turner, a certified TIG welder, to weld the cage in for me once everything had been painted. Turner has been TIG-welding for years, and his work is top-notch. He taught me a few tricks, such as using a small mirror on the top of the rollbar to weld in an area that can’t be seen, and also using 308 stainless filler rod for a beautiful weld bead. He explained that the stainless rod is much purer than mild steel rod, which would minimize pitting and bubbles in the weld. He was right, and his welding turned out great. Make sure to cover everything in the interior that has not been removed, including the inside window glass, before grinding or welding. It is easy to ruin the glass with burn marks. 3M makes a great self-adhesive sheet to protect from grinding and welding sparks.

09» Once everything was welded in, I painted all the welded areas and reinstalled the headliner, seats and carpet. I purchased a new headliner and carpet from Year One, and I also purchased five-point RJS harnesses with red webbing from Summit Racing Equipment.

10»  After driving the car for a few weeks, I realized I had accomplished all of my goals. It is easy to get in and out of the front and rear seats; I now have a place to mount the five-point harnesses; it blends into the interior when looking at the car from the outside; and the car is noticeably stiffer. Buying a kit may have been easier, but by building it myself, I was able to position everything exactly as I wanted, and isn’t that what building a hot rod is all about?

ARTICLE SOURCES

Picture of Detroit Speed and Engineering

Detroit Speed and Engineering

185 McKenzie Rd.
Mooresville, NC 28115

704/662-3272

Picture of Stainless Works

Stainless Works

9899 E., Washington St.
Chagrin Falls, OH 44023

800/878-3635

Picture of Madison Manufacturing

Madison Manufacturing

1200 Southeast Ave.
Tallmadge, OH 44278

800/230-3030

Picture of Year One

Year One

P.O. Box 521
Braselton, GA 30517

800/932-7663

Free Download WordPress Themes
Download Nulled WordPress Themes
download udemy paid course for free
download karbonn firmware
Download WordPress Themes
free online course
Scroll to Top