

THE AUTO BUILDER
Menu
Featured


Drop It Right
The C10 series of Chevy pickups is generally accepted as being the best-looking early pickups from the land of Bow Ties. But the one problem is that the factory fit them with roughly the same ride height as a 4×4. We suppose the guys who bought and used these trucks as trucks liked them that way, but the rest of us prefer them down in front. Having read nothing but truck magazines all your adult life, you know that there are many ways to lower a truck, from melting the springs with a torch all the way to installing forged aluminum IFS A-arms. We’ve read a couple of magazines ourselves and can tell you the safest, most affordable and simplest way.
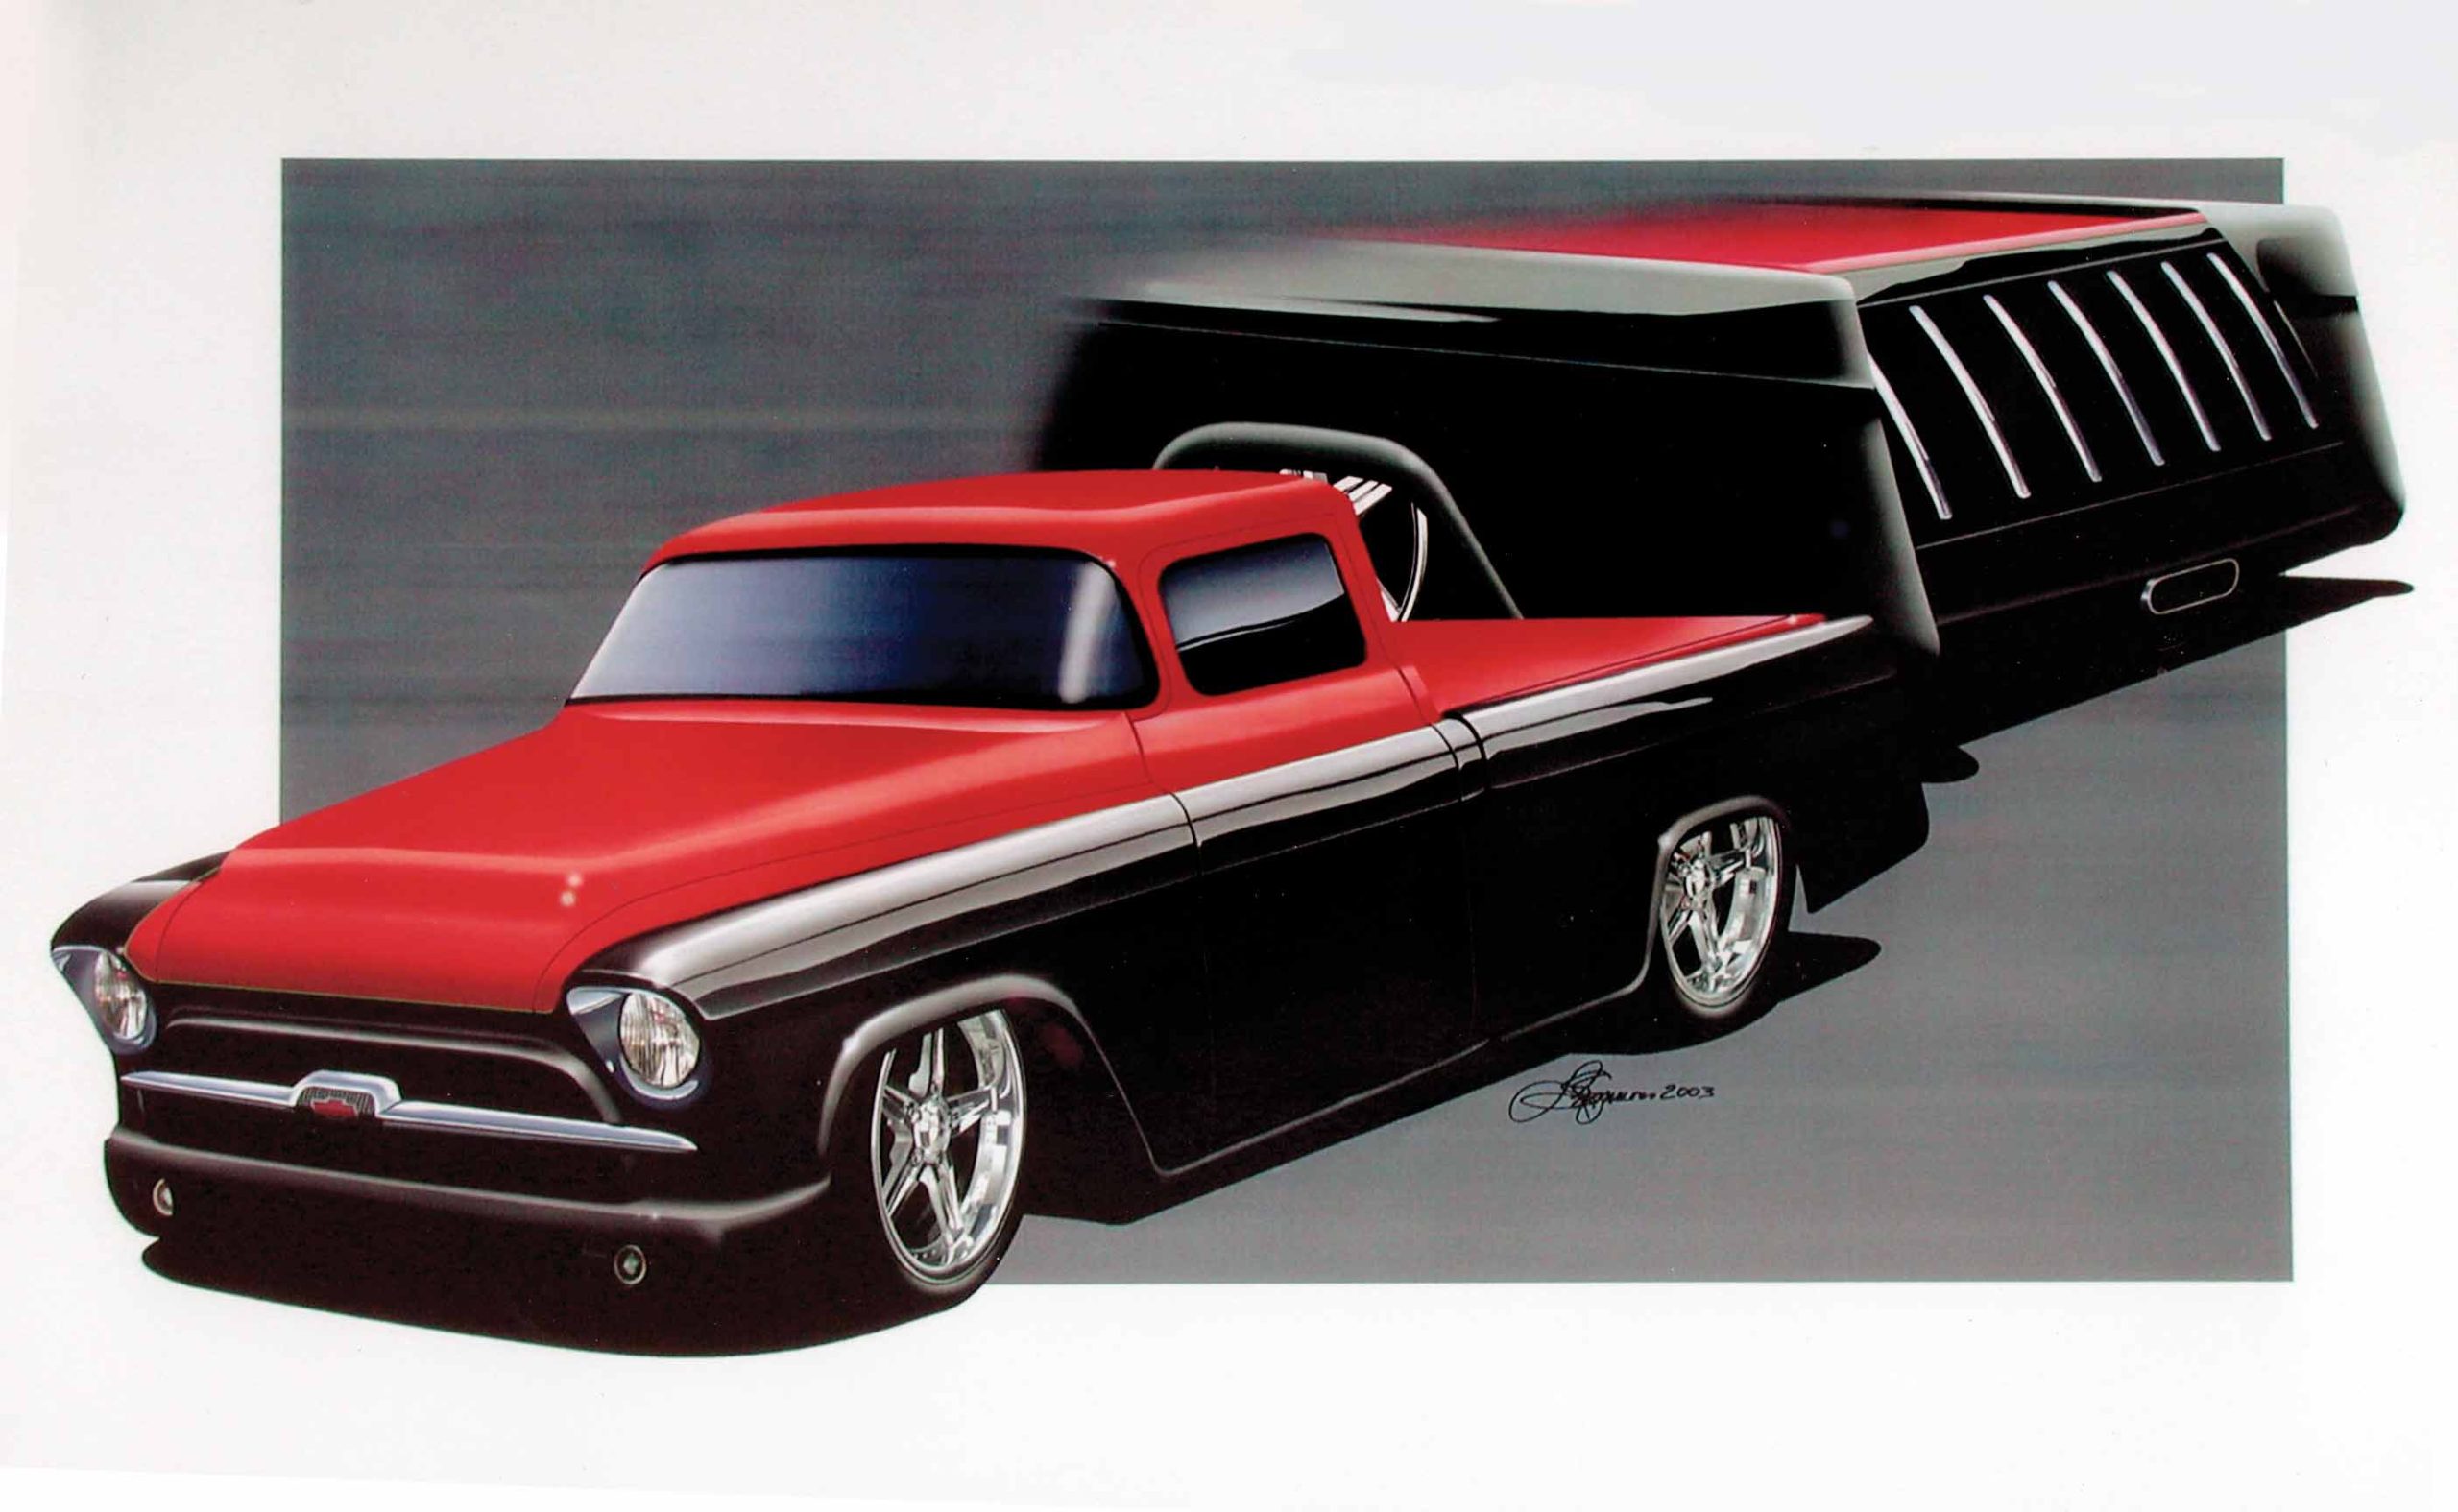
SR61 Starliner
Long before we ever saw it in person, we were familiar with the ProRides-built SR61 Starliner. We ran a rendering of the car back when it was still on the drawing board, and we heard updates on its progress from time to time. But our first real introduction to the car was at Air Ride Technologies’ Street Challenge at Putnam Park Road Course. Among the sights we must admit we thought we’d never see was that of a big-dollar, 3,800-pound ’61 Starliner ripping around a road course. Immediately, we fell in love—a car this size, this expensive, this good looking, and a builder who’s not afraid to test his work to the limits? That sounds like the kind of car for us.

Product Spotlight: Any Level Lift’s Static Lift Series
If you’re looking to give your Ford Super Duty the stance, performance, and capability it deserves, Any Level Lift’s Static Lifts have what you need. For 2017–2023 Ford F-250, F-350, and F-450 models, these lifts aren’t just about height; they’re about commanding presence, improved handling, and off-road readiness. With choices between 4.5″ and 5.5″ lifts, these kits are tailored to make your Ford the king of the road—and trail.


Spotlighter
POPULAR READS
-
Product Spotlight: Bill Mitchell Products Aluminum LS Engine Block
-
PRODUCT SPOTLIGHT: 60-66 Chevy C10 Fresh Air Vent Block Off Plate
-
Product Spotlight: Pyramid Optimized Design Sequential Aurora Taillight for 1964½–1966 Mustang
-
PRODUCT SPOTLIGHT: Cam Covers for GEN/3 Coyote from Pyramid Optimized Design


CIMTEX SUPER CAMEO: PART 9
Firewall Modifications to the Cab, Floor Pan and Doorsill—and a Rocker Panel Replacement
After 1-1/2 years of preparing a rock-solid foundation for our Cimtex Rods-constructed ’56 Chevrolet Super Cameo pickup, the time finally came to hang sheetmetal, but not without experiencing a few major disappointments.
“All I can say is, before you buy a truck cab or any kind of old car body, look before you leap,” commented Darrell Cimbanin of Cimtex Rods after picking up our ’56 Chevy big-?window cab from True Grit Sandblasting in Hutto, Texas. This cab was in worse condition than we originally thought. It’s easy to disguise what appears to be a good-looking truck cab with plastic filler and a nice paint job. Sometimes even the experts can be fooled.
A close visual inspection of our stripped ’56 big-window pickup revealed that there was a reasonable amount of cosmetic damage to the roof, which had accumulated 51 years of wear and tear. For example, a series of holes had been drilled in two major dent areas, presumably to accommodate a slide hammer. However, after pulling out the offending dents, the holes weren’t welded up—they were filled with Bondo putty.
The left- and right-side cab corners were also badly rusted. The previous owner repaired the exterior panel but didn’t bother to replace the rusted-out inner panels. To add insult to injury, someone used a stick welder and burned a bunch of holes through the surrounding sheetmetal. Then they covered up all their mistakes with plastic filler.
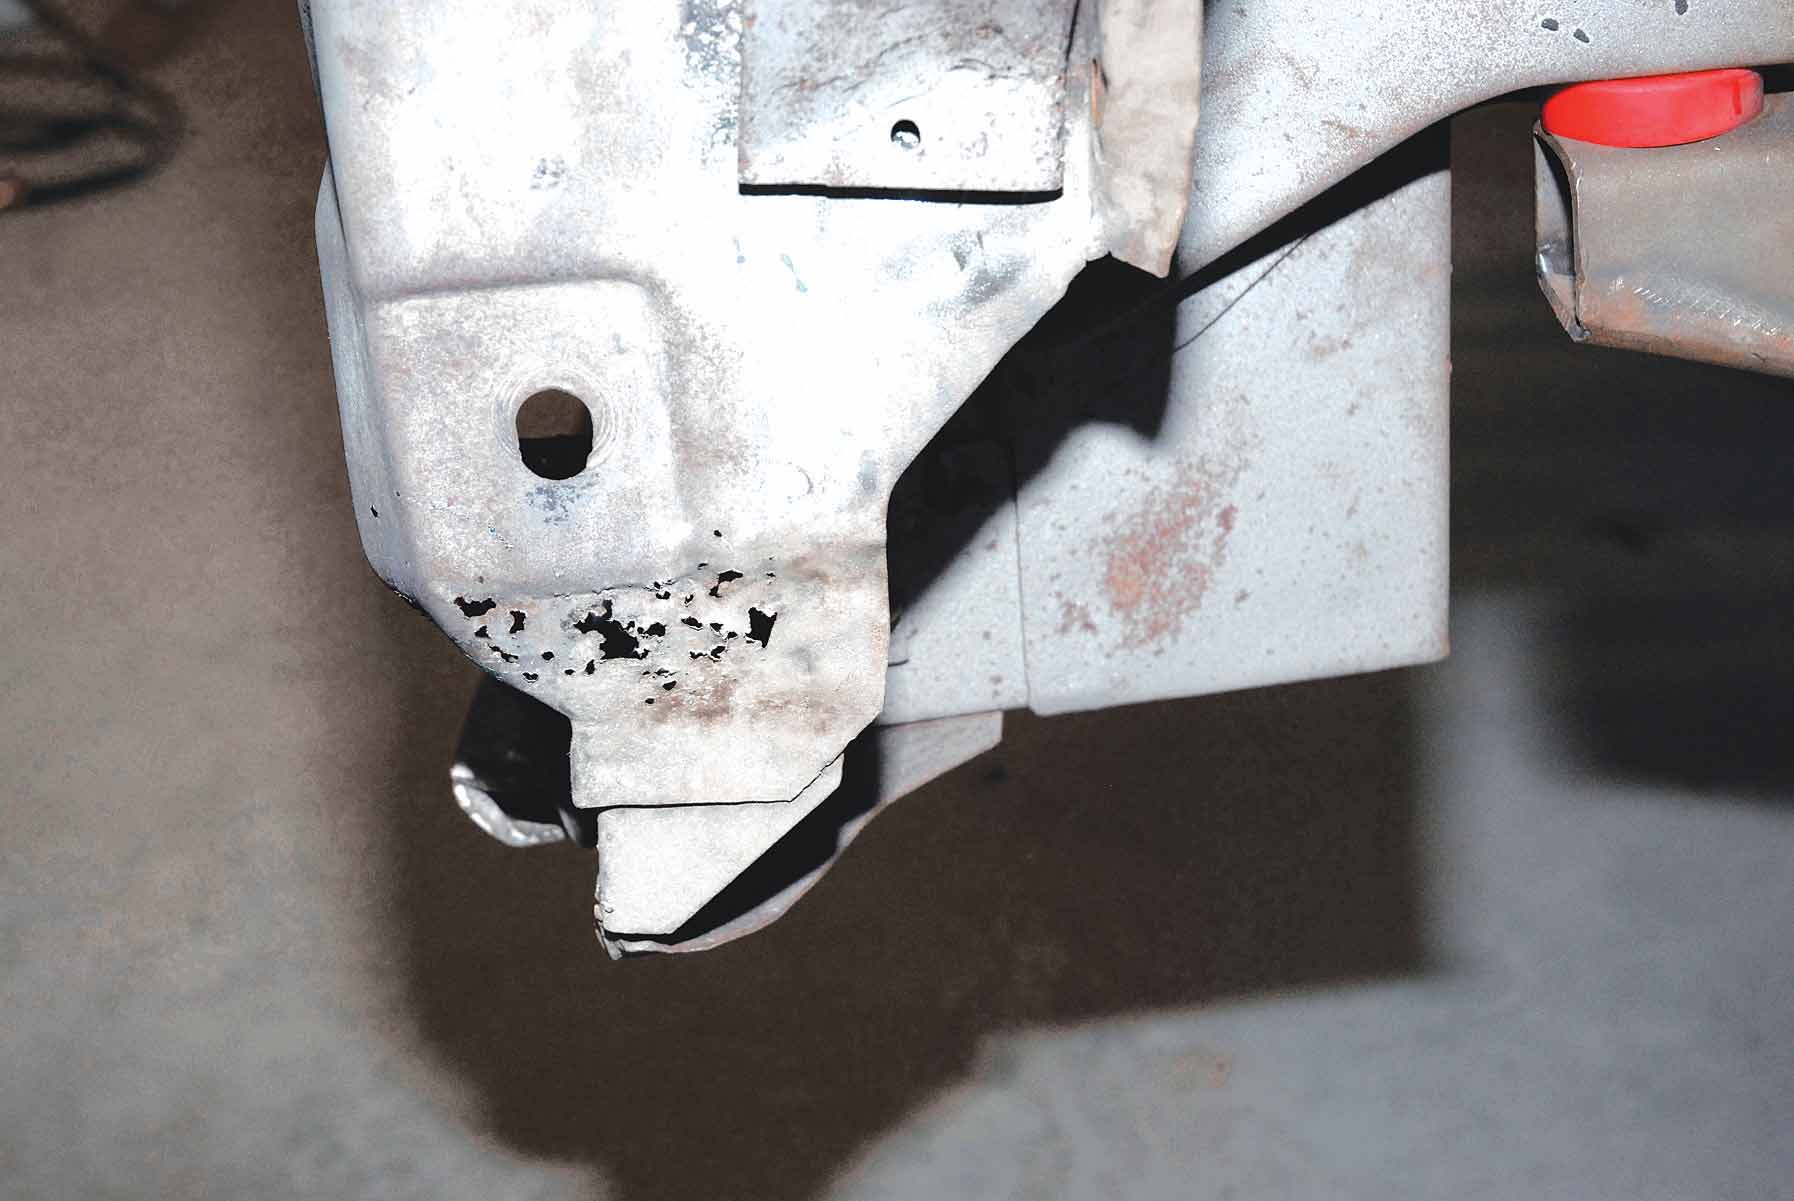
The right and left cab mount supports were badly rusted. The lower hinge pockets on the A-pillars were also in poor shape, as well as the right and left side floor pans. The rockers were smashed on both sides, and the steps also showed signs of rust, so we opted to replace almost everything in that area. Overall, the prep quality and workmanship on this truck was bad.
Before we searched for alternatives, Cimbanin assured us the condition described was typical for a 51-year-old truck and was nothing he couldn’t handle. Fortunately, the automotive aftermarket makes the most of the necessary replacement patch panels needed to restore these old trucks.
We contacted the folks at Classic Industries in Huntington Beach, California, and ordered the following:
Right- and left-side ’55-59 Chevrolet/GMC lower door hinge panels (CX 1583/84), ’55-’59 pickup doorsill/rocker panels (CX1617/18), two ’55-’59 right-hand/left-hand upper door hinges (CX1349), two ’55-’59 right-hand/left- hand lower door hinges (CX1650), right- and left-side ’55-’59 cab floor pans (CX1624/25), right- and left-side lower cab patch panels (CX1529/30), right- and left-side ’55-’59 cab supports (CX1626/27) and one ’54-’59 front bed panel (100612).
All told we were looking at approximately $800 worth of reproduction patch panels and about three days’ worth of serious work at a shop rate of $50 per hour.
That’s not to imply that you can’t do this job at home. We do recommend that you posses a reasonable amount of body working and welding skills. You will need a TIG or MIG welder, and if you have access to one, a spot welder. A plasma cutter would also be great, along with an air chisel and an electric or air die grinder. You’ll also need an assortment of C-clamps, body hammers, dollies and so on.
Because our Cimtex Super Cameo is powered by a twin Powerdyne-supercharged 350ci LT5/Corvette ZR1 four-cam engine and Jimmy G/GM 4L80E four-speed electronic-overdrive transmission, both are set back 6 inches in the modified ’56 Chevrolet half-ton truck chassis. This made it necessary to modify the existing firewall, so Cimbanin and Cimtex Rods craftsman Darren Barker rough-cut the firewall just enough to be able to bolt the cab to the modified ’56 Chevrolet Cameo chassis. He then used a set of Energy Suspension ’55-’59 Chevrolet/GMC polyurethane cab mount bushings, which leveled the body and kept it square to the chassis.
With the cab securely bolted in place, they tack-welded a pair of 2×2-inch support braces across the door openings before performing any further modifications to the cab. This was done to maintain the structural integrity of the cab, because once the old panels are removed the structure will become flimsy. Our fabricators executed their finish cuts to the firewall using a plasma cutter. Once it was completed, the finish cut measured 30-3/4 inches in width, 12-1/2 inches down to the face of the firewall and 13 inches down the face of the toe pan area.
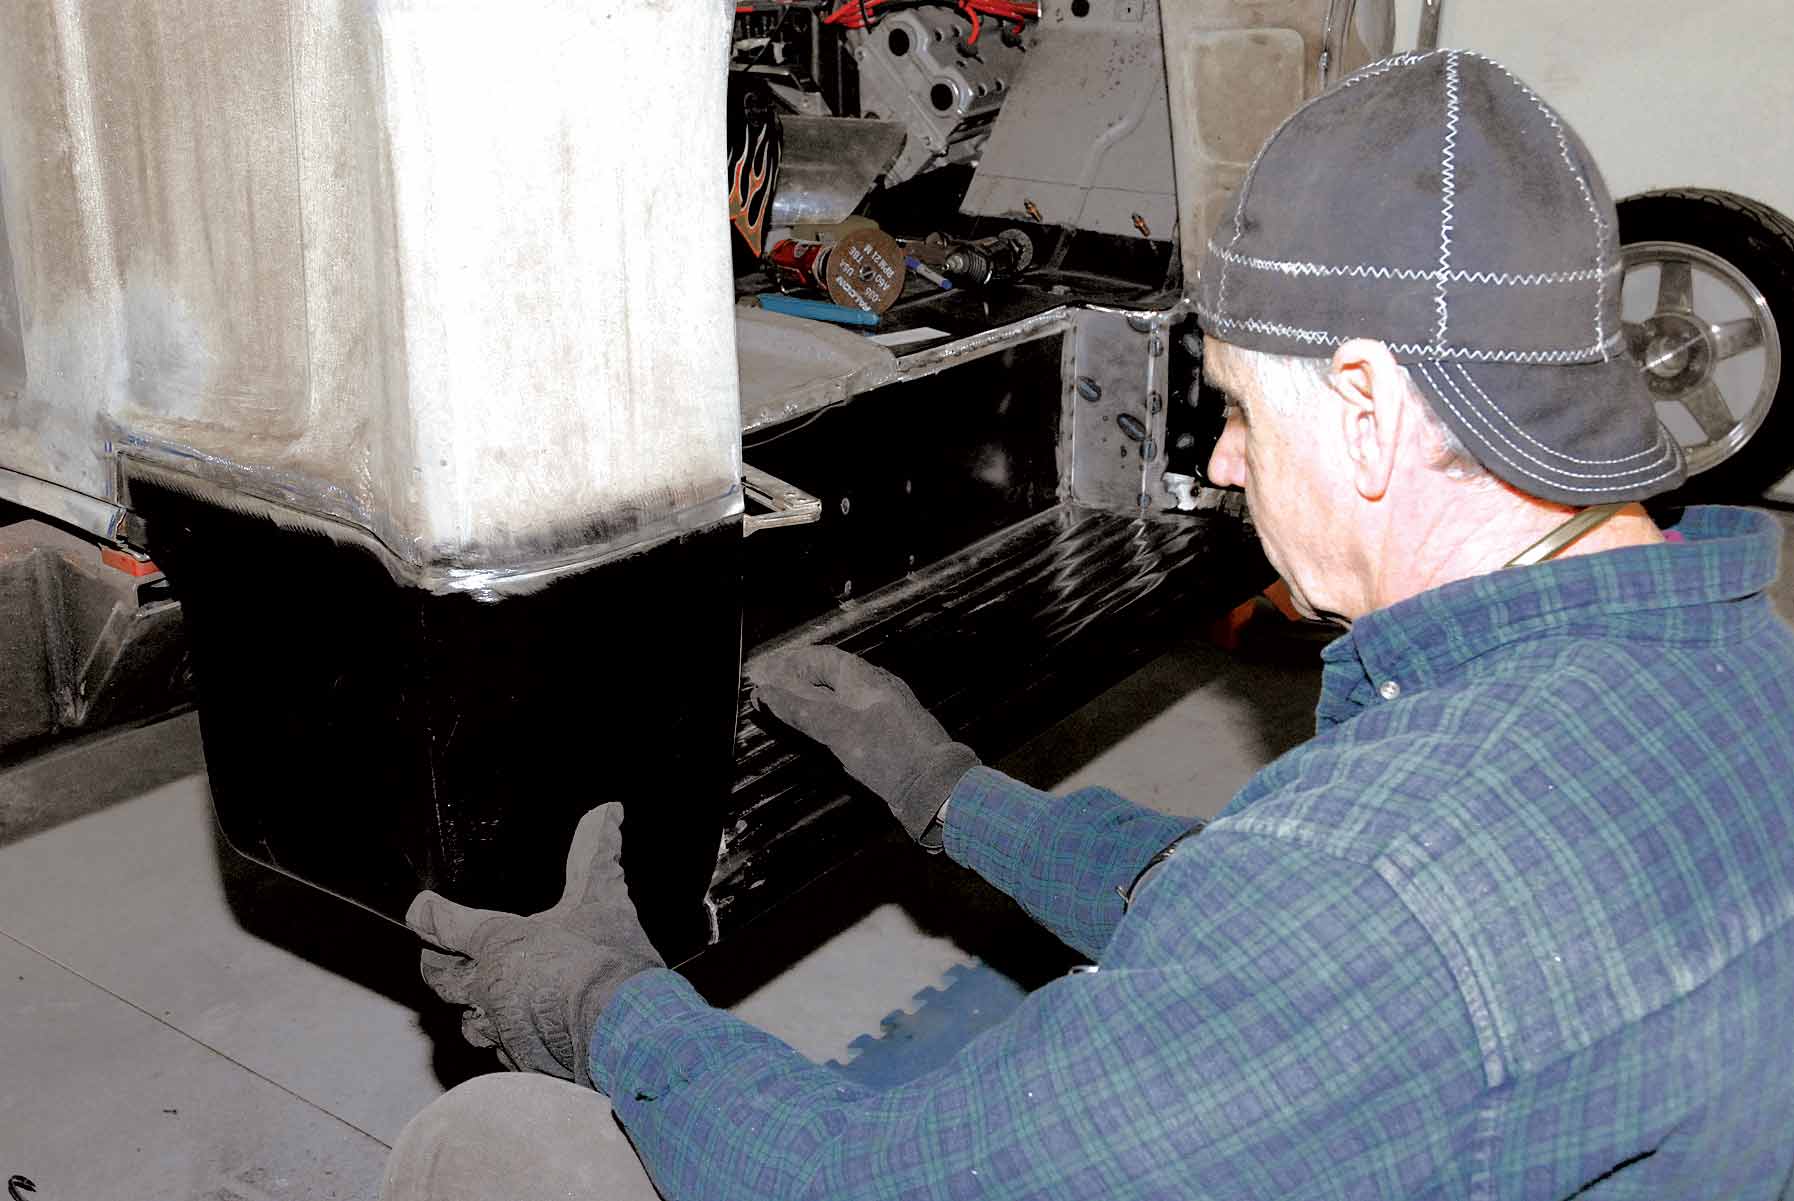
The next step was to remove the rusted-out floor pans. This was done using a combination of tools—initial cuts were made using the plasma cutter, while cleanup work was done using an air chisel and a die grinder. With the old floor pans removed, fitting the new floor pans was easy. The stampings provide an excellent template to follow, and there is enough material around the surface edges of the replacement pans to insure a perfect trim-to-fit installation. In this particular application, the new floor pans were overlapped with the existing toe pans by 4 inches to increase the structural rigidity in this area. Once everything was in place, Barker used a series of Cleco pins to secure the floor pans. However, you may find using sheetmetal screws more convenient.
With that done, Cimbanin fitted up the Classic Industries truck cab mount to the old mount using it as a template to draw his cut lines. It should be noted that the OE fender mounting bracket is not being reproduced, so it’s important that we save the existing piece, which was air chiseled loose, cleaned up and straightened. Cimbanin used an air chisel and a die grinder to remove the old mount. After trial fitting the new Classic Industries cab mount, it was tack-welded in place.
“Cab reconstruction is being done component by component, much the same way GM originally put these things together,” Cimbanin said. That doesn’t mean you can’t make it better. For example, one reason cab mounts rot out is that they collect dirt and mud. Although it’s highly doubtful that our Cimtex Super Cameo will ever see that kind of abuse, Barker fabricated a pair of inside cab mount support cover plates out of 18-gauge steel. These plates were then final-welded to the backside of the new Classic Industries cab support mount.
Next up was the installation of the truck cab support bracket, which extends from the truck cab mount across the face of the new floor pans. This is an important component, which maintains the structural integrity of the cab, as it strengthens the cross section of the floor pan. It also acts as a body mount with pre-drilled 7/16-inch bolt provisions. Finally, the OE ?fender-mounting bracket was reinstalled.
Then came the installation of the Classic Industries lower door hinge repair panel and new door hinge. A reference point was established first, working from the bottom bolt on the upper door hinge to the top bolt on the bottom door hinge, and arrived at a measurement of 15-1/2 inches. Then the new lower door hinge repair panel was used again as a template and the accompanying cut lines were drawn. A die grinder and air chisel were then used to break loose the factory spot welds on the lip of the cowl, while our installer used a die grinder to finish-cut the actual panel. At this juncture, the two-piece Classic Industries door hinge repair panel and right-hand lower door hinge were assembled into one component and fitted to the trimmed opening prior to being tack-welded in place.
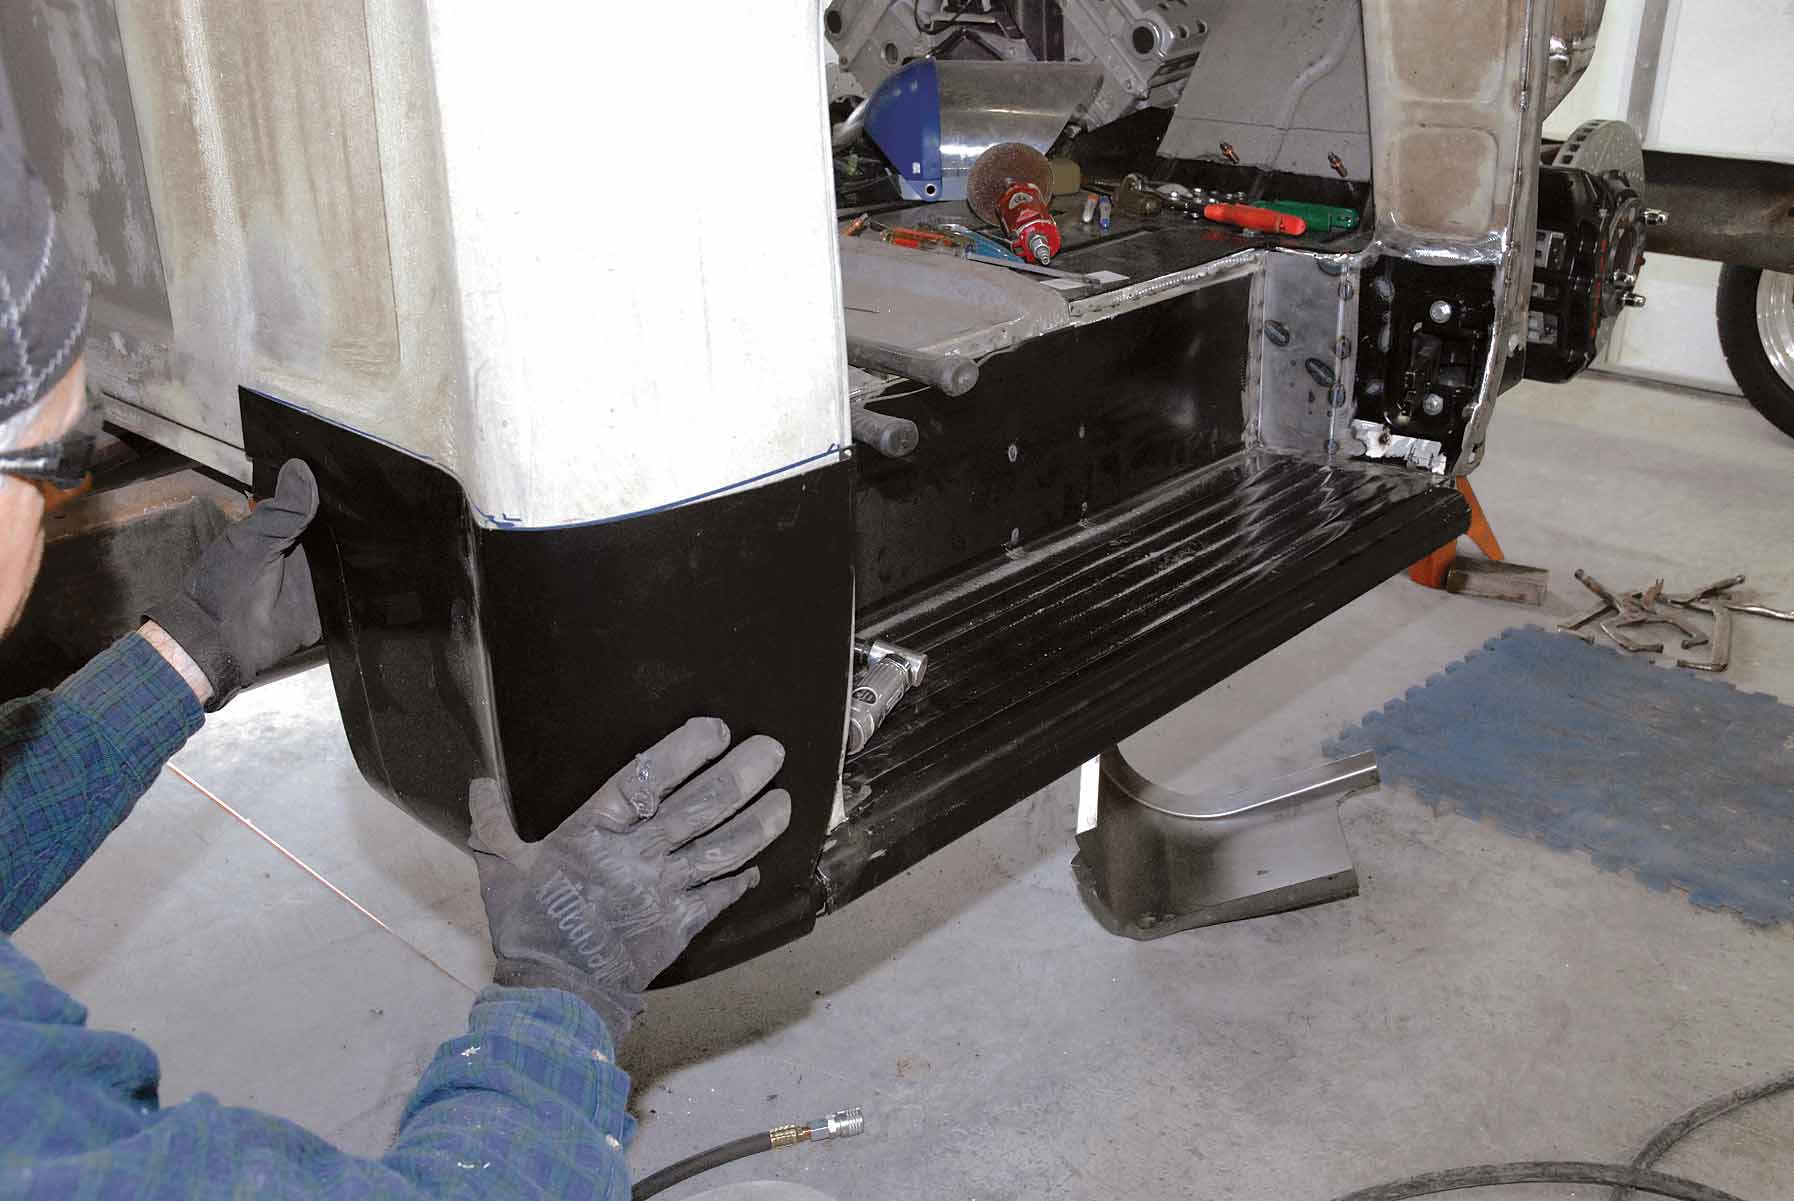
You may notice that there’s also a new filler panel located to the inside of the lower door hinge area. This 4×8-3/4-inch 18-gauge steel panel is also commercially unavailable, so Barker made a patch panel, complete with 90-degree mounting tabs. This panel will eventually butt up to the doorsill/rocker panel.
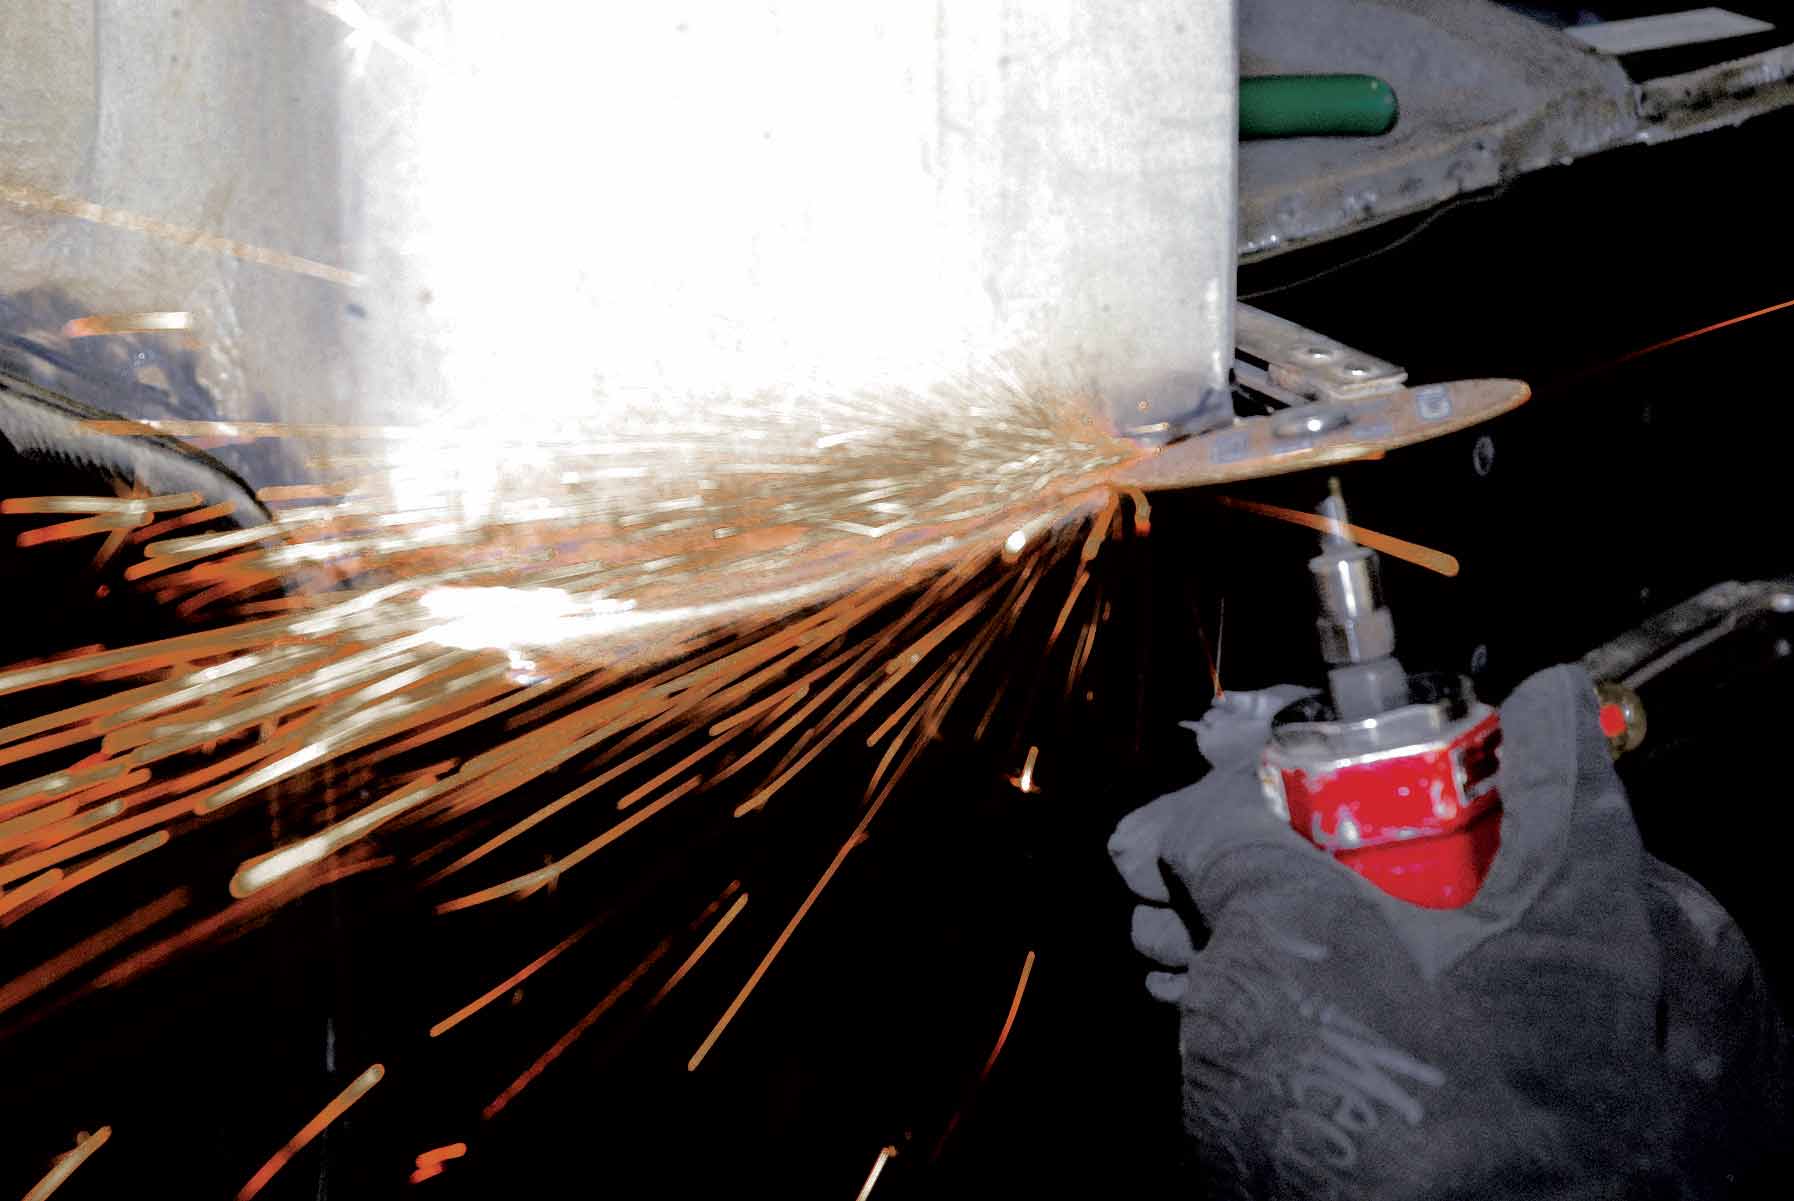
This brings us to replacing the rusted-out doorsill/rocker panel. This panel was originally stamped from 18-gauge steel and features a pair of spot-welded longitudinal runners for added strength, along with the requisite mounting tabs located at each end. One might assume that removal of the OE rocker panel is straightforward; however, it’s necessary to mark the location of the doorsill/rocker panel center support bracket first, which extends from the center of the floor cross brace underneath the cab. Since we’re reusing this bracket, extreme caution was used.
Once the old rocker panel material has been removed, our installers used a die grinder to grind away the spot welds around the entire circumference, which included the complete length of the OE rear floor pan lip. Then an air chisel was used to remove the excess material from the surrounding areas, doorsill/rocker panel center support included. With the doorsill/rocker panel area cleaned and prepared, Cimbanin trial-fit the Classic Industries reproduction doorsill/rocker panel to the passenger’s side of the cab. A 1/8-inch drill bit and 1/8-inch Cleco clamps were used to secure the Classic Industries doorsill/rocker panel in place, prior to spot-welding the circumference. Lastly, Cimbanin MIG welded the doorsill/rocker panel in place for added strength.
Both inner and outer lower cab patch panel replacement comes next. Initially, Cimbanin fit up the passenger’s-side patch panel to conform to the cab while scribing an approximate cutline. Next he used a die grinder to make his horizontal cut, as well as making a lateral cut to the doorsill area. Next our installer climbed underneath the cab and ground loose the welds securing the inner patch panel to the outer panel. Then Cimbanin removed the entire lower cab patch panel.
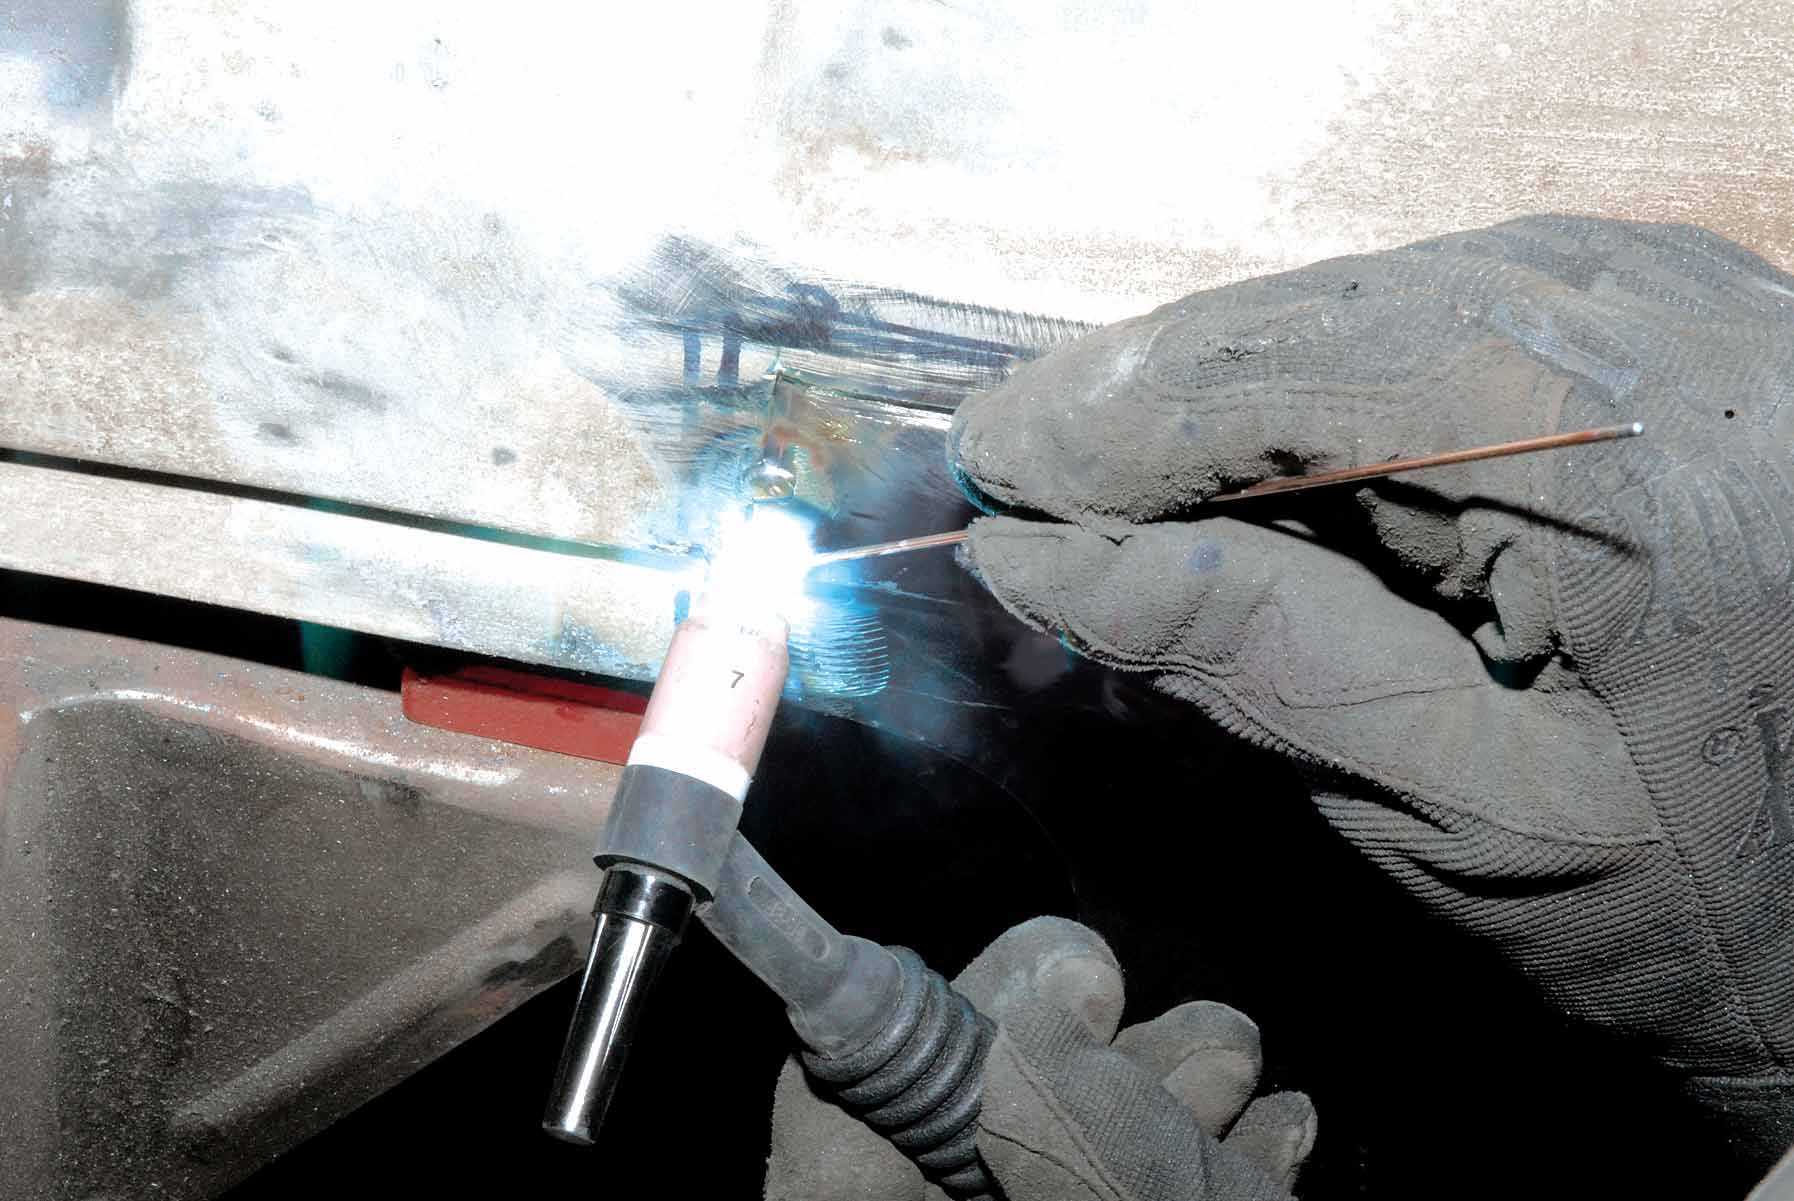
With the outer panel removed, removing the rusted-out inner panel was simple. It required grinding loose the spot welds on the floor of the truck cab, followed by some creative air chiseling and die grinding. However, prior to installing the new panels, Cimbanin did a little housekeeping. “The welding slag and plastic filler was a real mess. When you’re building a custom street truck or street rod, that’s the kind of stuff you run into,” Cimbanin said. Installing the new inner panels was straightforward—the upper lip of the panel butted up perfectly to the floor of the cab. All it took was a C-clamp here and there, followed by spot and TIG welding.
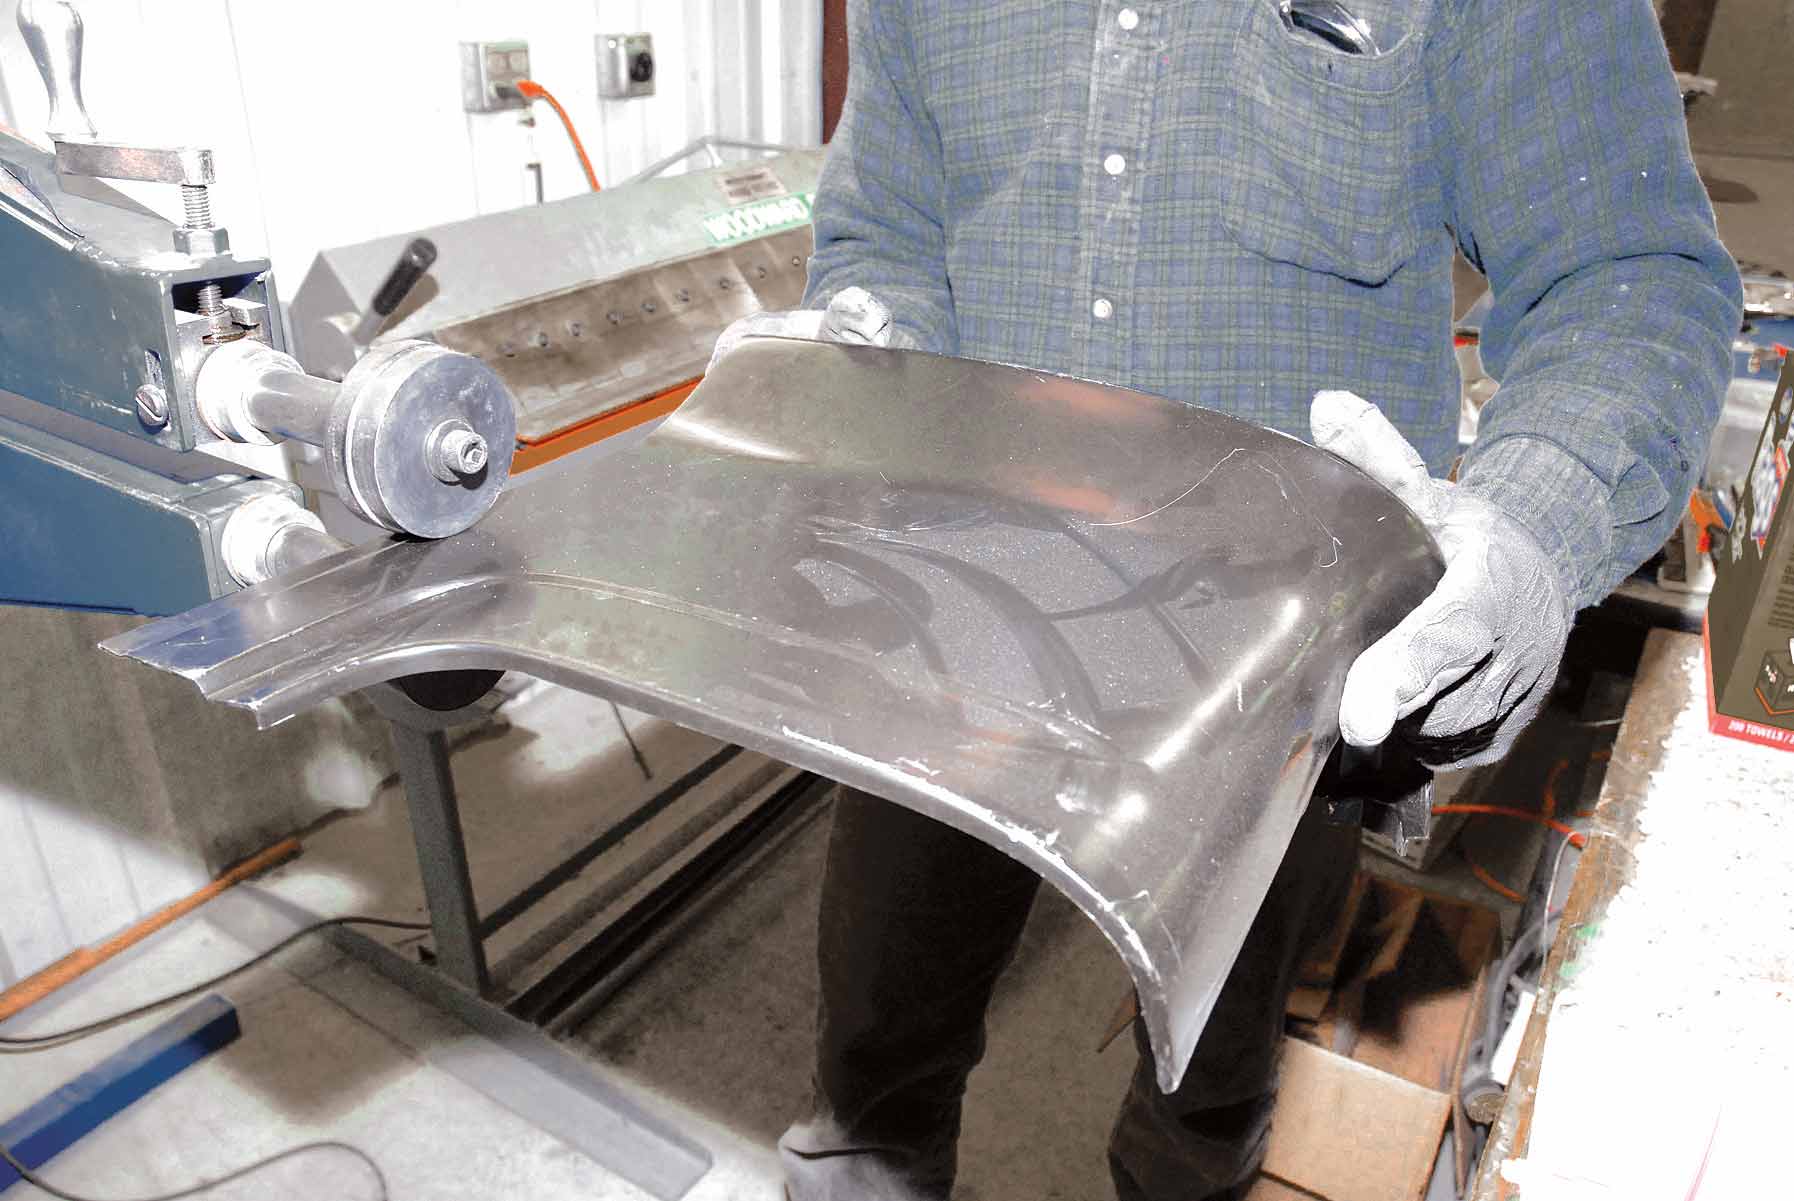
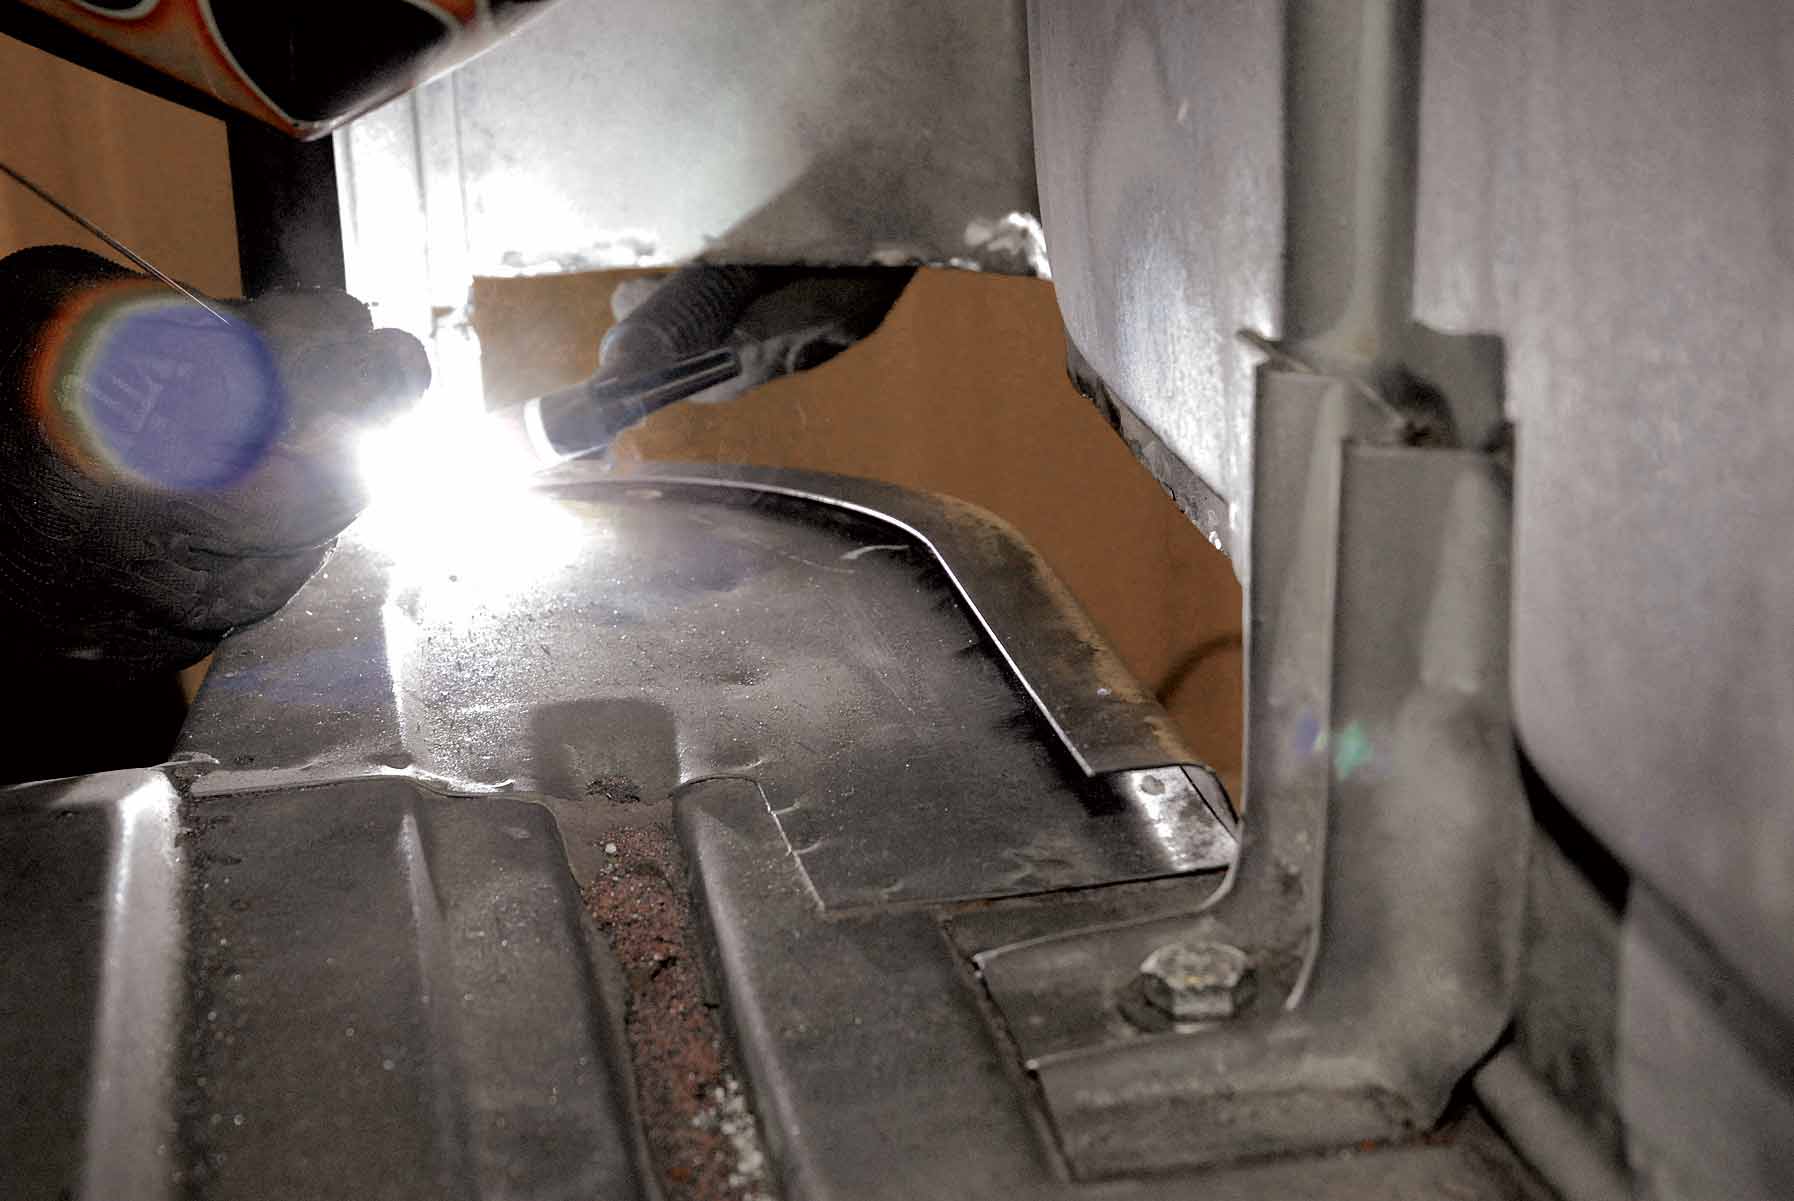
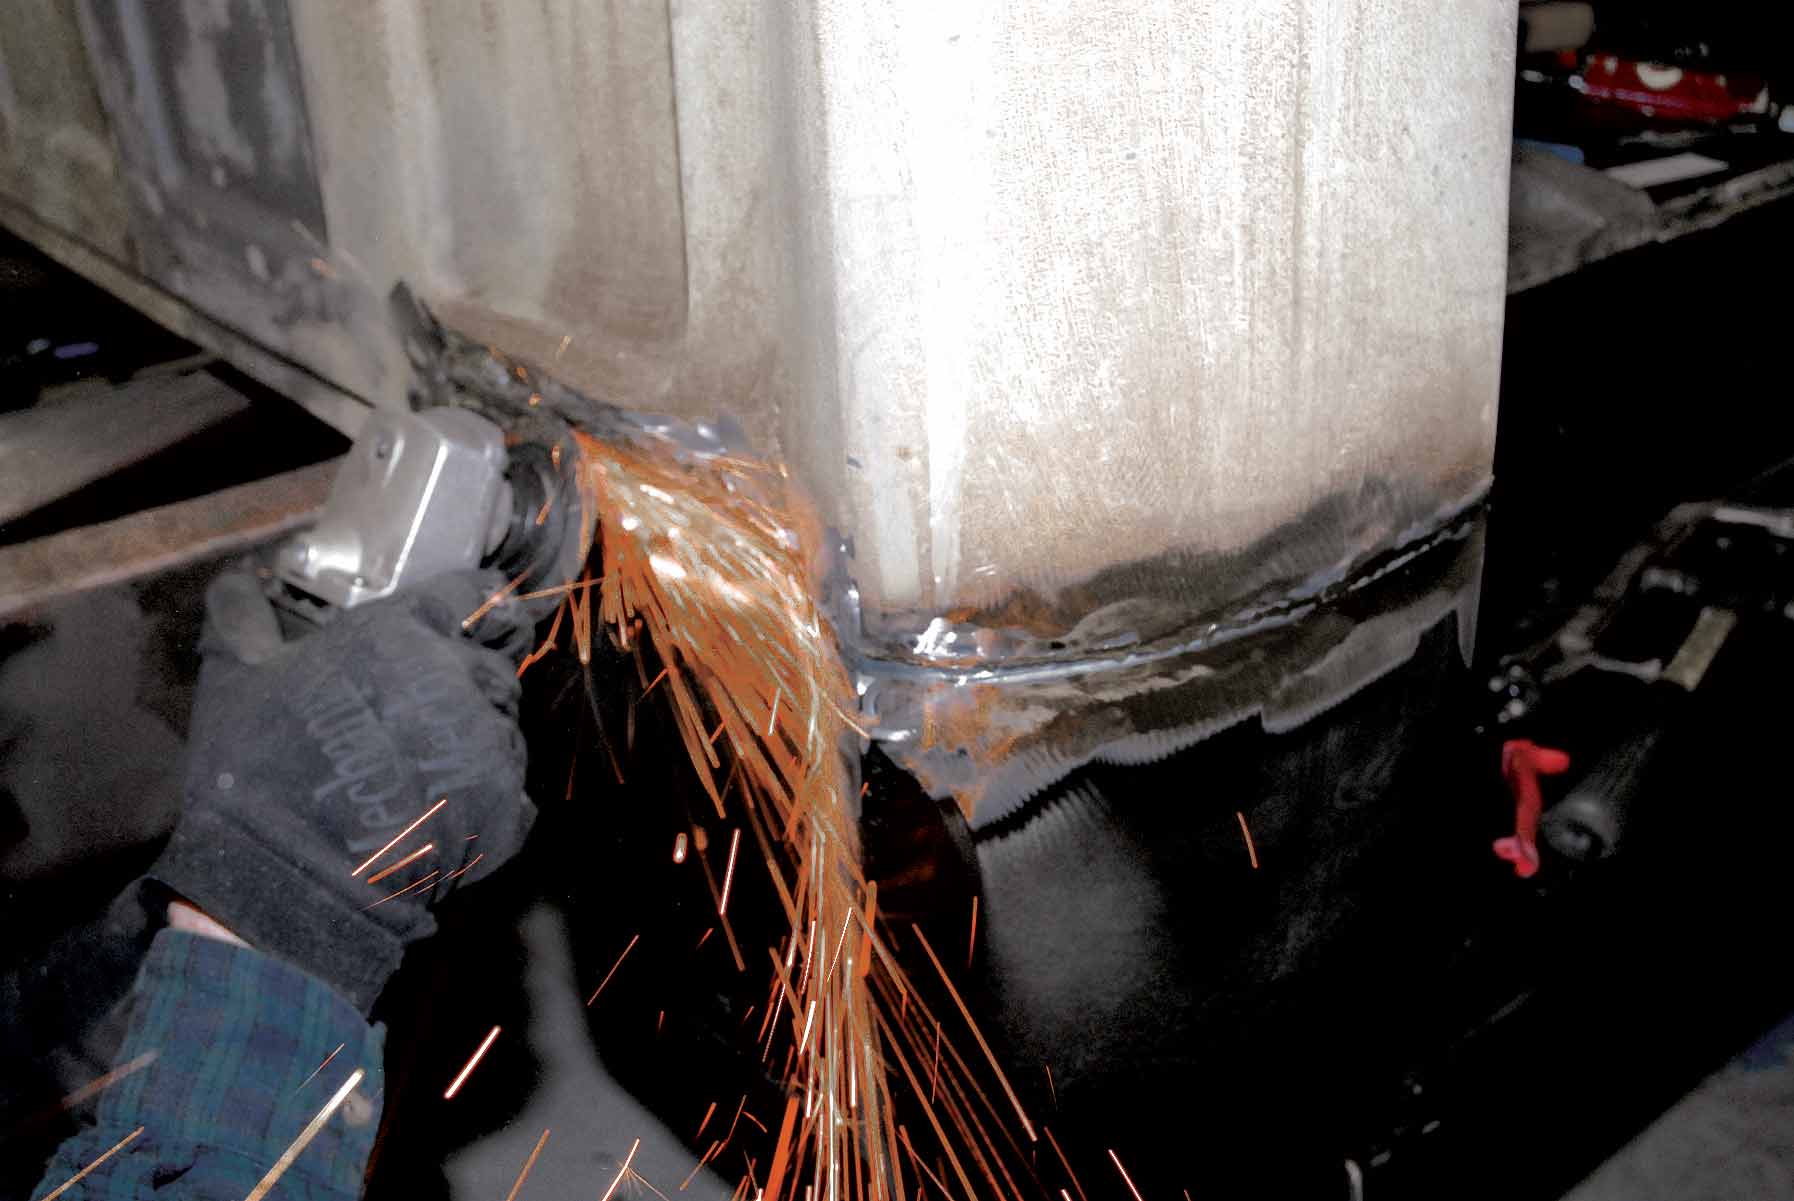
Installing the new outer panel proved to be time-consuming. For beginners, Cimbanin used his trusty bead roller to roll a 1/2-inch lip, or flange, in the top of the Classic Industries lower cab patch panel. This allowed both the patch panel and the factory sheetmetal to fit flush, while simultaneously providing extra strength to the weakened rear sheetmetal section of the cab. In the process, our installer also split and temporarily peeled back the thin strip of sheetmetal material on the corner of the Cameo’s doorjamb, in order to be able to properly align both old and new panels. Once satisfied with the fit, Cimbanin clamped the new panel in place and TIG welded everything together.
“Since this area was severely damaged from the stick welder, a lot of hammer welding was required in order to create a permanent bond with the existing sheetmetal and the new patch panel,” Cimbanin explained.
That concludes the patch panel replacement on our Cimtex Super Cameo, as the passenger’s side is no different from the driver’s side, so we won’t repeat ourselves—with two minor exceptions.
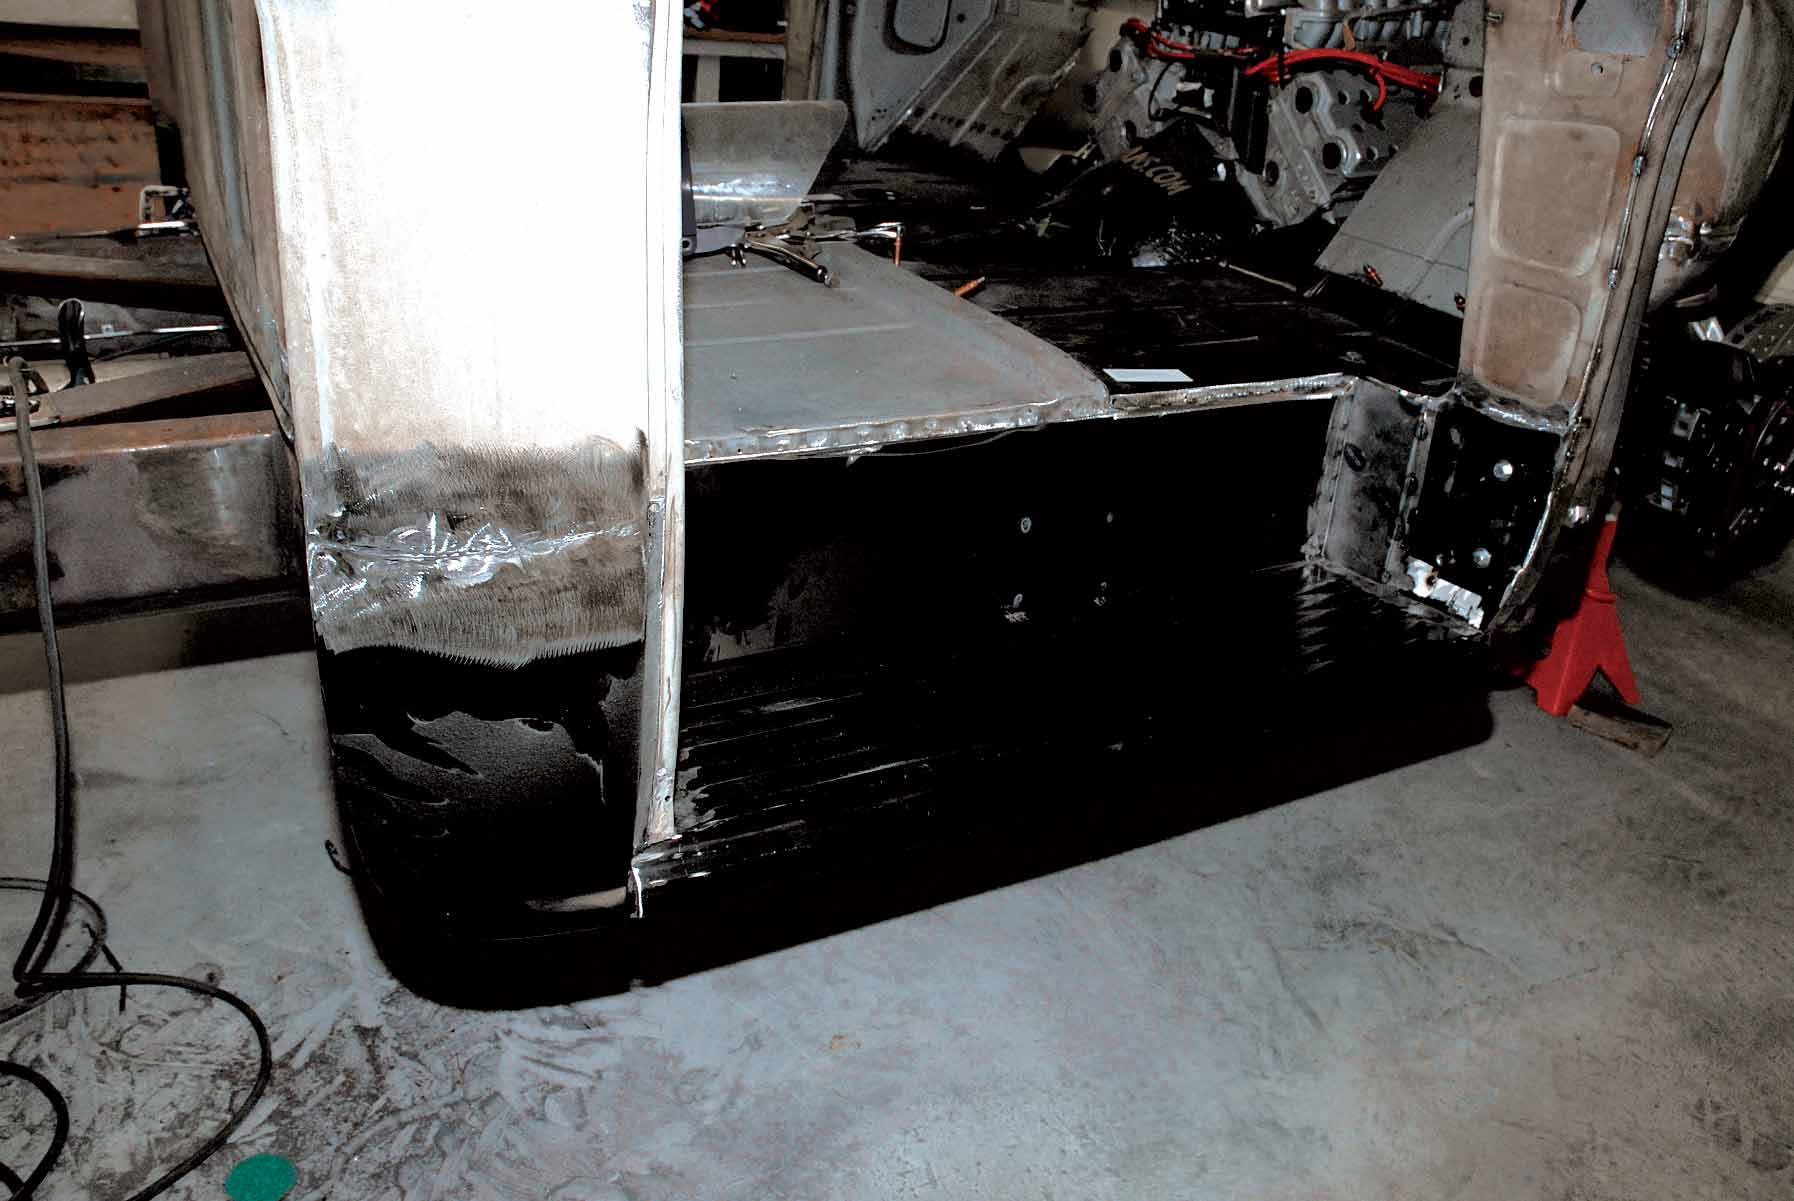
Since our Super Cameo’s fuel tank is now located in the rear of the chassis below the pickup bed, Barker tack-welded in a piece of 2-3/4-inch 18-gauge sheetmetal where the fuel filler neck used to be. Since the brake fluid reservoir is in a different location on the TCI brake pedal assembly, it was necessary to fill in the 2-3/4-inch hole on the Classic Industries reproduction floor panel.
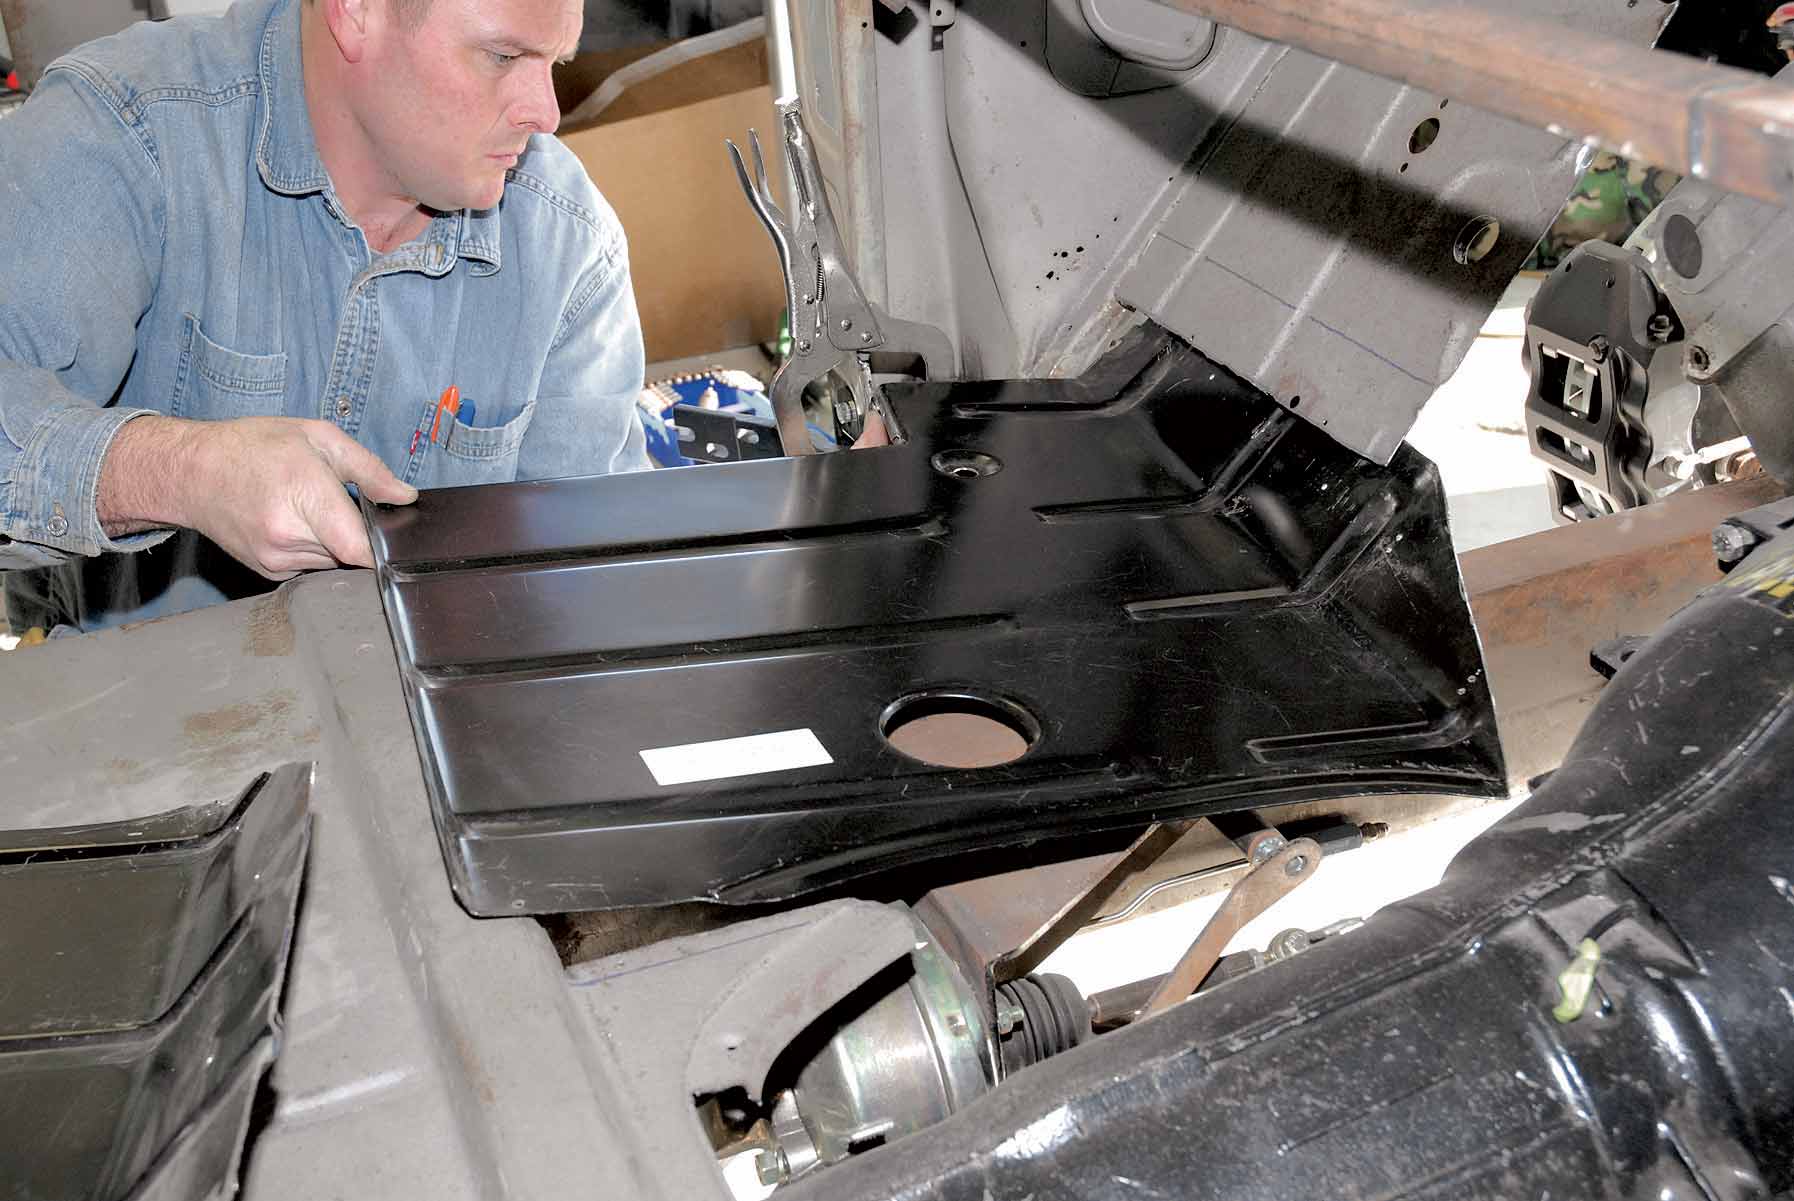
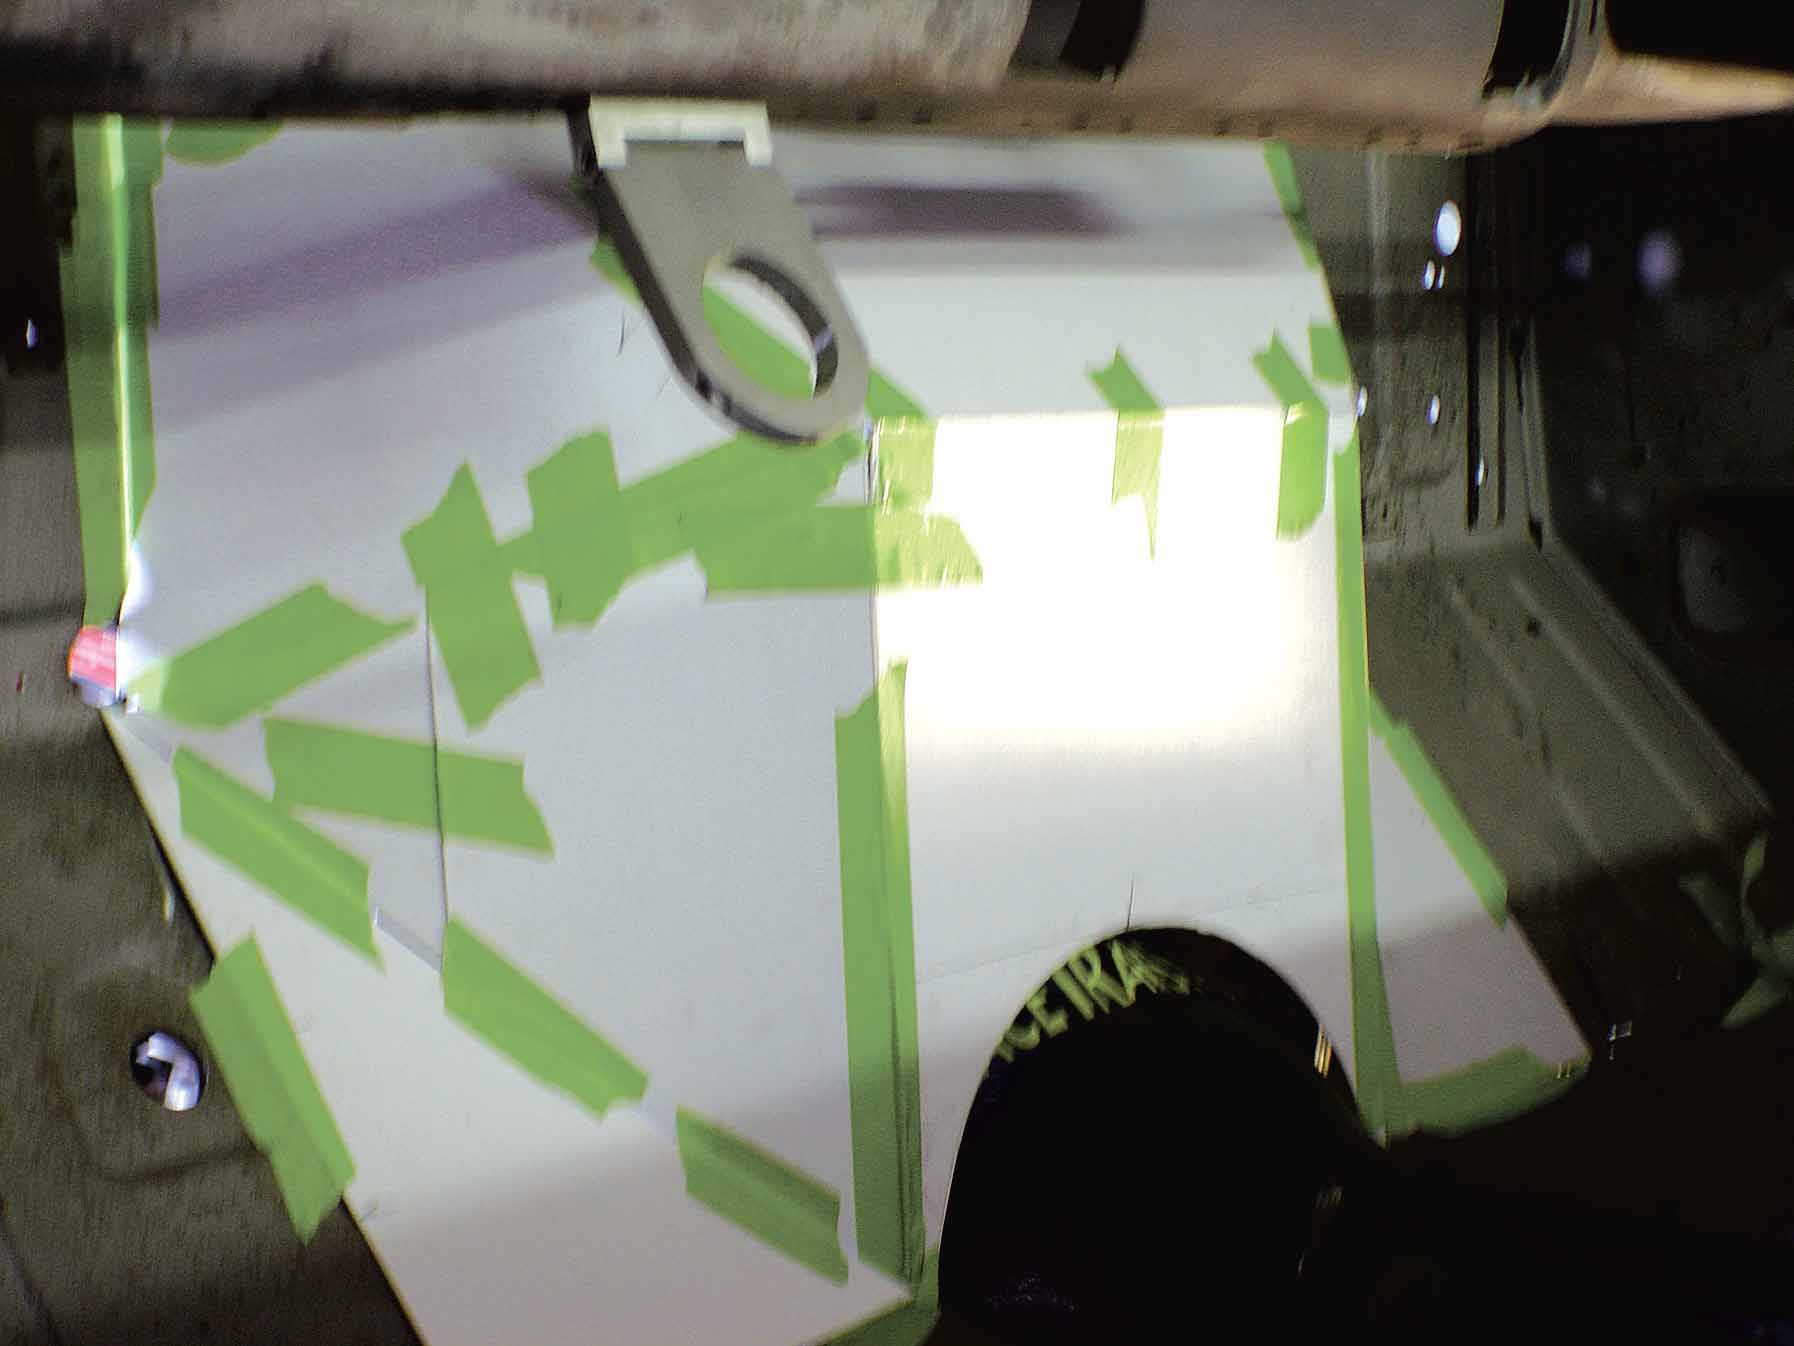
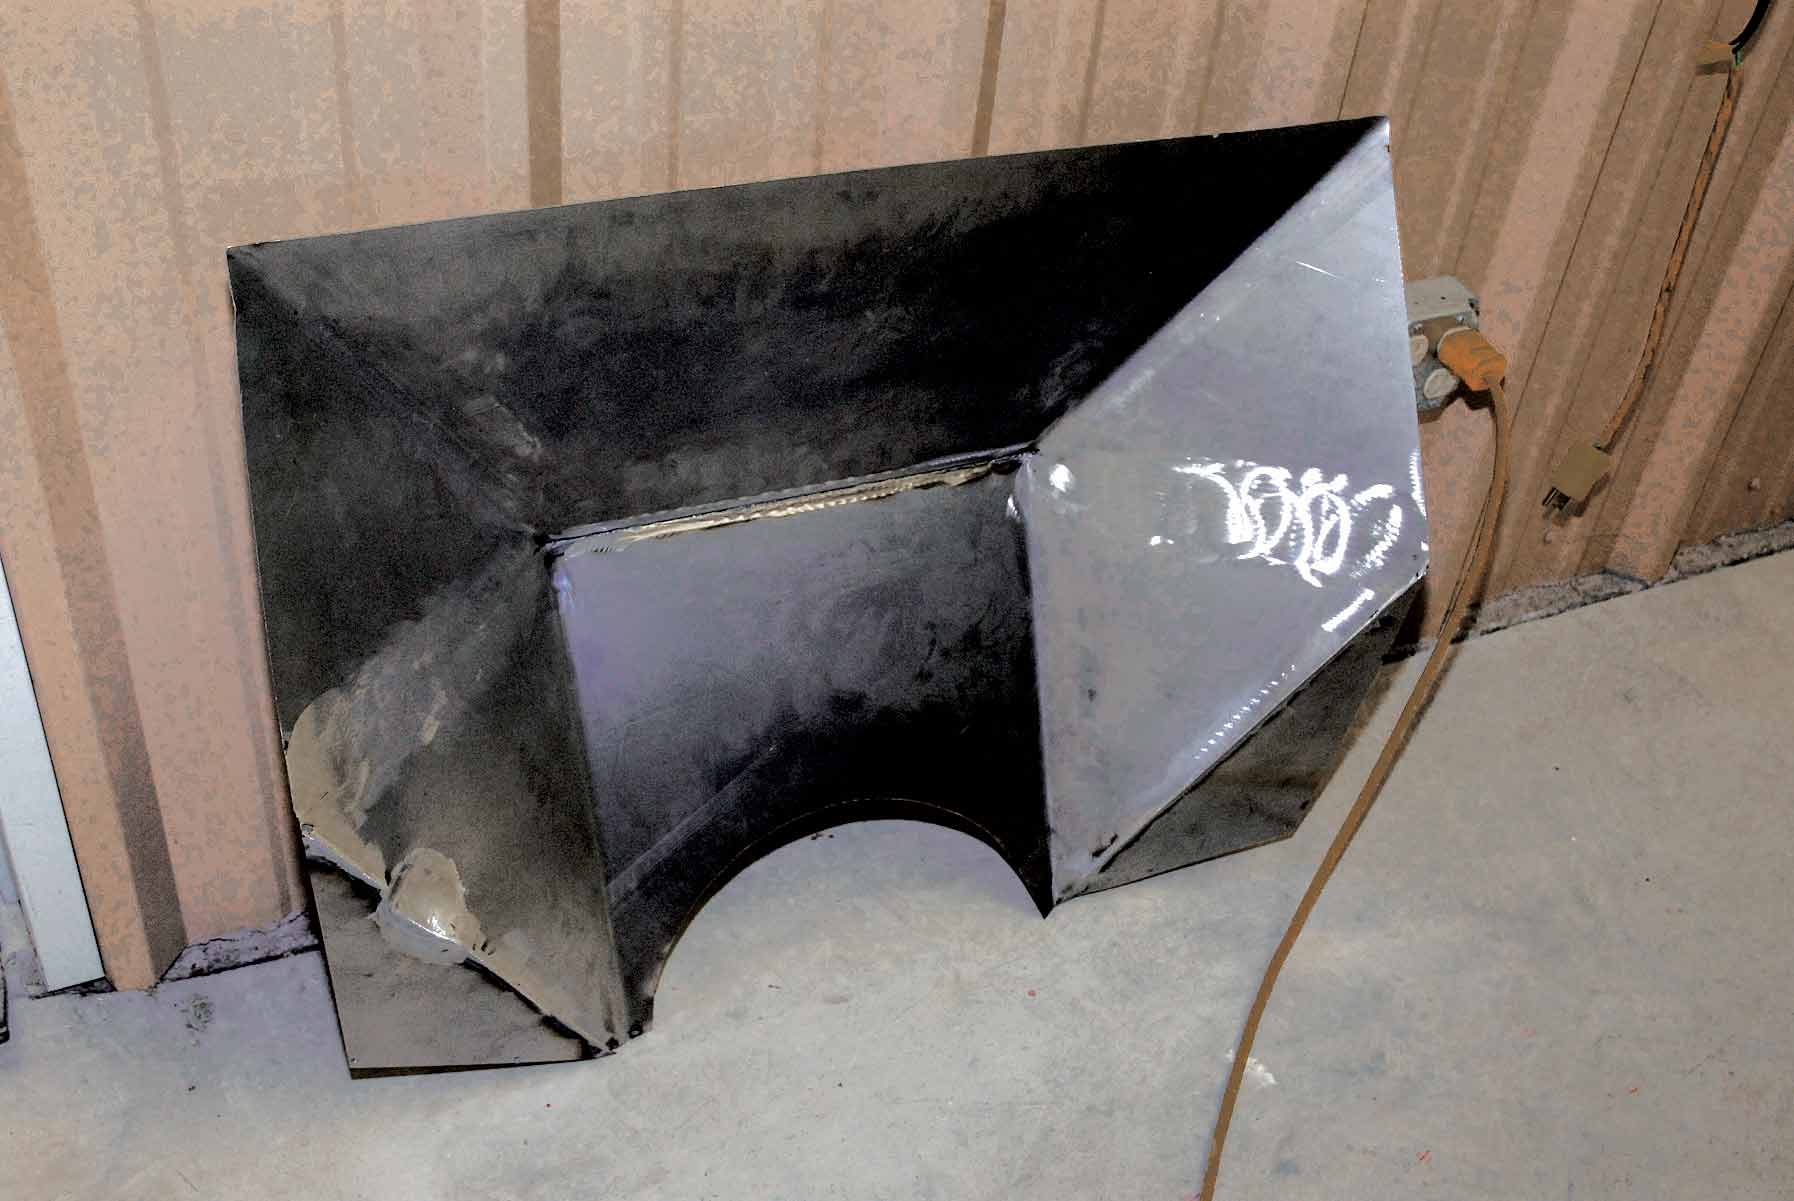
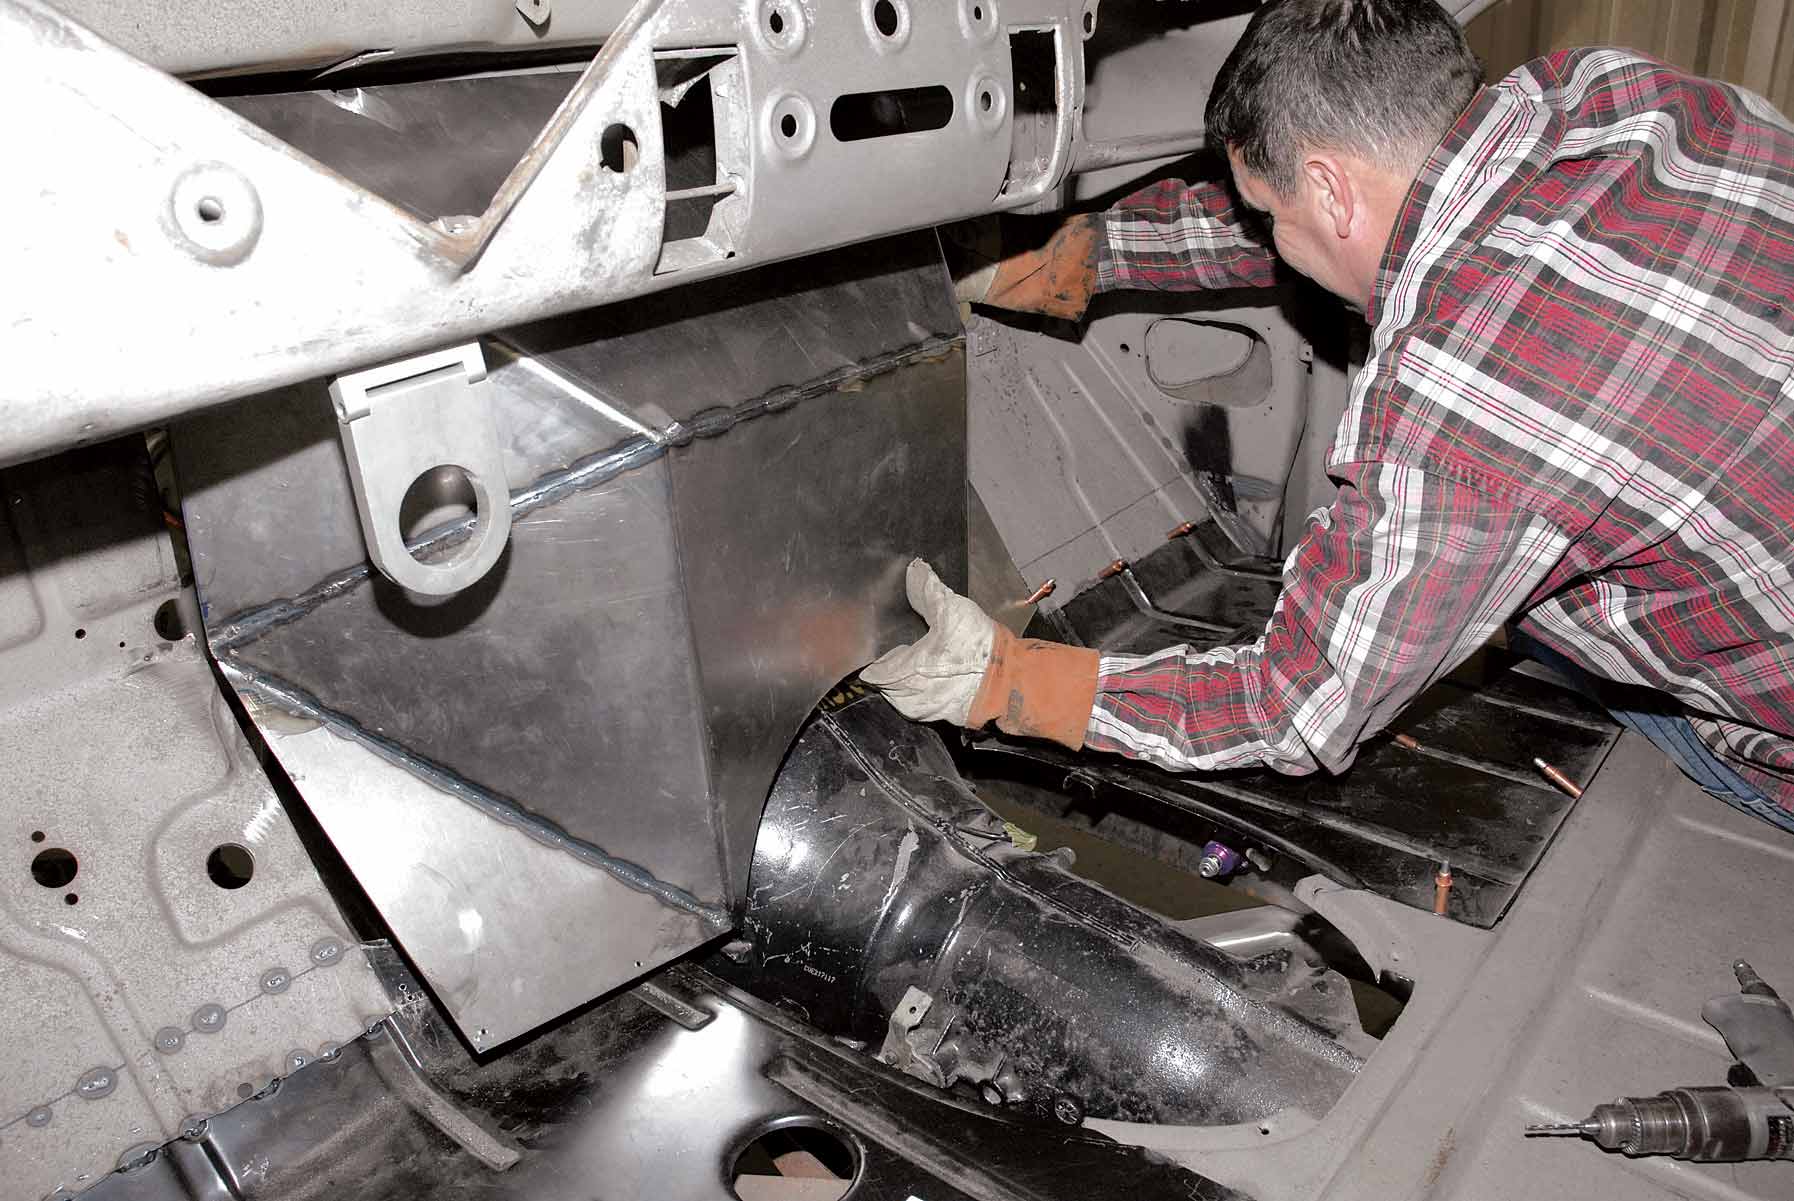
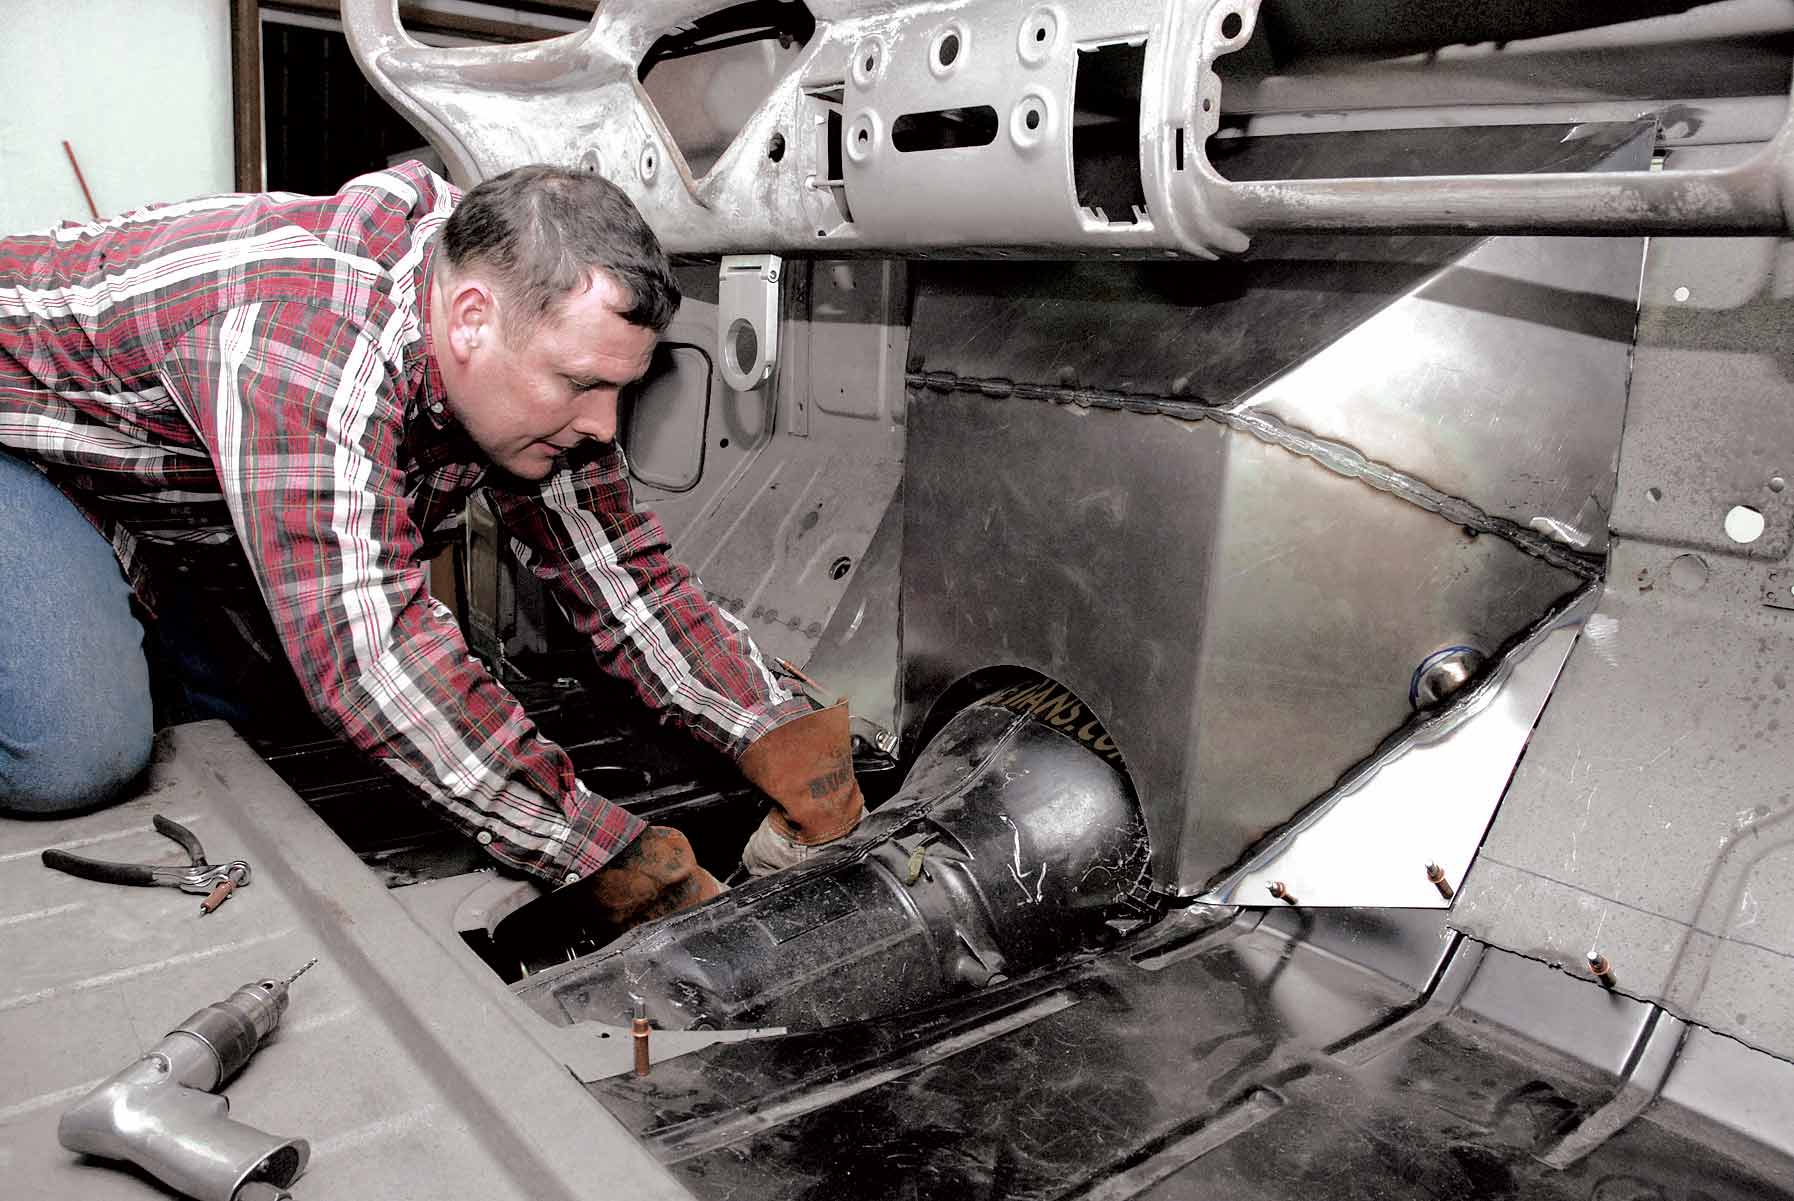
With all our Classic Industries patch panels welded in place, our attention was redirected to the firewall. Given the fact that we were dealing with a 6-inch engine setback, it was necessary to trim the firewall, as well as fashion a new firewall indentation, or dog house, to accommodate the massive twin-cam Corvette ZR1 cylinder heads. Initially, Tim and Darrell Cimbanin pieced together a 10-piece cardboard pattern featuring a series of 42-, 50- and 72-degree angles, along with a few odd-shaped filler panels, which were measured from point to point. These cardboard patterns were then duplicated in 18-gauge sheetmetal and tack-welded together inside the truck to form one unit. After a couple of minor modifications—forming a firewall indent to clear the passenger’s-side rocker cover—the dog house was refit and finish-welded to what remained of the existing Cameo firewall. Tim Cimbanin then fabricated a pair of 12×12-inch firewall block-off plates and trim-fit them to the curvature of the firewall. Finally, everything was finish-welded in place.
That concludes Part 9 of our Cimtex Rods Super Cameo buildup series. In our next installment we’ll cover the installation and alignment of our new Dynacorn International (DII) ’55-’59 Chevrolet/GMC reproduction cab doors, and we’re going to chop the top a whopping 3-1/2 inches.
1 This is how our Cimtex Rods Super Cameo cab looked sandblasted and set on its highly modified framerails. The full complement of Classic Industries parts and accessories for ’55-’59 Chevrolet/GMC patch panels and related components is shown here. You have everything from door hinge repair panels to doorsill/rocker panels, upper and lower door hinges, floor pans, lower cab mount panels and supports and a front bed panel. These pieces are 18-gauge steel and come coated in EDPM black. All told, you’re looking at about $800 worth of parts.
2. With the sandblasted truck cab bolted to the chassis, fabricator Billy Walker used a plasma cutter to remove the ’56 rusted-out driver’s- and passenger’s-side floor pans.
3. This is what the interior floor area of our ’56 Cameo big-window looks like after floor pan removal and cleanup.
4. Barker trial fits the Classic Industries driver’s-side floor pan in place.
5. Using an assortment of 42-, 50- and 72-degree-angle cardboard templates, Tim and Darrel Cimbanin came up with this dog house-design firewall cover.
6. The firewall cover was transformed into a MIG-welded 18-gauge sheetmetal firewall cover that fits like a glove.
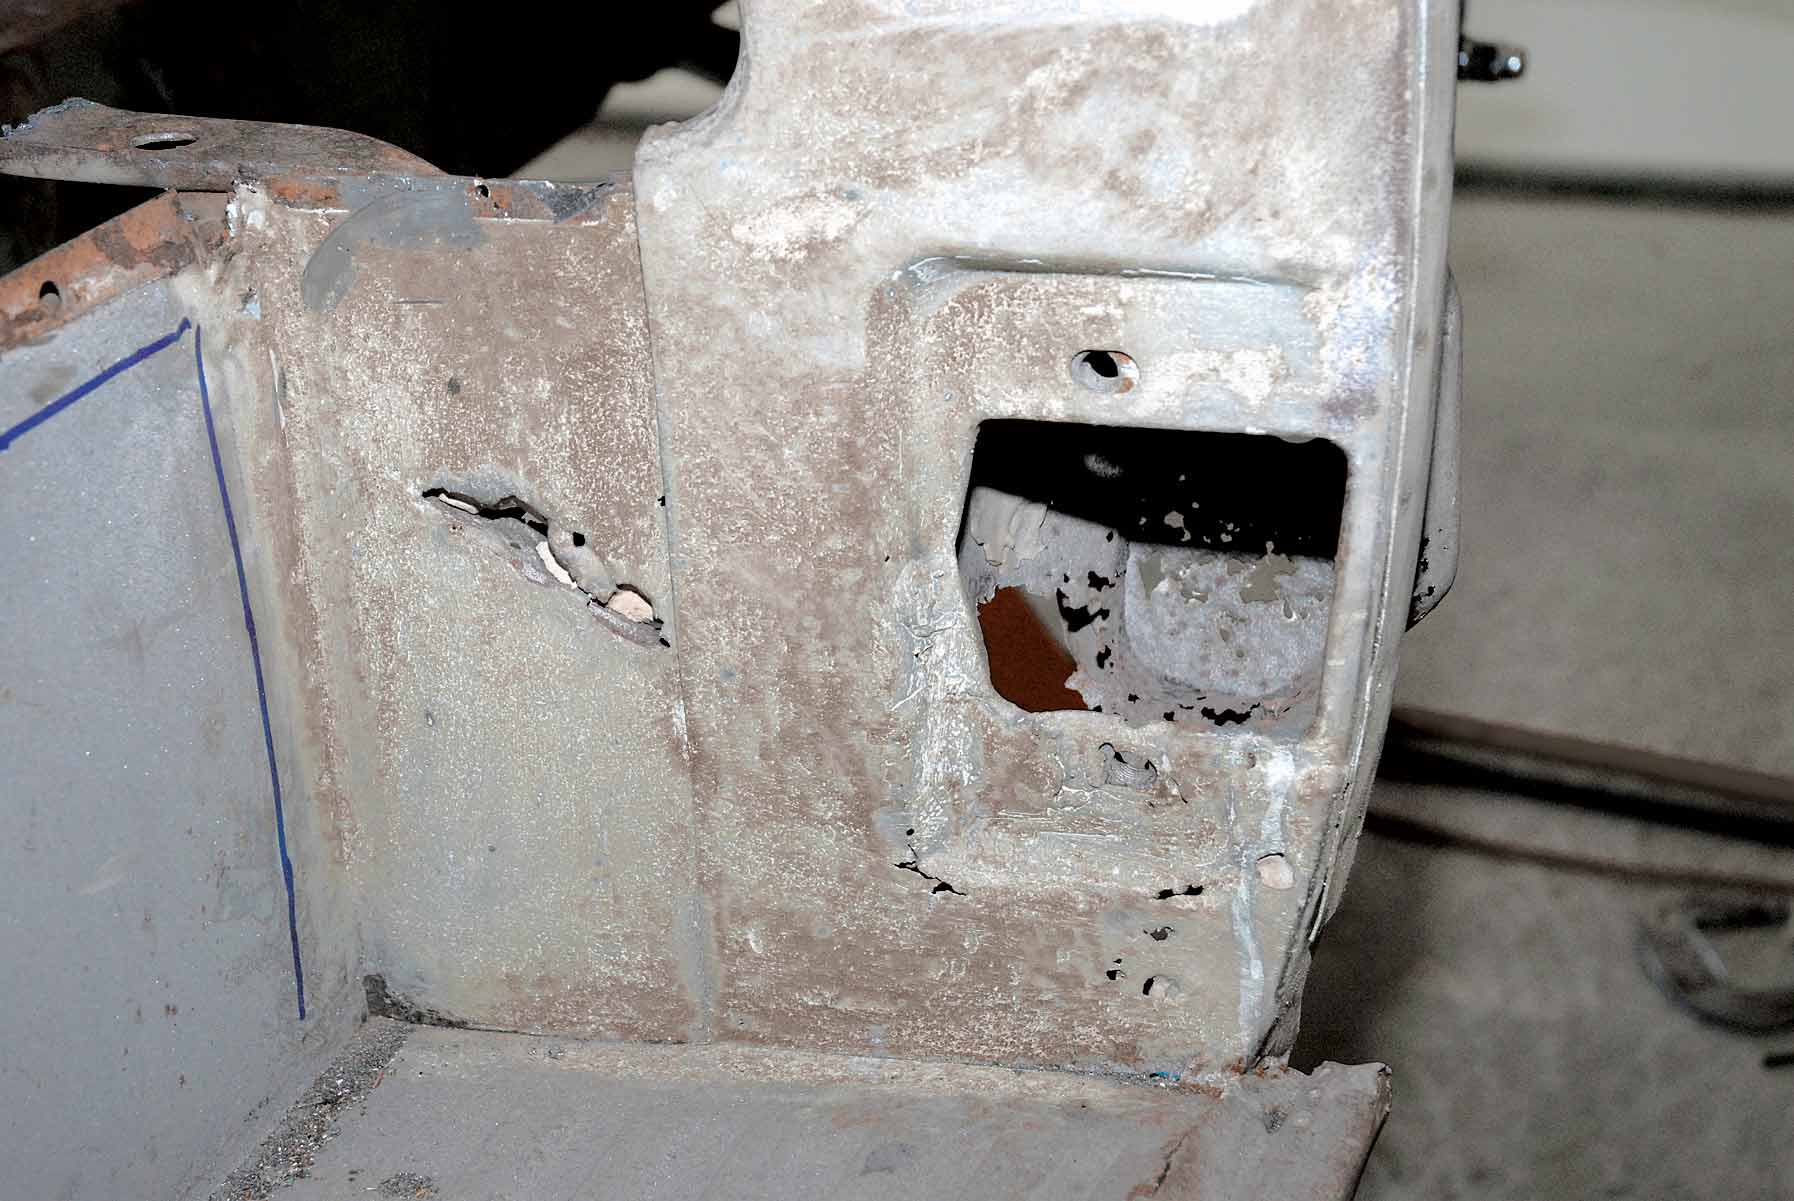
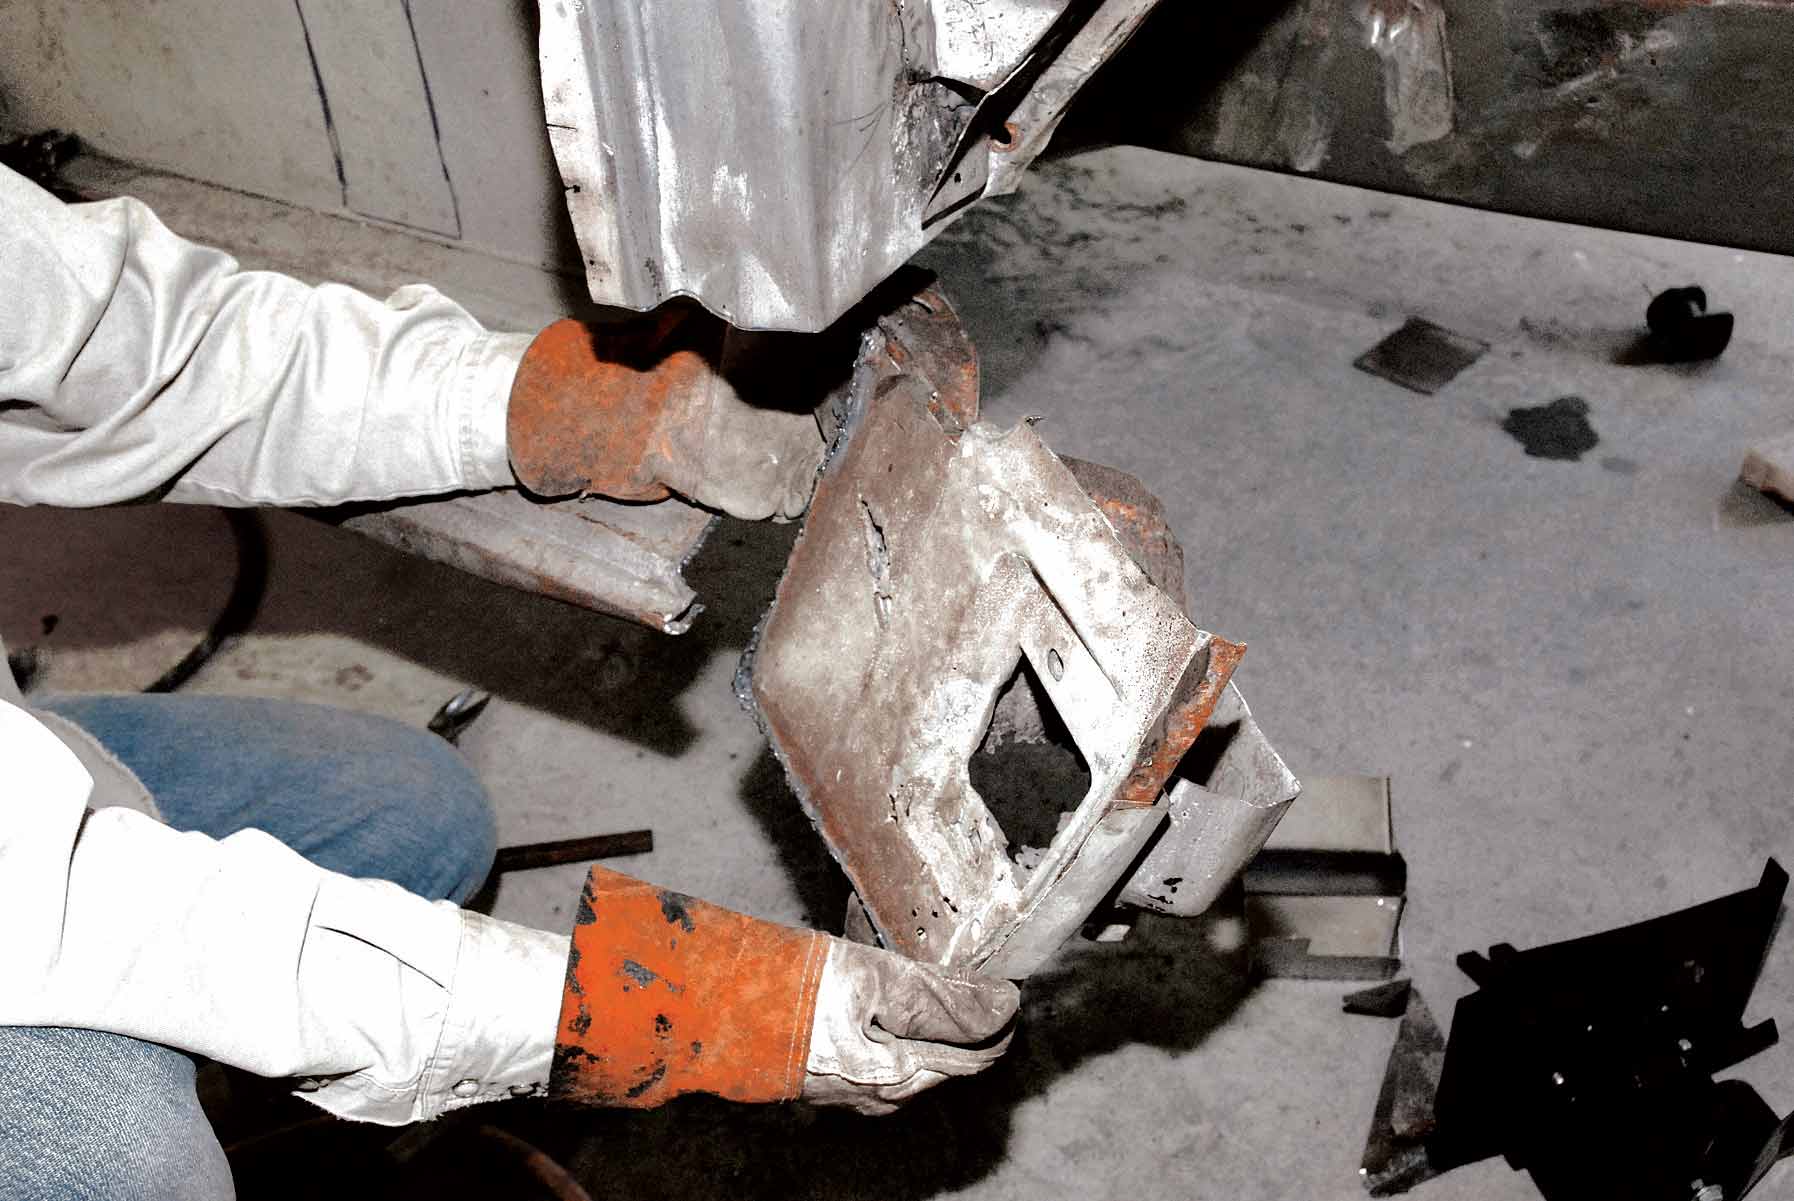
7-8 Years of compacted mud took a toll on the lower cab mounts and supports, as well as the inside door hinge panel.
7-8 Years of compacted mud took a toll on the lower cab mounts and supports, as well as the inside door hinge panel.
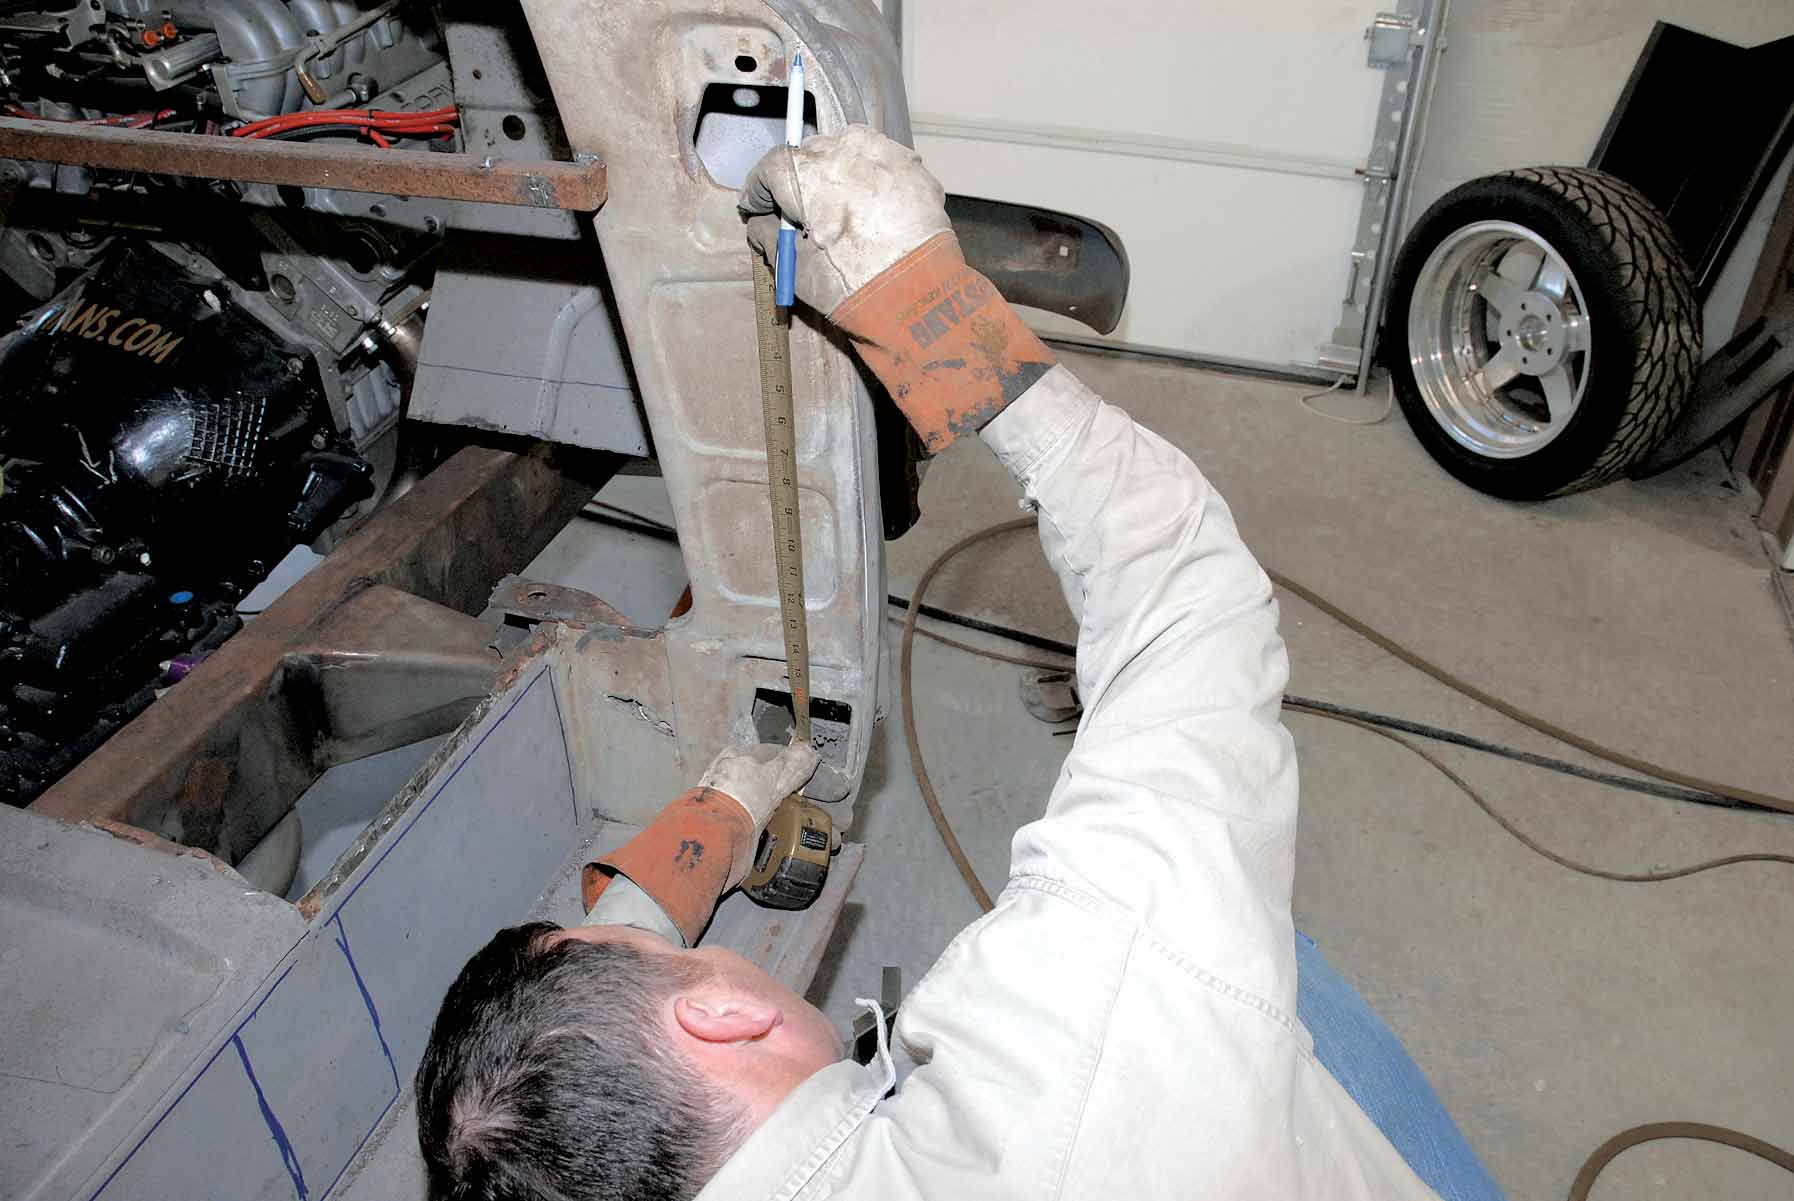
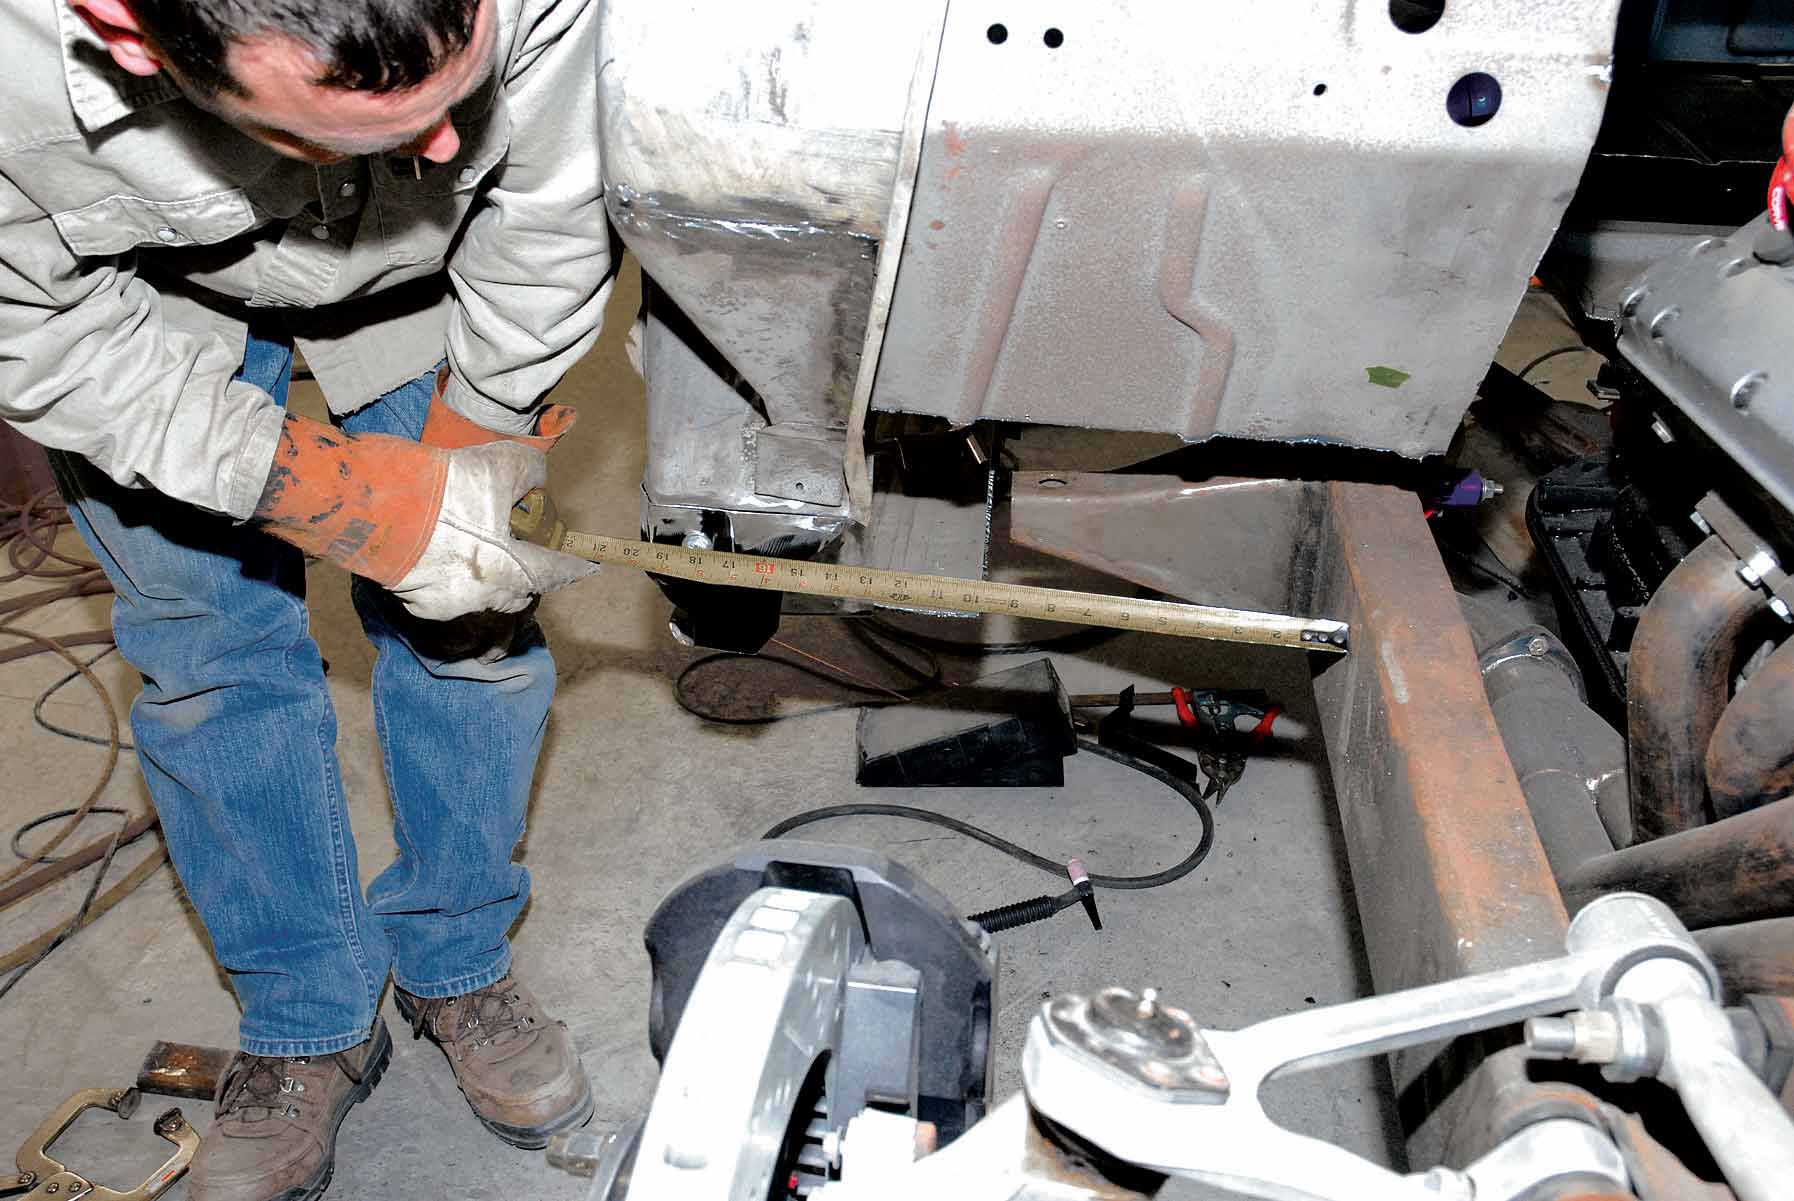
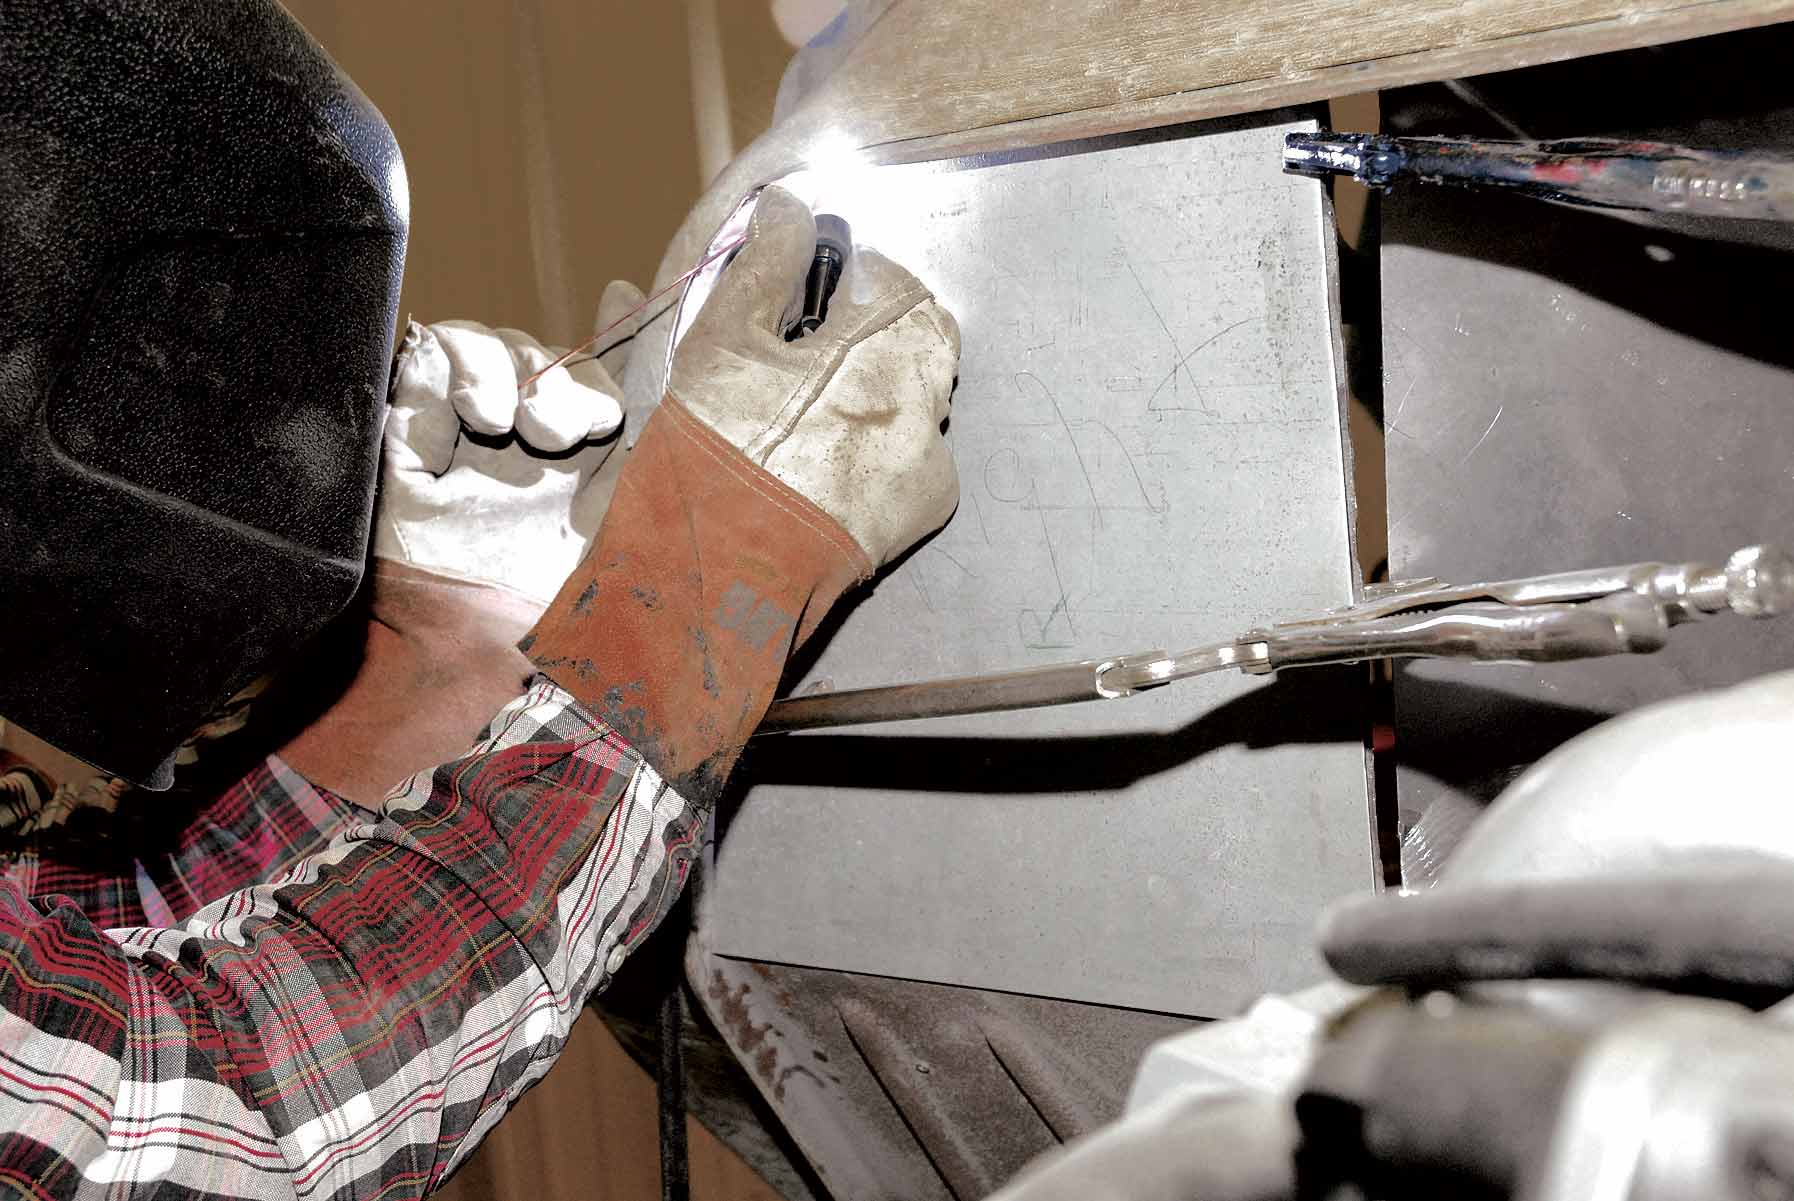
9. Prior to panel removal, Barker measures the bottom bolt of the upper door hinge to the top bolt of the lower door hinge (15-1/2 inches). This measurement is essential to locate the new lower door hinge and reproduction lower door panel.
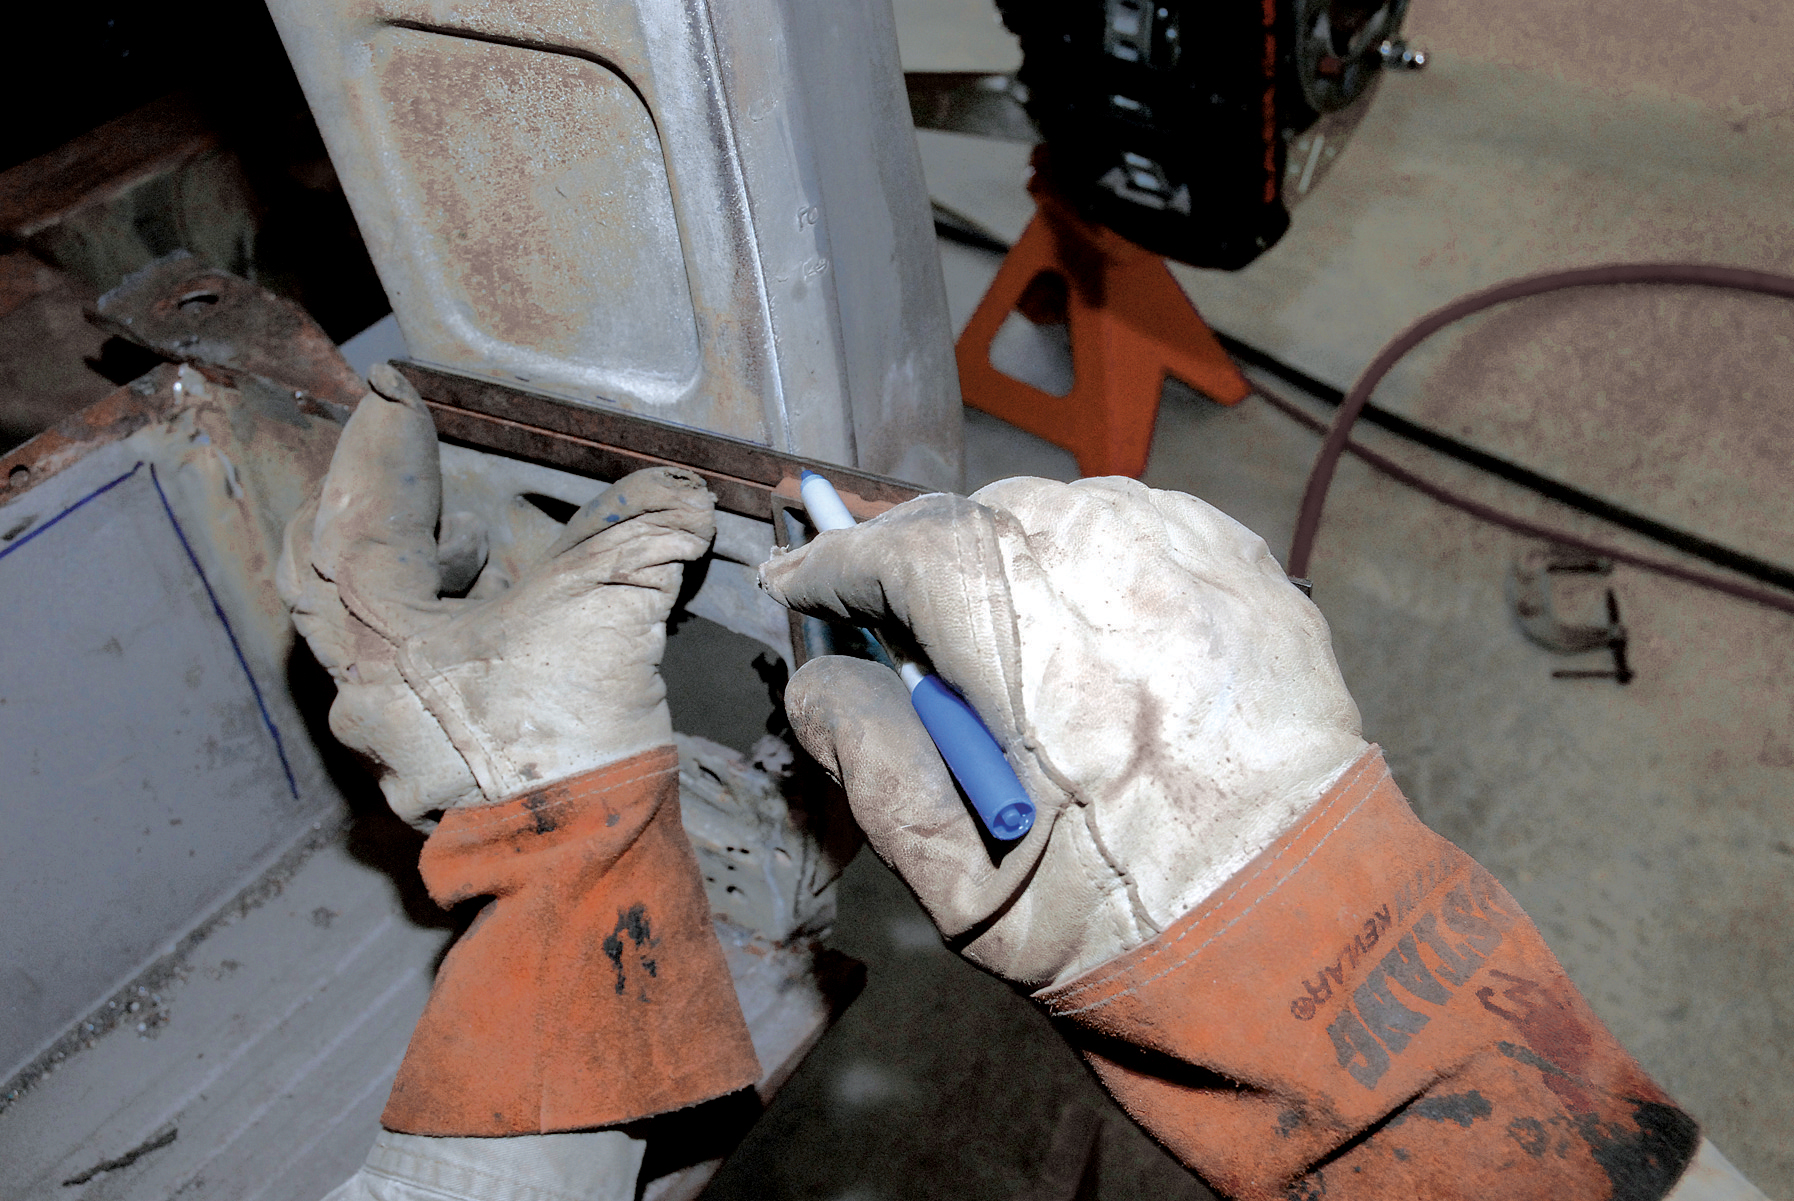
10-11. With this measurement, Barker draws a centerline through the lower door hinge bolt hole and transcribes that line around the corner using a T-square.
10-11. With this measurement, Barker draws a centerline through the lower door hinge bolt hole and transcribes that line around the corner using a T-square.
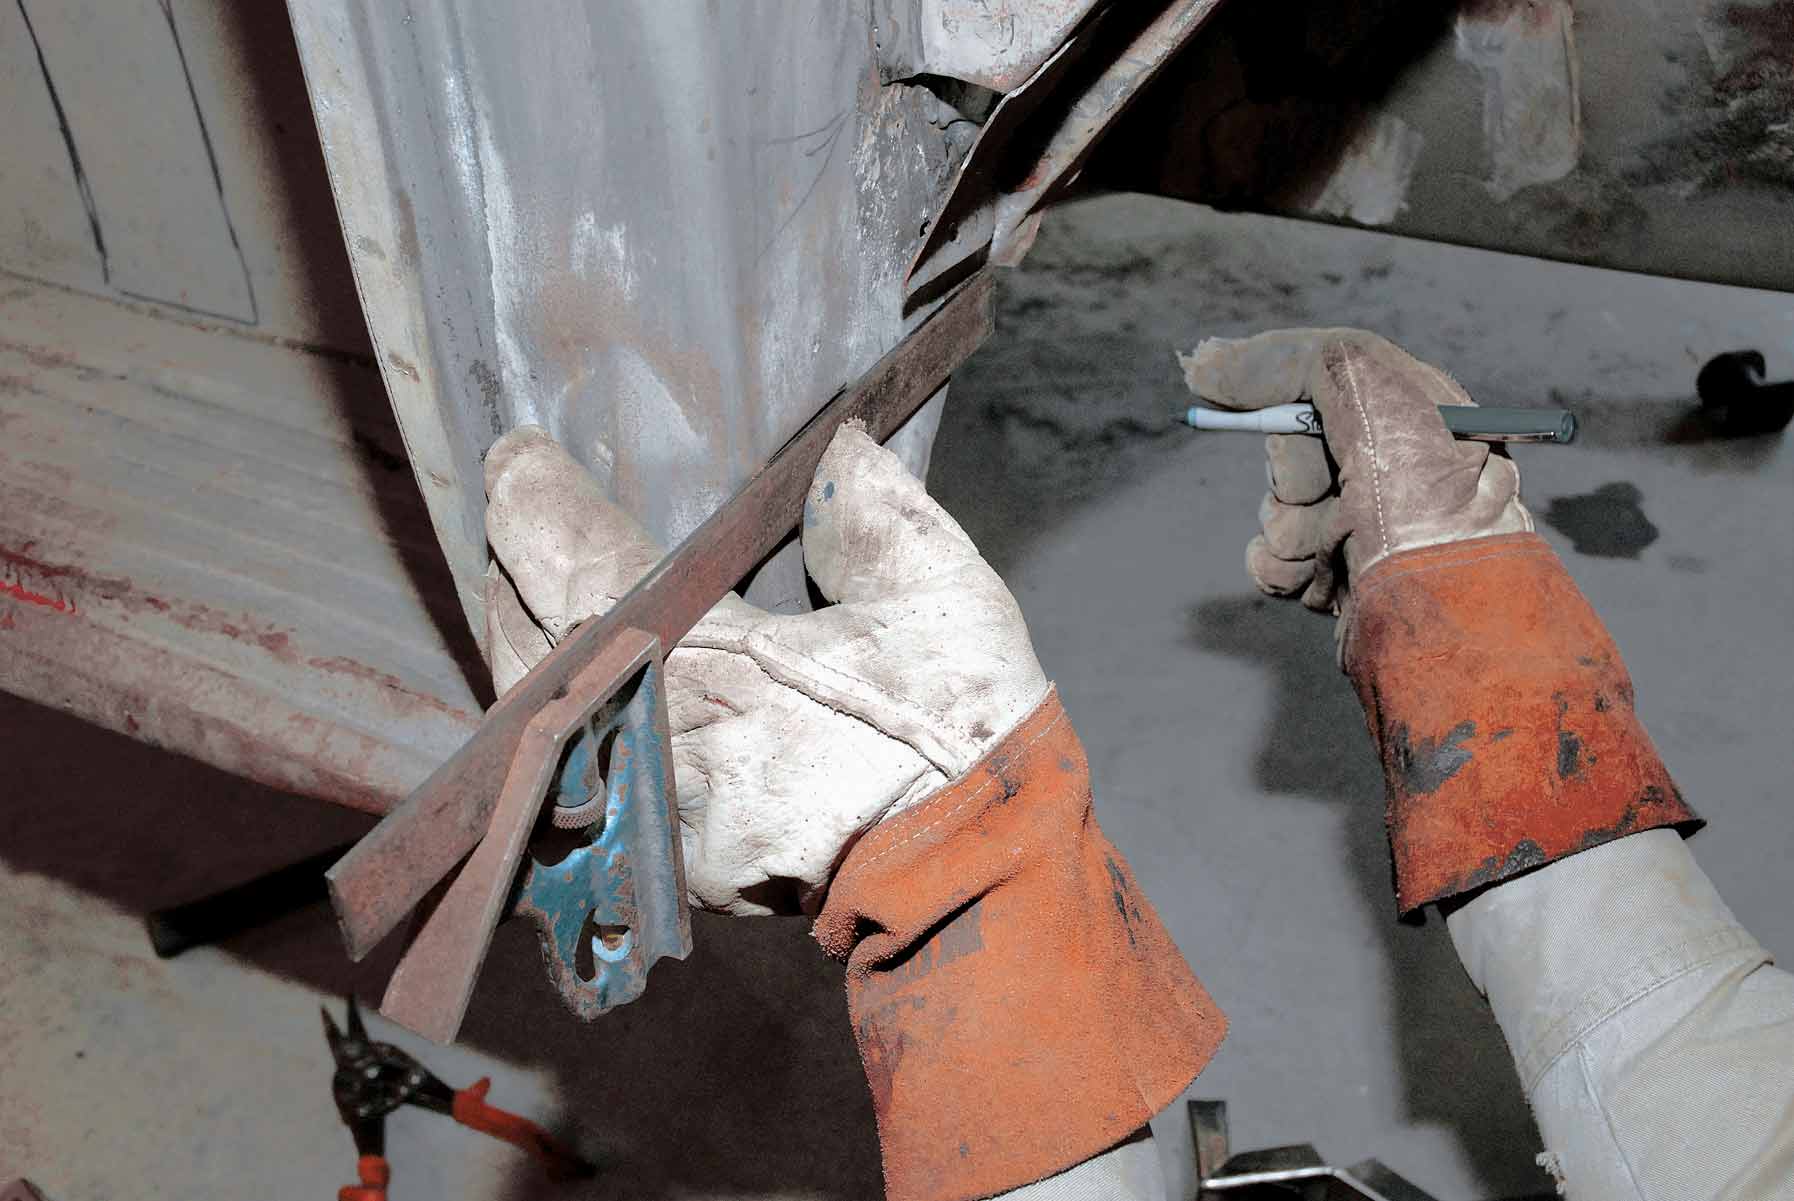
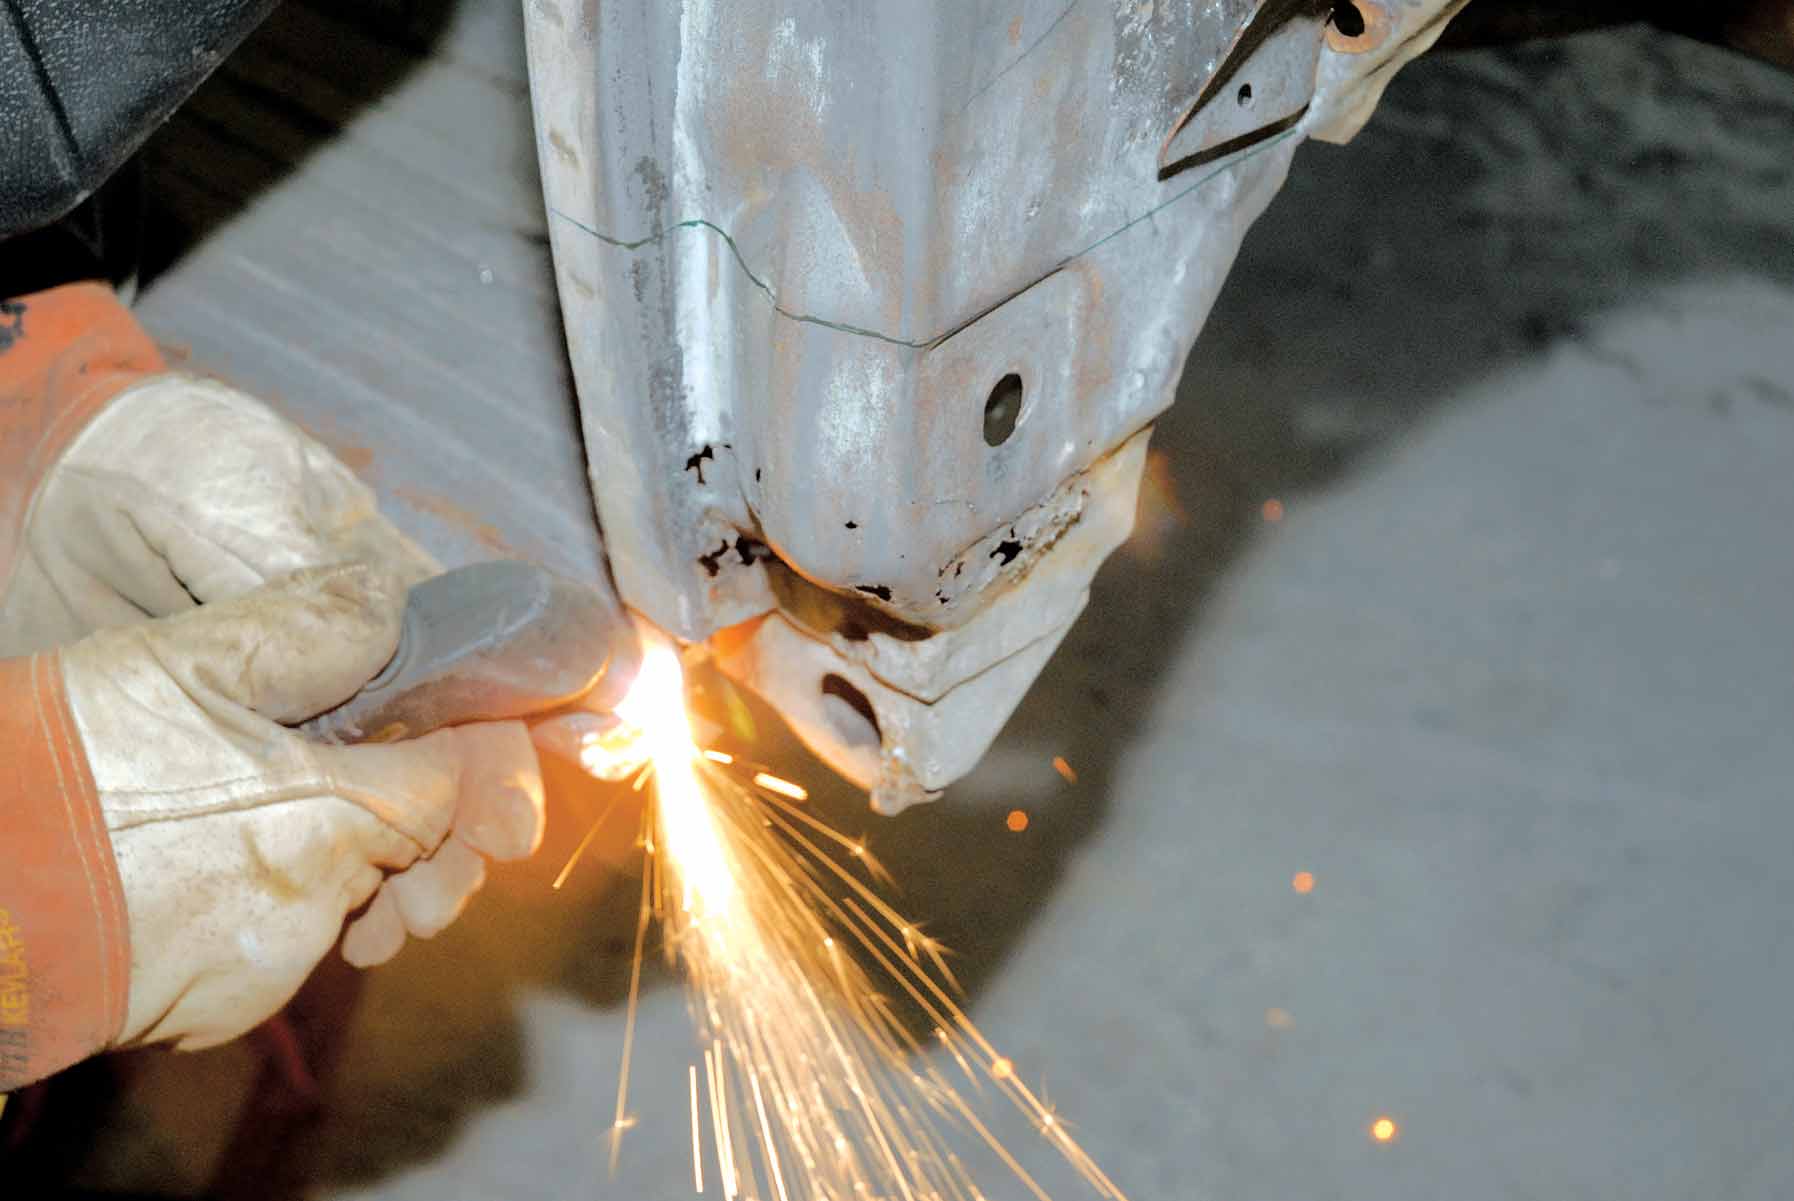
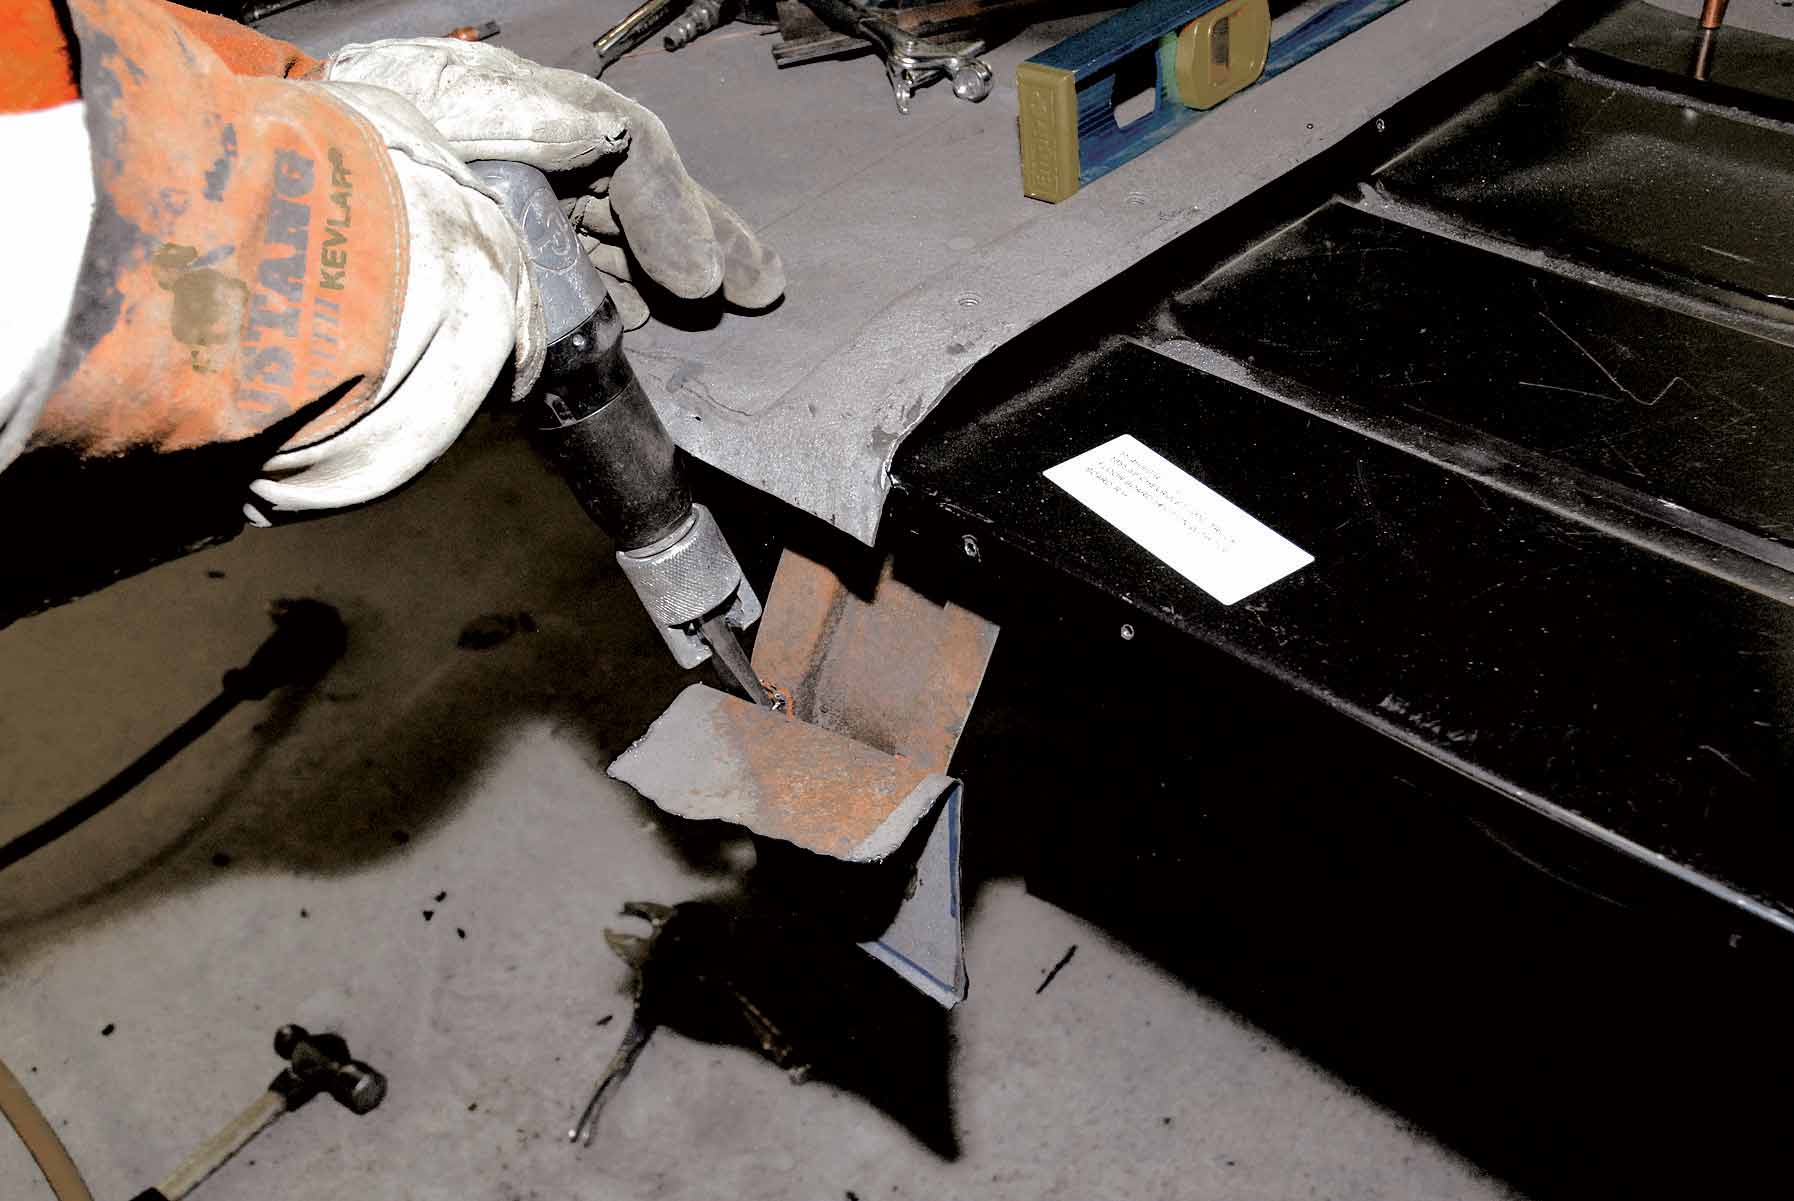
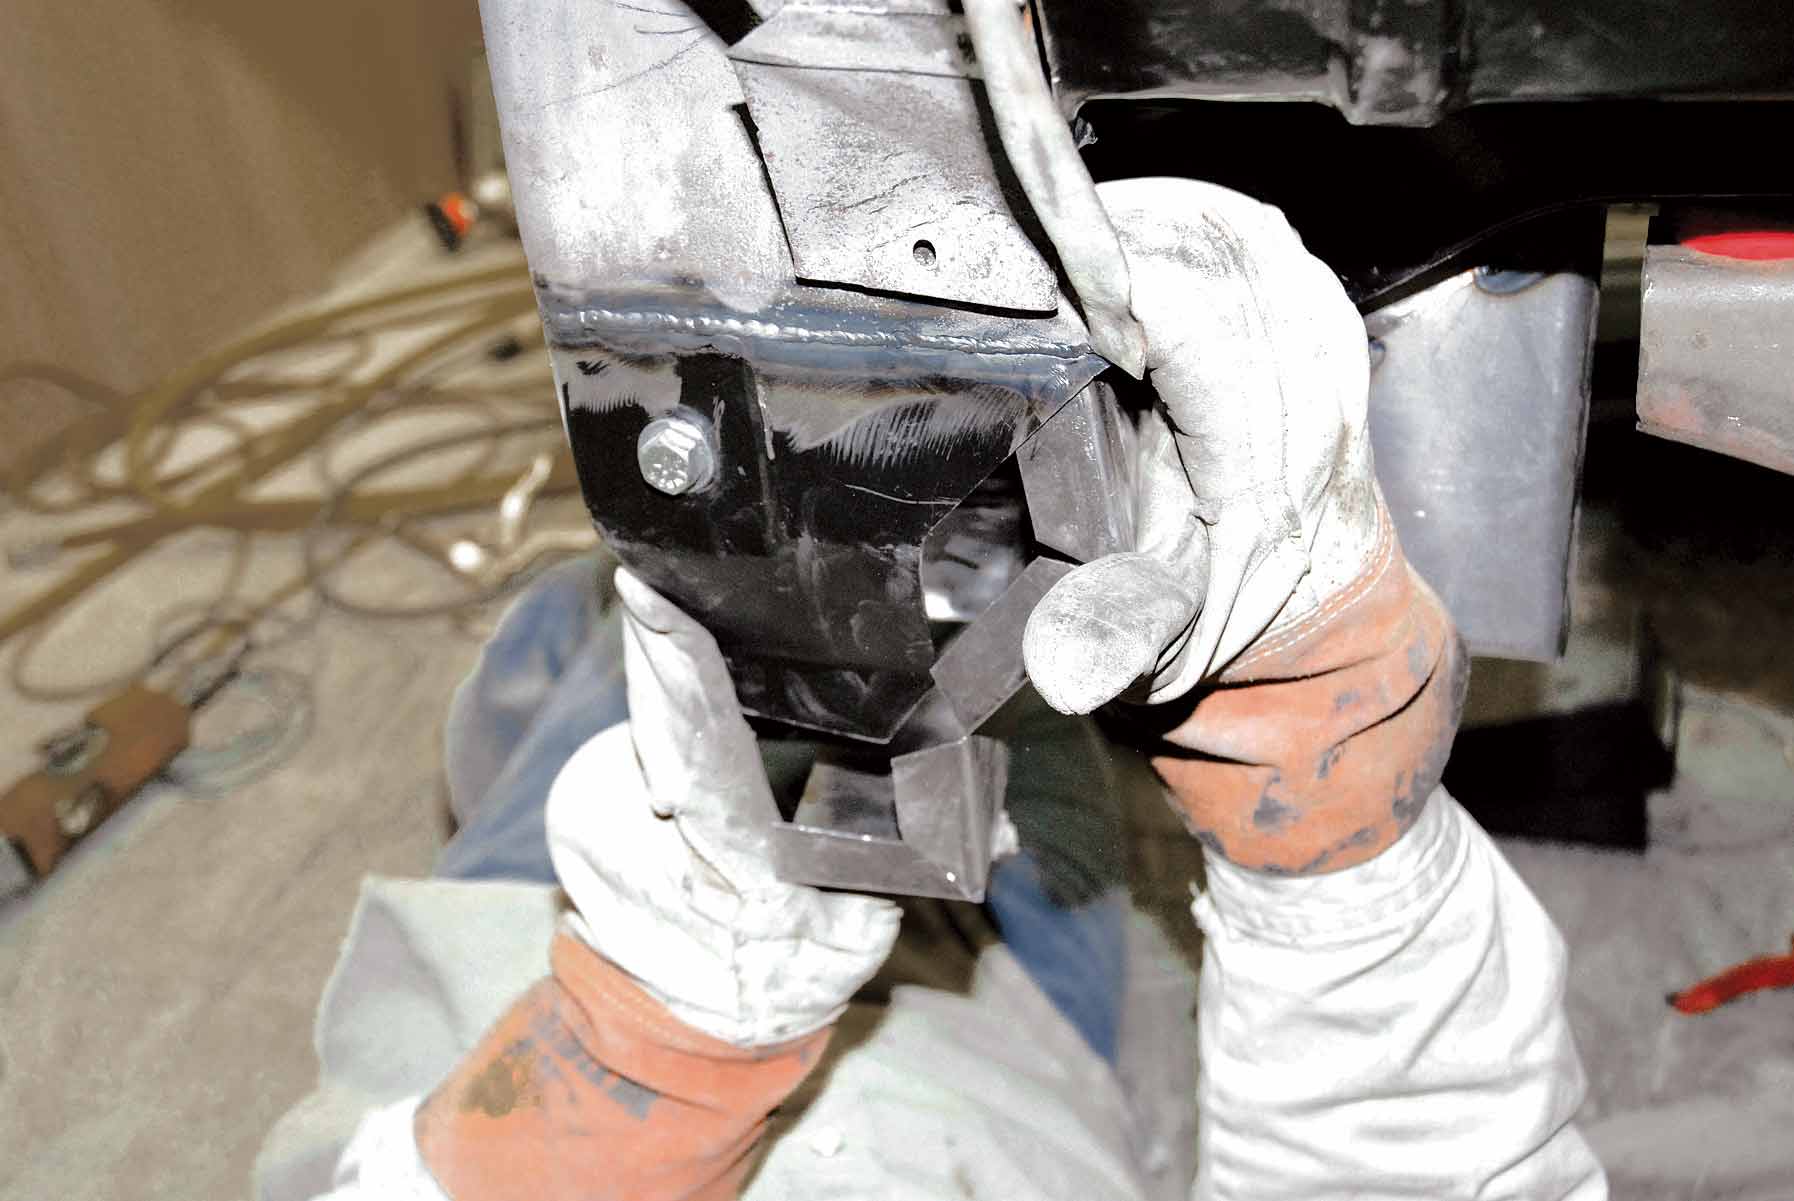
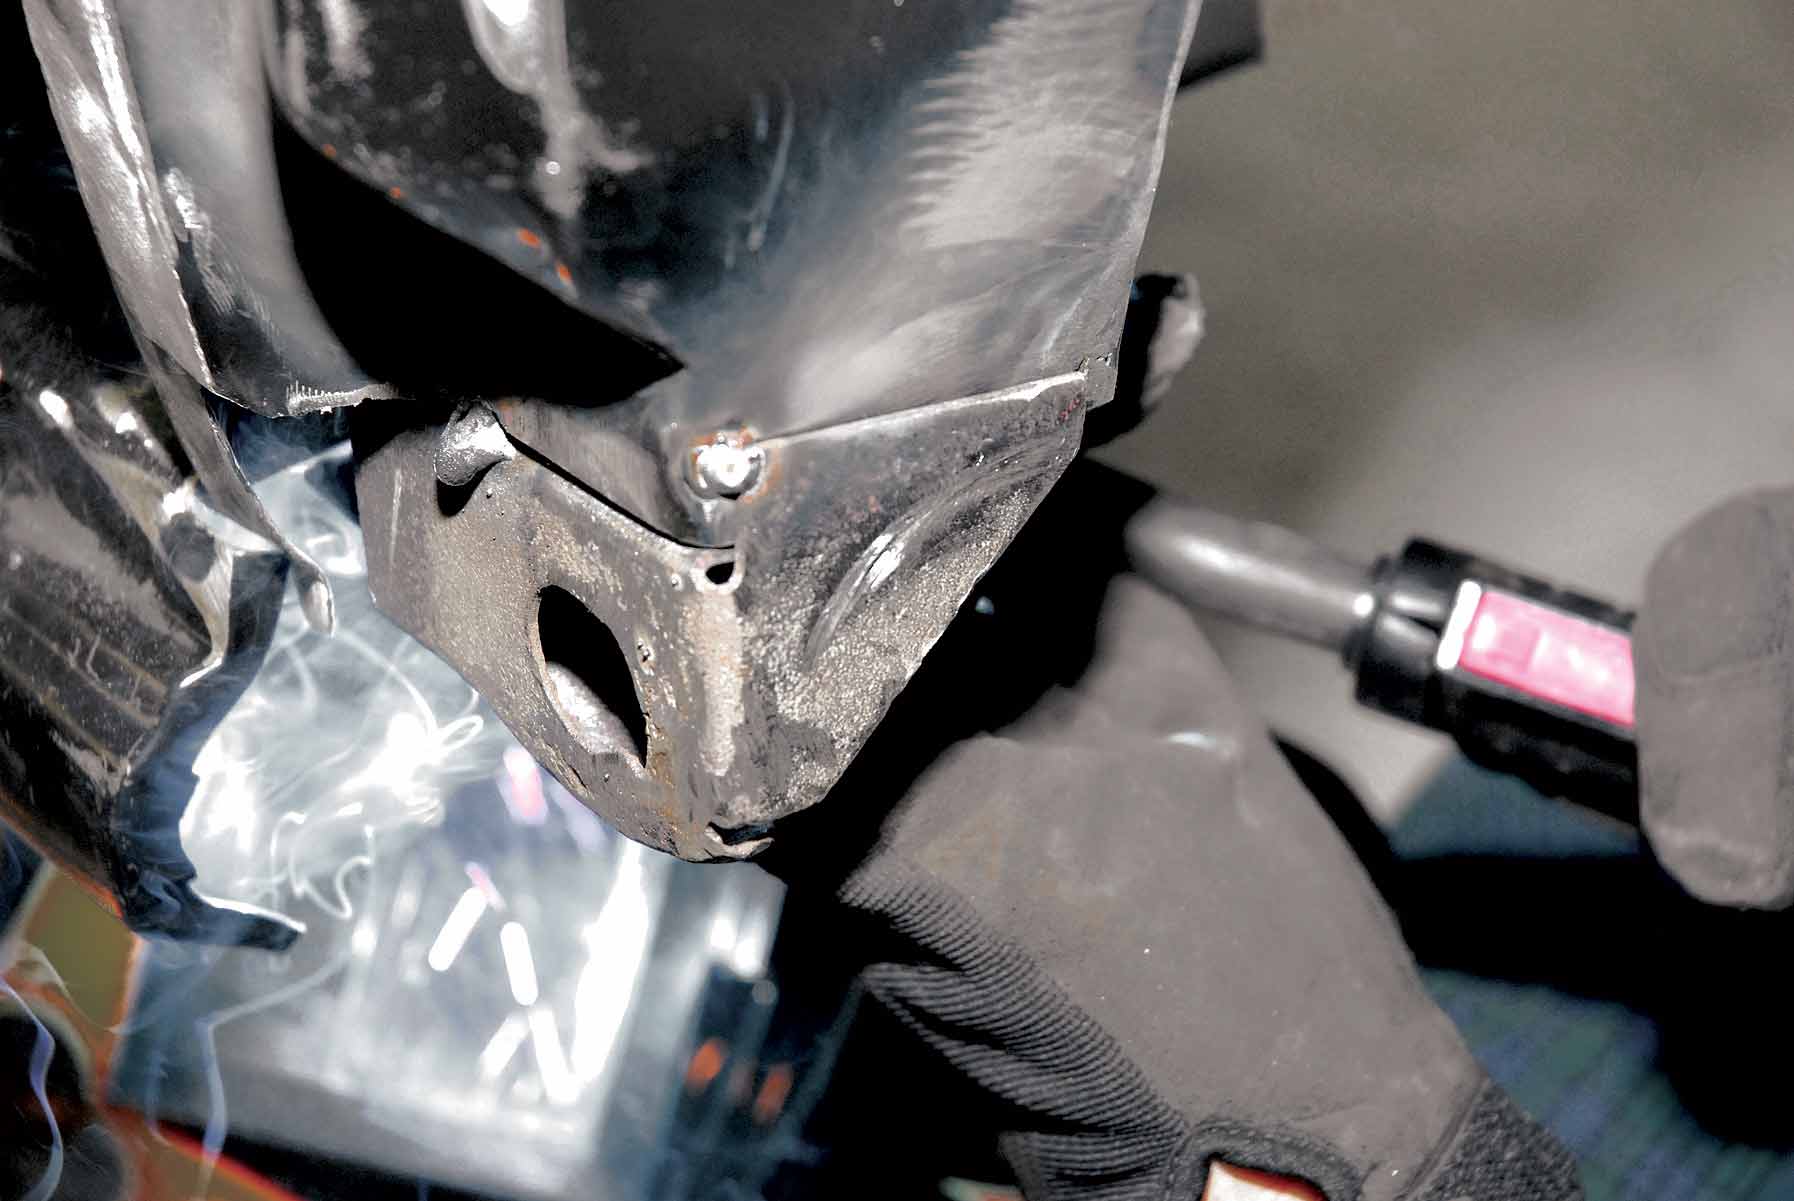
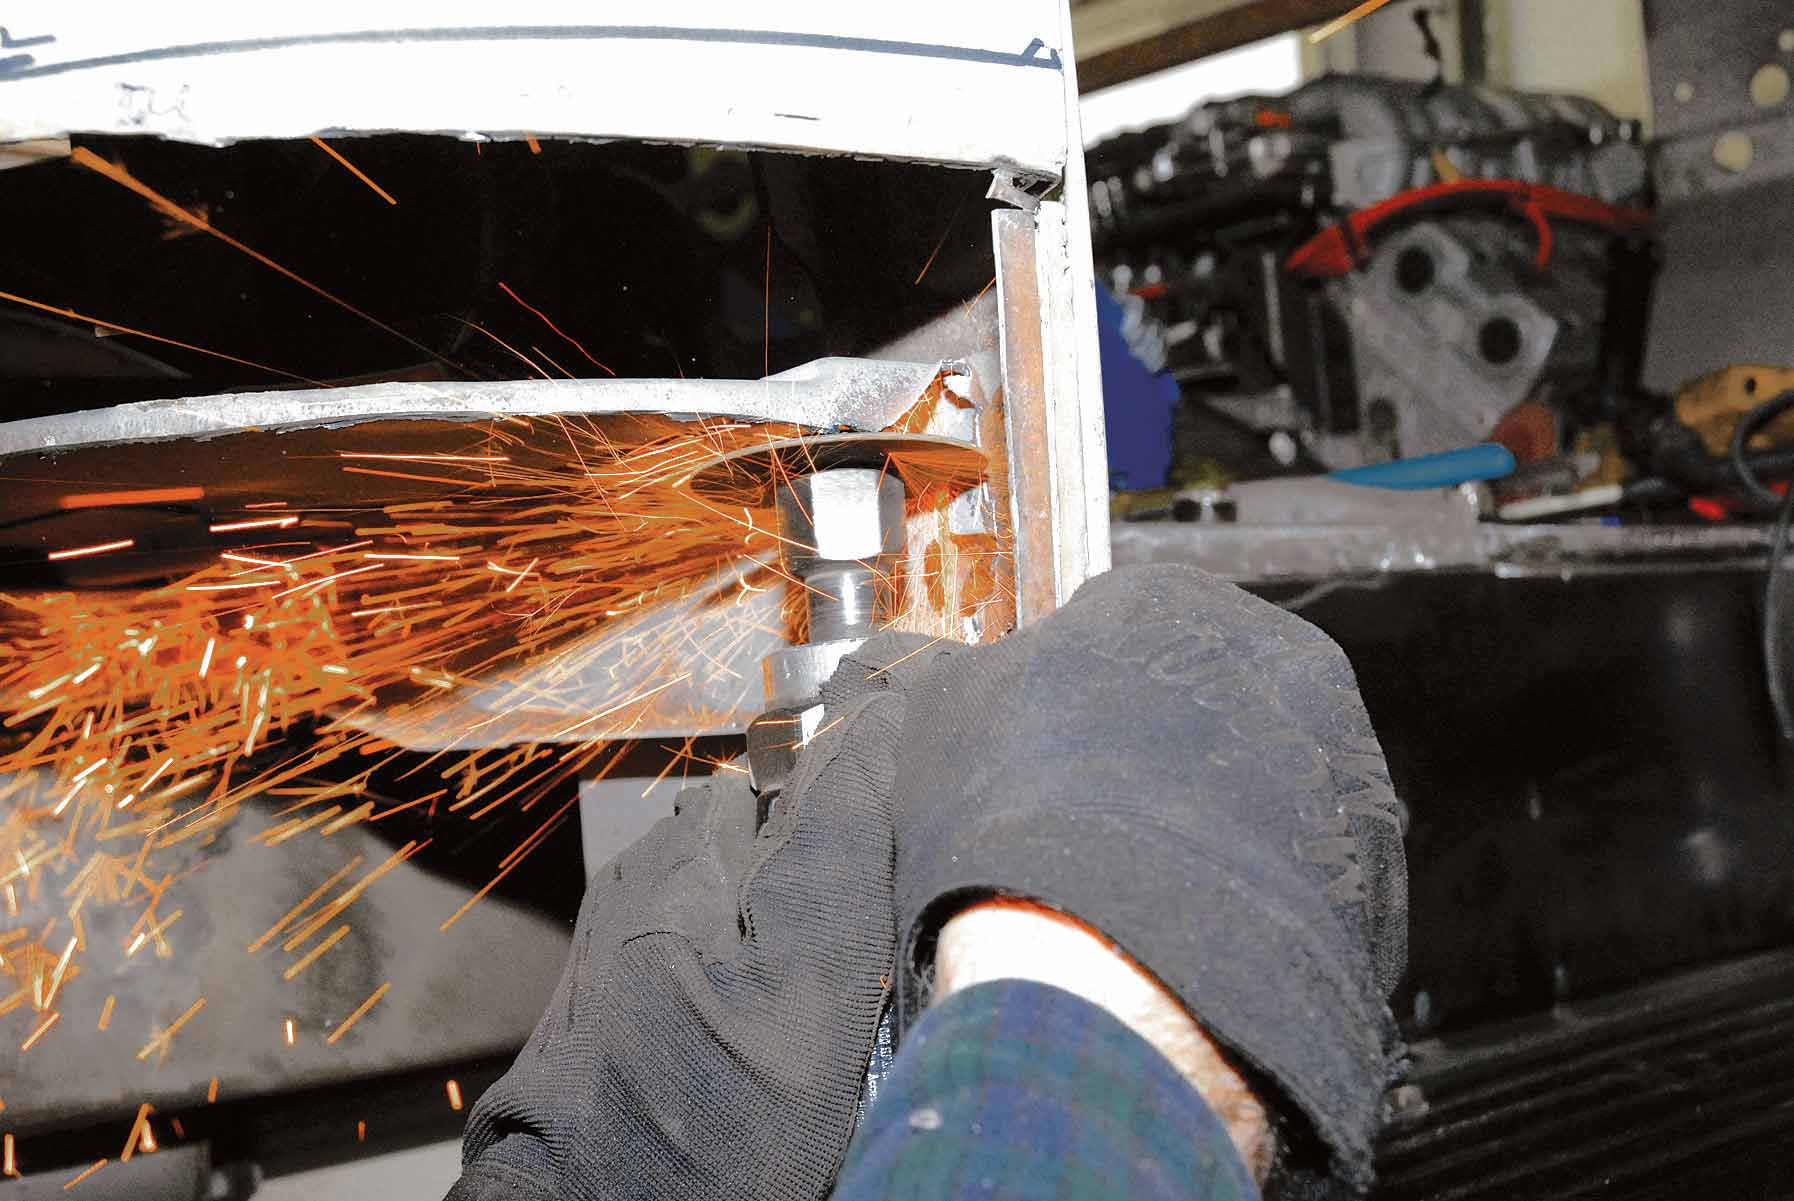
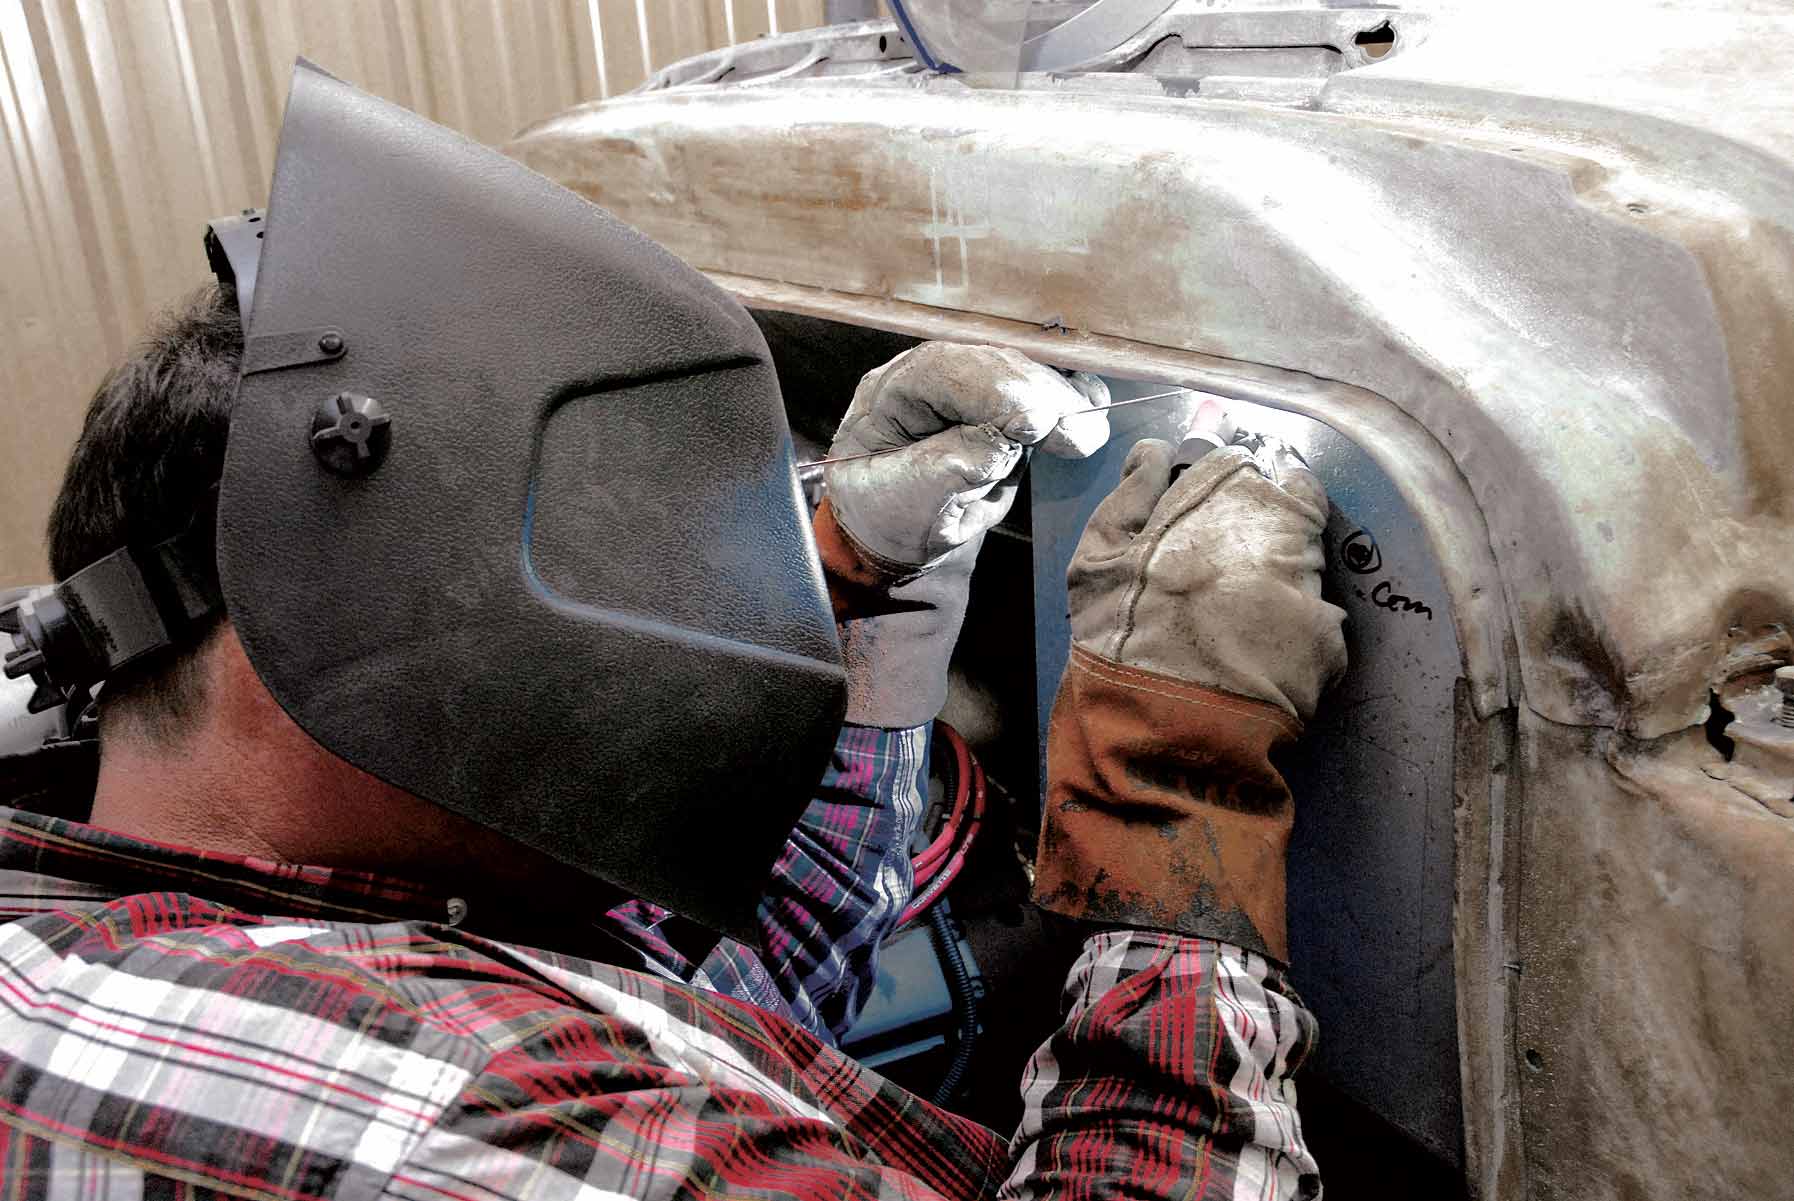
12-13. Prior to removing the rusted-out lower cab mount, our installer uses a die grinder to remove the OE fender mount bracket from the lower cab mount. As this piece is not being reproduced, it’s vital to restore and/or repair it.
12-13. Prior to removing the rusted-out lower cab mount, our installer uses a die grinder to remove the OE fender mount bracket from the lower cab mount. As this piece is not being reproduced, it’s vital to restore and/or repair it.
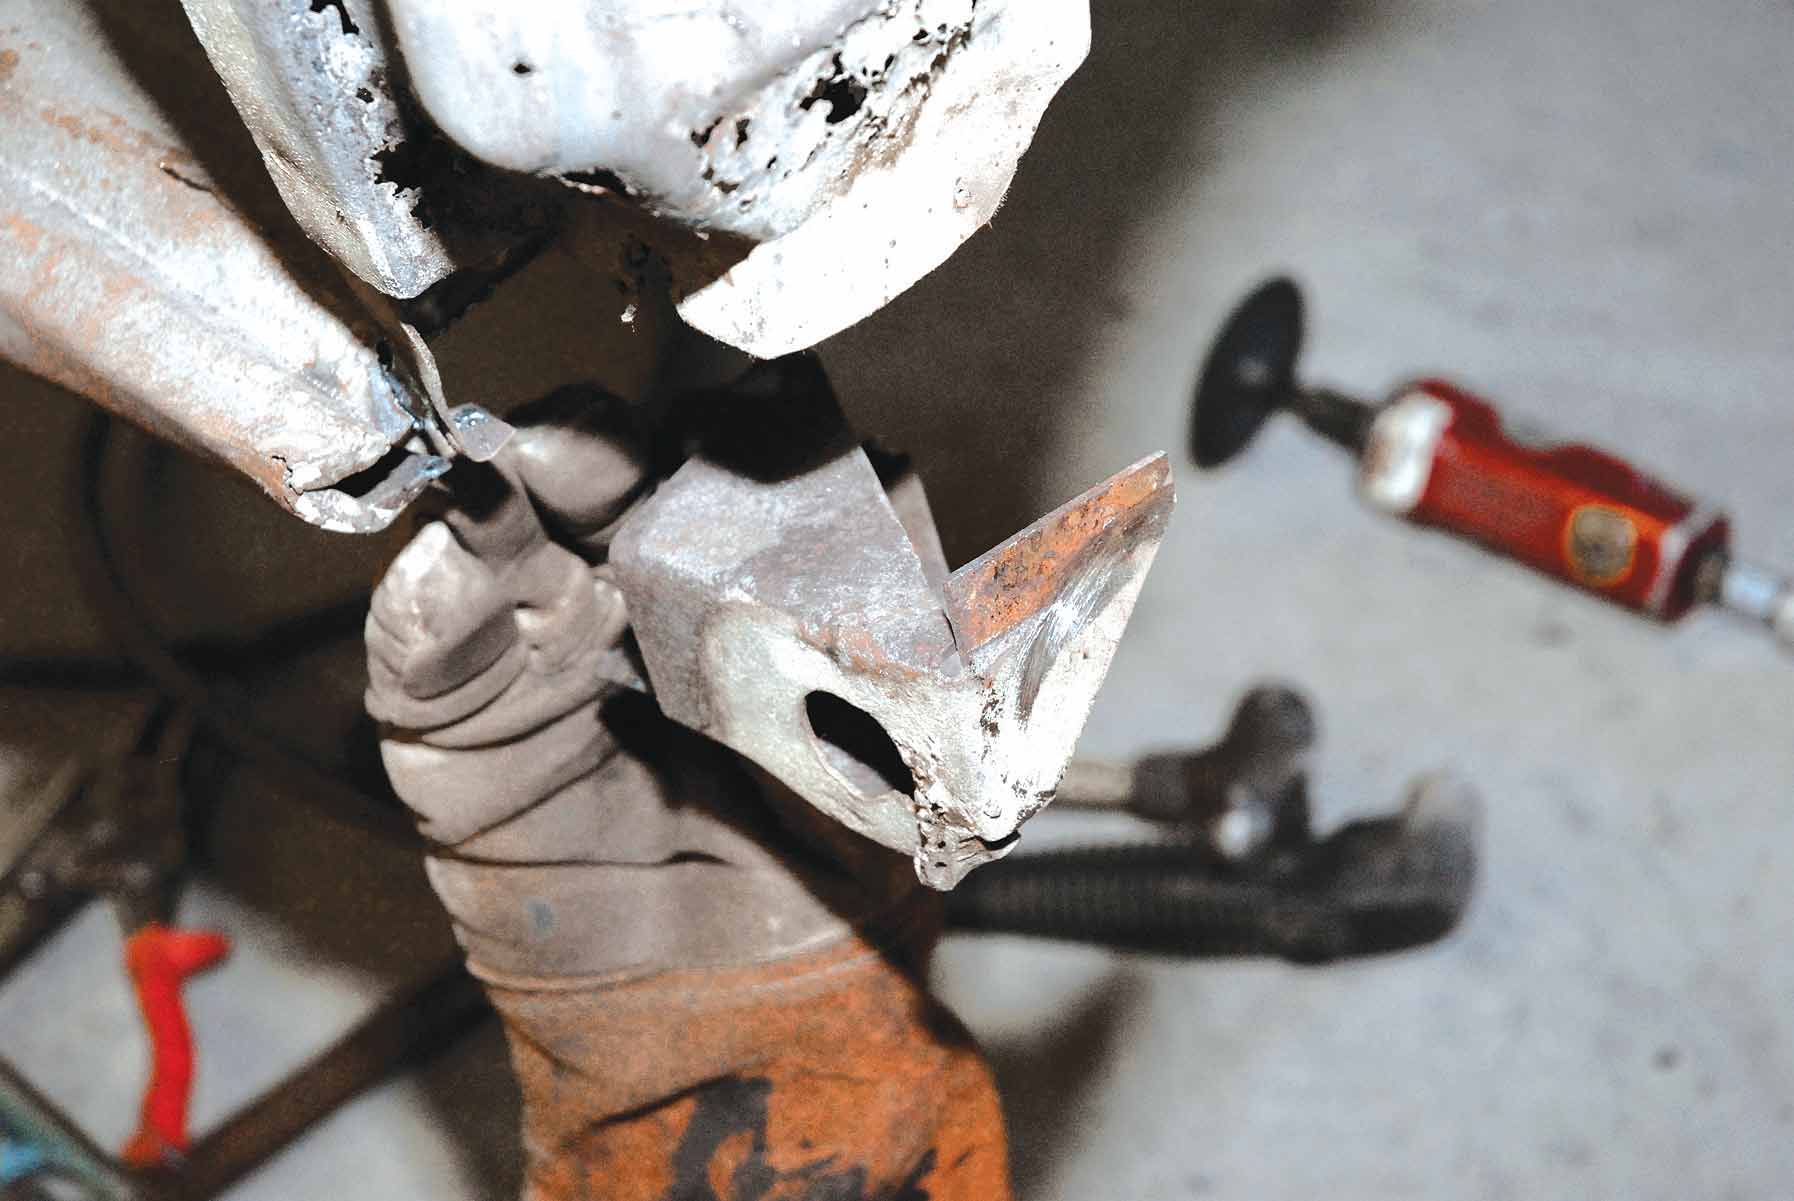
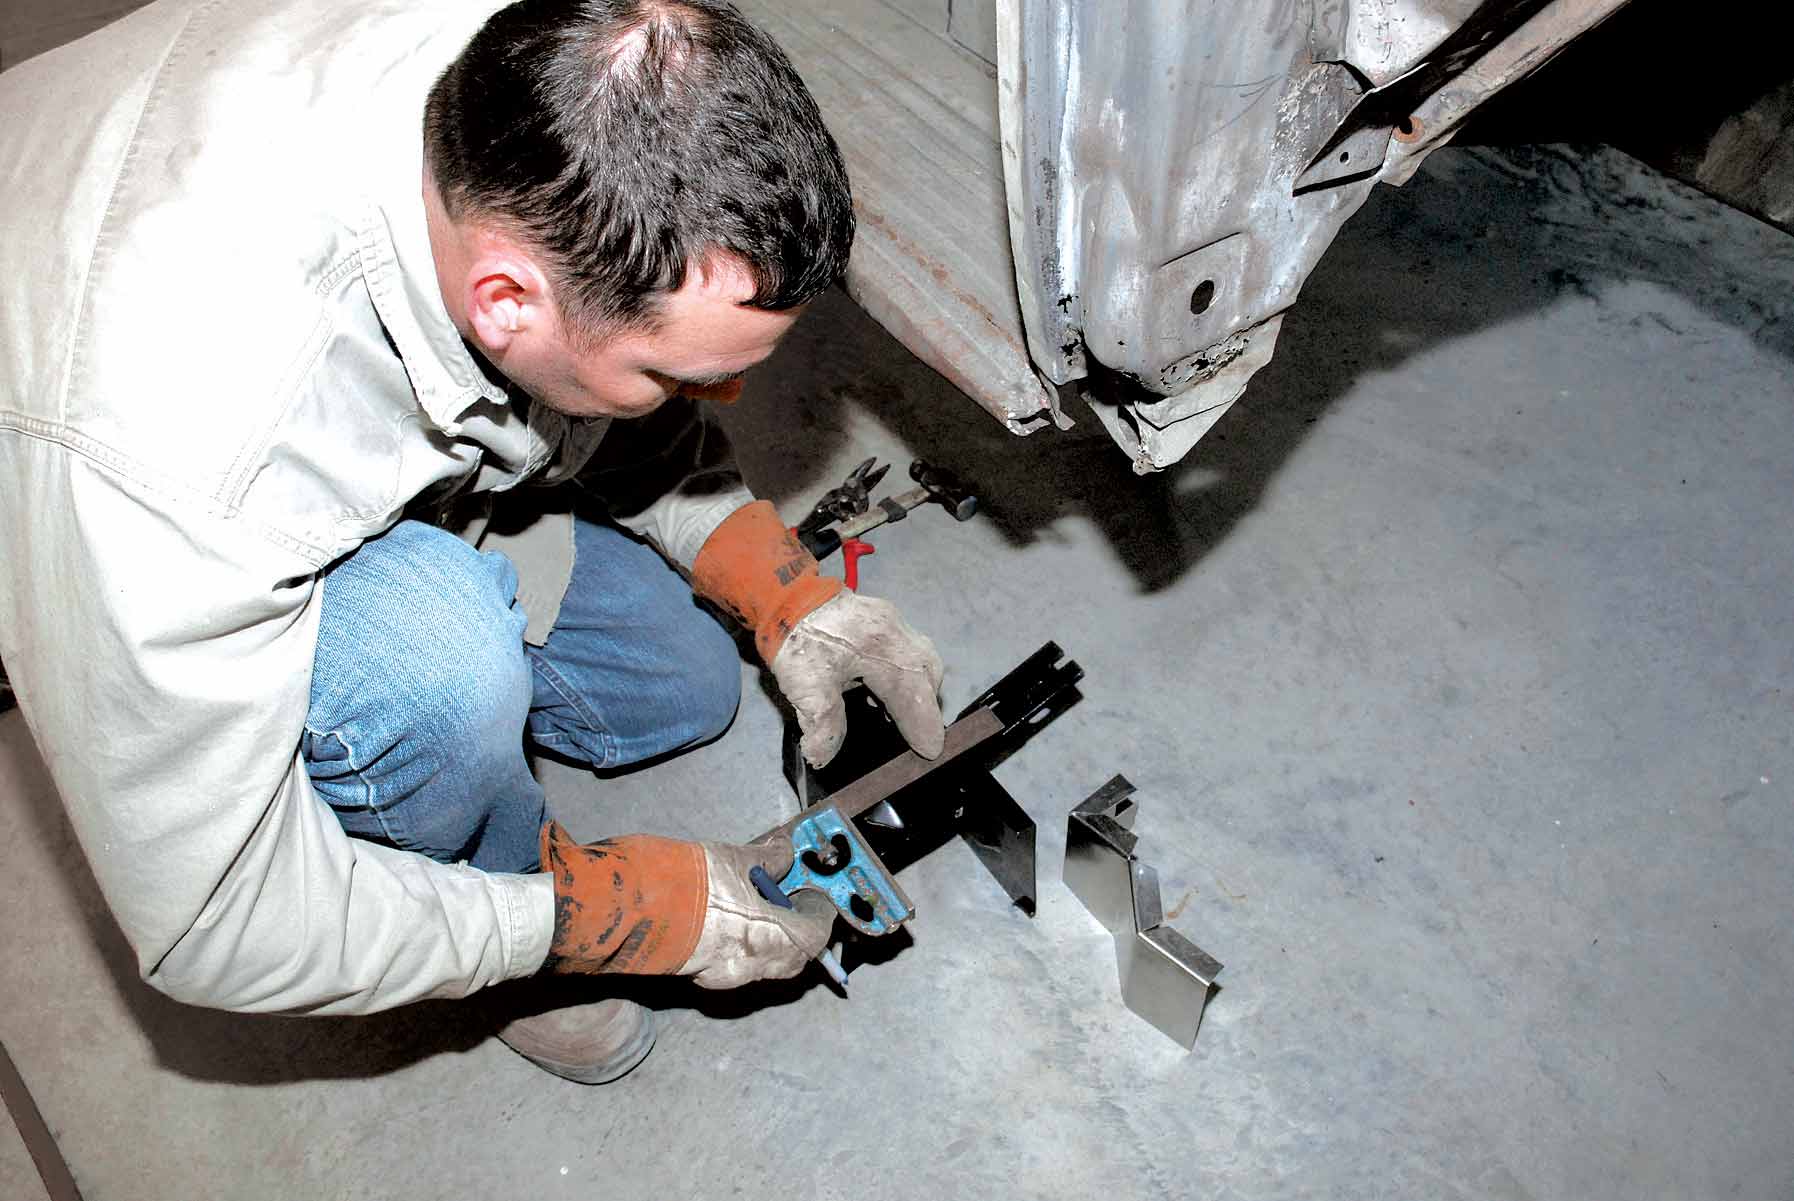
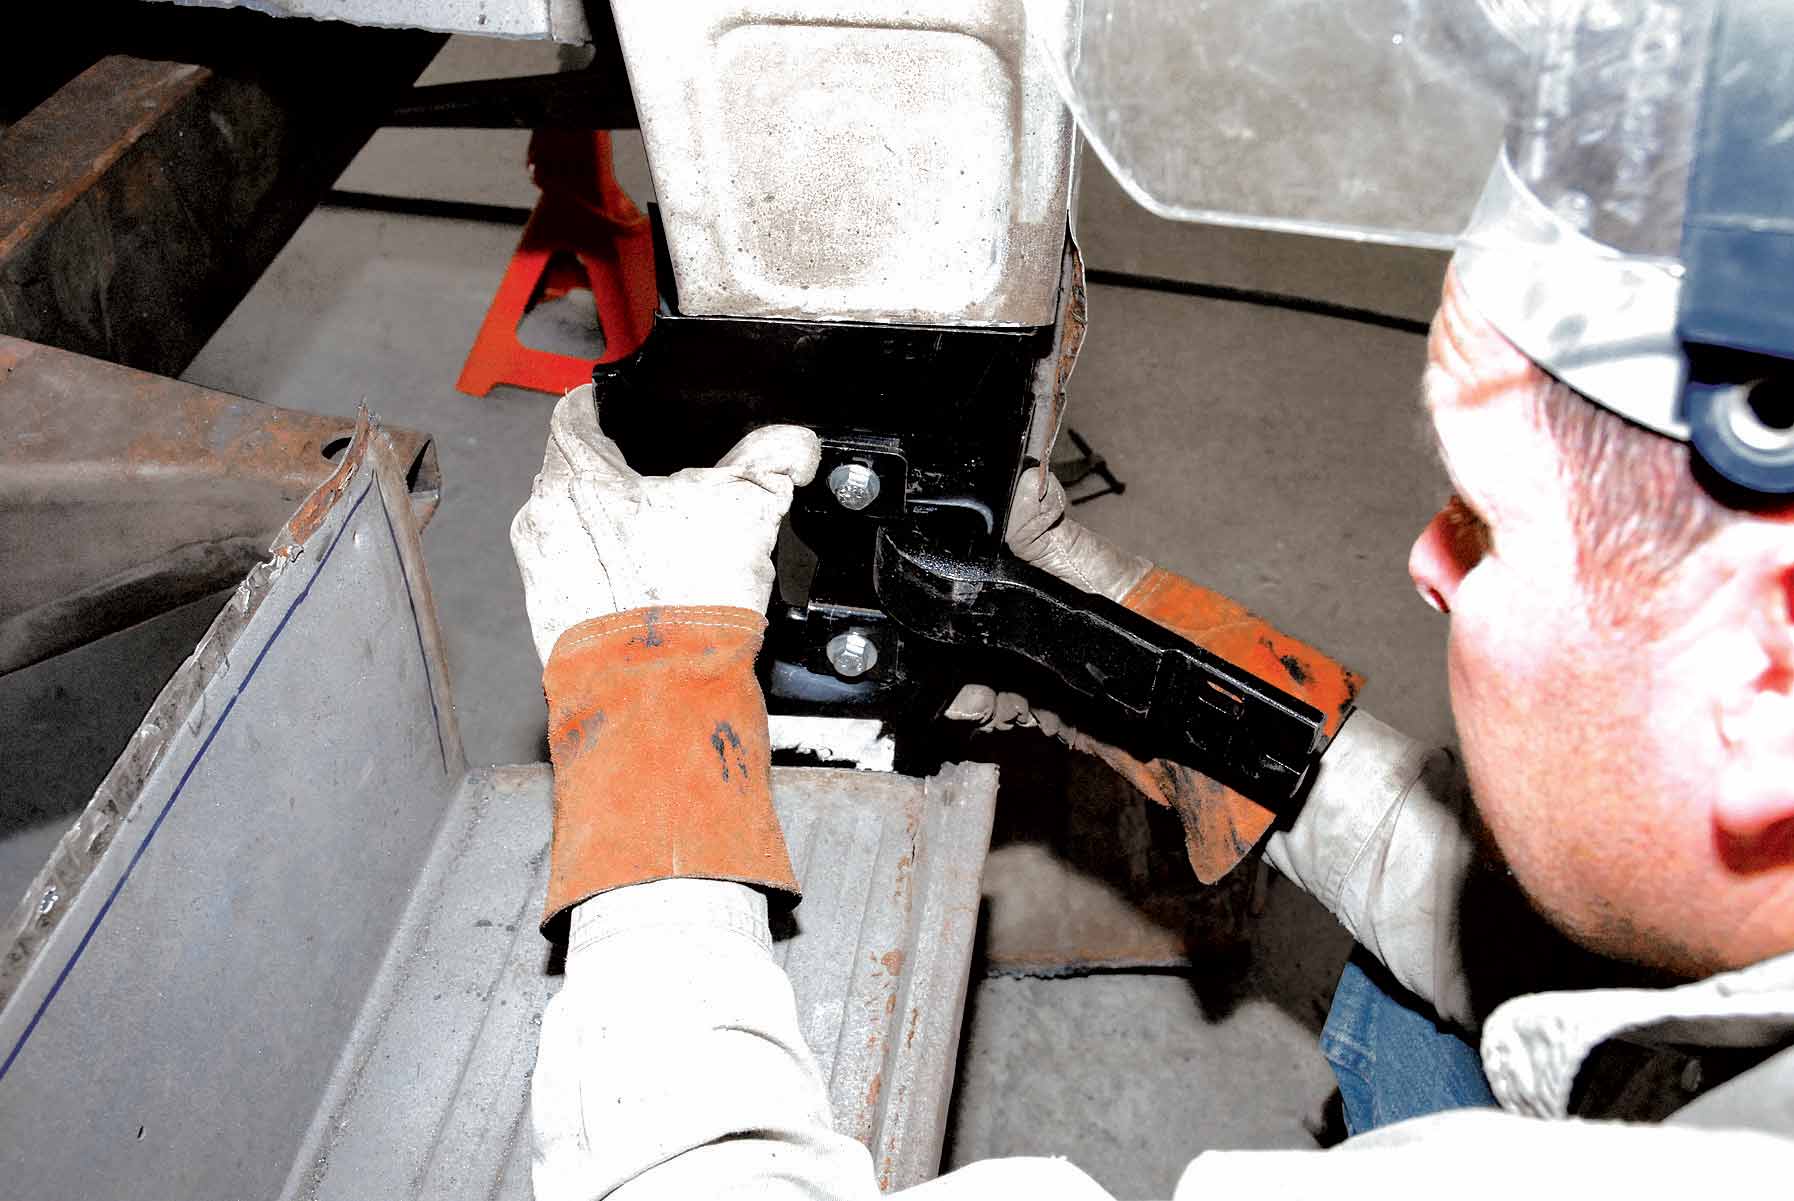
14. Next Barker bolts together the lower passenger’s-side door hinge to the door hinge repair panel and the lower cab mount to make one complete unit.
15-16. Rather than leave the cab mount open to collect more dirt, Barker fashions a four-angle bracket out of 18-gauge steel.
15-16. Rather than leave the cab mount open to collect more dirt, Barker fashions a four-angle bracket out of 18-gauge steel.
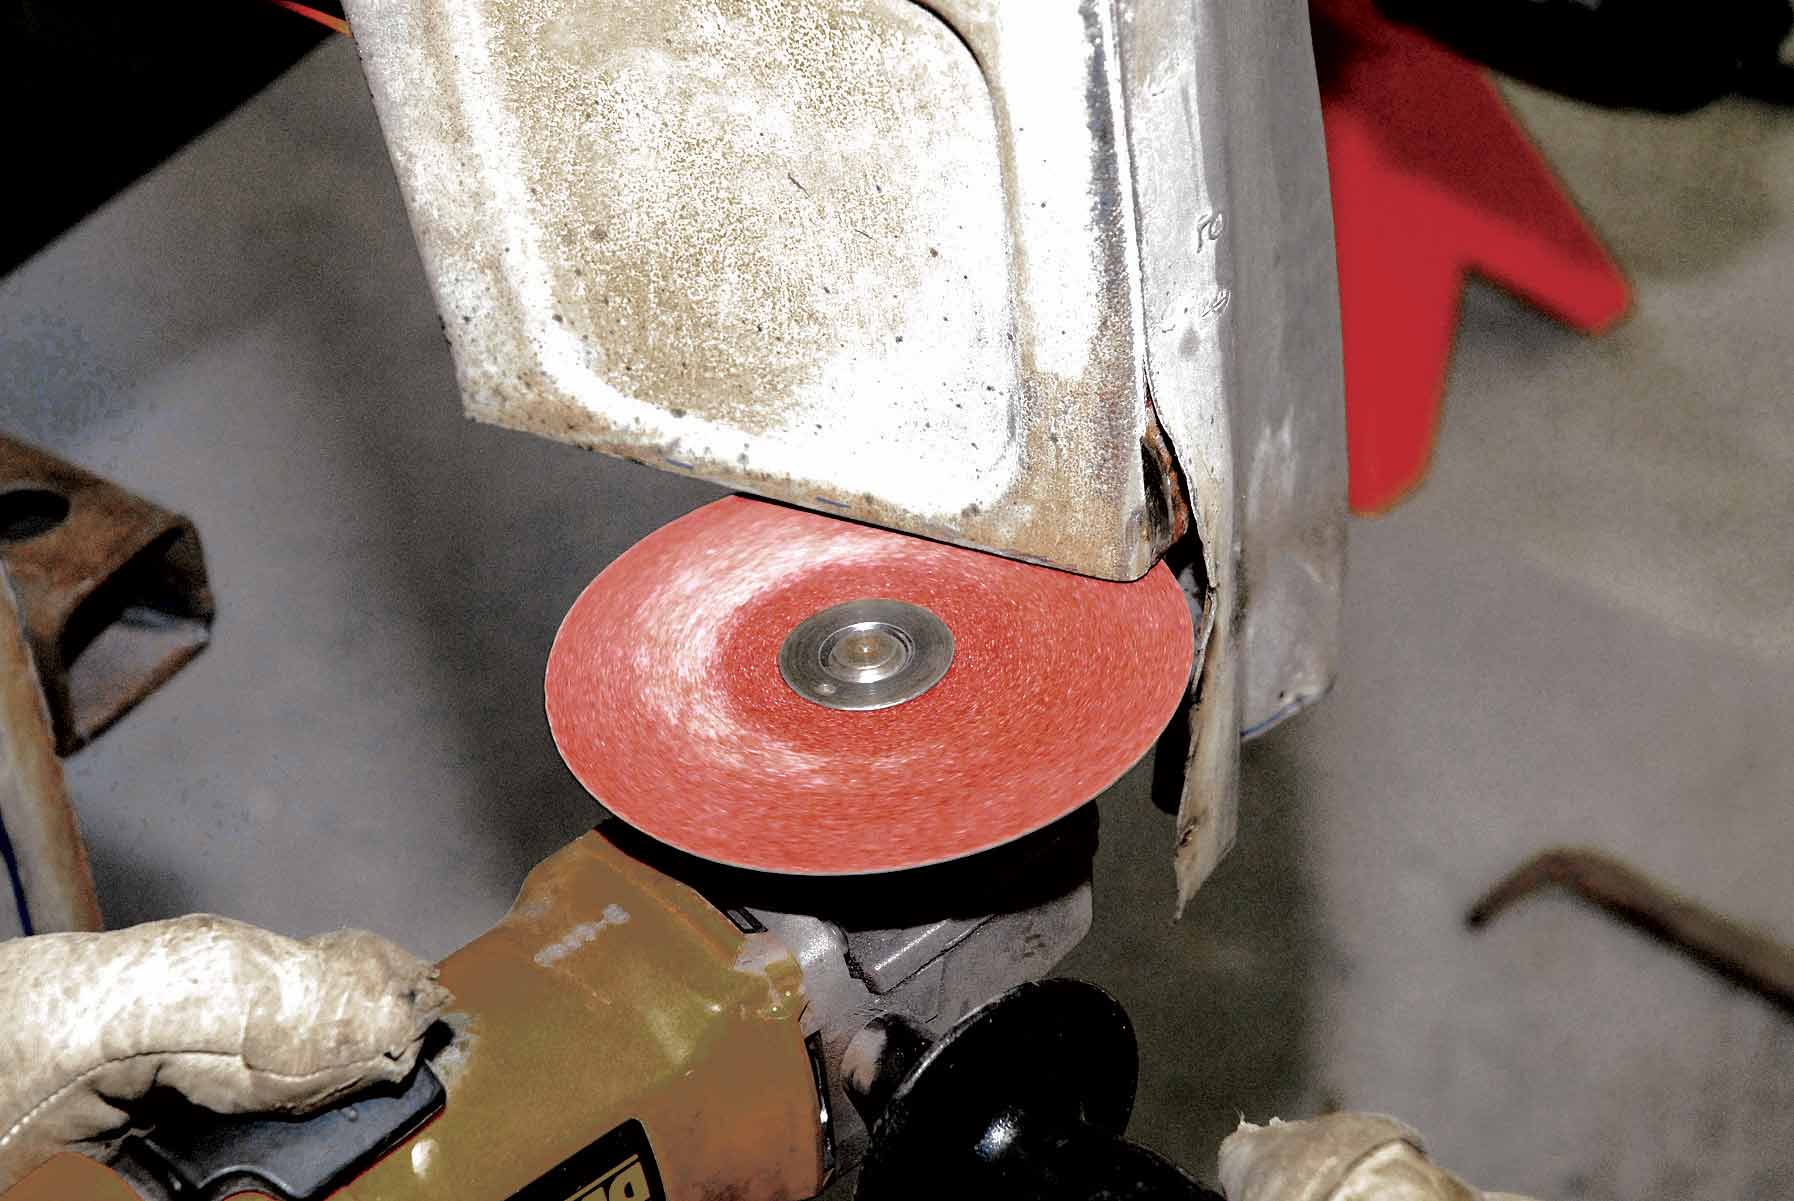
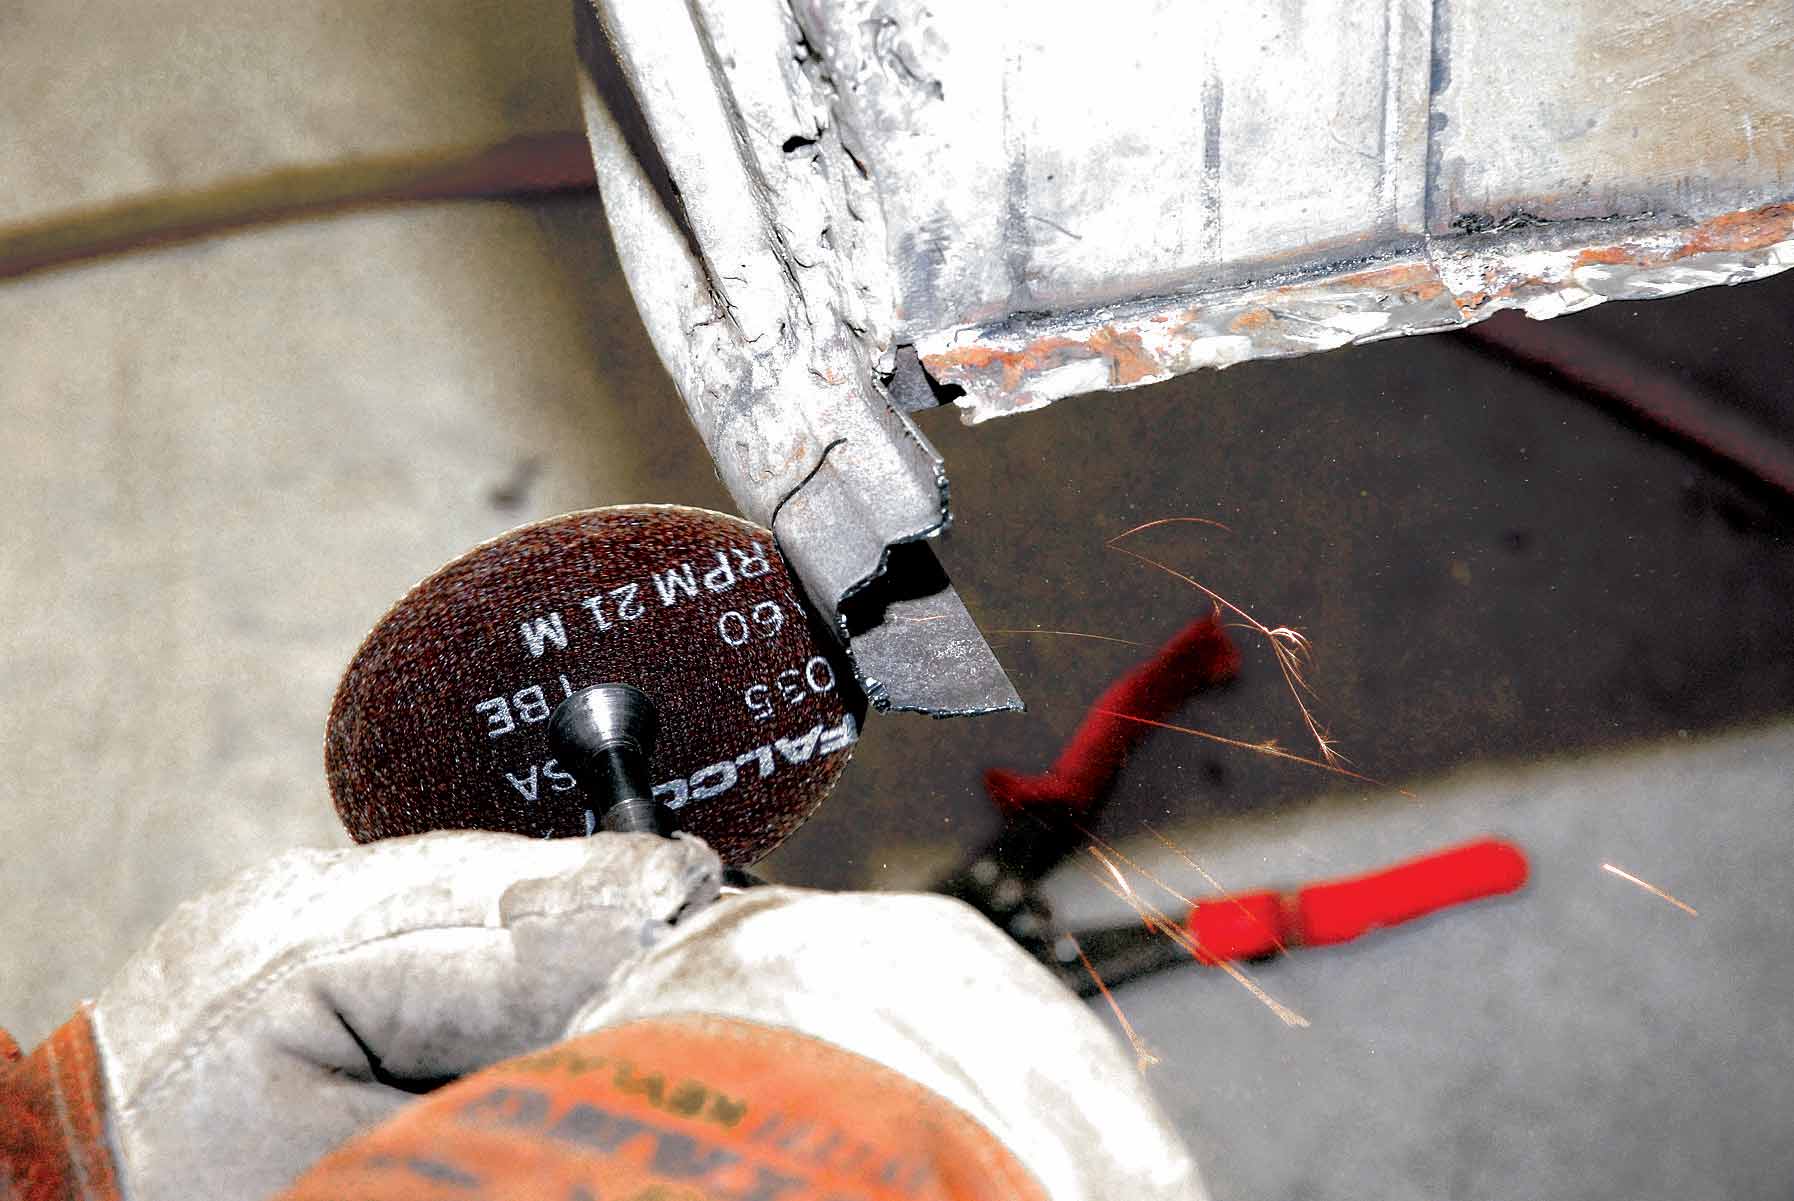
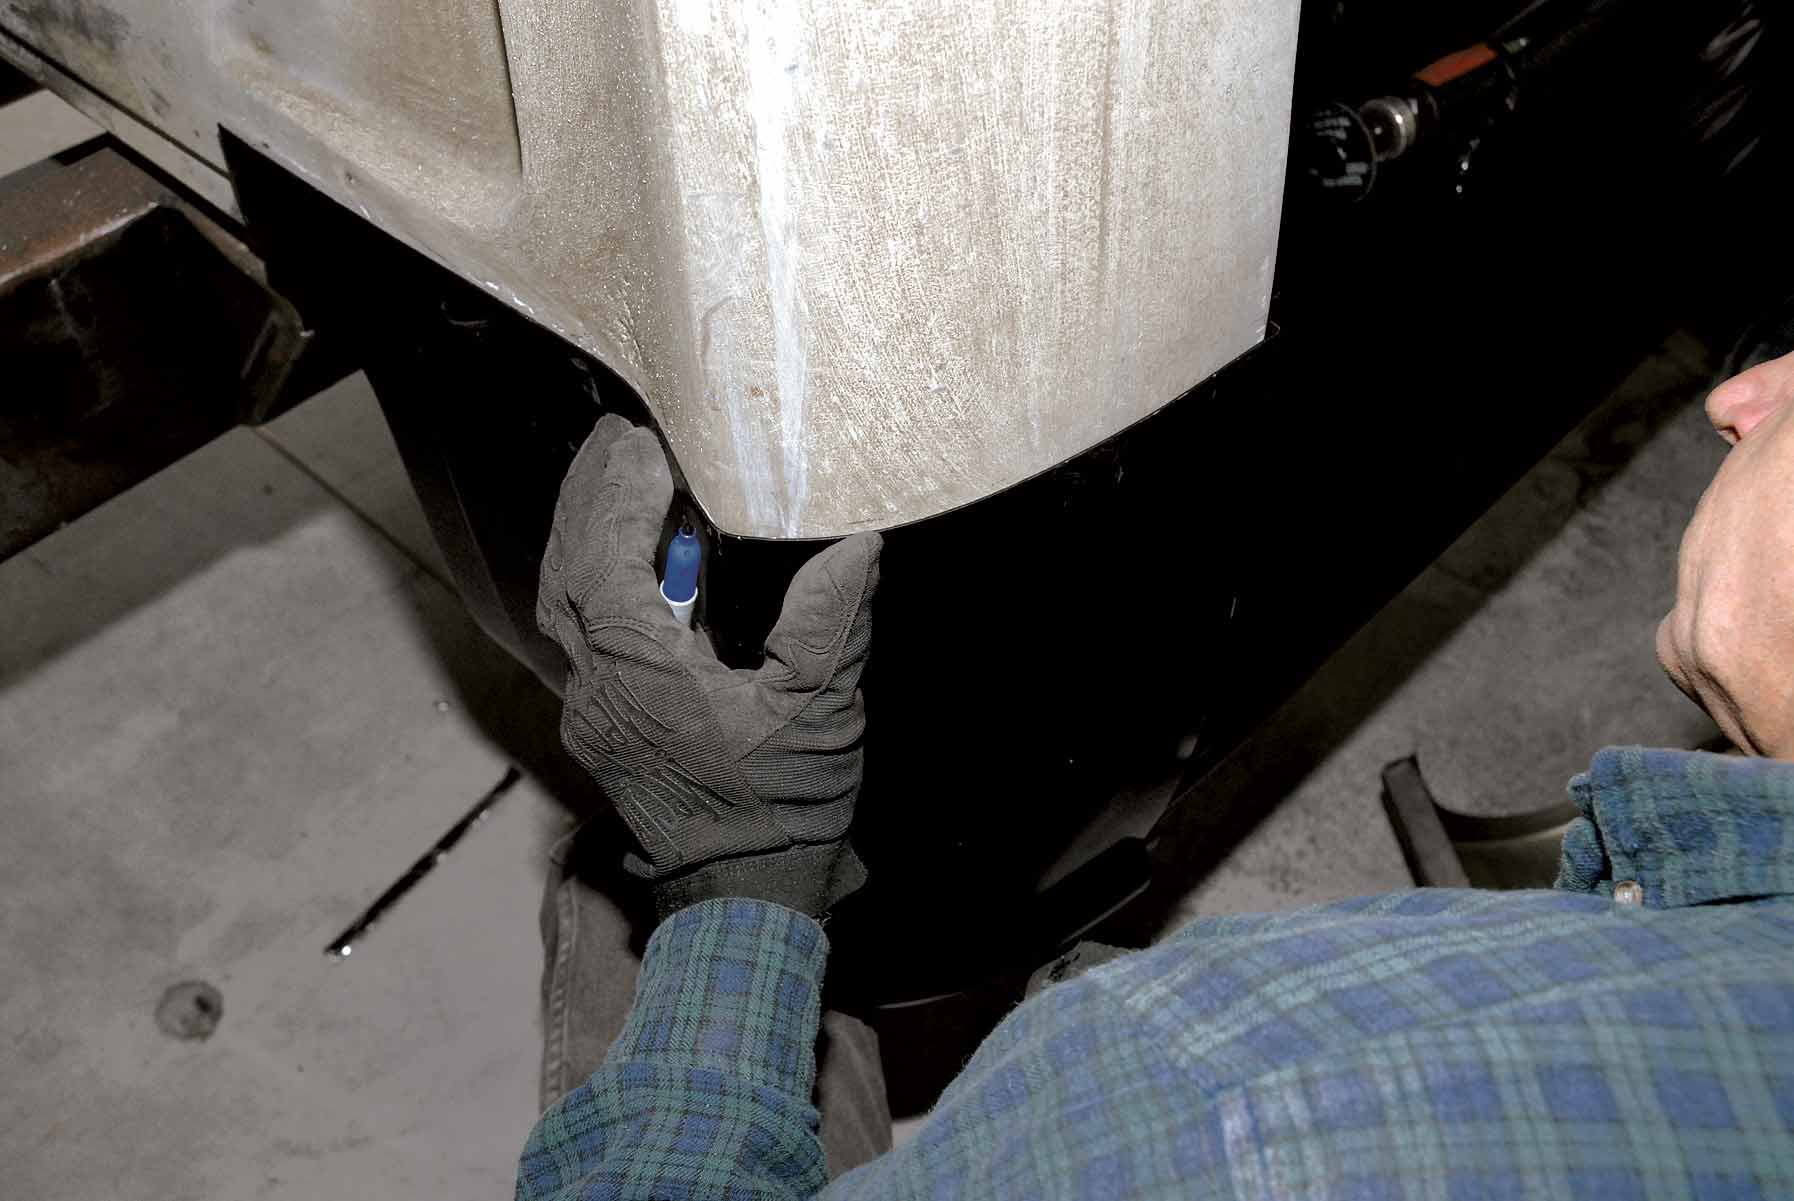
17. Next Barker uses a plasma cutter to cut the lower lip of the doorsill/rocker panel away from the lower door hinge, leaving it free.
18. This procedure is followed with a lateral cut made to the two-piece spot-welded sheetmetal at the front part of the doorjamb.
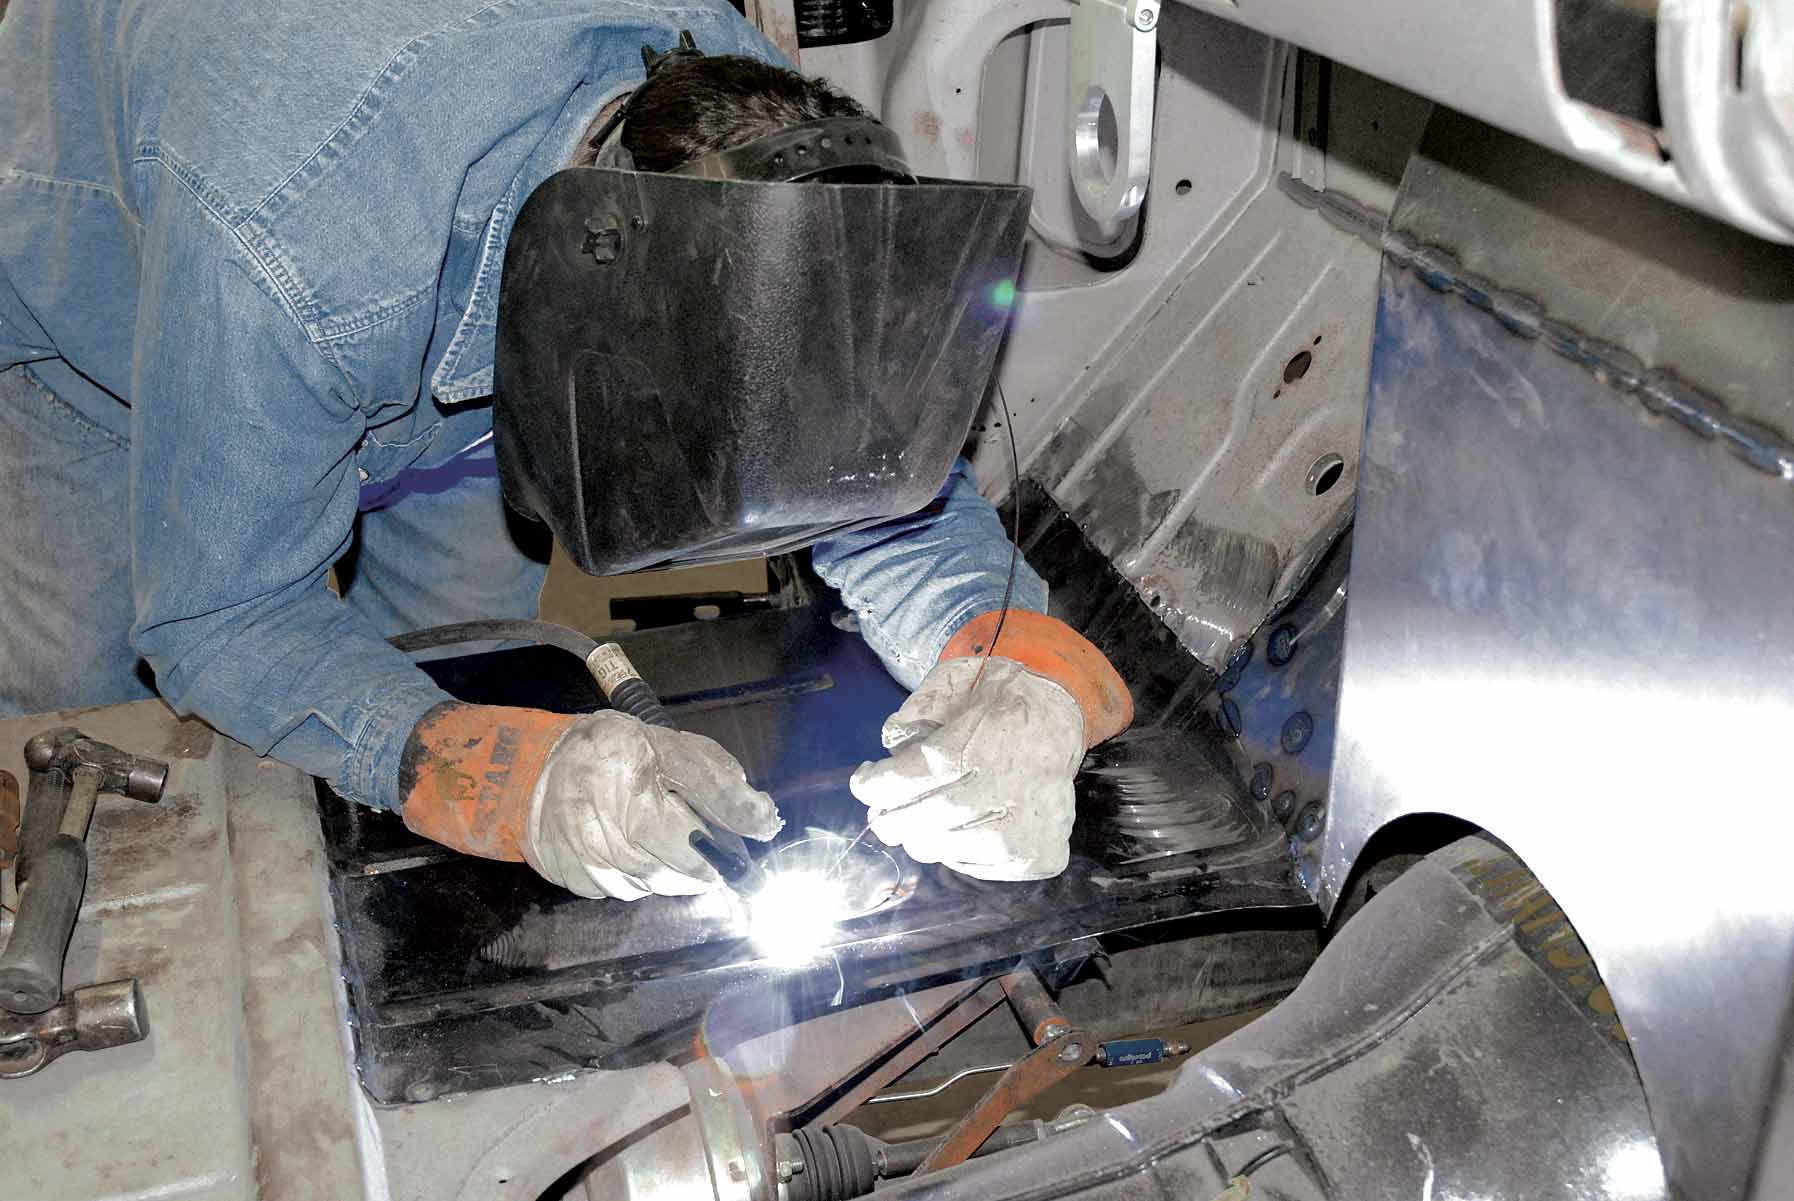
19-21. Barker uses a die grinder to make this horizontal cut through the door hinge panel and then works his way around to the front of the cab mount.
19-21. Barker uses a die grinder to make this horizontal cut through the door hinge panel and then works his way around to the front of the cab mount.
19-21. Barker uses a die grinder to make this horizontal cut through the door hinge panel and then works his way around to the front of the cab mount.
22-23. In these photos our installer trial-fits the Classic Industries door hinge panel, lower right-side door hinge and cab mount together.
22-23. In these photos our installer trial-fits the Classic Industries door hinge panel, lower right-side door hinge and cab mount together.
24-25. They did some die grinding and measuring here.
24-25. They did some die grinding and measuring here.
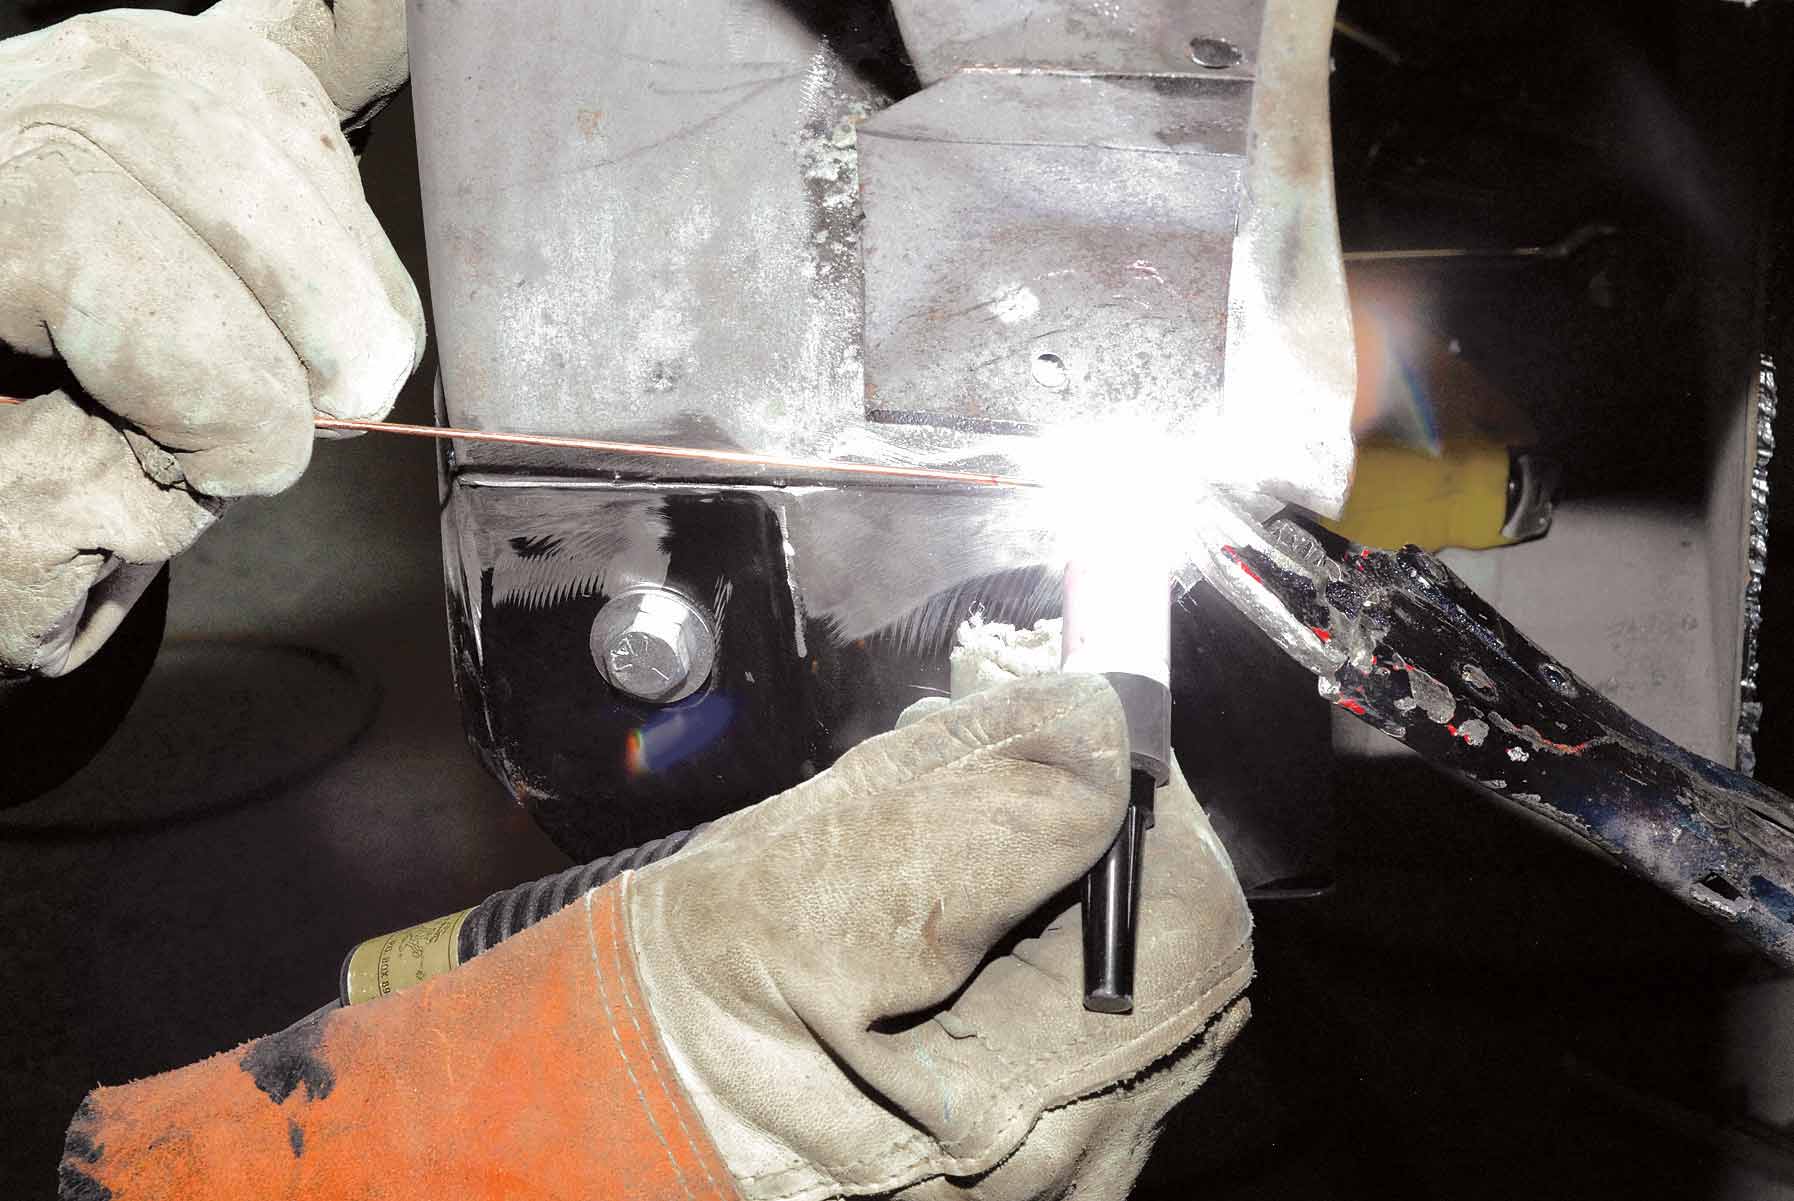
26-27. Then they began welding.
26-27. Then they began welding.
28. After grinding, our repaired door hinge panel/cab mount looks like this.
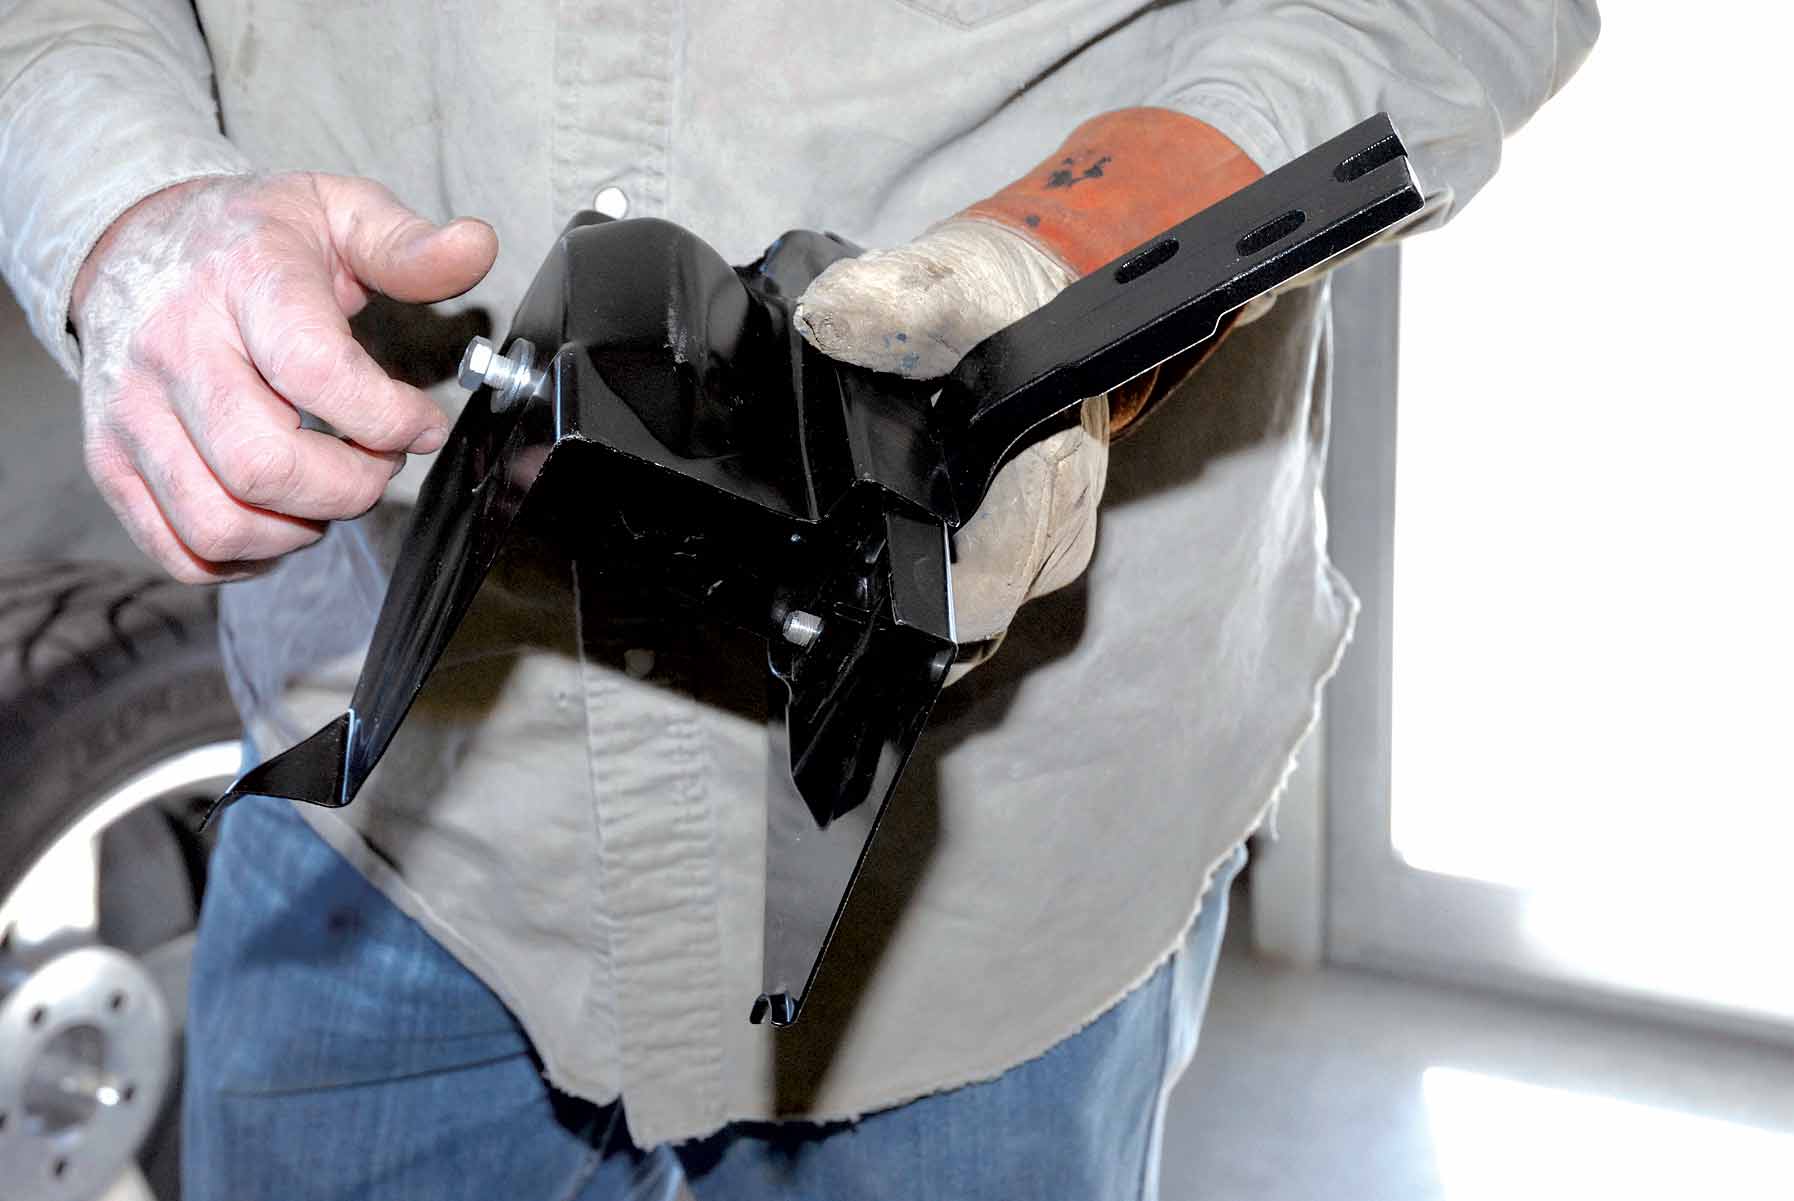
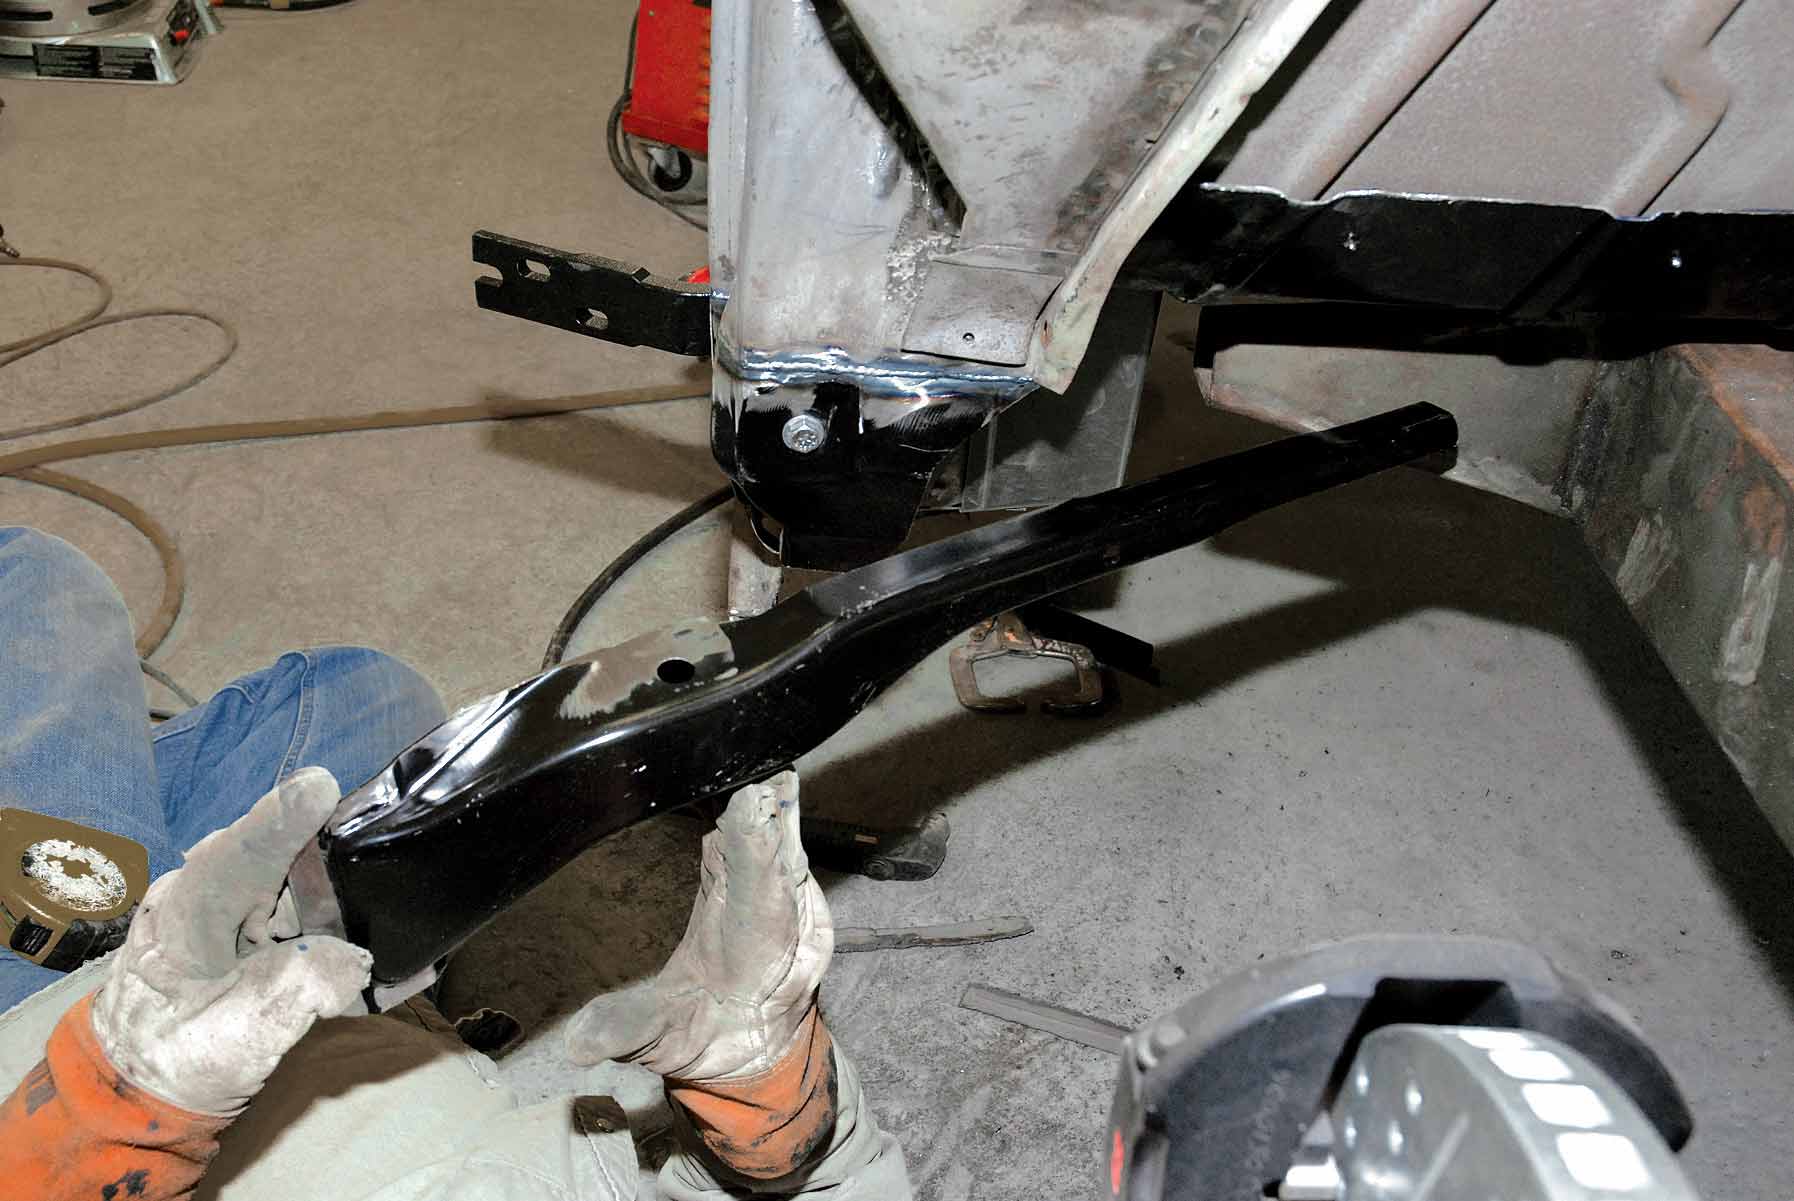
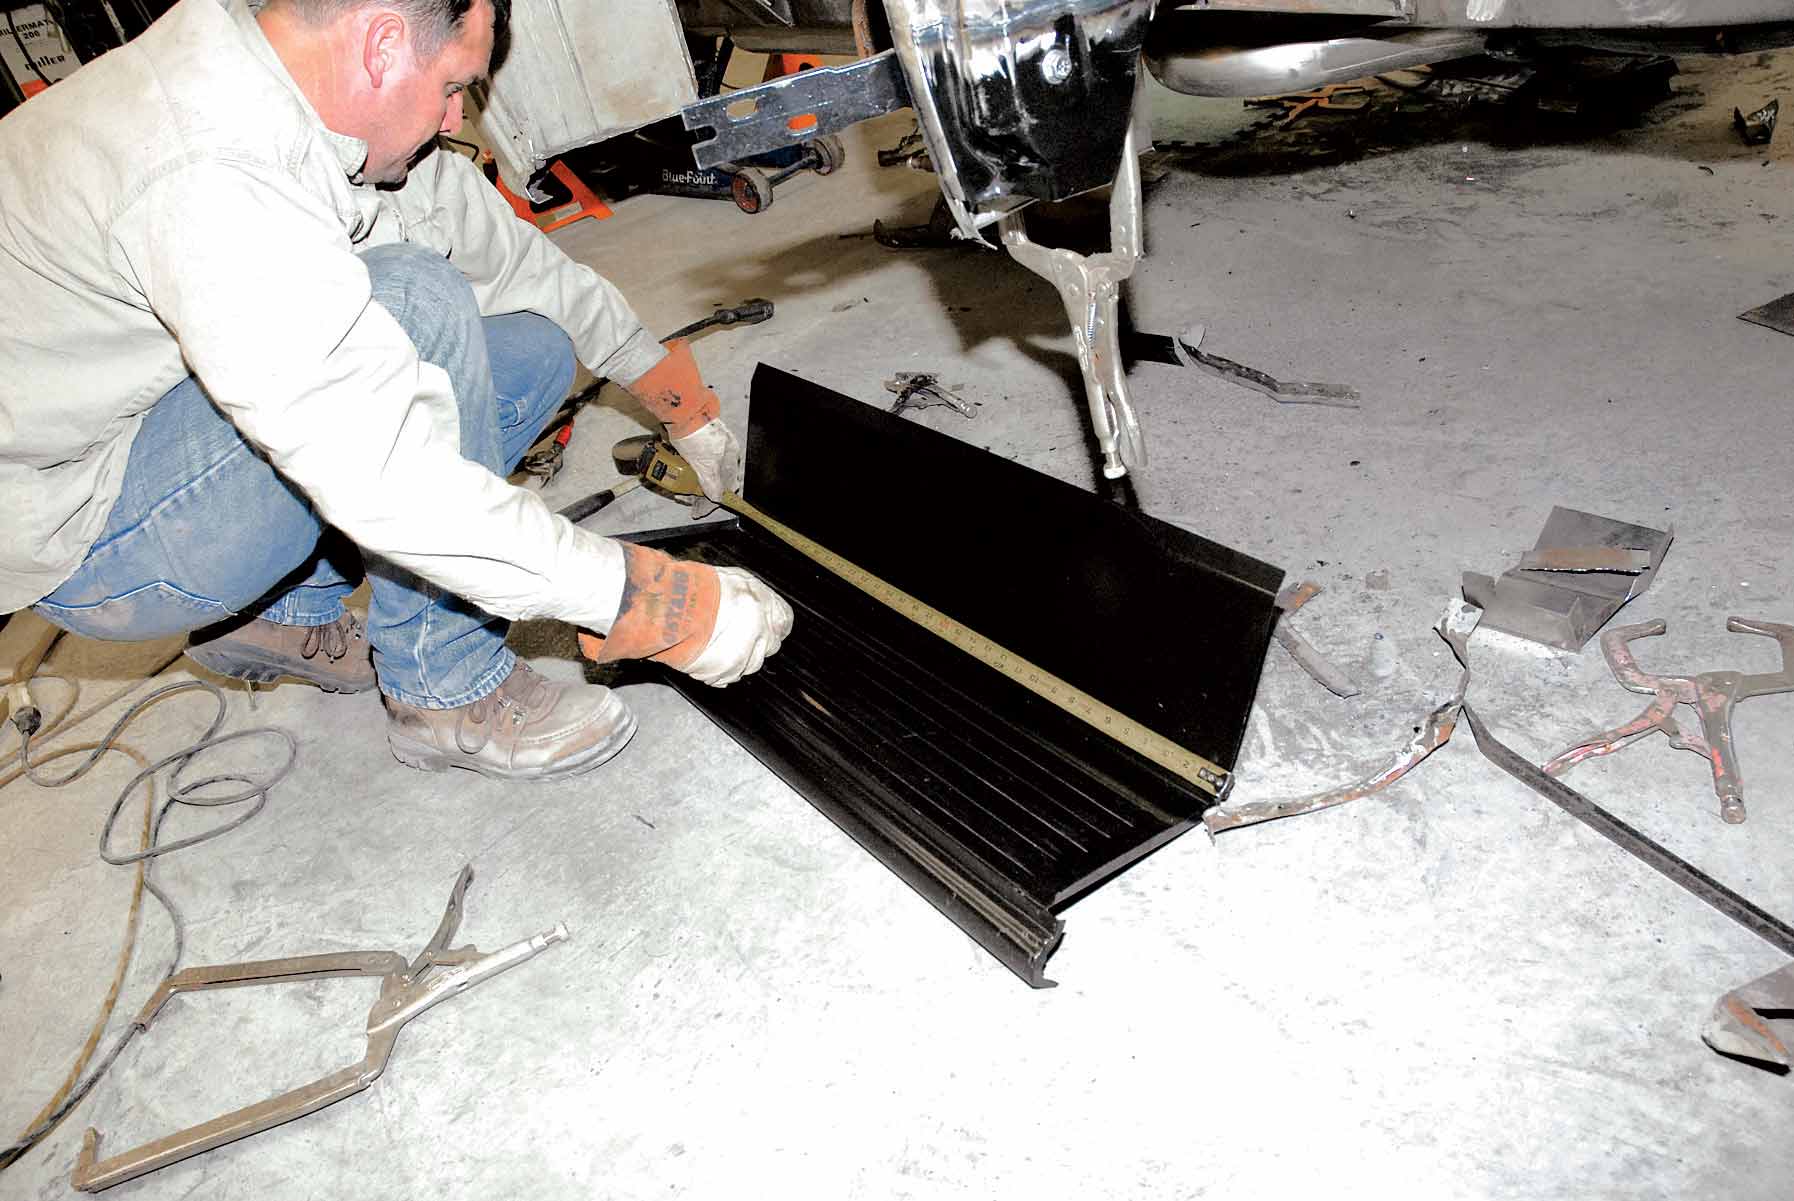
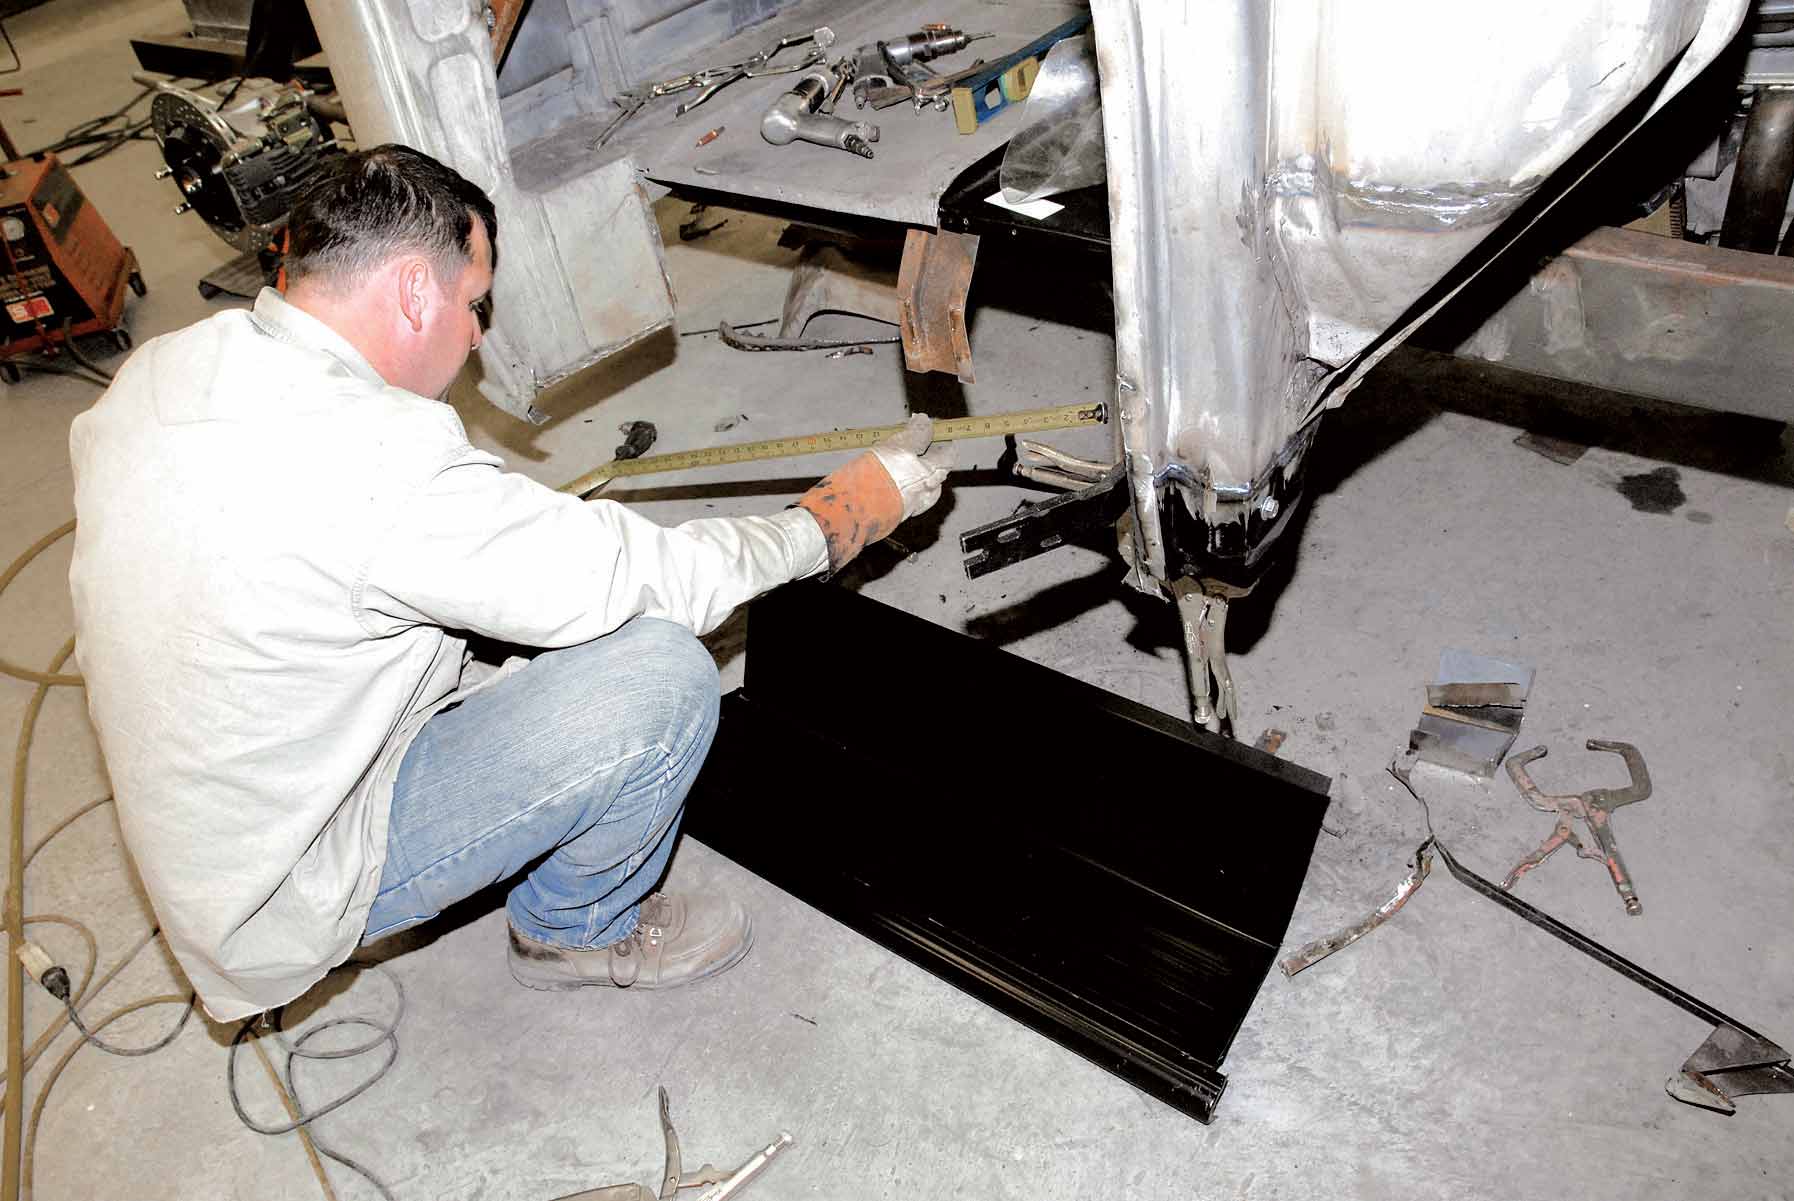
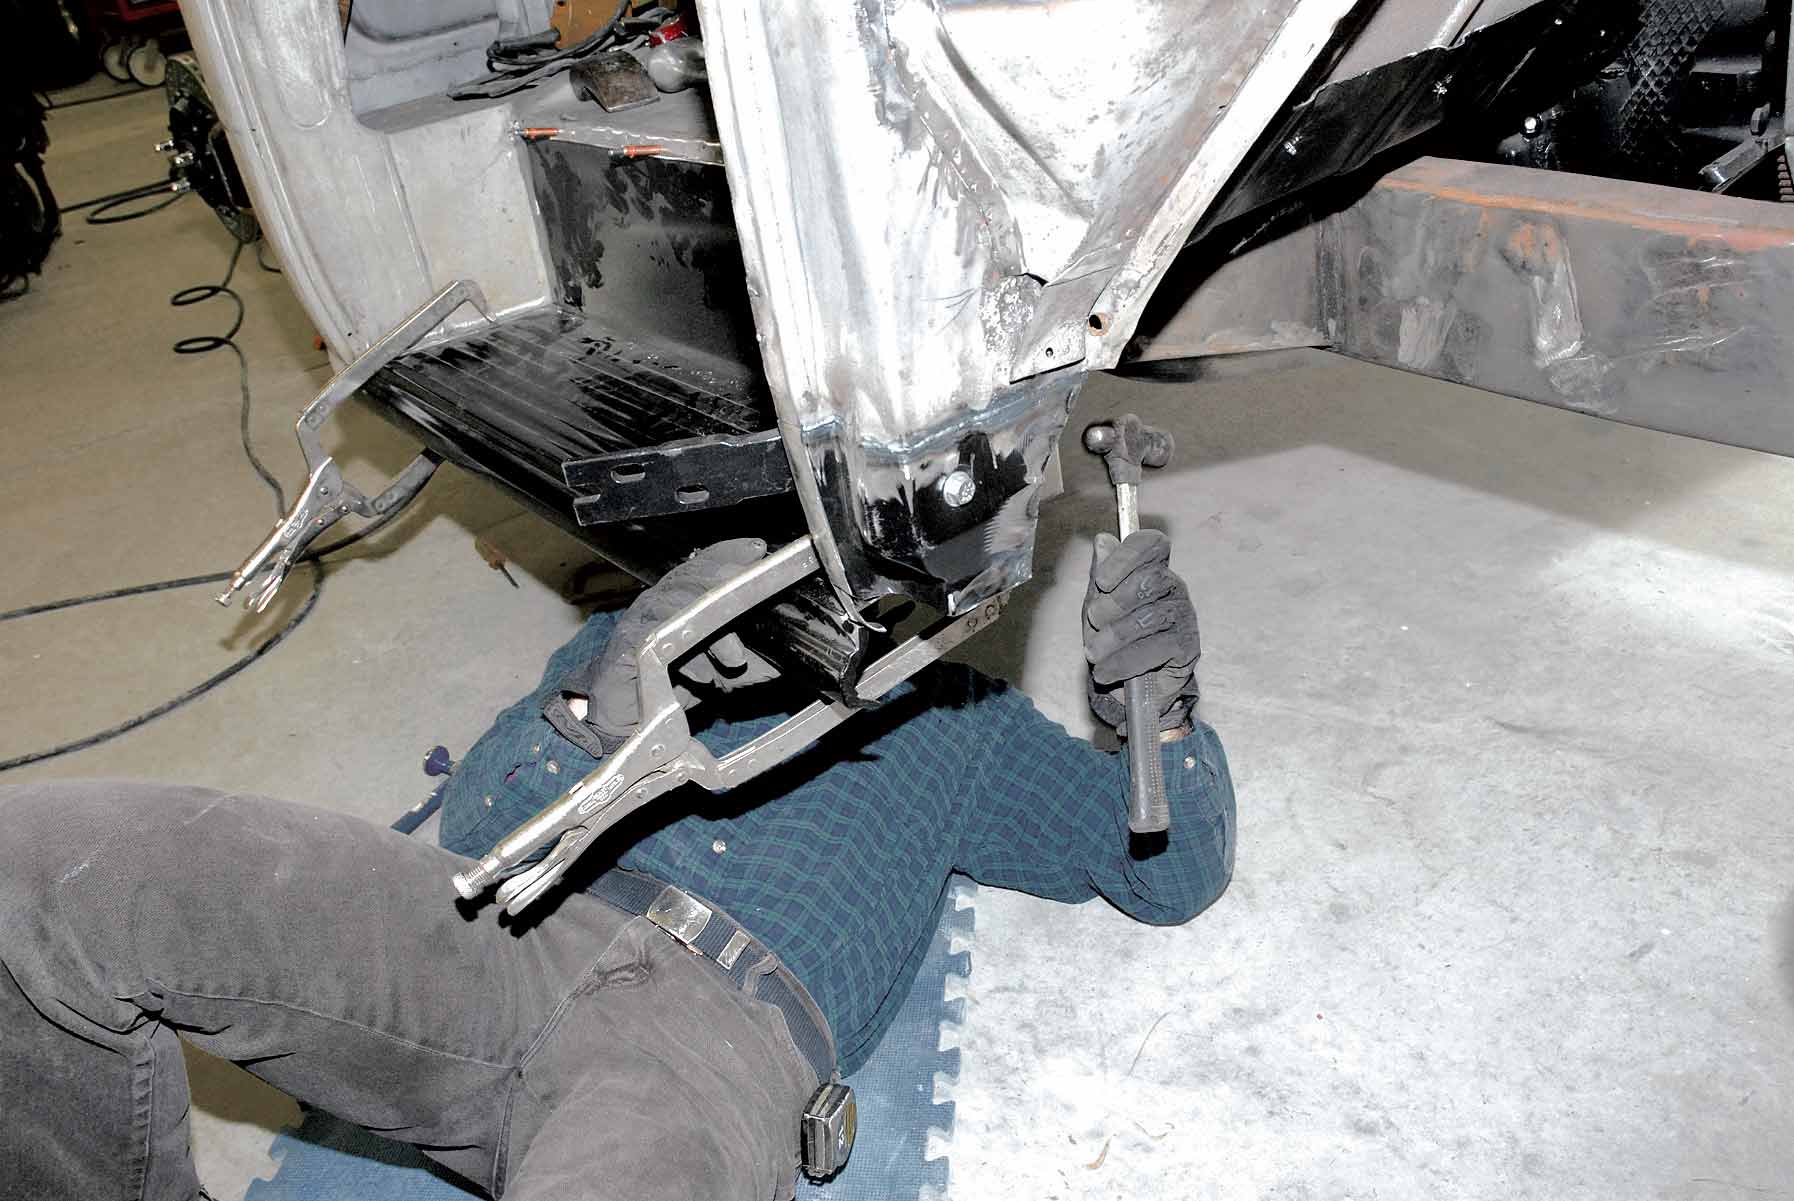
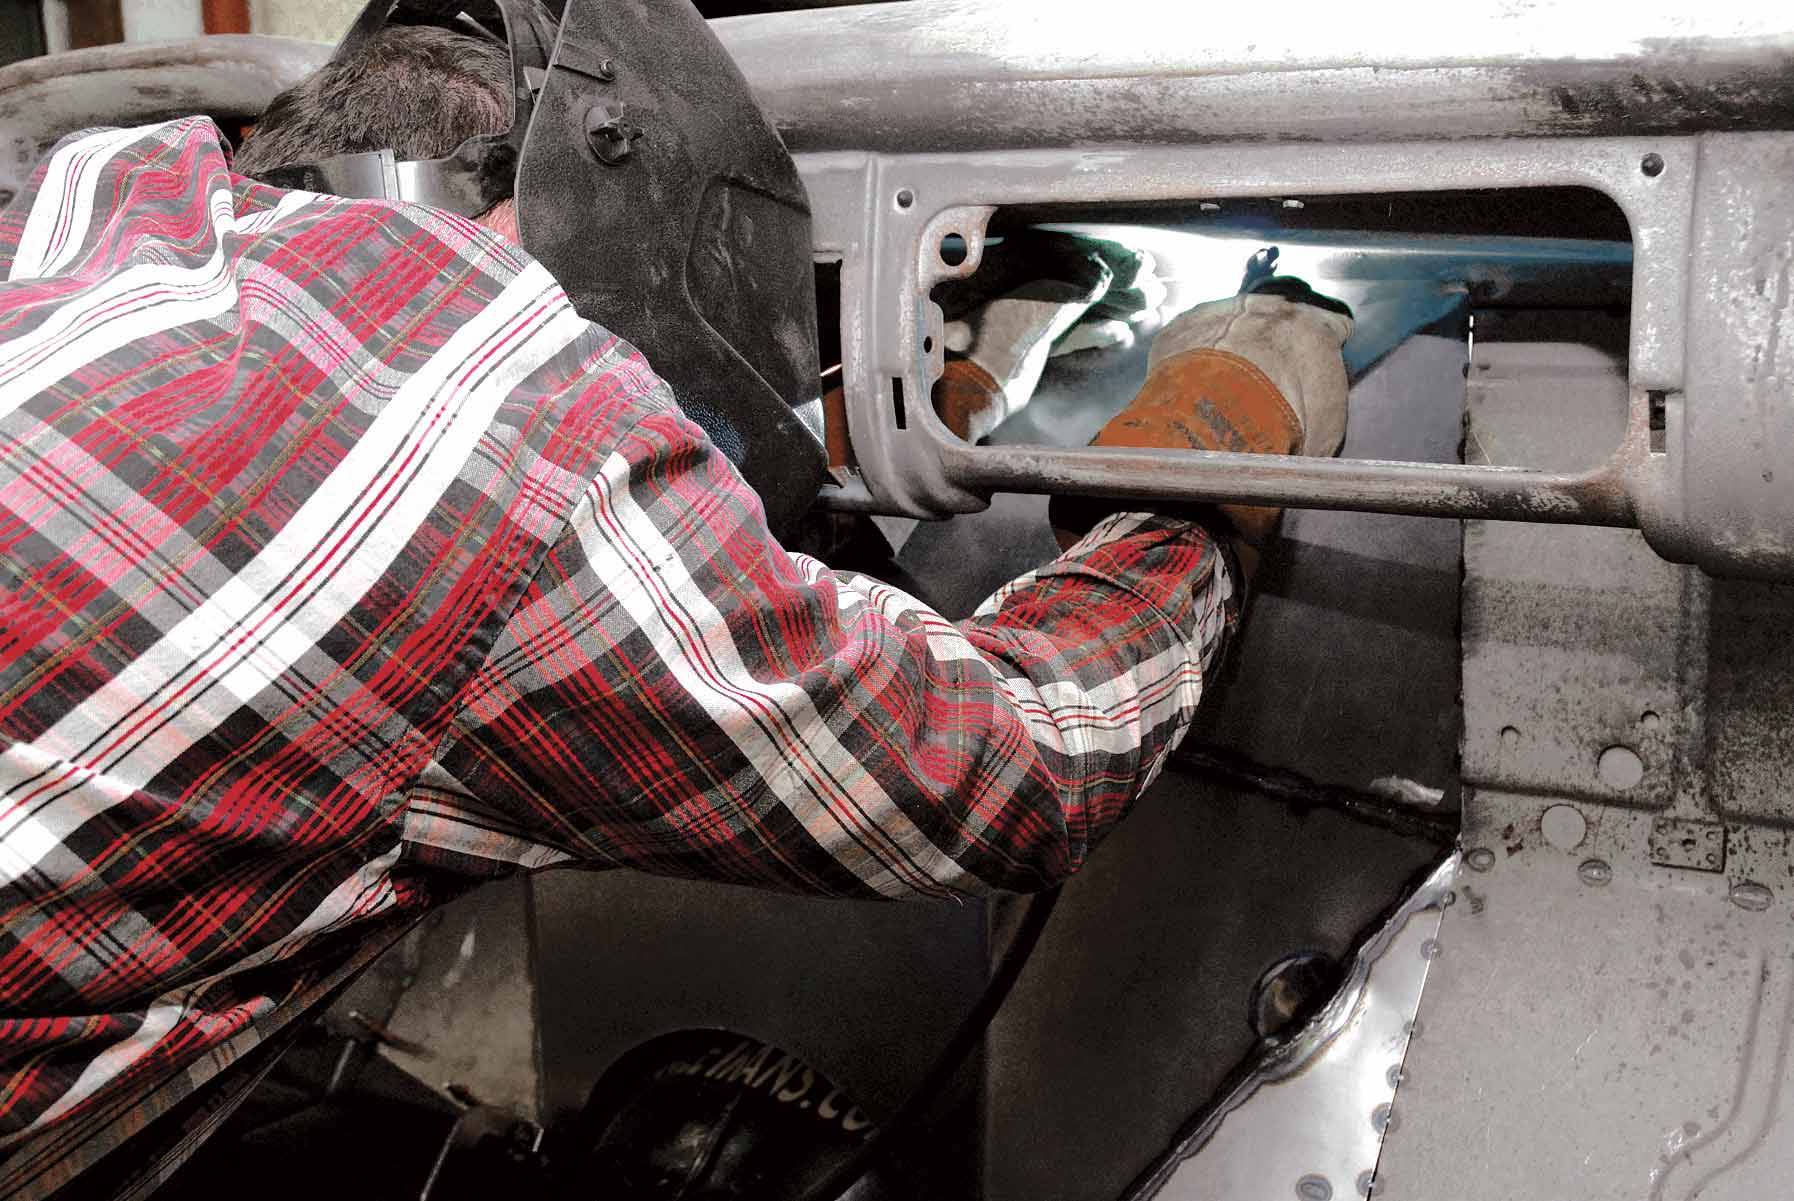
29-30. Next comes the installation of our truck cab mount supports, which run from the outside cab mount spanning the entire length of the passenger’s-side floor pan. This piece has a 7/16-inch body mount bolt provision so fitting and final welding is a no-brainer. This is how it should look once it’s installed.
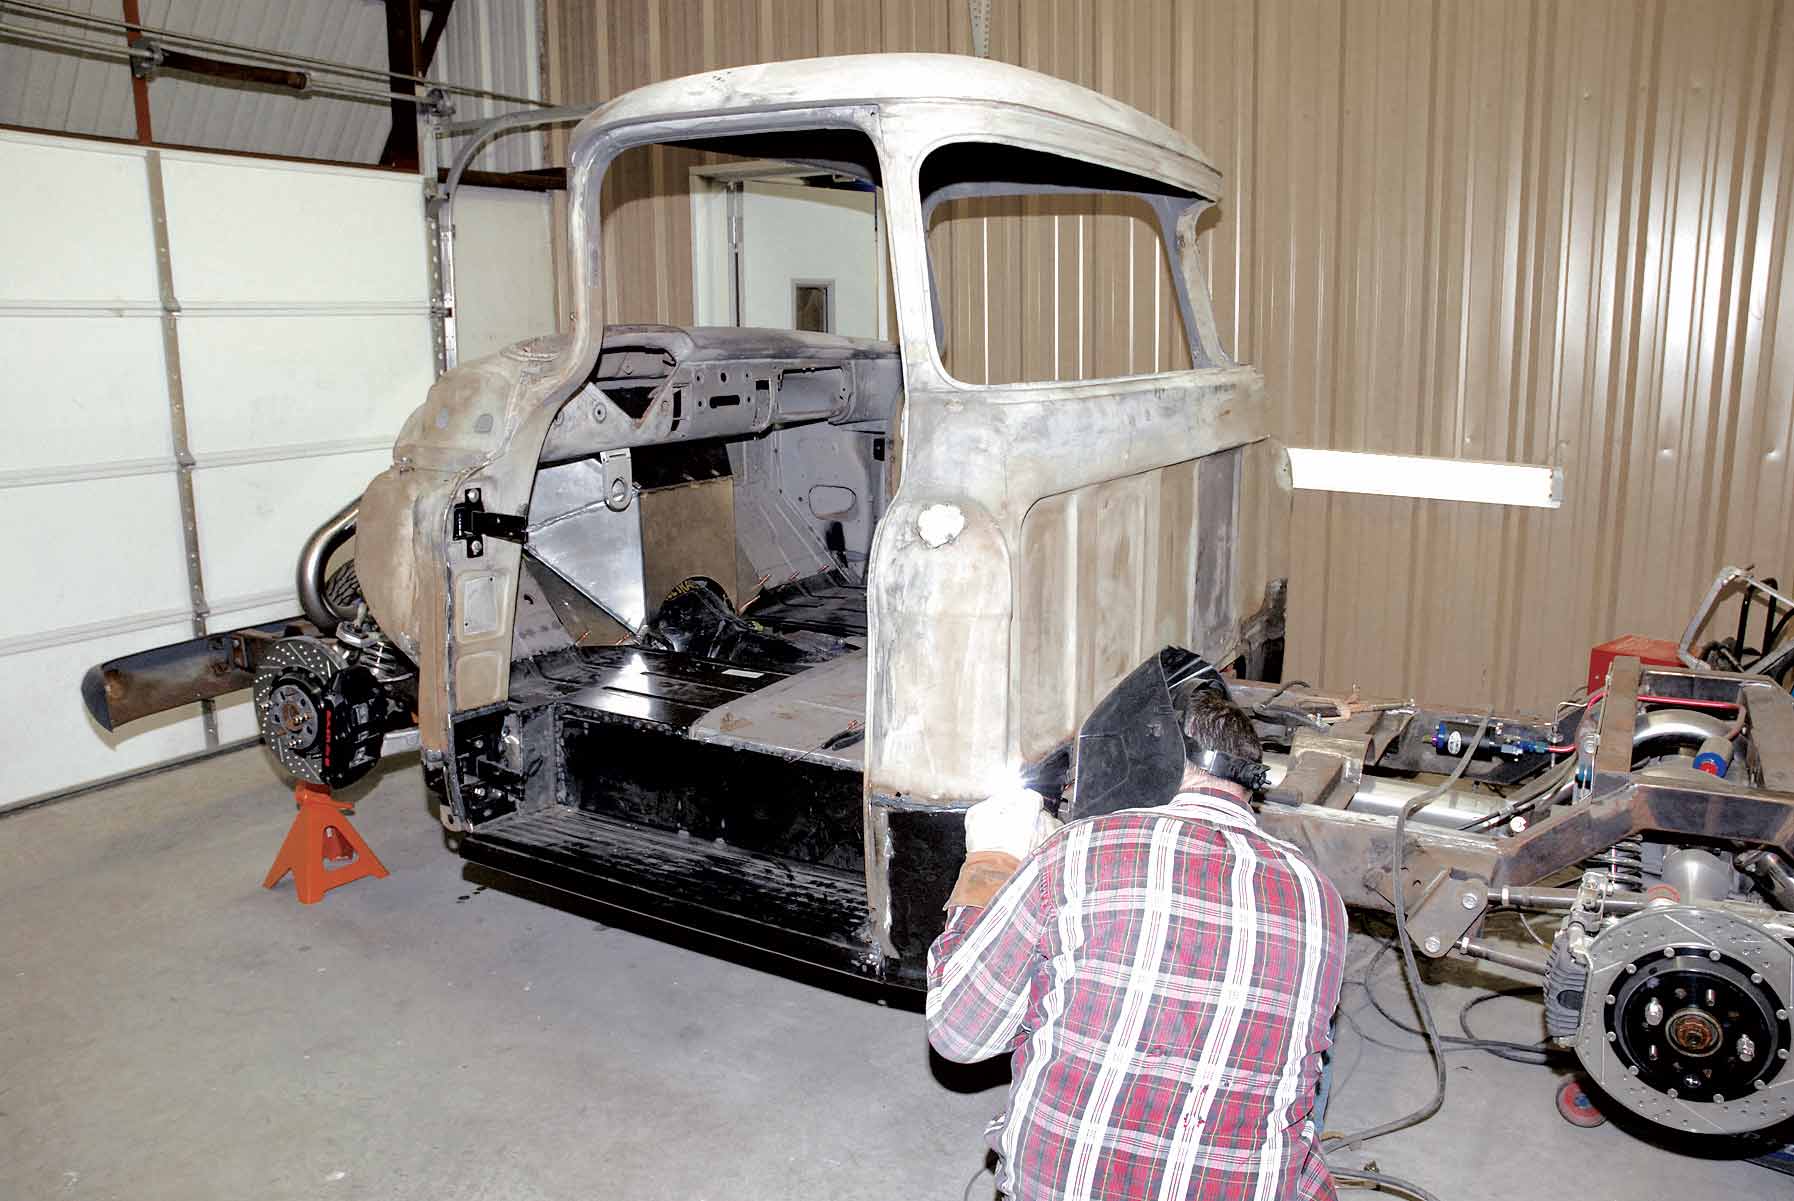
29-30. Next comes the installation of our truck cab mount supports, which run from the outside cab mount spanning the entire length of the passenger’s-side floor pan. This piece has a 7/16-inch body mount bolt provision so fitting and final welding is a no-brainer. This is how it should look once it’s installed.
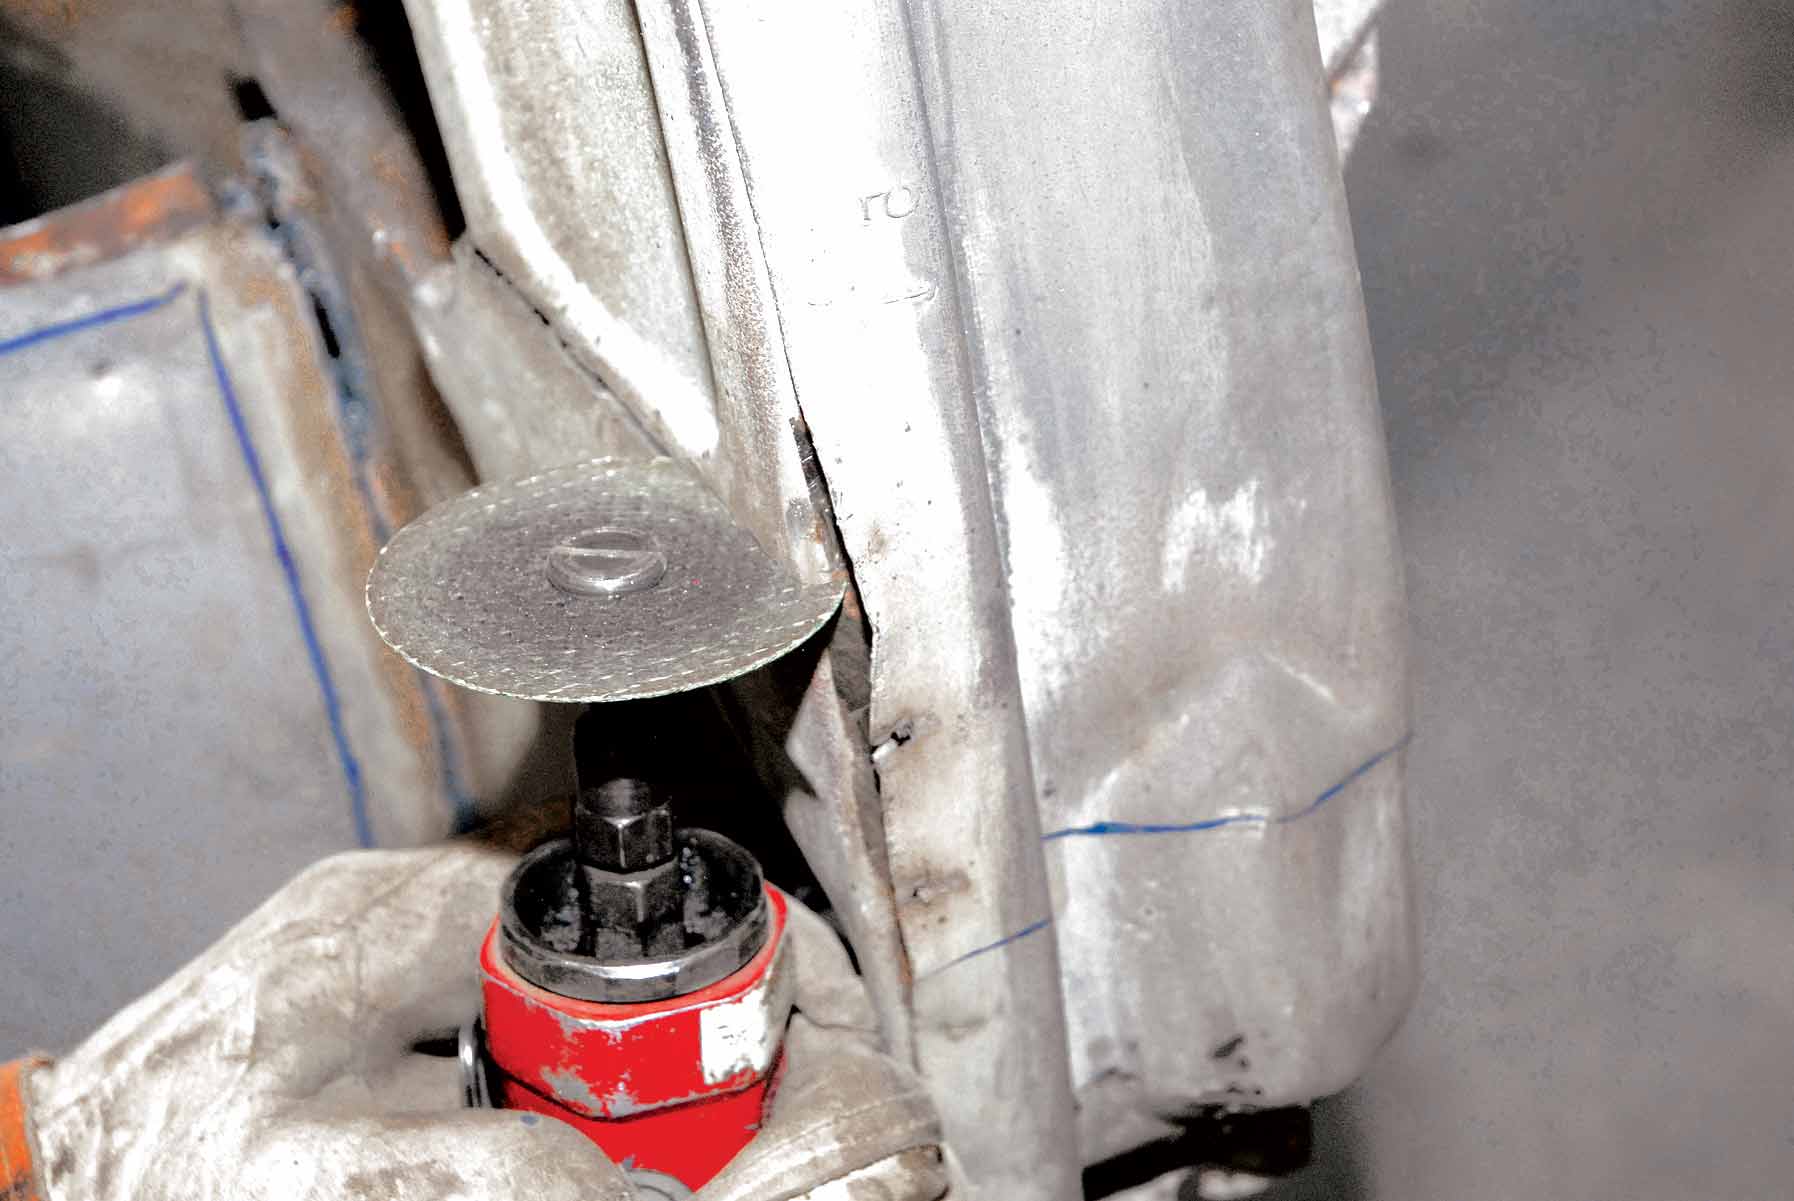
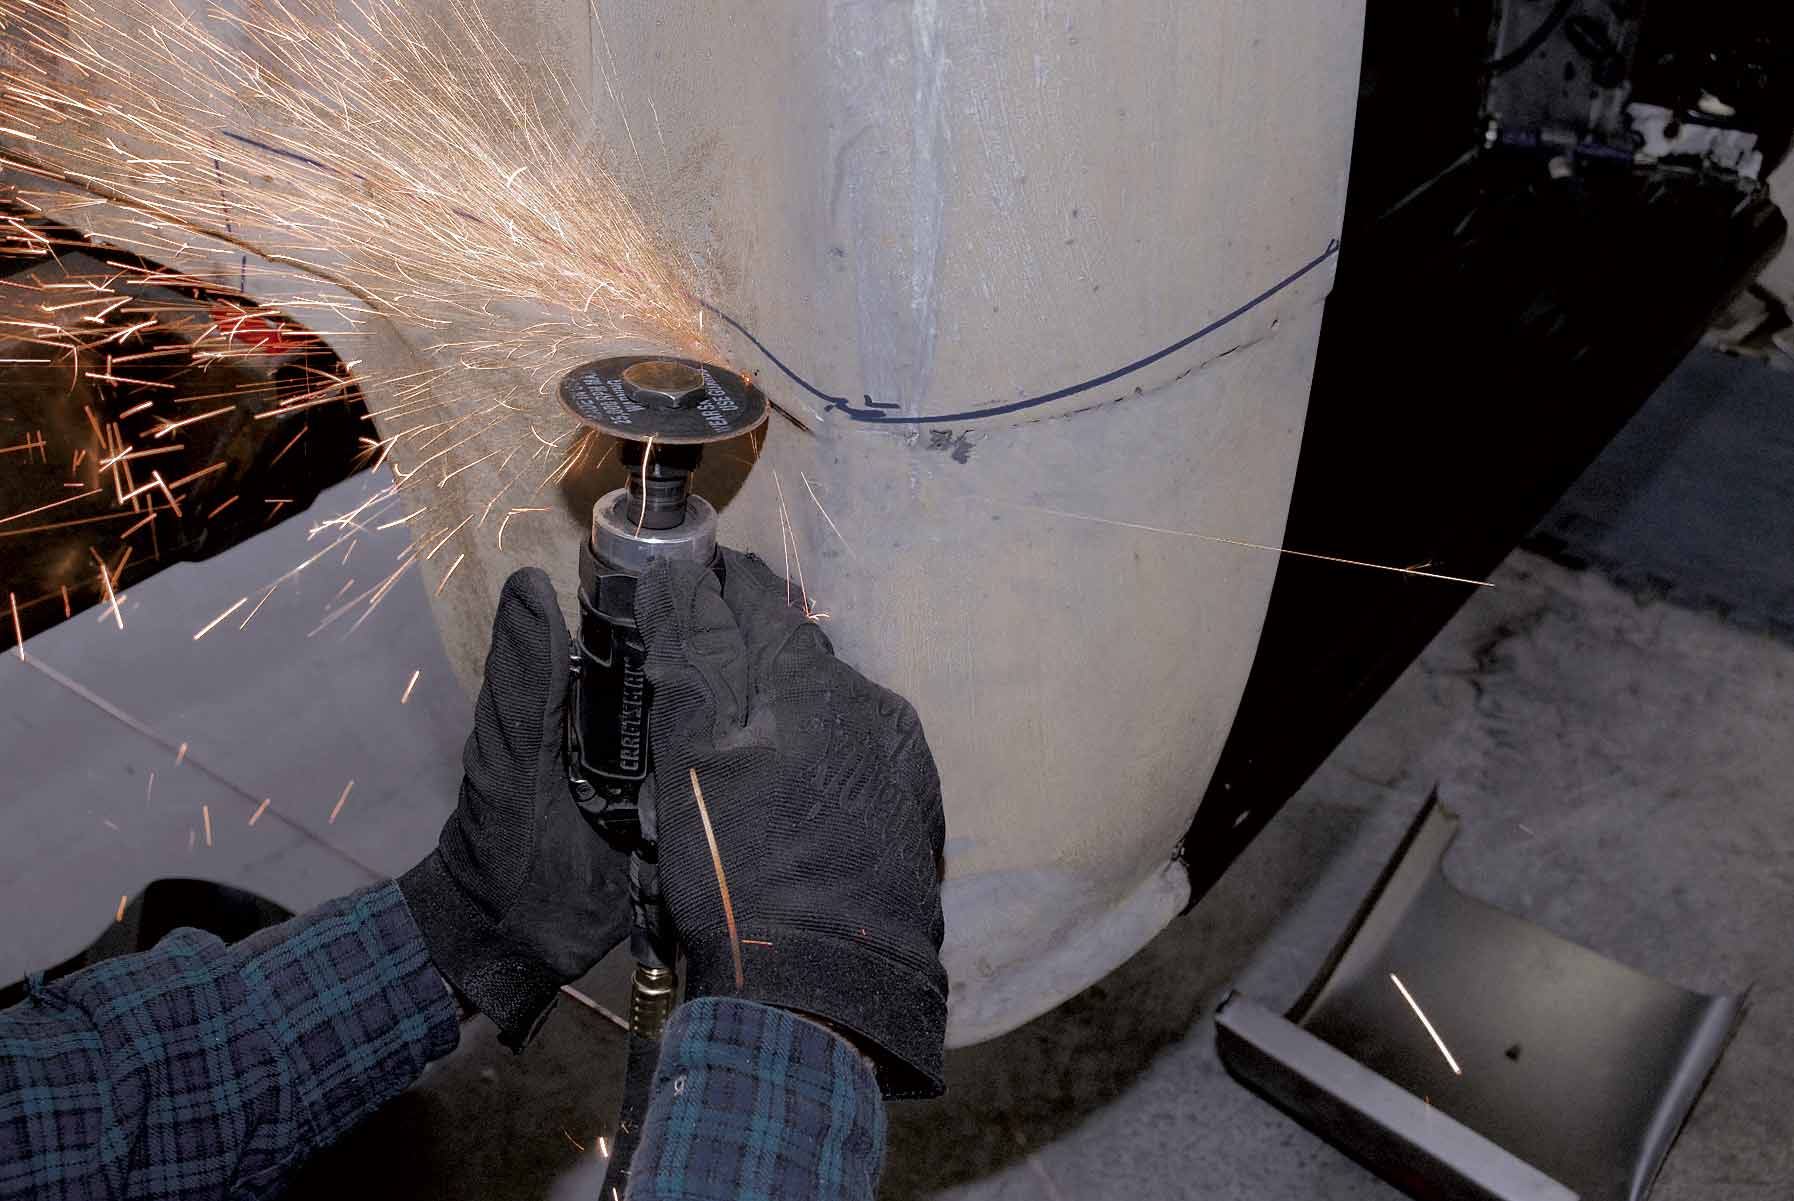
31. Next our installer tackles the passenger’s-side doorsill/rocker panel. He begins by grinding away the spot welds, which secure the doorsill/rocker panel to the rear floor pan.
32-33. Barker uses a plasma cutter to make short work of the job. But before striking an arc, he locates the position of the doorsill/rocker panel center support.
32-33. Barker uses a plasma cutter to make short work of the job. But before striking an arc, he locates the position of the doorsill/rocker panel center support.
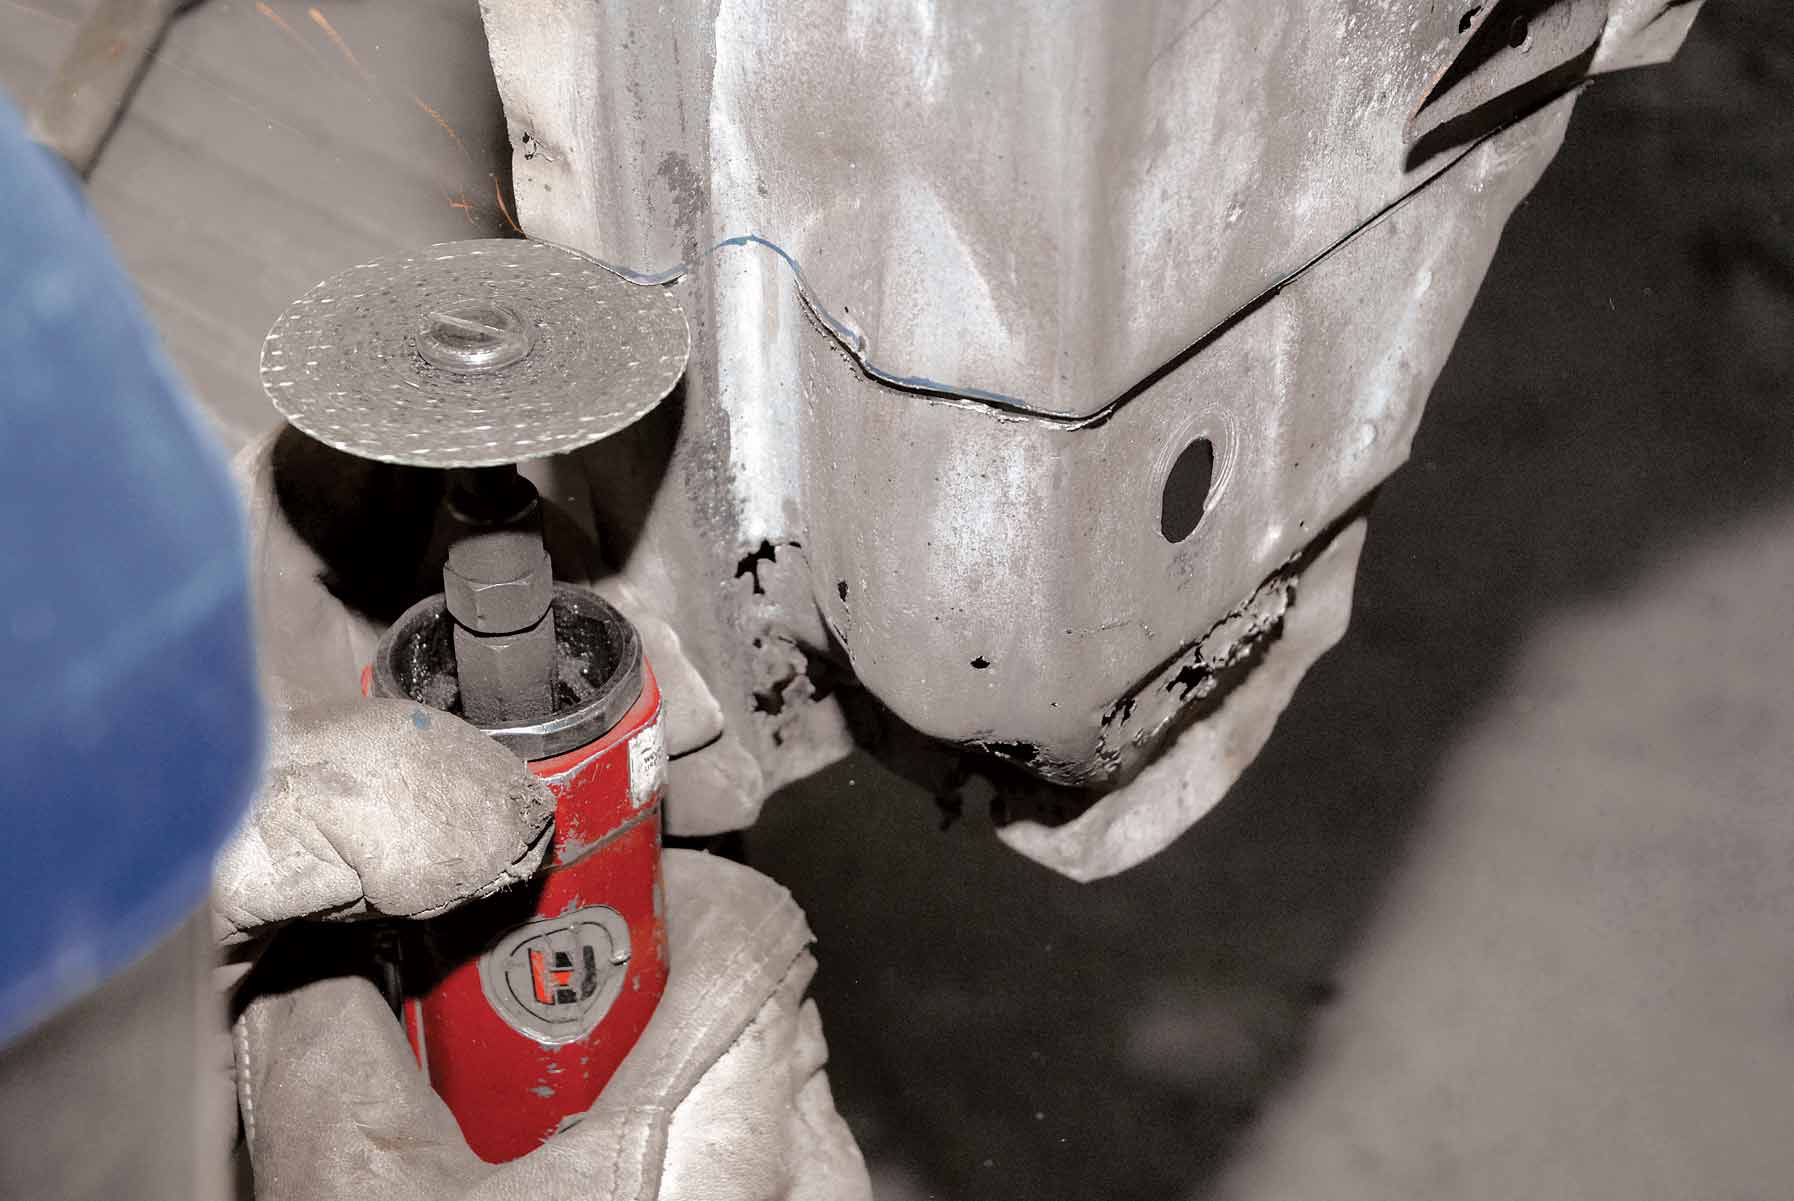
34. Once the OE Chevrolet doorsill/rocker panel has been trimmed away, our installer uses an air chisel to clean things up.
35-36. Part of the cleanup includes removing the rear lip of the old doorsill/rocker panel, as well as trimming away all the excess material from the center support.
35-36. Part of the cleanup includes removing the rear lip of the old doorsill/rocker panel, as well as trimming away all the excess material from the center support.
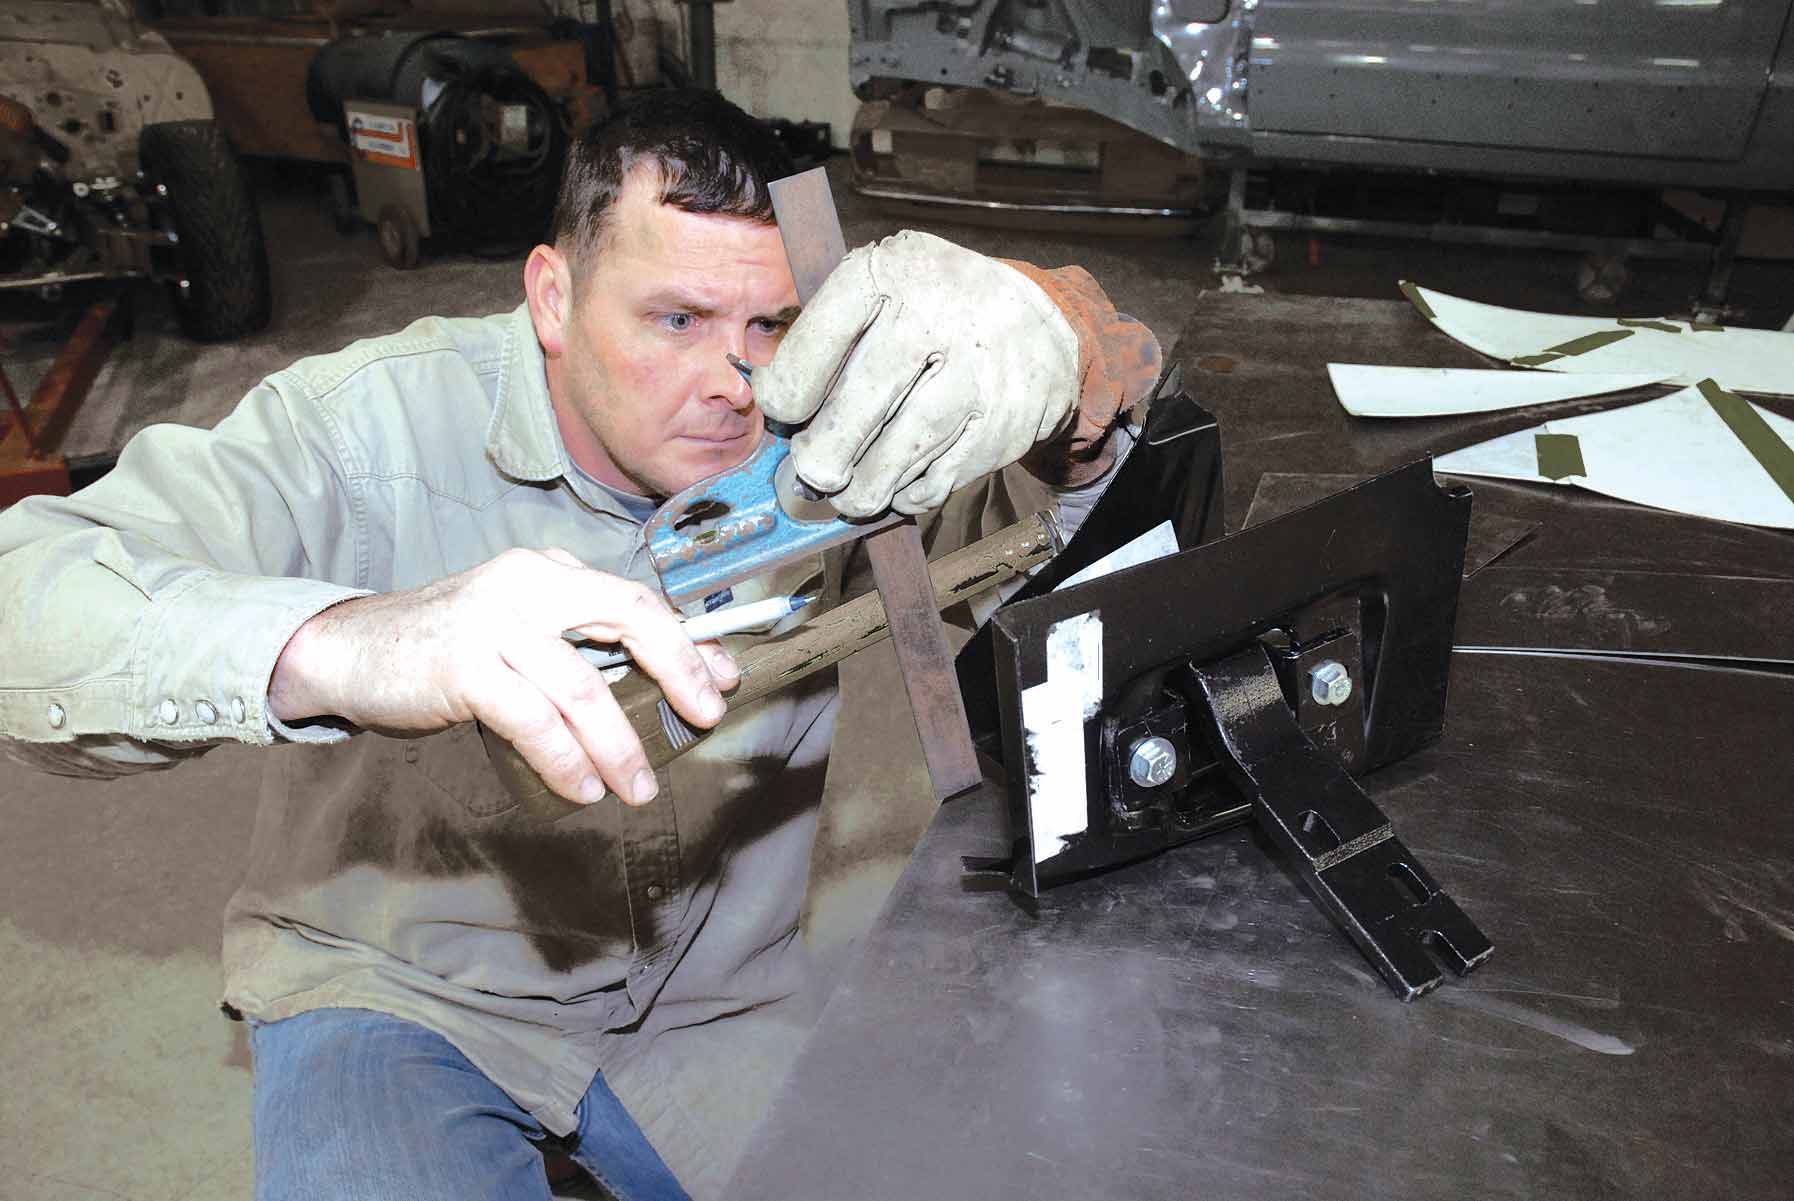
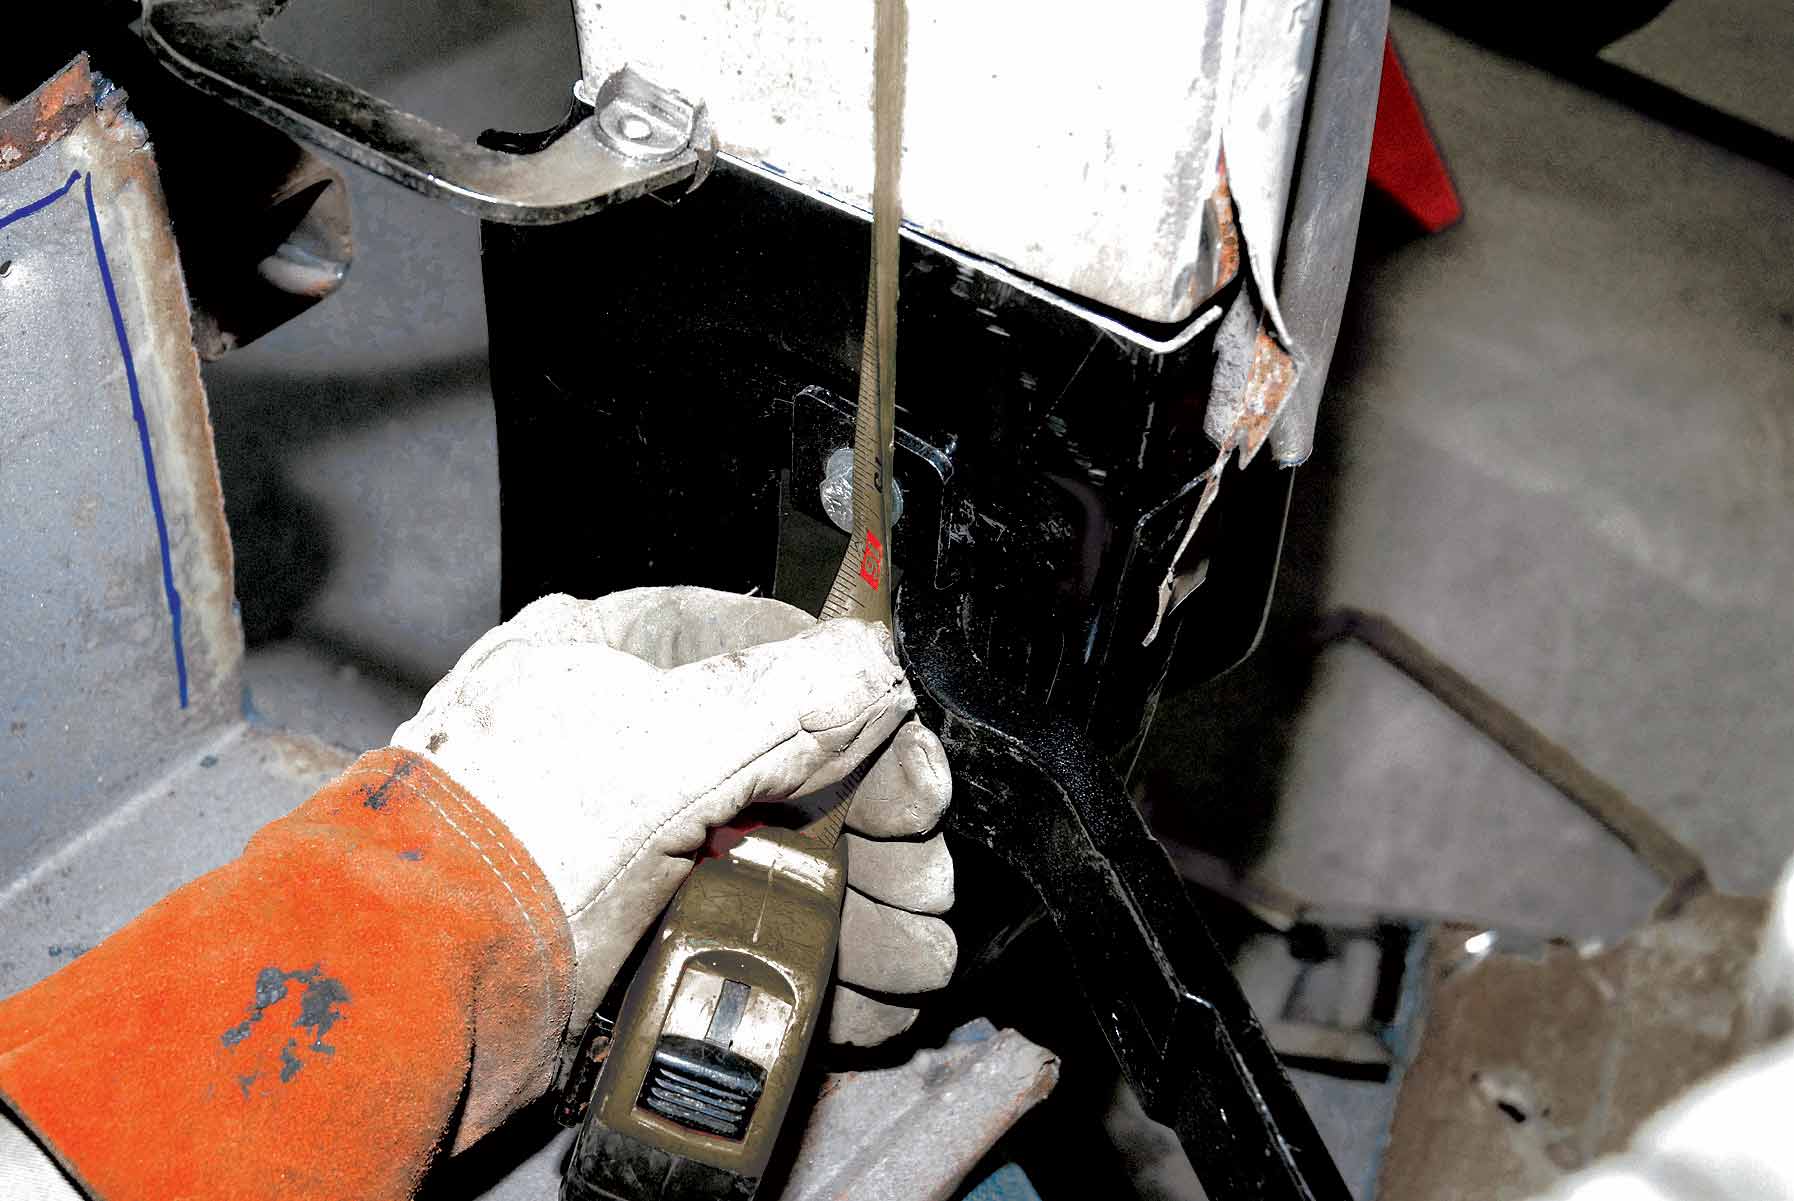
37-38. Barker uses his tape measure to reference the new Classic Industries doorsill/rocker panel to the opening.
37-38. Barker uses his tape measure to reference the new Classic Industries doorsill/rocker panel to the opening.
39. Prior to the doorsill/rocker panel installation, Barker fabricated and welded in a 3x4-inch 18-gauge steel-flanged patch panel, which is welded directly to the passenger’s-side door hinge panel.
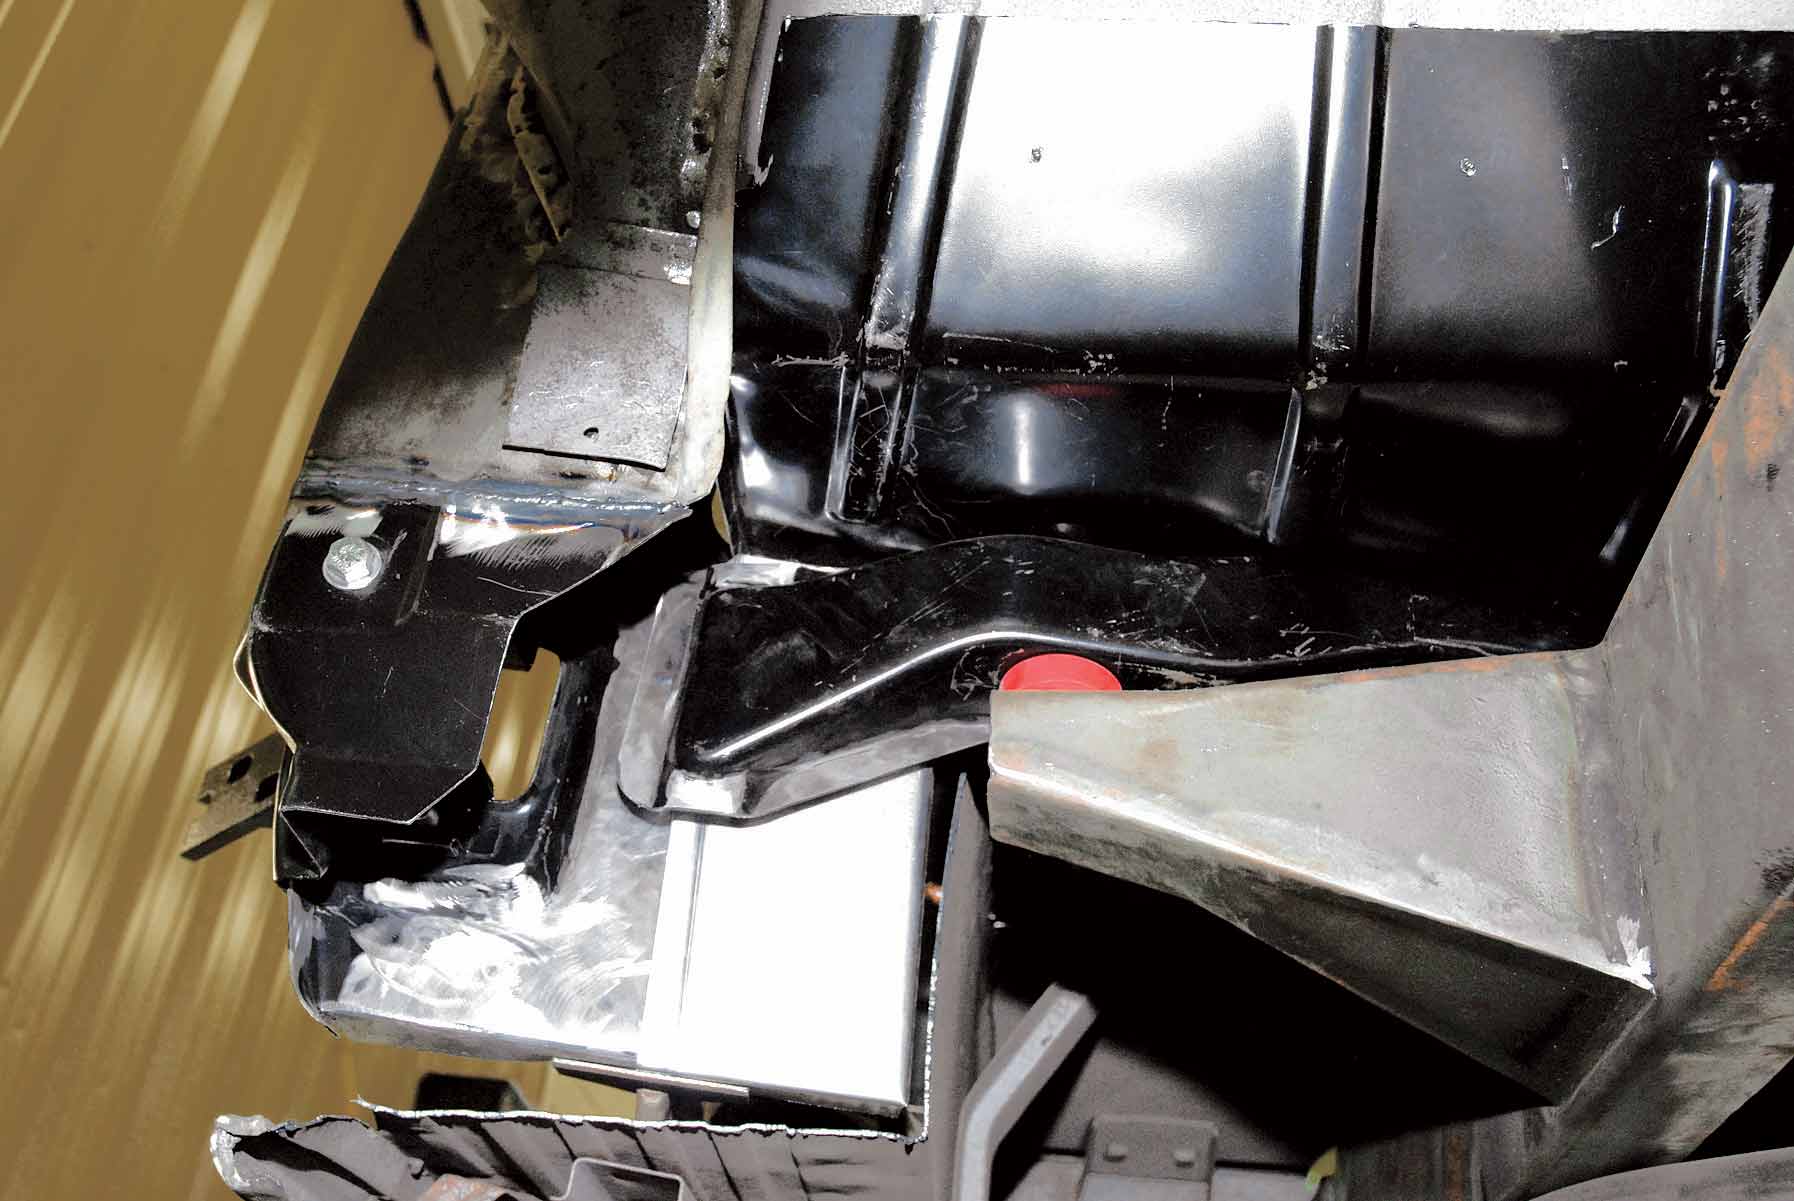
40-41. With the patch panel welded in place, the next step is the installation of Barker’s specially fabricated cab mount block-off plate, which eliminates any dirt buildup inside the mount.
40-41. With the patch panel welded in place, the next step is the installation of Barker’s specially fabricated cab mount block-off plate, which eliminates any dirt buildup inside the mount.
42-43. Prior to spot- and tack-welding the Classic Industries doorsill/rocker panels, Cimbanin thoroughly cleans the to-be-welded areas with a grinder.
42-43. Prior to spot- and tack-welding the Classic Industries doorsill/rocker panels, Cimbanin thoroughly cleans the to-be-welded areas with a grinder.
44-45. Cimbanin holds the new doorsill/rocker panel in place with a set of Cleco pins.
44-45. Cimbanin holds the new doorsill/rocker panel in place with a set of Cleco pins.
46-47. With everything firmly clamped in place, the welding begins.
46-47. With everything firmly clamped in place, the welding begins.
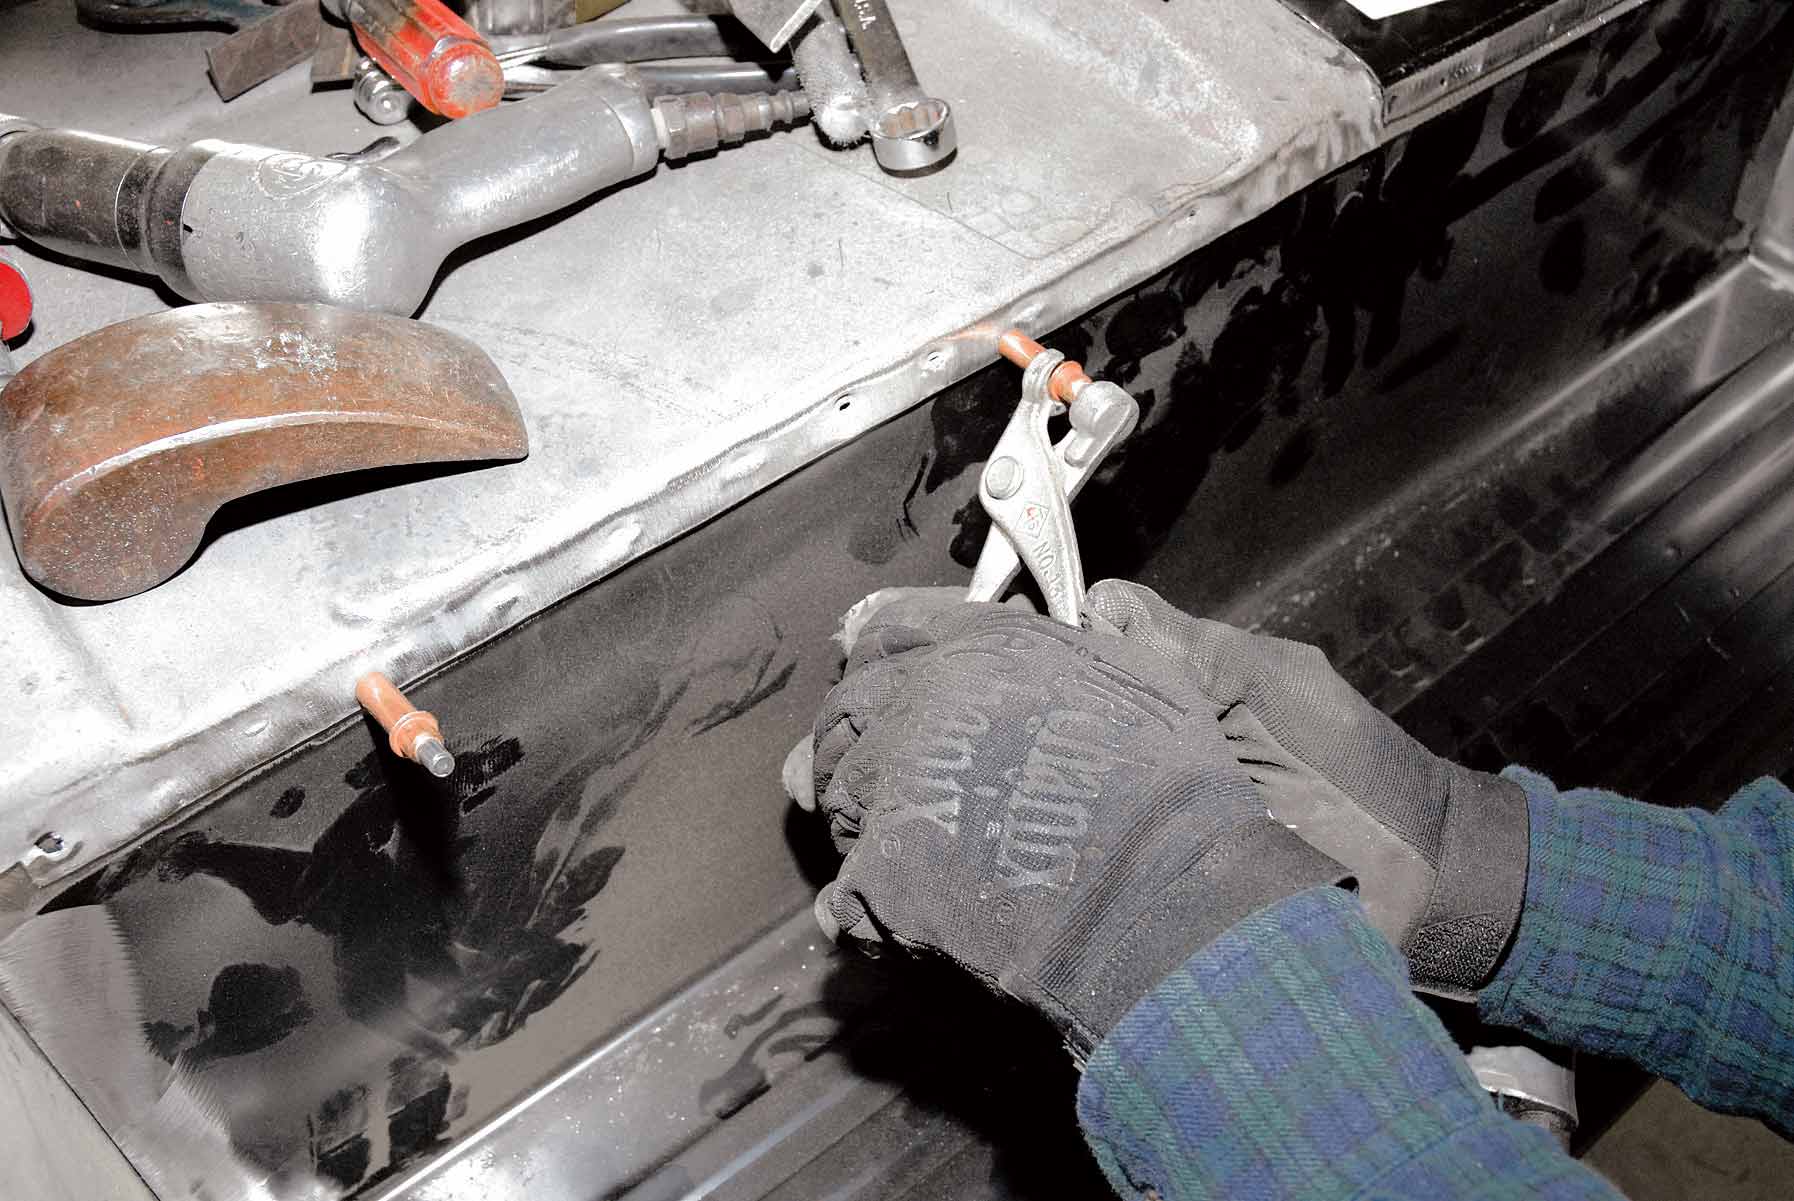
48-49. An ideal spot-weld pattern is 1- to 1-1/2 inches apart. If you do not have a spot welder, use a TIG or MIG welder. If you don’t have Cleco pins, sheetmetal screws work just fine.
48-49. An ideal spot-weld pattern is 1- to 1-1/2 inches apart. If you do not have a spot welder, use a TIG or MIG welder. If you don’t have Cleco pins, sheetmetal screws work just fine.
50. Prior to moving to the rear quarter of the cab, Cimbanin rewelds the passenger’s-side OE fender-mounting bracket in place.
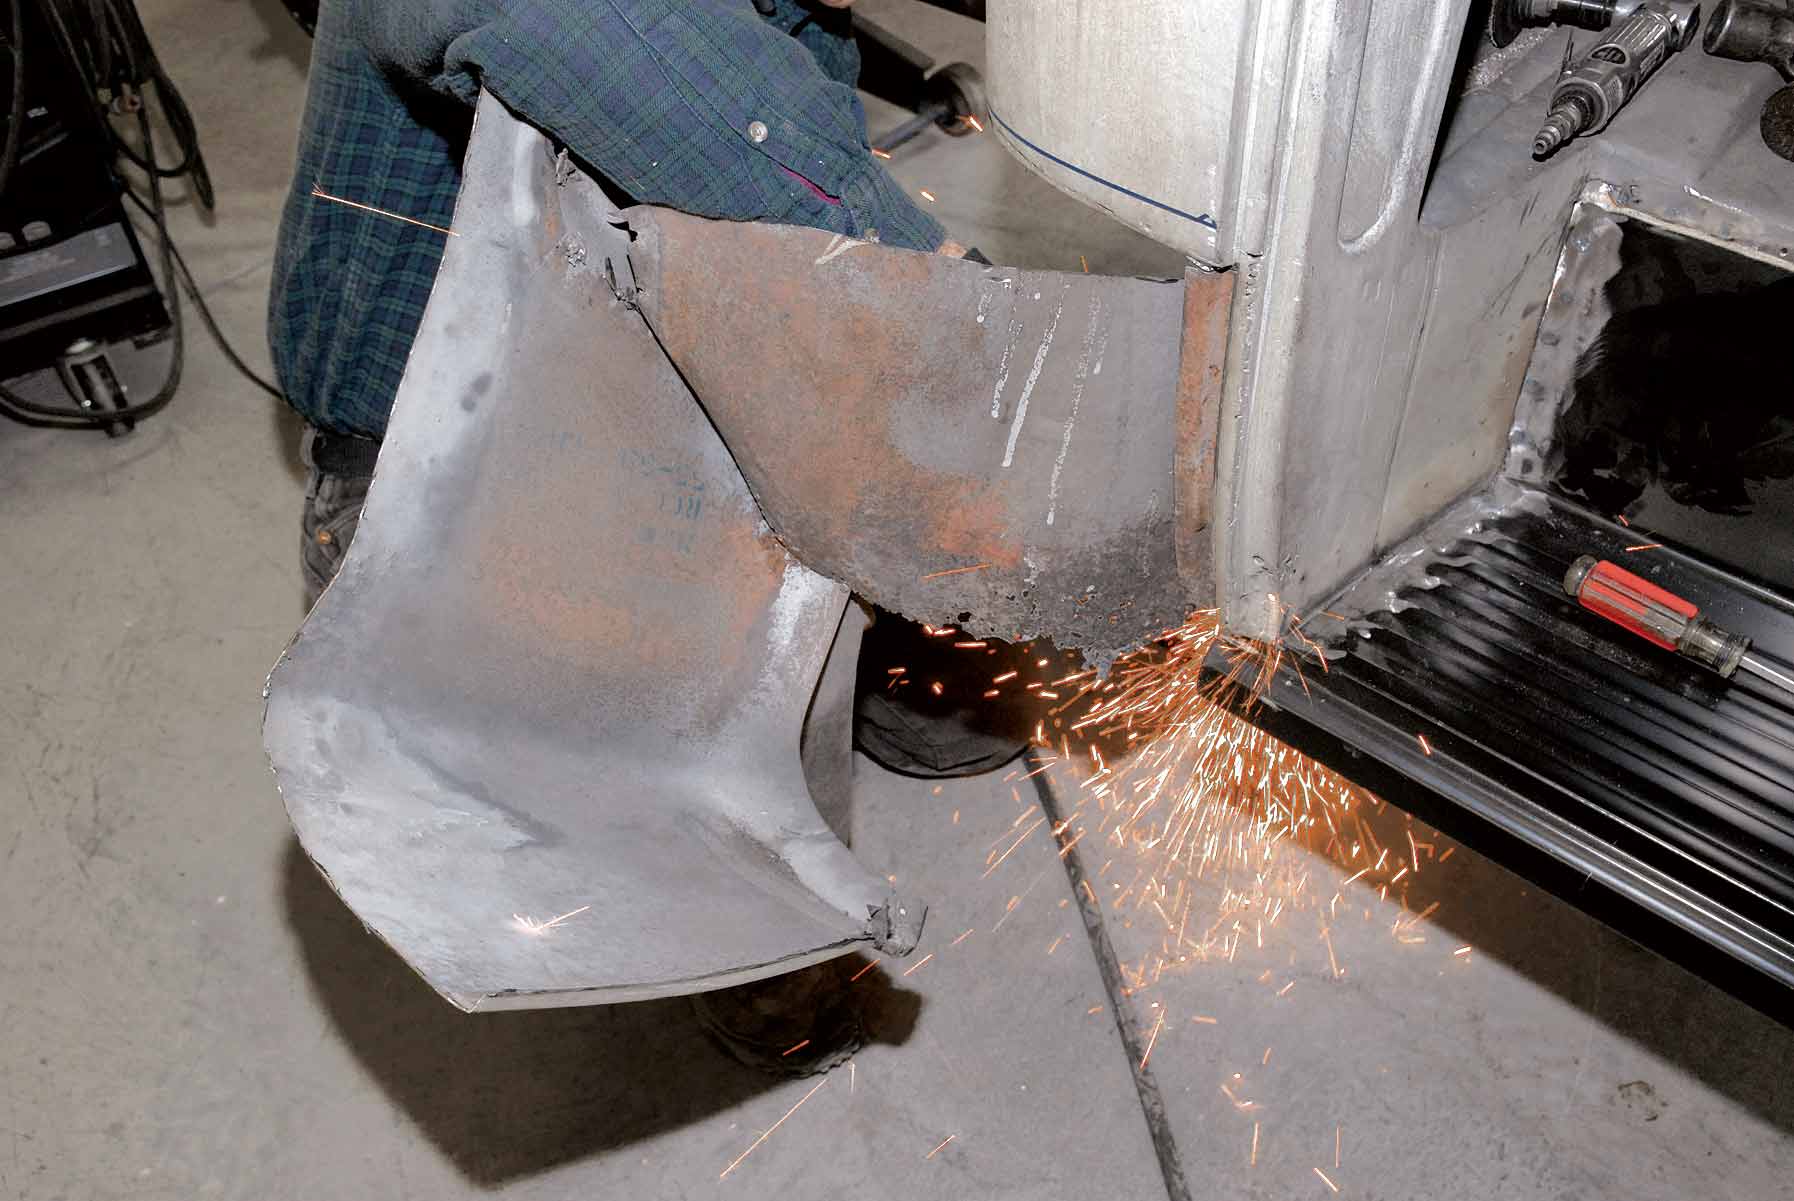
51. Moving onto the back, Cimbanin uses a Classic Industries reproduction lower cab patch panel as a template to scribe his cut marks.
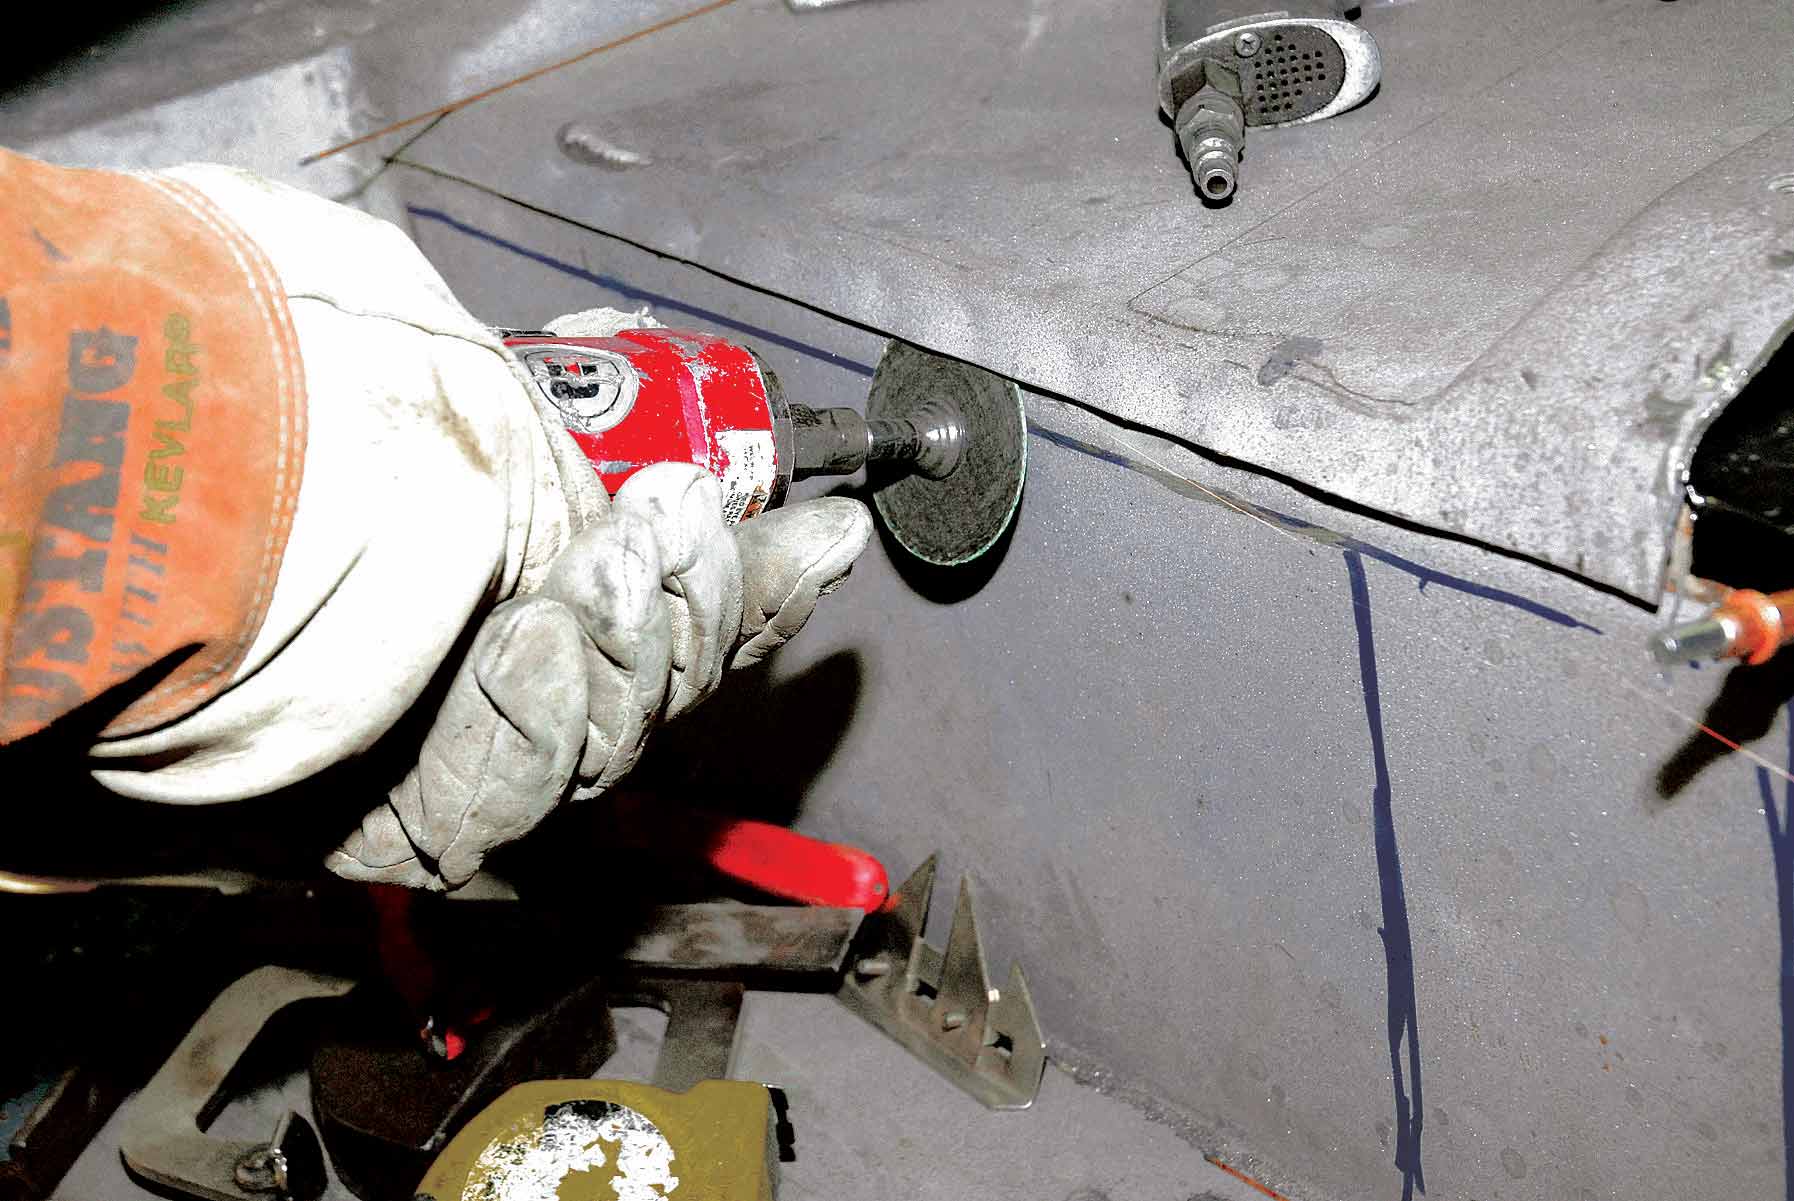
52-53. A die grinder does the job just fine. Once the outer panels are peeled back, you can get a better look at the shoddy workmanship done previously.
52-53. A die grinder does the job just fine. Once the outer panels are peeled back, you can get a better look at the shoddy workmanship done previously.
54-55. The Craftsman die grinder appears to be the do-all tool, as we see it being used to clean up the underside of the cab, as well as being used to cut the spot welds inside.
54-55. The Craftsman die grinder appears to be the do-all tool, as we see it being used to clean up the underside of the cab, as well as being used to cut the spot welds inside.
56. A lot of careful fitting is required.
57. Since this area had been badly damaged with a stick welder, Cimbanin wanted to overlap the panels to provide as much excess material as necessary. A trip through the bead roller provides the flange.
58. After grinding away the welding slag and plastic filler from the inside and outside of the truck cab, Cimbanin trial-fits the inner panel. A series of C-clamps are used to hold the panel in place.
59. Satisfied with the fit, our installer begins final-welding the inner panel in place.
60-61. With the inner panel welded in place, our installer trial-fits the outer skin one more time. A little trimming is needed.
60-61. With the inner panel welded in place, our installer trial-fits the outer skin one more time. A little trimming is needed.
62. Satisfied with the results, Cimbanin tack-welds the new panel in place.
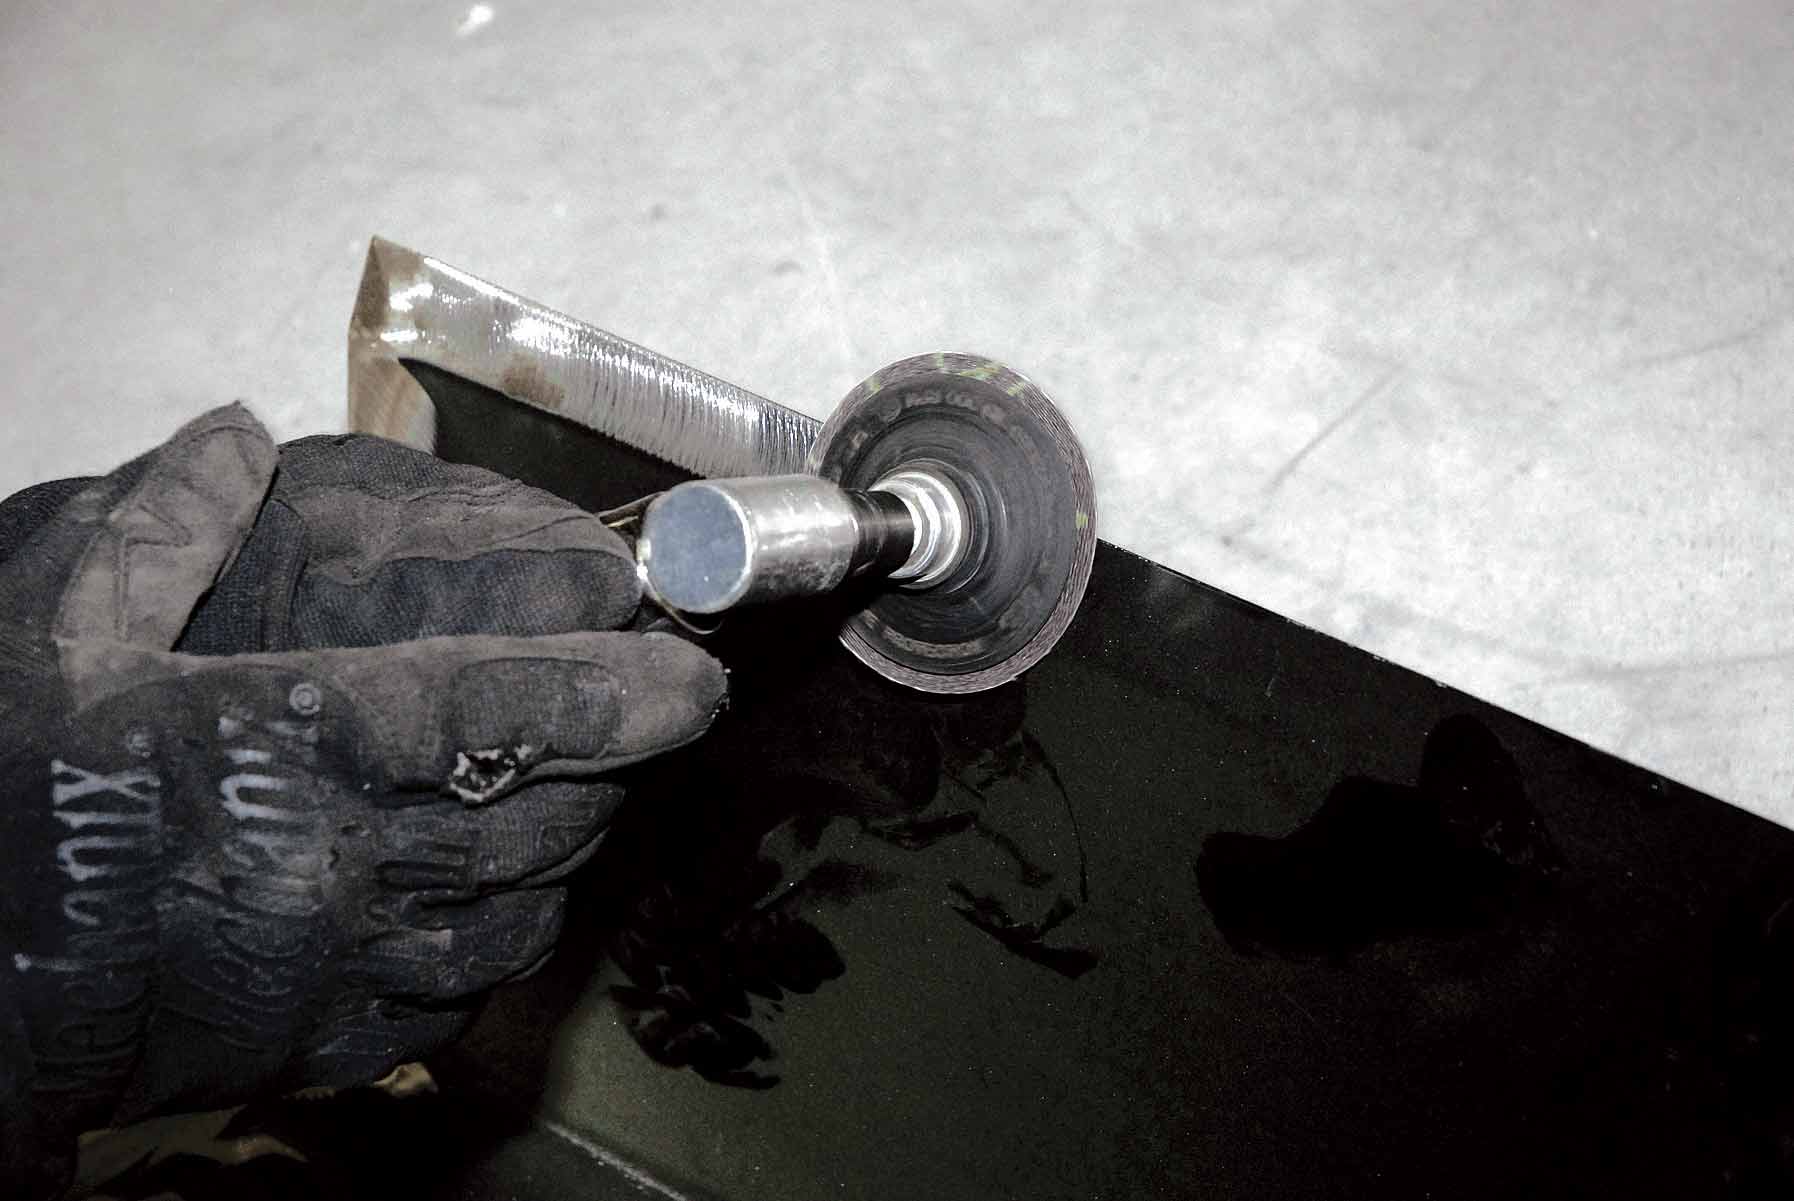
63. Each and every weld is followed with more grinding until the entire surface area is built up with metal.
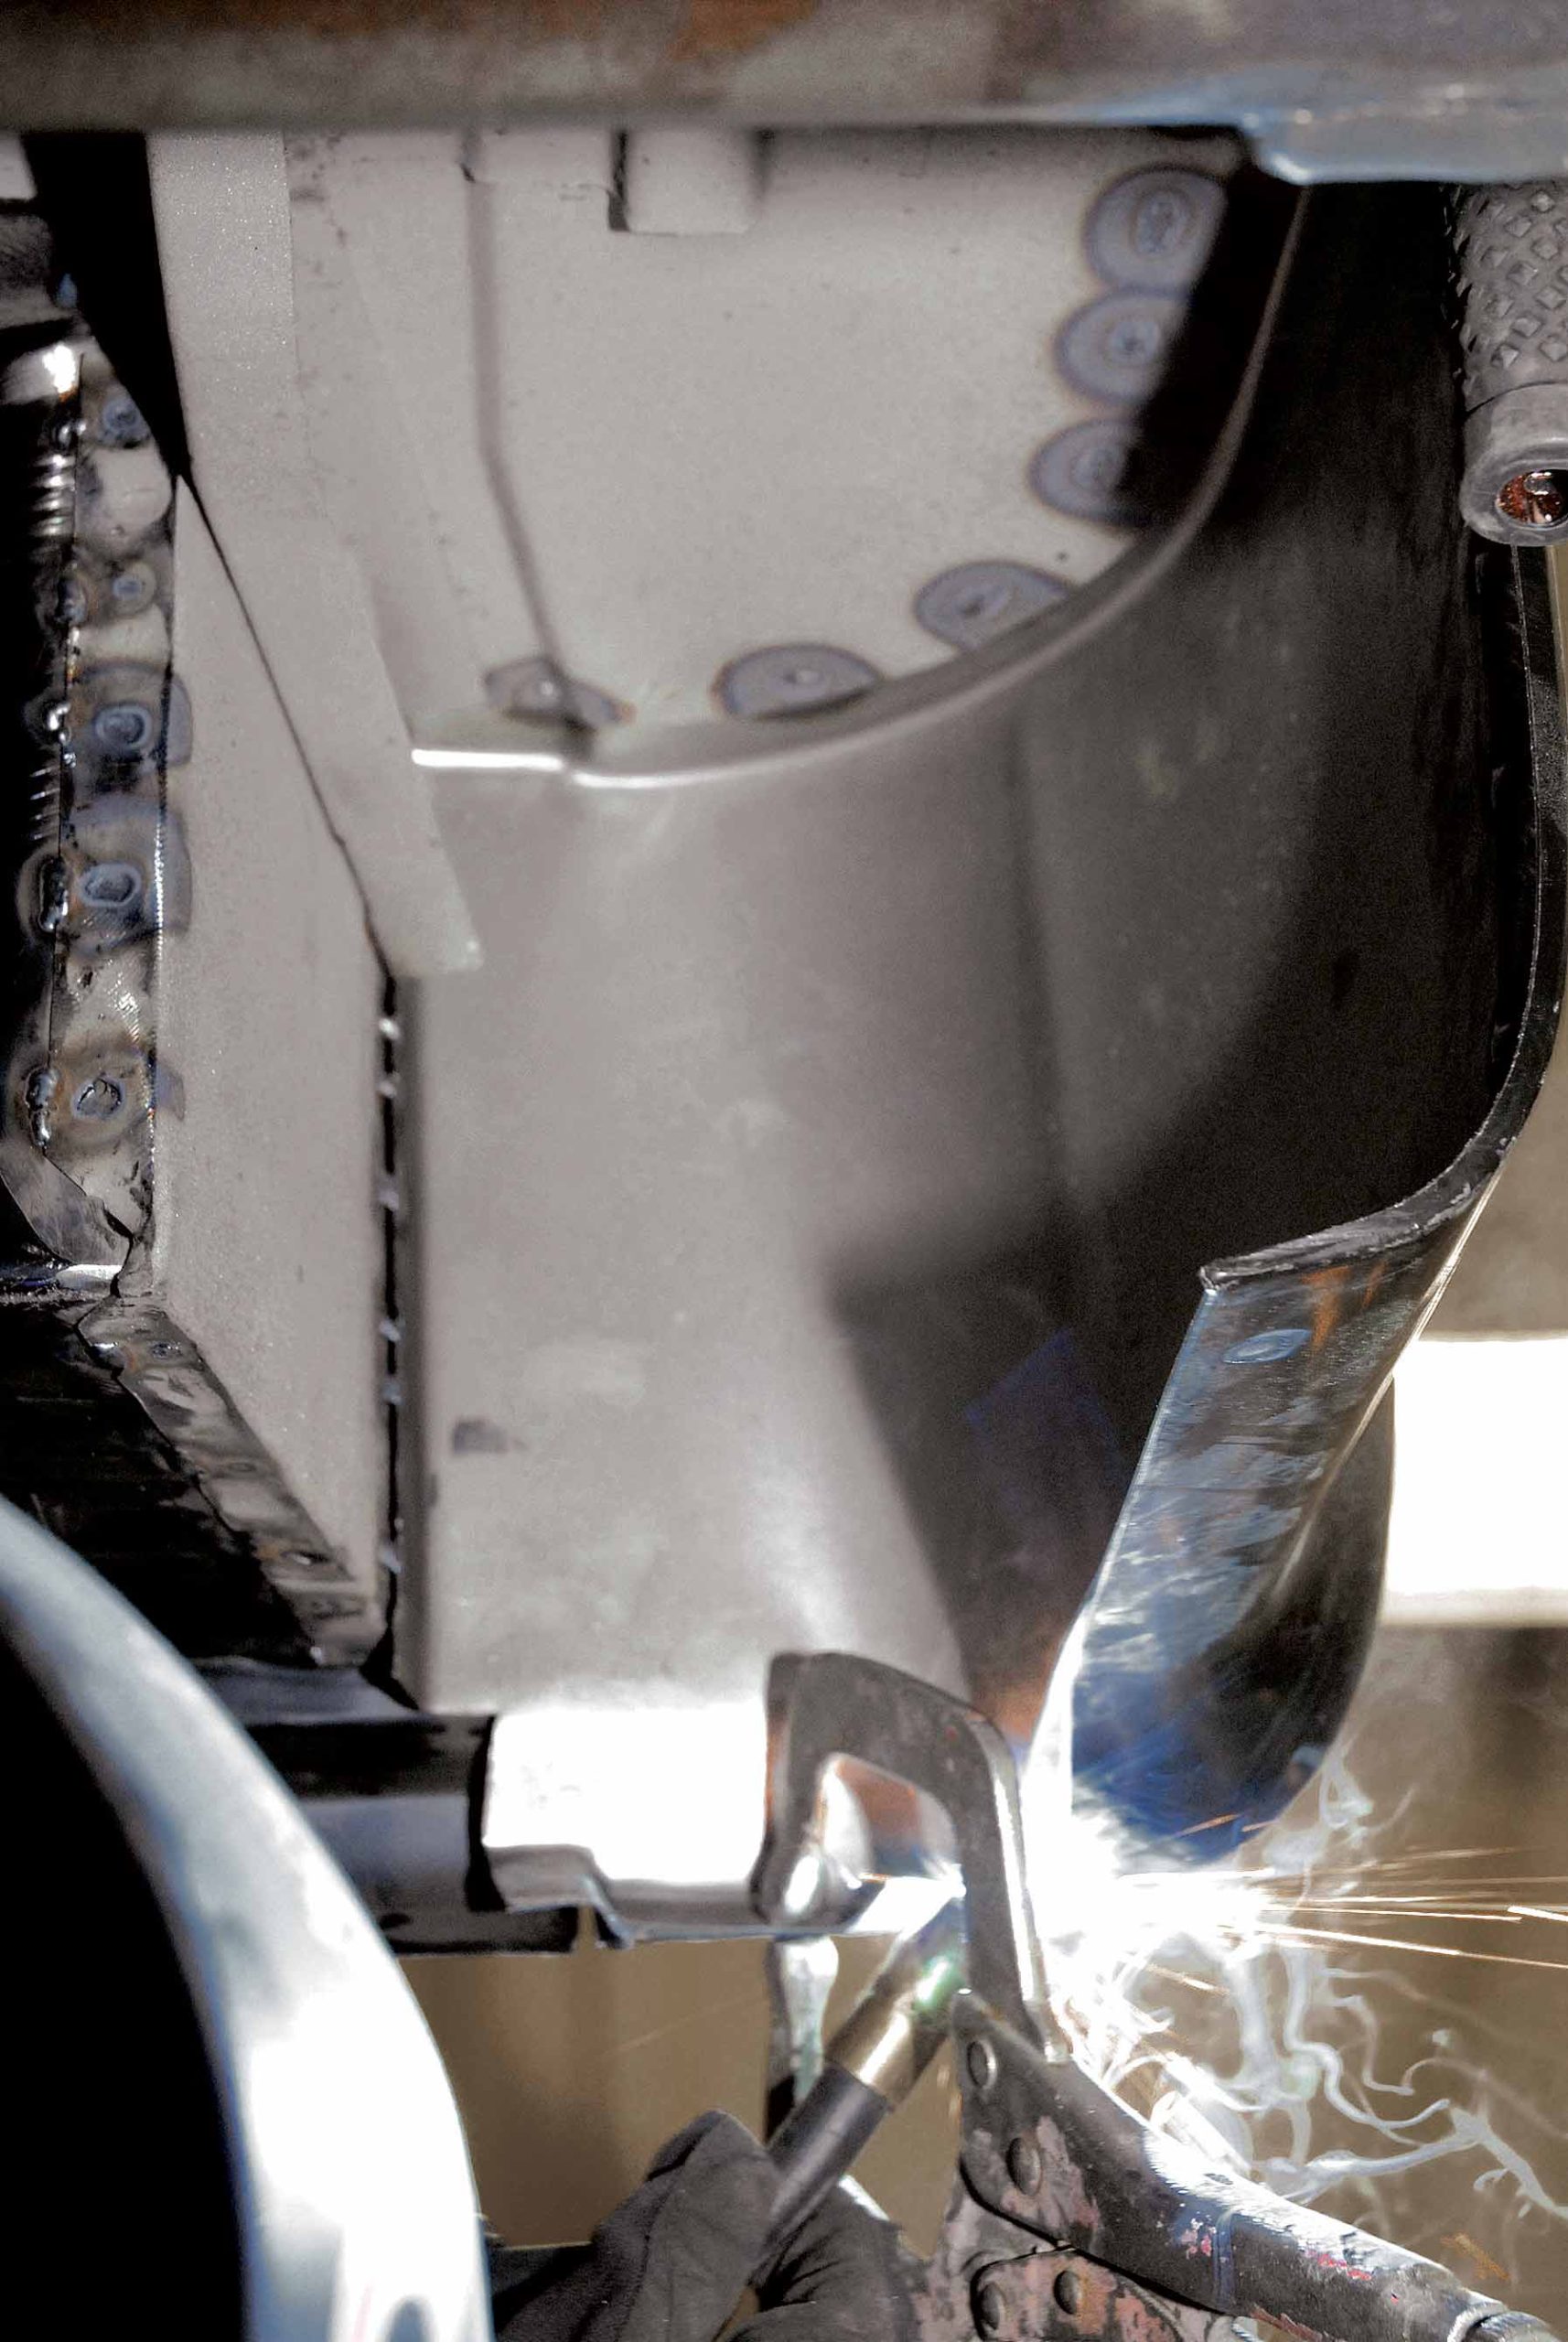
64. Cimbanin focuses his attention on the underside, where both inner and outer lower cab patch panels are welded together.
65. This is how the car looks.
66. We’re not going to show both sides being repaired.
67-68. Back at the firewall, Barker is seen trial-fitting the new firewall indentation, or dog house, to the old firewall.
67-68. Back at the firewall, Barker is seen trial-fitting the new firewall indentation, or dog house, to the old firewall.
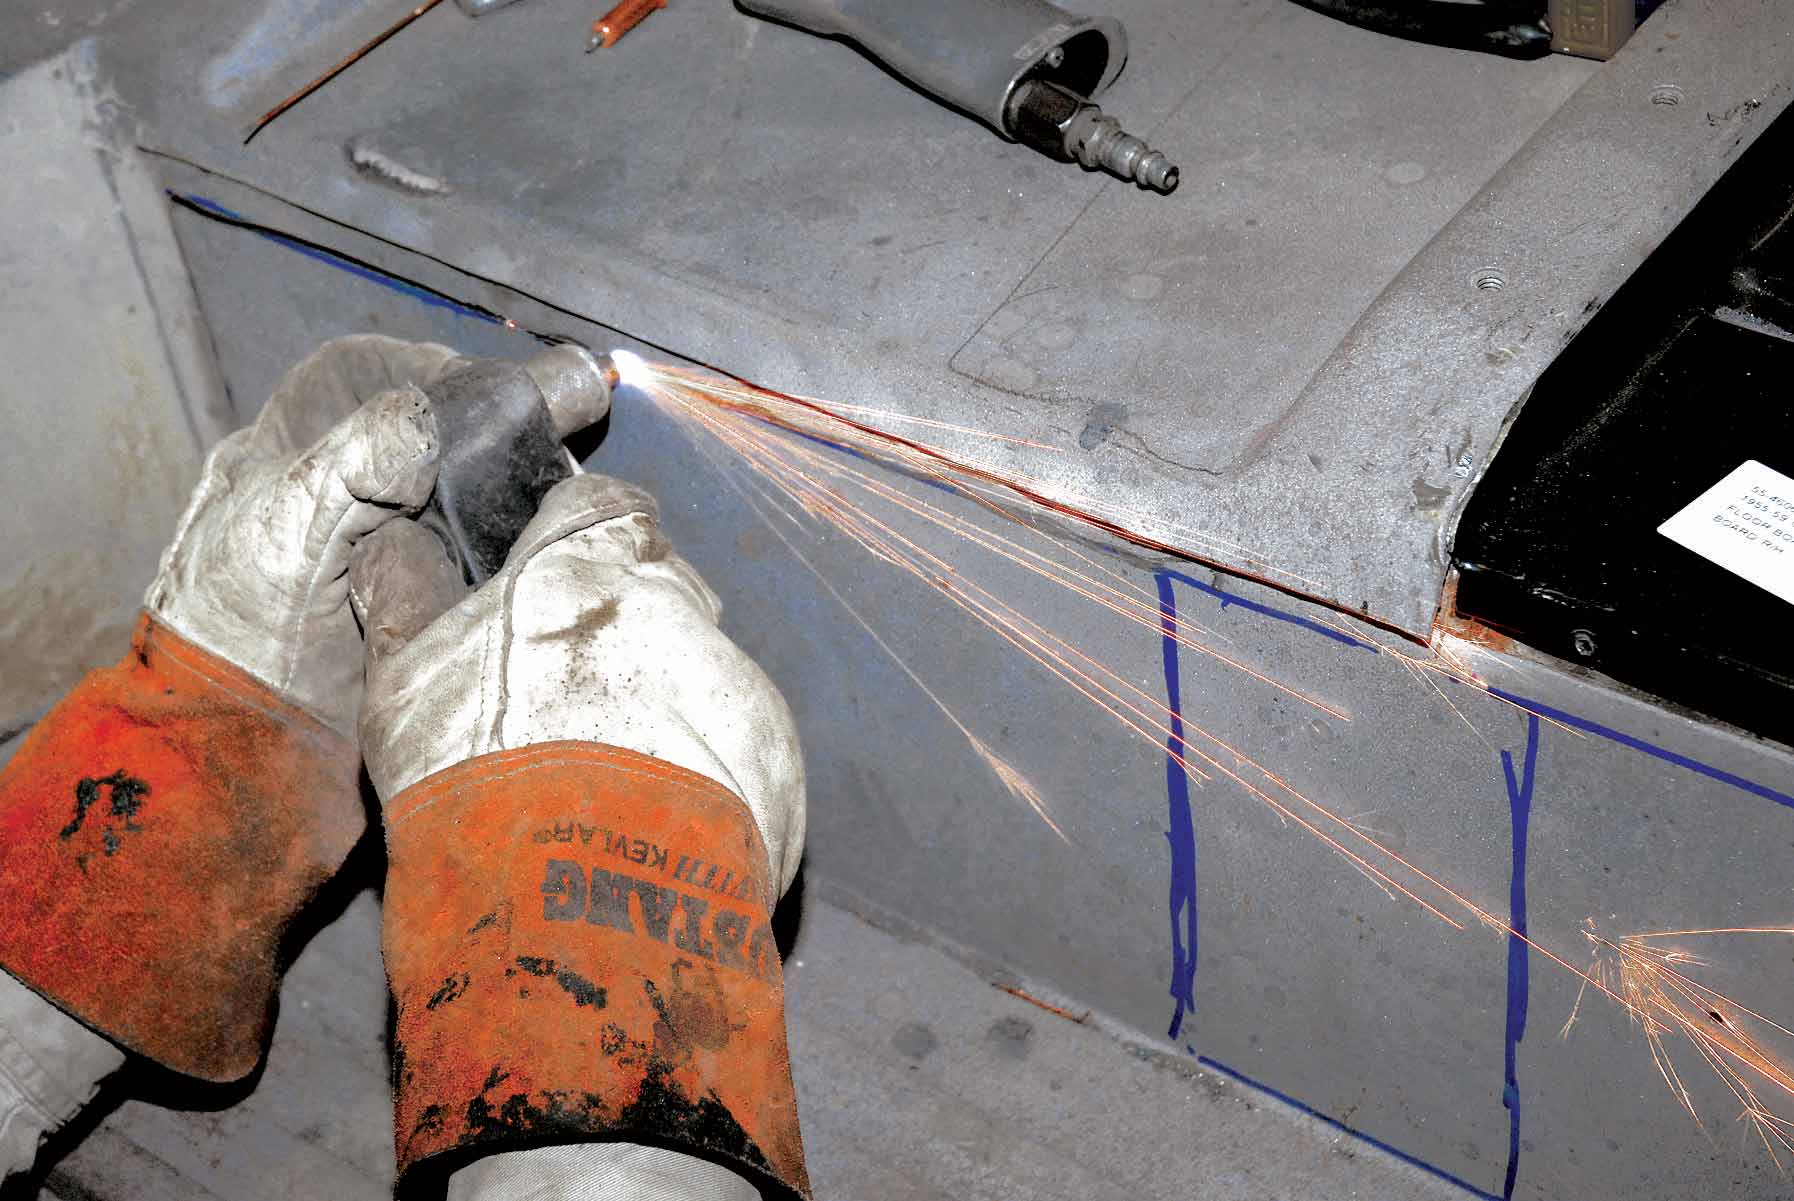
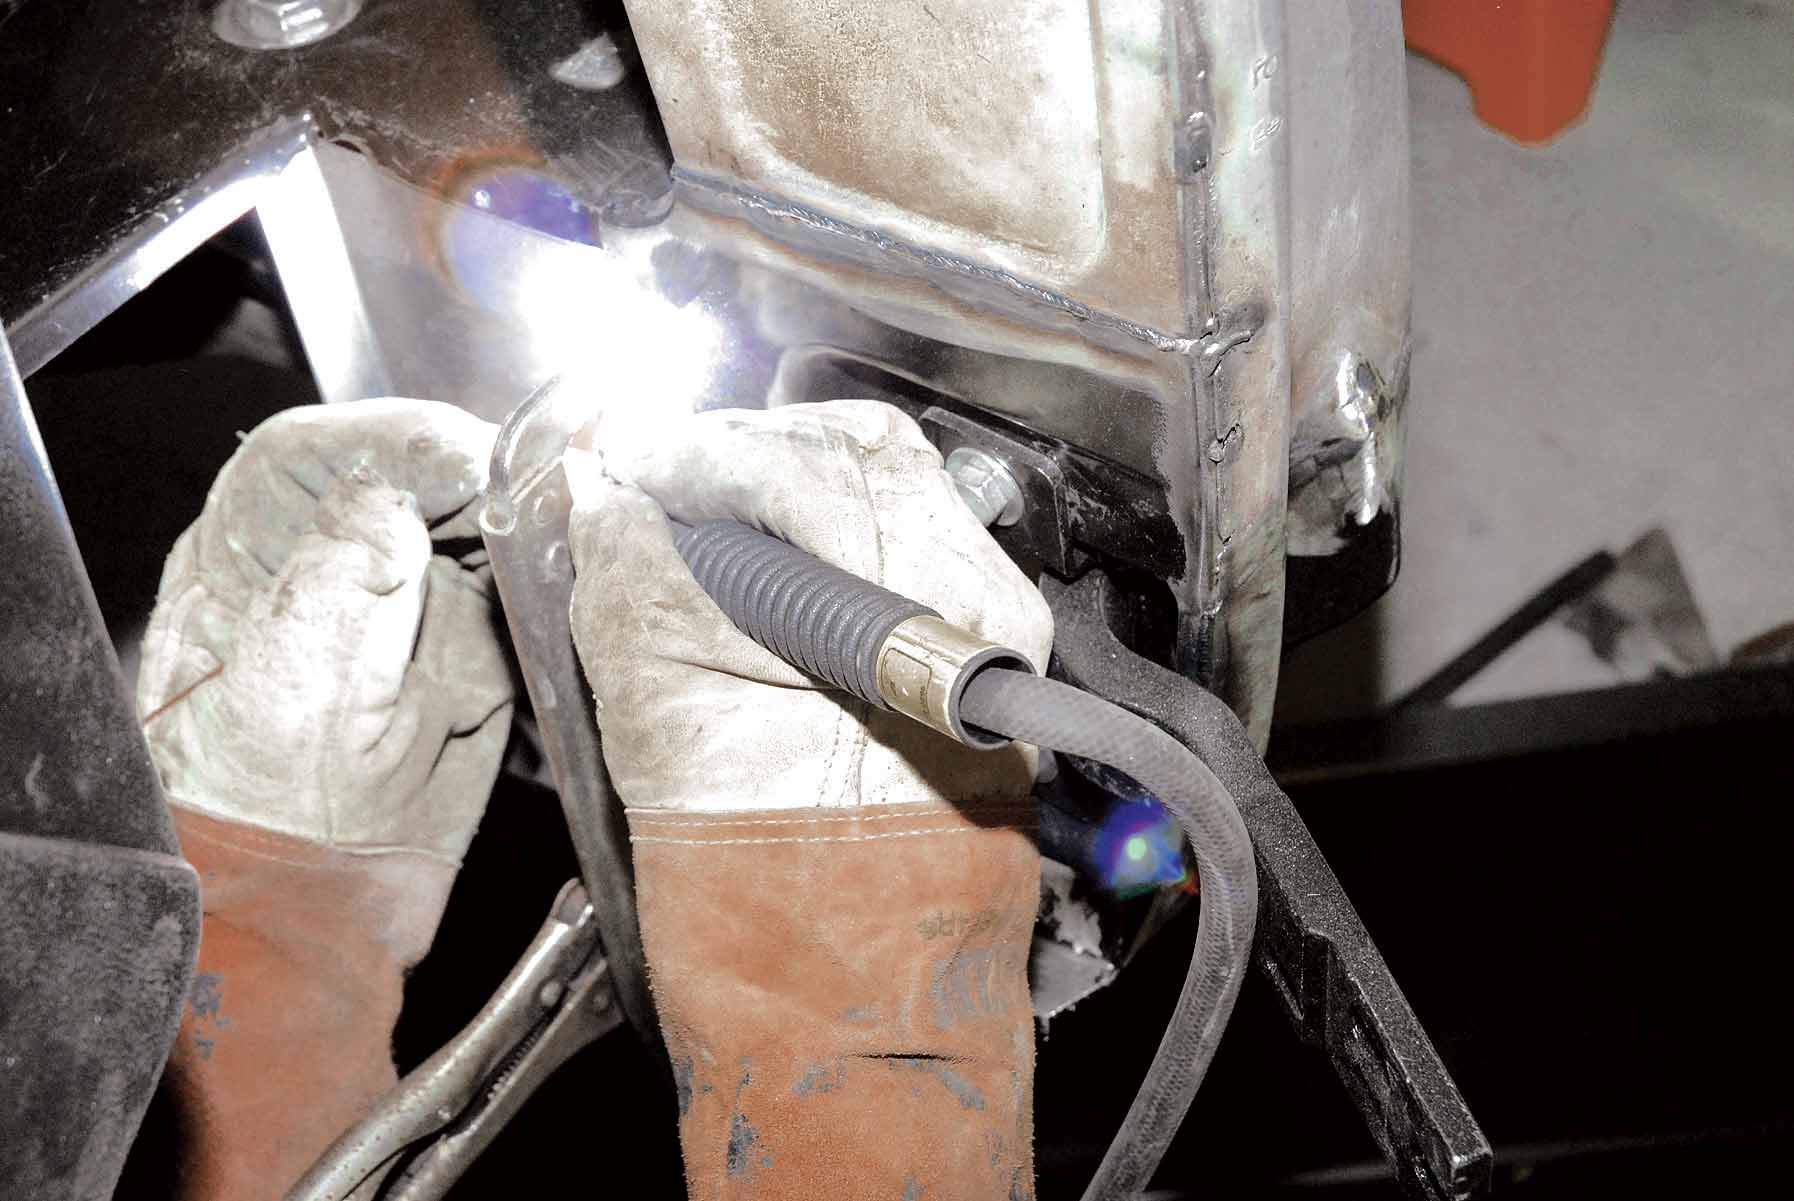
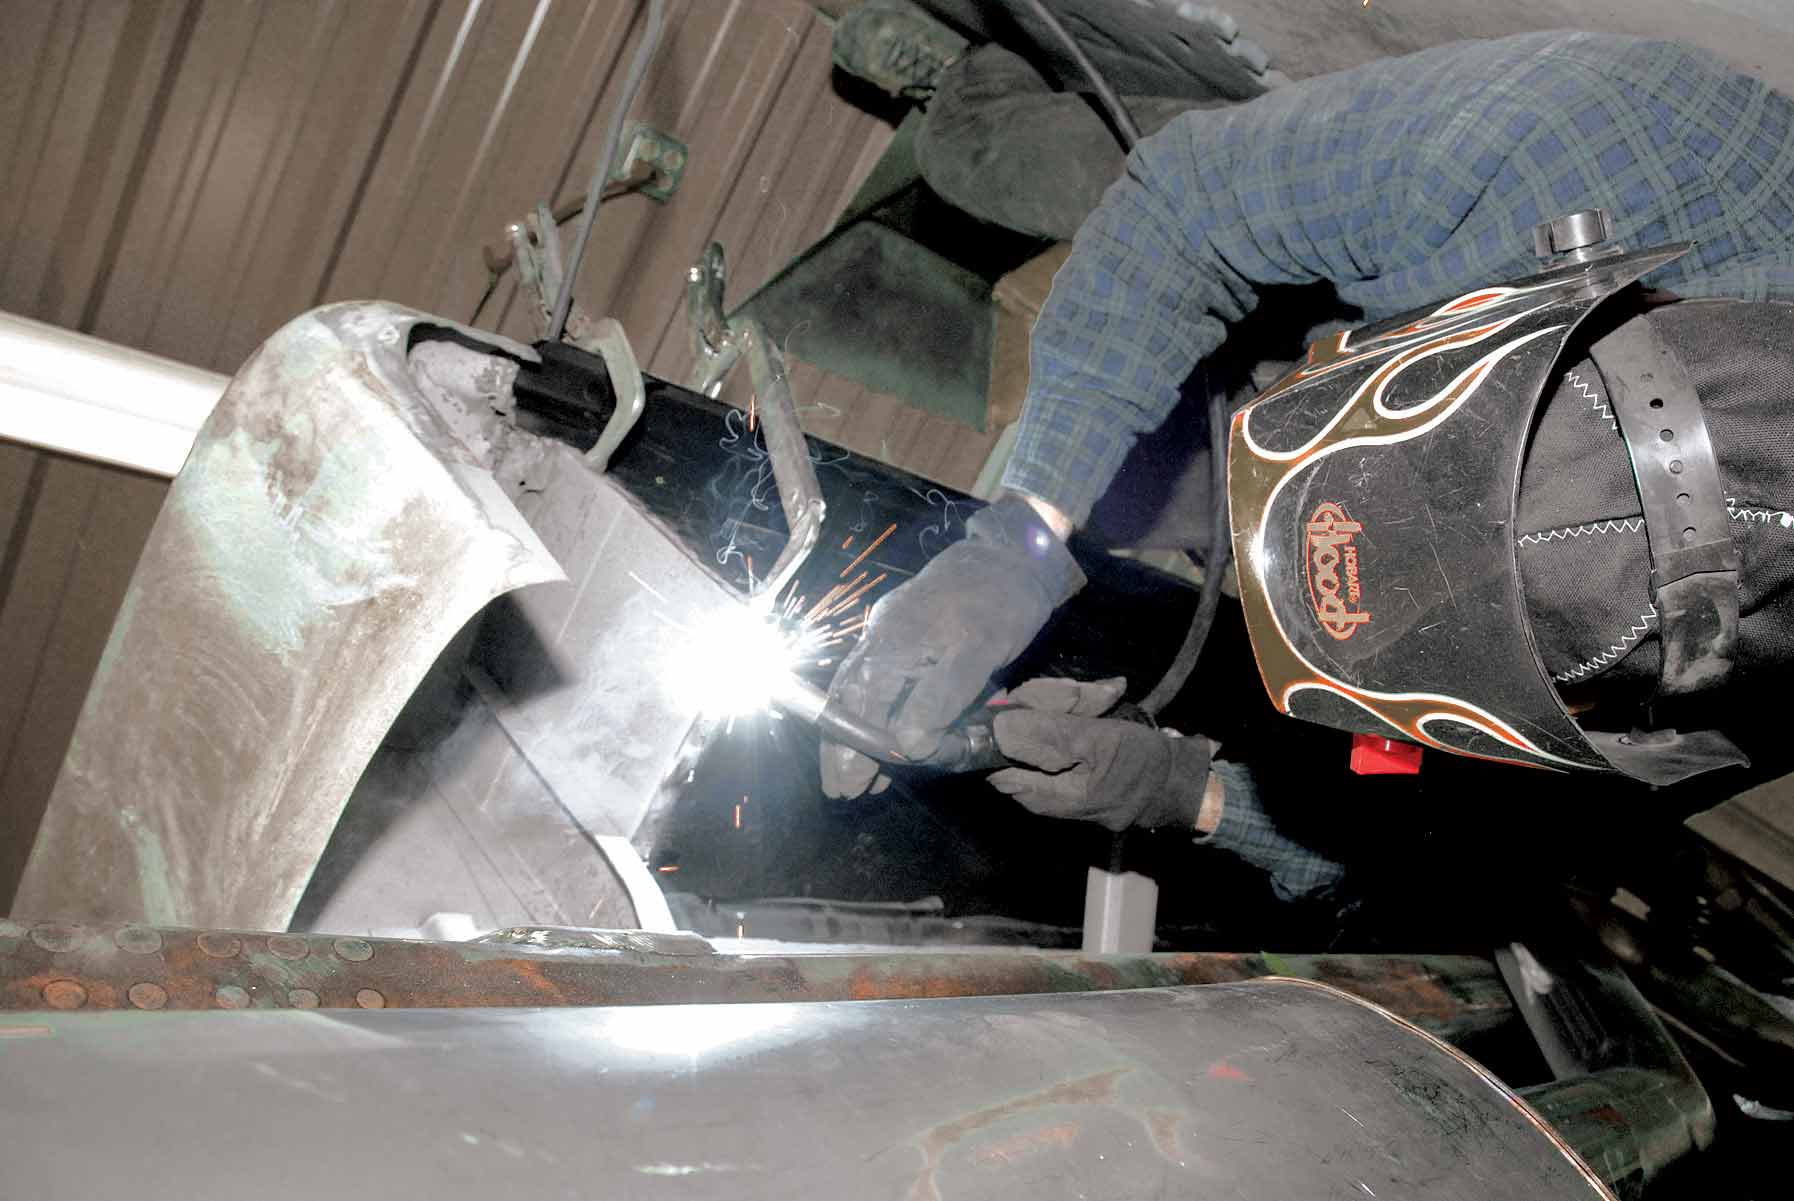
69. Barker tack-welds the passenger’s side of the Cameo’s dog house to the existing firewall, starting at the lower corner.
70. Welding continues along the circumference of the firewall, while Barker also final-welds the old and new overlapped toe panels together.
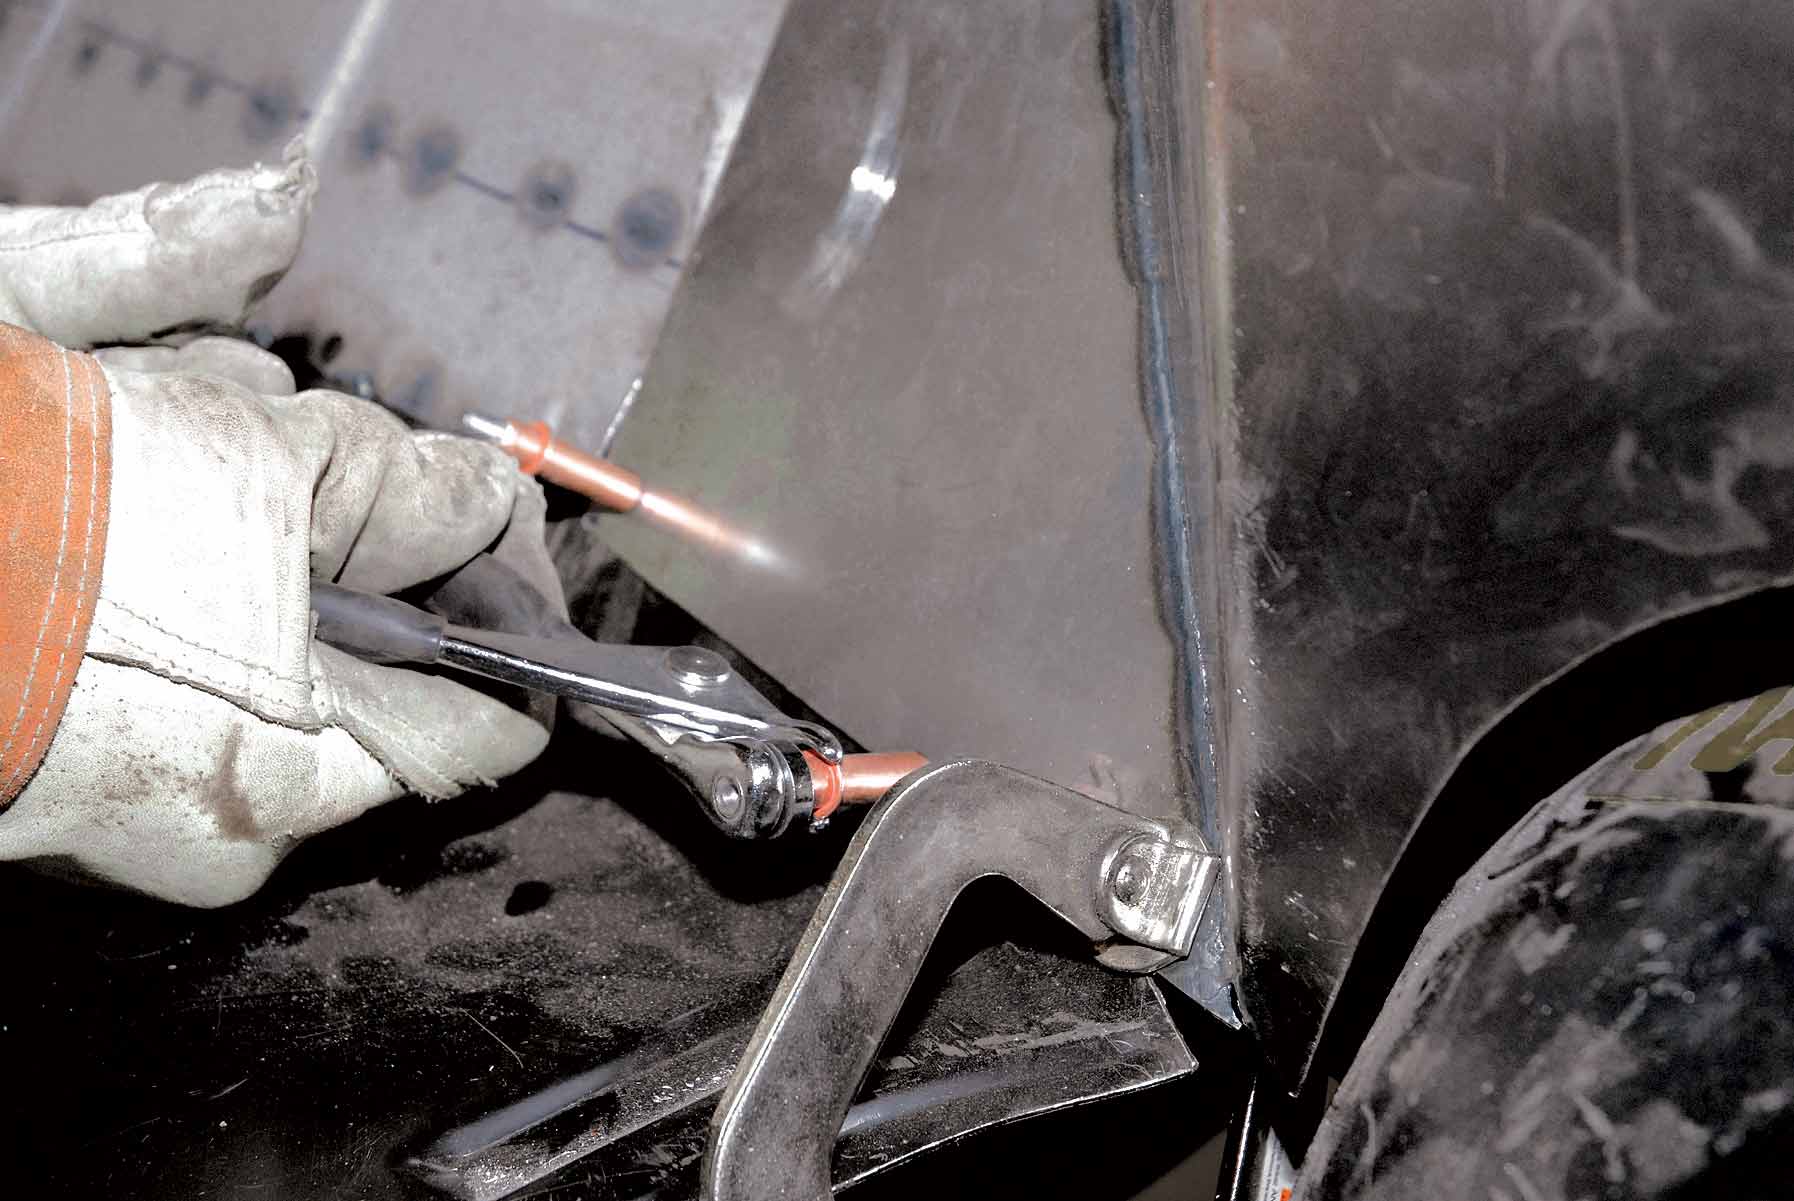
71-72. In these photos, we see our installer welding on the passenger’s-side firewall blank, which was made from a contoured 12x12-inch piece of 18-gauge sheetmetal.
71-72. In these photos, we see our installer welding on the passenger’s-side firewall blank, which was made from a contoured 12x12-inch piece of 18-gauge sheetmetal.
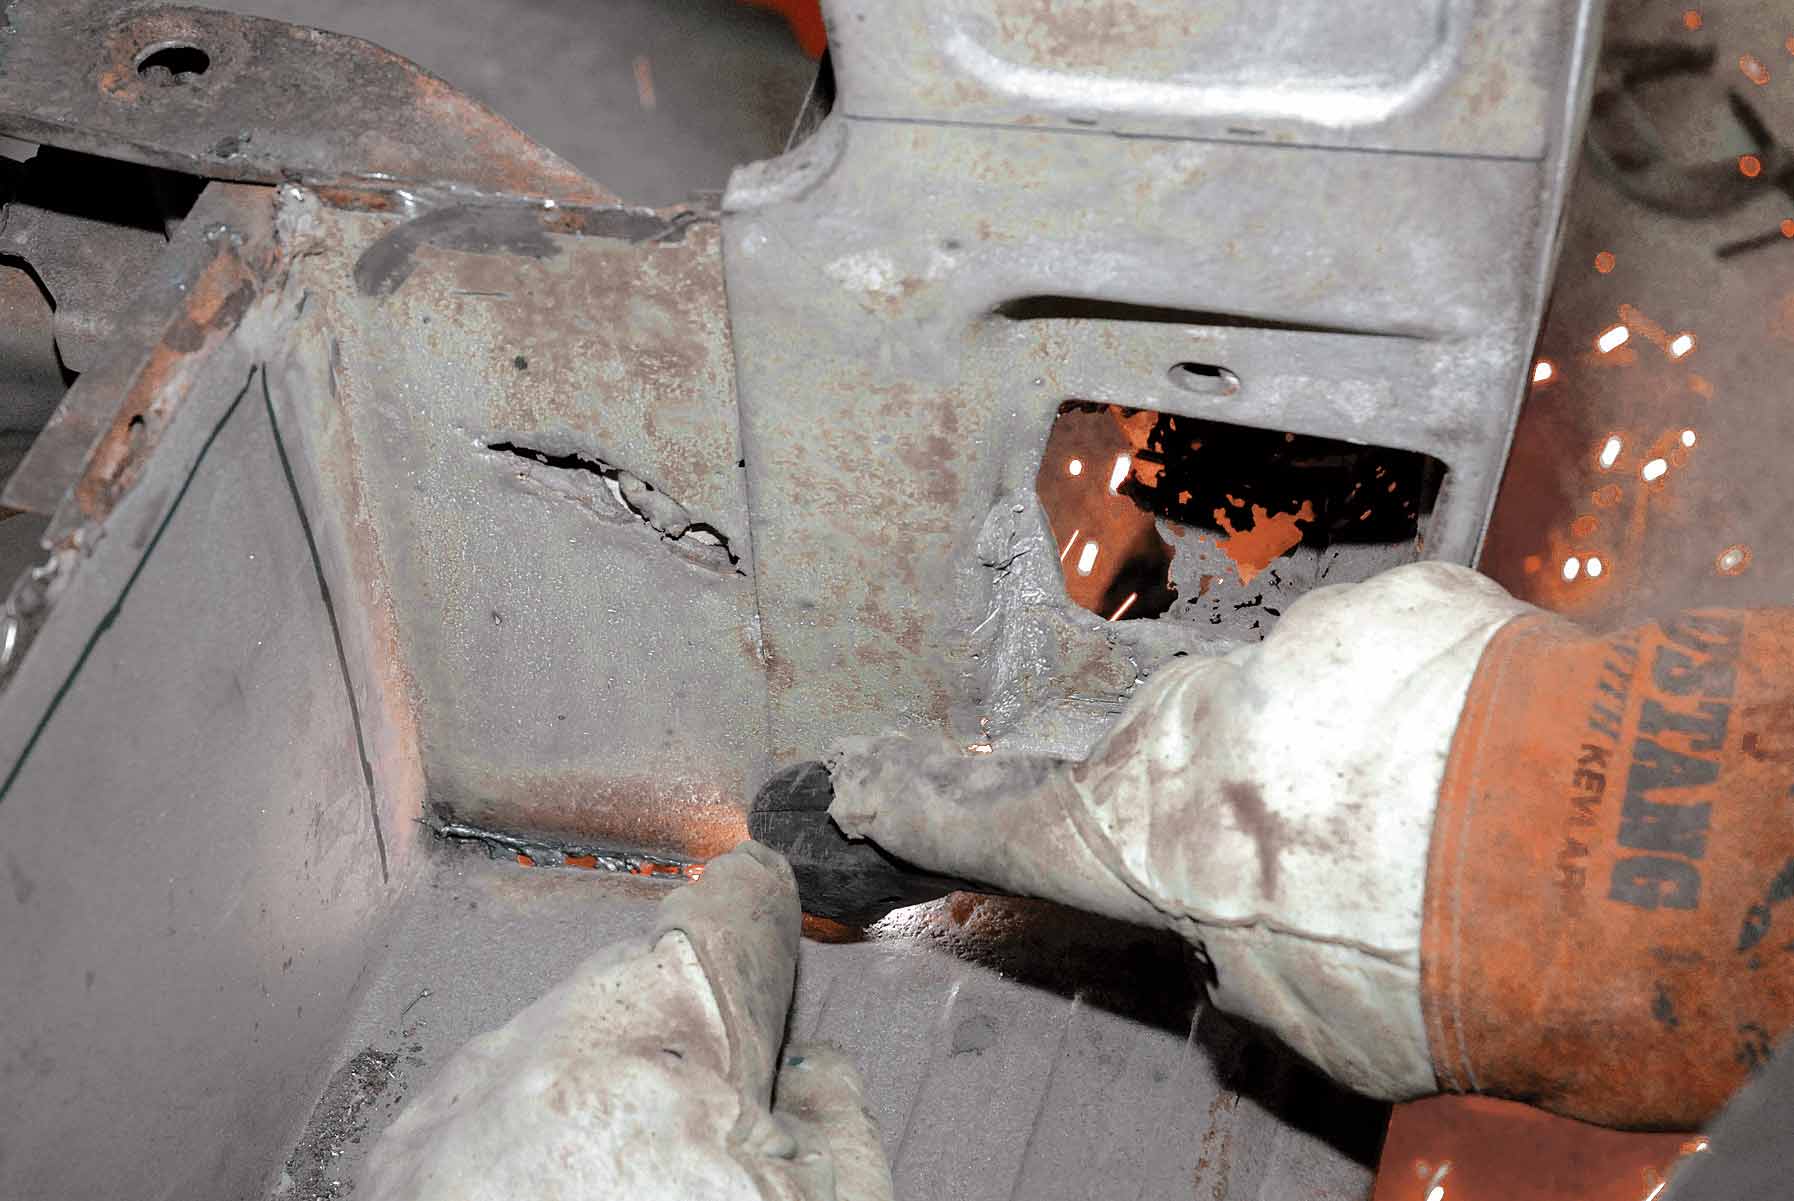
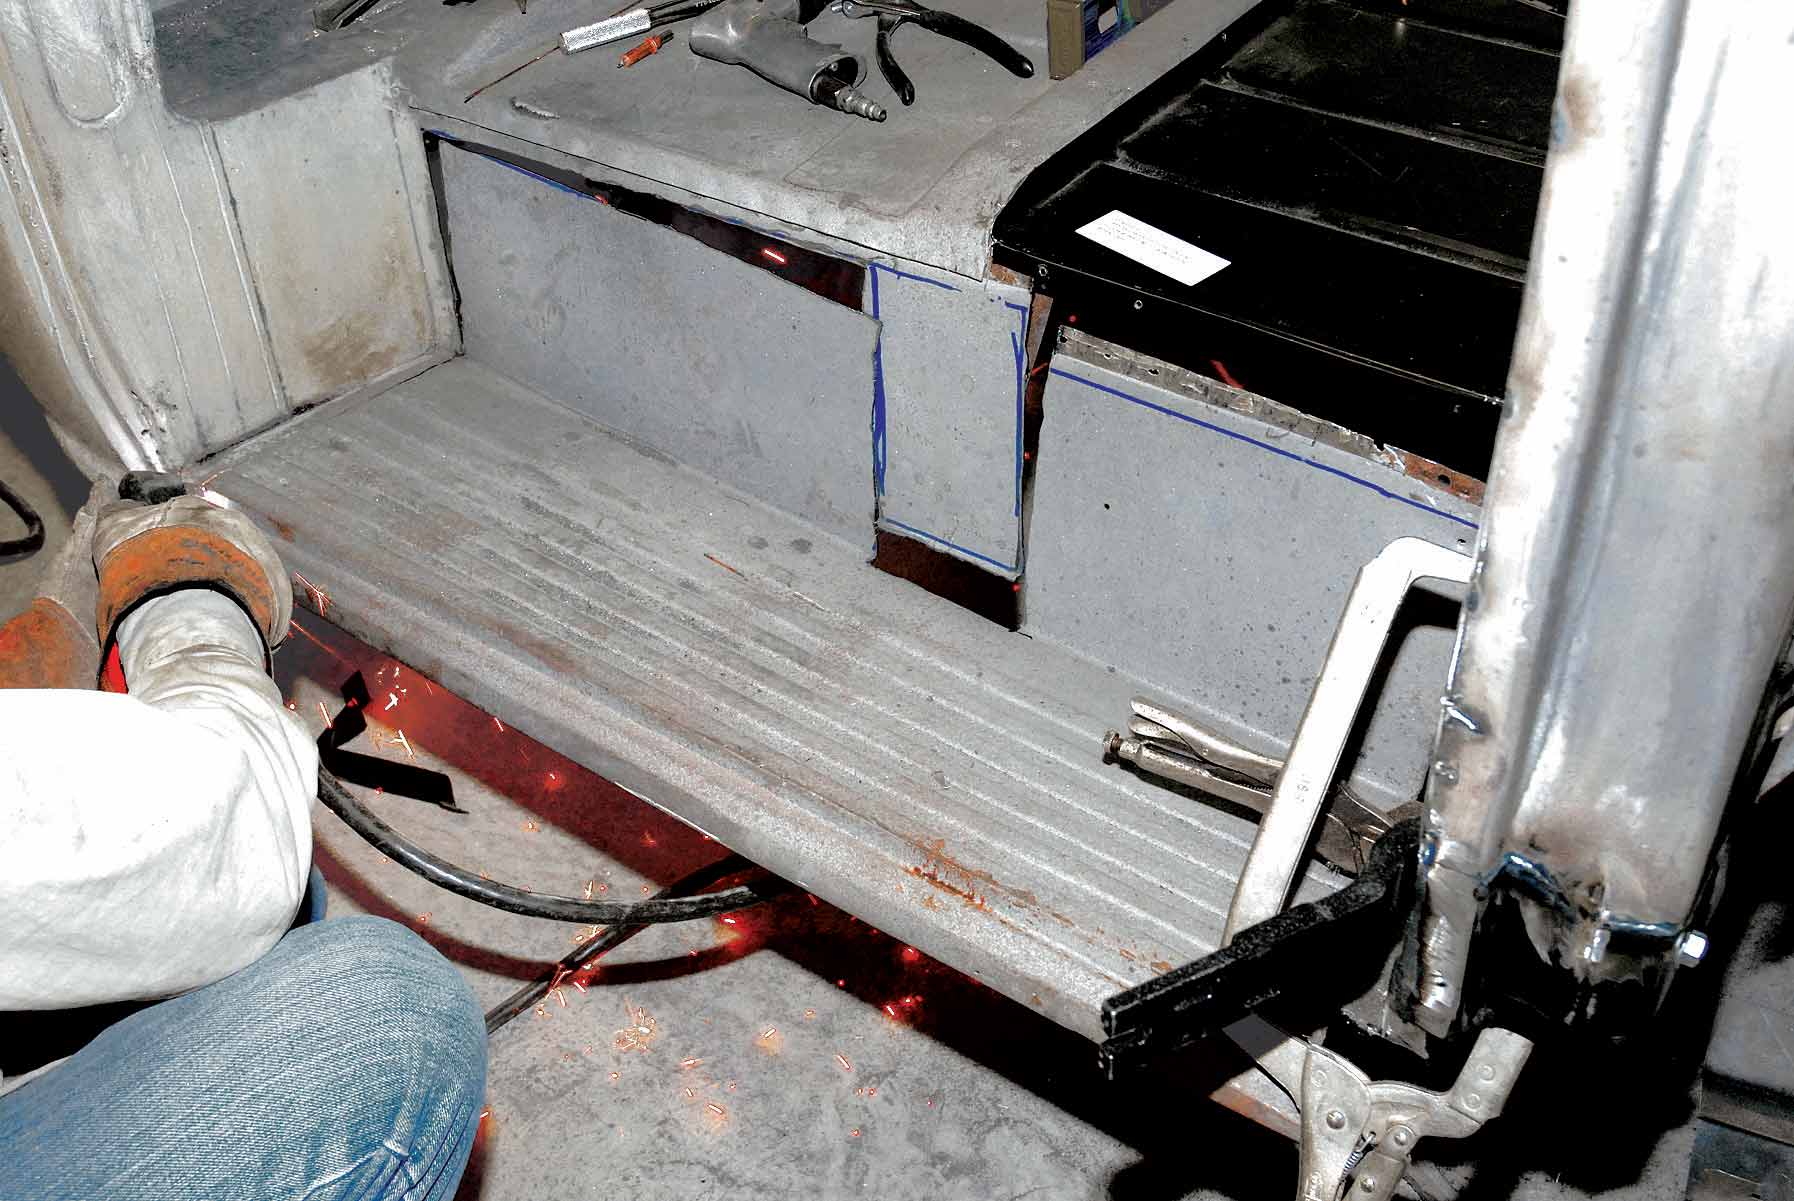
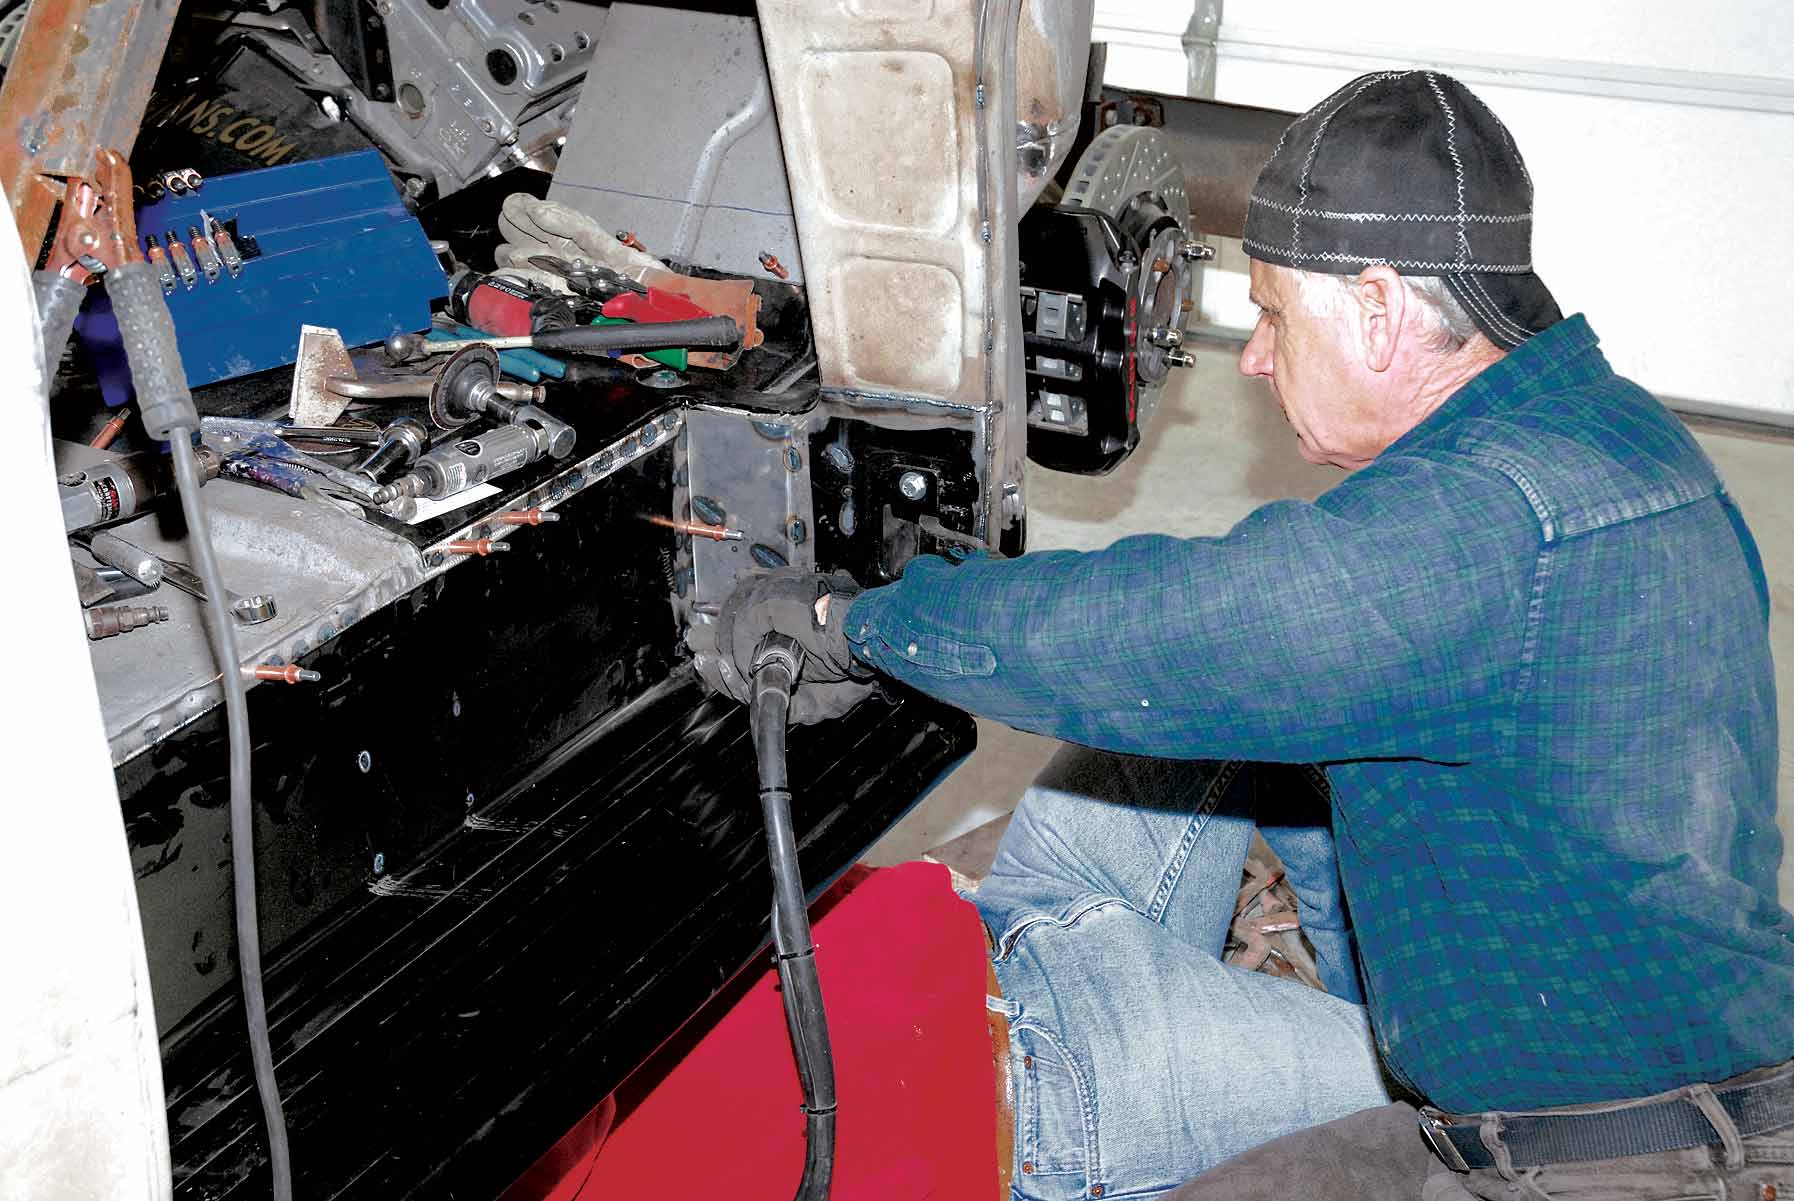
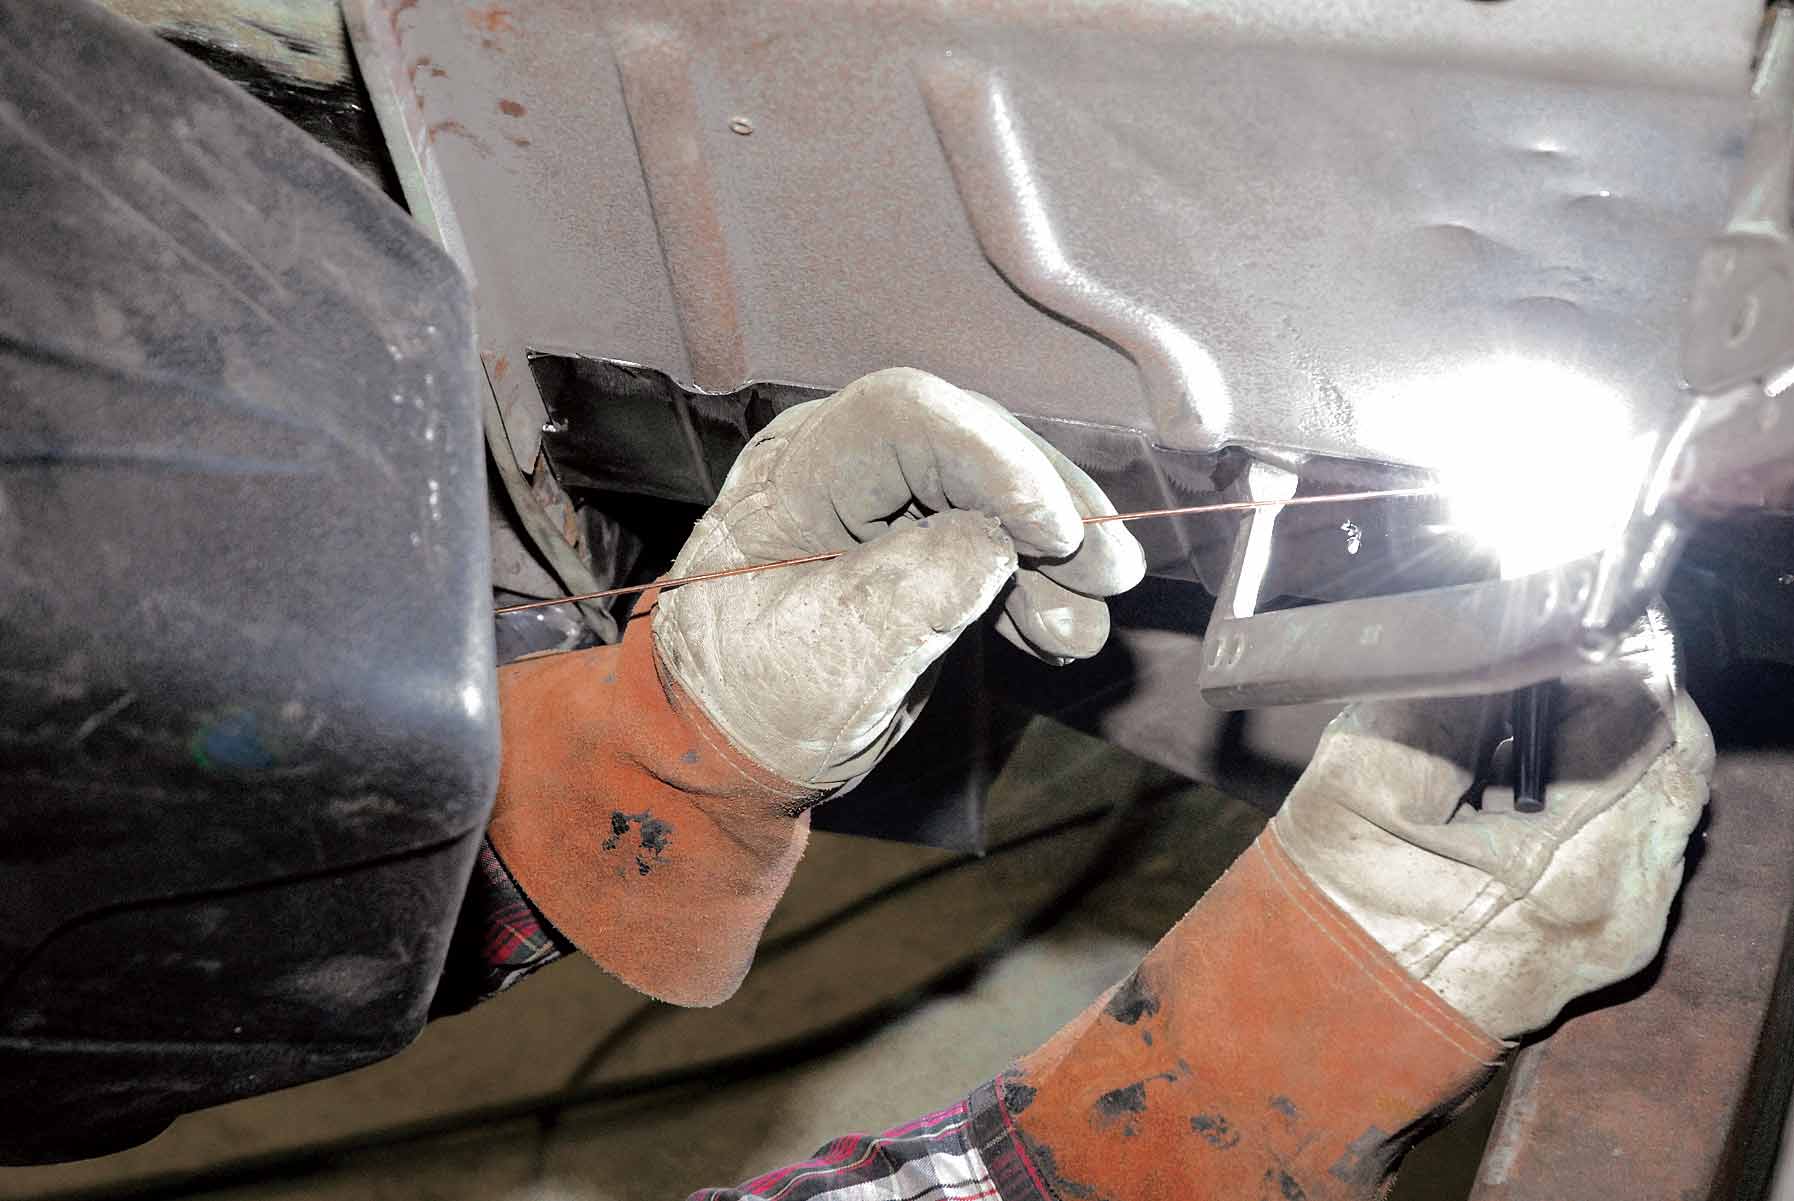
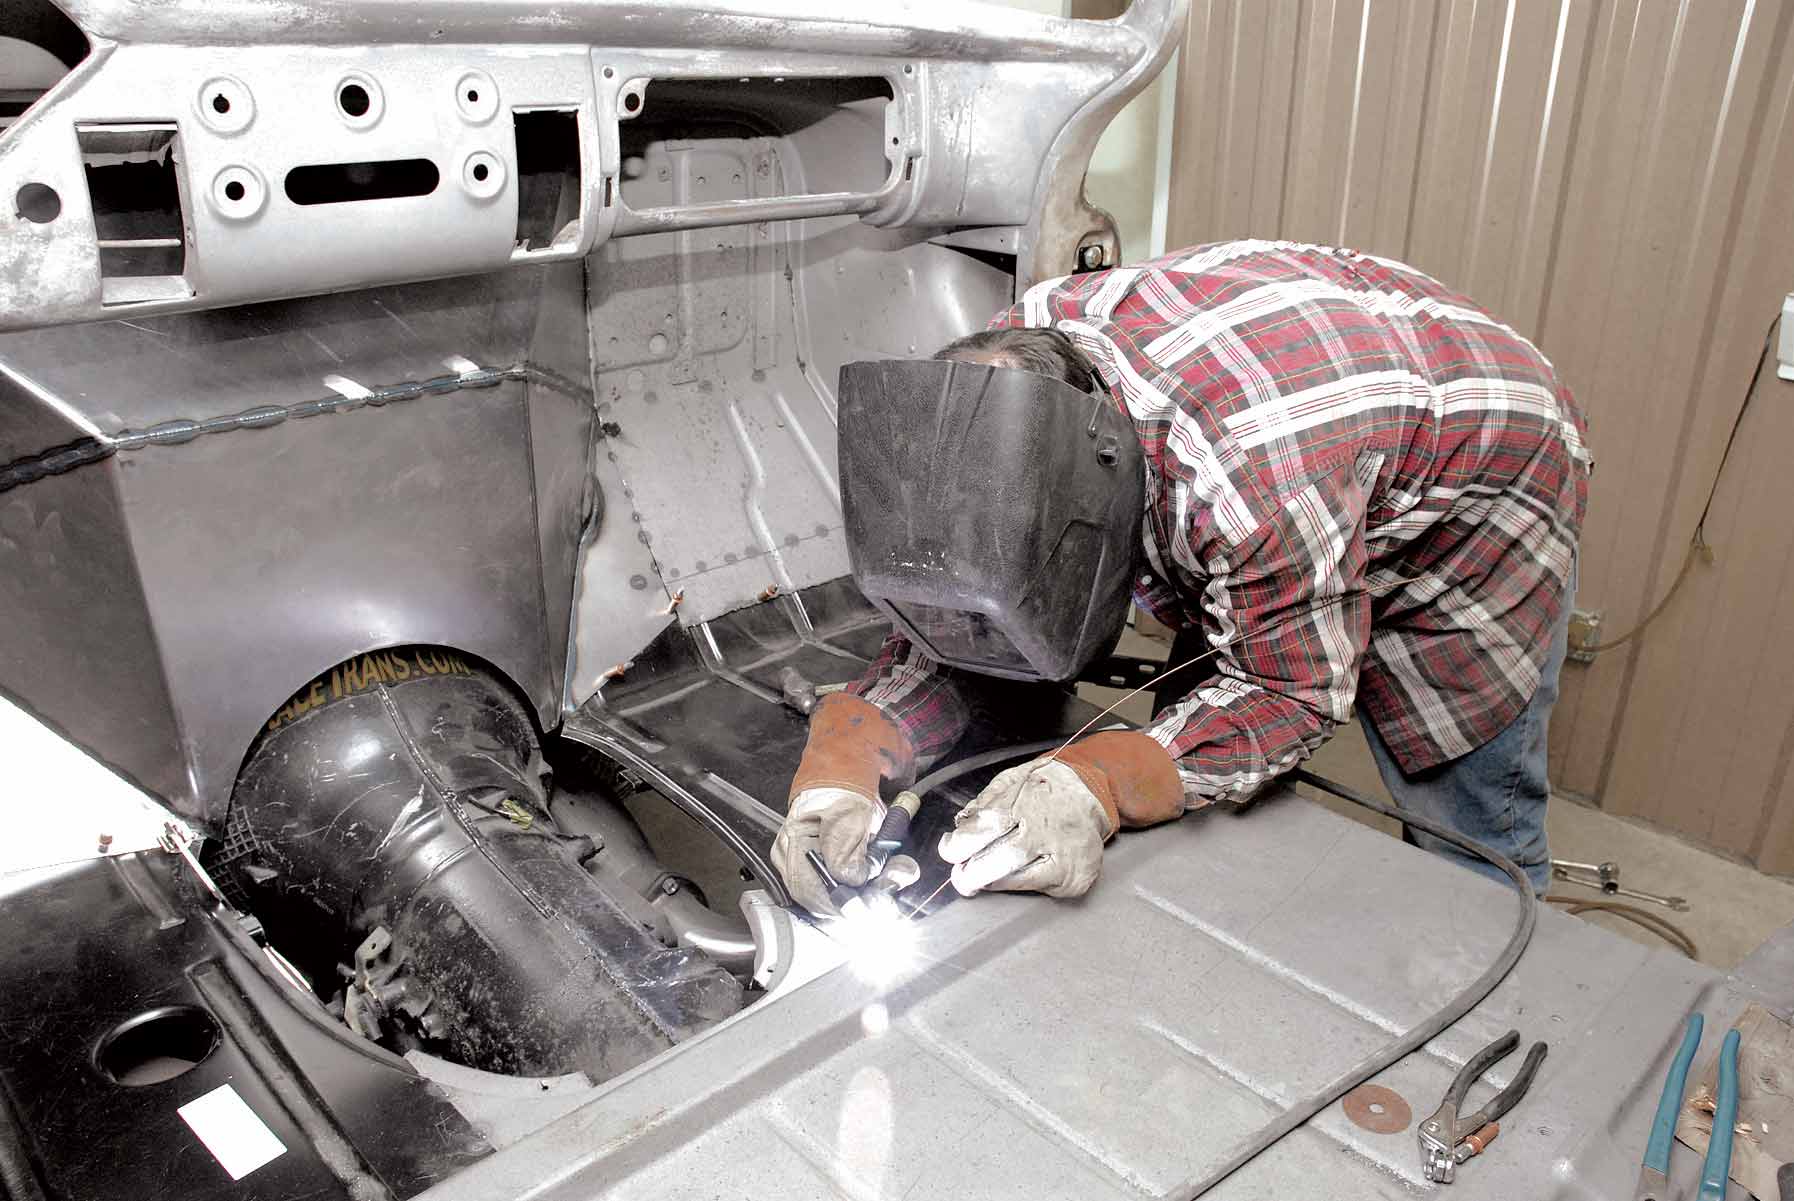
73. With the exterior of the firewall tacked in place, Barker finish-welds in the new Classic Industries reproduction floor panels.
74. Barker works his way around the entire circumference of the firewall. Not one inch of metal surface is overlooked.
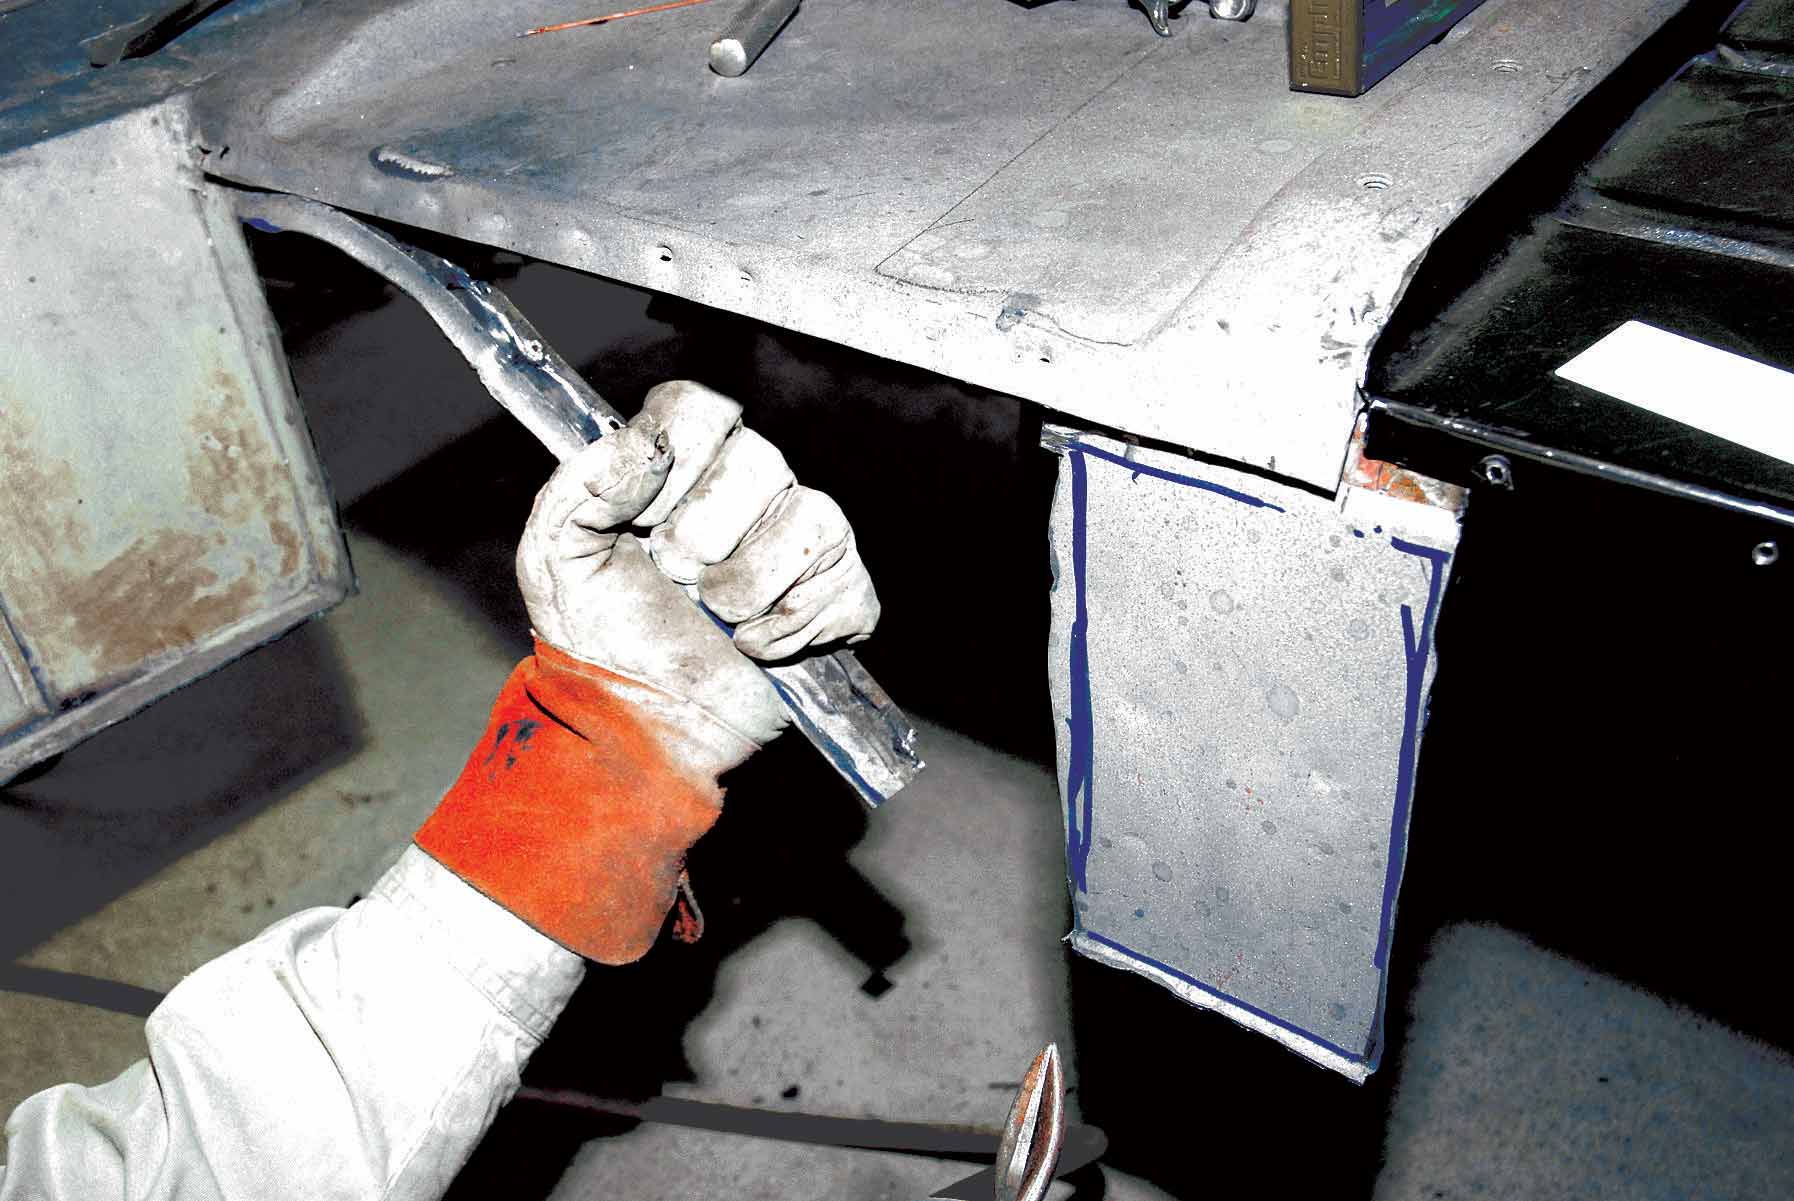
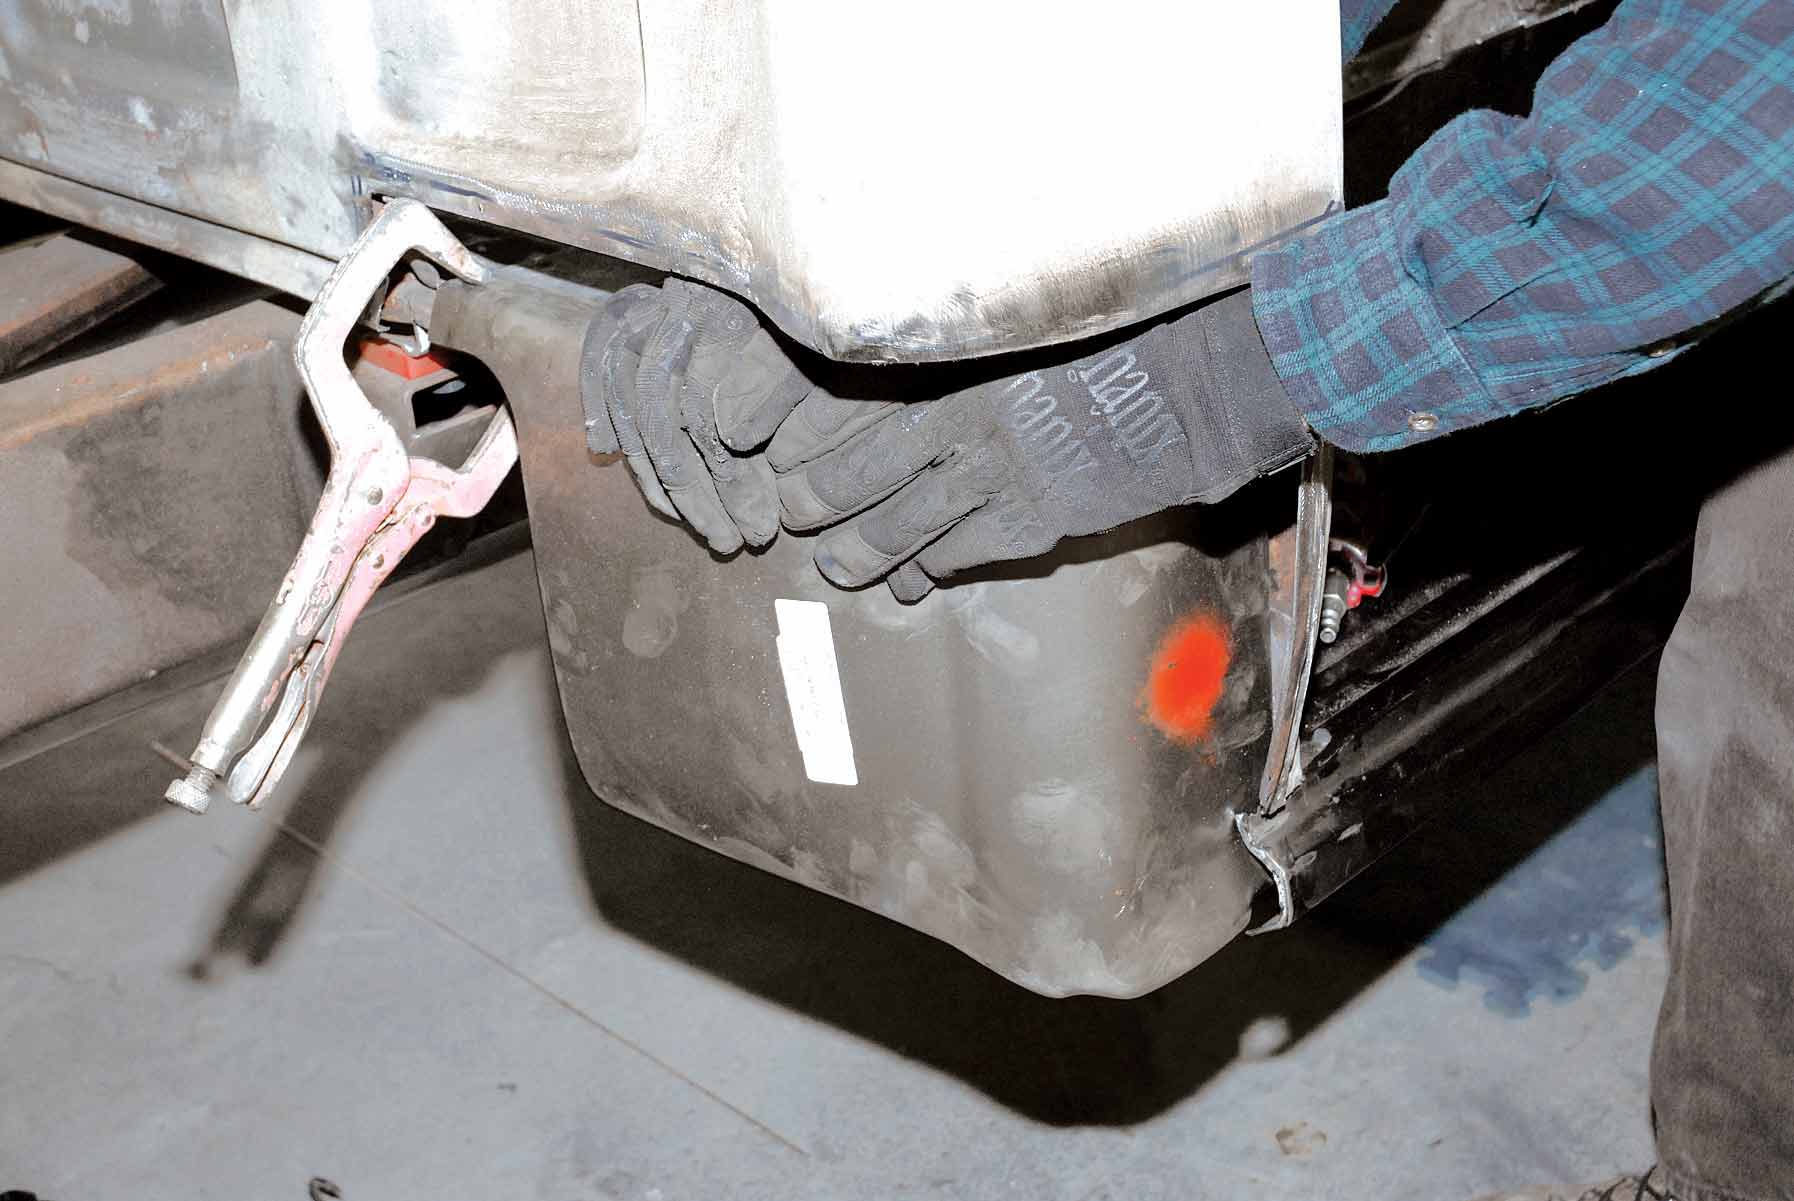
75. The guys at Cimtex Rods blank out the old gas filler cap opening with a 2-3/4-inch welded-in plug.
76. Since the OE brake fluid reservoir won’t be used, Barker also welds up that hole, using another piece of 2-3/4-inch sheetmetal.
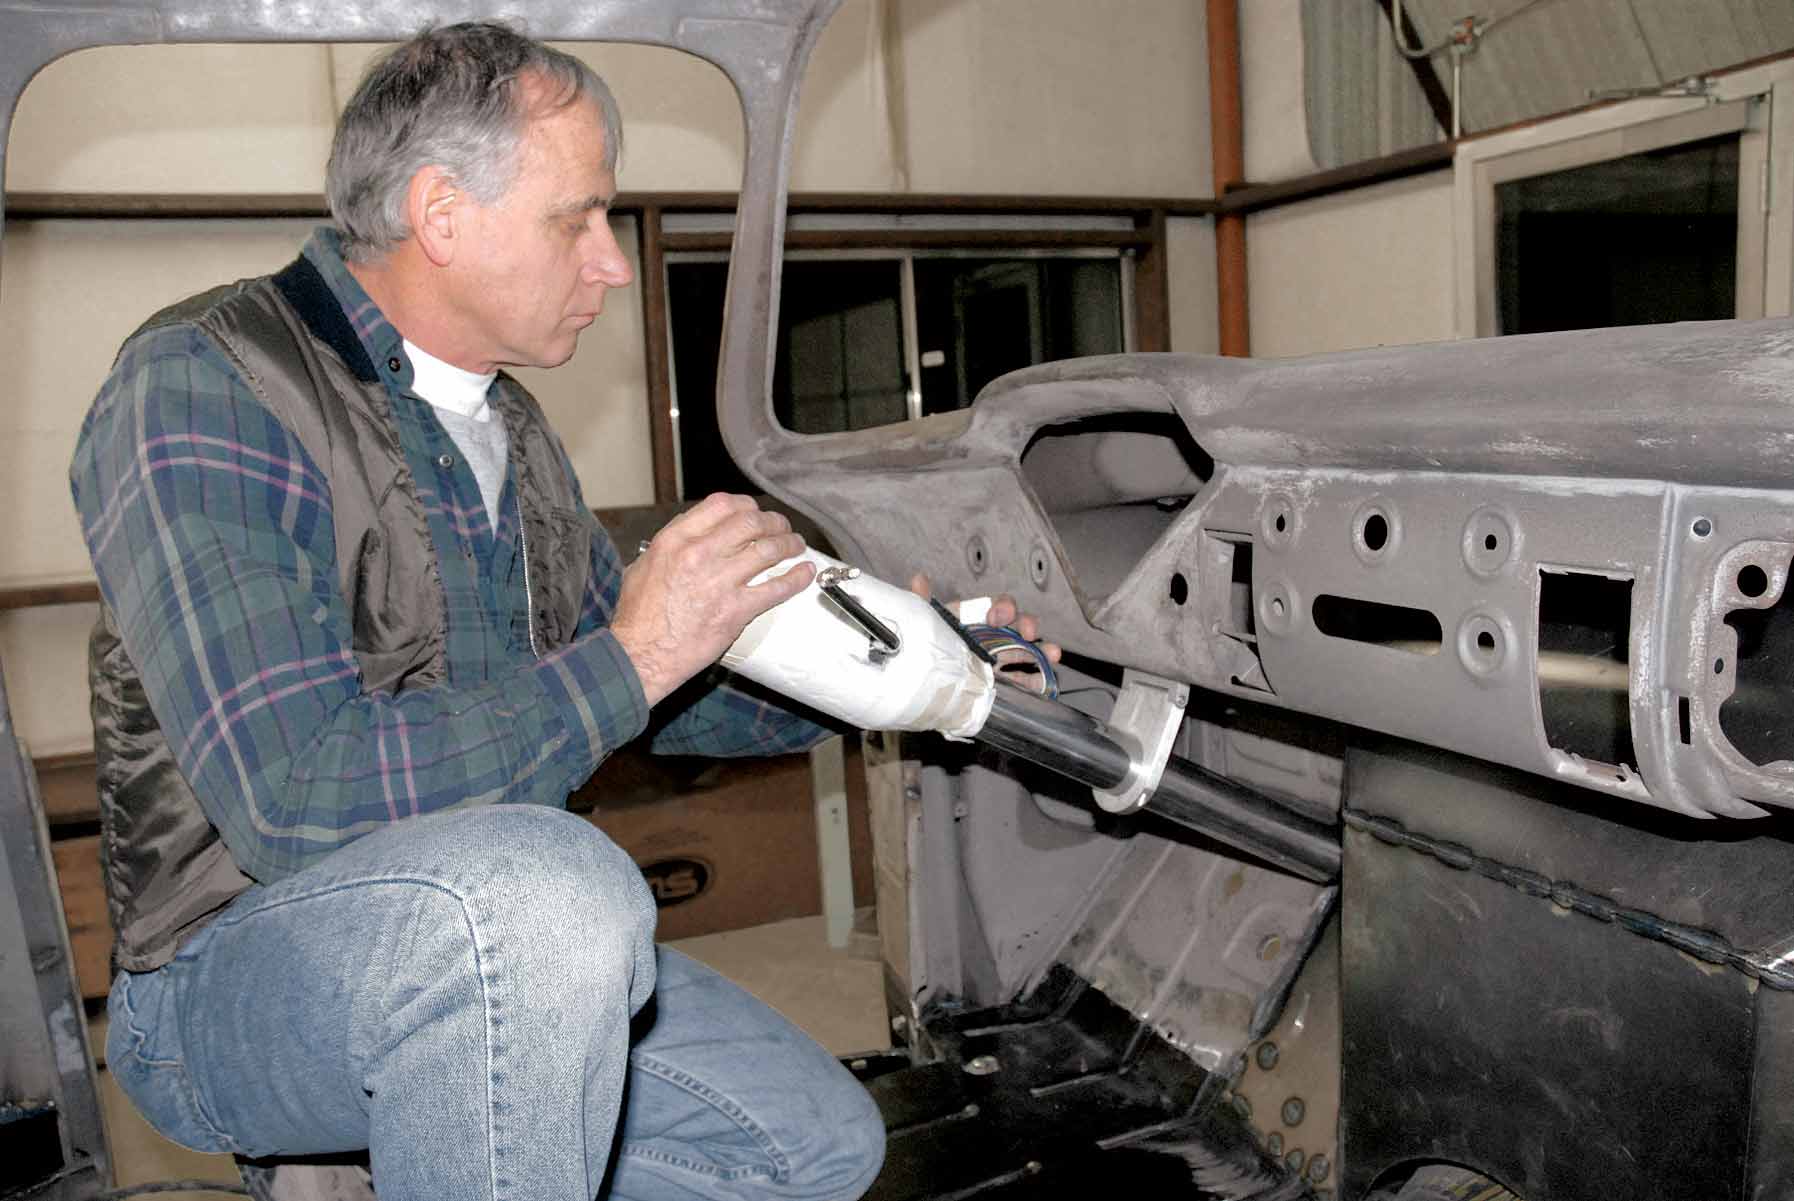
77. With the newly modified firewall completed, Cimbanin test-fits the Super Cameo’s new polished aluminum six-way-tilt ididit billet steering column.
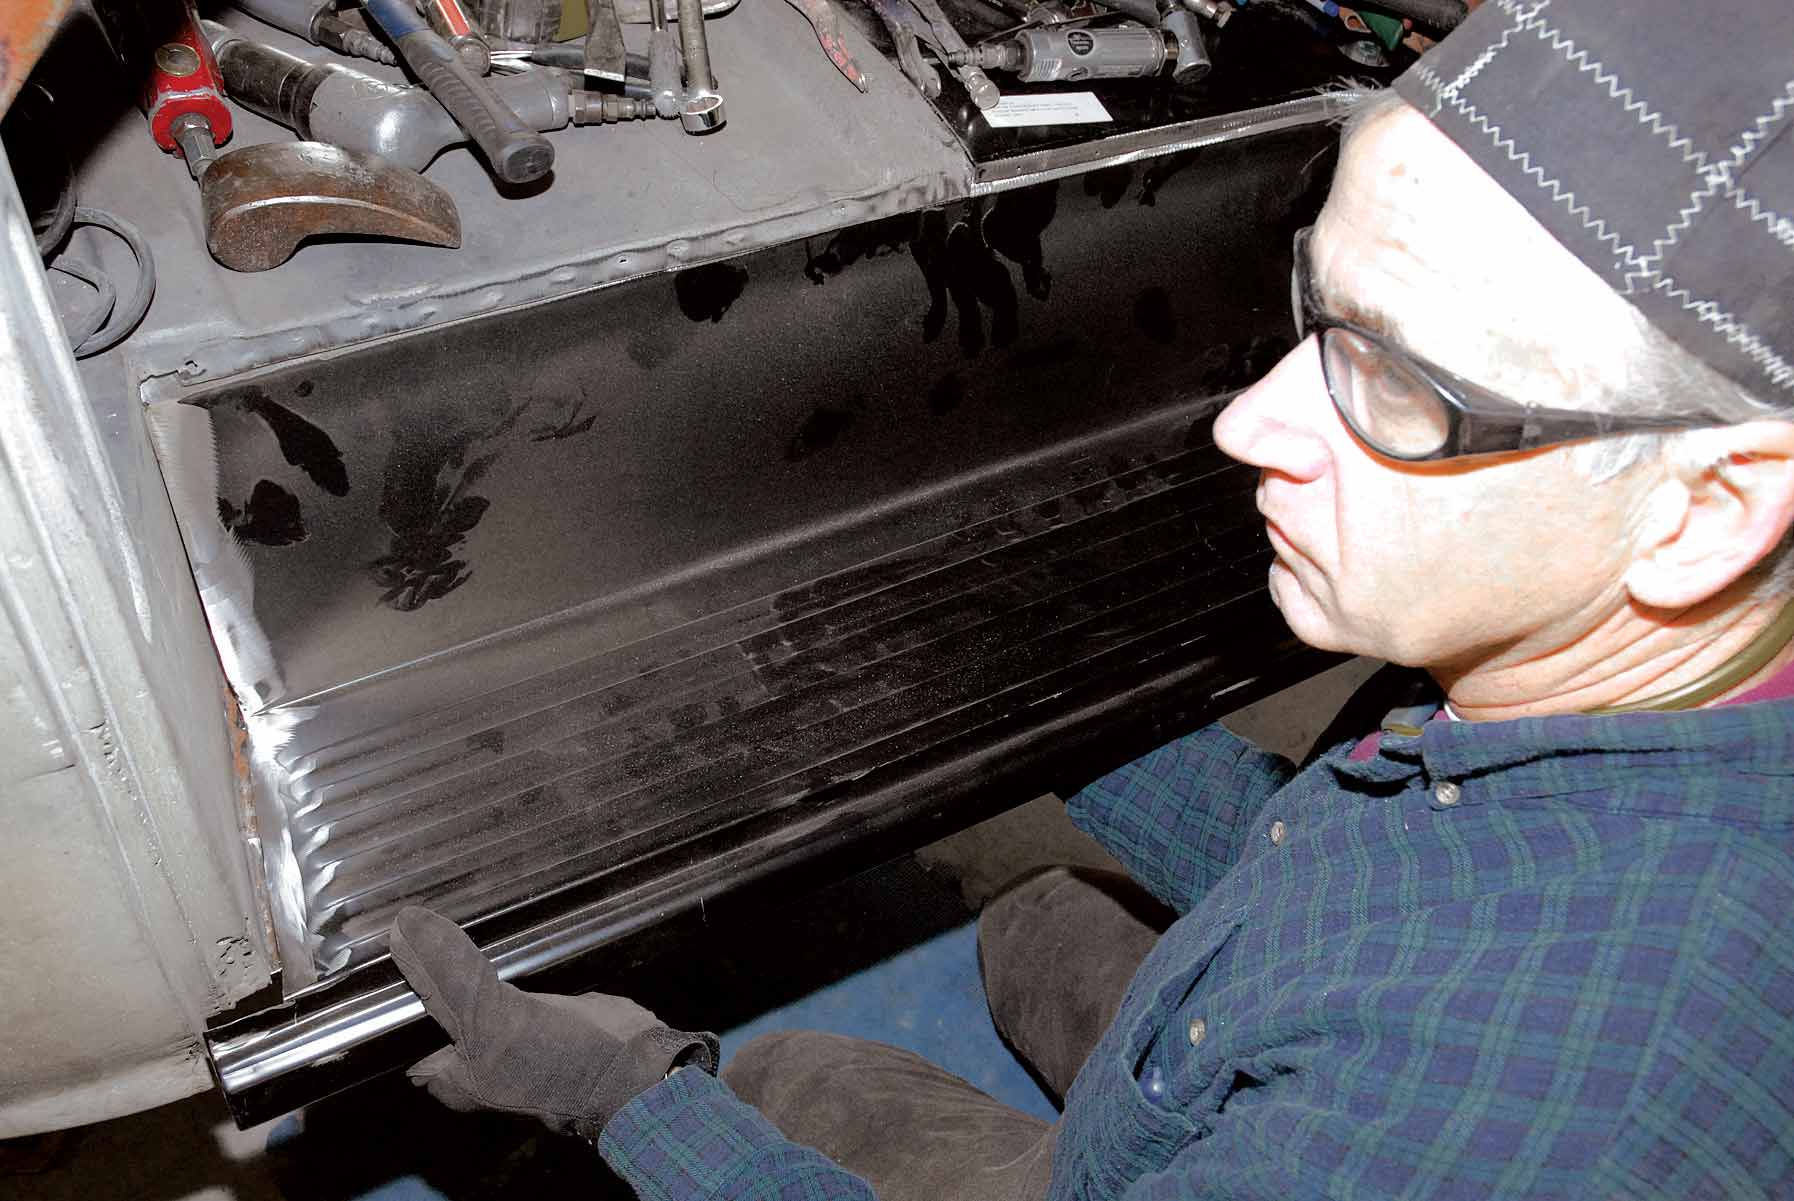
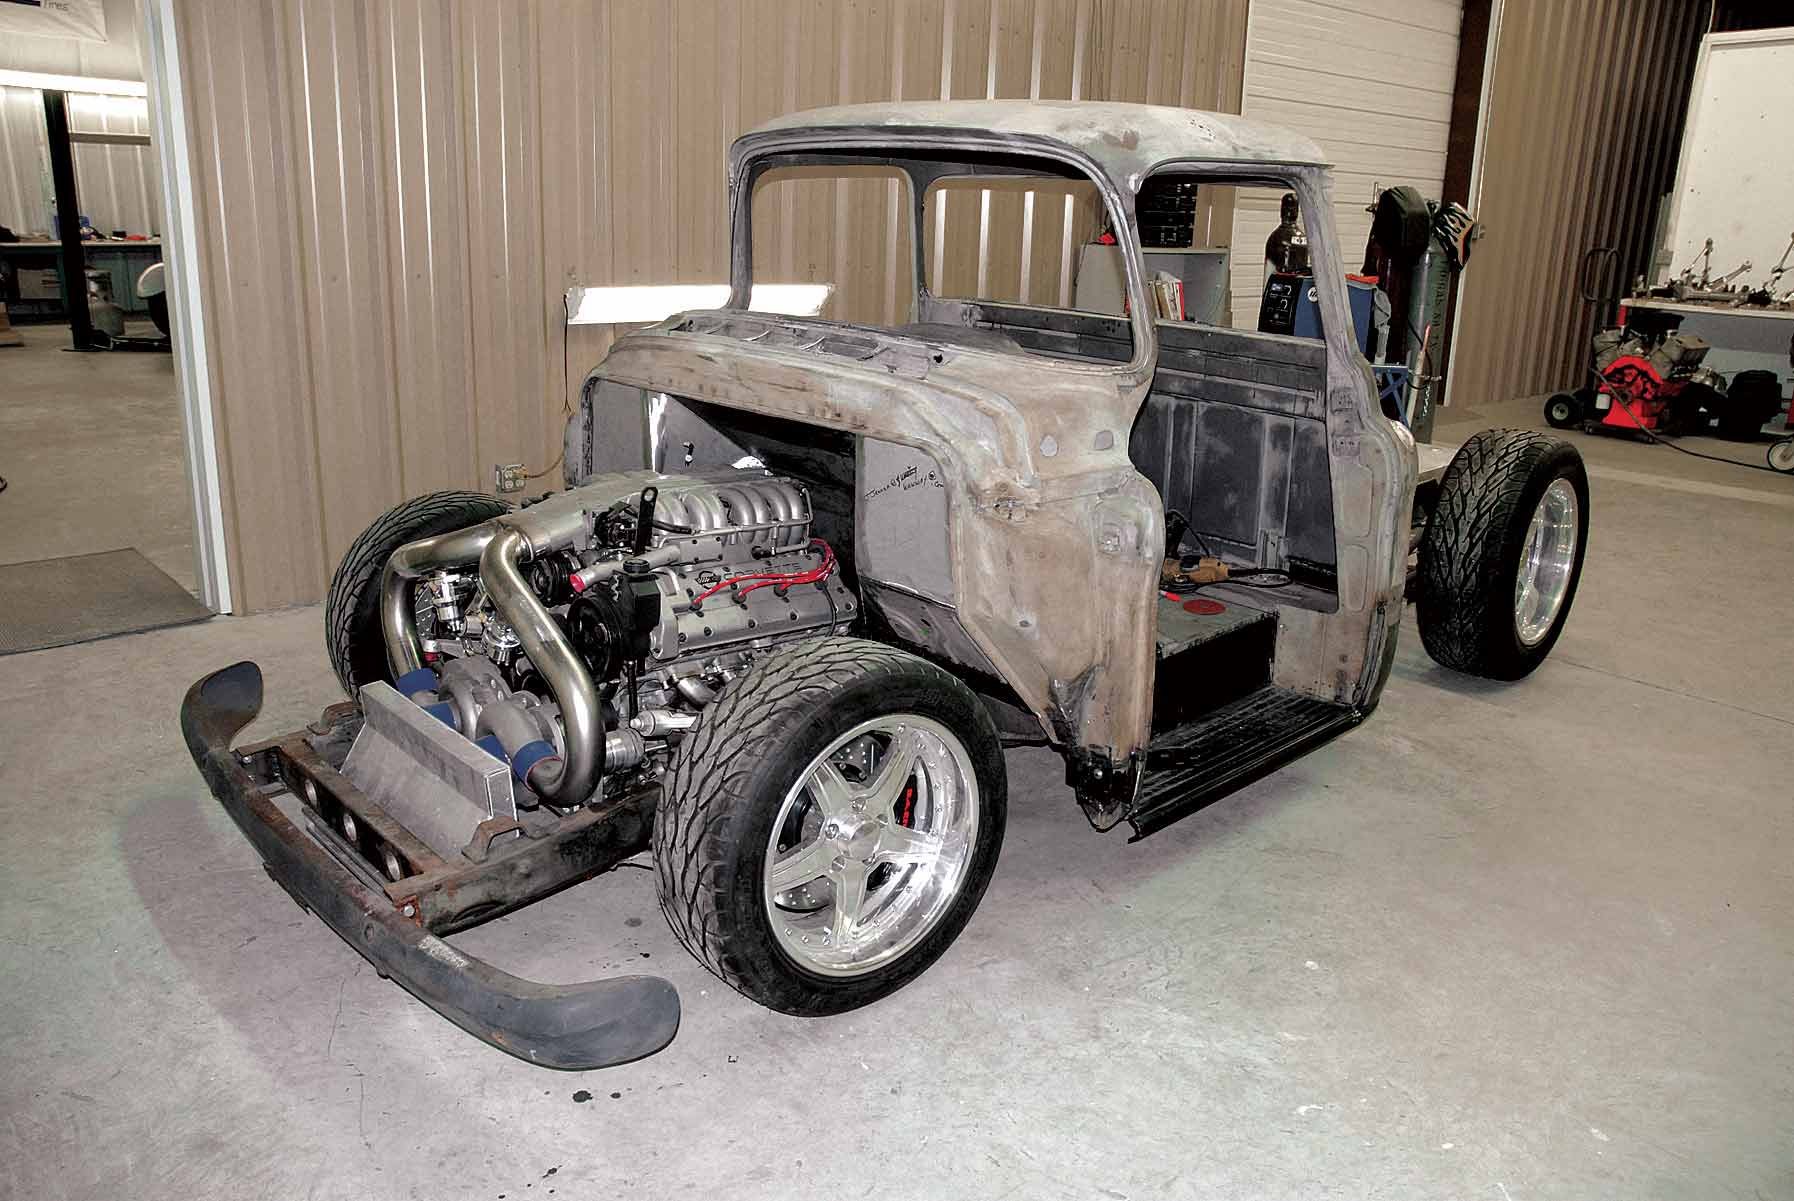
78. Here’s how our Cimtex Super Cameo looks all patched up and ready for some new Dynacorn International doors. In our next issue, we’ll install the doors and chop the top.
ARTICLE SOURCES
Cimtex Rods
P.O. Box 205
Jarrell, TX 76537
512/746-2707
Classic Industries
18460 Gothard St.
Huntington Beach, CA 92648
714/847-6887
Energy Suspension
11311 Via Callejon
San Clemente, CA 92673
949/361-3935
