
THE AUTO BUILDER
Featured

SR61 Starliner
Installing a Custom Accessories Three-Point Harness System
- All Post
- 20 High Priority - SR Super Rod
- Builds
- 25 High Priority - FB Ford Builder
- Cars
- 30 High Priority - AR American Rodder
- 01 Post Status
- 35 High Priority - RD Rodders Digest
- 40 High Priority - OTR On the Road
- 45 High Priority - SRB Street Rod Builder
- 50 High Priority - TB Truck Builder
- 55 High Priority - BSCENE Buckaroo Scene
- 60 High Priority - FPB Family Power Boat
- Trucks
- Swaps
- Performance Boats
- _000 Home Sliders
- Modern/Future Tech
- Builders
- 00 Sidebars
- Manufacturers
- 05 High Priority - HCI Hot Compact Imports
- 05 Publications
- 10 High Priority - CR Chevy Rumble
- Back
- Fuel System
- Electrical
- Exhaust
- Transmission / Drivetrain
- Suspension
- Steering
- Brakes
- Wheels and Tires
- Interior
- Exterior
- Accessories
- Chassis
- Engine
- Power Adders
- Back
- Transmission / Drivetrain
- Suspension
- Steering
- Brakes
- Wheels and Tires
- Interior
- Exterior
- Accessories
- Chassis
- Engine
- Fuel System
- Power Adders
- Electrical
- Exhaust
- Back
- Brakes
- Wheels and Tires
- Interior
- Exterior
- Accessories
- Chassis
- Engine
- Electrical
- Exhaust
- Fuel System
- Transmission / Drivetrain
- Suspension
- Power Adders
- Steering
- Back
- Exterior
- Accessories
- Power Adders
- Chassis
- Engine
- Electrical
- Exhaust
- Fuel System
- Transmission / Drivetrain
- Suspension
- Steering
- Brakes
- Wheels and Tires
- Interior
- Back
- Engine
- Fuel System
- Electrical
- Power Adders
- Exhaust
- Transmission / Drivetrain
- Suspension
- Steering
- Brakes
- Wheels and Tires
- Interior
- Exterior
- Accessories
- Chassis
- Back
- Fuel System
- Electrical
- Exhaust
- Transmission / Drivetrain
- Power Adders
- Suspension
- Steering
- Brakes
- Wheels and Tires
- Interior
- Exterior
- Accessories
- Chassis
- Engine
- Back
- Transmission / Drivetrain
- Suspension
- Steering
- Brakes
- Wheels and Tires
- Power Adders
- Interior
- Exterior
- Accessories
- Chassis
- Engine
- Fuel System
- Electrical
- Exhaust
- Back
- Steering
- Interior
- Accessories
- Power Adders
- Exterior and Hull
- Engine
- Fuel System
- Electrical
- Outdrives
- Back
- Power Adders
- Chassis
- Engine
- Electrical
- Exhaust
- Fuel System
- Transmission / Drivetrain
- Suspension
- Steering
- Brakes
- Wheels and Tires
- Interior
- Exterior
- Accessories
- Back
- Chrysler
- Mercury
- Subaru
- Volvo
- Volkswagen
- Chevrolet
- Cadillac
- Pontiac
- GMC
- AMC
- BMW
- Oldsmobile
- Buick
- Jeep
- Acura
- Lincoln
- Mitsubishi
- Ford
- Dodge
- Honda
- Nissan
- Toyota
- Plymouth
- Back
- 05 Pub HCI Hot Compact Imports
- 15 Pub 4x4 4x4 Builder
- 20 Pub SR Super Rod
- 25 Pub FB Ford Builder
- 30 Pub AR American Rodder
- 35 Pub RD Rodders Digest
- 40 Pub OTR On the Road
- 55 Pub BSCENE Buckaroo Scene
- 10 Pub CR Chevy Rumble
- 50 Pub TB Truck Builder
- 60 Pub FPB Family Power Boat
- 45 Pub SRB Street Rod Builder
- Back
- Steve Sellers
- Bobby Alloway
- Chip Foose
- Boyd Coddington
- Rad Rides by Troy
- Cal Auto Creations
- Ring Brothers
- George Barris
- Jesse James
- West Coast Customs
- Jack Fuller
- Carl Casper
- Bob Cullipher
- J.F. Launier
- Jerry Nichols
- Back
- Street Rods
- Hot Rods
- Late Model
- Drag Race
- Handling
- Compact Cars
- Fuel System
- Electrical
- Exhaust
- Transmission / Drivetrain
- Suspension
- Steering
- Brakes
- Wheels and Tires
- Interior
- Exterior
- Accessories
- Chassis
- Engine
- Power Adders
- Transmission / Drivetrain
- Suspension
- Steering
- Brakes
- Wheels and Tires
- Interior
- Exterior
- Accessories
- Chassis
- Engine
- Fuel System
- Power Adders
- Electrical
- Exhaust
- Brakes
- Wheels and Tires
- Interior
- Exterior
- Accessories
- Chassis
- Engine
- Electrical
- Exhaust
- Fuel System
- Transmission / Drivetrain
- Suspension
- Power Adders
- Steering
- Exterior
- Accessories
- Power Adders
- Chassis
- Engine
- Electrical
- Exhaust
- Fuel System
- Transmission / Drivetrain
- Suspension
- Steering
- Brakes
- Wheels and Tires
- Interior
- Power Adders
- Chassis
- Engine
- Electrical
- Exhaust
- Fuel System
- Transmission / Drivetrain
- Suspension
- Steering
- Brakes
- Wheels and Tires
- Interior
- Exterior
- Accessories
- Engine
- Fuel System
- Electrical
- Power Adders
- Exhaust
- Transmission / Drivetrain
- Suspension
- Steering
- Brakes
- Wheels and Tires
- Interior
- Exterior
- Accessories
- Chassis
- Back
- 05 Post Imported
- 20 Post Missing Images (All)
- 25 Post Missing Images (Partial)
- 15 Post In Progress
- 30 Post Internal Review
- 40 Post On Hold
- 27 Post Missing Content
- 50 Post Approved
- 10 Post Images Imported
- 17 Post Missing TXT Files
- 18 Post Missing PDF Files
- Back
- Chassis
- Engine Swaps
- Interior Swaps
- Driveline
- Back
- Street Trucks
- OffRoad Trucks
- Fuel System
- Electrical
- Exhaust
- Transmission / Drivetrain
- Power Adders
- Suspension
- Steering
- Brakes
- Wheels and Tires
- Interior
- Exterior
- Accessories
- Chassis
- Engine
- Transmission / Drivetrain
- Suspension
- Steering
- Brakes
- Wheels and Tires
- Power Adders
- Interior
- Exterior
- Accessories
- Chassis
- Engine
- Fuel System
- Electrical
- Exhaust
- Back
- 01 Sidebar Left
- 01 Sidebar Right
Spotlighter
POPULAR READS
-
Product Spotlight: Bill Mitchell Products Aluminum LS Engine Block
-
Product Spotlight: Pyramid Optimized Design Sequential Aurora Taillight for 1964½–1966 Mustang
-
PRODUCT SPOTLIGHT: 60-66 Chevy C10 Fresh Air Vent Block Off Plate
-
PRODUCT SPOTLIGHT: Cam Covers for GEN/3 Coyote from Pyramid Optimized Design
10 Cool Bow Tie Tips
Helpful Hints for Your Next Chevy Project
Author

Josh Kaylor
Photography The Auto Builder Staff
During a recent bench racing session, talk hovered around various tips and tricks that we have seen, used in our own garages or picked up during our various shop visits. The discussion also raised the idea of us gathering more of these ideas for future posts, but to hold you over, here are 10 worthwhile tips that, if they fit your needs, can become some of your own favorites.
These tips are performance-oriented in nature because no matter how good-looking a matching-numbers Chevy might be, getting there and back is vital, as is prepping the car properly and inexpensively with little trouble. While six-figure projects and high-tech billet products flood the market, finding a good deal at the local salvage yard or a worthwhile part left over from a project can be just as exciting and much easier on the wallet.
Even though these are just 10 of the thousands of tech tips and tricks we have in store for you, they are useful for Chevy enthusiasts looking to add performance and power on a budget. We hope that at least one of these tips finds its way into your home garage and saves you a couple of bucks in the process.
1.) CHEVY TO CHEVY
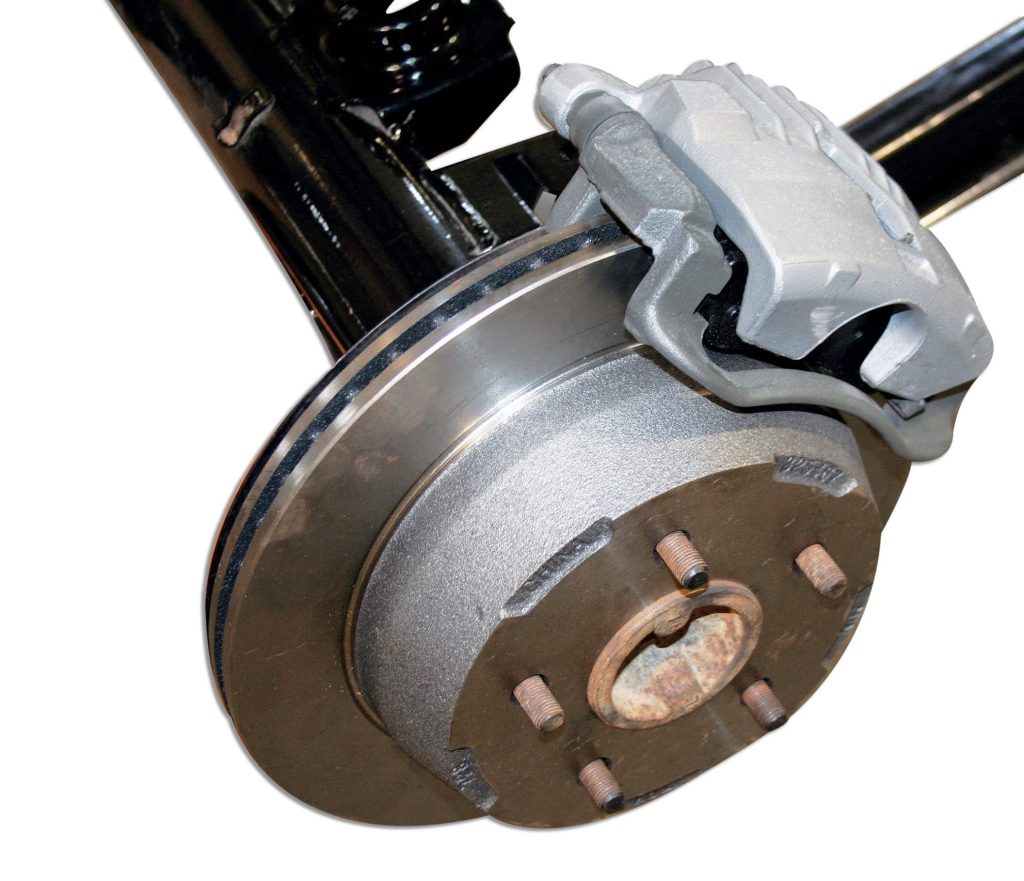
Certainly, the Pro Touring segment of our hobby has had an influence on the way cars are built today, with big wheel/tire packages and big-brakes being just two popular areas. And with so many ’60s and ’70s Chevys still running 10- and 12-bolt rearends, during a recent shop visit we took note as a ’71 Chevelle received a set of very affordable S-10 rear brakes. This conversion requires ’97-’03 S-10 Blazer rear disc brakes, which bolt on easily and only require the fabrication of 3/4-inch spacers between the axle flange and brake mounting bracket. How you accomplish this is strictly up to you, but a 3/4-inch plate works best. The conversion will require the S-10 rotors, calipers, pads and mounting flanges. For a full install on this disc brake conversion with a ’71 Chevelle, check out the article “Scrapyard Binders” here.
2.) UNCOMMON FIVE-SPEED SWAP
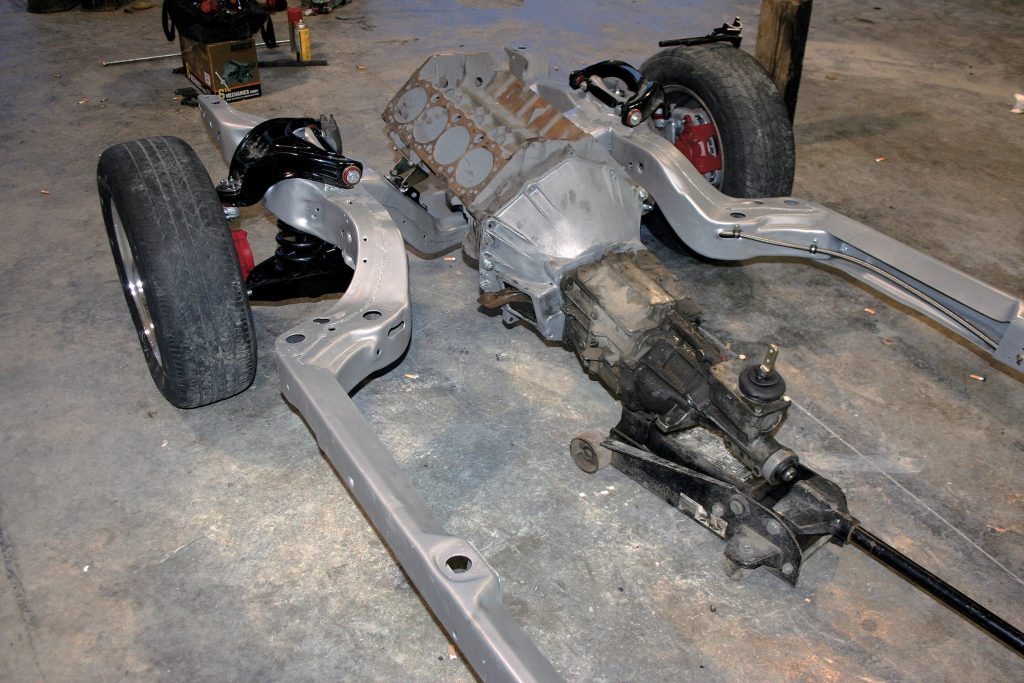
The use of modern, more powerful engines has long been a popular swap, and now with new technology all packaged and ready to go, new power choices are growing rapidly. But if you happen to be a Chevy zealot stuck on the numbers and older-looking drivetrains and power accessories, your choices are somewhat limited. However, if swapping parts to look old works for you, here’s one inexpensive way to add a little zip to your automatic-equipped Chevy. Swap out that that old Powerglide for a new modern five-speed. This low-buck install is possible by swapping in a bell housing from a late ’80s Jeep equipped with an inline six and bolting up a T-5 trans from a Fox-body Mustang. While the T-5 was also available in the IROC Camaro, the more readily available Mustang application also fits the Jeep bell housing, which has the Chevrolet bolt pattern up front and the T-5 pattern in the rear.
3.) BODY POWER STEERING BOX
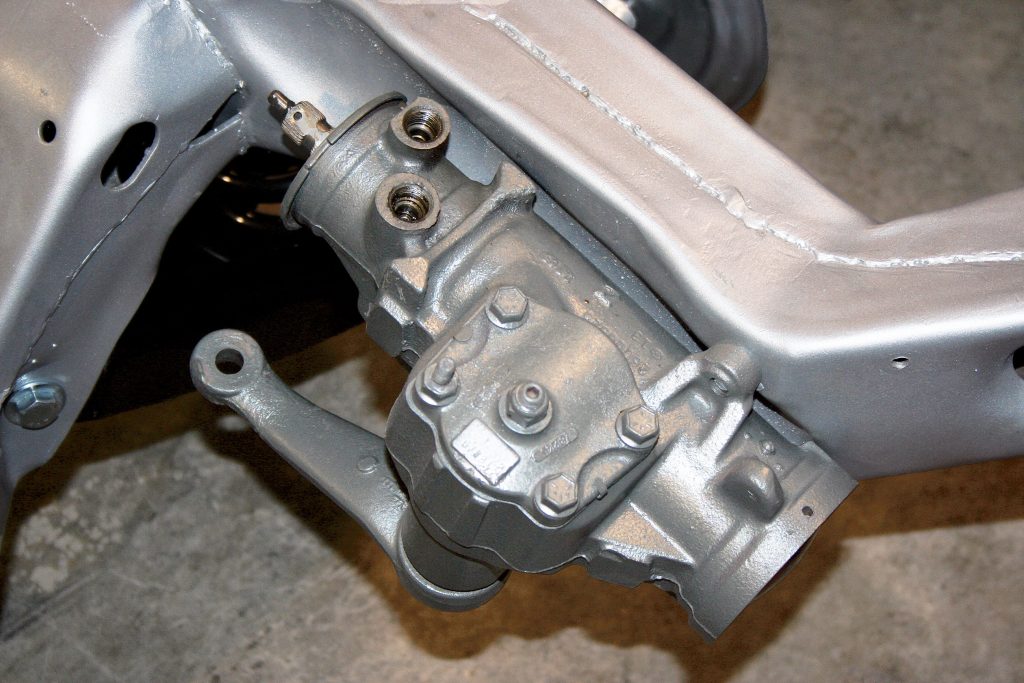
If excessive side-to-side steering play has worn you down and you’re looking for an update, rather than a rebuild for your GM A-body, here’s an affordable solution that can work with a simple trip to your local salvage yard. The ’91 Chevrolet Caprice police interceptor quick-ratio power steering box will bolt directly in place of the three-bolt GM power steering box found on the ’70-’72 Chevelle, Monte Carlo and El Camino. It must be the three-bolt Chevelle box (many were equipped with a four-bolt). The Caprice steering box is the new-style, quick-ratio design with three turns lock-to-lock, which will enhance the steering response of early Chevys. We found just such a Caprice box at a local salvage yard for only $50. If you check online, they cost about $275 refurbished. Check out your local junkyard, but know that these are not new and might need reconditioning.
4.) THE 4/7 SWAP
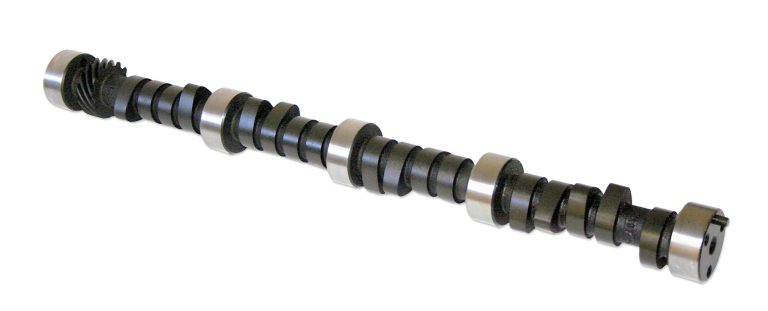
If you haven’t heard of the 4/7 swap, it’s a trick that’s been used by racers for a few years. It is a cam timing modification created for the small block to better optimize power output by smoothing the torque curve with less variation between data points and to optimize volumetric efficiency of all eight cylinders for better cylinder filling. The key to the swap is changing the firing order from 1-8-4-3-6-5-7-2 to 1-8-7-3-6-5-4-2. Some pro engine builders claim that firing the seventh cylinder directly after cylinder 5 (adjacent, same-side cylinders) makes it more difficult for the engine to be as efficient (volumetric efficiency) cylinder-to-cylinder. To address this notion, the firing order was altered to better optimize the firing order as cylinders five 5 and 7 are adjacent to one another (on the same side) yet are fired one after the other. The 4-to-7 swap now fires 4 immediately after 5, which is located across the engine rather than adjacent. Obviously, the stock cam timing no longer works, and the spark plug wires to the distributor (if so equipped) need rearranging. Because the camshaft lobe indexing must be altered between the affected intake and exhaust valves for the cylinders 4 and 7, the folks at Comp Cams offer some of their more popular grinds for a 4/7-swap camshaft. For more info on these 4/7 cams, go to the Comp Cams website or call the helpline at 800/999-0853.
5.) UNNECESSARY MESS
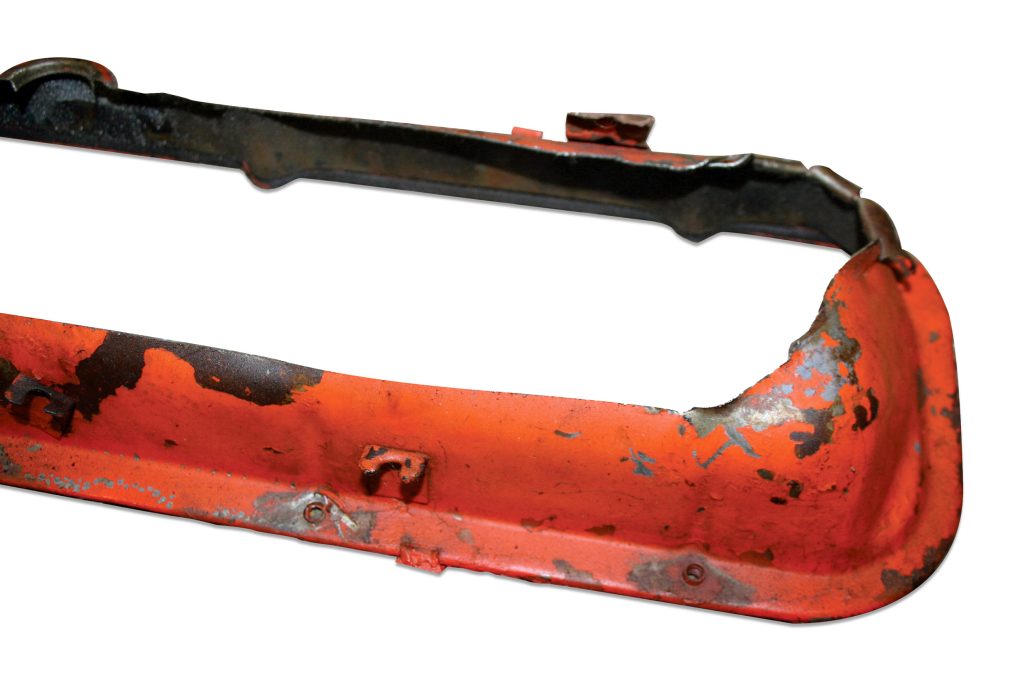
Even if you do not have improved topside valvetrain oiling, you will generally create a mess each time you adjust the valves with the engine running. There is a way to help this beyond using rocker arm deflector clips, which don’t work on roller rockers and are known to fly off stamped rockers, oiling down the engine compartment anyway. One way to prevent this mess is to take a set of old stamped steel valve covers that you won’t be using and to cut out a center section of each cover. When cutting the top of the valve covers, you want to ensure that you have relieved the covers only enough to allow the adjusting tools to fit without needing to wrestle with the adjustment. Loosely bolt the valve covers in place using a gasket, start the engine and adjust the valves. The cutout opening will allow you to access the valves without making a mess. Also, with the covers in place, oil won’t stack up at the bottom of the head and leak down onto the headers, the side of the block and the floor.
6.) EXHAUSTING DASH
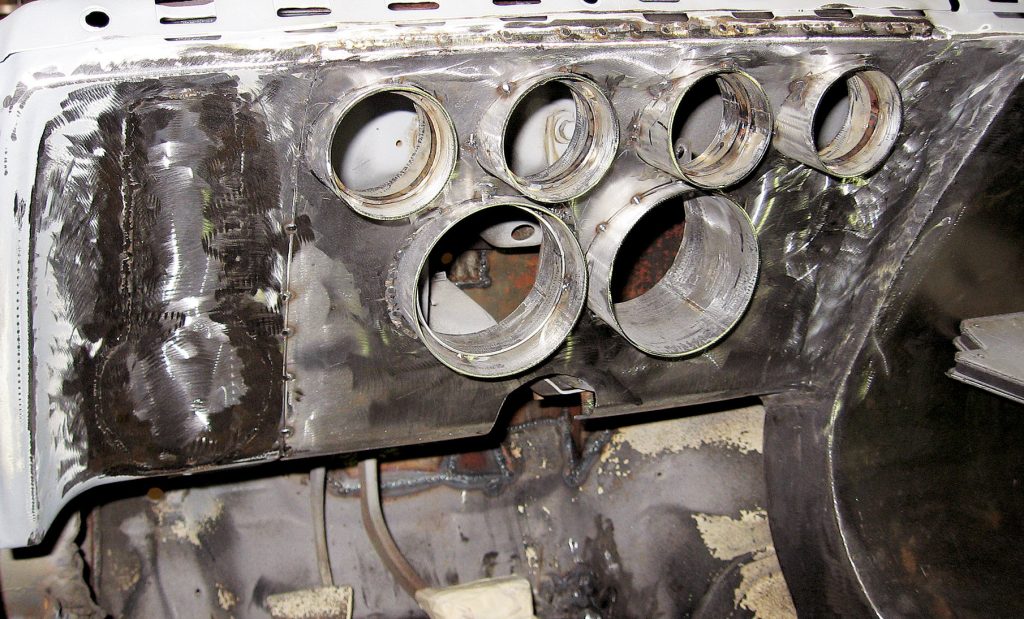
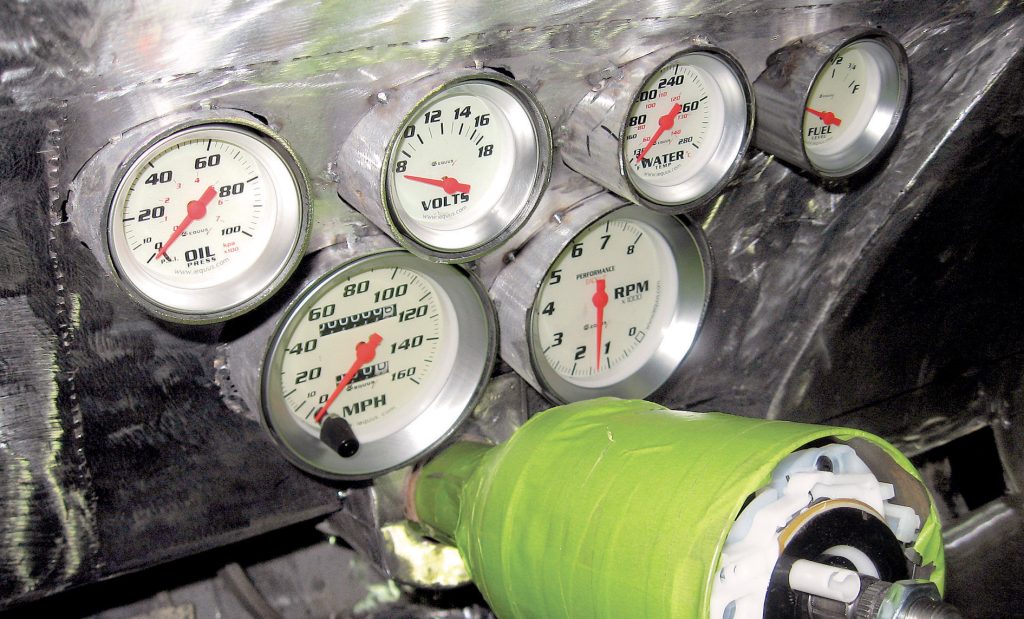
Looking to give that dash of yours a high-tech molded look but aren’t willing to pay a high-tech price to hire a shop to build one? We’ve seen this performed and actually completed such a project ourselves. Go to the local muffler shop and lay down $5 or $10 to get a good length of exhaust tubing to fit the gauge you will be using. Muffler shops usually stock exhaust tubing in various diameters, so be sure to take your gauges and bezels to check for proper fit. Cut it to the proper length and even cut slight angles for a real custom effect. Weld it to the dash or dash panel, smooth the welds with a little body filler and paint it body color. Also, for larger tachs and speedos, diesel exhaust tubing works really well.
7.) WAGER ON THE WARRANTY
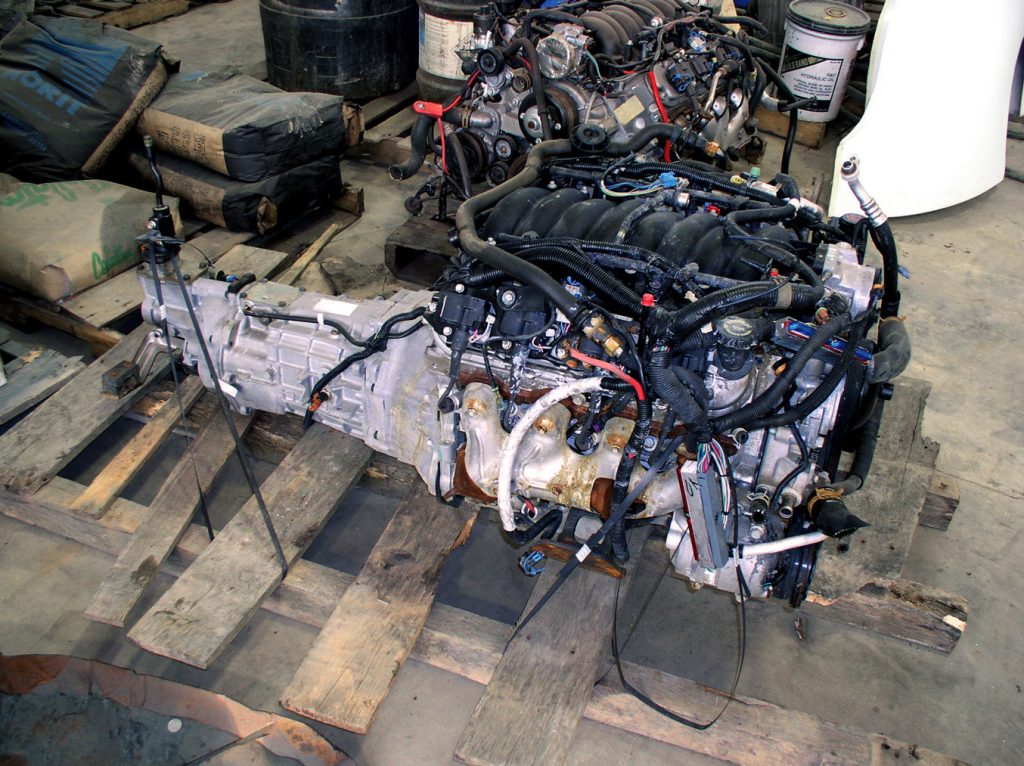
During a junkyard search, we ran across a massive shelf of GM Vortec/LS1 engines. With crate motors being so popular today, we got curious and asked about these engines. Since many new cars powered by these engines are lasting 200,000 miles or more and GM offers a 100,000-mile limited warranty, we decided to ask how much it would cost to take home one of these take-out engines. Here’s what we found; $1,900 would have taken home the complete Tahoe cast-iron LS1 with trans and wiring. It had a documented 25,000 miles on the engine. For this price, take it home and slap on some paint and a few Street & Performance LS1 goodies, and you’re good to go! You can compare this to something in the neighborhood of $6,000 for an LS1 crate engine sans trans!
8.) WHEN SMALL WORKS
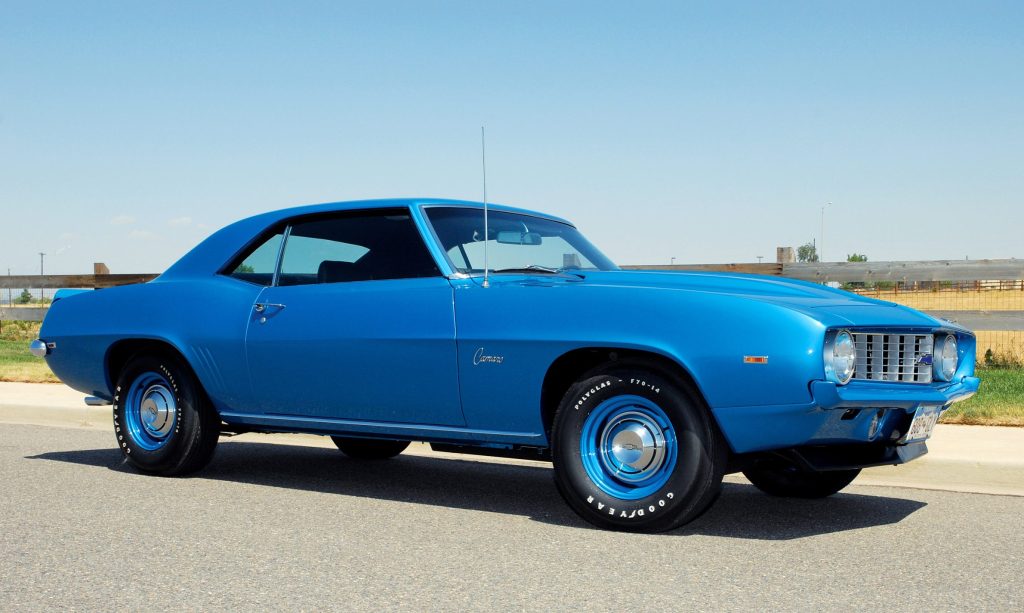
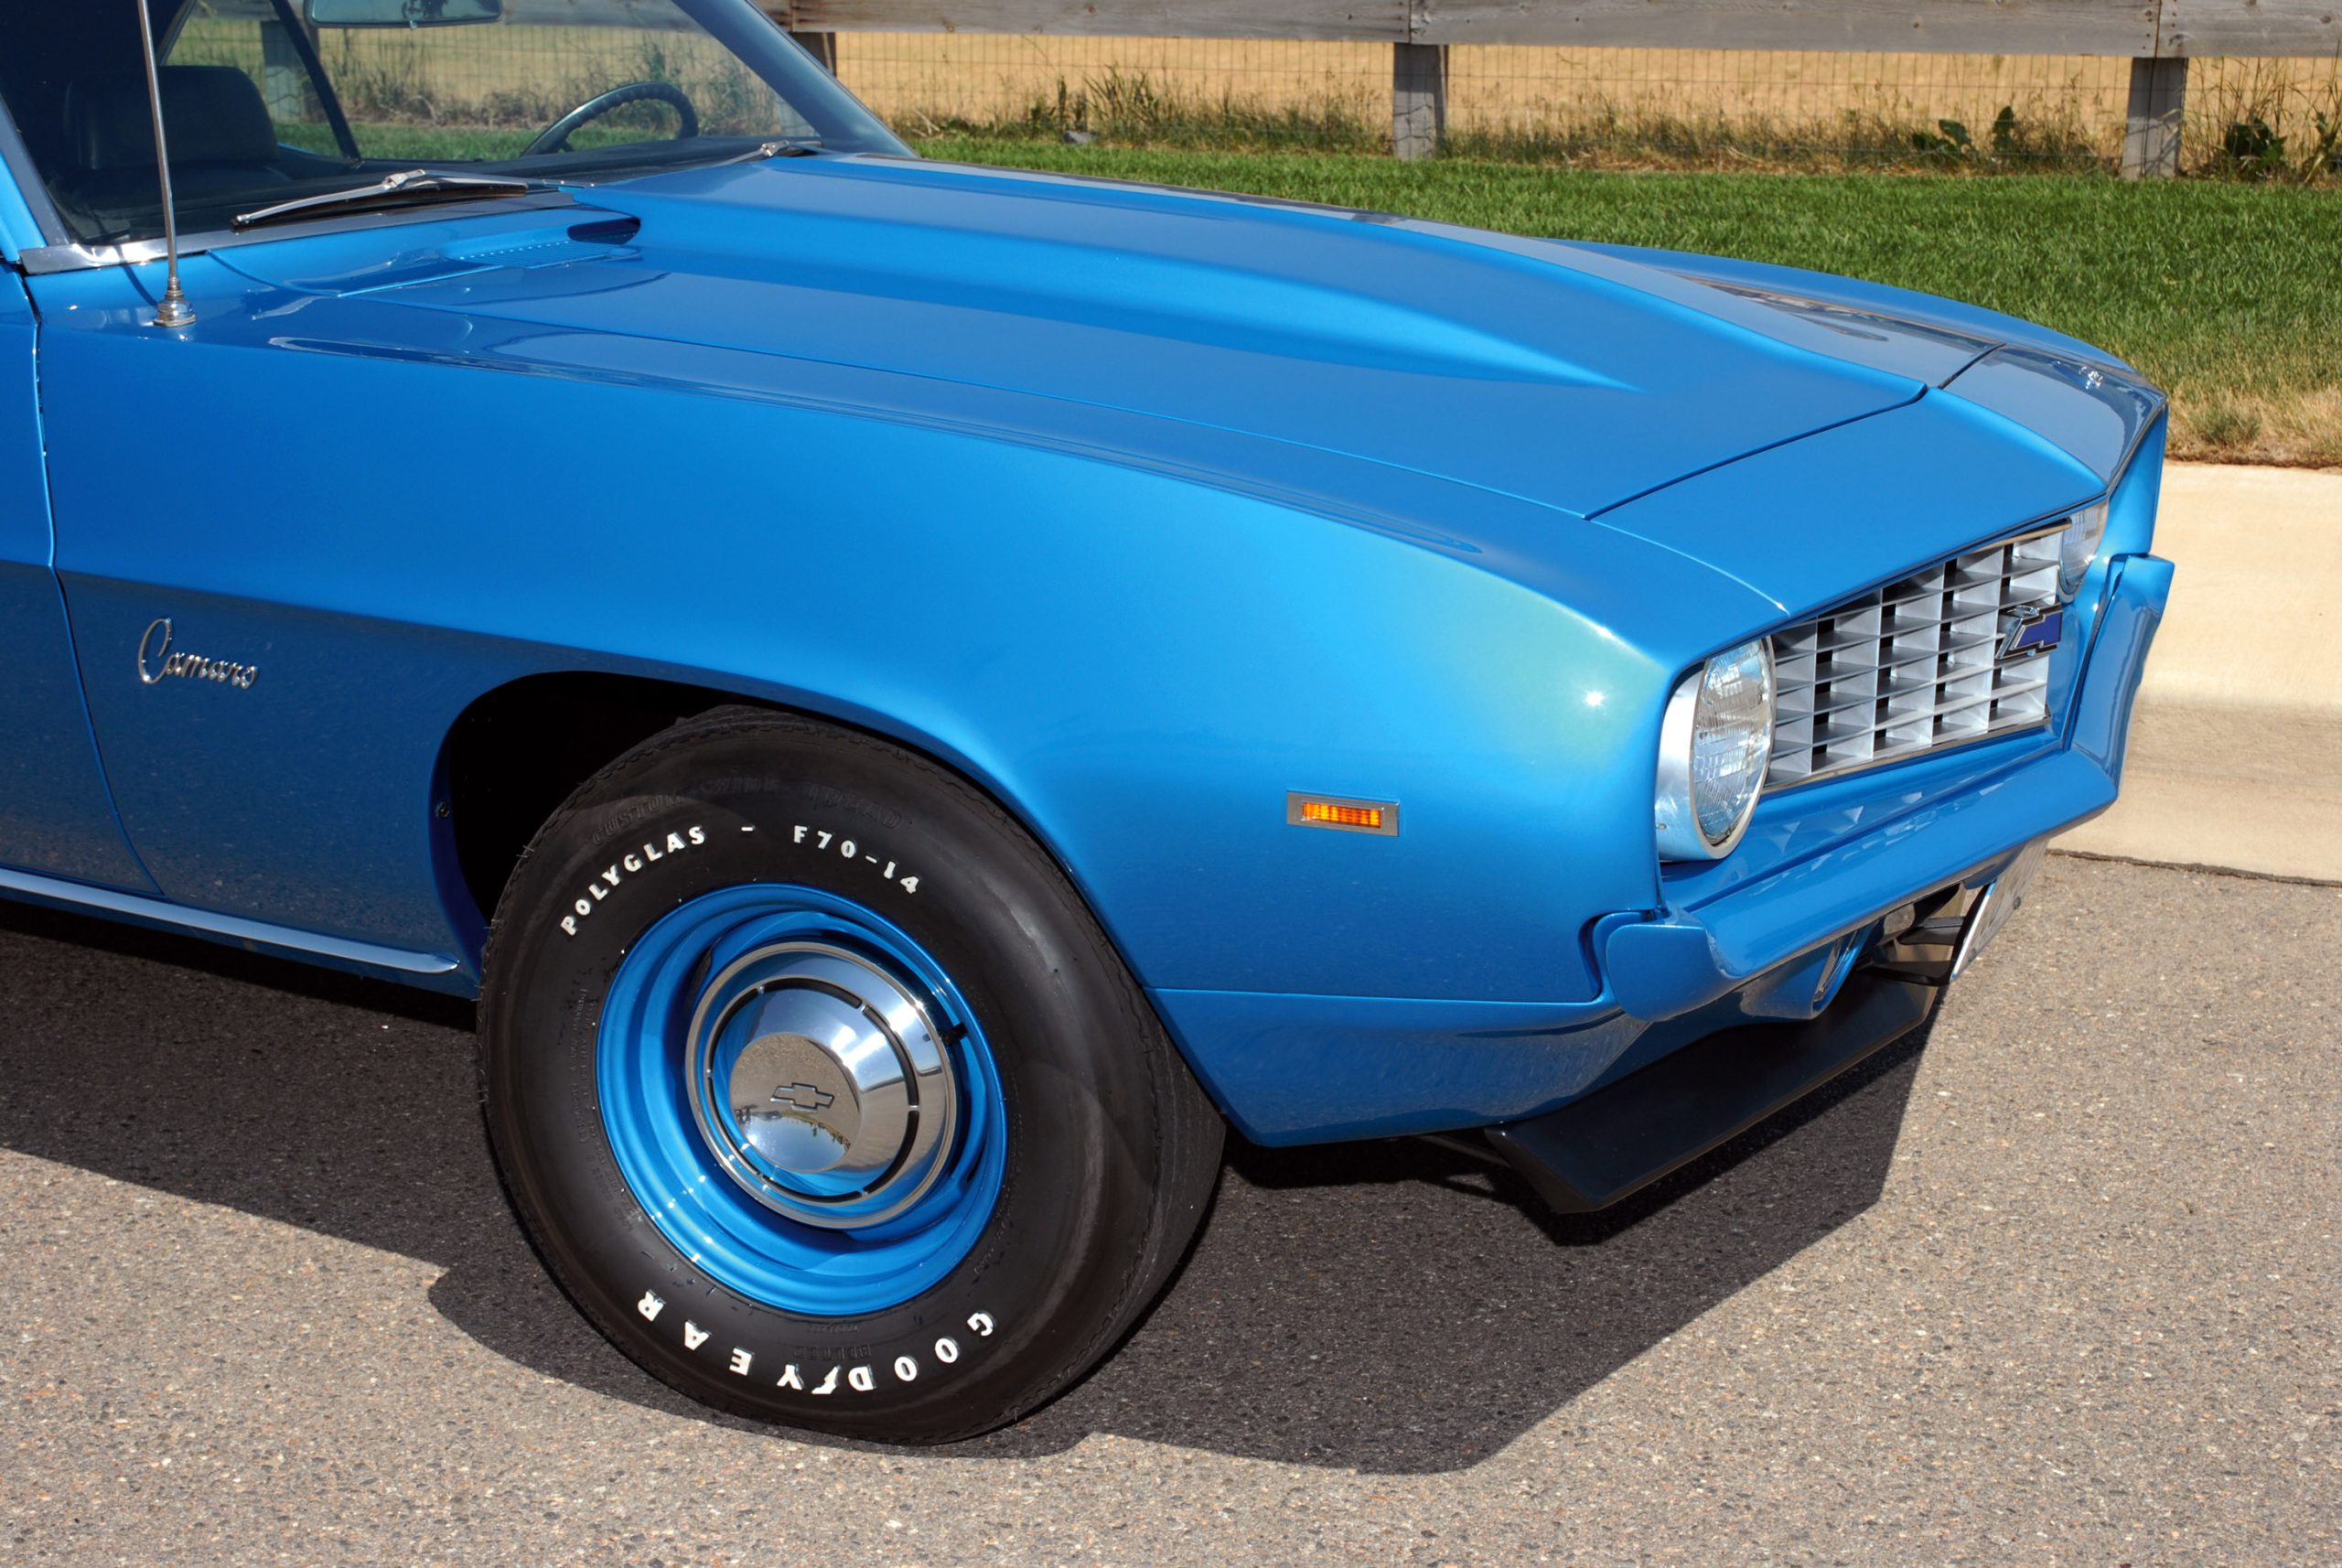
For the traditionalist who has updated a ’60s car from drum brakes to disc brakes but wishes to retain the original look of the GM 14-inch wheels, you are in luck. Many Gen-I Camaros are equipped with disc brakes but feature a unique 14-inch wheel that is fully capable of clearing the brake calipers. These wheels will bolt onto your GM car and clear small OE-style disc brakes. If you want to retain the factory look but have updated to disc brakes from drum brake-equipped cars, check out the Gen-I Camaro 14-inch wheels. These not only work for the Camaro, but also for many other Chevy muscle cars that have been fitted with OE front disc brakes. See if they work for your application.
9.) ALL LOCKED UP
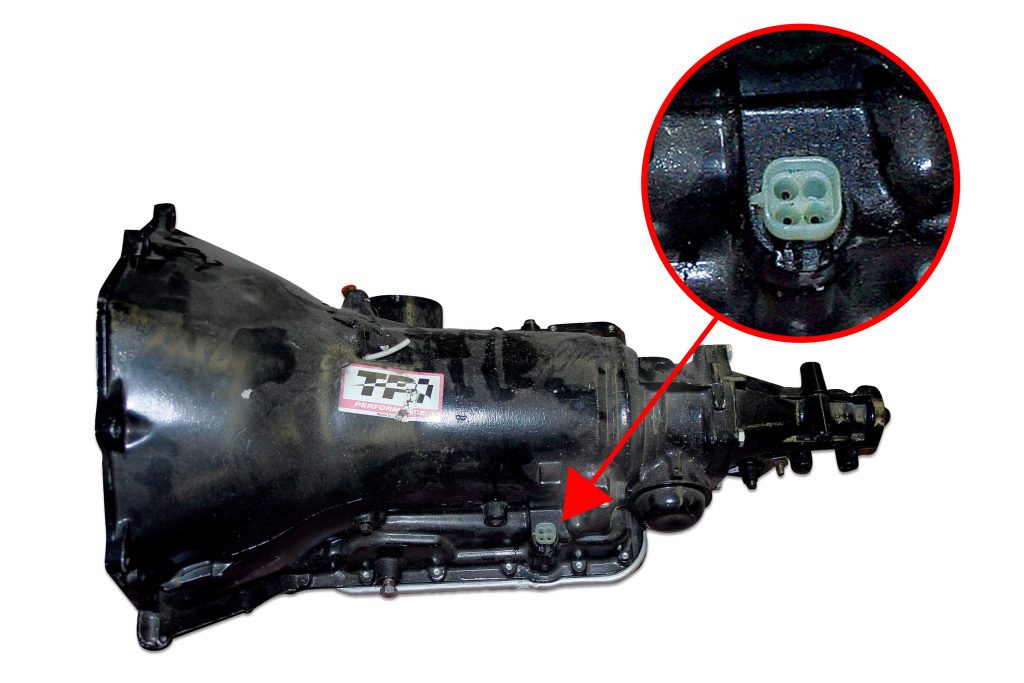
Here’s one for you diehard performance enthusiasts who want control of your power. The 700R4 with lockup is known for its improved fuel mileage and better gearing and works great while cruising along on the highway at 80 mph and turning a lazy 1,400 rpm. The one downfall is that the car falls flat on its face once the lock-up kicks in. To eliminate this from happening when you want acceleration, you can install a convenient toggle switch to override the lock-up. Remove the lock-up computer and route a positive wire to the four-pin lock-up plug on the trans. Route this up to the dash and hide a toggle switch that will allow you to switch the lock-up on or off, depending on your driving requirements and how much of a burst of power you may need prior to lock-up engagement.
10.) SILICONE VALLEY
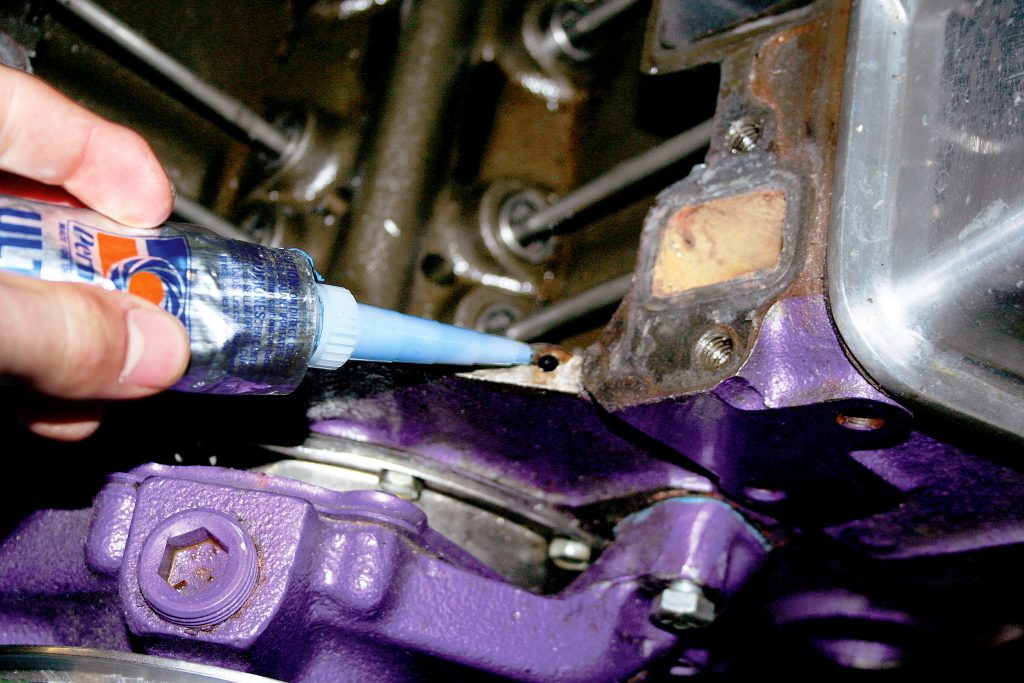
We’ve been taught through the years to use the gaskets that are provided in the kits we buy. However, gasket technology has improved dramatically, and it’s not all applied to all replacement gasket or installation kits. That’s one reason why we lived with such difficulty with front and rear intake manifold leaks when using new gaskets. A small trick we learned over the years is, rather than even attempting to seal the intake parting lines with the provided “Made in China” front/rear rubber gaskets, to fill the front and rear valley cover with a high-quality silicone sealer. This allows you to build a better seal where casting differences or mismatched machined parts are used, such as when the heads or block deck surfaces are cut but not the top of the block. It also works better when no imperfections or machine tolerances are present.


