


Street Trucks
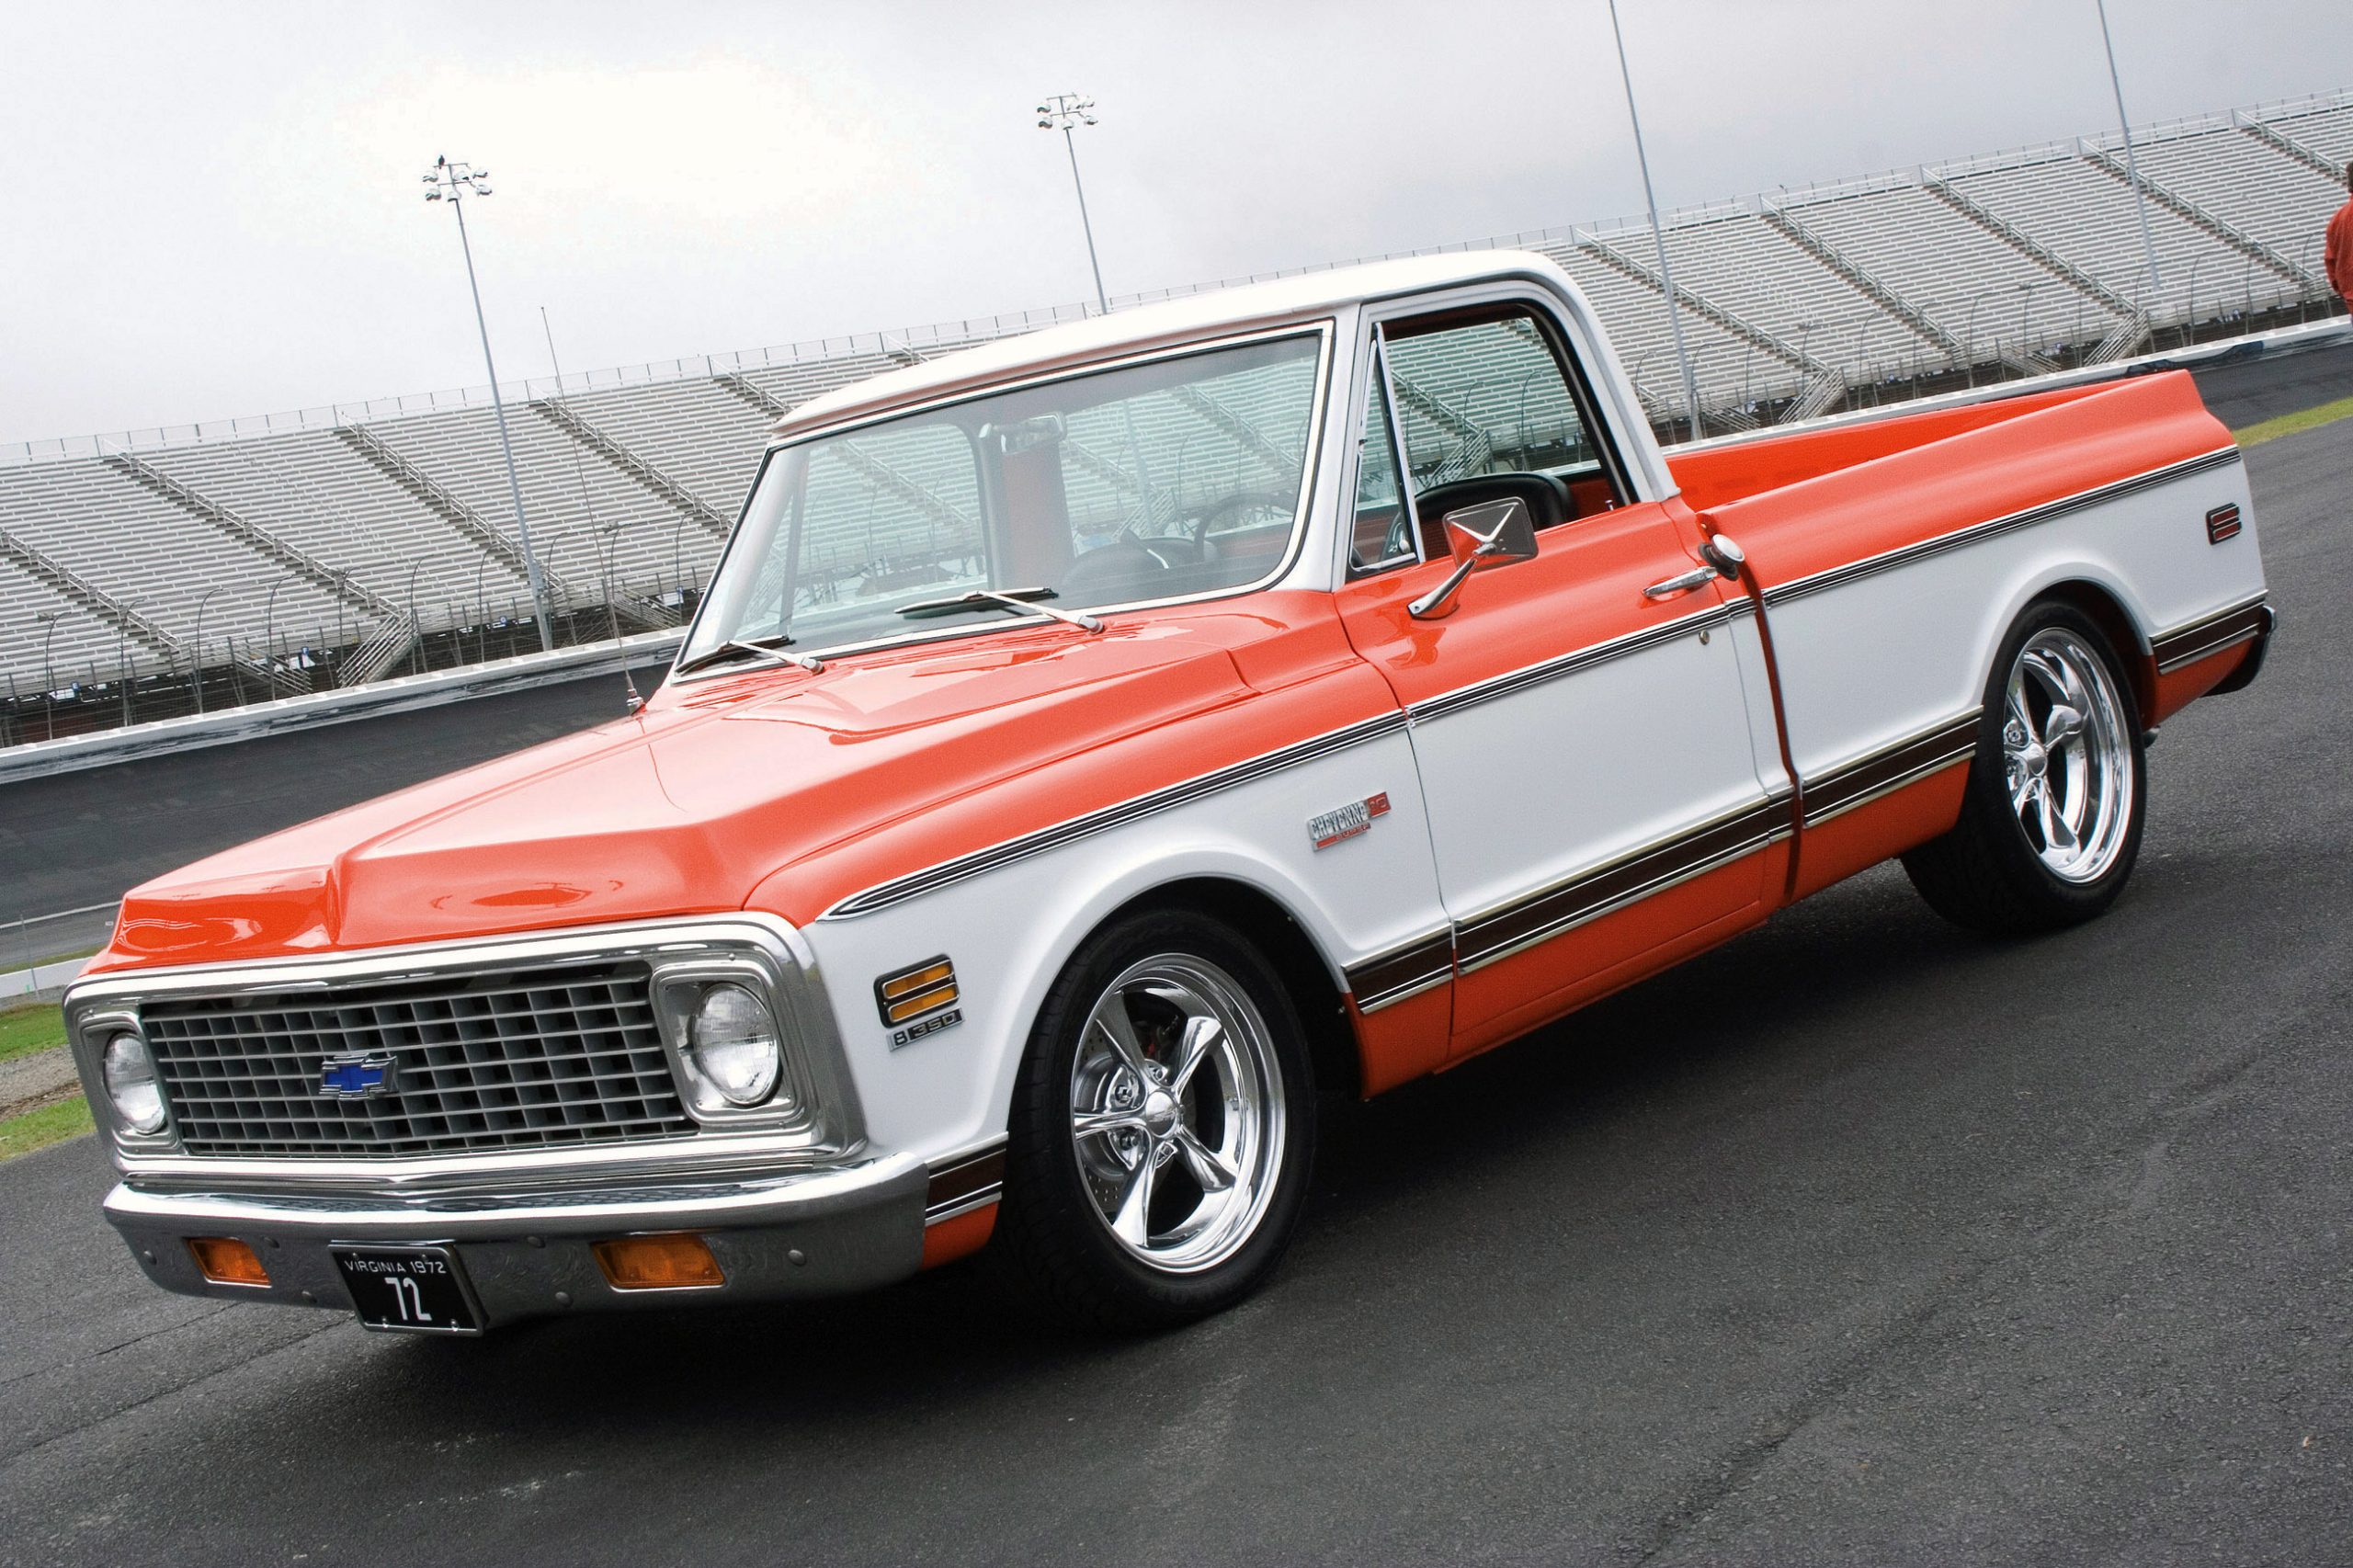
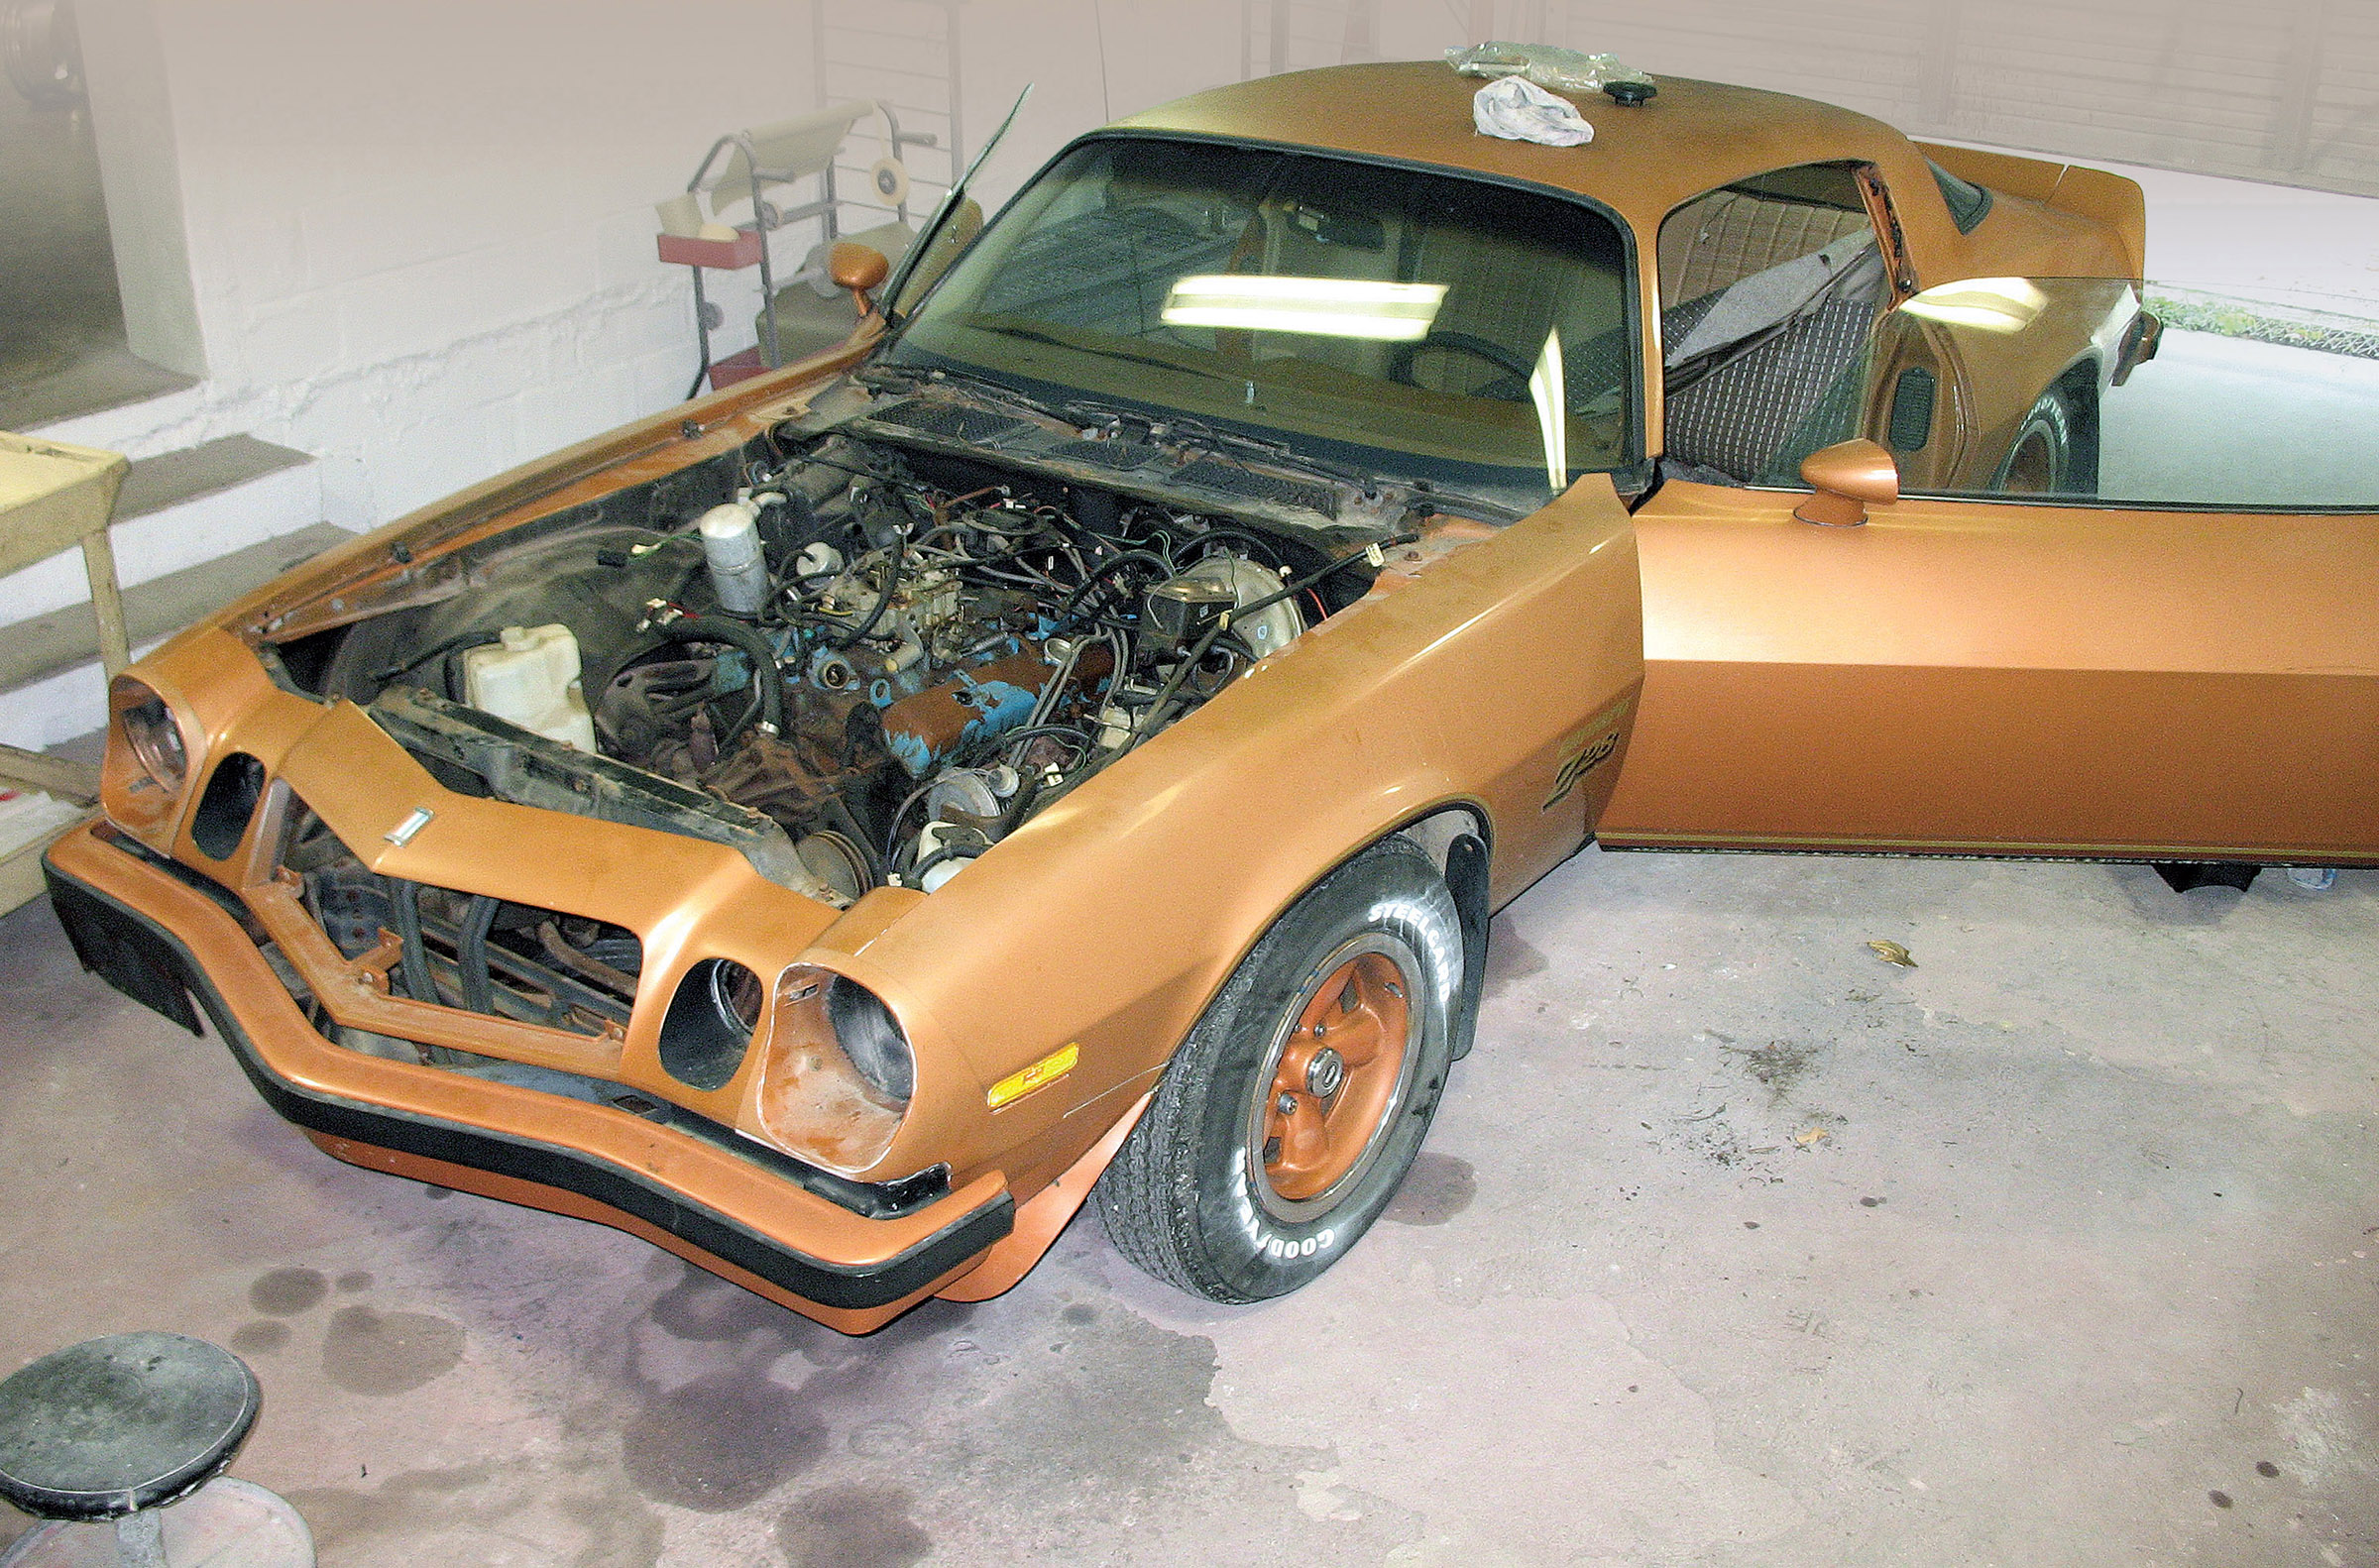
Virginia Beach, Virginia, residents Ronnie and Linda Loyd have always held a special place in their hearts for classic trucks. Having owned several old trucks through the years, Loyd built a certain appreciation for early Chevy pickups, especially those of the 1967 thru 1972 era. Since Loyd already owns a ’33 Ford coupe and a ’93 454 Chevrolet SS pickup, he decided now would be the perfect time to complete his collection by getting the early ’70s truck he always wanted.
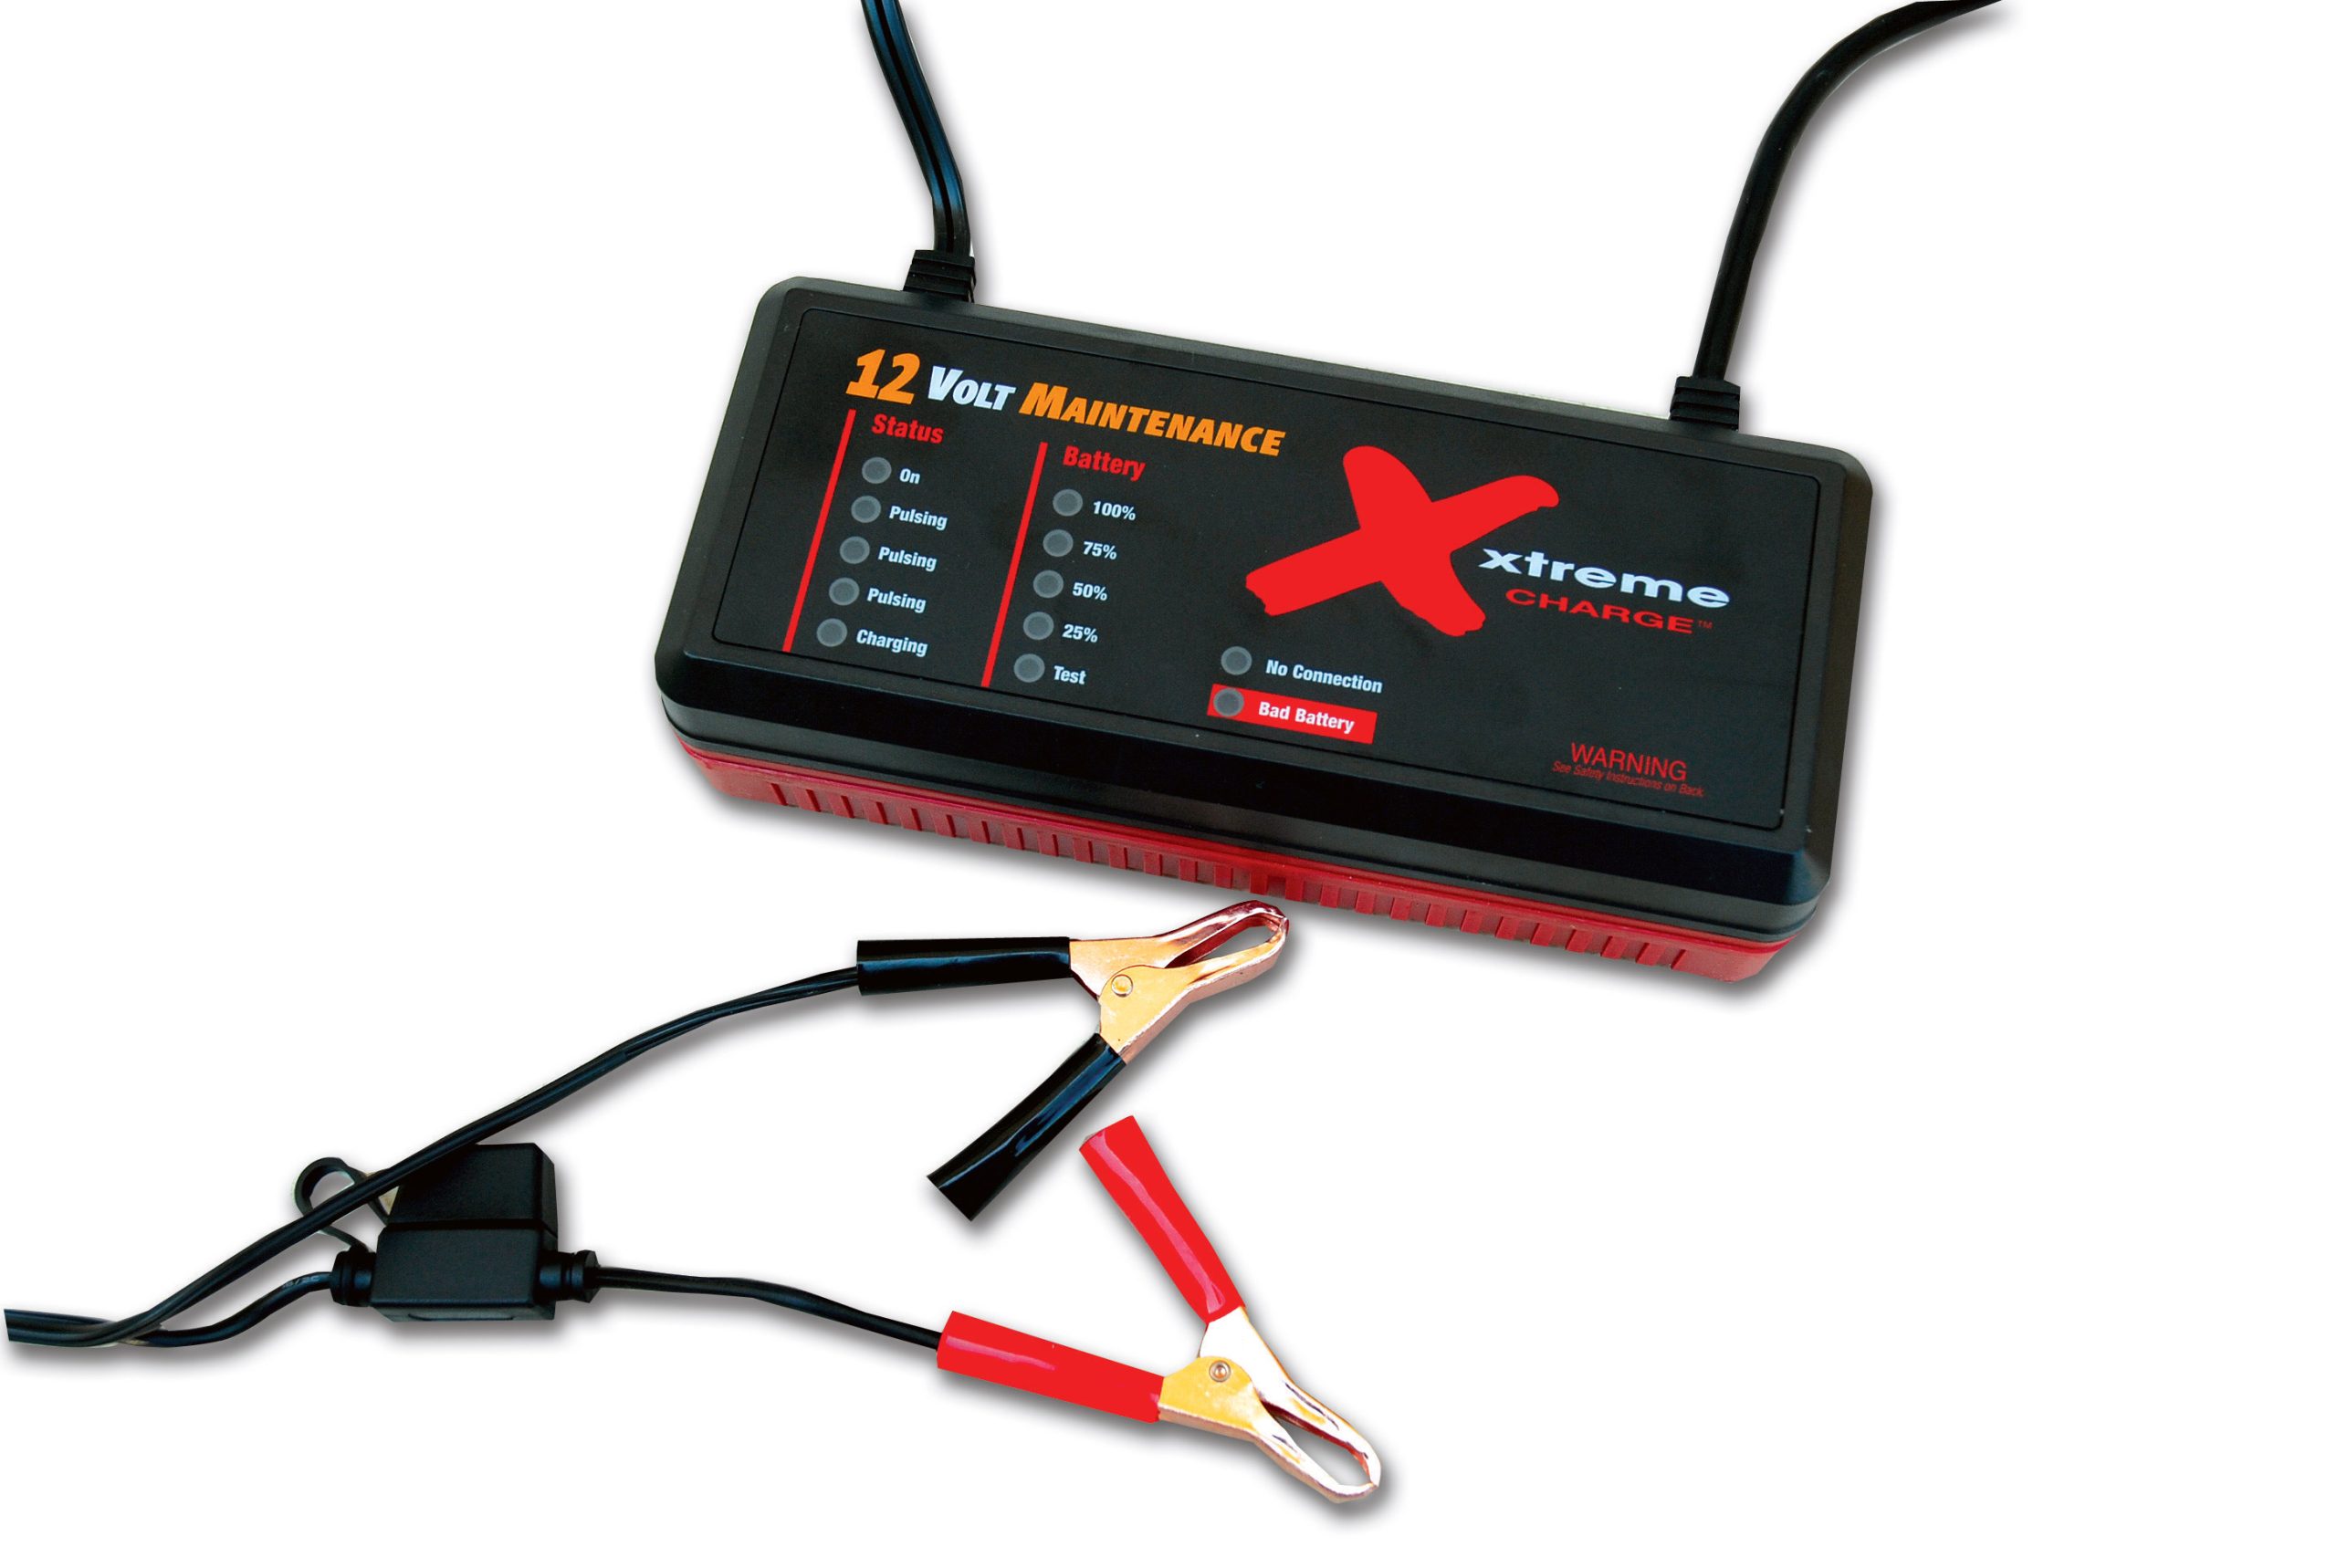
There is nothing more aggravating than having a dead battery, and it always occurs at the least opportune times. Our street rods are often stored or sit for periods of time. How many times have you decided the weather was perfect for an afternoon cruise and had a problem cranking the car?

Let’s face it, most of us are working within the confines of a set of unwritten, yet clearly defined, rules of hot rodding. Stance, engine choice and wheels are for the most part selected from a menu of items that come “pre-approved” by our peers. Sure these rules work most of the time, and they provide a degree of certain acceptance when you’re building a traditional pre-’49 hot rod. But all in all, it also makes us a group of conforming nonconformists. However, for some hot rodders (and they are in the minority) building hot rods is about pure ingenuity, a total lack of peer pressure and joy of mixing parts from various sources and making it all work.
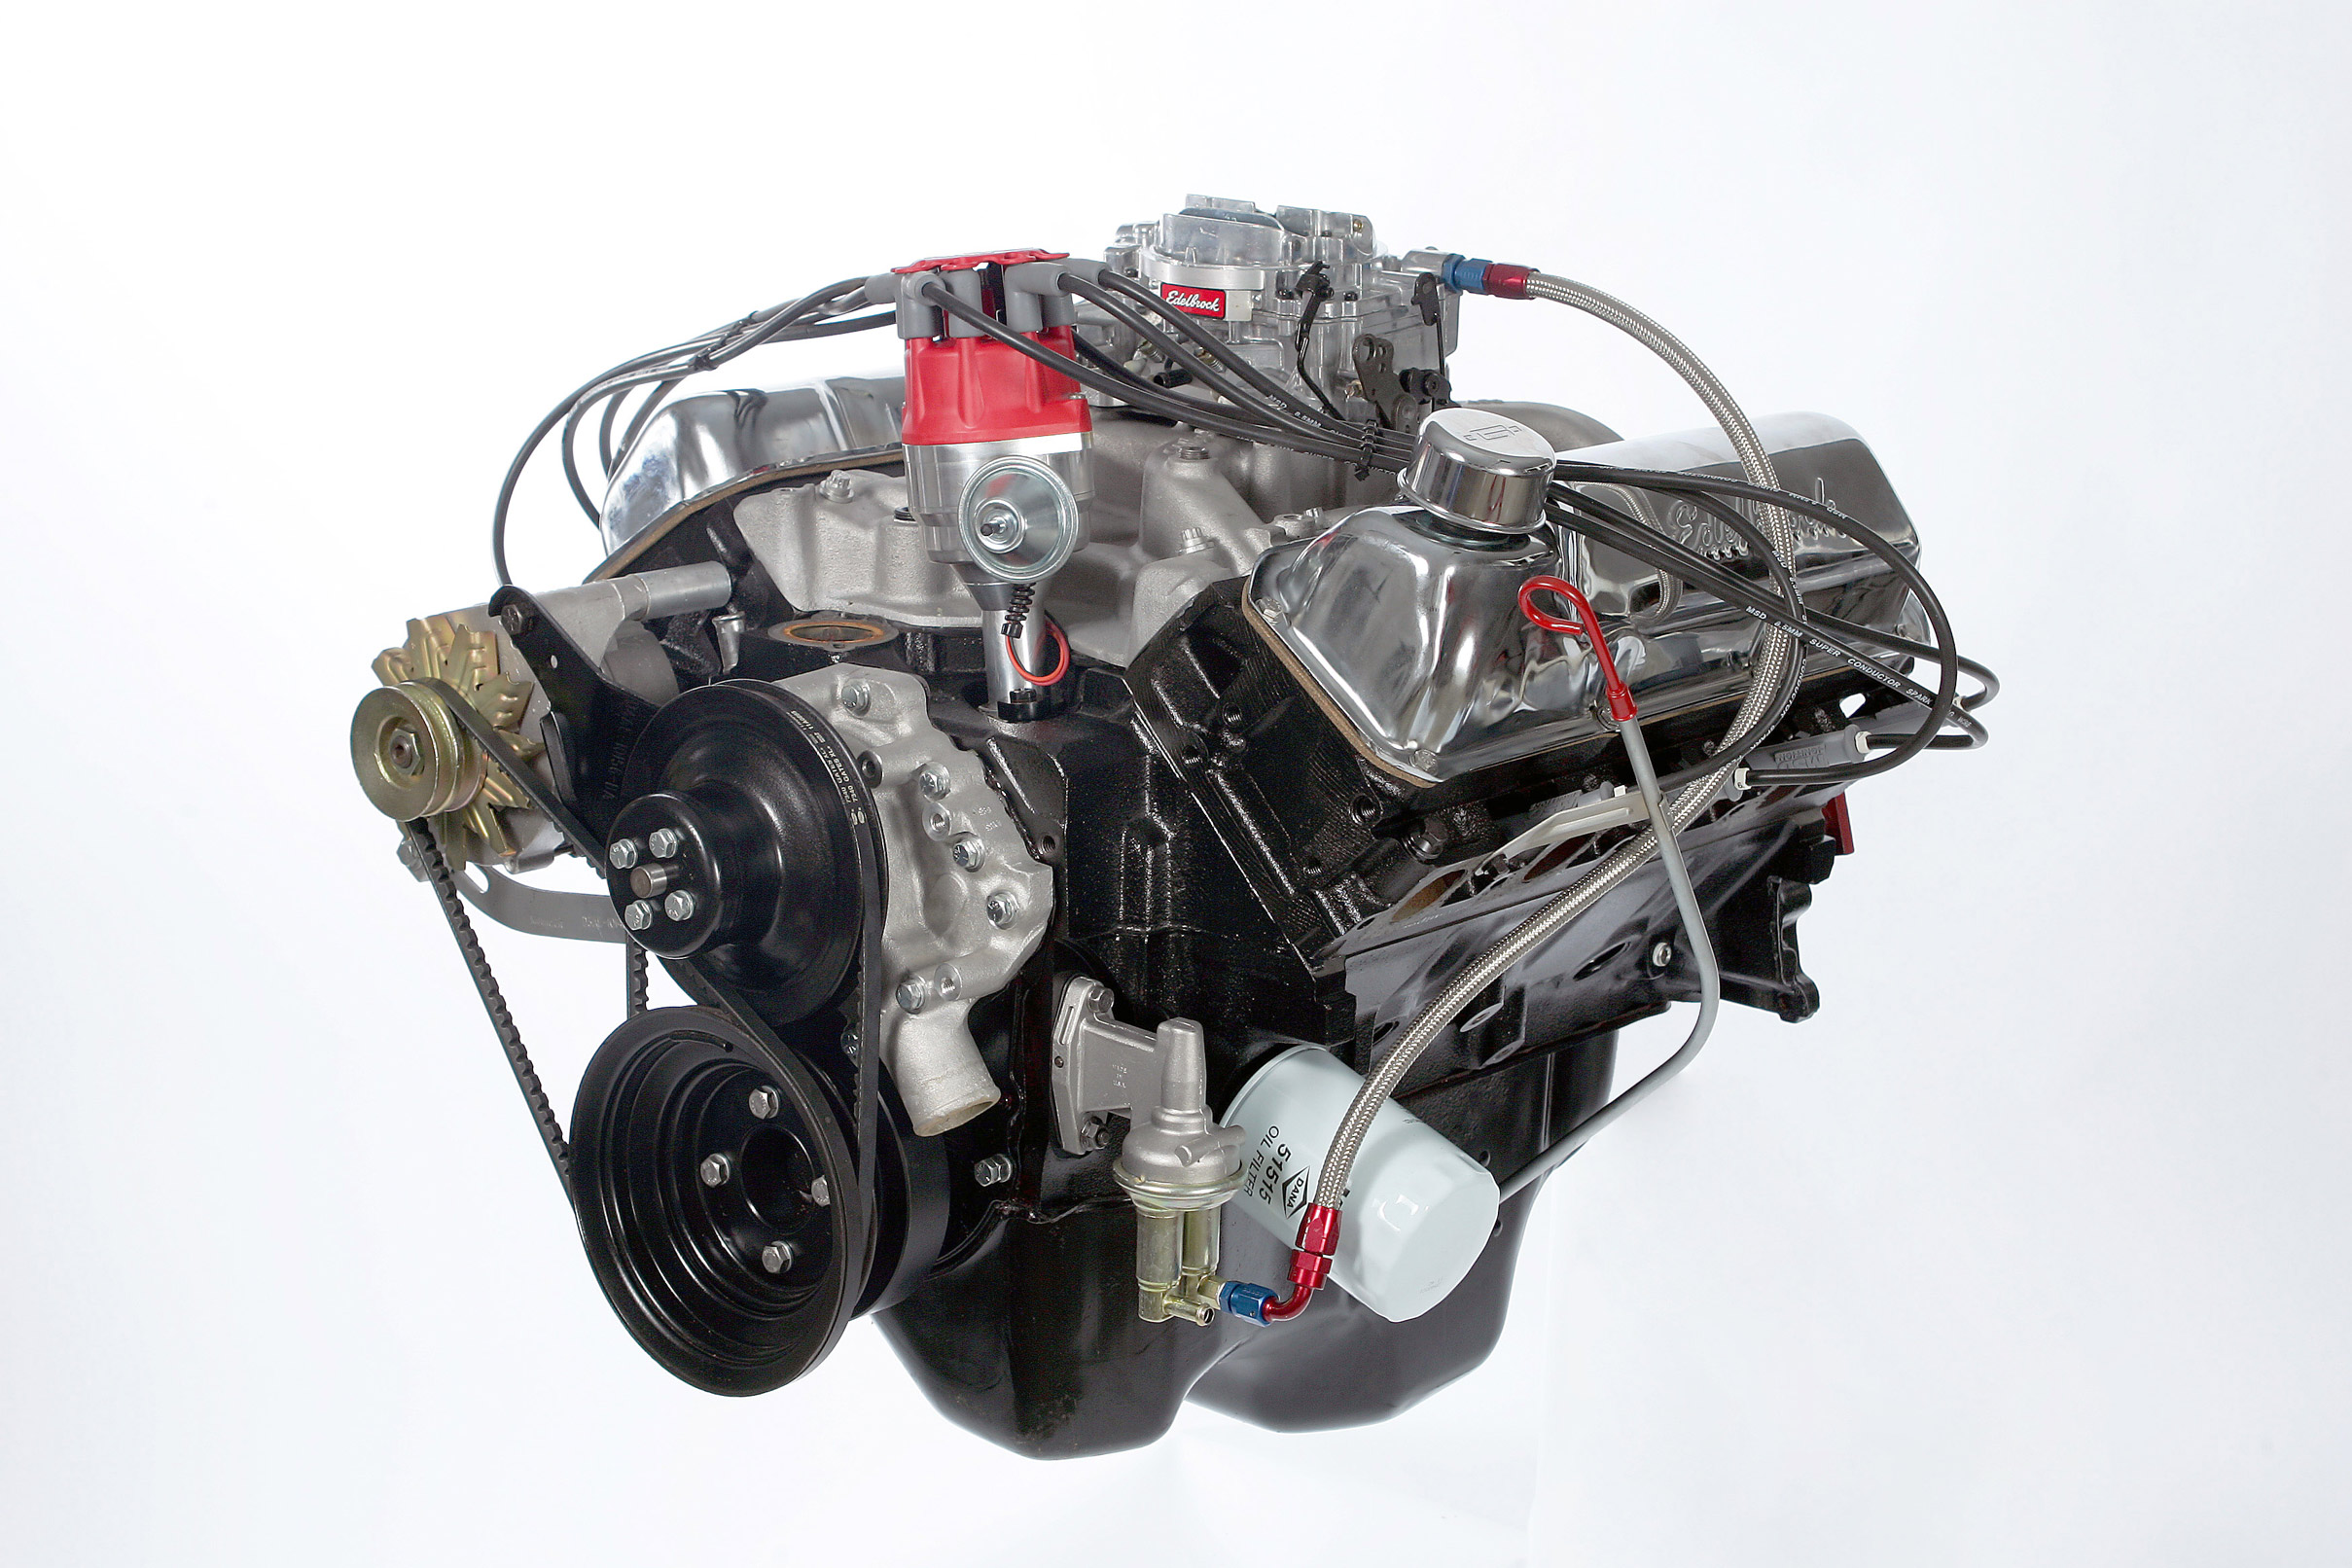
Ford fans will always have a soft spot in their blue-oval hearts for the Windsor, the Cleveland and the big 460 FE engines—and deservedly so. If you’ve ever crawled a junkyard for one of these engines, you’ve likely passed over more than a few 351M and 400 engines to find what you are looking for. Poor factory numbers and bad word-of-mouth have made these cousins to the mighty Cleveland about as wanted as poison ivy at a nudist colony, but there is power to be found in those engines—and cheap, too.
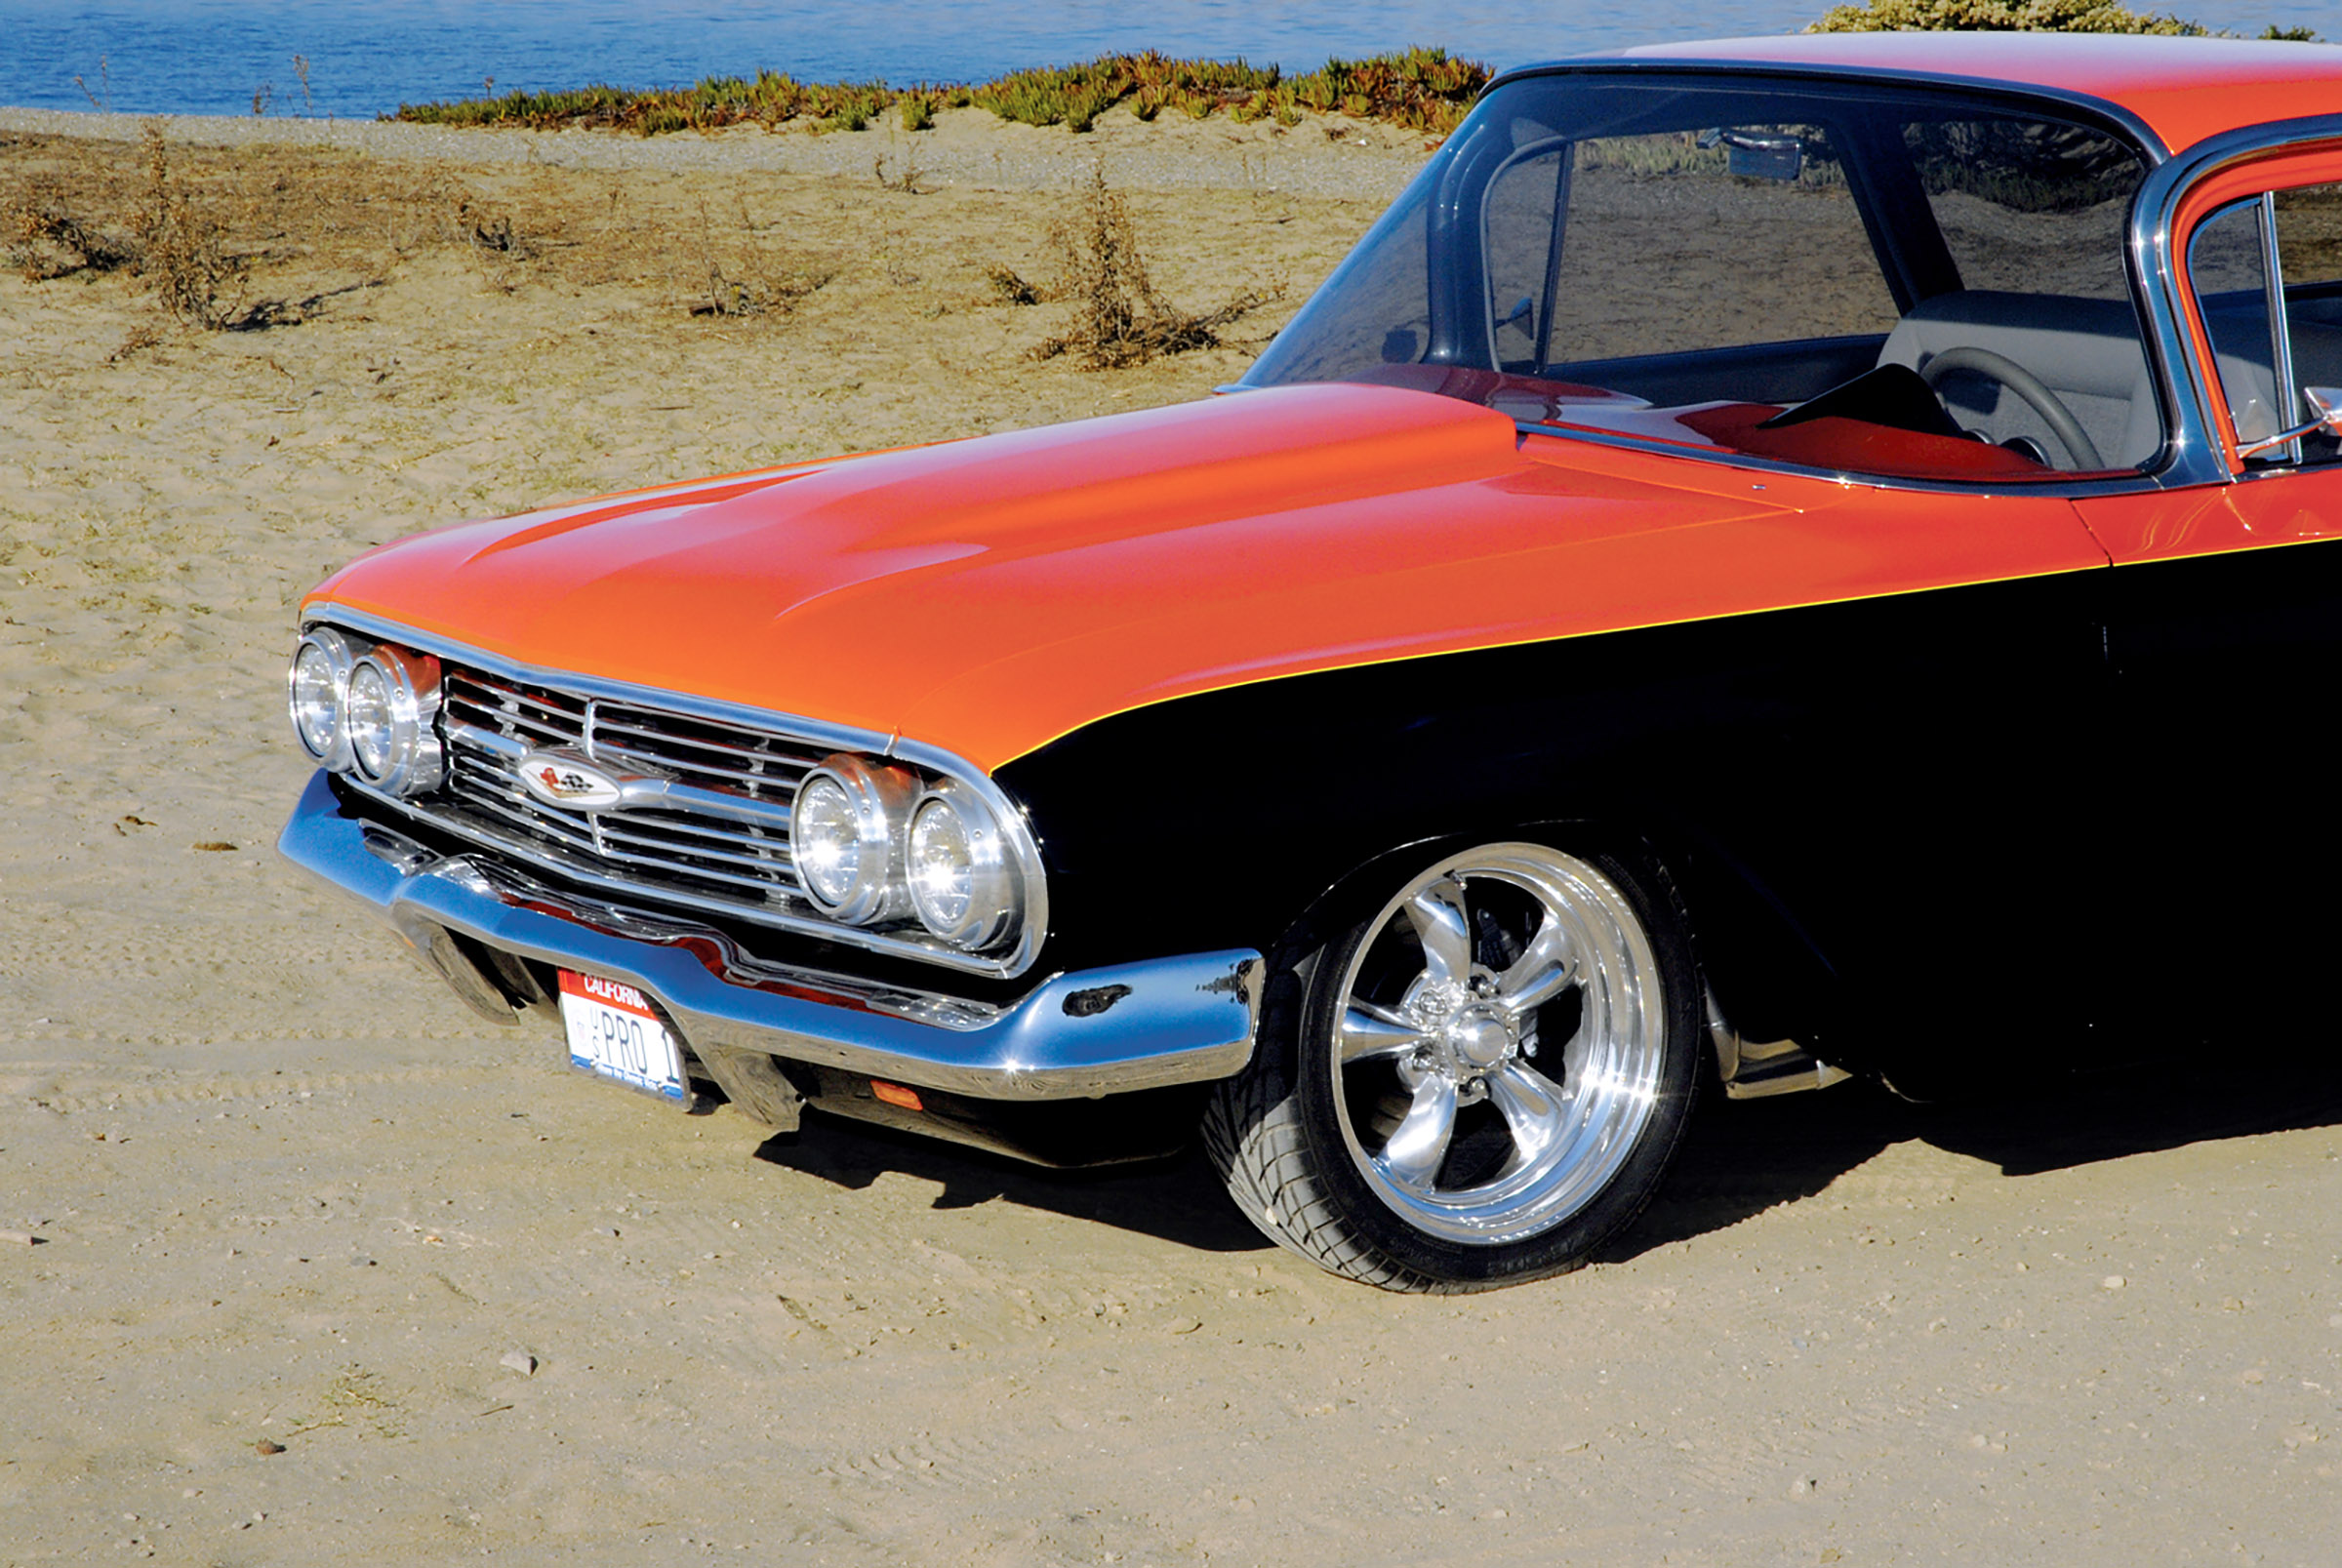
“I started building this car a little over 15 years ago after completing a Pro Street ’70 Camaro RS for my then-16-year-old son, Brad,” says overhead door installation specialist Jim Meltzer of Ventura, California. “I always had the urge to build a ’59 Pro Street Chevrolet El Camino (hence the nickname “U.S. Pro-1”), having owned one of those cars when I was just 21 years old,” he says. “Forty years later, the ’60 came along, and I figured that was close enough. The El Camino project was a joint collaboration with my sons Brad and Rod, and it got off to a great start. We made plans for a big motor and even built a full rollcage for that huge hunk of steel with the intentions of actually racing it.”
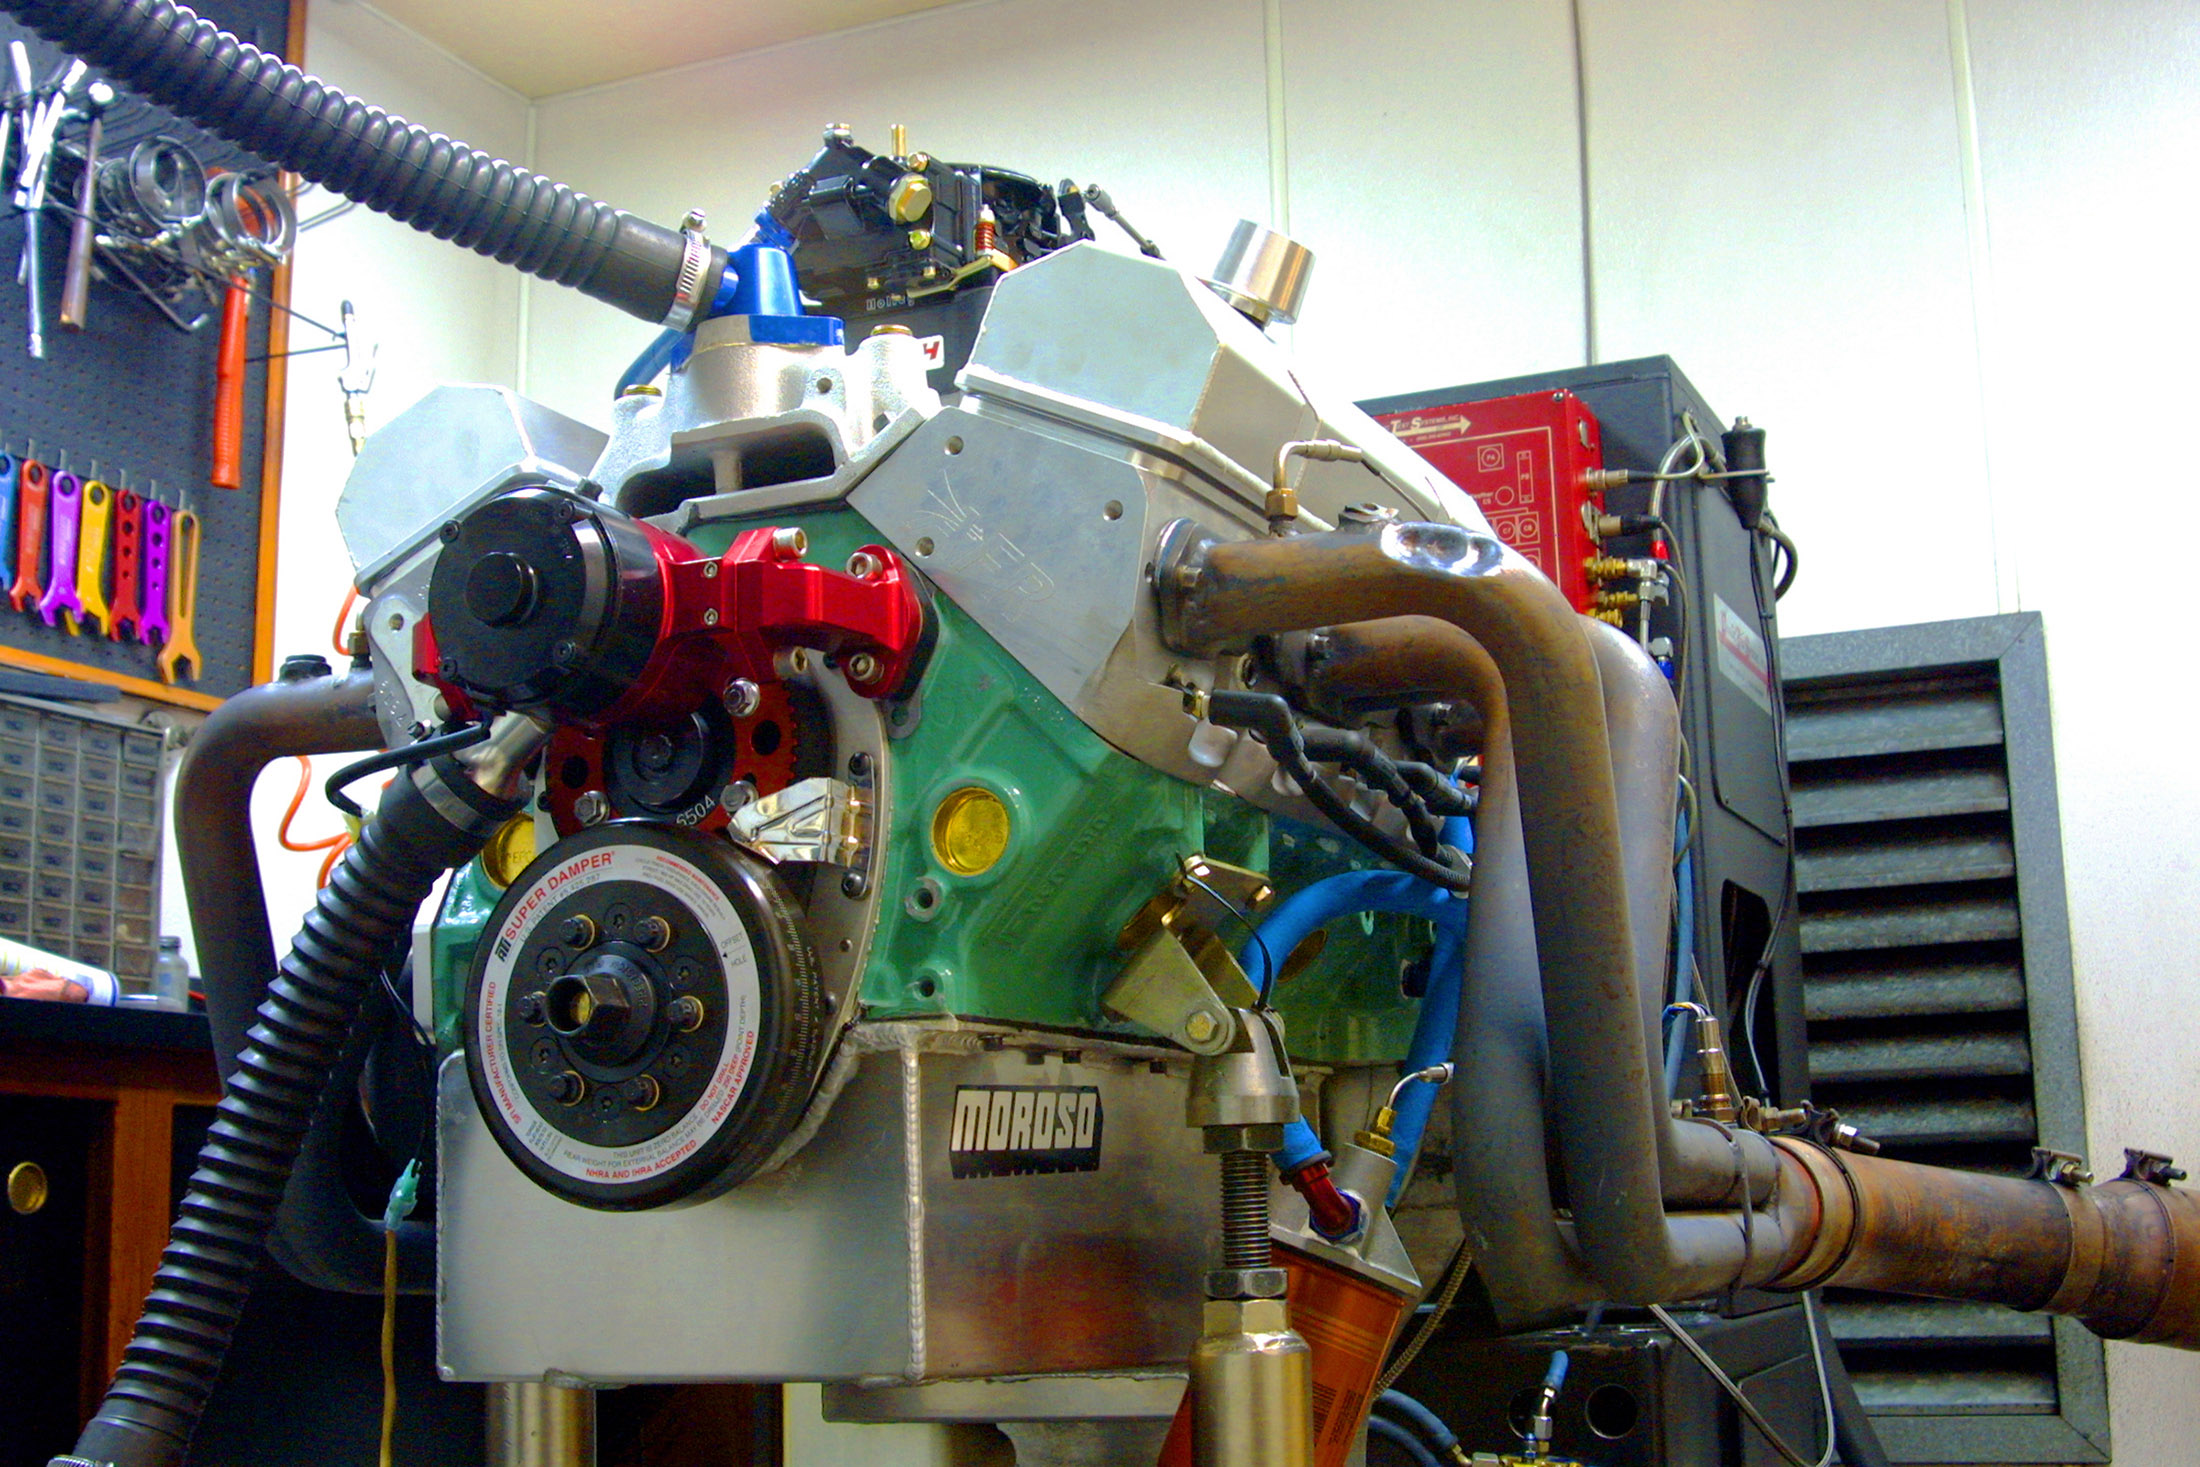
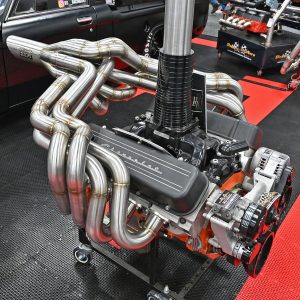
We showed you how to build a small-block engine that could make over 500 hp and 500 lb-ft of torque on 87-octane gas. It was a motor that could be driven just about every day with a hydraulic-roller cam and a good carburetor, making acquisition and maintenance almost nonexistent. Like many things we do in the engine world, the results we enjoyed—while good—just weren’t satisfying anymore. We wanted more.
When starting any project that requires bodywork, rebuilding or even repainting, the first question is always, “What could possibly be lurking under the old paint that could come back and haunt us later?”
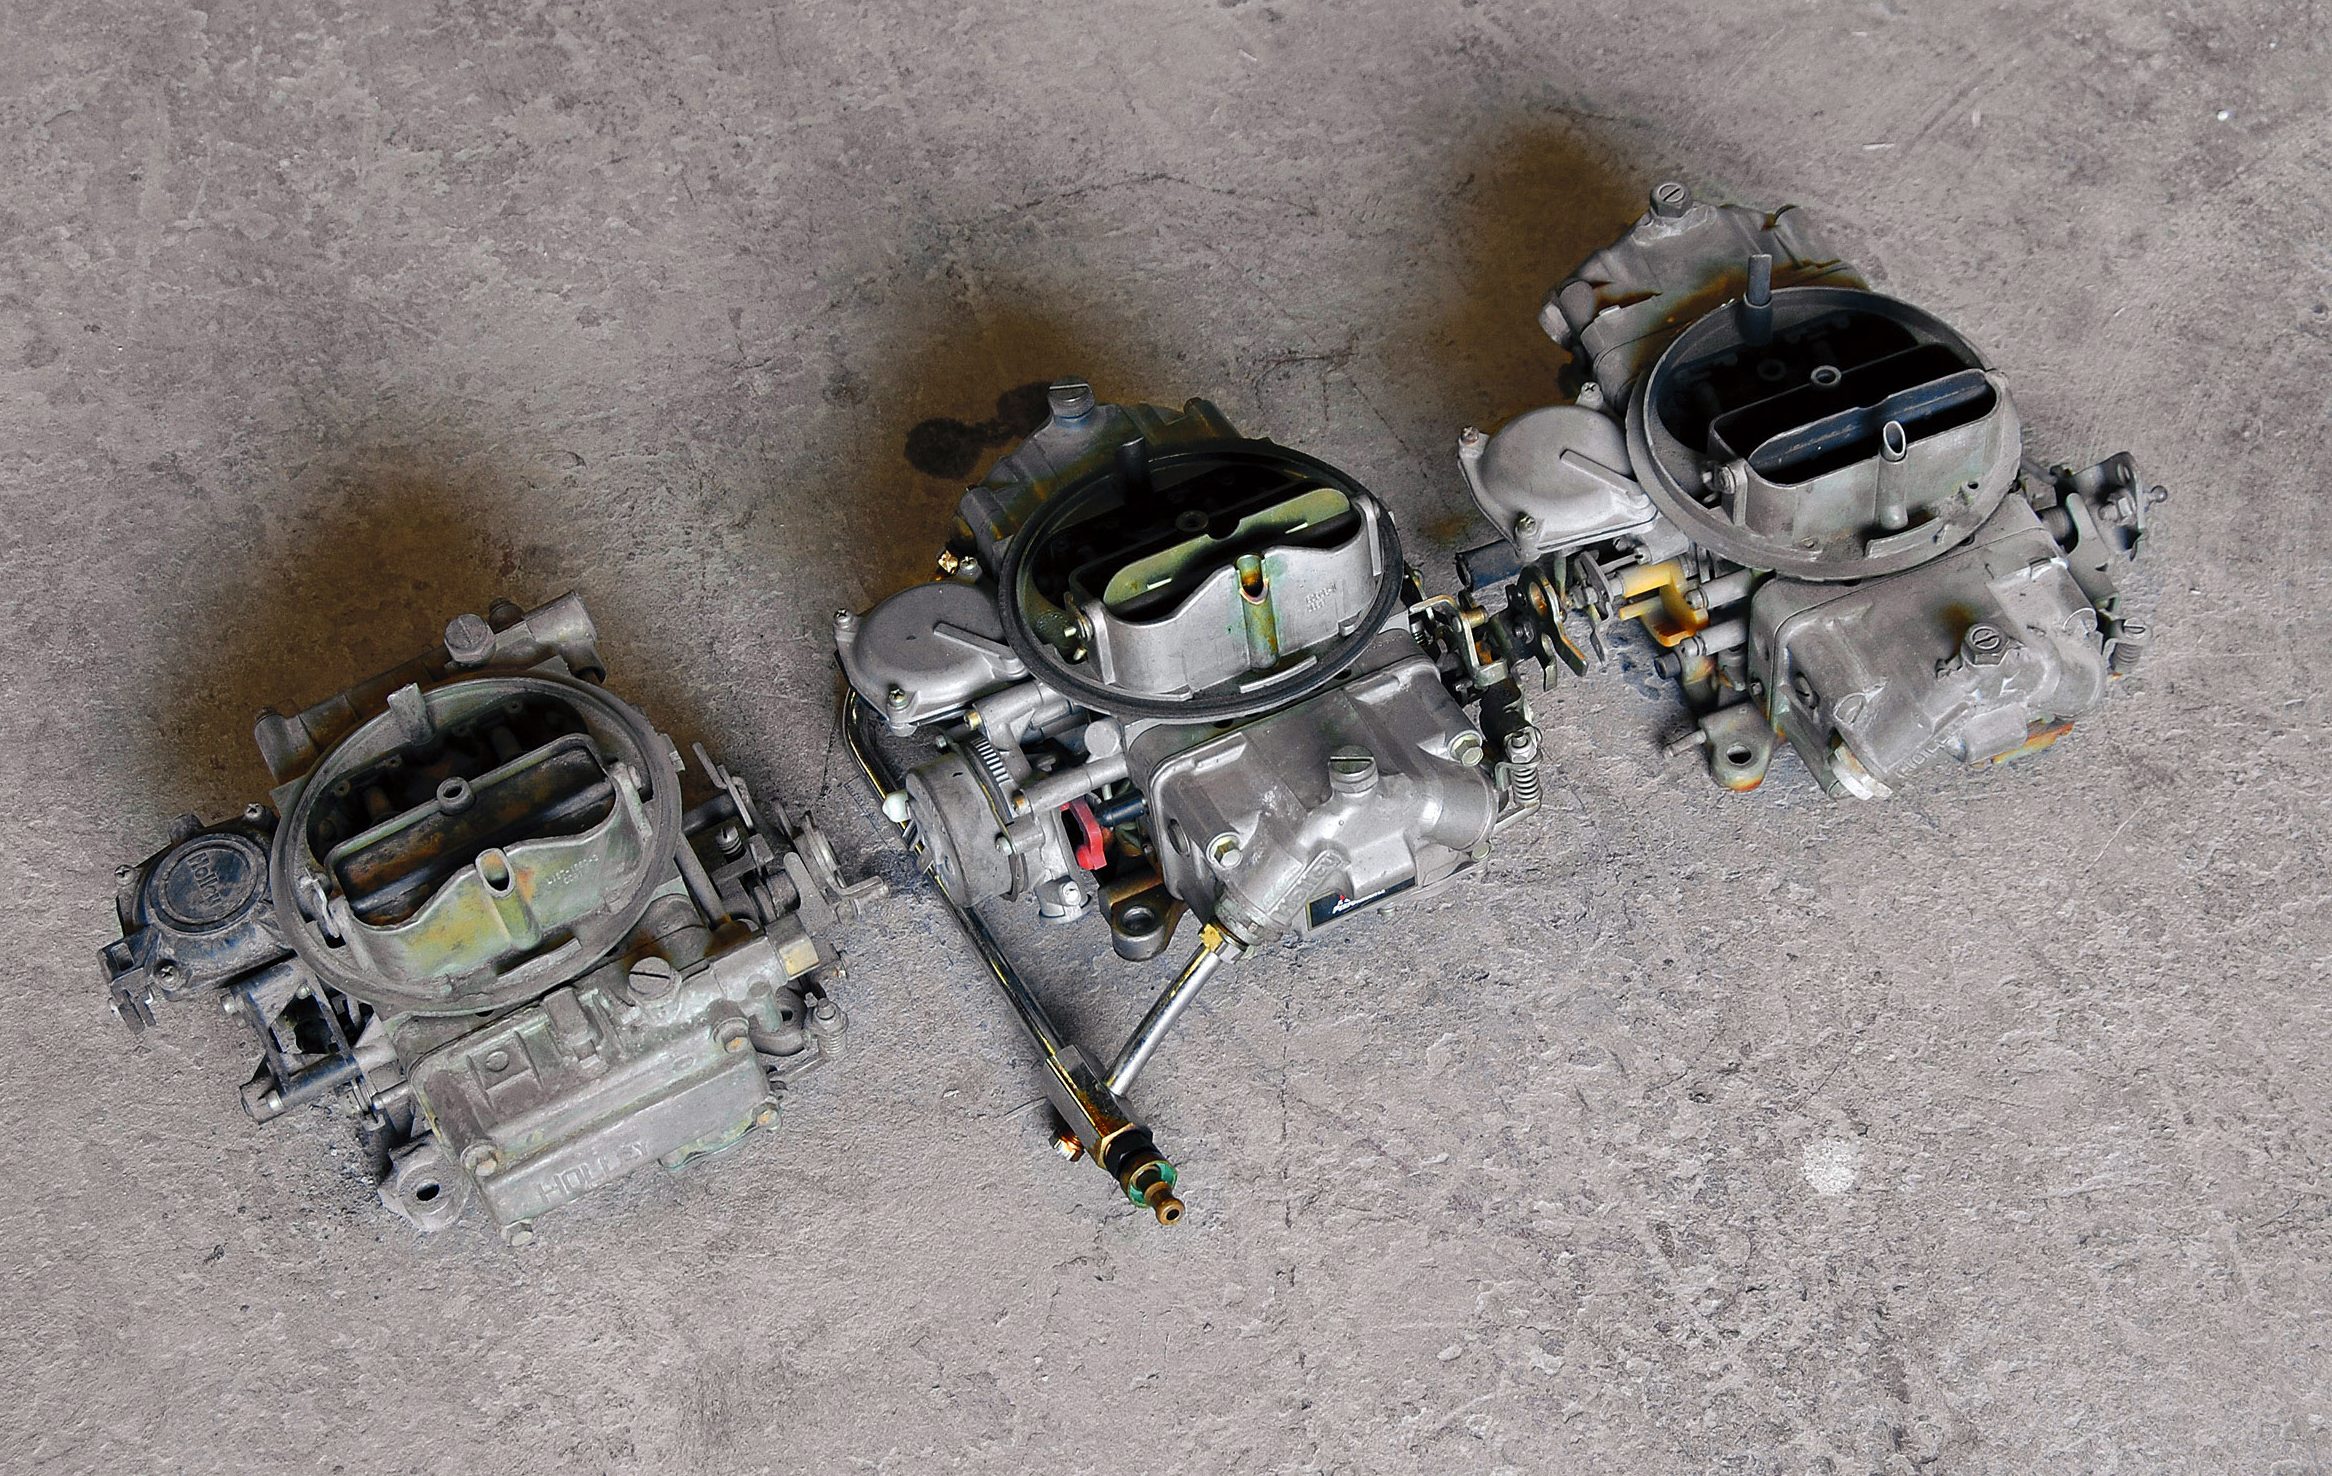
Holley carburetors have long been a staple in the go-fast world of high-performance motoring, whether it’s NASCAR, drag racing or on the street. Much like other performance-oriented products—perhaps even more so with a carburetor—a carburetor requires a fundamental setup and a degree of maintenance, and that’s considering you have chosen the correct-size carburetor for your application, at least to get it in the ballpark. Knowing how to adjust, maintain and even repair your Holley carburetor goes a long way toward helping to ensure that your carburetor will make optimum horsepower for a long time. Because of this, we decided to compile a few troubleshooting and repair tips for the popular 4150-series Holley carburetor, which is the series designation for Holley’s street/strip and racing carburetors.
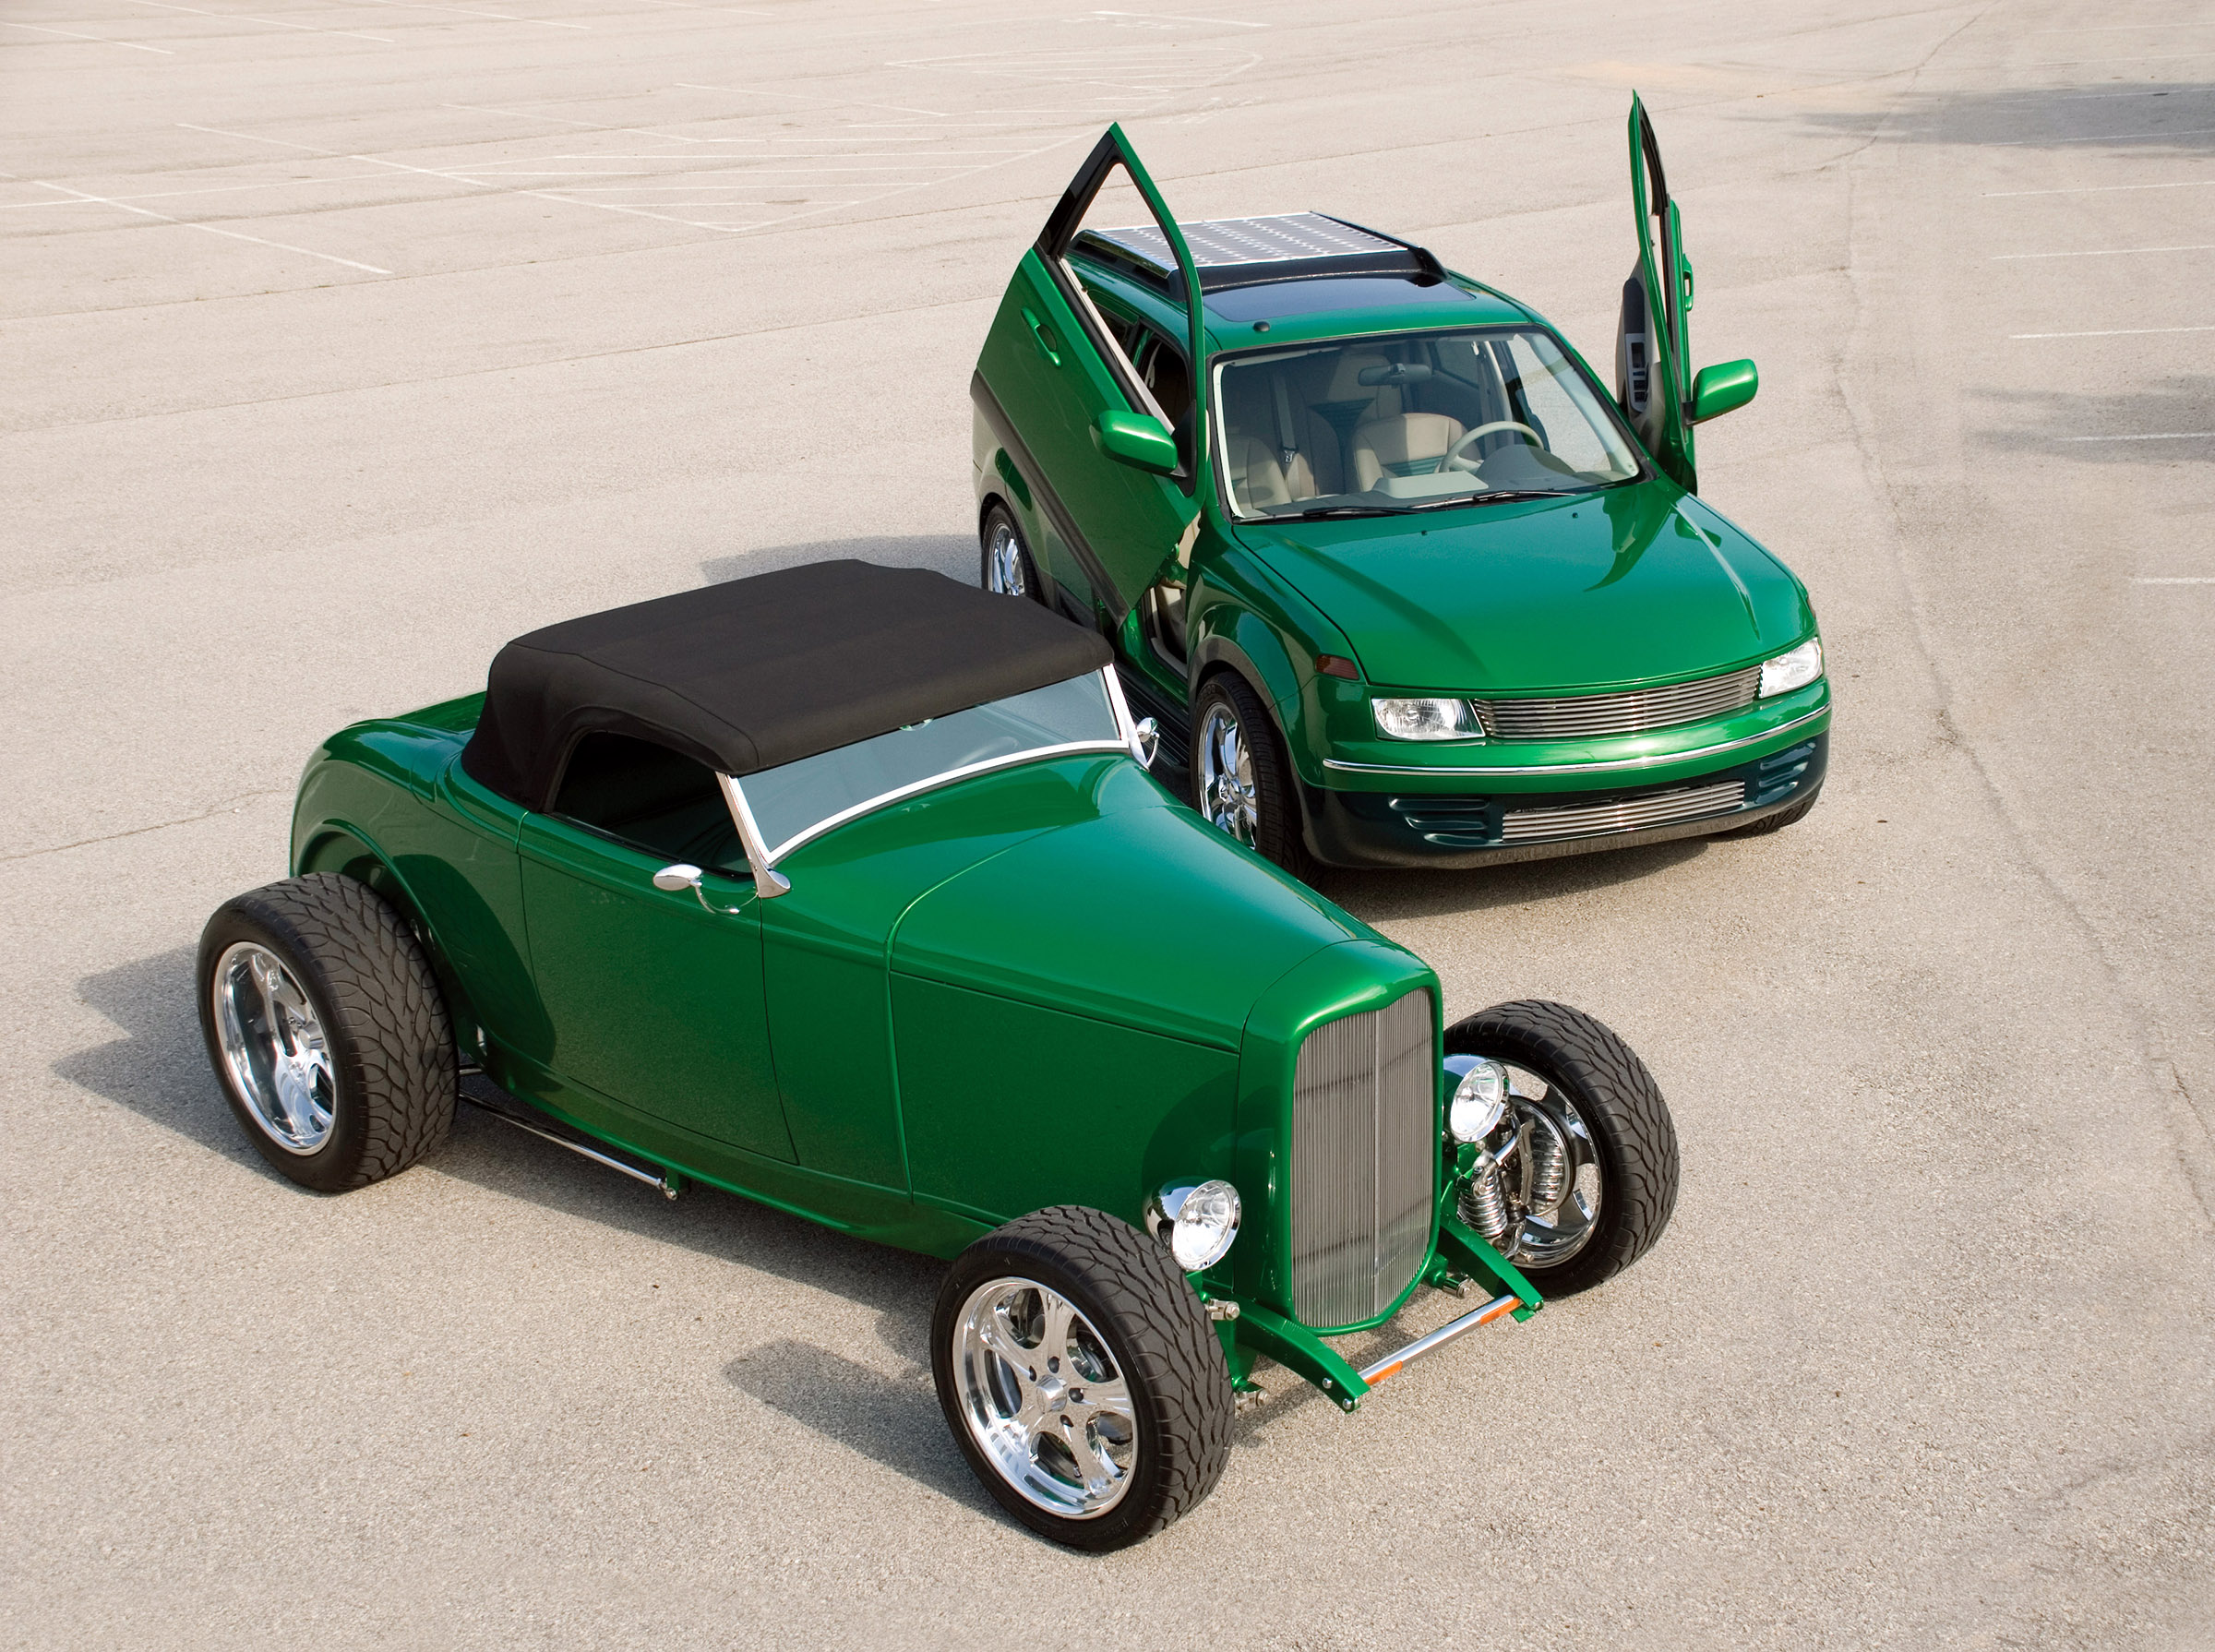
Alternative-fuel sources and hybrid cars are all the rage today. Everyone from major automakers to backyard inventors is pursuing alternative fuels and energy sources. While the ultimate goal is generally to eliminate dependence on foreign oil, for hot rodders there is also the desire to invent and create a better-performing engine.
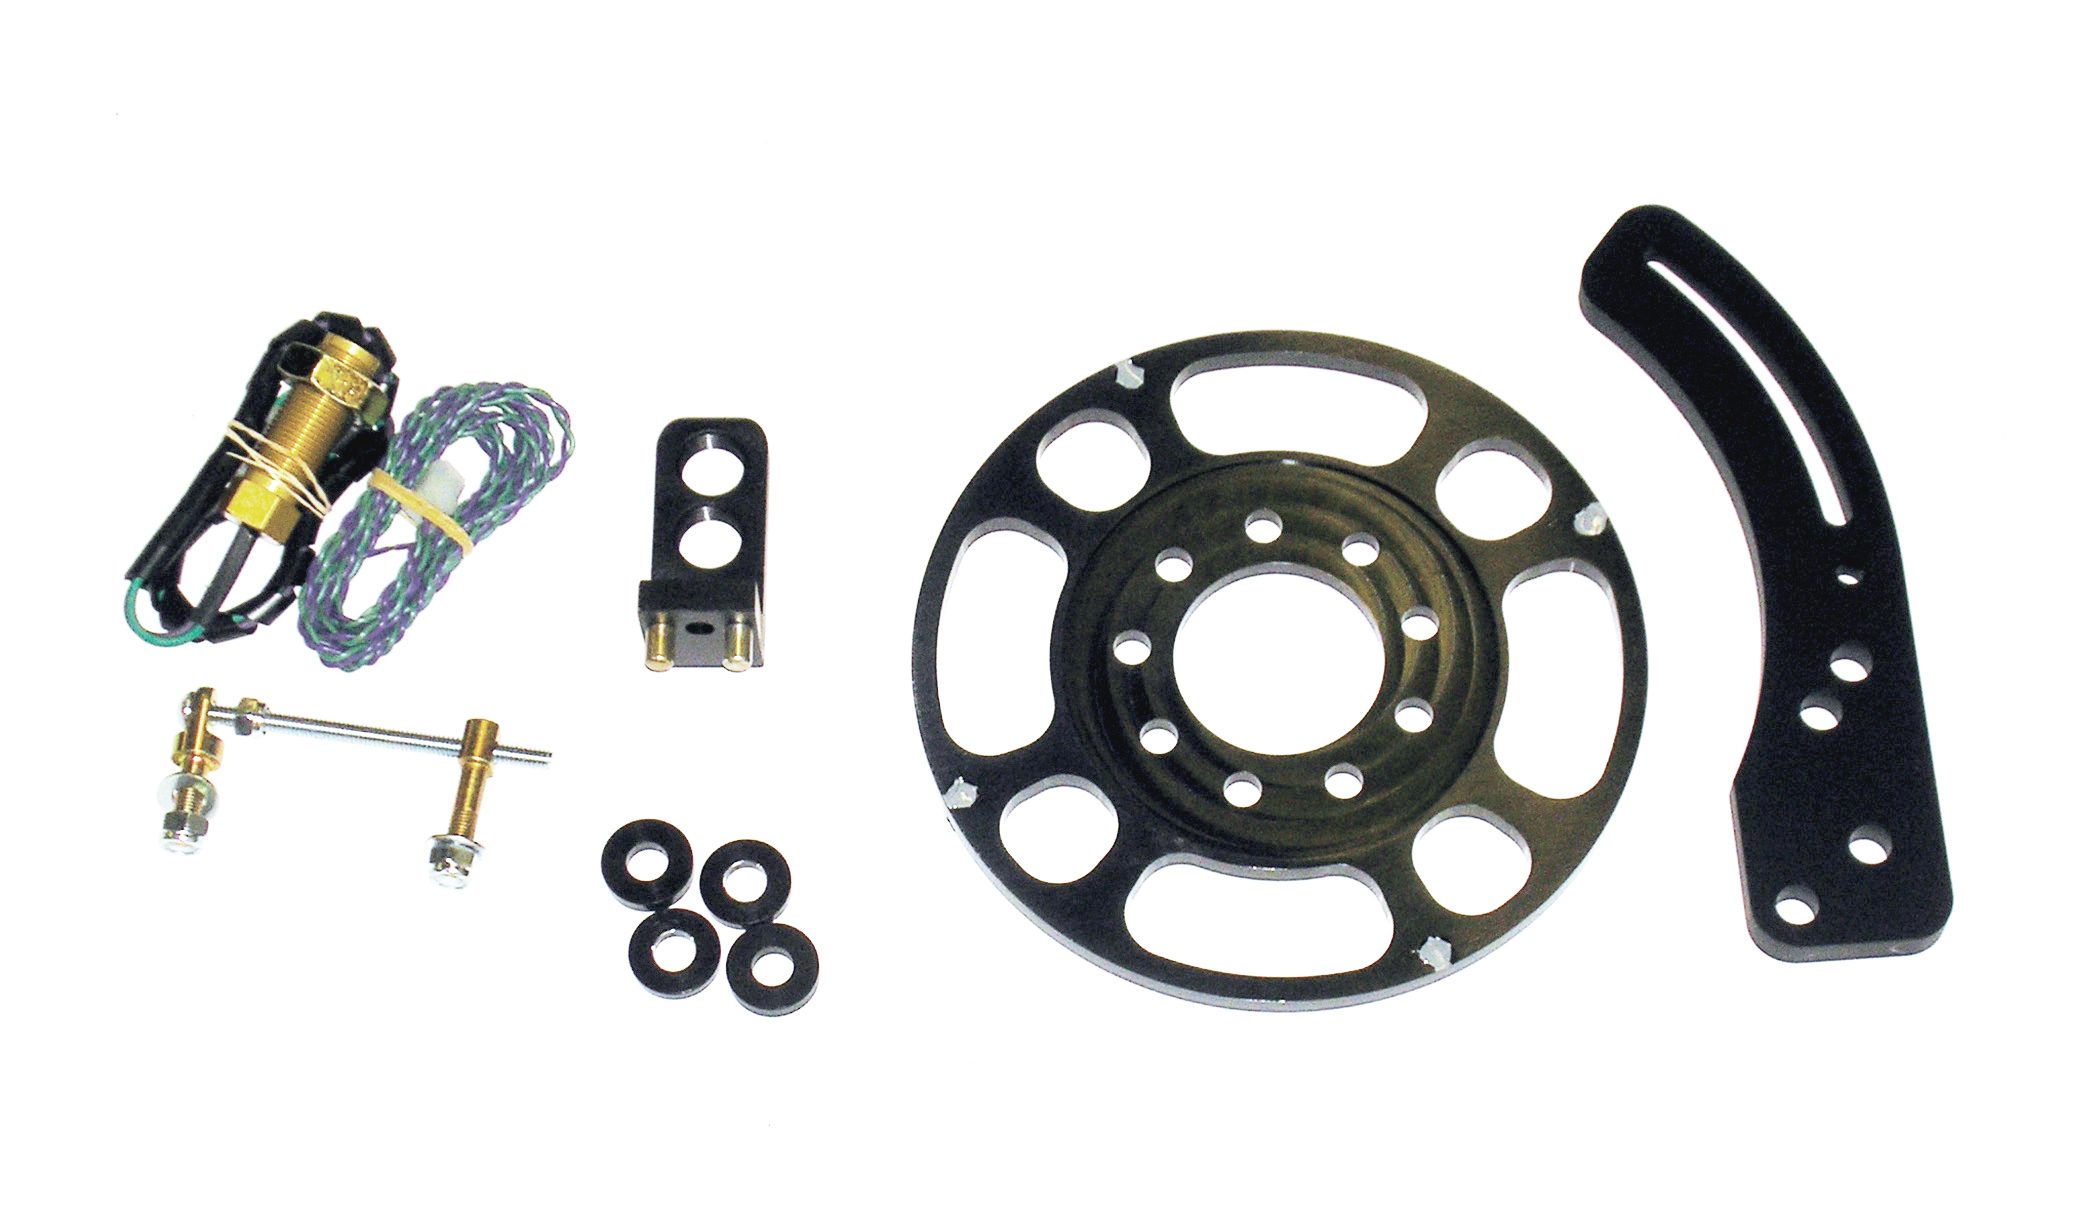
Crankshaft trigger mechanisms have been used in racing applications for a considerable length of time. In truth, they’ve actually been in service for decades. It’s a simple known fact that one of the best ways to improve engine performance is to ensure that the ignition timing is stable. That’s the whole purpose behind such a system, and that’s why racers regularly use them.
0Comments
