TheAutoBuilder.com

Project ‘67: Part 9

Putting a Stop to Our Project ’67

Author

Picture of Carrie Fesler

Carrie Fesler

Story & Photography

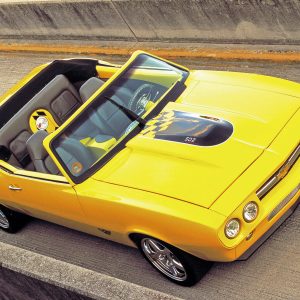
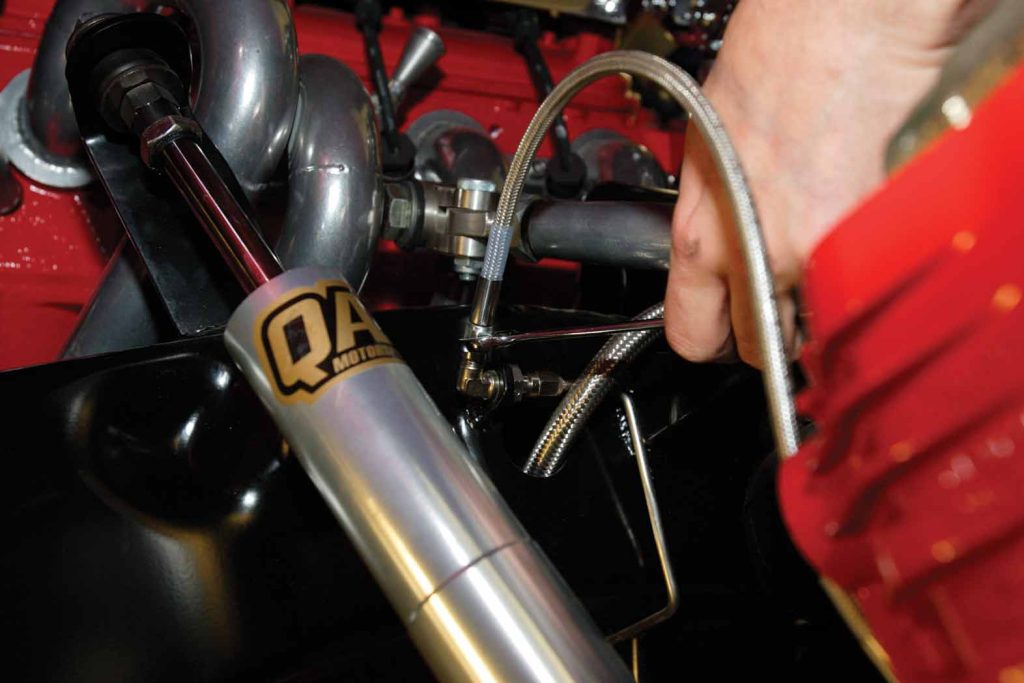
In the long continuation of our Project ’67, the 1967 Chevrolet C10 buildup, several major components and systems have been previously addressed, most notably the Goodwrench LQ4 6.0-liter 366ci Escalade engine buildup by Arizona Speed & Marine. This included the versatile Magnuson Radix supercharger, 4L60E transmission and numerous performance parts and accessories.
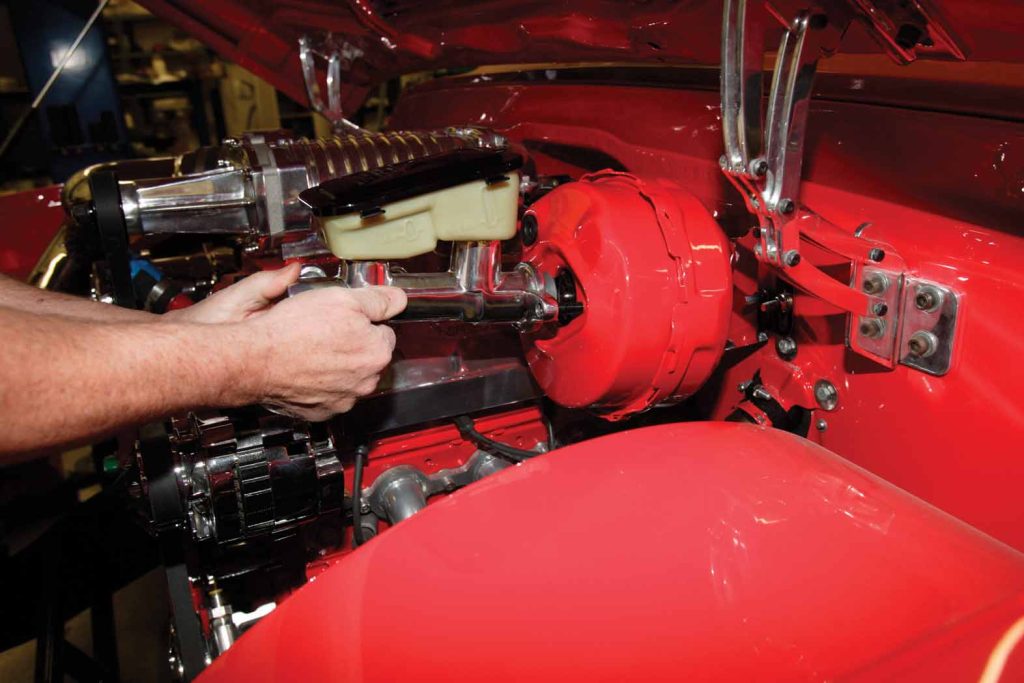
 Continuing along those performance lines and all-out fashion, we would need to contend with the great amount of power this engine package would deliver. Initially, we can’t say that the stock brakes on the C10 were ever designed for the shear torque that would be applied to these assemblies, so it would eventually be necessary to address the stopping performance as well as the go performance. And, after all, brake upgrading was a part of this project plan from the beginning.

Baer Racing in Phoenix is known for its beefy solutions to all matters of braking considerations. In our case, the recommended solution was a complete set of brakes, including the Baer Track Plus system for the front and rear. Baer Racing has been developing brake upgrade kits for well over a decade now, and it has easy-to-install kits for any number of applications. Starting with a replacement kit for the Fox Mustang chassis, Baer soon increased the number of manufactured systems to over 150 different kits, making it one of the largest selections available for parts, complete systems, rotor replacements and other related options. Each of Baer’s kits is designed for installation with no welding or fabrication of any kind.
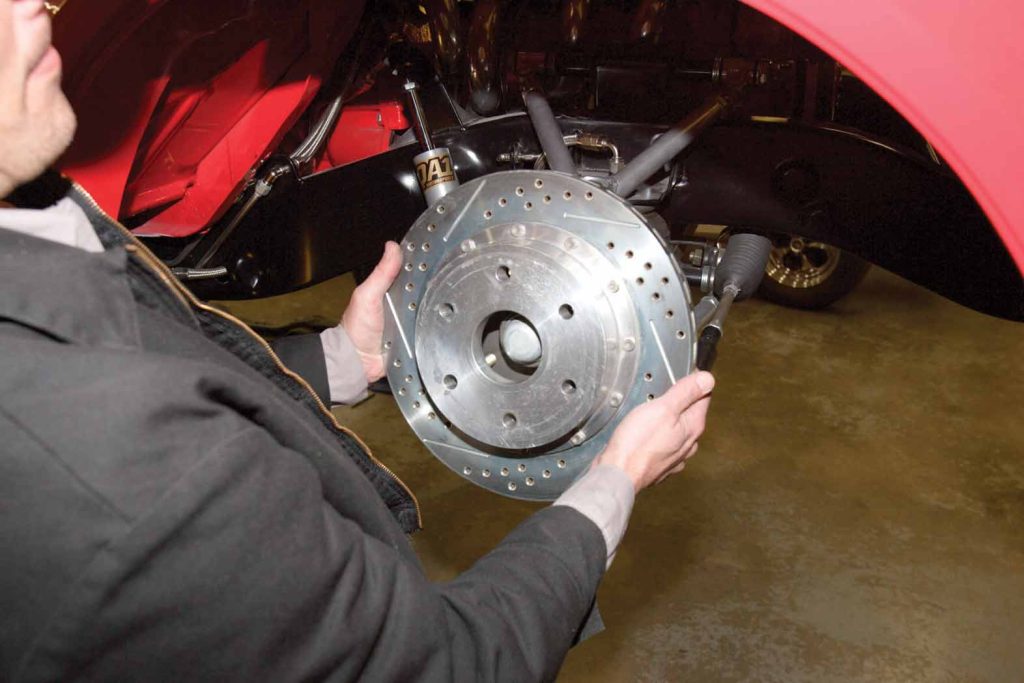
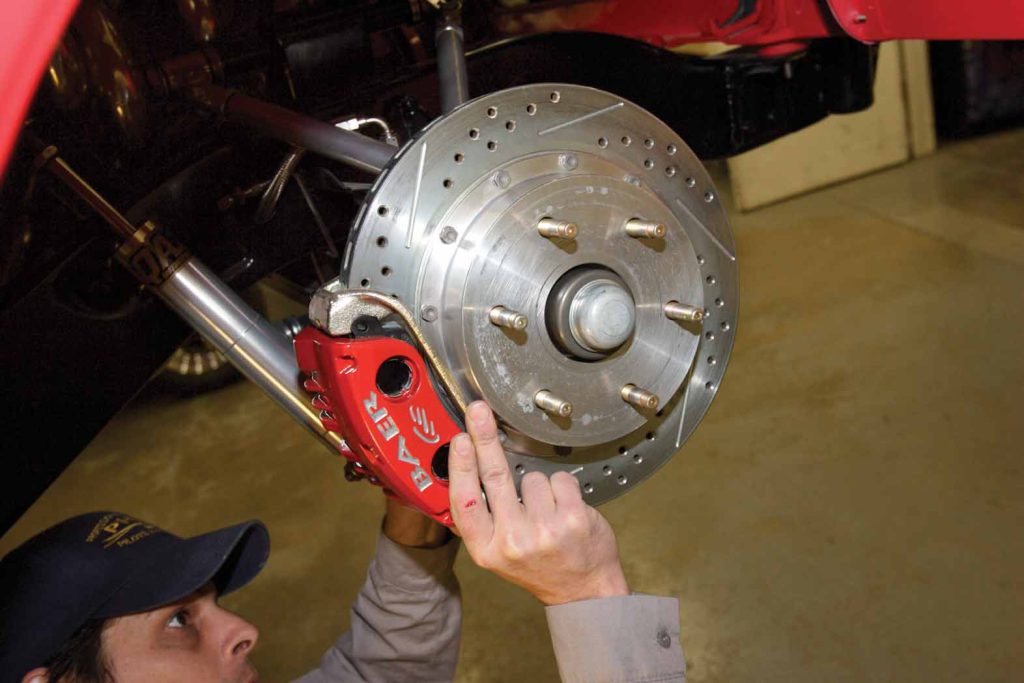
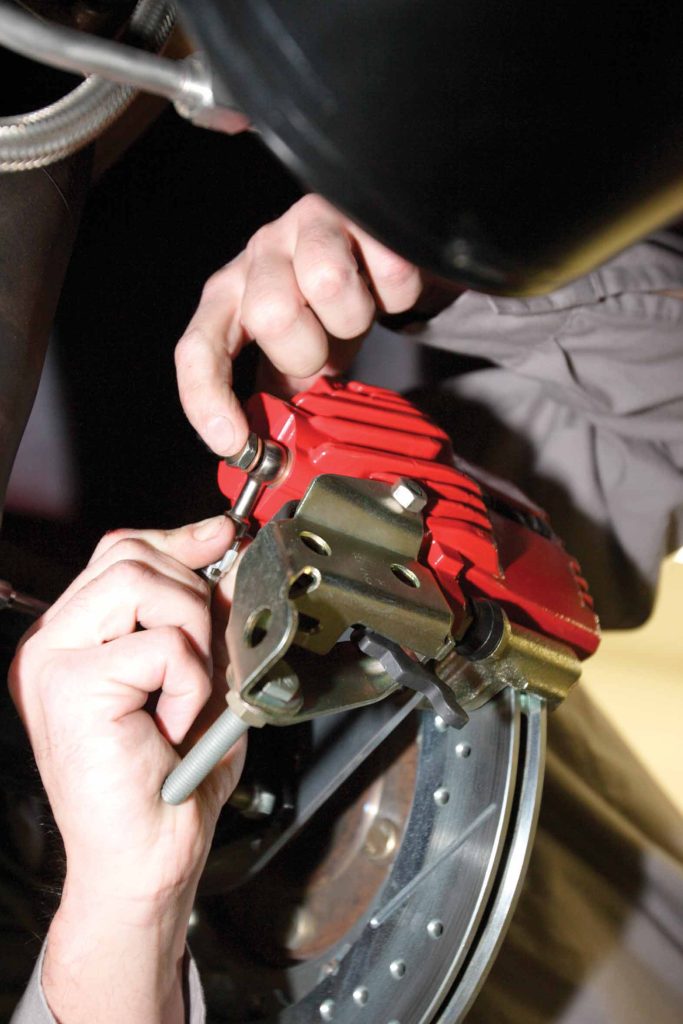
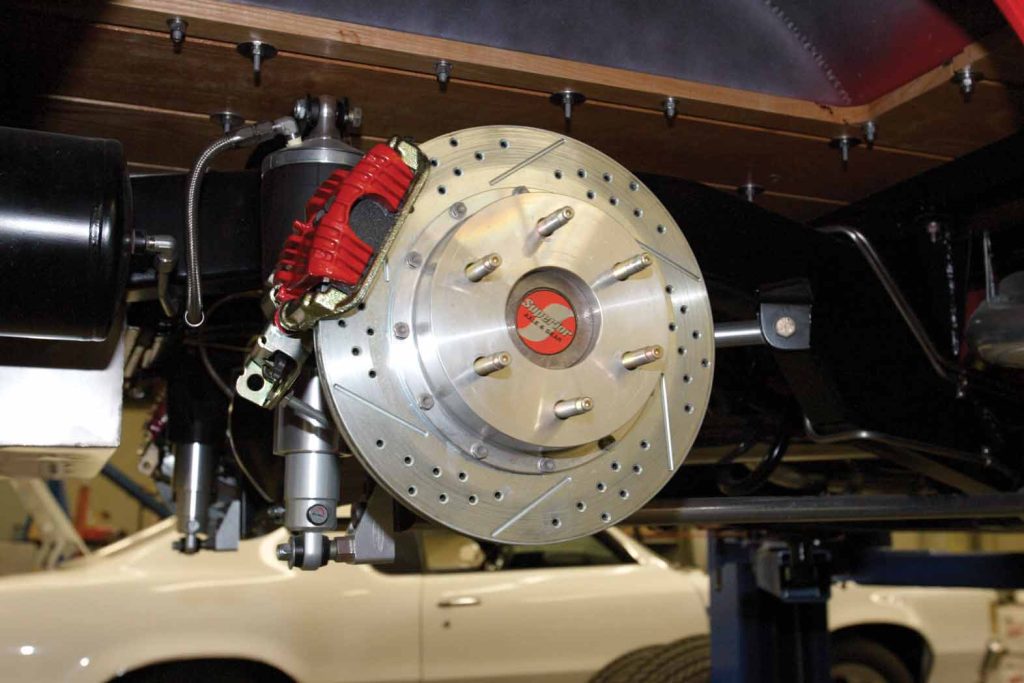
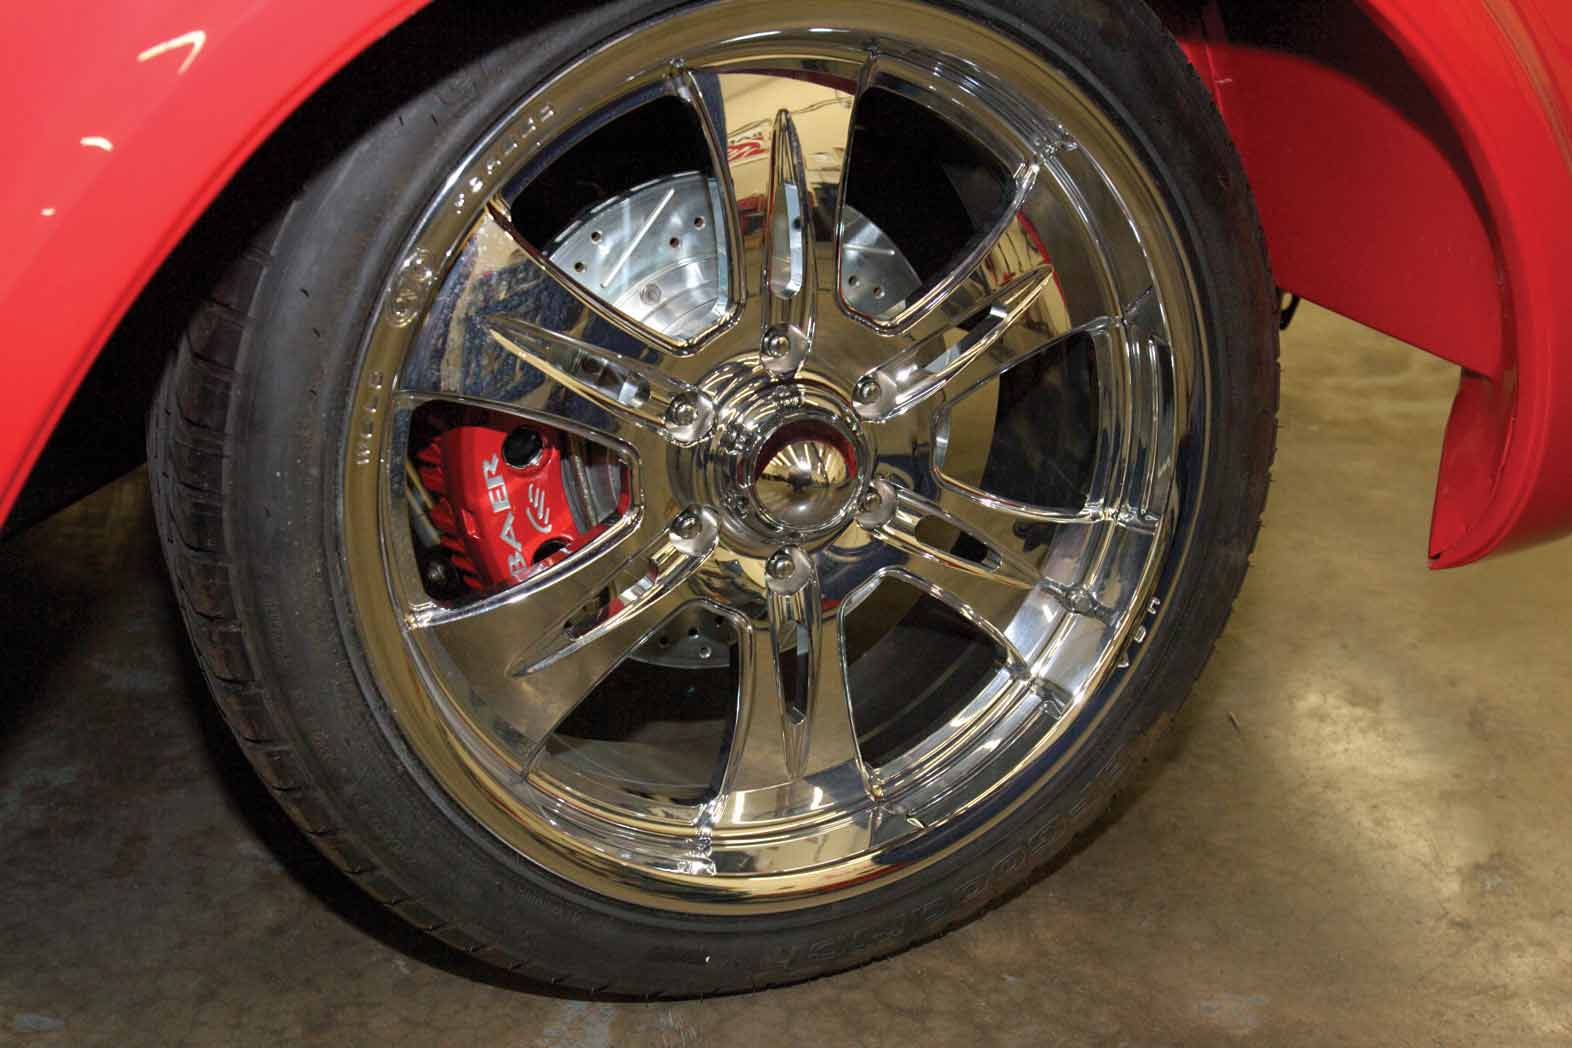
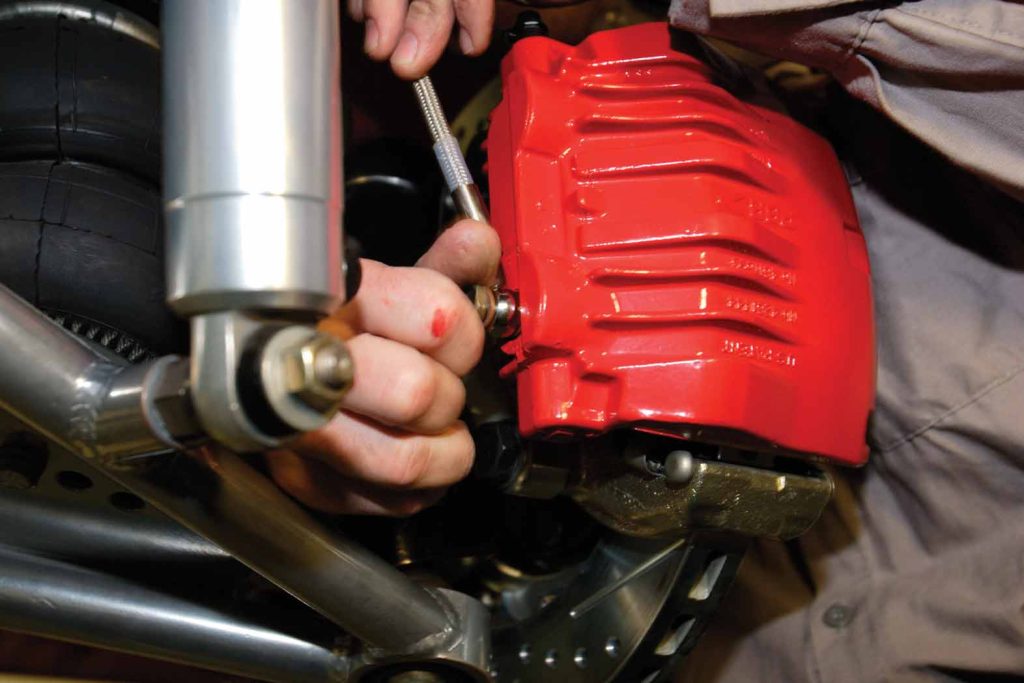
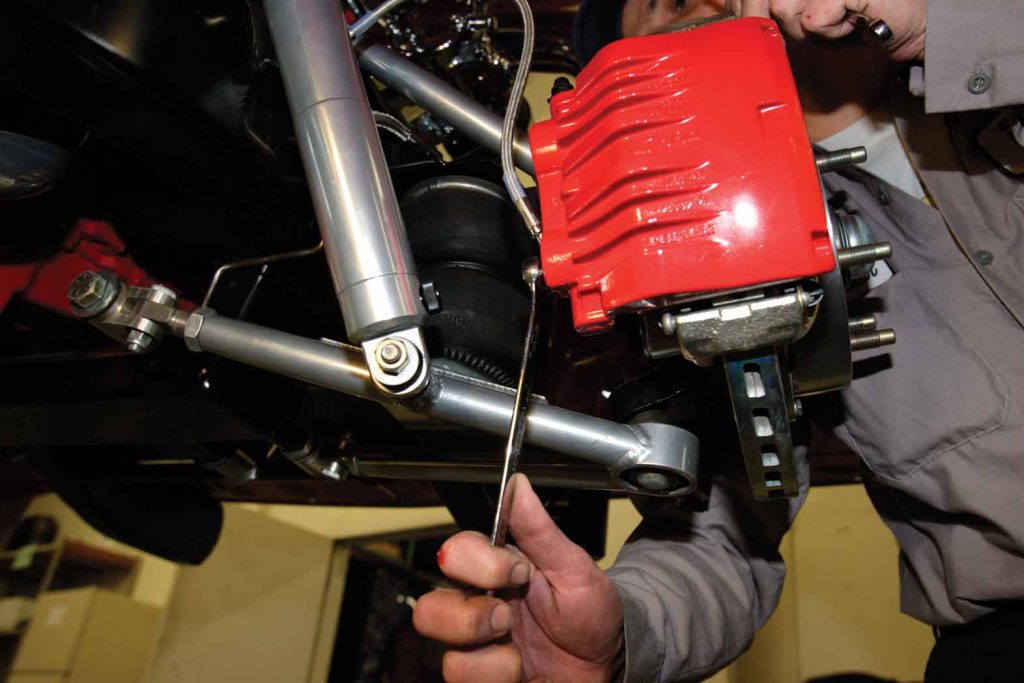
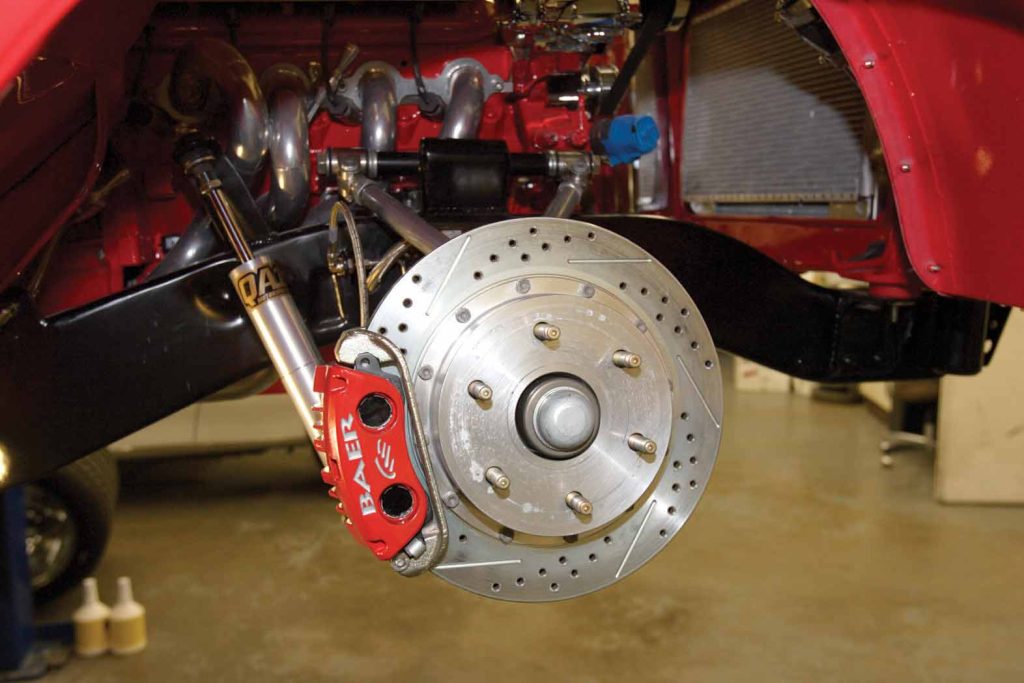
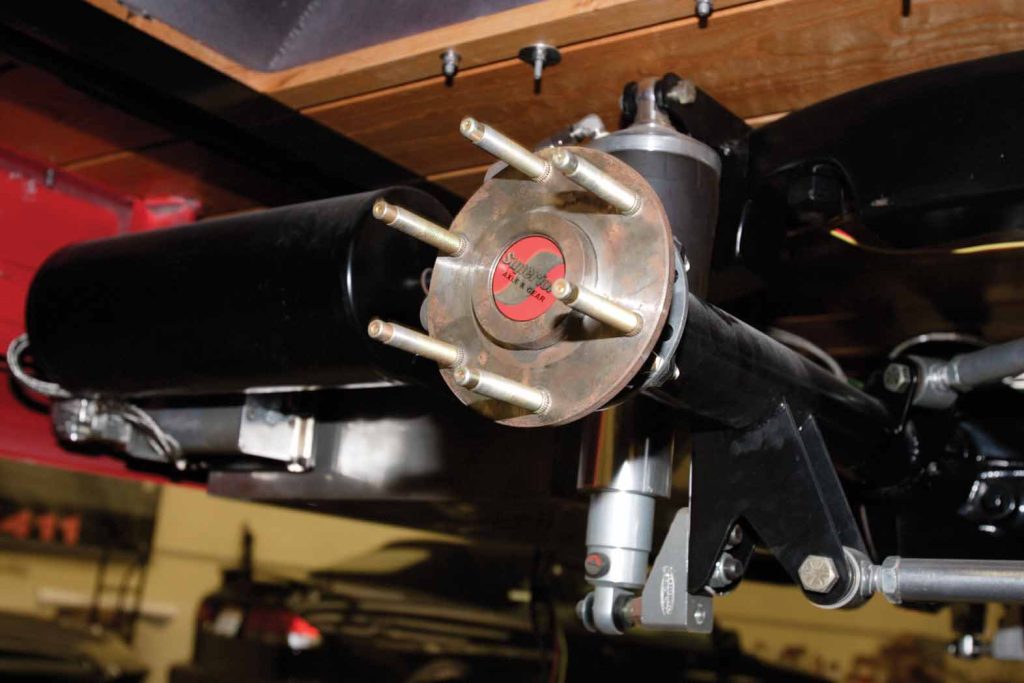
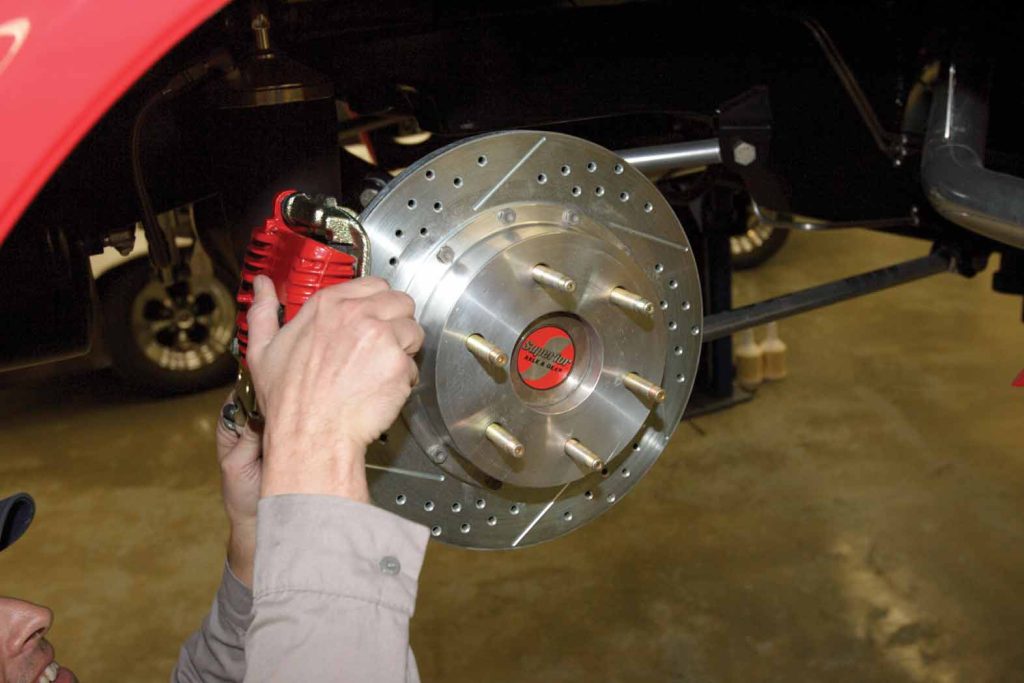
For our C10, both the front and rear brake kits feature Baer Claw Track PBR two-piston aluminum front calipers with PBR one-piston Pin Drive rear calipers. Matching large-diameter drilled and slotted rotors—13-inch front and rear—replace the 11.6-inch (front) and 11-inch (rear) OE units. For the standard ’67 GM pickup (available in six-lug or five-lug), the Baer brake kit increases the front track by 0.375 inch on both sides and more on a drop spindle. The standard increase on a typical Mustang II front suspension, as our truck is so equipped, is 0.300 inch. Due to the larger diameter and contact pattern of the rotor/caliper, there is an increase in the amount of braking force generated, and the larger rotors are able to absorb and shed more heat, which keeps the brake system working correctly under difficult driving conditions. This is just what we were searching for in this demanding application.
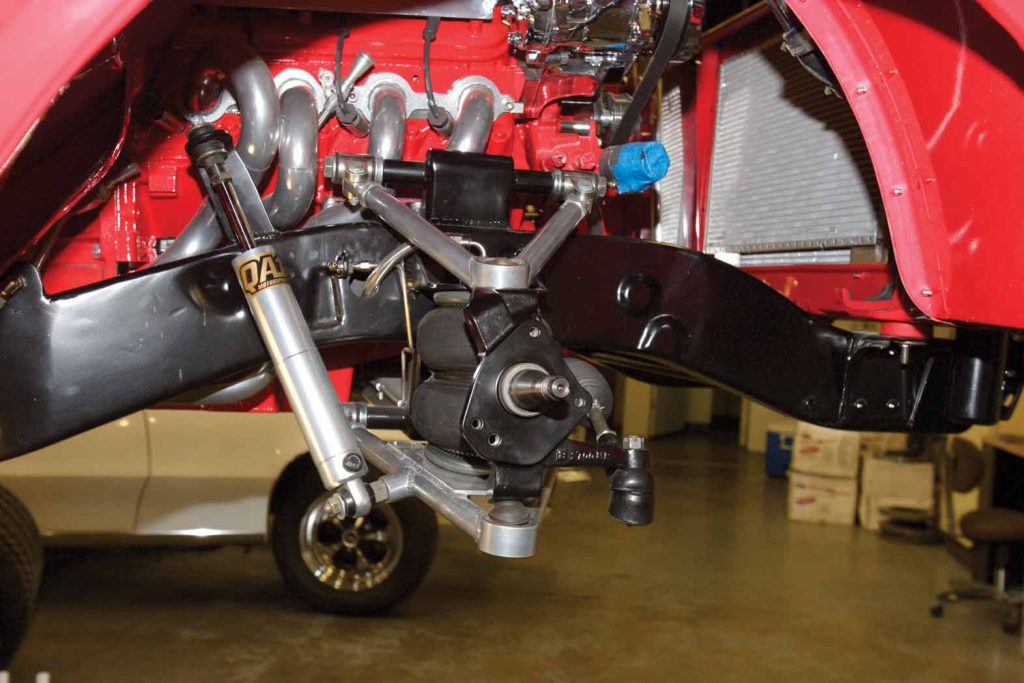
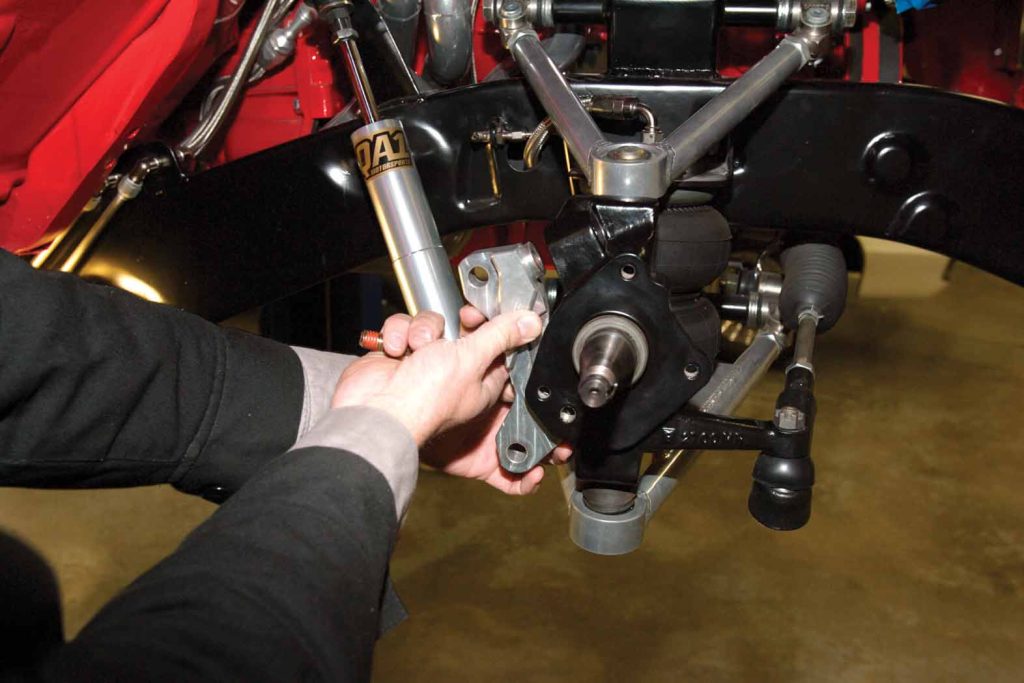
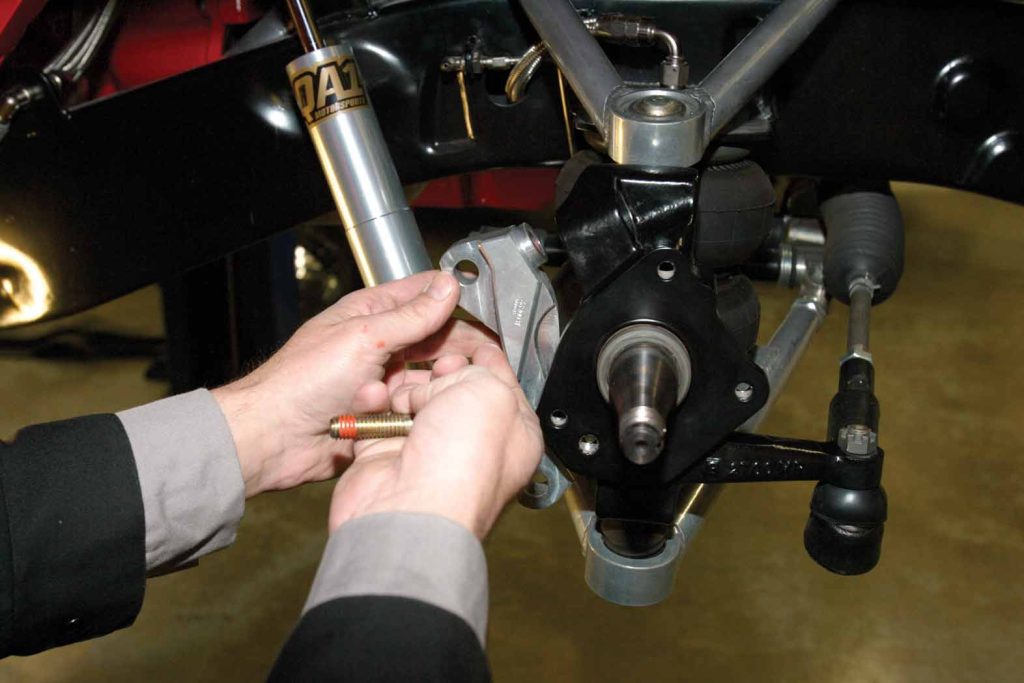
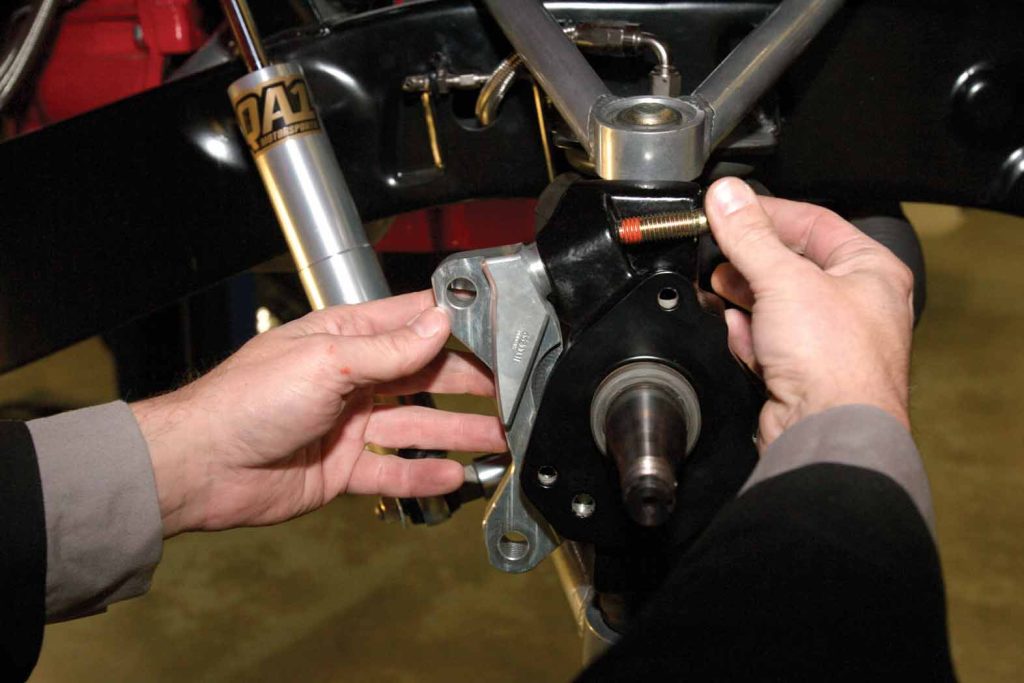
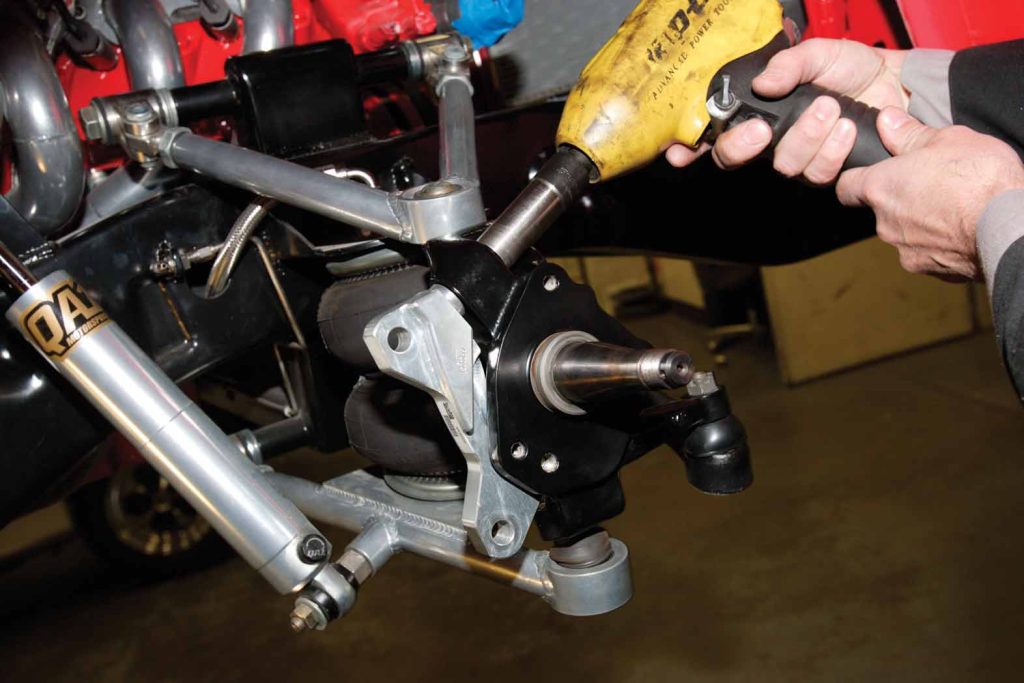
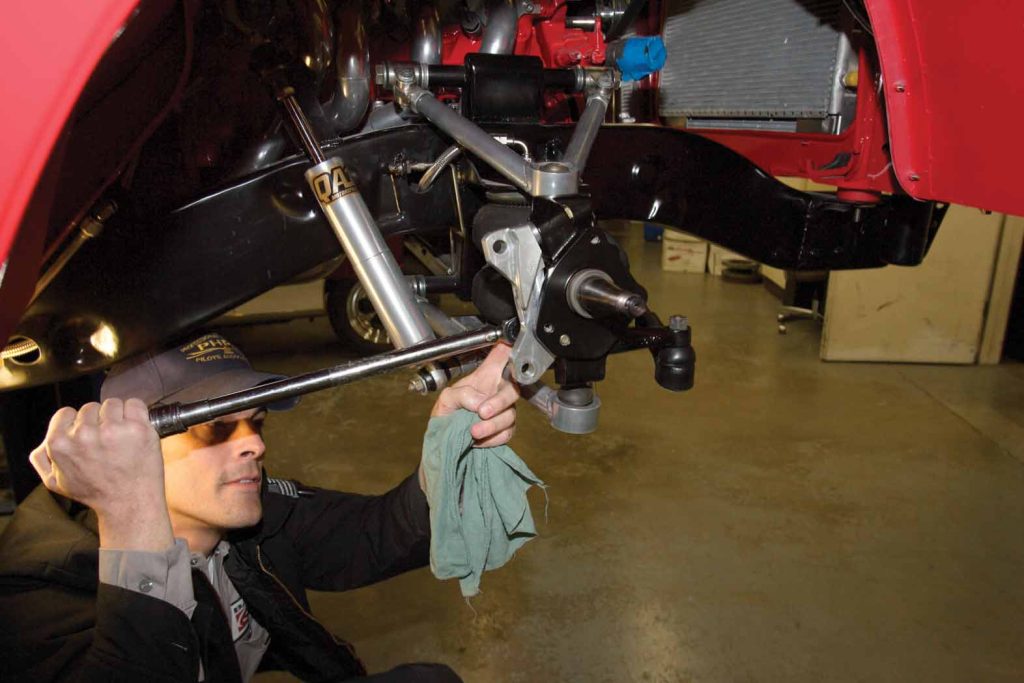
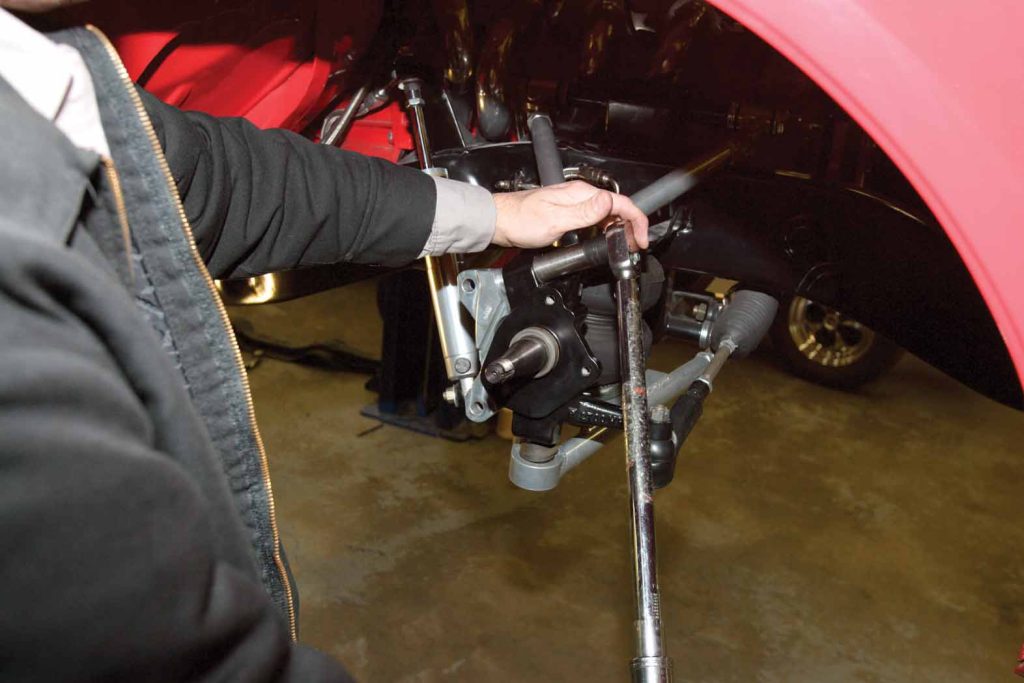
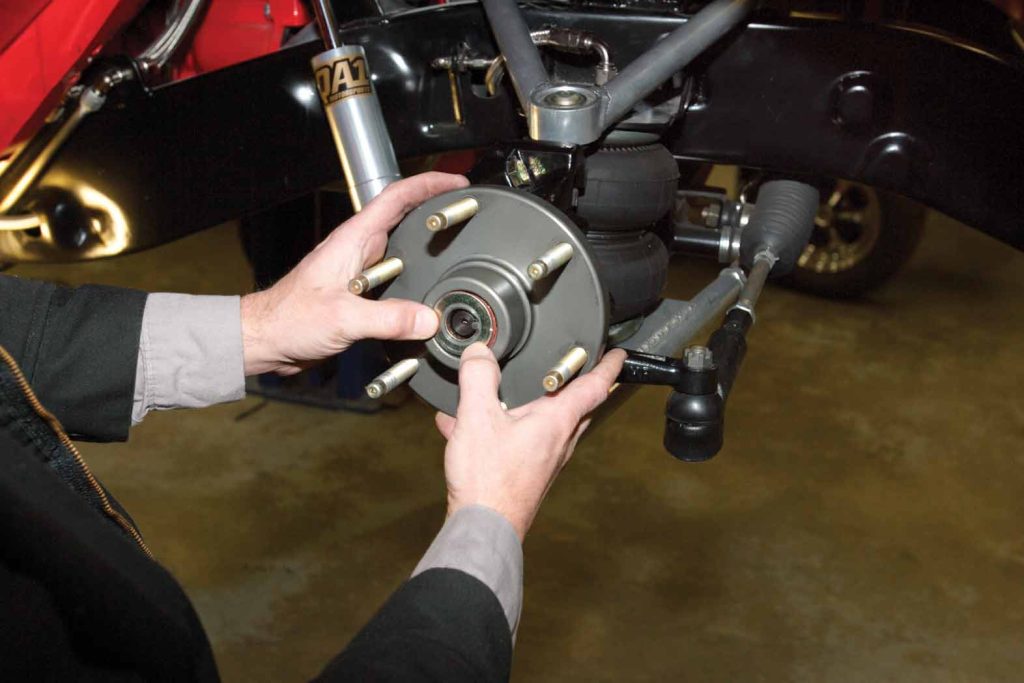
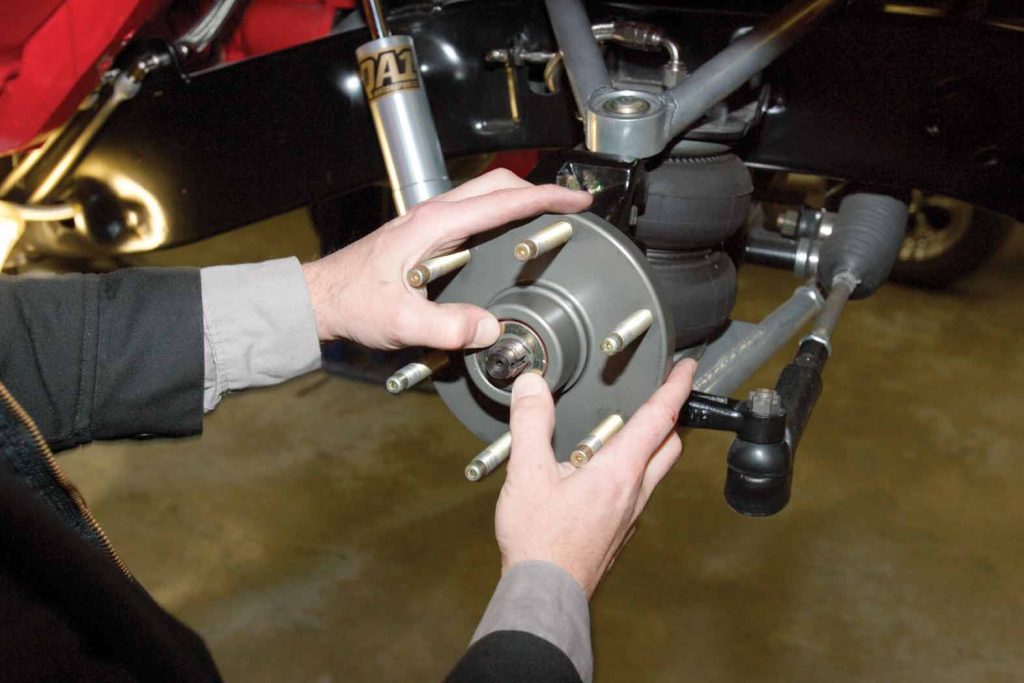
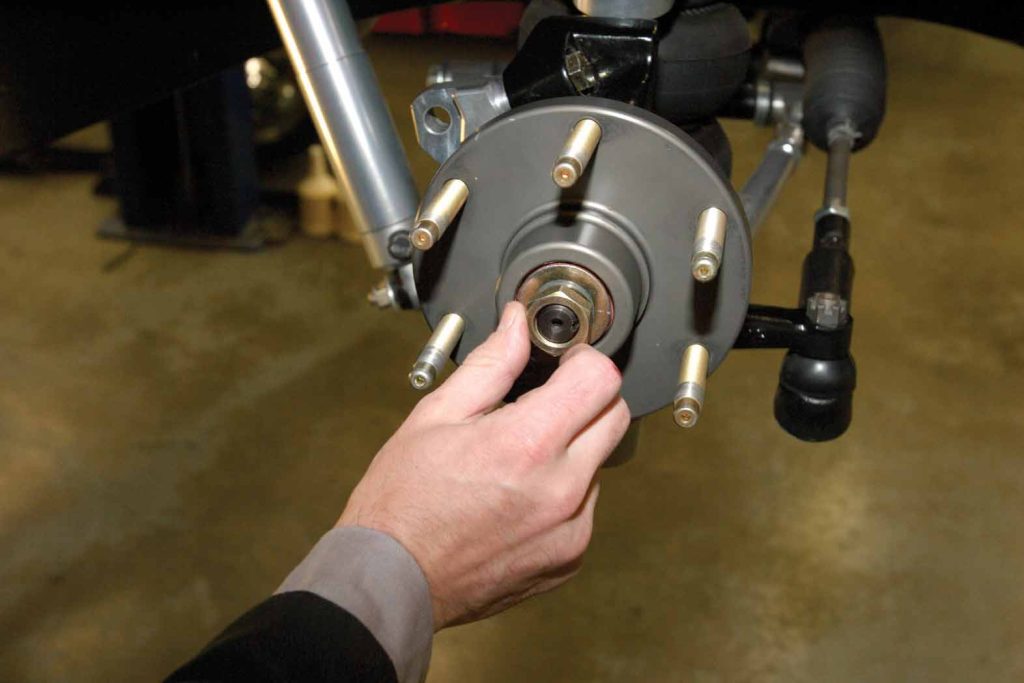
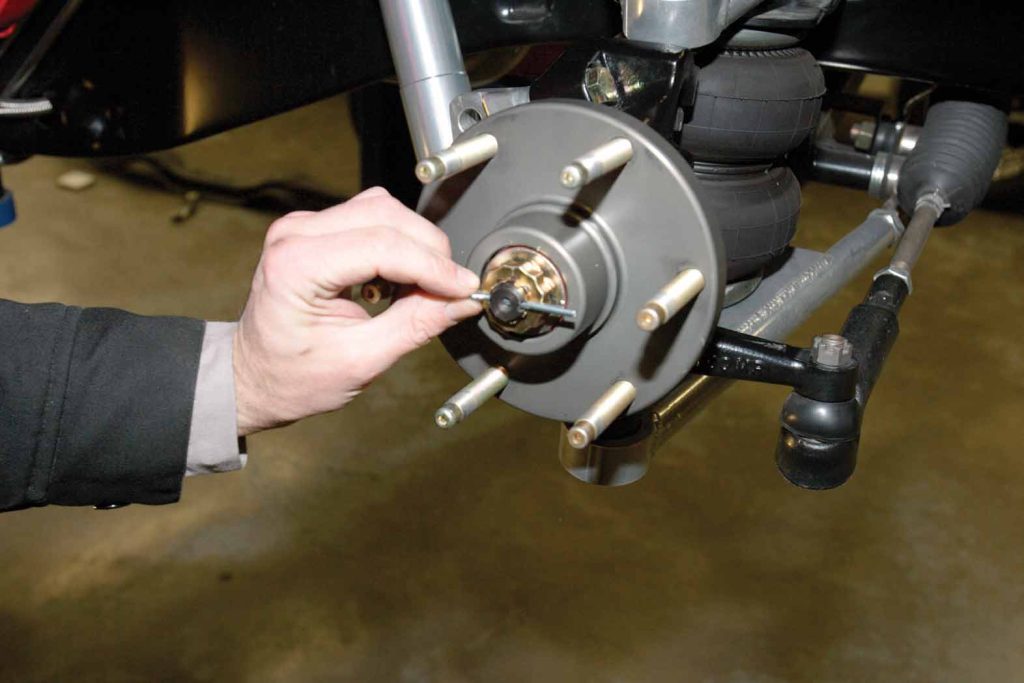
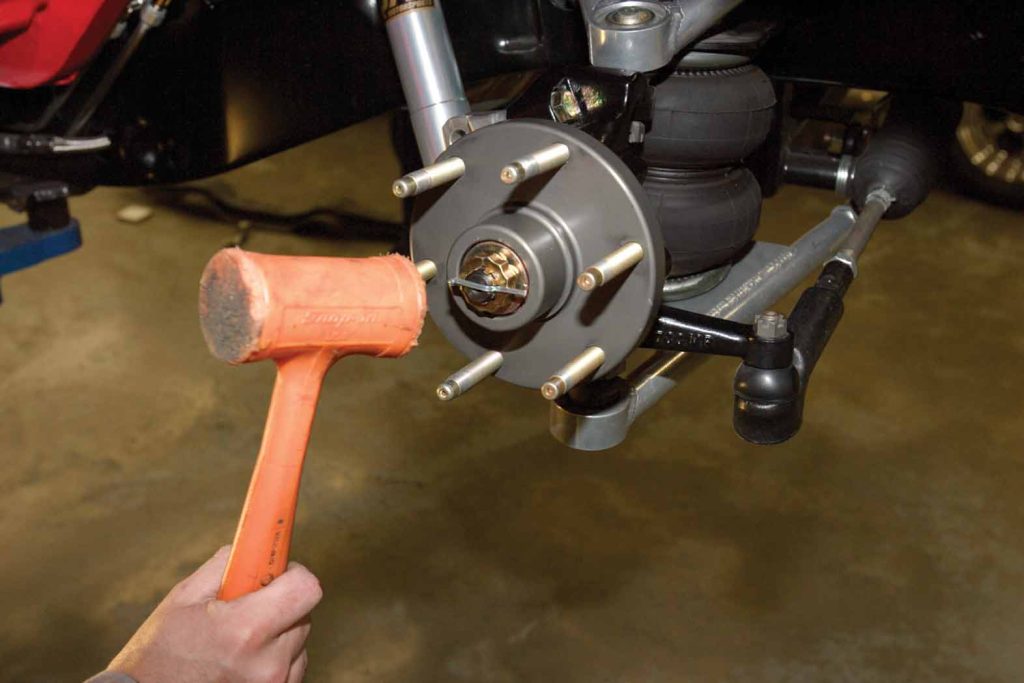
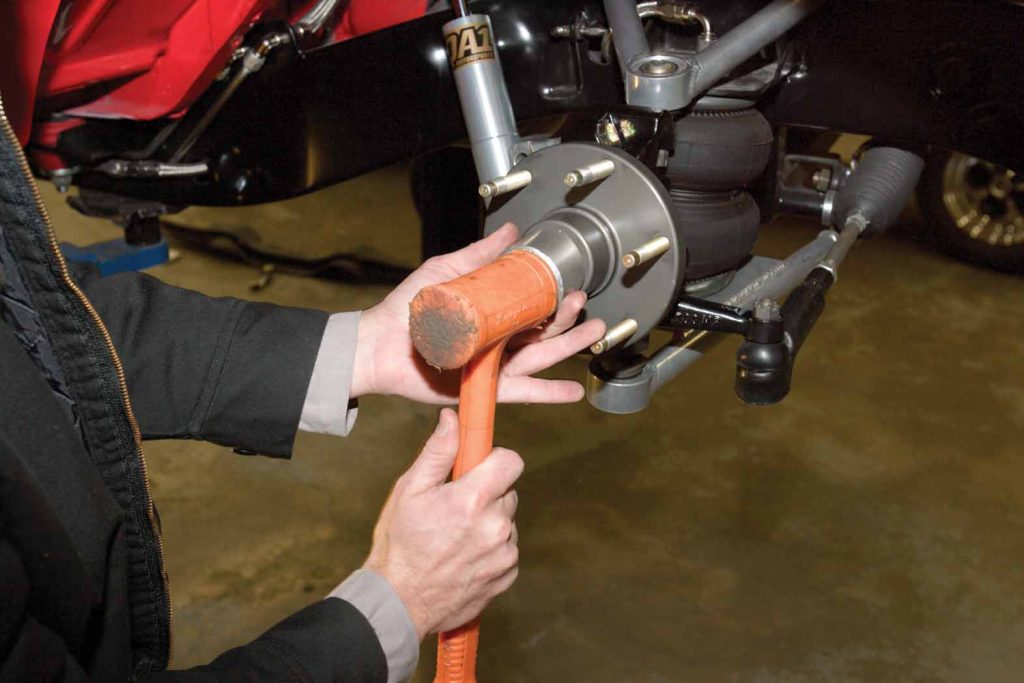
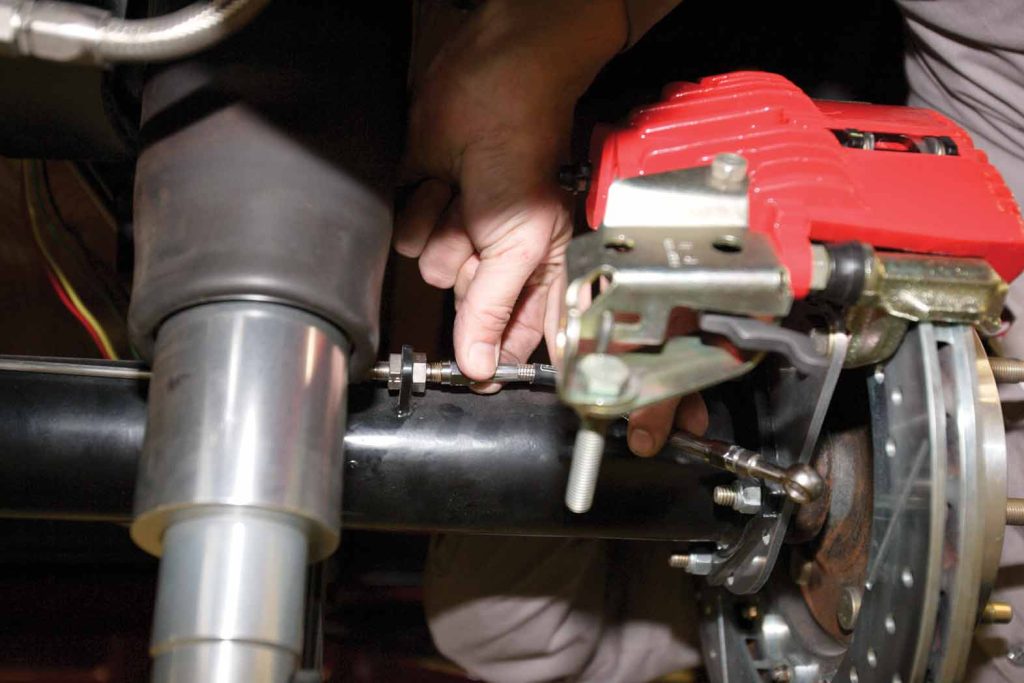
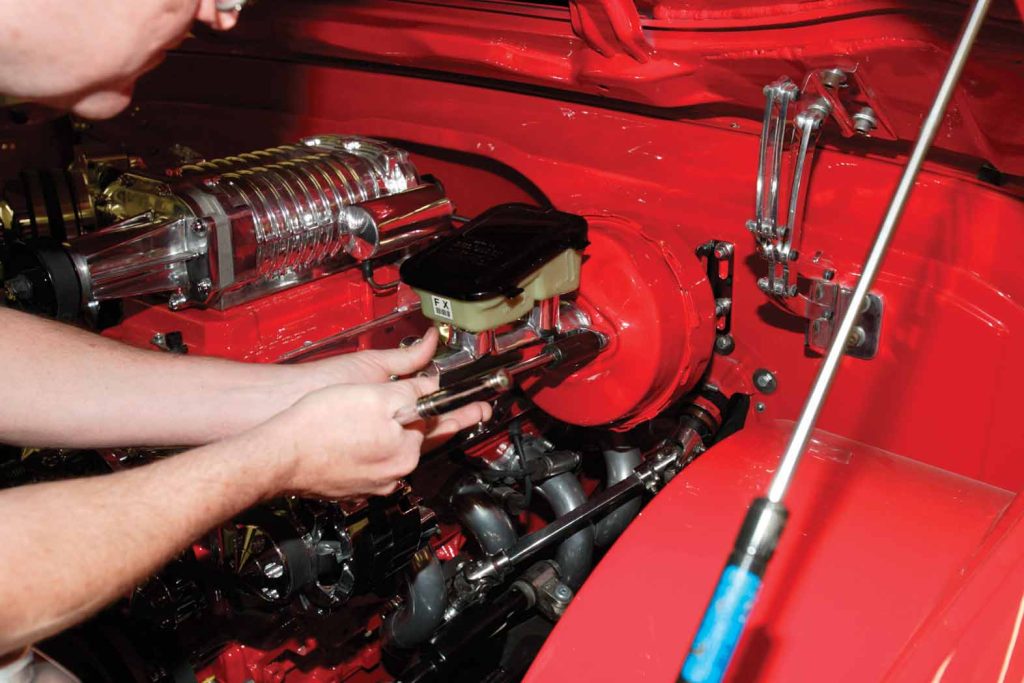
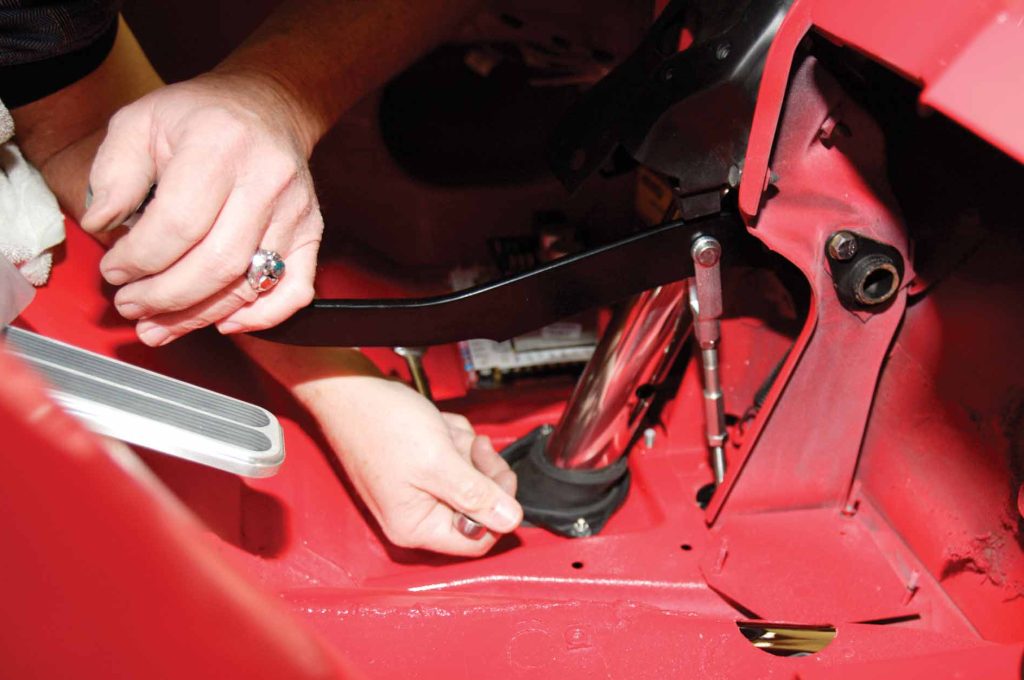
 
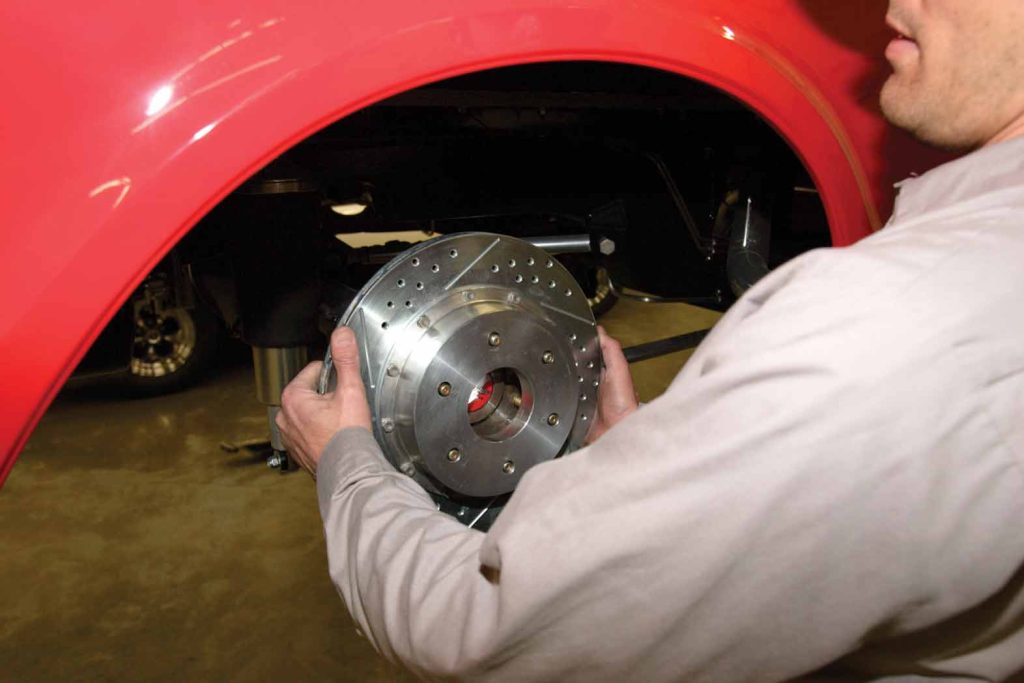
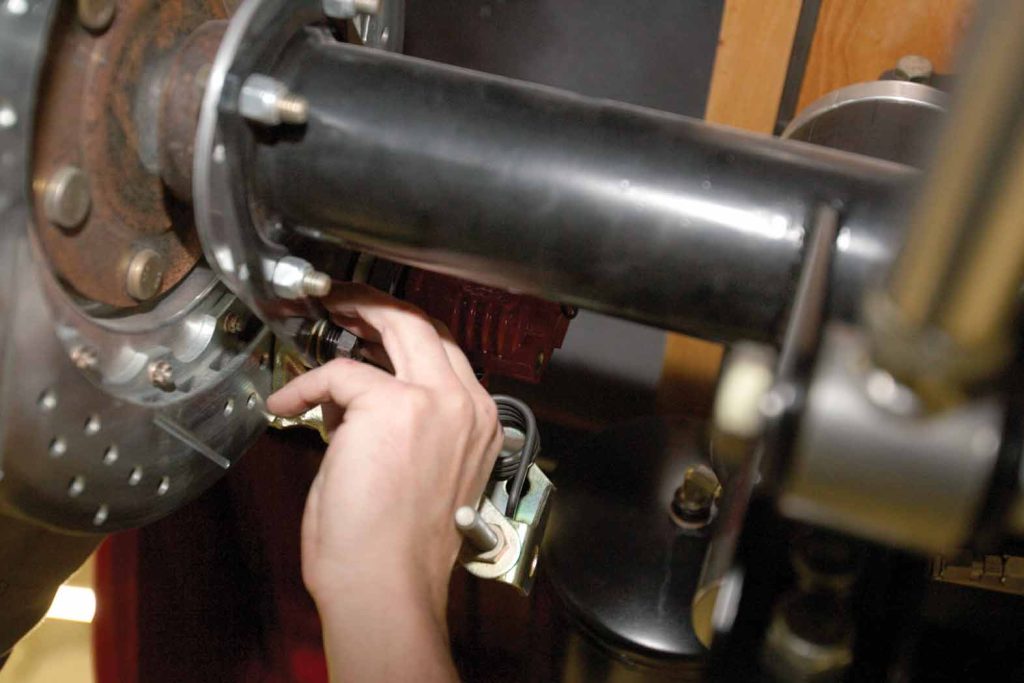
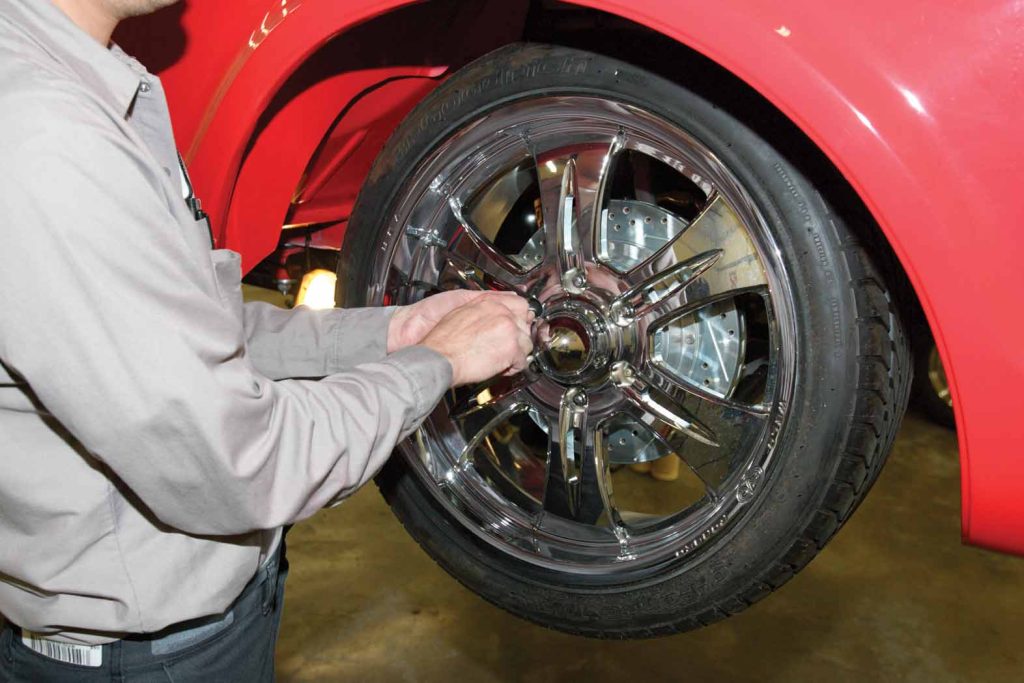
So, with the selection of parts complete, the Chevy was taken to Baer’s facility for the installation of the brakes. Hal Baer and his team quickly equipped our project with the required upgrades, and we were on hand to follow this installation along so that you could see exactly what is involved in getting this job done. Keep in mind that your Chevy pickup doesn’t need to be modified as much as this one is for you to enjoy the benefits of these brakes. Check out this installation to see just how straightforward it is, and then you can decide how much brake you need to give your Chevy real stopping power.

 Continued»

During our suspension modifications, we updated the front suspension to a typical tube-type aftermarket Mustang II assembly, commonly available from such companies as Heidt’s, Scott’s, etc. Typically, these systems will come with an upgraded disc brake system unless you order a basic unit without it, as we did. Being local, Baer had just the assembly we needed—its Track Plus braking system.
Our first step was to place the intermediate bracket, which will hold the caliper, up to the front side of the spindle, and then start the 7/16-inch bolt (from the rear) and tighten finger-tight. Next, we inserted the 3/8-inch bolts and tightened finger-tight.
We then used an impact wrench to secure all bolts and torrqued each bolt to the specified torque settings (7/16-inch bolt to 65 lb-ft and the upper 3/8-inch bolts to 35 lb-ft).
With hub in hand, we then made sure the inner portion of the hub was packed with grease before using the supplied retaining washer to begin the hub installation.
While installing the hub onto the spindle, use the supplied hardware, including the main nut, and while rotating the hub, tighten the assembly until very snug. Once fully seated, back off just enough to snug down on the proper rotation feel. It is important to perform this step correctly; otherwise, you will prematurely wear out the bearings, or they will have too much free-play.
The final step of the hub installation is to secure the retaining castle nut with the supplied cotter pin before tapping the dust cover into place. Make sure not to ignore this step.
The rotor installation is basically as easy as it looks. Using the wheel studs as guides, we simply slid the new two-piece rotor into place. Baer makes a variety of rotors for this application. We chose the two-piece rotor so that Baer could modify the hat in order to accommodate our new six-lug Weld Wheels.
With the rotor in place, we installed the caliper over the rotor and attached it to the intermediate bracket that we installed earlier using the supplied hardware.
Brake lines are important in any brake installation, so make certain that yours are in good shape without noticeable kinks or abrasions. As the brake lines are an important element to any installation, we installed all new lines because this truck was built from the frame up. However, it is important to ensure that all brake lines are free from all suspension and steering movement so that they will not come into contact with any moving parts.
Once the lines were properly routed and secured, we tightened the banjo bolts and hose connections. With the line tightened at the caliper, we then tightened the line to the frame connector fitting.
Beautiful and safe, our front system is finished and ready to bleed once the rear system is installed.
Because of this article, Baer removed the rear axle in order to fit and more easily install the mounting bracket for this new rear caliper system. That will not be needed for your installation because the brackets will simply bolt on. This process was detailed in a previous Truck Builder (June ’04).
As with the front rotors, we lined up the rear axle wheel studs with the rotor and slid the assembly into place.
We then slid the rear caliper over the rotor and attached it to the rear bracket. It is important to tighten these bolts securely. To spec, we used an impact wrench and checked for torque.
Due to the four-disc system, similarities between the front and rear are obvious. At the rear, the frame line was connected to the line connector located on the axle.
Once the rear brake lines were secured and properly routed, we tightened the banjo bolts and hose connections.
There you have it. The entire installation is pretty much complete. The only remaining task is to install the wheels, tires and miscellaneous items beneath the hood.
To complete our installation, we added a set of 20-inch Weld wheels wrapped in BFGoodrich rubber.
There are other parts to this system than just the rotor and caliper installation. A new brake booster is required in order to allow the system to function. We replaced the factory booster with a 9-inch dual-diaphragm booster to add to our impressive display under the hood. We added a touch of flare by matching the booster with our custom mixed red paint and then added small touches of chrome and polishing work.
With our old stock booster removed, this portion of the engine compartment lacked something, so we proceeded with the newer booster installation. Luckily, the addition of our new booster was a snap. We simply placed the new unit in place and bolted it tightly.
With the new booster in place, we added the master cylinder and bolted it into place.
Our final step was to attach the booster cable to the brake pedal. Once attached, we proceeded to bleed the system before taking it out on the road.
Nestled behind our 20-inch Weld Wheels, these new Baer brakes were a definite improvement from where we started.

ARTICLE SOURCES

Picture of BAER Brake Systems

BAER Brake Systems

3108 West Thomas Road, Suite 1201Q
Phoenix, AZ 85017
602/233-1411

Picture of BFGoodrich Tires

BFGoodrich Tires

1 Parkway South
Greenville, SC 29602

864/458-5000

Picture of Weld Wheel Industries

Weld Wheel Industries

6600 Stadium Dr.
Kansas City, MO 64129

800/669-9353

Free Download WordPress Themes
Download Nulled WordPress Themes
Premium WordPress Themes Download
Download WordPress Themes
udemy free download
download intex firmware
Download Premium WordPress Themes Free
download udemy paid course for free
Scroll to Top