Work Continues and the ’Glass Flies as We Finish the Alterations to the Hull

In our last installment, we prepped the bottom of our behemoth Spectra 20 for extensive modifications to its lifting strakes. As we were on the cusp of getting into the lamination of the actual structures that would be shaped into the lifting strakes, a patch of bad weather stopped us dead in our tracks. Luckily, the motivation to get the bottom of the boat done, which had waned early in the project, wasn’t going to be thwarted with a couple of rainy days. Once the clouds cleared, we got back to work preparing for the modifications to the bottom of our hull.
In theory, the work was straightforward—we would mask off the area surrounding our repairs and strake
extensions, and we would use the form we had constructed to guide the lamination so that the edge of our lifting strakes would come out straight. The thought was that if we relied on the form, we could greatly reduce the amount of work that would be required to true the strakes after the lamination process was completed. It was a good theory, but it never really made it past that stage, as you will soon see.


recommended 5 cc of catalyst per pint of resin.
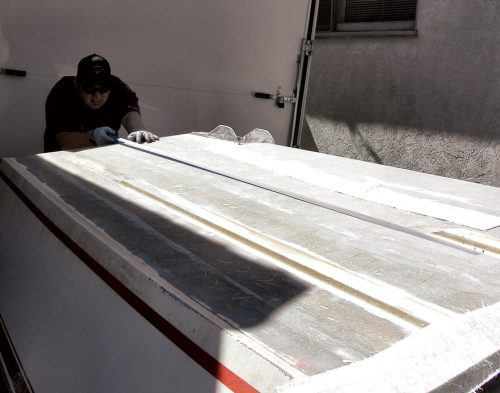
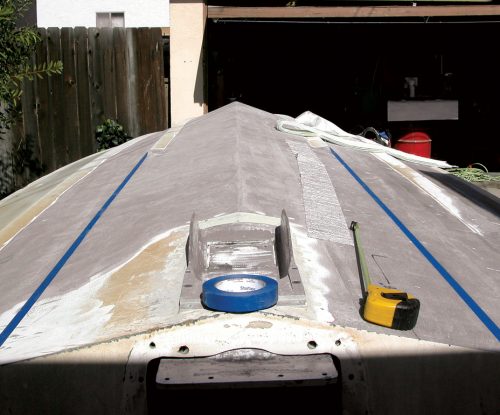
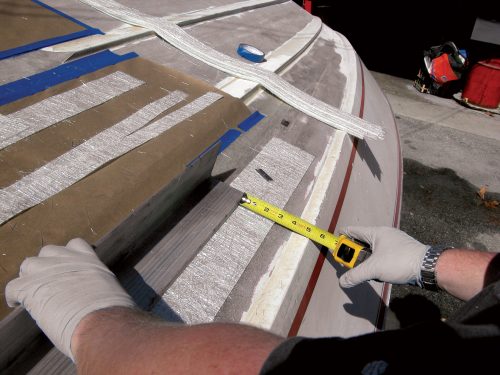
Before we could do any of the repair work, the first step was to wash down the hull and remove any contaminants that may weaken the bond between the existing fiberglass and the new ’glass we would be laying. After the hull was washed with water, it was left to dry in the sun for a couple of hours so we would be sure there wasn’t any latent moisture that may cause problems once we started laminating the fiberglass. After we were sure the hull was completely clean and dry, we started masking off the area around our lifting strake extensions. It would be nice if we could have used a straightedge to assure our tape lines were in the appropriate locations.
Unfortunately, our addition to the strakes started right after the strakes curved around from the entry portion of the bow.
To be sure we had the tape laid in the correct location, and the strakes were following the proper path, a good degree of visual inspection was used. Once we thought we were where we needed to be on the first strake, we took a measurement from the edge of the tape line to the keel of the hull and duplicated that dimension on the other side of the boat. From there we could check the distance between the outer edges of our new tape lines to the existing outer strakes. Once both tape lines were halfway between the outer strake and the center of the hull, we knew we had our tape lines laid out correctly. Thankfully, the hull is symmetrical, and we didn’t run into one of those situations where the finished product looked awry, while the measurements indicated things were properly located. With the measurements coming up equal on both sides, and the tape lines looking straight and true, we started masking off our work area.
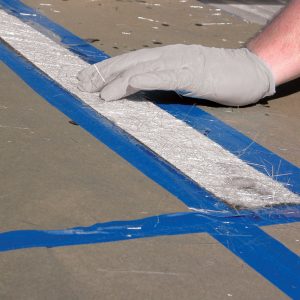
We chose a heavy-weight construction masking paper for our project. The thought was that the thicker paper stock would be less prone to wick up stray resin and subsequently become bonded to the hull. We bought a 24-inch-wide roll from our local home improvement store and then cut the roll in half on the band saw, effectively doubling the amount of linear footage of masking paper. You can also purchase 12-inch-wide taping paper. However, the main reason we cut the roll in half was because 12-inch-wide paper strips are easier to work with than 24-inch stock, and because we’re always looking to save a buck, we opted for the off-brand blue painter’s tape that was less than half the cost of the Scotch tape of equal width and footage. This was a decision that would prove problematic down the road. For whatever reason, the tape did bond well to the hull but would sometimes lose its bond to the masking paper. The headache this caused was definitely not worth the couple of bucks we saved on the tape.
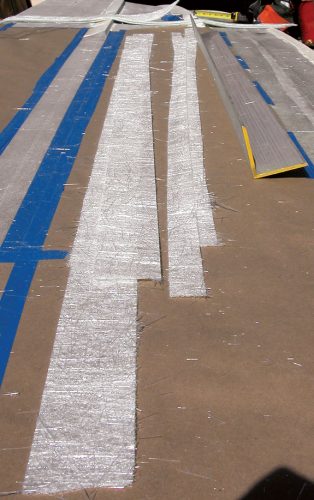
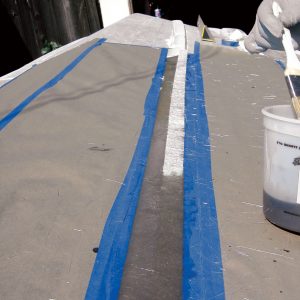
After the area surrounding both strake extensions was masked off, we started cutting the fiberglass that would be needed for the lamination of the strakes. A measurement was taken of the length and width of the strake area, and then strips were cut from the rolls of mat and cloth we had purchased in our previous installment.

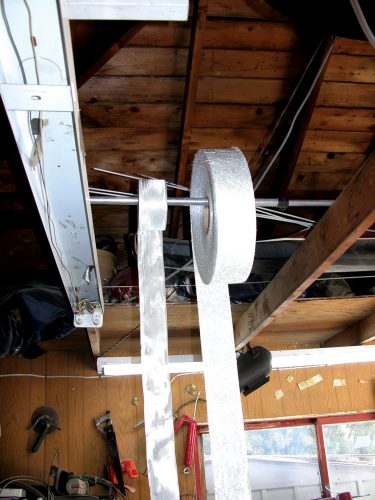
Handling the rolls of fiberglass proved to be somewhat cumbersome, so we devised a way of suspending them overhead so that material could easily be dispensed and cut to length. Both rolls were put on a section of bar stock, which straddled two rafters in the garage. With the ’glass stored overhead, the required 69-inch strips could easily be cut without fear of getting dirt or debris in the mat and compromising its structural properties down the road. Once we had cut out 15 strips of mat and seven strips of cloth, each 69-inch strip was cut to a width of 2.625 inches, which matched the width of the area of our repair.
With the fiberglass cut to its rough dimension, we had to address the problem of building up one side of the strake faster than the other. If we just laminated all of the strips together, we would sand away 90 percent of the fiberglass on the side of the strake nearest the keel line. While the waste wasn’t that big of an issue, the added work this would create most definitely was. In the end, we decided that between each full-width layer of mat, we would laminate two strips of mat that were half the width of the strake. These half-wide strips would be laminated on the outside of the strake, raising that side twice as fast as the inside of the strake. This solution was a good compromise because it didn’t create too much of a step in the middle of the strake for the full-width strips to bend over, and it greatly reduced the amount of sanding that would be required after the lamination was complete. With our solution in hand, we cut half of the strips of mat and a quarter of the strips of cloth lengthwise down the middle.
With our ’glass cut, we brought the form up over to the boat and did a dry run to see how things looked.
Unfortunately, things didn’t work too well with the form. While it was constructed properly and held the appropriate guide angle, we realized that the form ended up sitting between us and the work. Because of the height of the hull and the distance between the edge of the dolly, it was impossible to work over the form and not be bumping and moving it every time we laid a new piece of ’glass. In the face of this realization, we had a tough decision to make. Using the form in this manner meant we risked bumping the form and letting resin get underneath it, which could end up bonding it to the hull. Another downside to the form being moved from incidental contact was that it would disturb any wet ’glass that hadn’t hardened. With the downsides of using the form ultimately being poor results, and a giant chunk of pressboard laminated to the bottom of the hull, the form was relegated to the scrap bin. By deciding to laminate the strakes without a guide, we realized we had subsequently added many hours of sanding and truing to get the strakes relatively straight.
With our path chosen, we started the lamination. Our goal was to laminate three to five strips at a time, allow them to harden and cool, and then move on to the next set of strips. The reason we did this was because too much resin will generate excess heat, which can warp the hull. In addition to being mindful of how many strips we could laminate at once, we also had to make sure to have some cloth in between every three layers of mat. With this in mind, the ’glass was laid out in a fashion that would allow quick access to the needed strips as we went through the process.
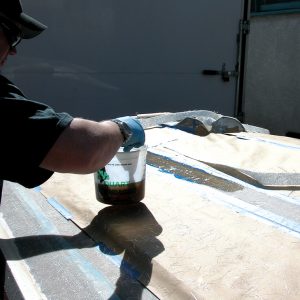
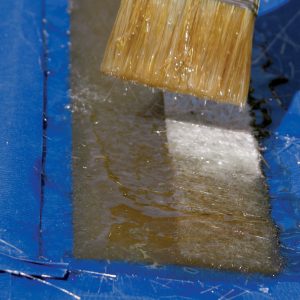
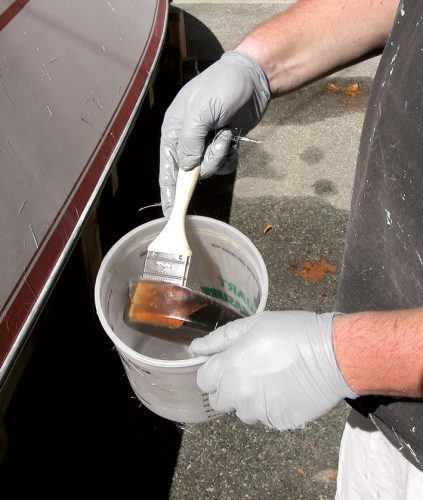
Once the ’glass was laid out, the first batch of resin was mixed. We started with two pints of resin, looking to do three layers of fiberglass. The idea was it would be better to start with a little extra resin and get a feel for how much we would need and then mix less on the next batch if it there was a good amount of excess. The resin was to be mixed with 5 cc of catalyst per pint. So, for our first batch, 10 cc of catalyst was added to the 2 pints of resin and mixed with the brush that would be used to laminate the strips to the hull.
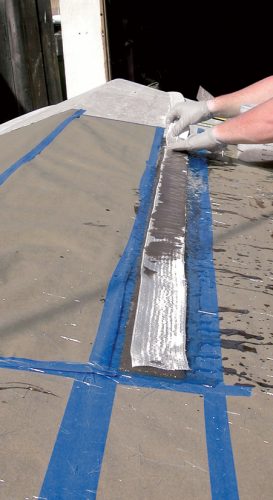
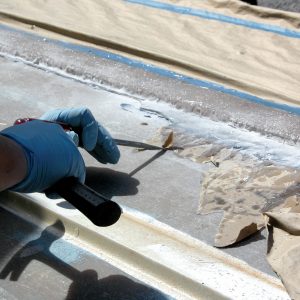
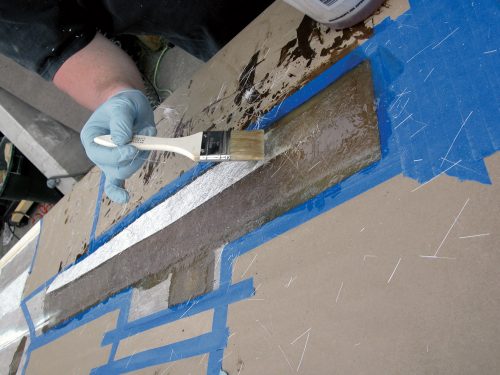
We wet the area of the hull to be laminated with catalyzed resin and then laid the first full-width strip of mat. Resin was brushed on and into the mat over the entire length of the strip. Once the mat was completely saturated in resin, a roller was used to remove any air bubbles and press out excess resin. Next, the two half strips were laminated one at a time on top of the first layer of mat, and then a full-width layer of cloth was laid, coated in resin and squeegeed out to remove excess resin and keep the cloth flat. We used the squeegee on the cloth because the roller seemed to pull the cloth up and create more air bubbles than it would remove. As we worked, we could feel the heat start to build in the repair, and in the mixing cup that was holding our catalyzed resin. We quickly laid down the last layer of mat and rolled it out just as the resin was starting to “kick off” or harden.
We were left with about a half pint of resin in our mixing cup, so we knew we could mix smaller batches, especially if we planned not to laminate such thick sections. For the remainder of the afternoon, we lowered our resin down to 1-pint batches and consistently laminated three to four strips of fiberglass per batch. Once we had built the overall dimension of the repair higher than the original strake, we repeated the process on the other side of the boat.
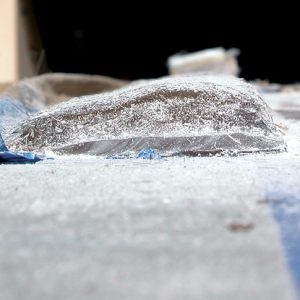
For something that seemed so simple, the process seemed to take quite a bit of time. The main reason for the delay was because we waited for the heat to dissipate from the previous batch before we started a new one. While you might be able to keep working with everything hot, we felt that the added heat might cause the resin in the current batch to kick off sooner, causing us to actually get less done per batch. It took an entire day to laminate two 69×2.625-inch sections about 0.875-inch tall. Both of the strakes were left to cure for a couple of days before we touched them again. The great thing about fiberglass is that you really don’t have to wait beyond its initial hardening time, but we had plenty of other work to do, so letting it sit for a while wasn’t going to delay anything.
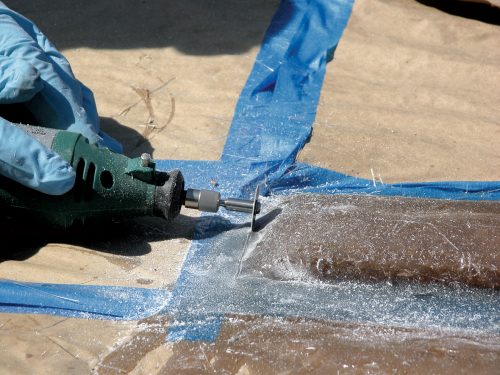
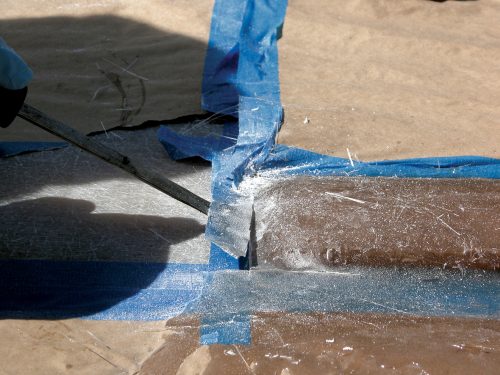
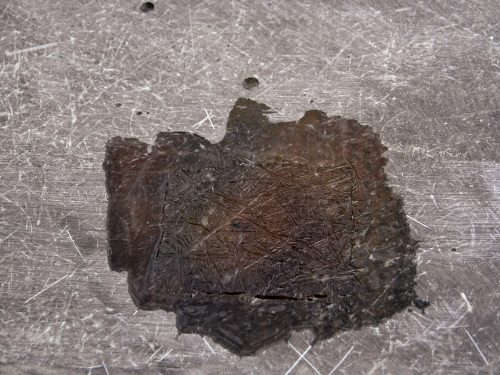
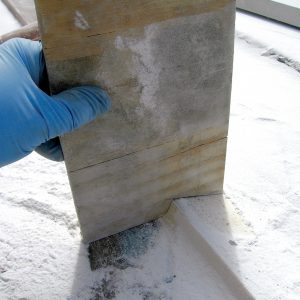
After a couple of days, we returned to our project to remove the masking paper and tape, hopefully revealing a straightedge that wouldn’t require too much work. Because we ditched the form, resin had flowed over the masking tape and paper, encapsulating it in a bed of resin that wasn’t reinforced with fiberglass. To remove the masking paper, we were going to have to cut through the resin, down to the masking tape. Luckily, the area we would be cutting would be outside of our repair in un-reinforced resin. We used a Dremel tool with a small steel cutoff wheel on it to make an incision all the way around the repair. After the incision was made, it was easy to insert a flathead screwdriver into the cut and snap out the resin, which was bonded to the paper.
All was going well, and we were revealing the edge of the strake at a decent rate, until we got to the front of the driver’s-side strake. That inexpensive tape we had purchased must have lifted and allowed resin to get under the paper as well. This resulted in a good 3-foot section of masking paper and tape being bonded to the hull. We were able to chisel some of the resin and paper away from the hull, but the majority of it would need to be sanded off when we started shaping the strakes. So, our frugal purchase on the tape ended up costing us much more in time down the road. With both strakes freed from their masking and resin, we turned our attention to repairing the outer strakes and filling some of the strange screw-sized holes that populated the bottom of the boat.
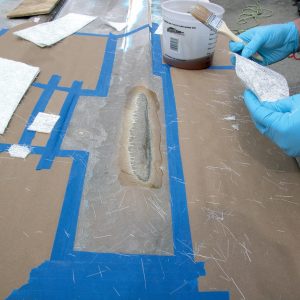
Again, we cleaned and dried the hull, as it had rained between our first set of strakes and this repair. After everything was dry, the area around the damage on the outer driver’s-side strake was masked. This time we laid two layers of tape right at the edge and made sure to knead down the tape with a screwdriver handle to ensure it wouldn’t lift from the paper. Because we knew we were already in for quite a bit of sanding, our strategy for the repair of the driver’s-side outer strake was simple. We were going to raise the deeply ground-out sections to the level of the rest of the ground-out ’glass and then raise everything above the normal strake height. We would then grind and sand the repair area back into shape.

We cut small pieces of mat and cloth to fit down into the smaller area of the repair and build it up to the level of the rest of the repair. Once all the ’glass was cut, it was laid out in a logical fashion for easy retrieval in the order it would be needed for the repair lamination. Once the deeply ground area was laminated back to the level of the rest of the repair, longer sections of ’glass were cut and laid out. These sections were then laminated in the same fashion as our previous strake additions until the area had been built up sufficiently. One thing to note: the second day of laminating was probably 10 degrees cooler than the first, and this definitely added to the curing time for the resin. So, even though we were laying less ’glass, the small repairs took almost an entire day.
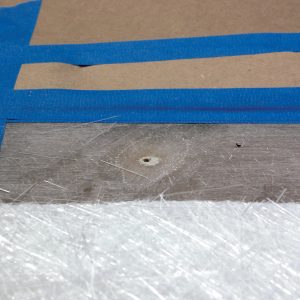
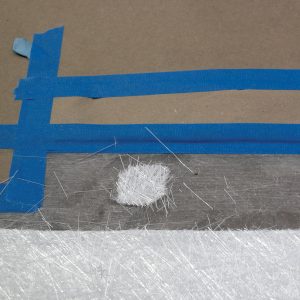
In addition to the damaged strake, we also repaired the many screw-sized holes that littered the bottom of the hull. For most holes, two layers of mat were all that were needed to complete the repair. Since most of the repair areas were ground in a circular shape, we first cut a small circle of mat that fit within the ground-out circle. We then cut a larger circular layer that was just a bit wider than the ground-out area. This would allow us to sand the entire repair flush with the hull for an essentially invisible repair. With all of the laminating done on the bottom of the boat, we called it a day and tried to get mentally prepared for the drudgery that was soon to follow.
With all of the repairs in place, the only thing left to do was to grind and sand them into shape and smooth with the hull. Sounds simple, right? It is, if you don’t mind the incessant howl of air compressors, belt sanders, 4.5-inch angle grinders, and air files—and then there’s the dust. Aside from being bad for your lungs, the fiberglass dust that was unleashed as part of these repairs is one of the most annoying irritants a person could encounter in the course of their exposure to this hobby. No matter how many precautions you take, or how many layers of clothes you wear, you will get fiberglass dust in places you never figured, and you’ll lie awake at night because any limb that came in moderate contact with the dust will be in discomfort from the mere brush against a sheet. That being said, we have a boat we want to put in the water, so the complete arsenal of tools was brought to bear against the raw fiberglass that would become our extended strakes and repair areas.
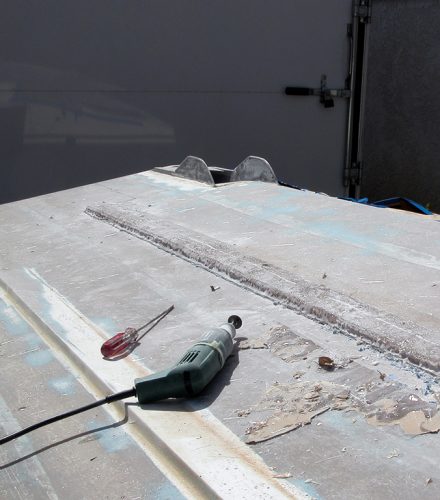
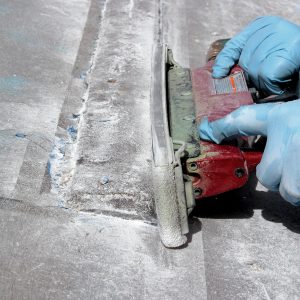
After thinking about our game plan for a while, we determined that it would be best to true the vertical face of the strake first and then sand down the profile toward the keel from there. To aid in our efforts, we made a plywood profile guide from a good portion of strake. We could then use this profile to determine where we needed to sand. We first tried to use the air file with 36-grit paper to true up the vertical portions of the strake. We had borrowed a bigger gas-powered compressor that could keep up with the constant demand of the air file, but even this potent combo was no match for the rugged fiberglass. Next, we tried an unorthodox application for our venerable Craftsman belt sander. This tool had done the bulk of the prep on the hull prior to laminating the strakes, so why not try it on its side to true up the strakes? Simply put, belt sanders don’t like being used on their sides. The uneven pressure on one area of the belt caused the belts to walk and subsequently get chewed up.
Quickly running out of options, our hopes now rested on a tool that is despised by many for its lack of control, and its ability to quickly take things too far and create more work. We’re talking about our old friend, our trusty $19 Harbor Freight 4.5-inch angle grinder. When equipped with 24-grit sanding discs, this tool becomes a fiberglass-shredding machine without rival. But for the same reason, we were hesitant to employ it for this task. Since we didn’t want to have to re-laminate the area, a soft touch was going to be needed so that we didn’t take away too much ’glass. To this end, we swapped out the 24-grit discs for 60-grit discs and slowly started working on the vertical face of the strake. We used light pressure, letting the disc rest upon the face of the strake, while we kept it from burning a groove at the corner of the strake and hull. Slowly but surely, the face of the strake was taking shape. Once it was roughed out, we were pleasantly surprised. We had brought the face of the strake within 1/16 inch of uniformity with itself and the existing strakes on the boat. At this juncture, we turned back to the air file to smooth everything out. While the air file is nowhere near as efficient at removing ’glass, its long flat span allows it to evenly knock down areas. Within 45 minutes, we had the vertical face of the strake trued up and ready to provide a starting point for our profile gauge.
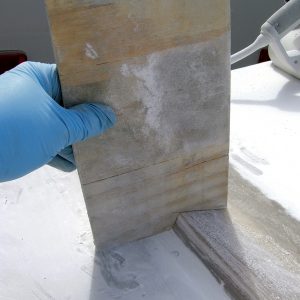
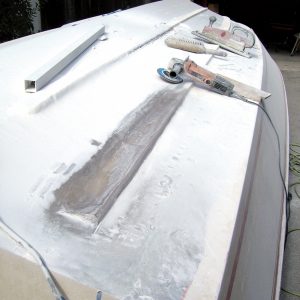
With a straightedge to work off of, and a profile gauge to check our work with, we swapped out the 60-grit discs for the more abrasive 24-grit units. This was done because we had 69 inches of fiberglass to shape down and didn’t want to spend all day on one strake. To start, we held the angle grinder in such a fashion to mimic the angle we needed to match the factory strake. We spent 10 to 20 minutes with this method to get a general shape that was similar to our profile gauge but taller. Once this was achieved across the entire strake, we started applying more pressure with the 24-grit discs and hogging out material at a vicious rate. After getting close to the desired profile height, we swapped back to the 60-grit discs and used faster, lighter and longer sweeping strokes to help make the surface more uniform. Once we got down to about 1/16 inch of being true to the profile gauge, we went back to the air file to give everything a final smoothing over.
The profile gauge was double-checked across every inch of the strake and showed little to no deviation. Any imperfections were small enough that a light skim coat would handle them prior to gelcoat. With the first strake out of the way, and a solid methodology in place, we continued on to the next strake, inundating the area in a virtual snowfall of powdery white fiberglass dust. The dust continued to fly hour after hour as we moved from the strake to the repair areas. Finally, all we were left with were the small-hole repair areas. For these, the mat was quickly knocked down with a 120-grit disc on the angle grinder and then finish-sanded flat with 36-grit paper on the air file. A solid 16 hours of hard work over two days netted us with enough fiberglass dust to fill a 20-gallon trash can halfway—and this is just the stuff we swept off the hull throughout the process.
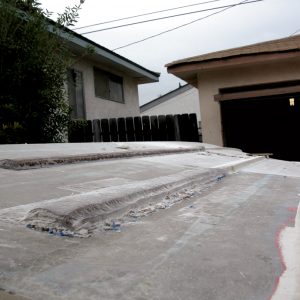
This task, which we had trivialized because of our faith in our form technique, reared its ugly head and put up a fight that we would have rather not been involved in. In the end, determination, an arsenal of stout power tools, countless quantities of sandpaper and sanding discs, and numerous cold beverages won out, and our hull was ready to be prepped for gelcoat. There is still some light sanding to be done on other areas, but for the most part, we have cleared the largest hurdle of this entire project.
Be sure to check back with us in the next installment when we show you how using modern additives can make shooting your own gelcoat easier than you thought possible.