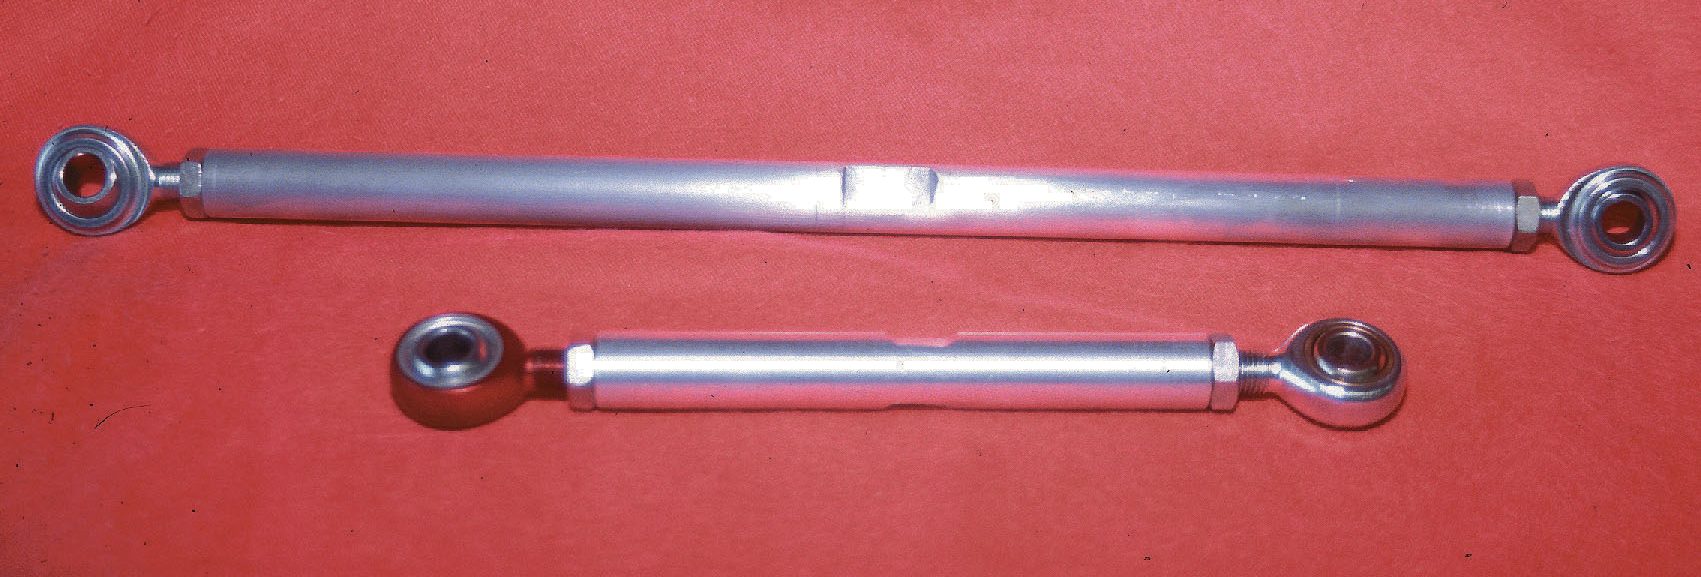
This is a story about two tensioners, one fabricated with machine tools and the second fabricated in a garage with a minimum of tools. In fact, the only power tool you will need is a drill motor, yet the finished products will be almost identical.
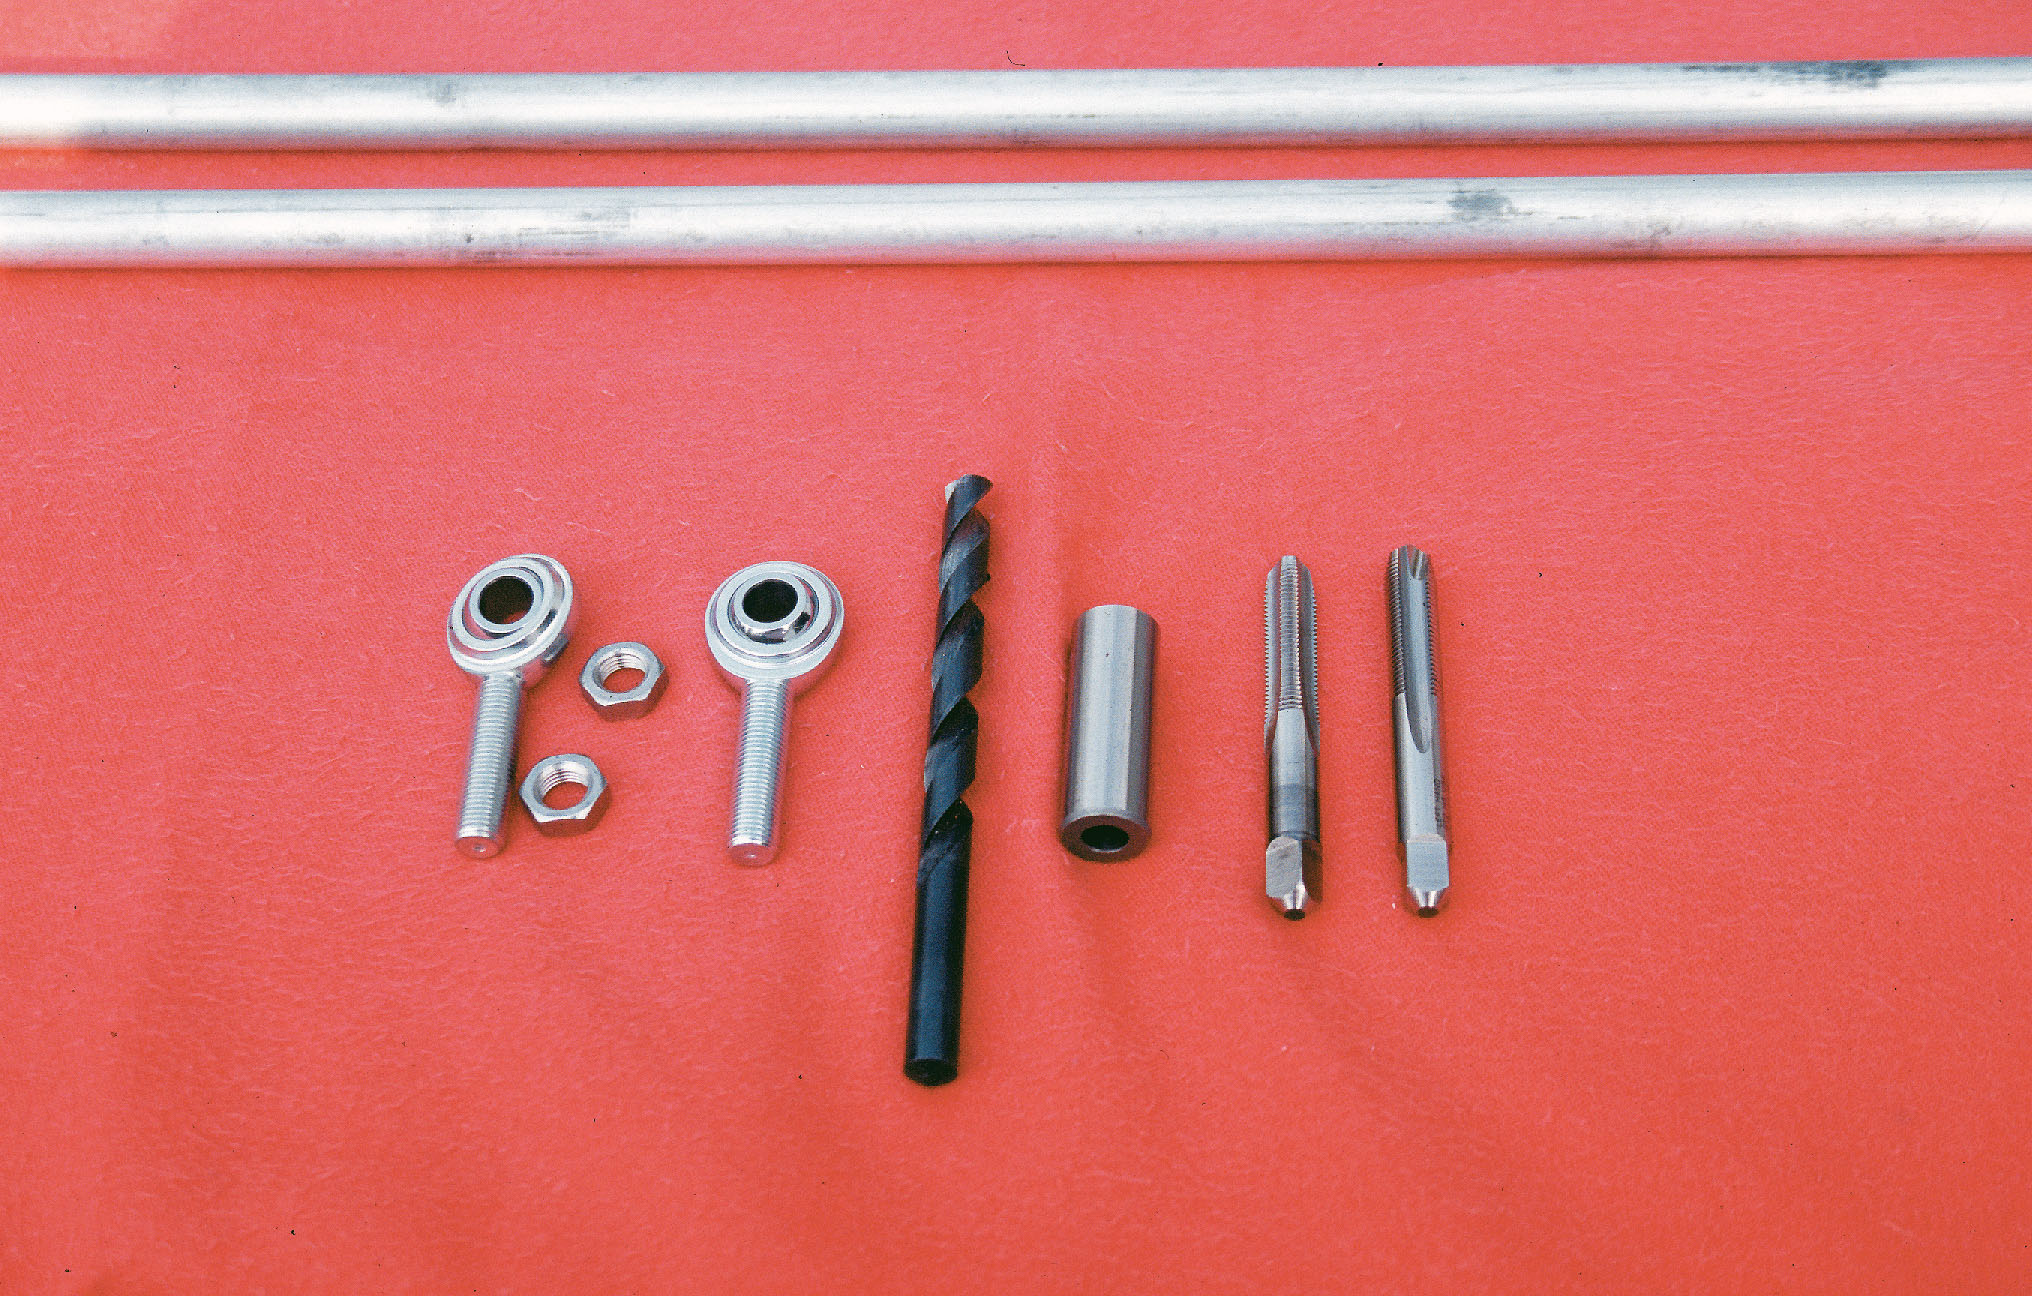
Your first response to fabricating something may be, “I don’t have the necessary tools; I don’t have any way to get the materials I will need.” If you have a door number so the UPS man can find you, you have everything you need. The materials list at the end of this story contains everything you will need. The rod-end bearings and lock nuts were purchased from AFCO Hot Rod Parts. The aluminum round stock and cutting tools were purchased from MSC.
The aluminum round stock comes in 6-foot lengths with a list price of about $10. The average length of a tensioner body is 12 inches, so you can get five tensioners from each piece of aluminum. Do the math: At $2 apiece, we are not talking about big bucks. You could buy some extra rod-end bearings and make some extra tensioners to sell to your buddies. They can get a bargain and you could recoup your investment!
We are going to travel two paths from the UPS truck to the finished product. Again, we will apologize to the real machinists among you, and talk to the home builders and self-taught home machinists on one path, and to the home builder with only a drill motor on the other path. We will call the home-builder path “Path A” and the home-machinist path “Path B.”
Both paths make the same first three stops and then diverge. Step 1 is the materials list at the end of this article. Step 2 is at the back of the UPS truck, when the materials arrive. Step 3 is your trusty hacksaw: Cut the aluminum round stock to slightly longer than the desired finished length. The next step is to square up the ends of the aluminum and get to the finished length. From here, the two paths begin to diverge.
Path A
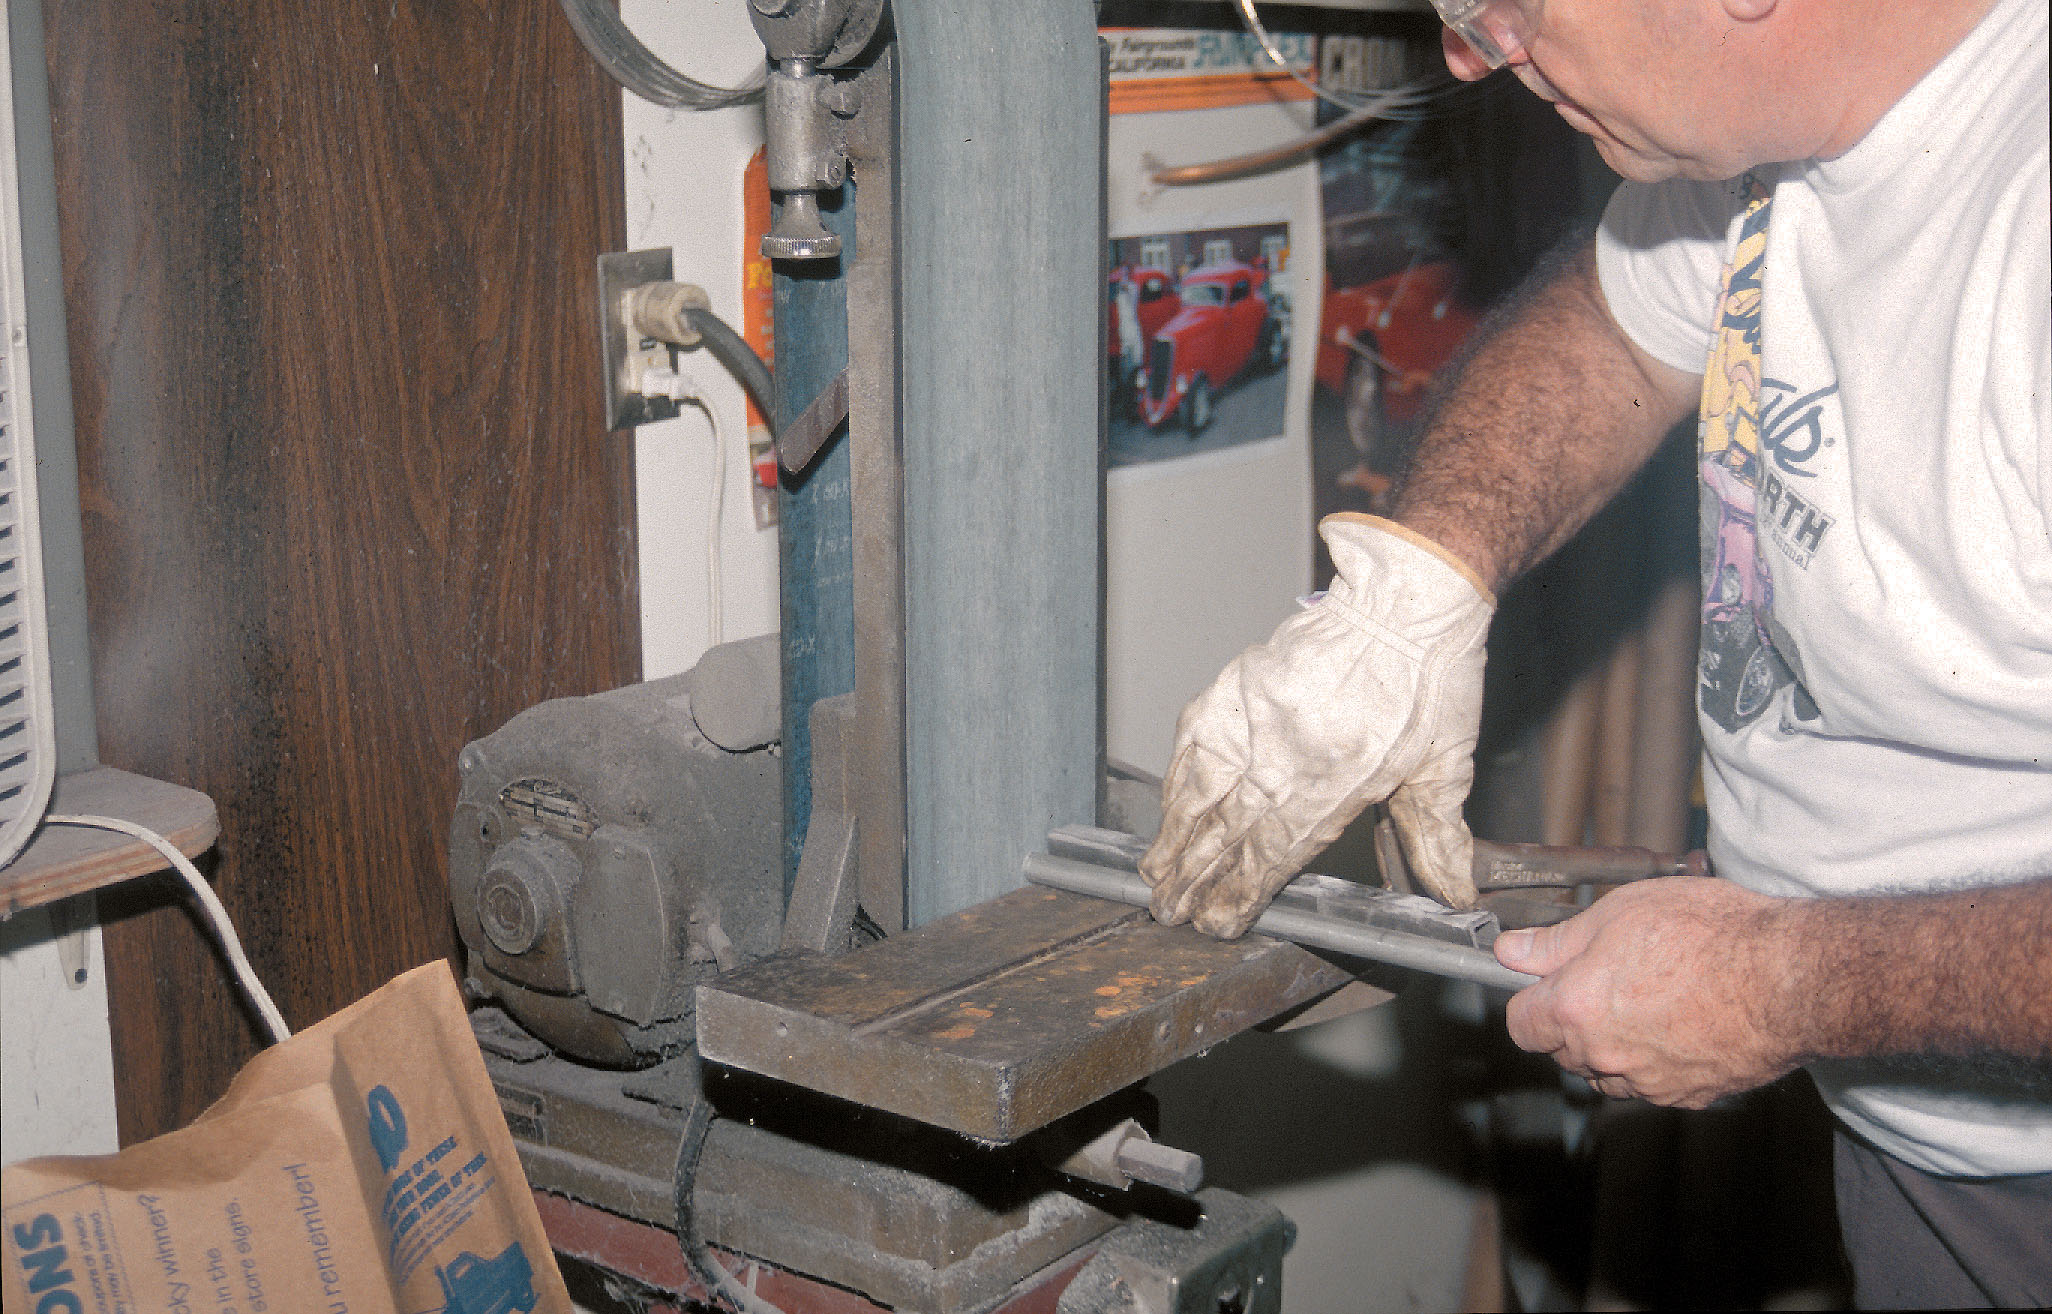
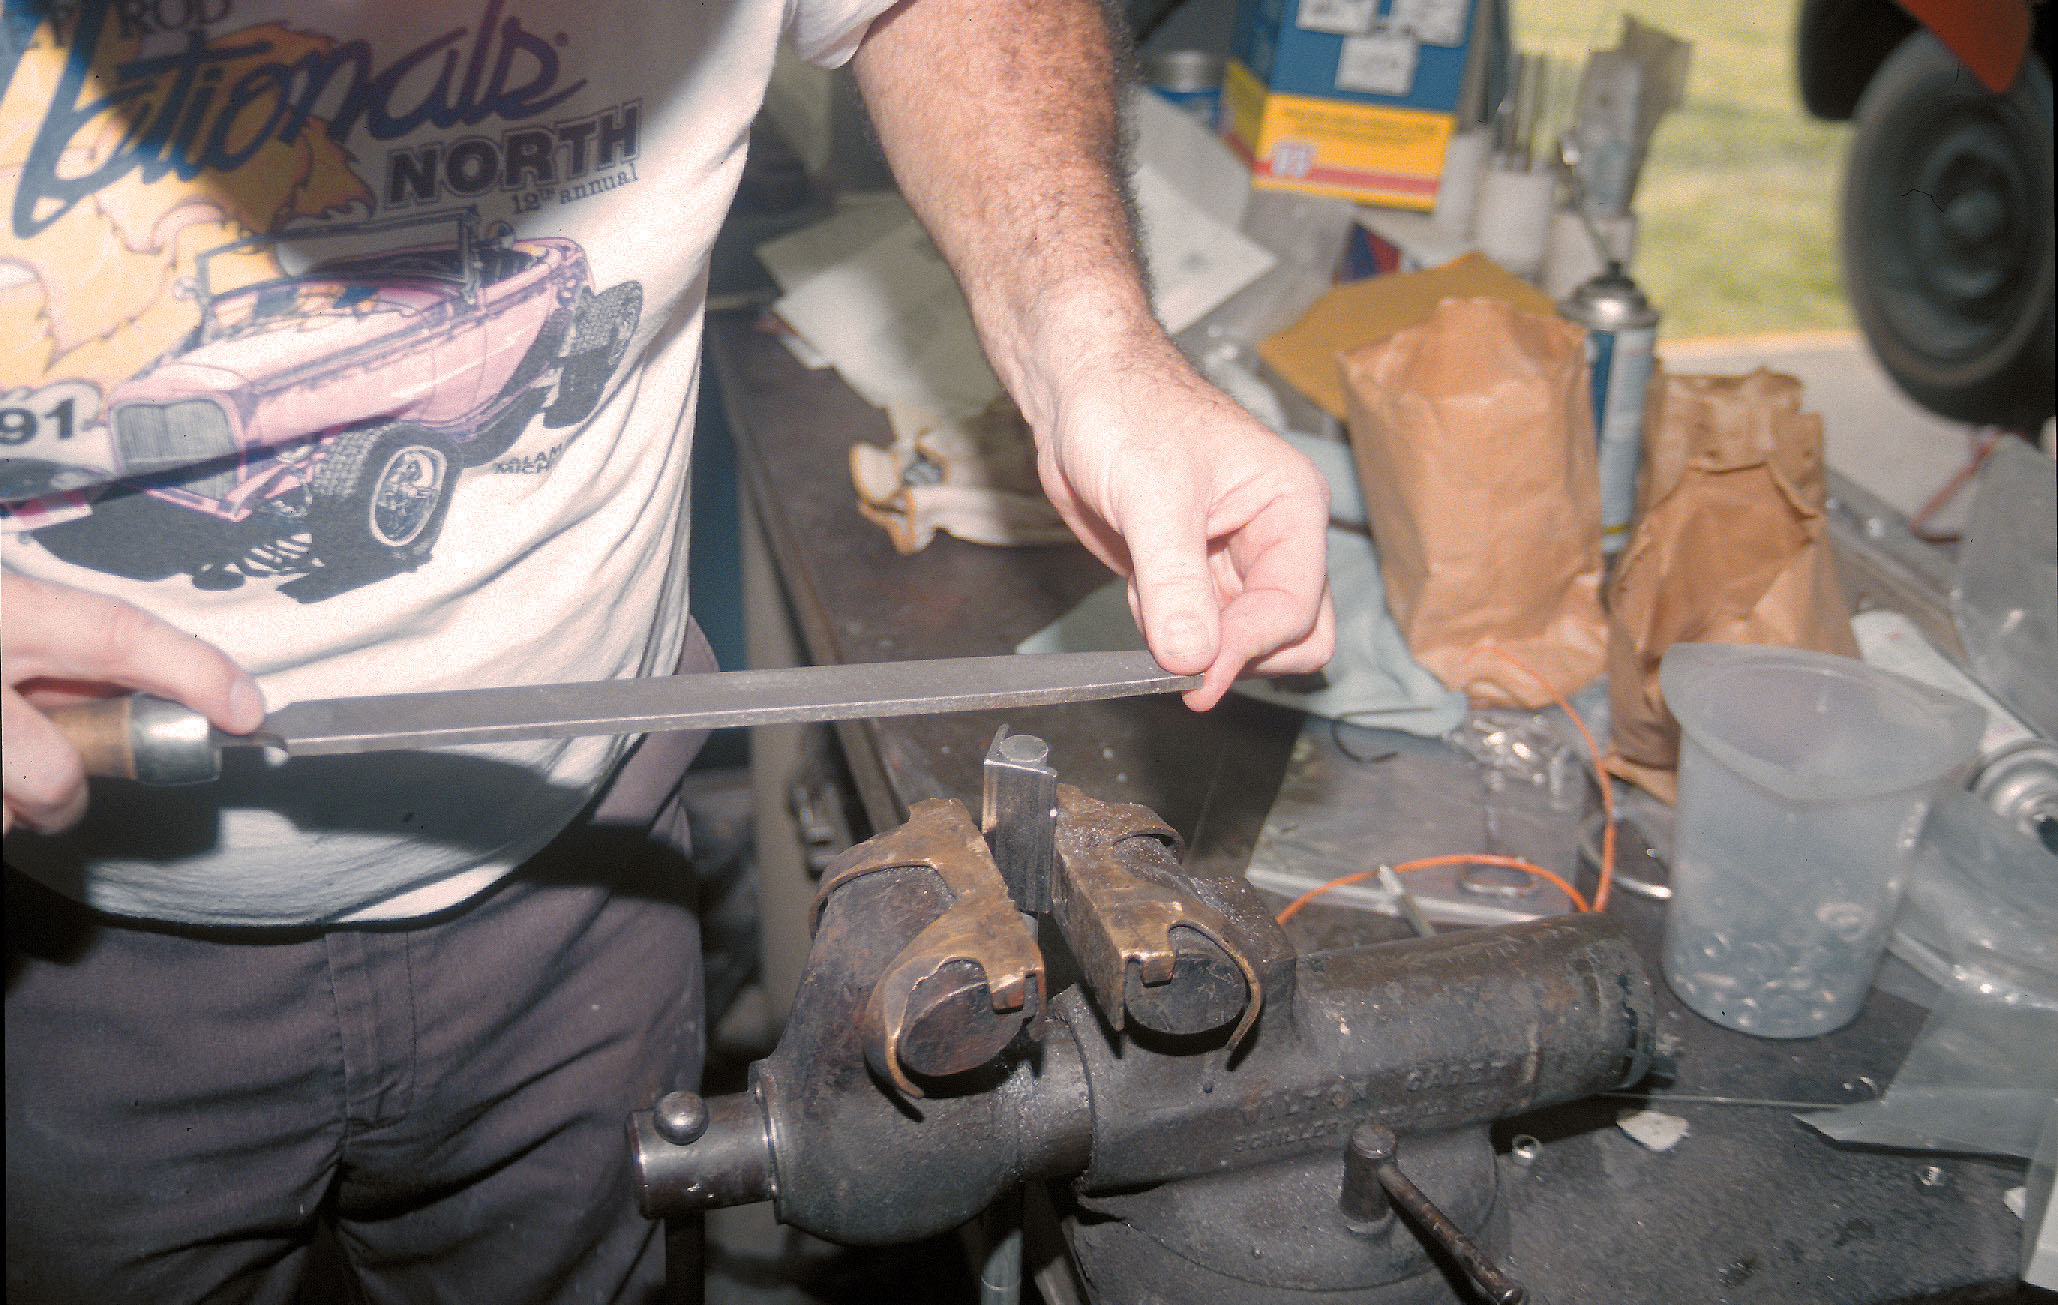
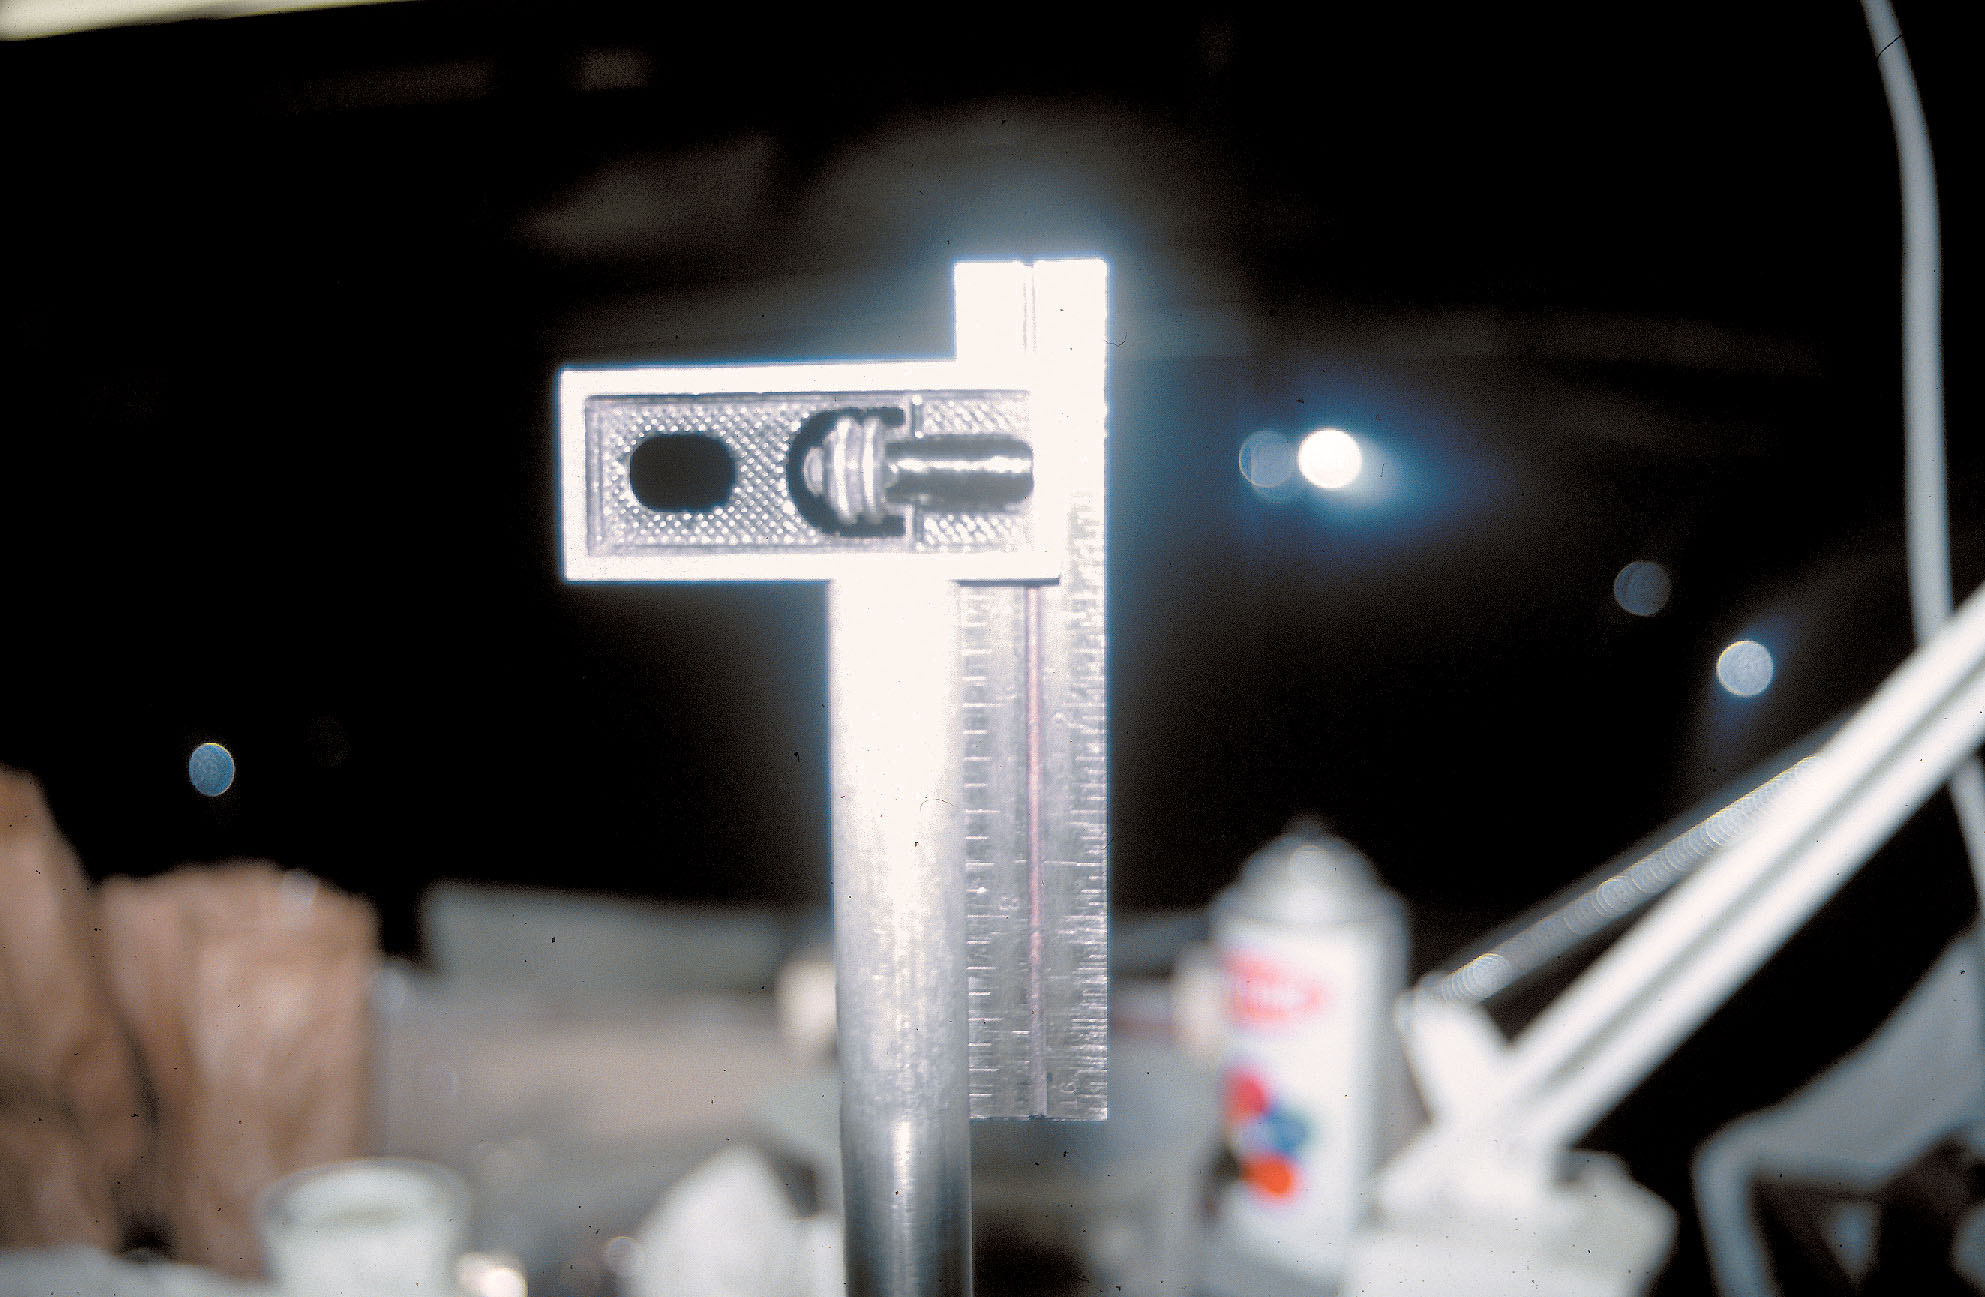
Step 4. If you own a belt or a disk sander, set up a guide fence and square up the ends of the round stock. If you don’t have a sander, get your file out and go to work. You can check the end for squareness with a right-angle square. If you don’t have a square, look at photo #5. If the gap is equal on all sides, the end is square.
Path B
Step 4. If you have a milling machine only, face off the ends of the aluminum round stock. If you have a lathe, face off
the ends.
Path A
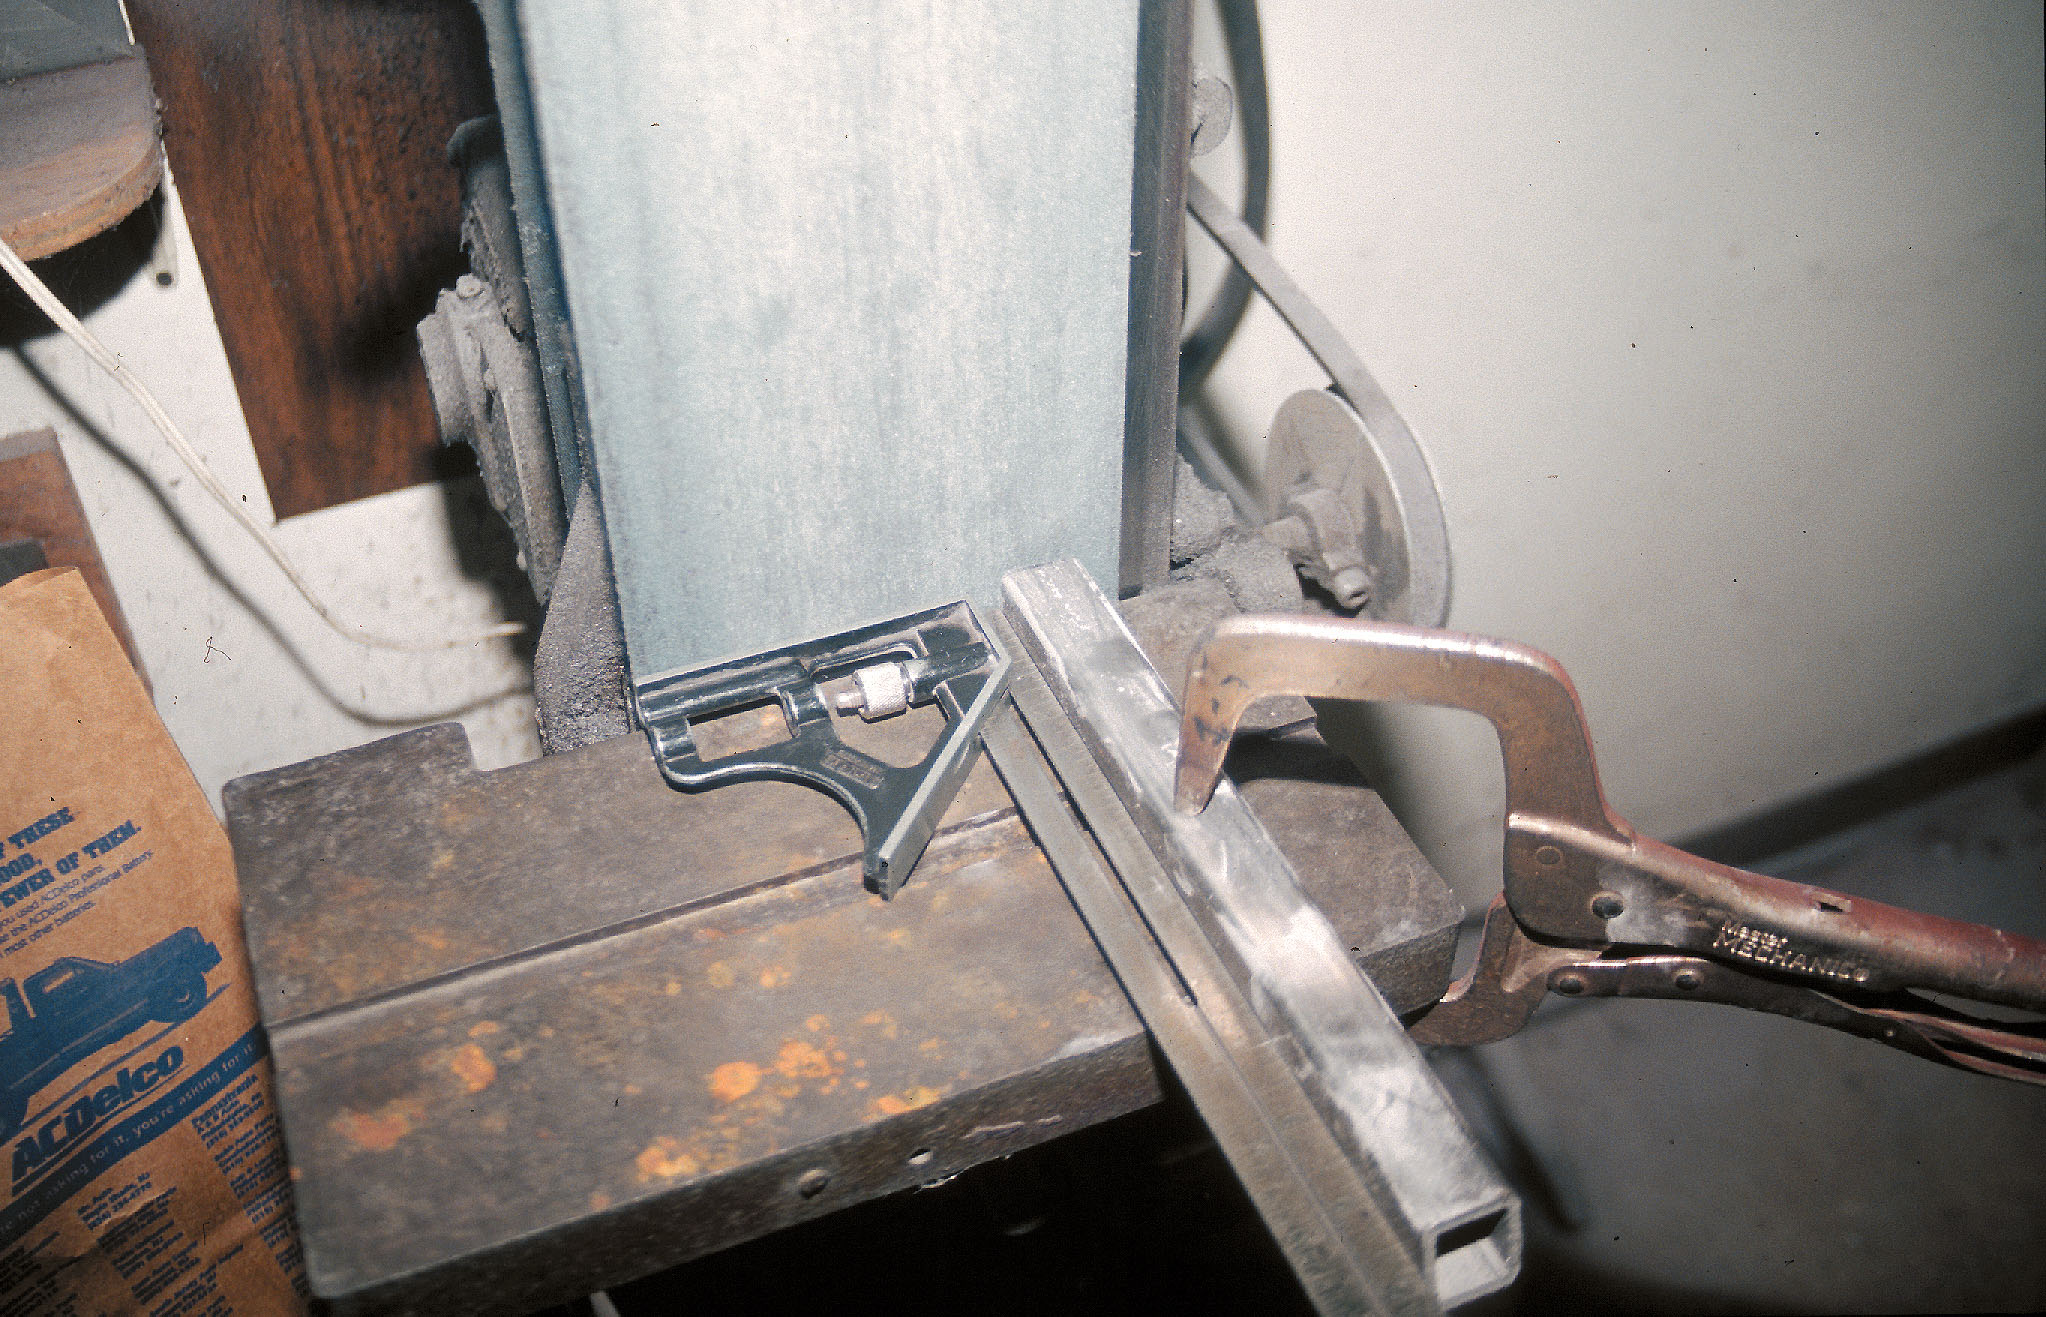
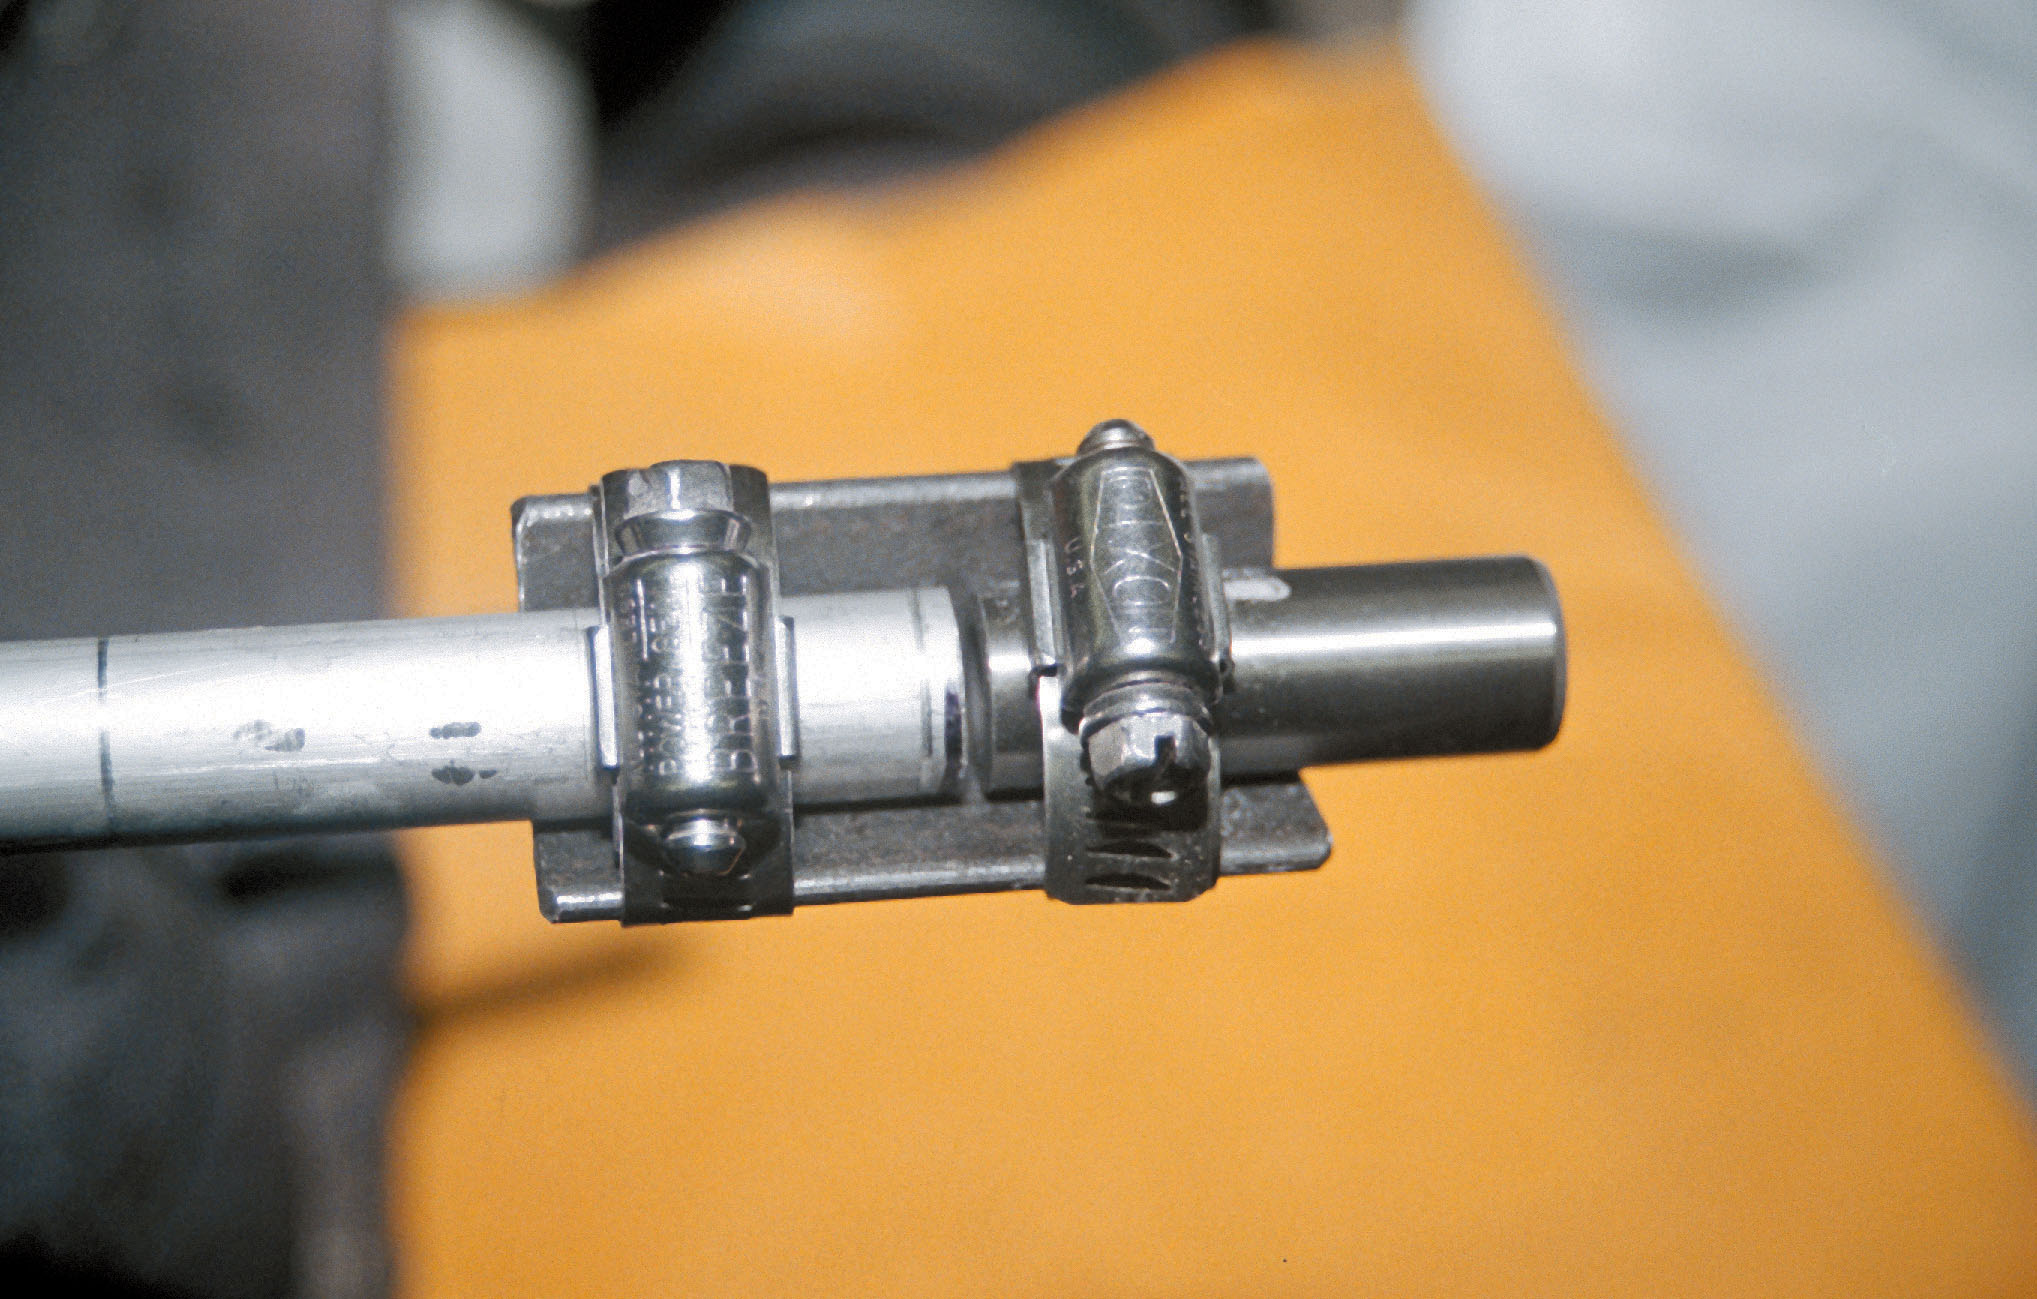
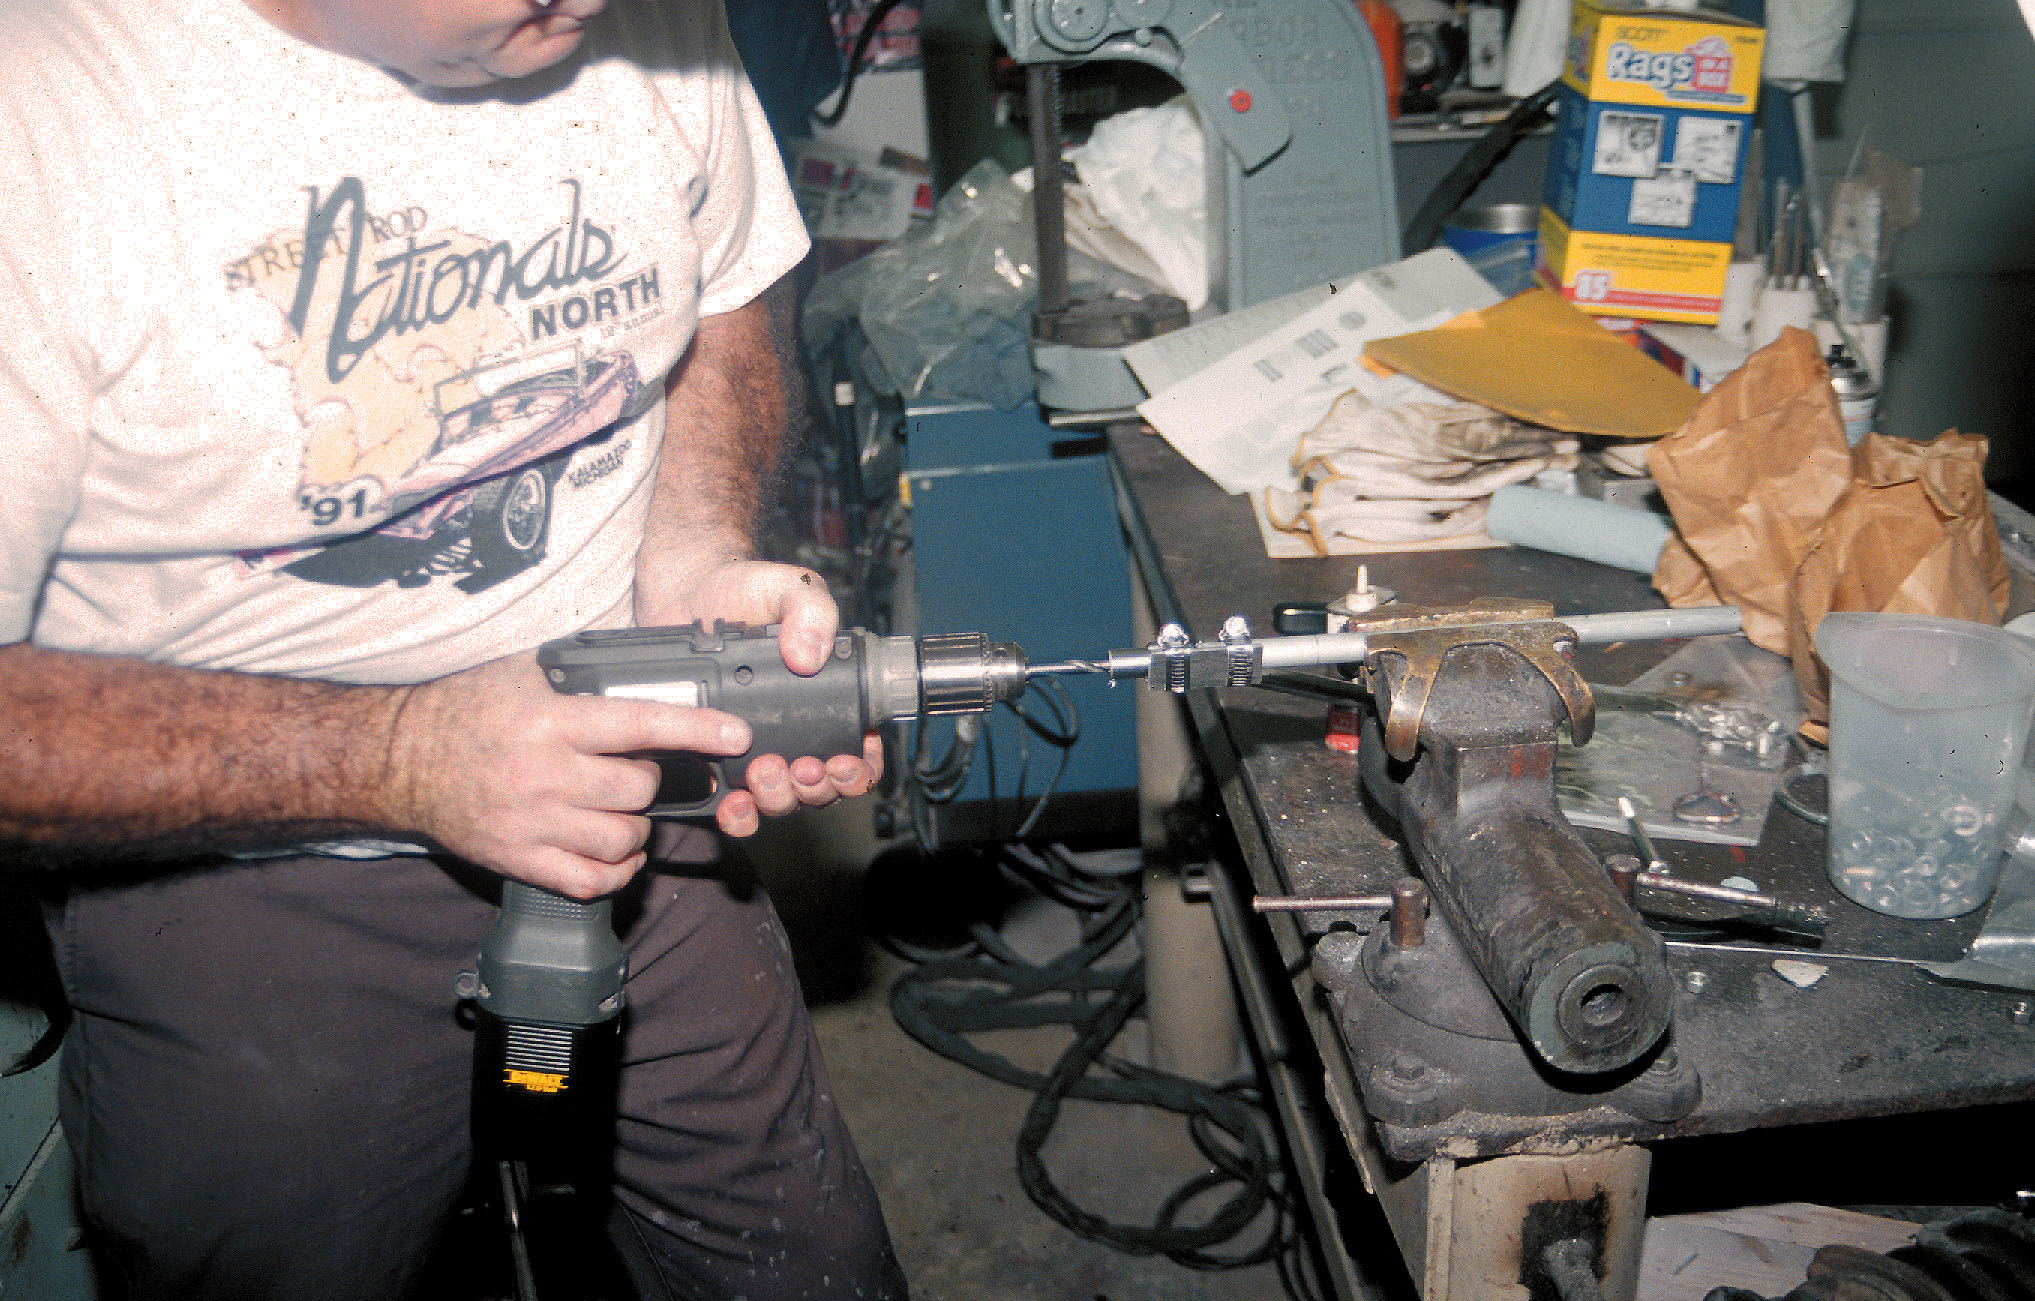
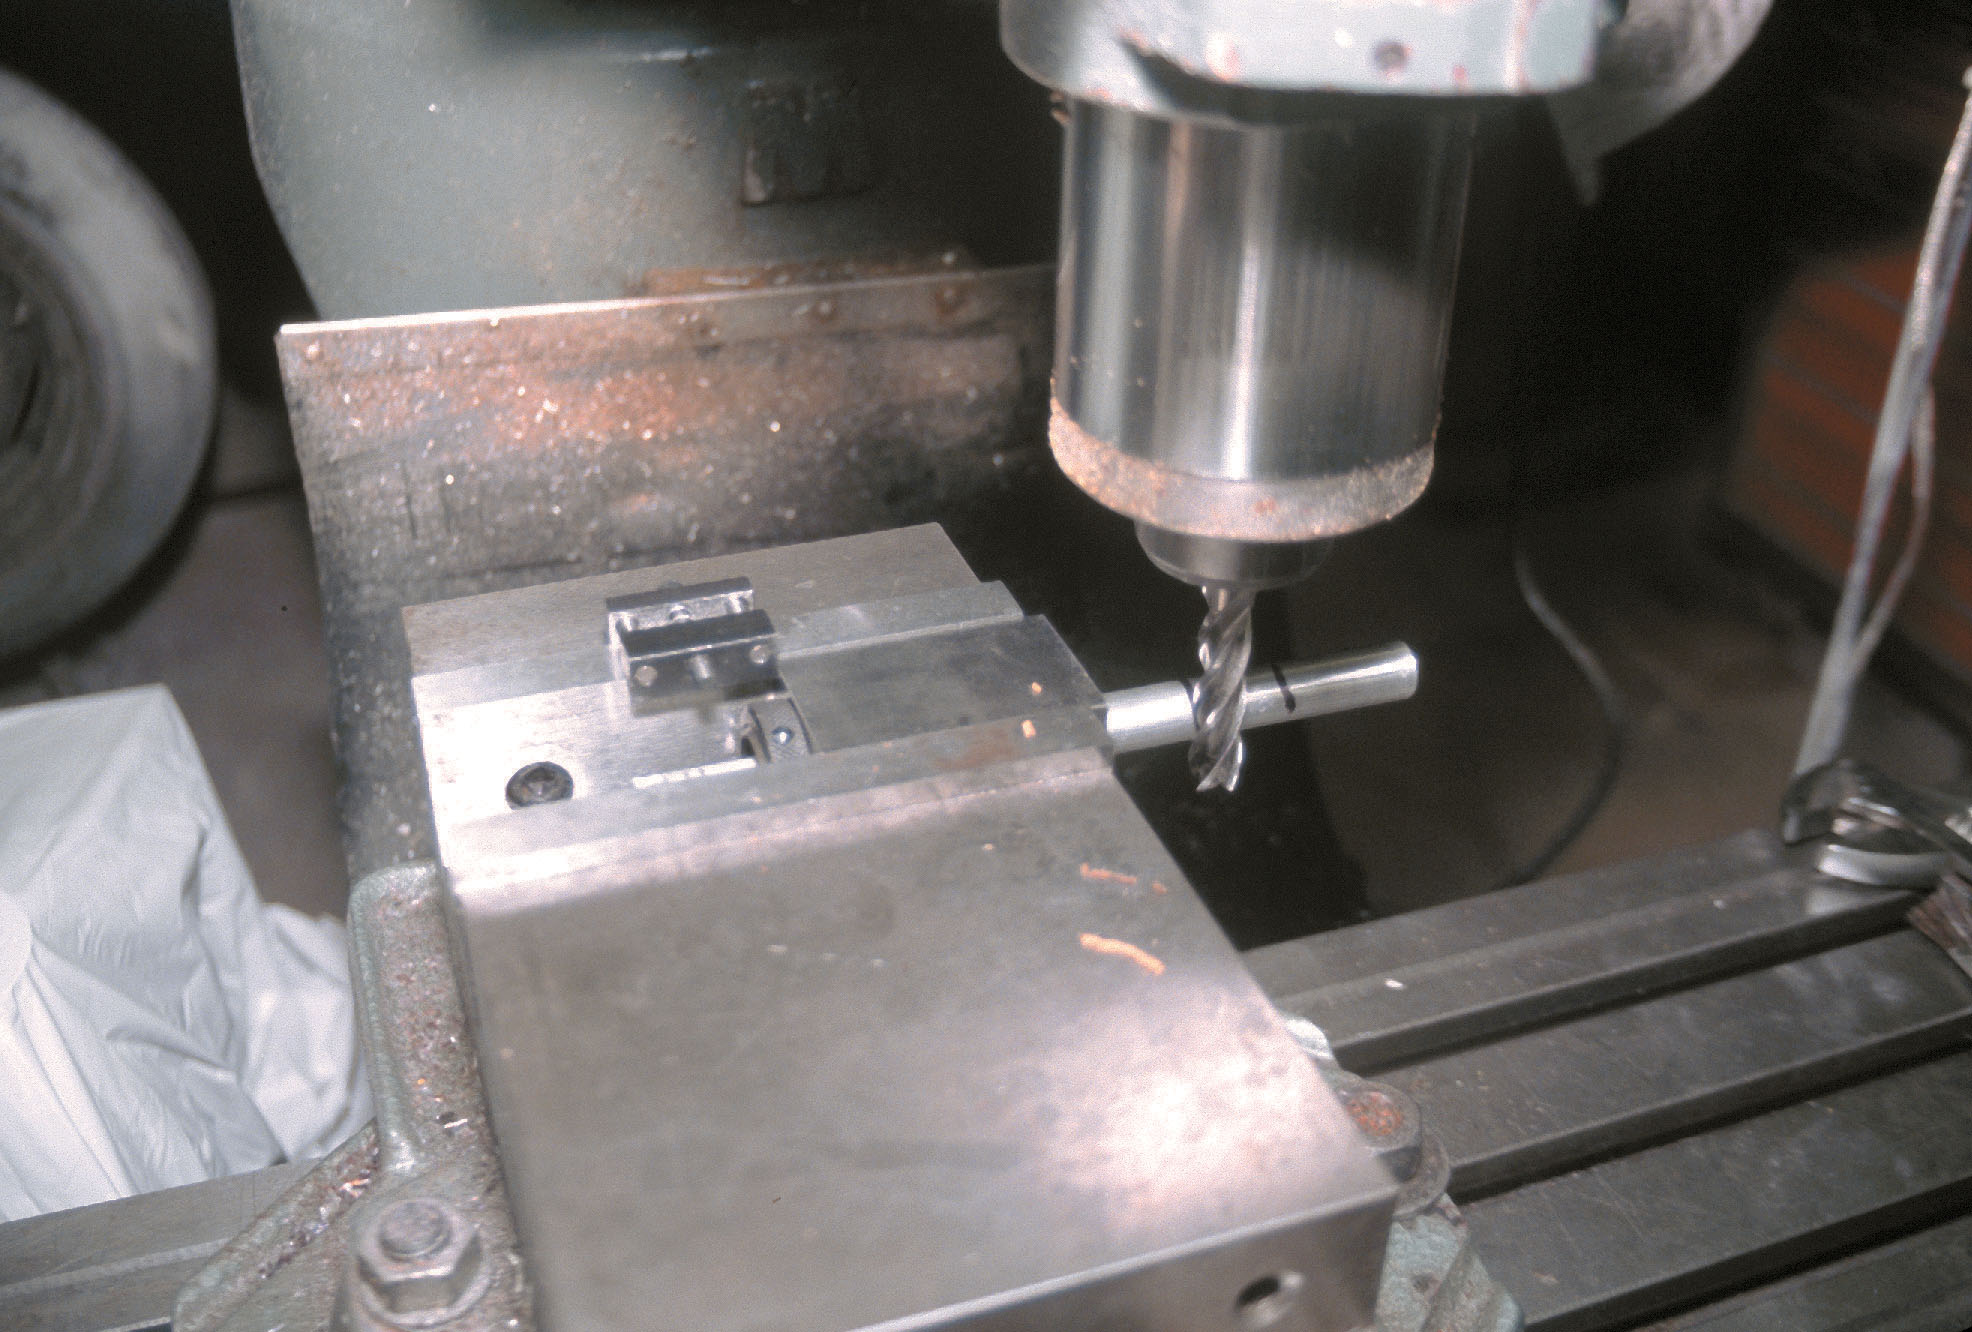
Step 5. Go to your junk box and find two small hose clamps and a scrap of angle iron. Clamp the angle iron to the end of the aluminum round stock with several inches extending past the round stock. Using the second hose clamp, clamp the drill bushing to the angle iron. Leave a gap of 1/8- to 3/16-inch between the bushing and the round stock to allow the drill chips to escape. The drill bushing is the same o.d. as the aluminum round stock, so it will center the drill bit. The drill bushing is made of tool steel and is harder than woodpecker lips. Lubricate the drill bit and the bore of the bushing. The “Q”-letter drill is the correct tap drill for the 3/8-inch-24 tap.
Drill both ends of the aluminum to a depth of 2 inches.
Path B
Step 5. If you have a milling machine only, see Path A. If you have a lathe,
center-drill and finish-drill both ends of the aluminum with the “Q” drill to a depth of
2 inches.
Path A
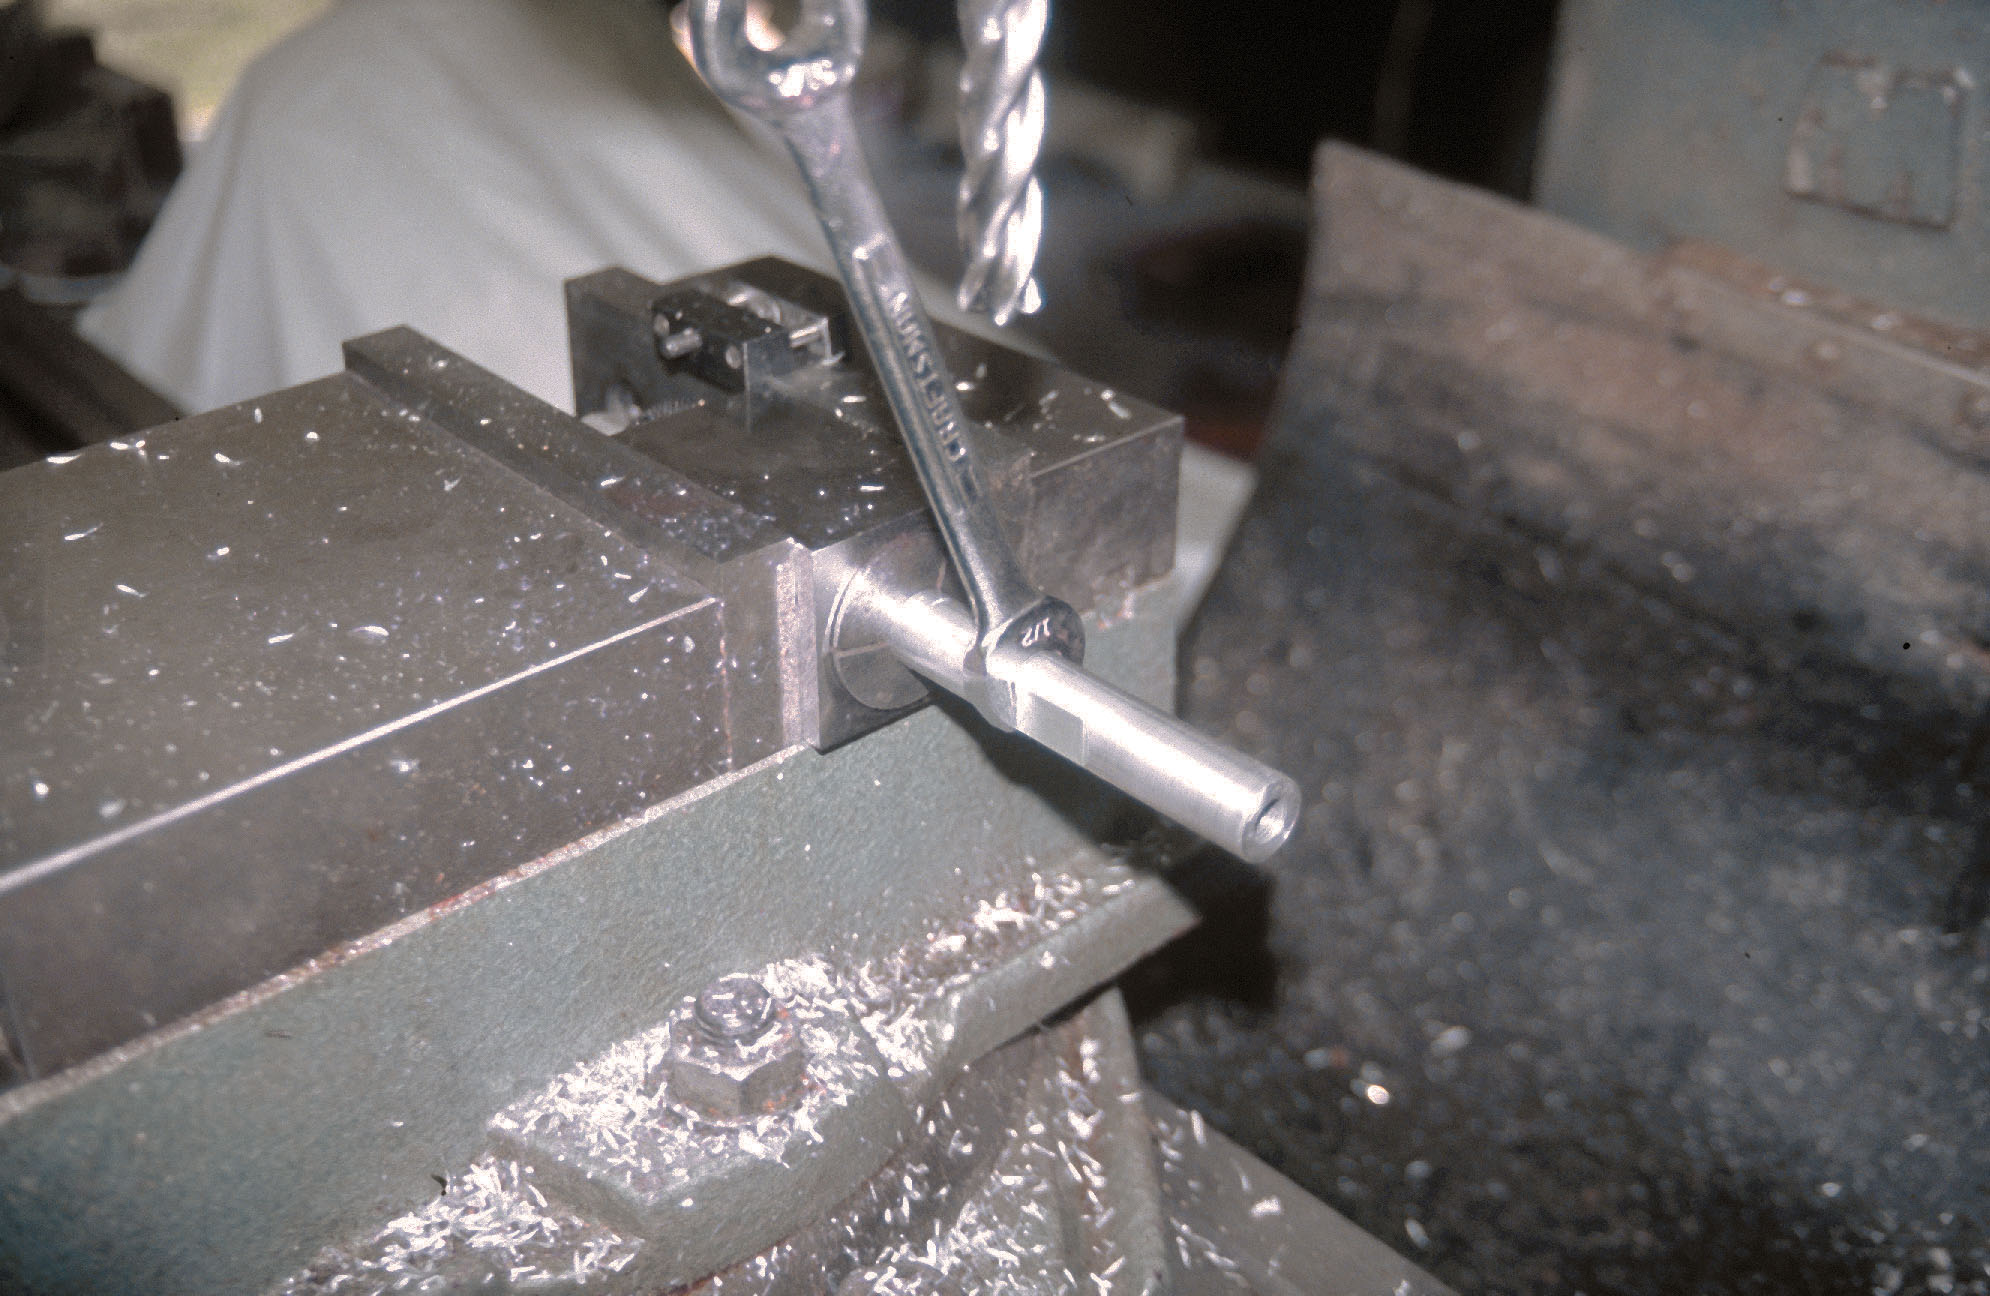
Step 6. Remove the hose clamps and angle iron and clamp the round stock vertically in your vise. Remember that taps need to be lubricated to cut clean threads. Since we are working with aluminum, you can use a commercial tapping fluid, kerosene, penetrating oil or waterless hand cleaner. The taps that were specified are called gun taps because they force the chips forward in front of the tap. Gun taps can be used to power tap but are not designed to be used in blind holes. Remember that we drilled the holes 2 inches deep to provide room for the chips. The advice your high school shop teacher gave you about tapping (one turn forward, half a turn backward) is still good. Thread one end with the right-hand tap and the other end with left-hand threads. Clean up the chips and the cutting oil and take a break.
Path B
Step 6. If you have a milling machine only, see Path A. If you have a lathe, you can hold the round stock in the chuck and tap the holes by hand or put the tap in the tailstock and turn the chuck by hand. The same advice about lubrication and one turn forward and half a turn backward still applies! Clean up the chips and the cutting oil and you also deserve a break.
Note: If you’re building a “rat rod,” you can stop here and proudly display the vise-grip scars on your tensioner. Each pair of scars will represent one adjustment. If you want something more professional looking, put some flats on the body of the tensioner.
Determine the best location for the flats and mark the aluminum. The center is not always the best location for the flats. There may be more “wrench room” nearer one end. Remember that we drilled the ends 2 inches deep, so stay at least 2-1/4 inches from the end when locating the flats.
Path A
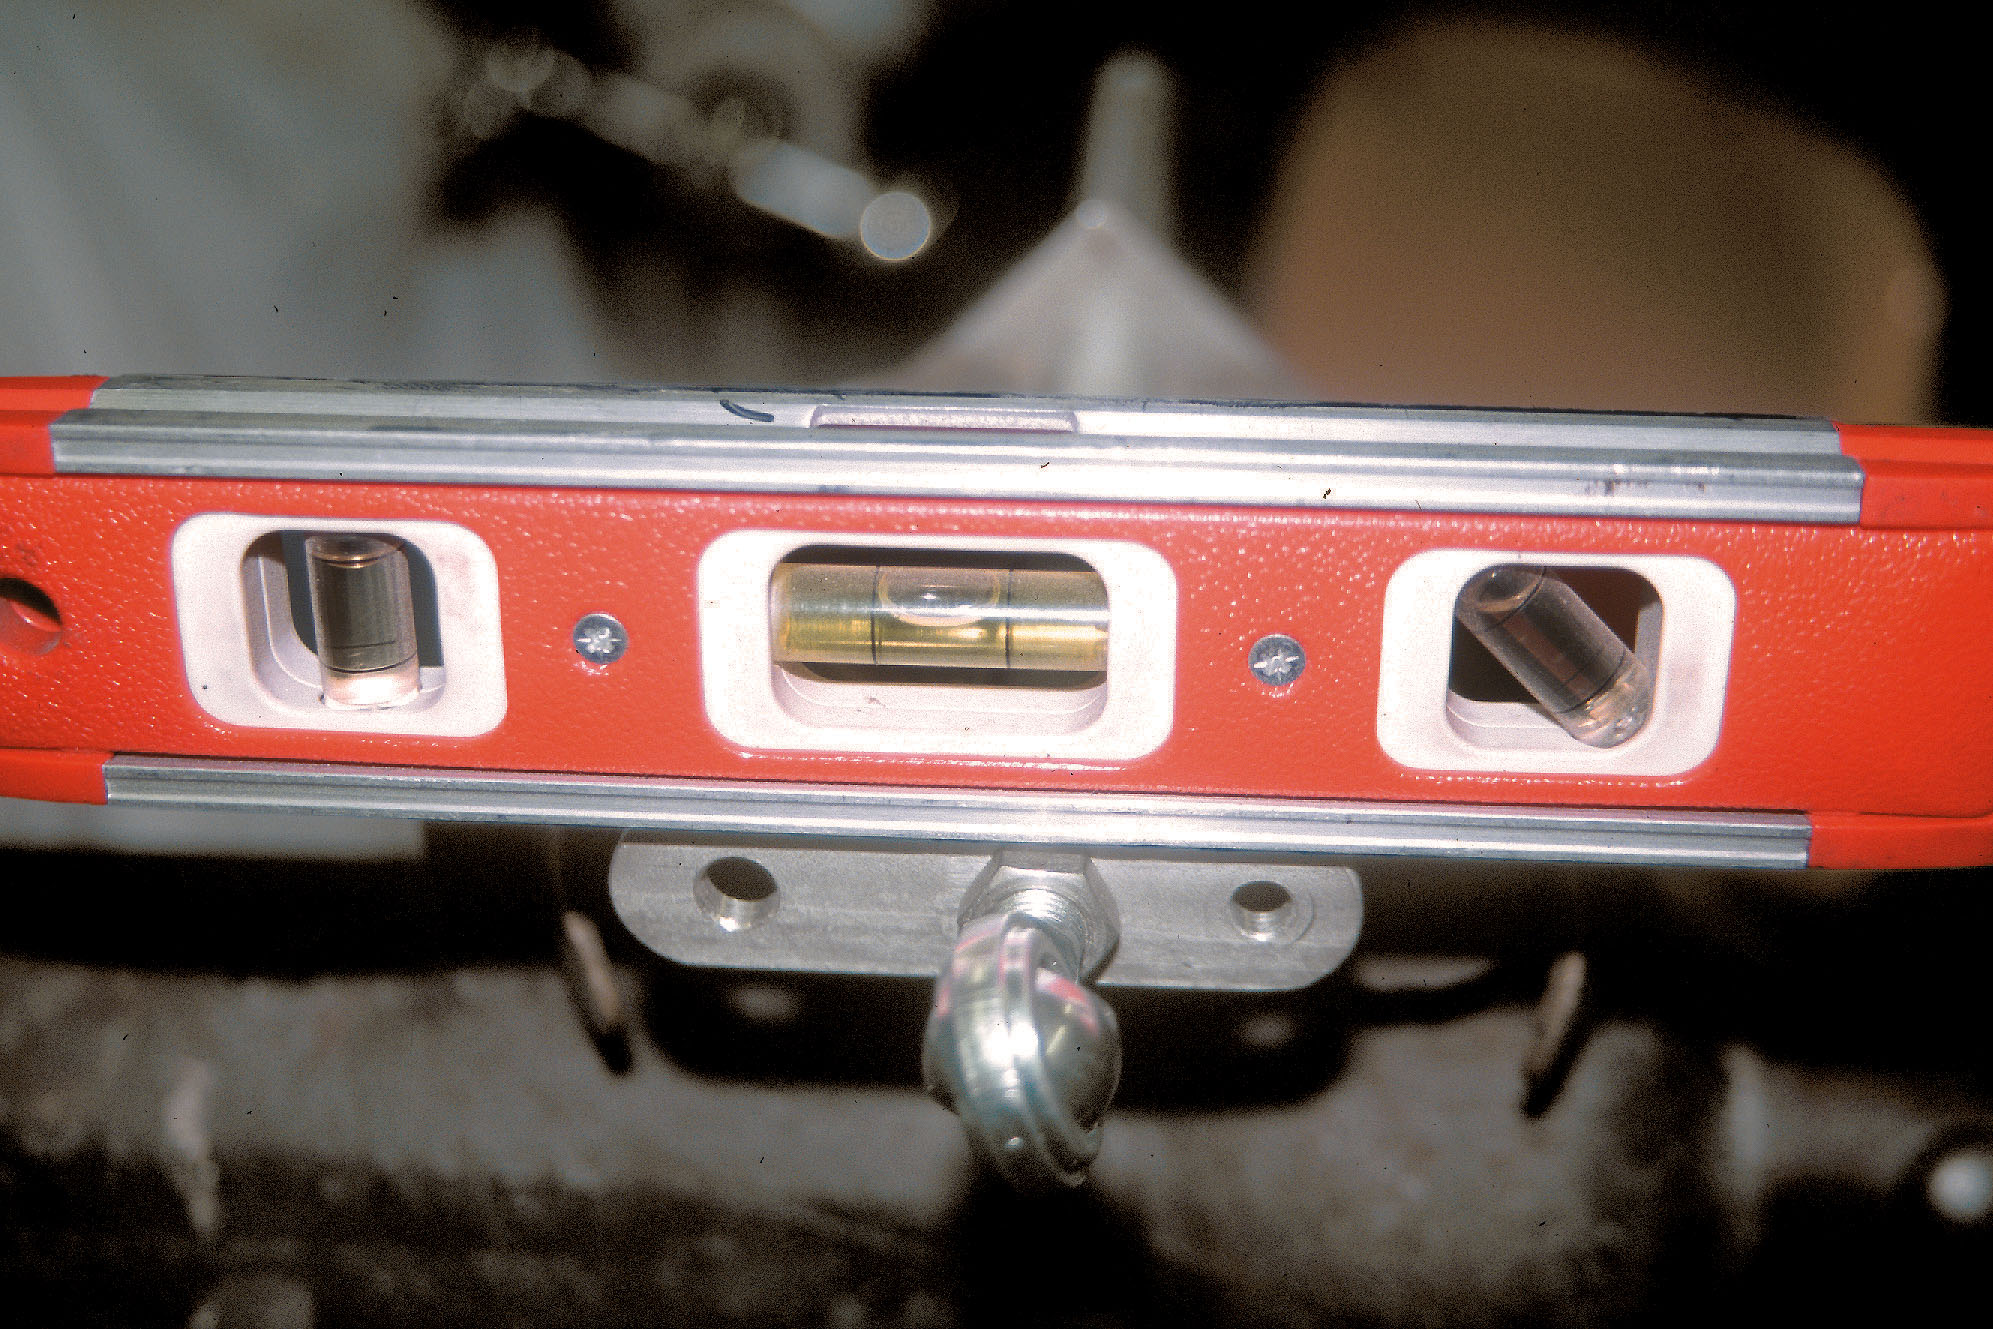
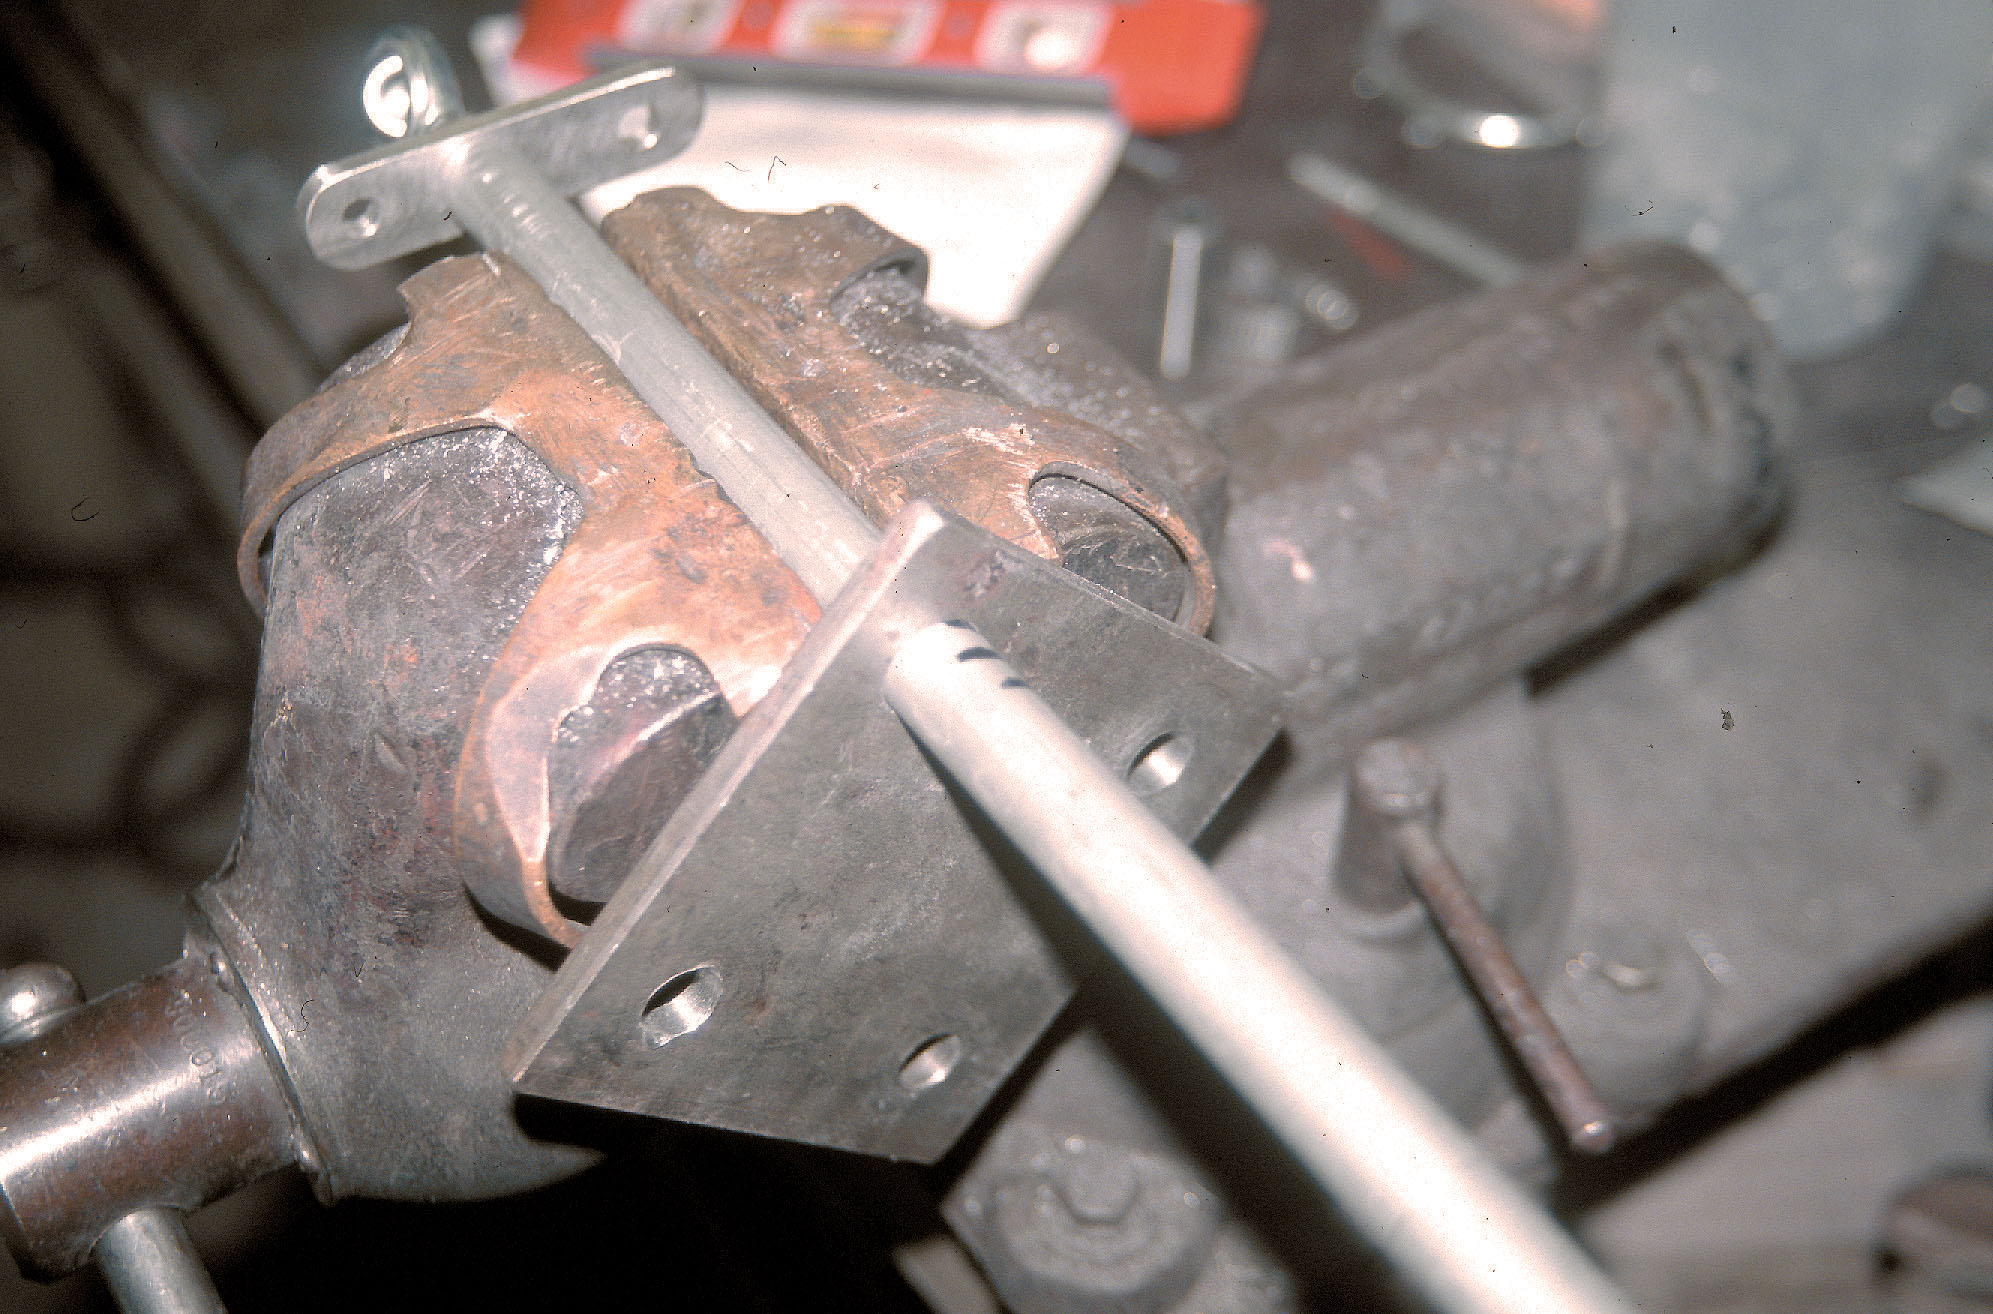
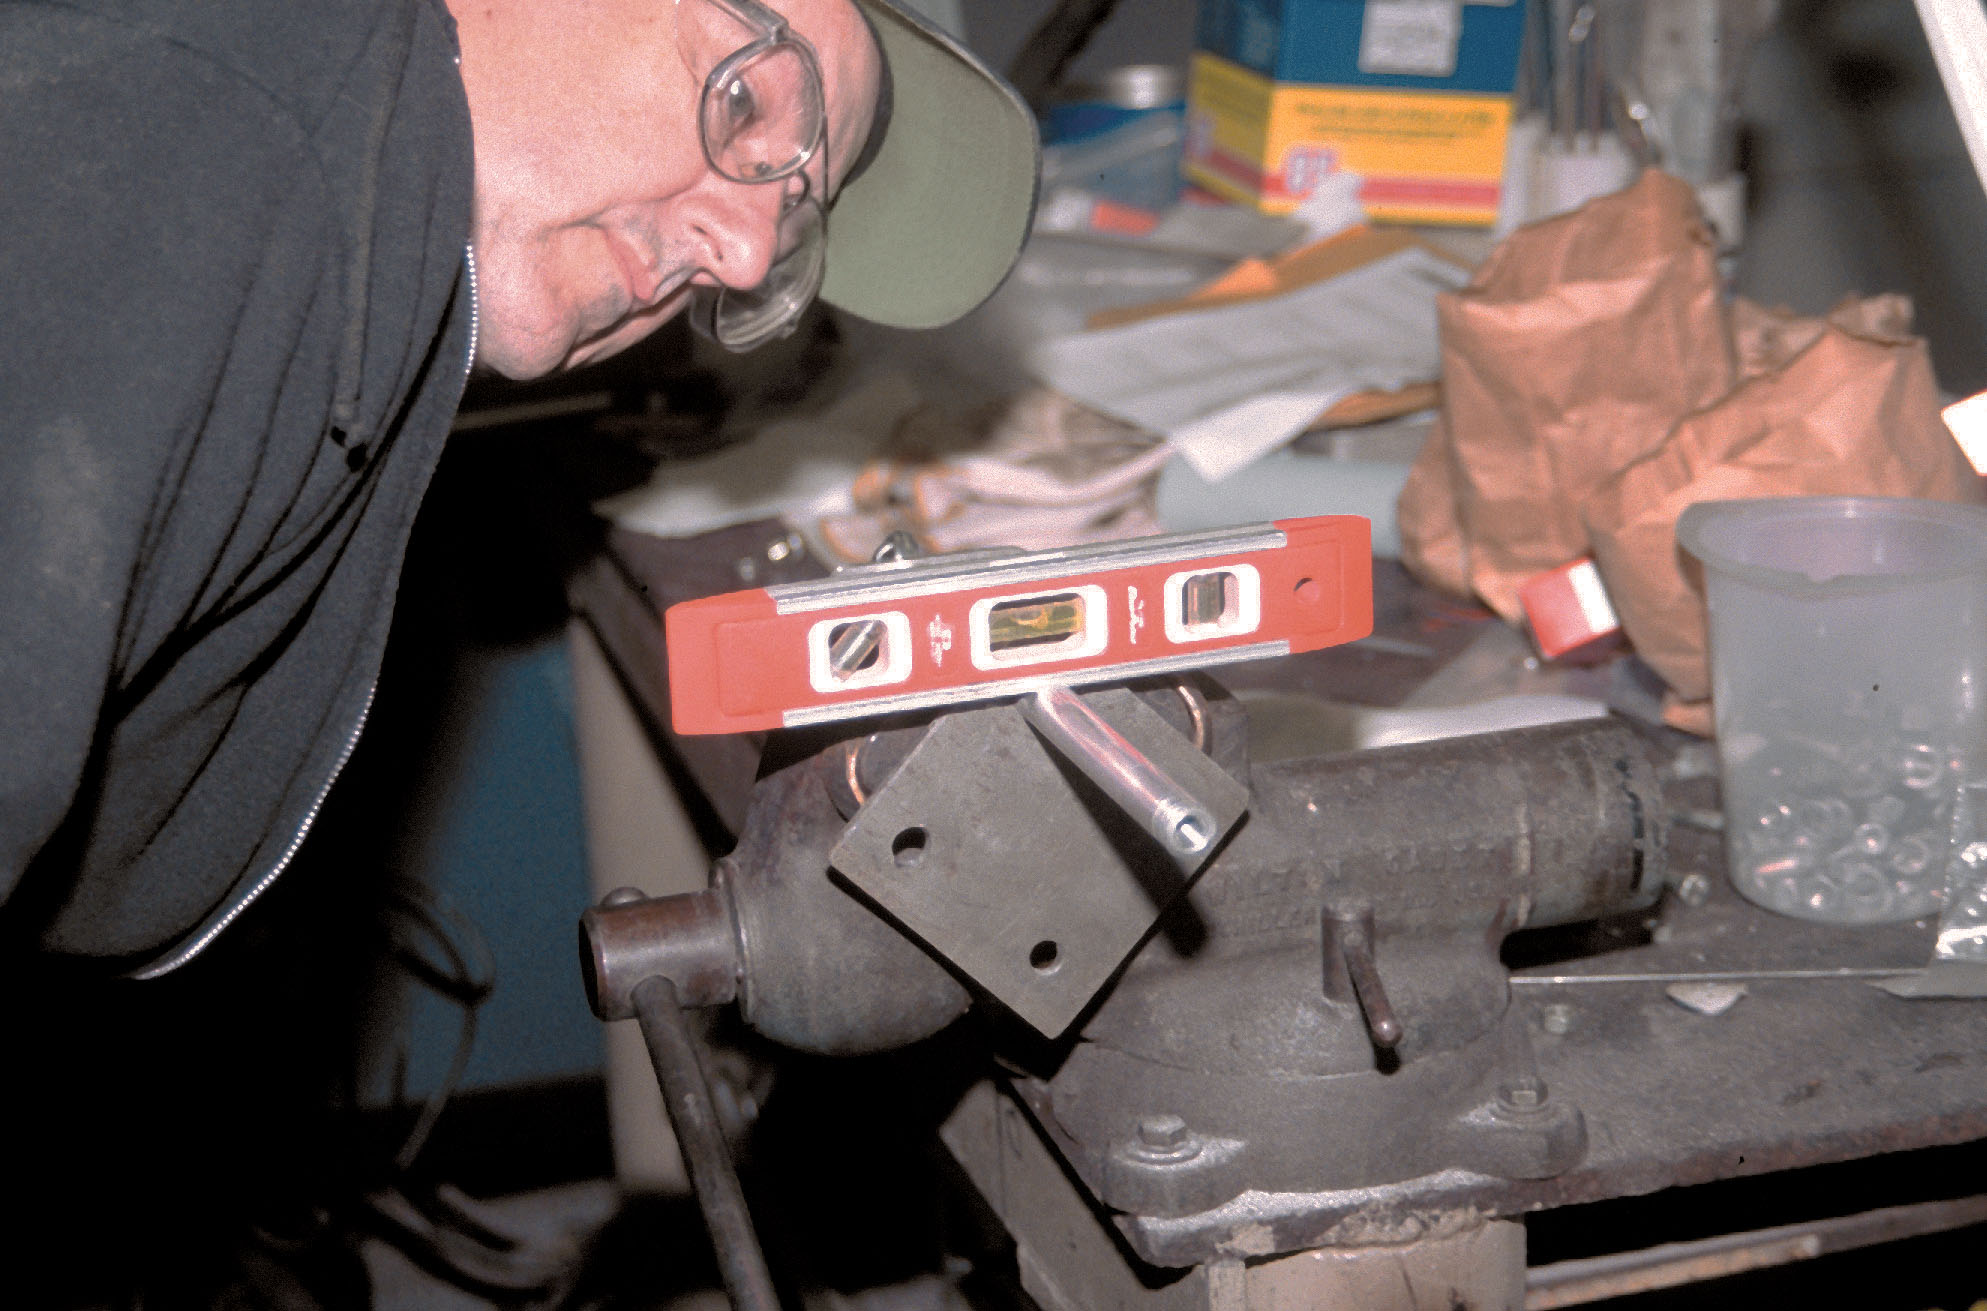
Step 7. We clamped our tensioner horizontally in the vise. Another trip to the junk box, this time for a scrap of metal to use with a level to index our tensioner. We drilled a 3/8-inch hole in the scrap and secured it to the end of the tensioner in a level position, using one of the rod-end bearings and a jam nut. We will use the same surface of the scrap metal to reindex the tensioner after we rotate it 180 degrees.
We found a piece of 1/4x4x3-inch mild steel and drilled a 5/8-inch hole through it. We then slid the 1/4-inch plate over the 5/8-inch-diameter tensioner and pushed it against the ends of the vise jaws.
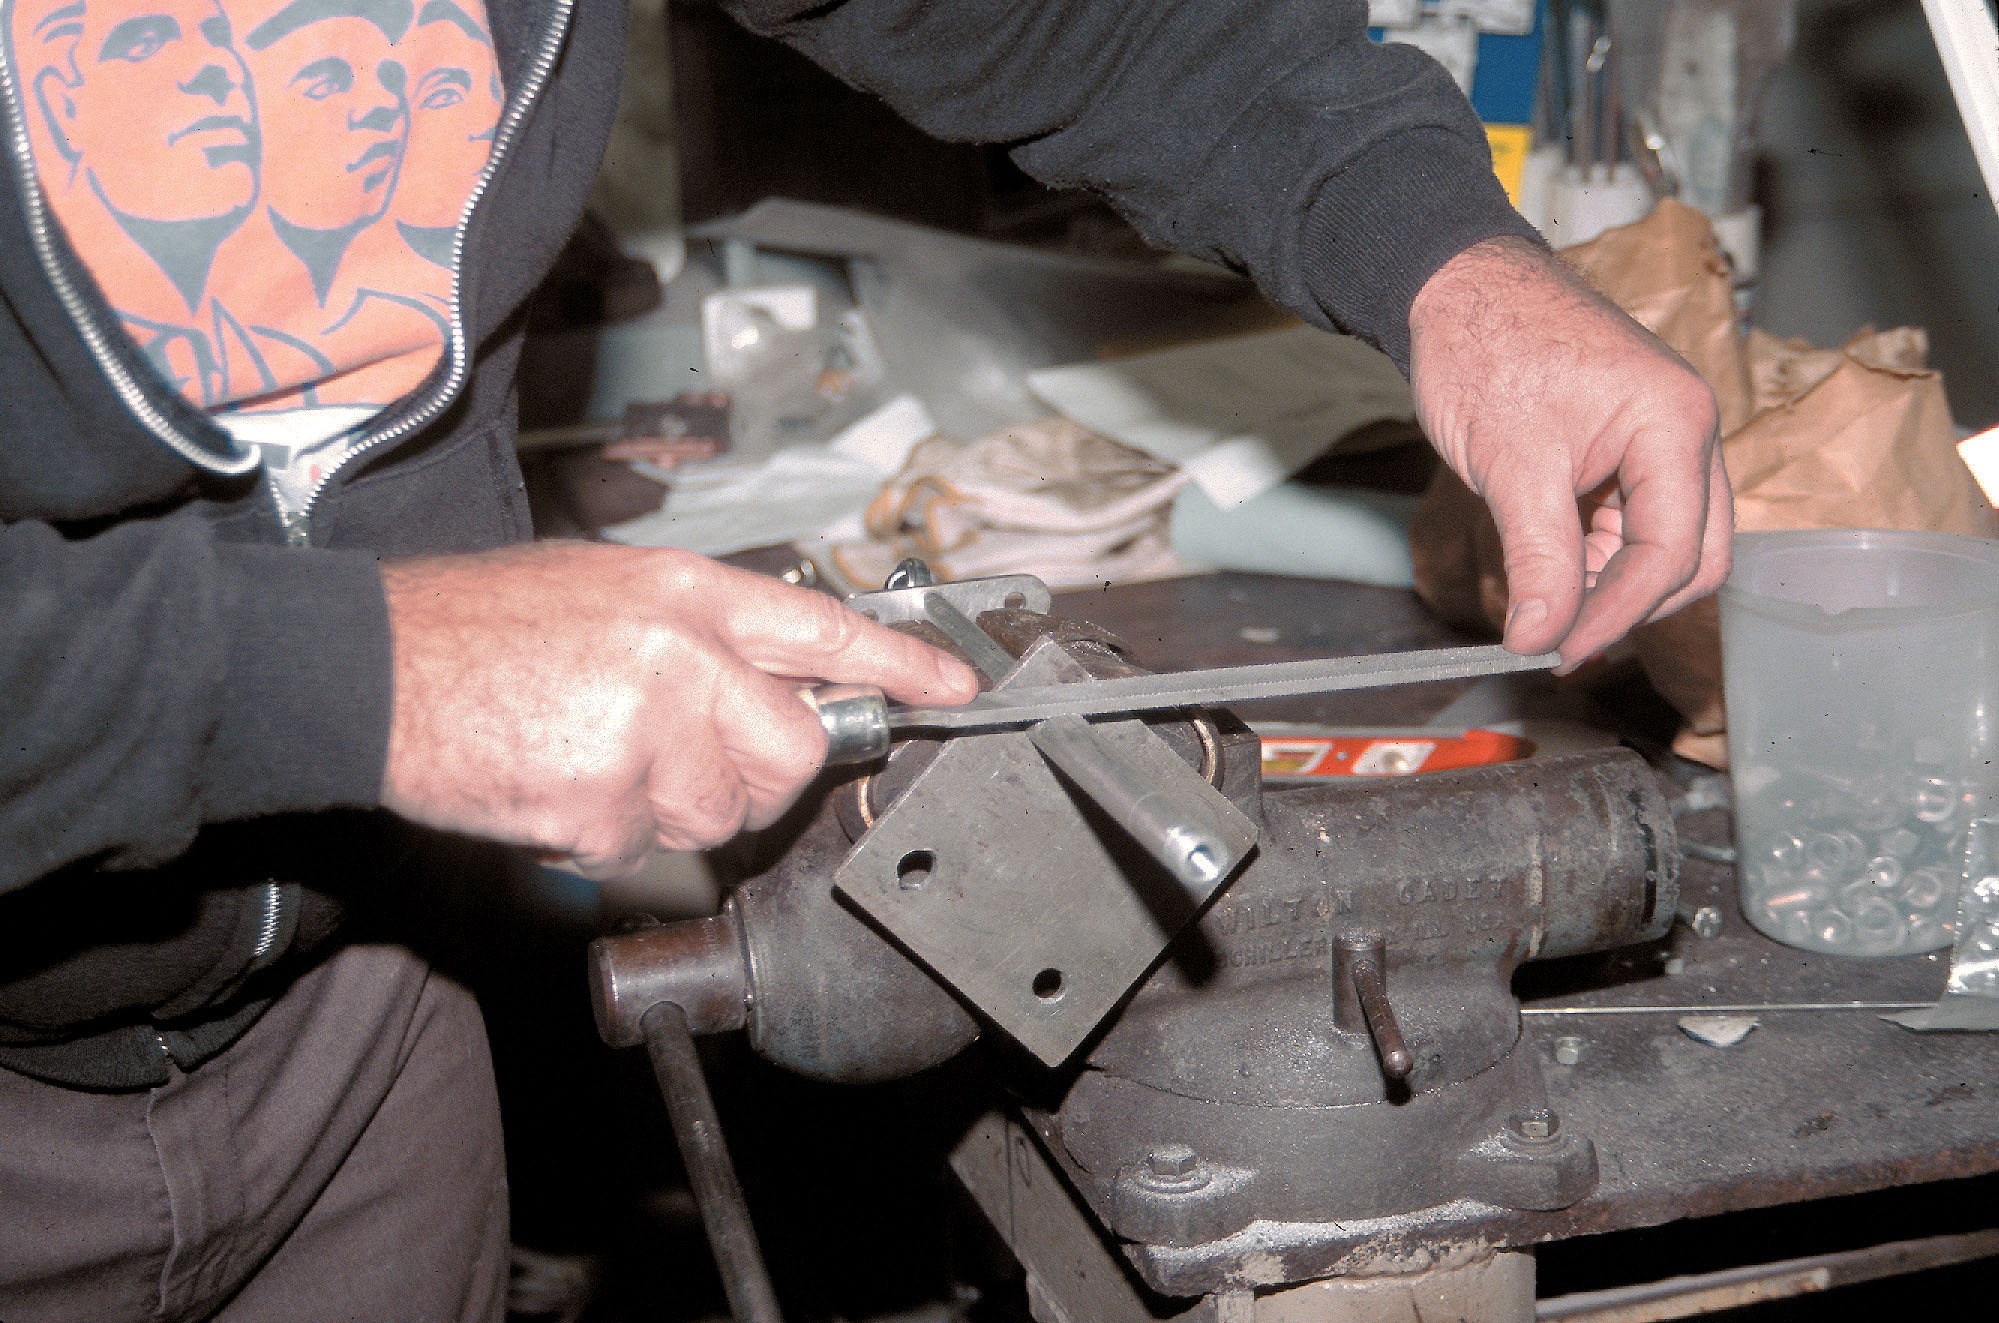
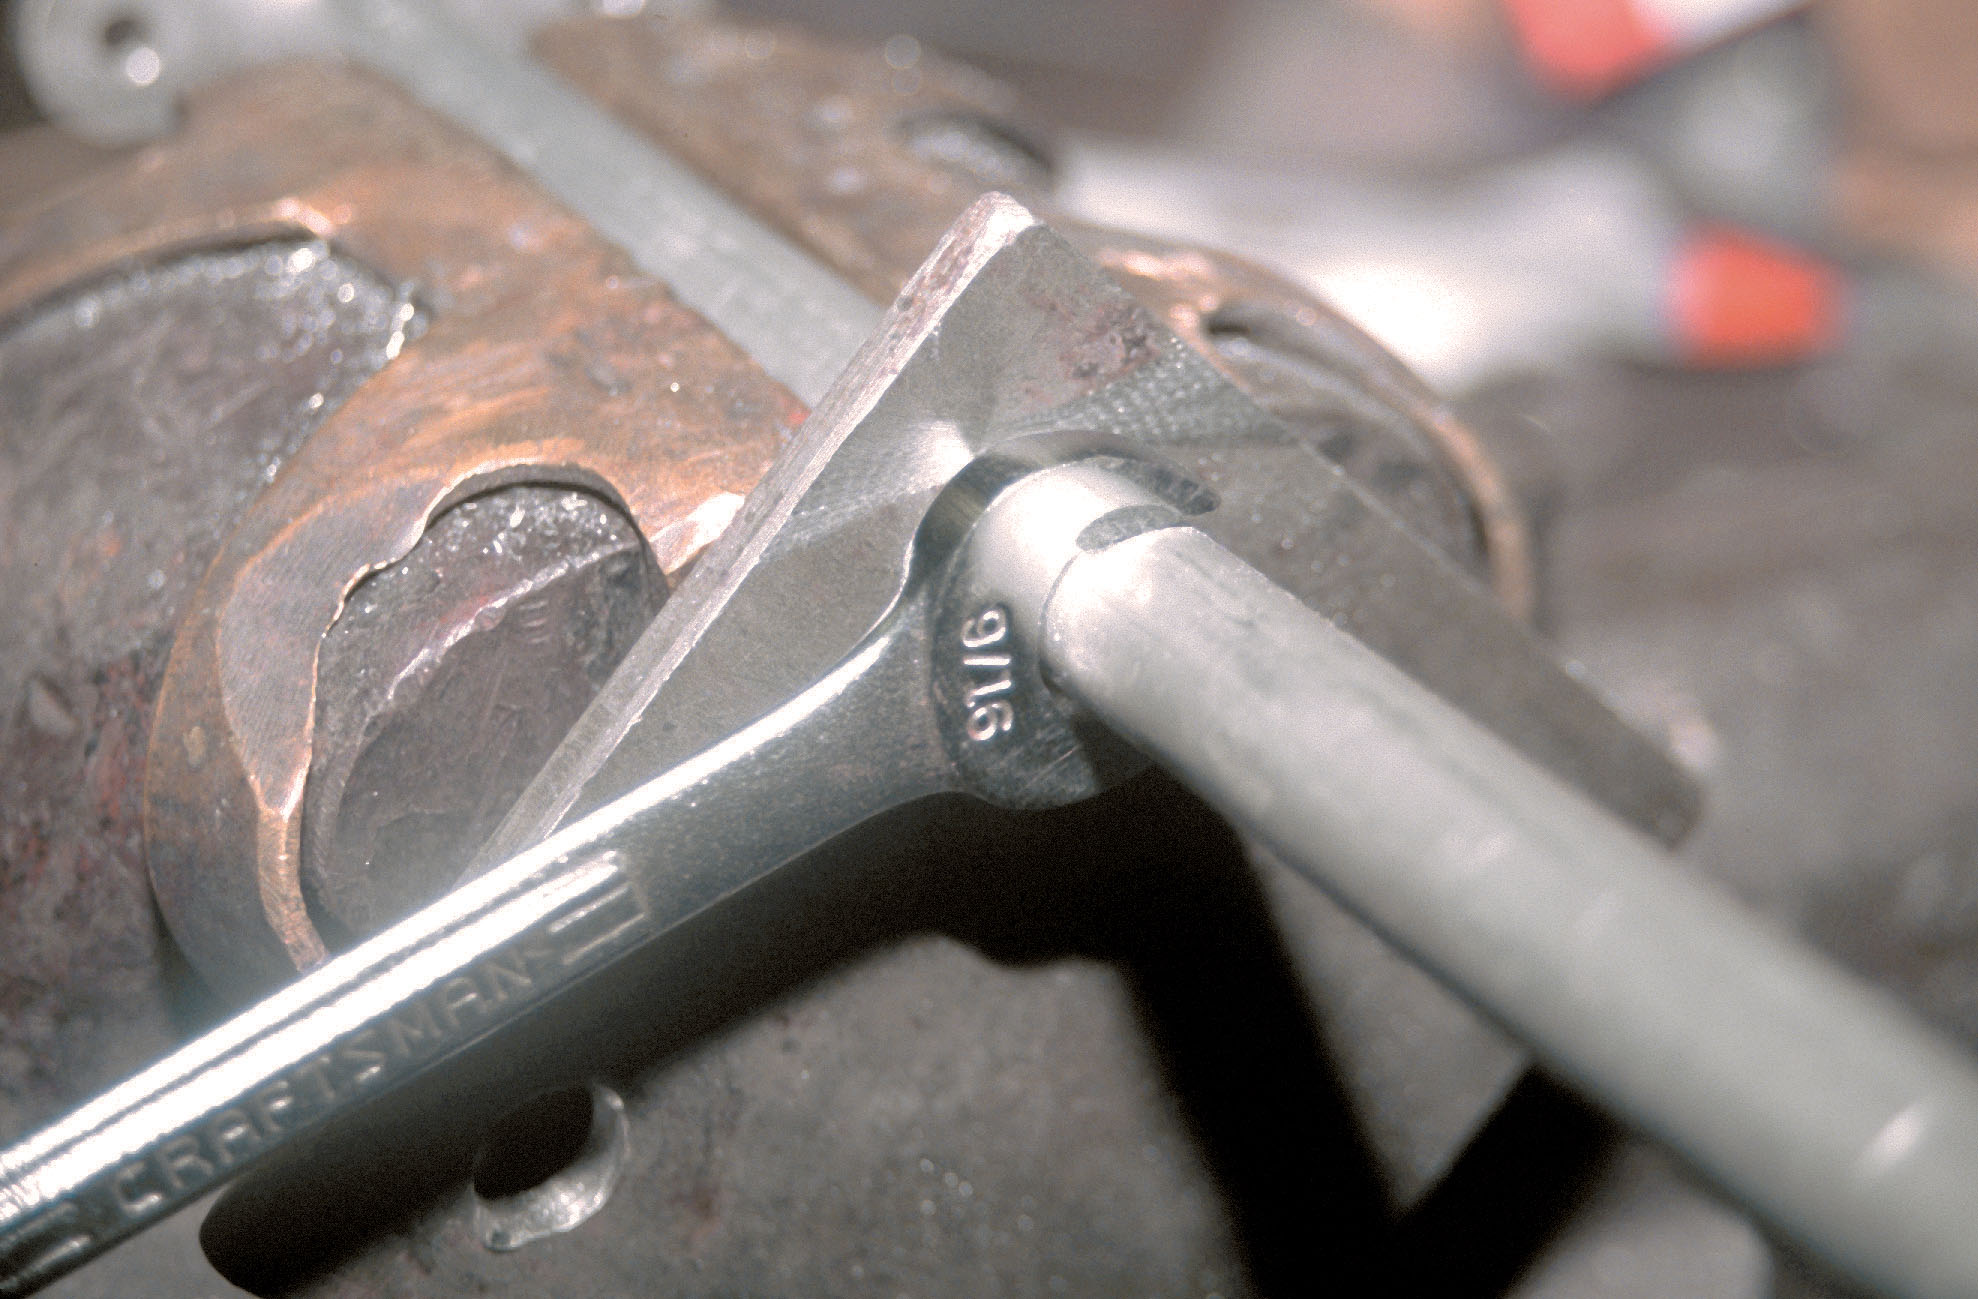
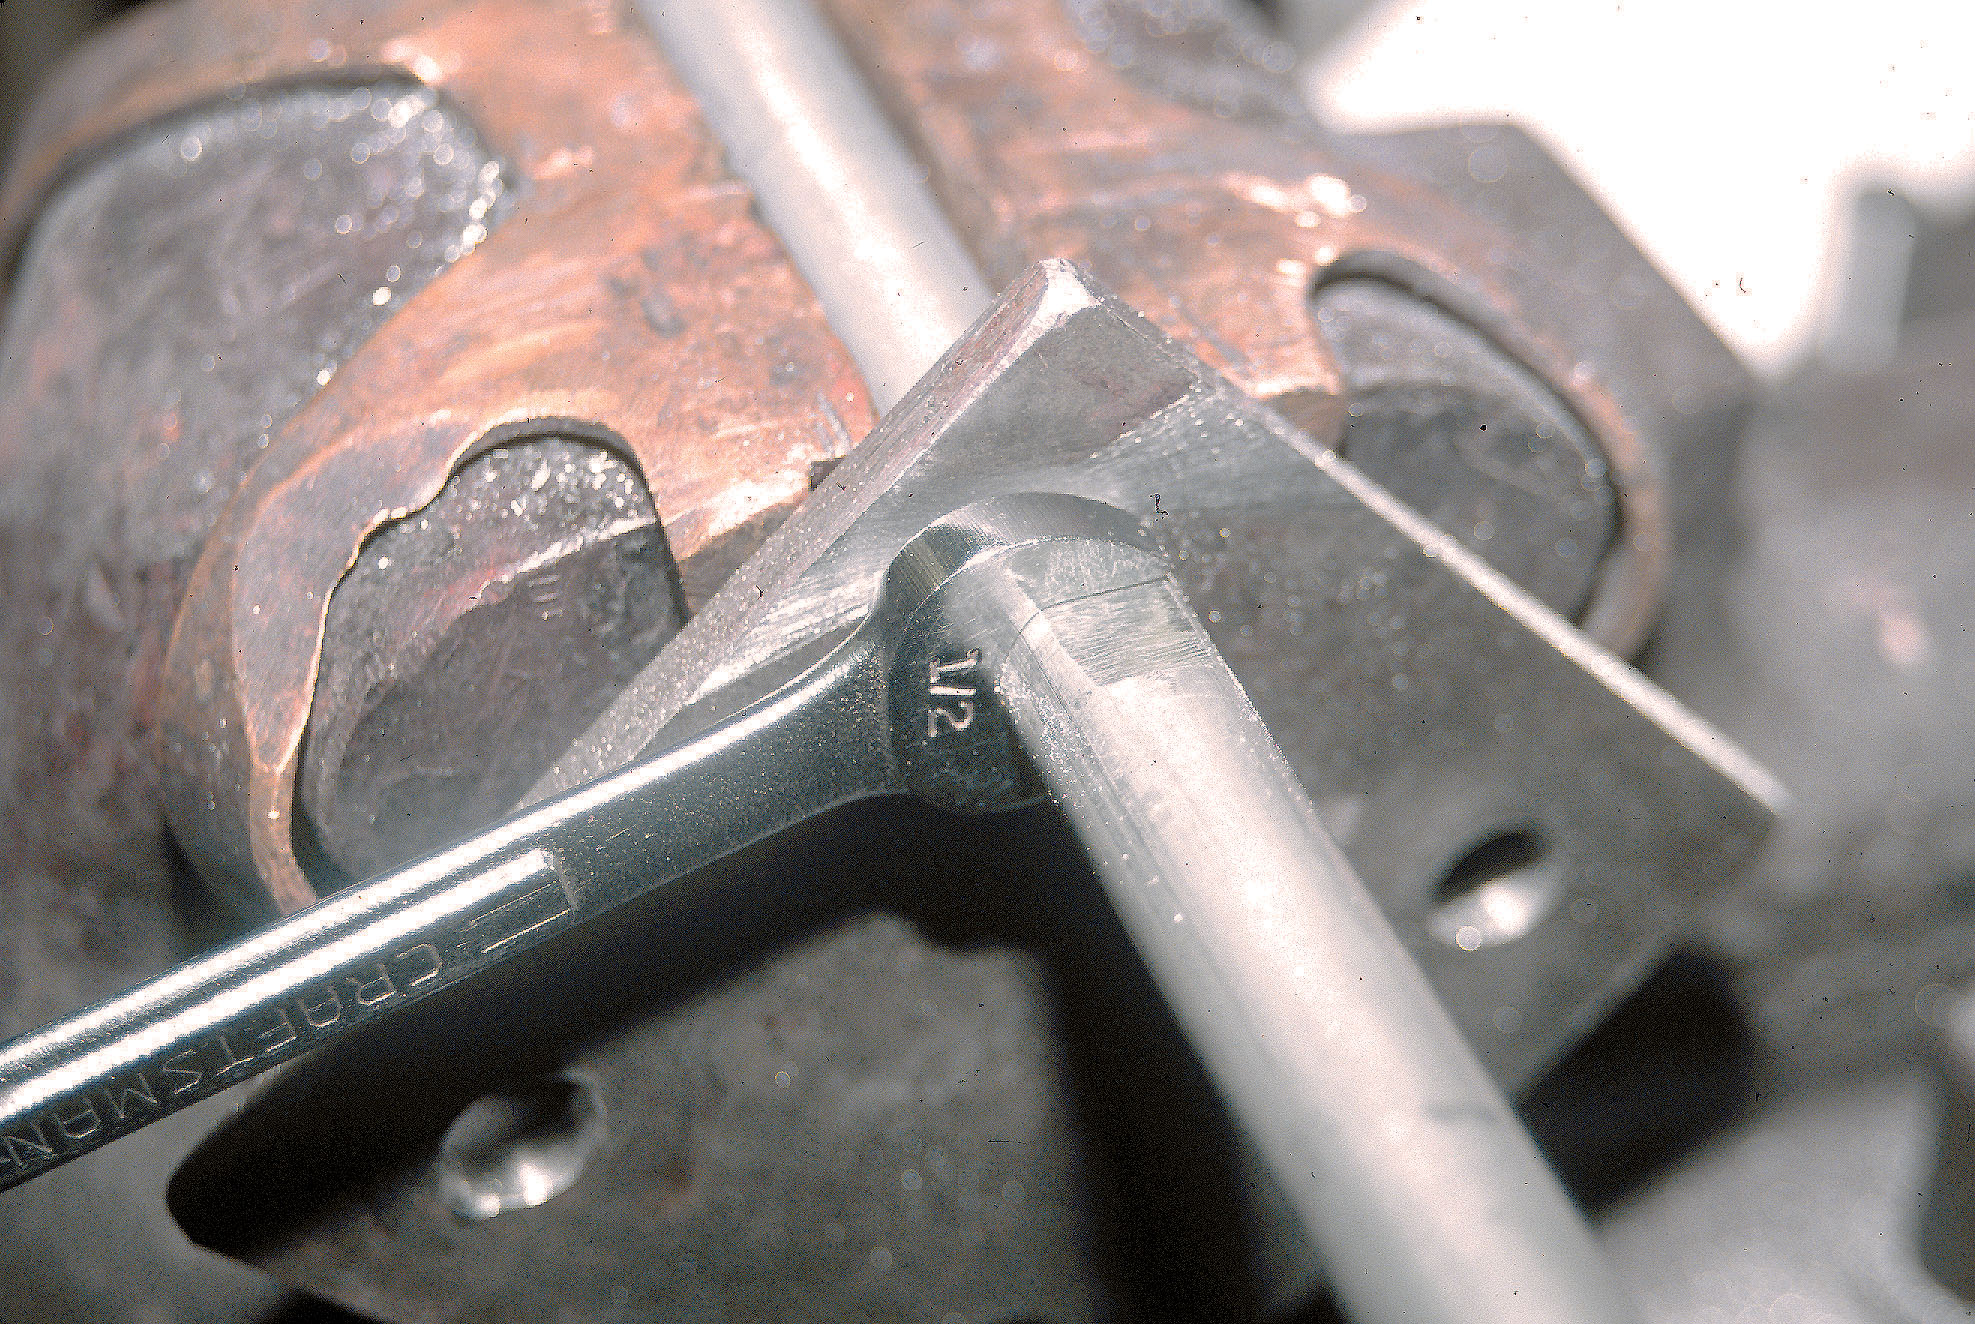
When we file our flat on the tensioner, we will keep the file tight against the 1/4-inch plate. Take your time and keep the file level. How much do you file off? We started with a 5/8-inch o.d., so we can file the first flat until a 9/16-inch wrench will just fit over it. Rotate the tensioner half a turn, and, using the same surface of scrap metal that is still secured to the end of the tensioner, re-level that surface. This will place the first flat exactly on the bottom of the tensioner. Repeat the filing procedure until you can just fit a 1/2-inch wrench onto the flats.
Carefully clean the edges of the file cuts, remove the “leveling” scrap from the end of the tensioner and clean things up. We started with a Scotch-Brite pad and some WD-40 and progressed to Scotch-Brite and metal polish. After polishing, we cleaned everything with lacquer thinner. When the part was completely dry, we sprayed it with clearcoat from an aerosol can.
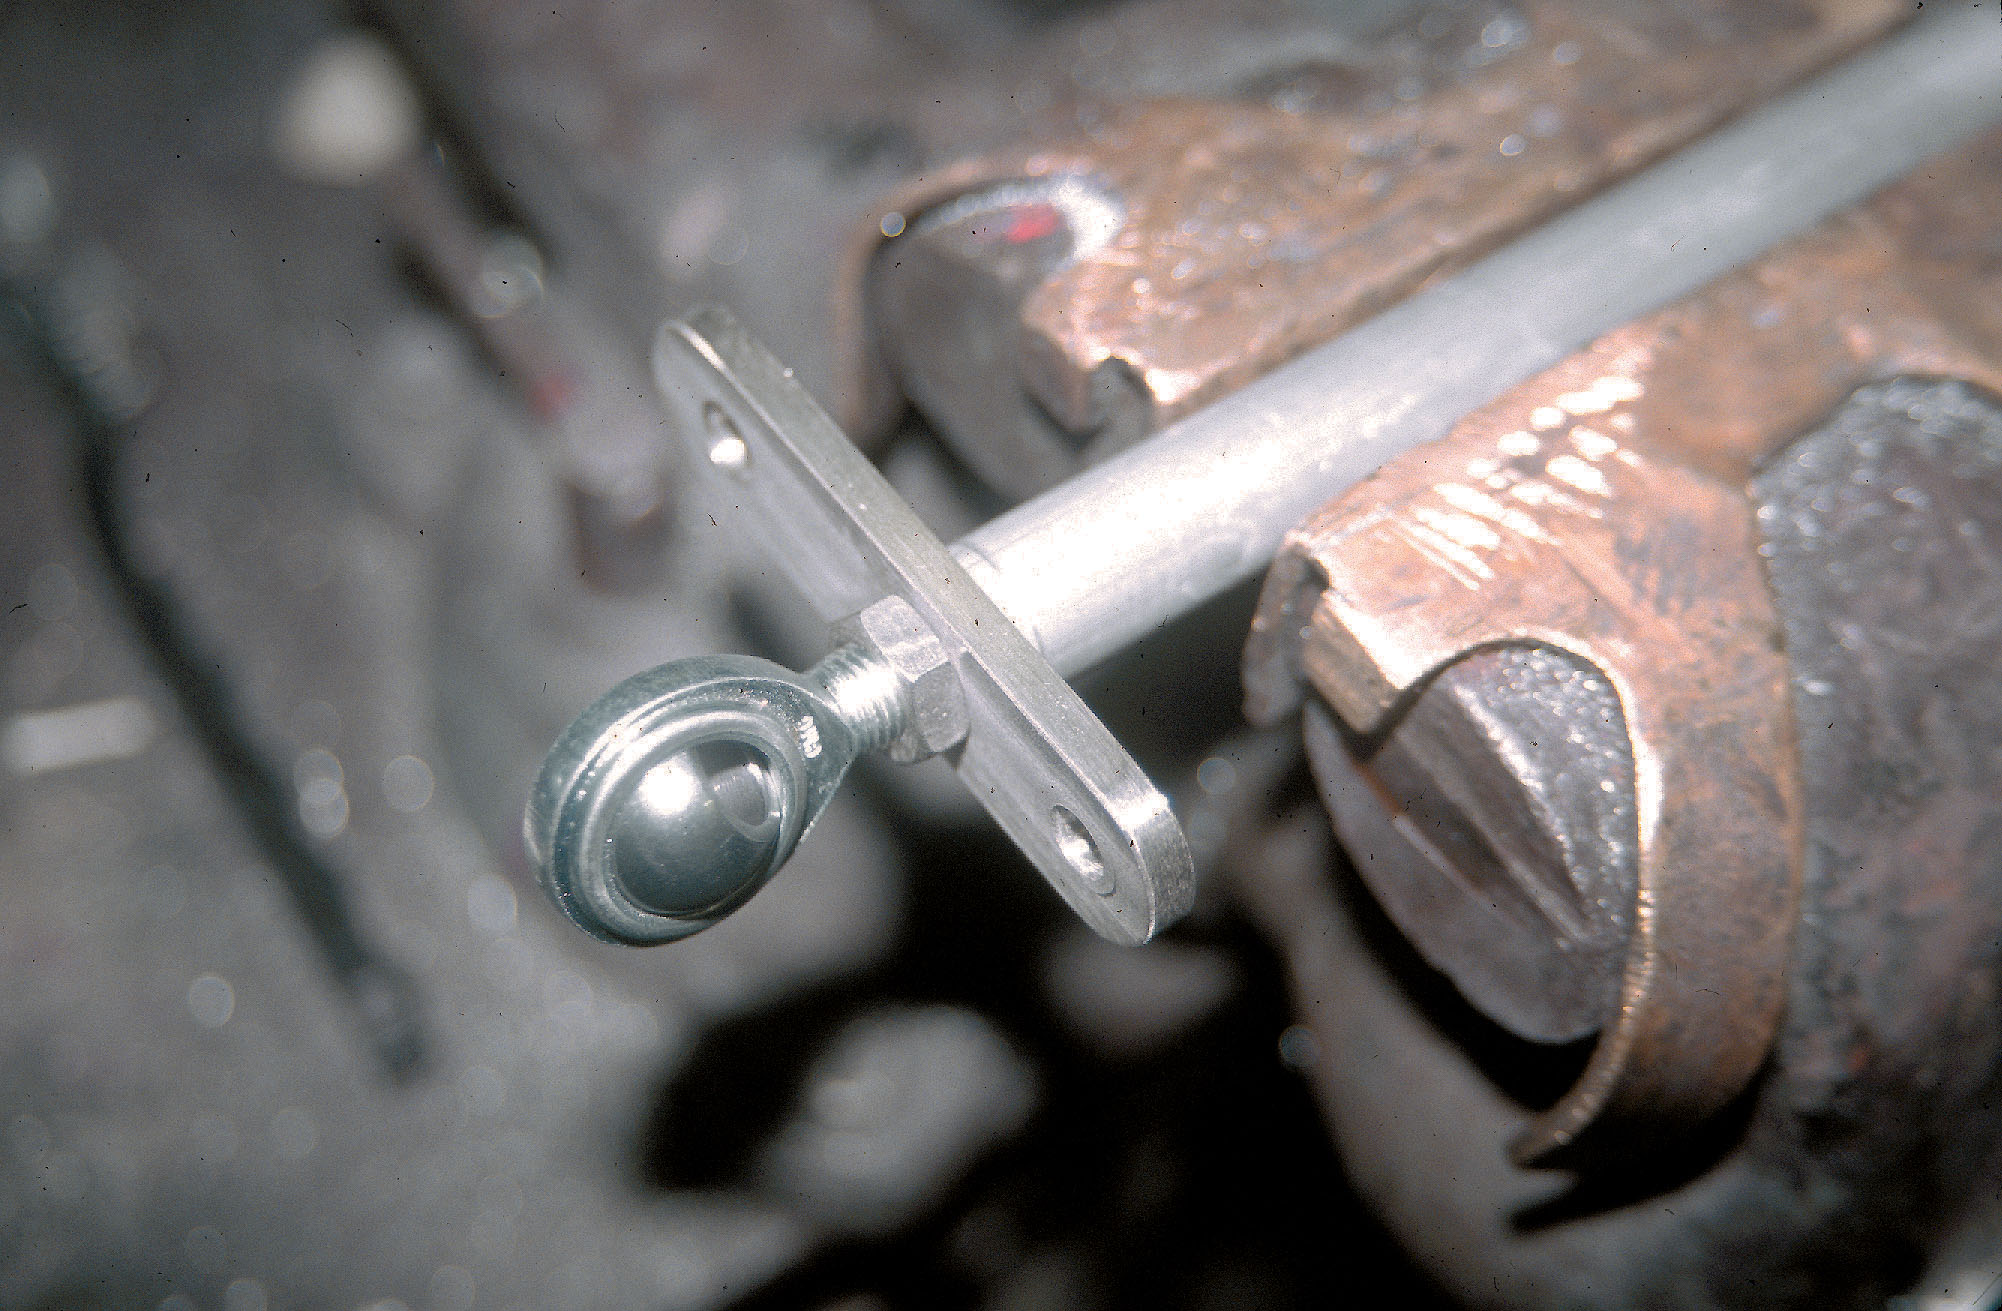
Put a dab of never-seize on the threads of the rod-end bearings, install the jam nut and screw the bearing into the tensioner body. Take a big step back and admire your work. Another job well done!
Path B
Step 7. If you have a vertical milling machine, mark the location for the flats and clamp the tensioner into the milling machine vise. We can mill a flat on both sides of the tensioner without taking the tensioner out of the vise, or we can use the leveling scrap on the end (as in Path A) and mill the two flats in two operations.
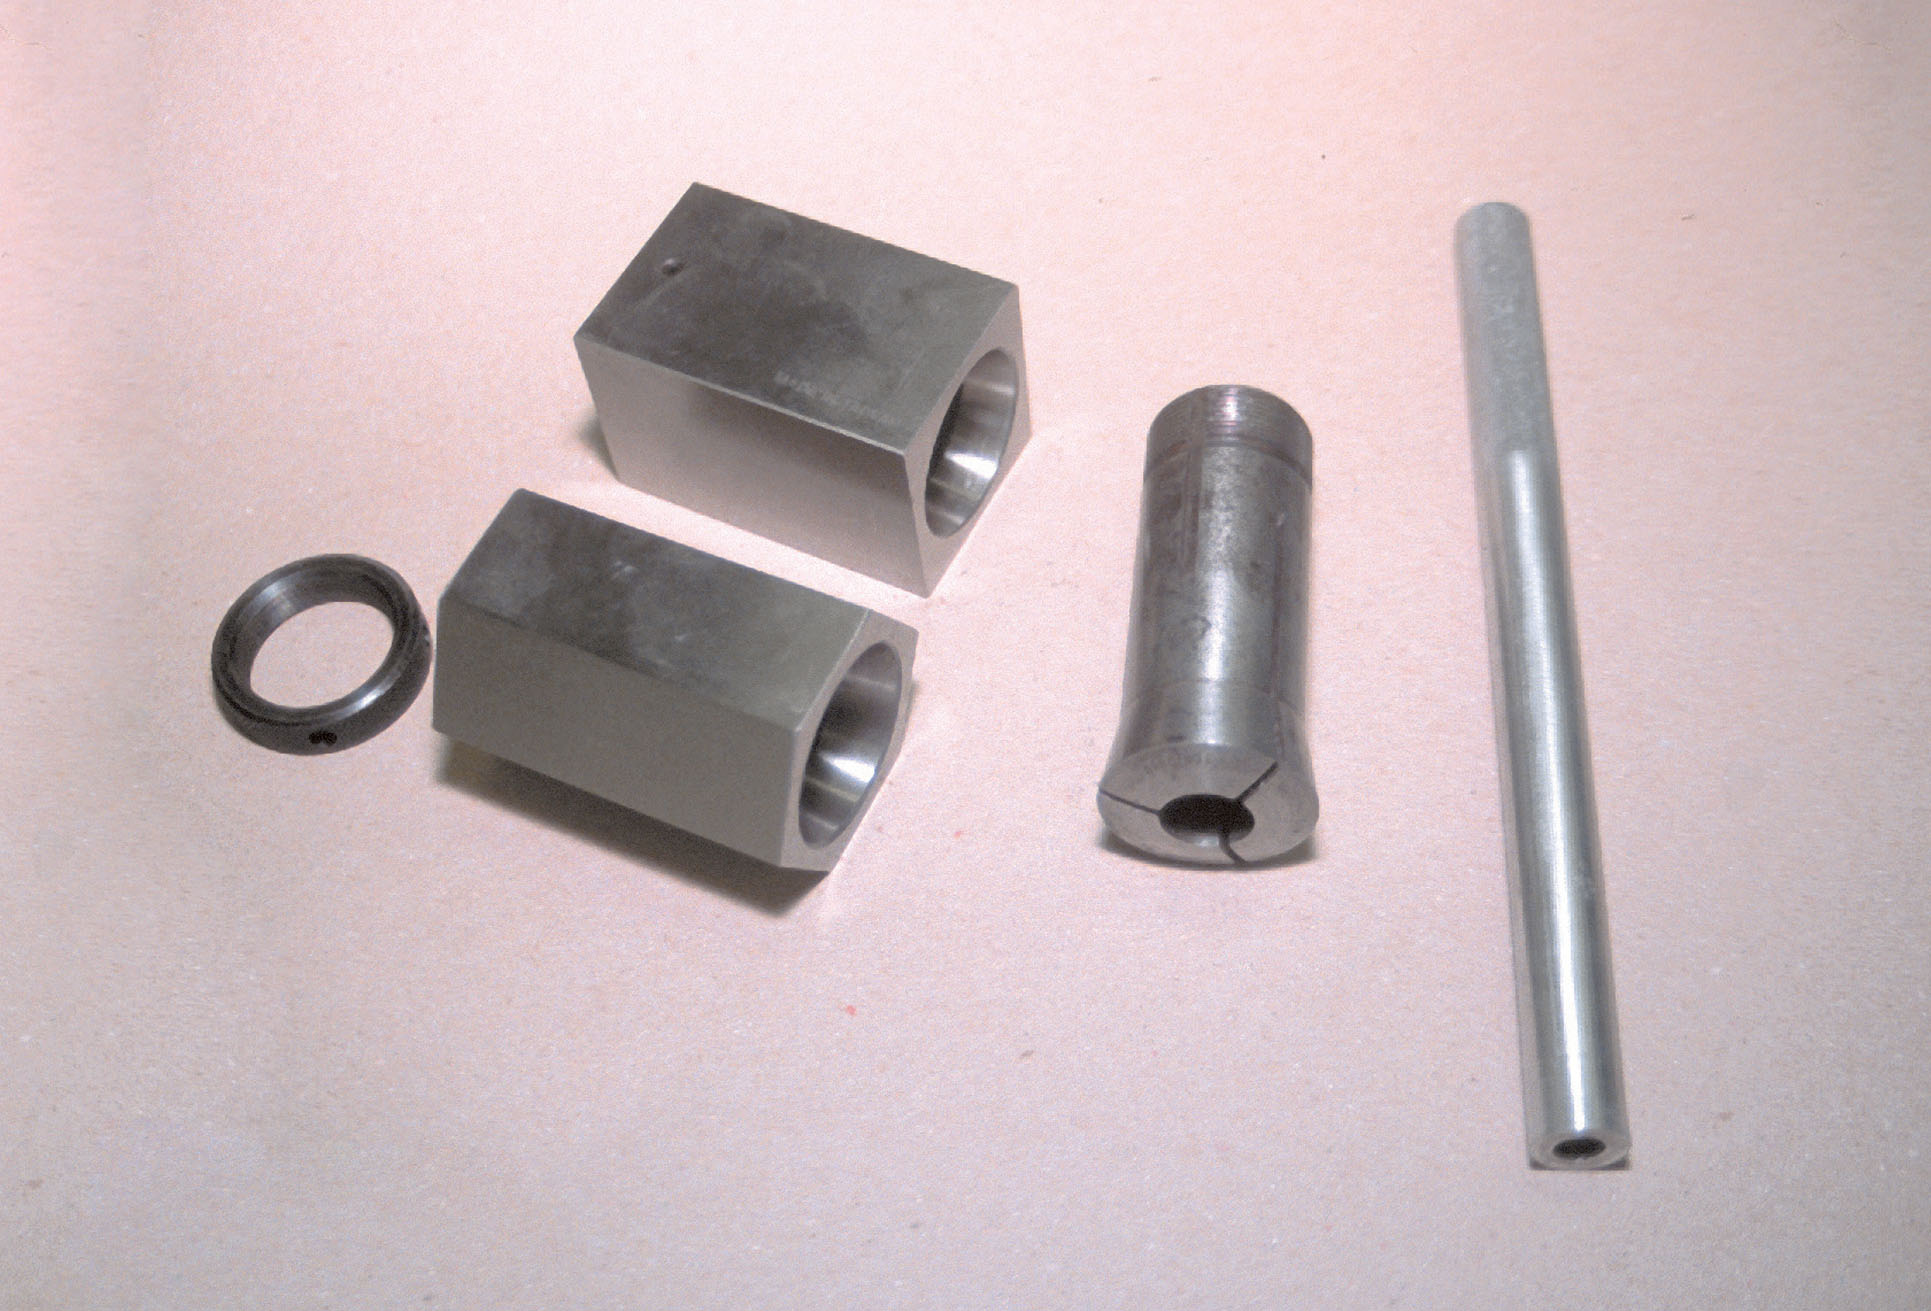
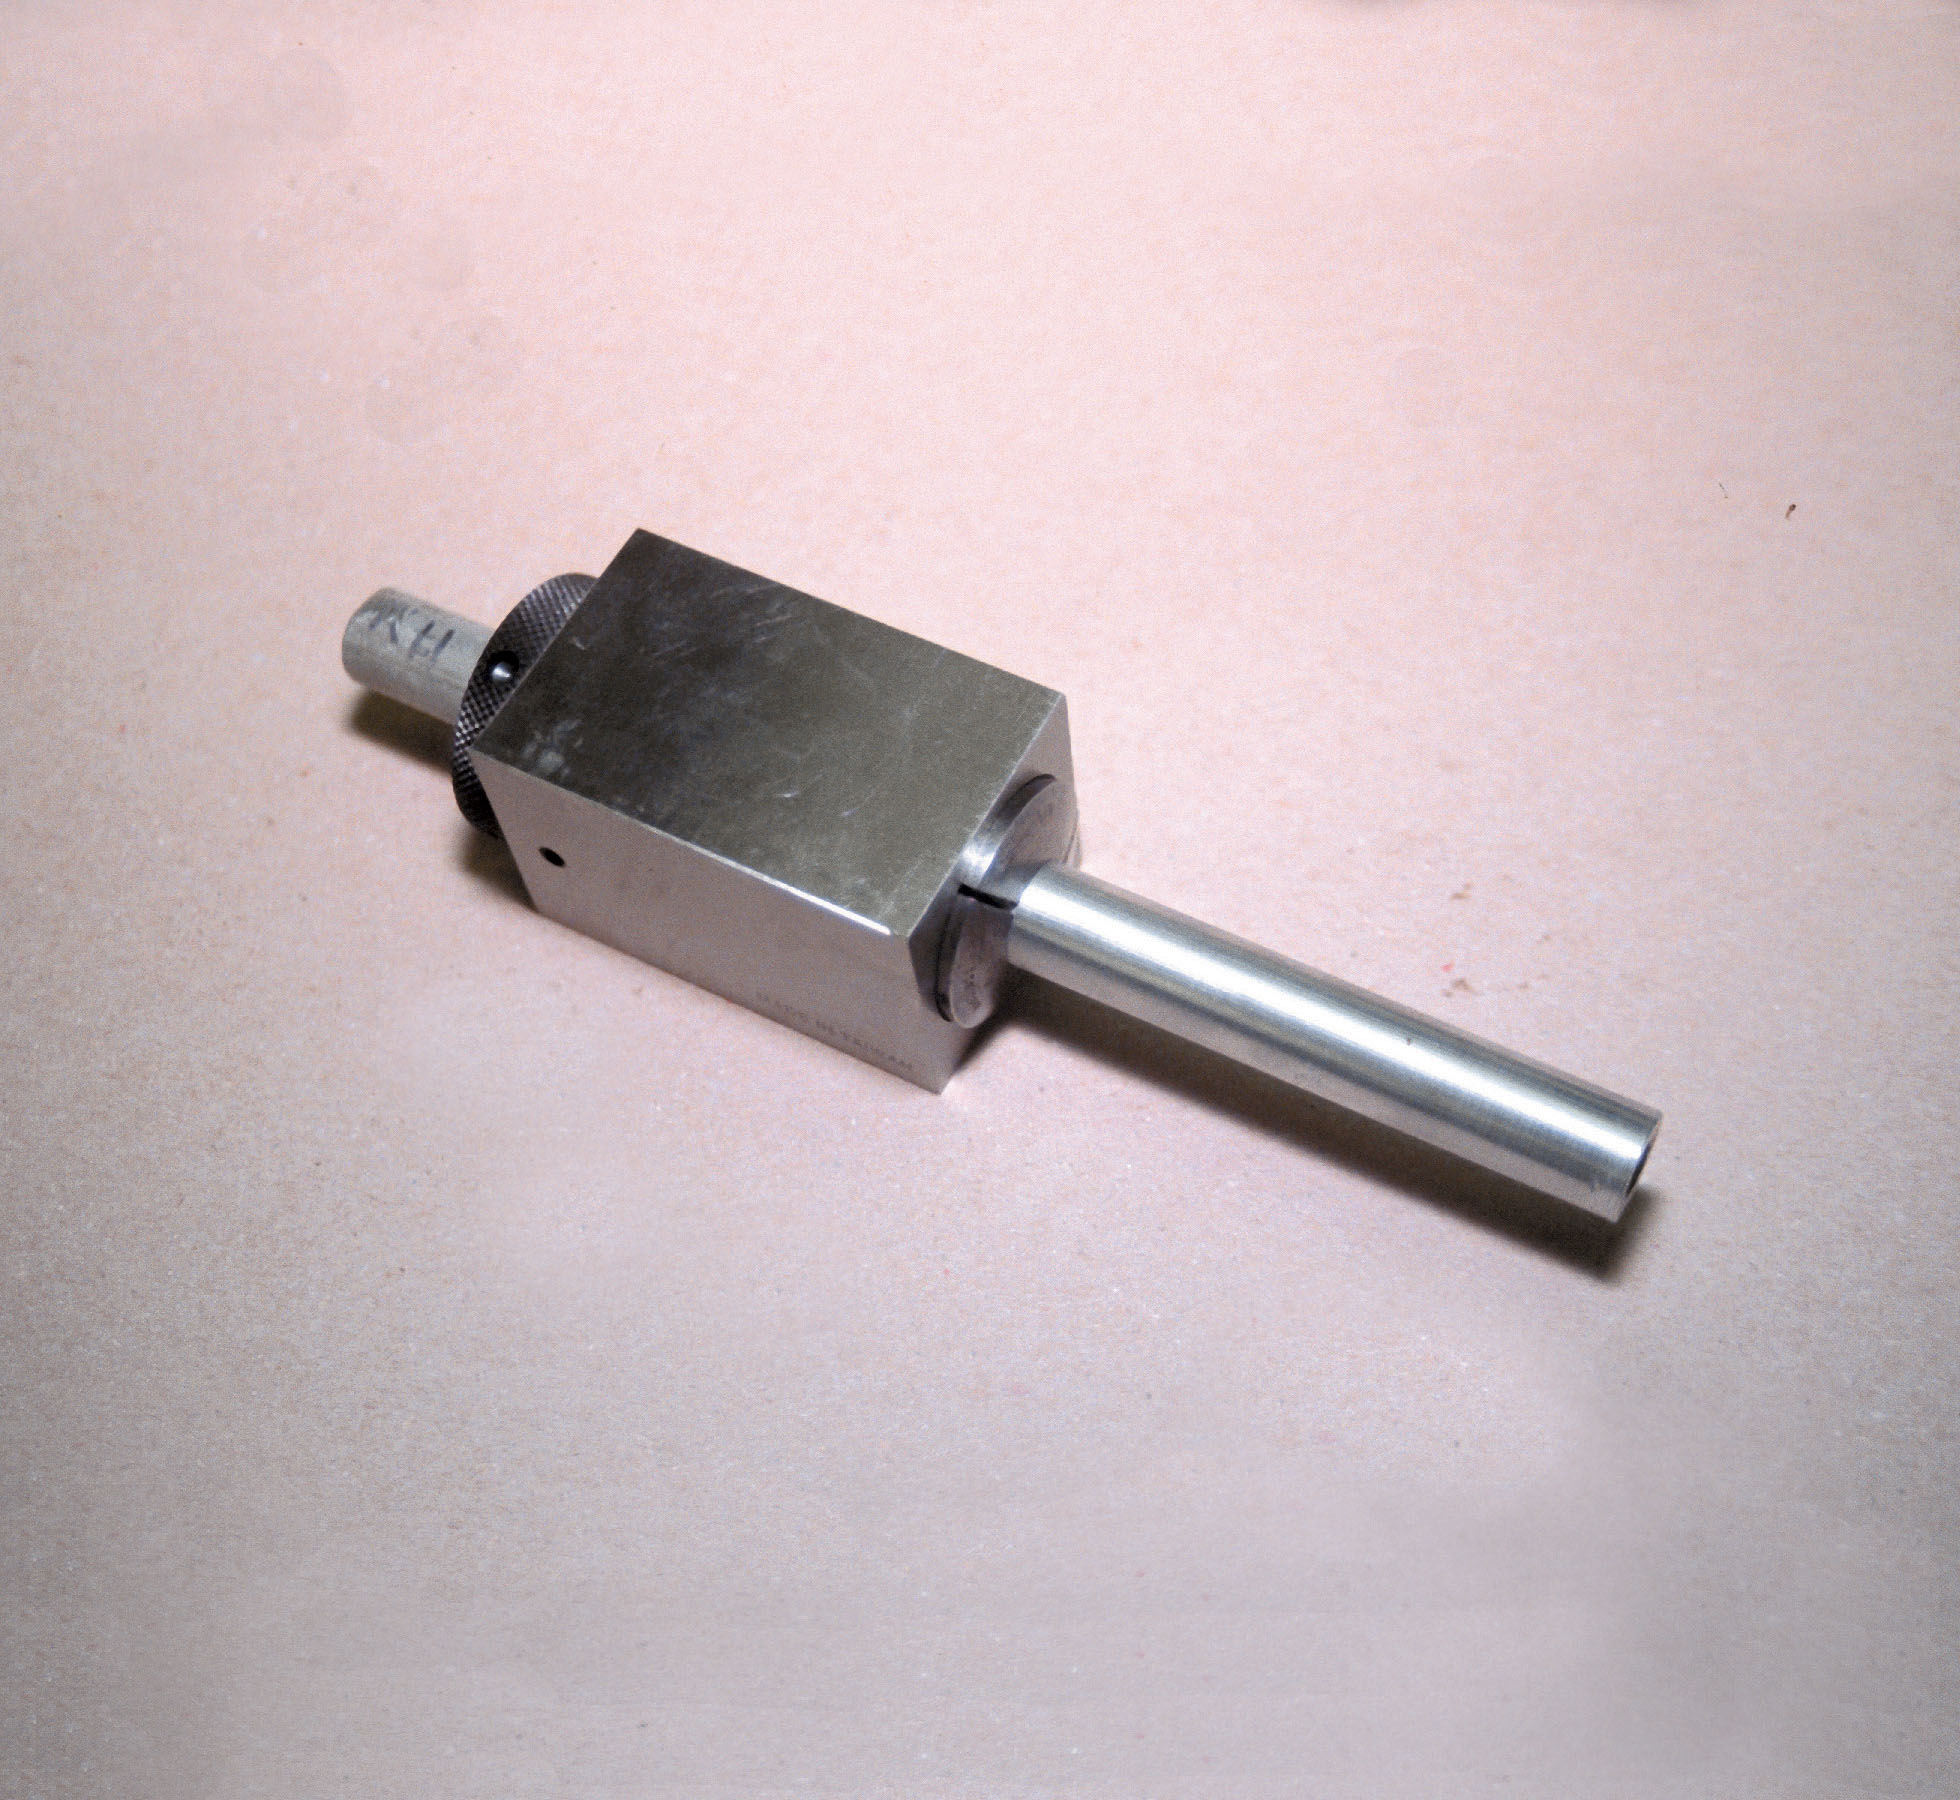
Another option is to use a collet block to hold the tensioner in position for milling the flats. Collet blocks come in four- and six-sided models and utilize a standard 5-C collet to hold the work piece. The tensioner would be secured in the collet block and the first flat is milled. The collet block is then rotated in the vise to reindex the tensioner. This would be the ideal way to mill six flats on your tensioner.
MSC and other machine tool suppliers sell collet blocks for about $50. You also will need to purchase a collet for each diameter material that you need to hold. The 5/8-inch collet costs about $6.
We used a 3/8-inch-diameter end mill and cut the two flats on the tensioner body. We deburred the edges of the cuts and cleaned things up with lacquer thinner. We used the same polishing and clearcoating procedure as in Path A, assembled the pieces and we’re done!


