How to Modernize an Older Mustang by Installing Super-Stopping Disc Brakes
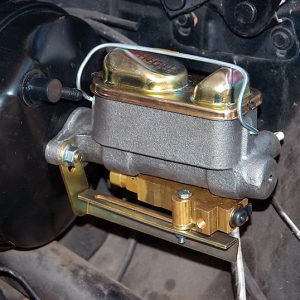
Master Power offers a dual master cylinder and power booster assembly designed for the early Mustangs. It comes with the firewall bracket, a proportioning valve and a new pedal assembly to make sure the leverage is correct for the new parts that are being installed.
The Ford Mustang was one of the first cars to offer disc brakes as an option, but they were not a big hit with buyers when they were first introduced. Most buyers were happy to buy a base model with a six-cylinder engine or a slightly improved version with a 289 backed by an automatic transmission. This was the standard Mustang package that most Mustang owners wanted in those days—grocery-chasers that people had no intention of using to sit on the pole of the Indianapolis 500. Aside from the Brickyard, that’s all changed, as standard drum brakes are no longer considered standard fare, and car enthusiasts now know the benefits of full disc brakes. It’s hard to find a car today without them, at least on the front brakes.
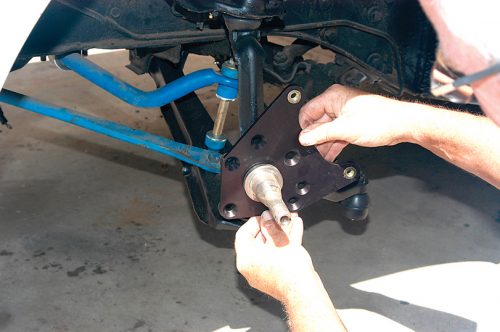
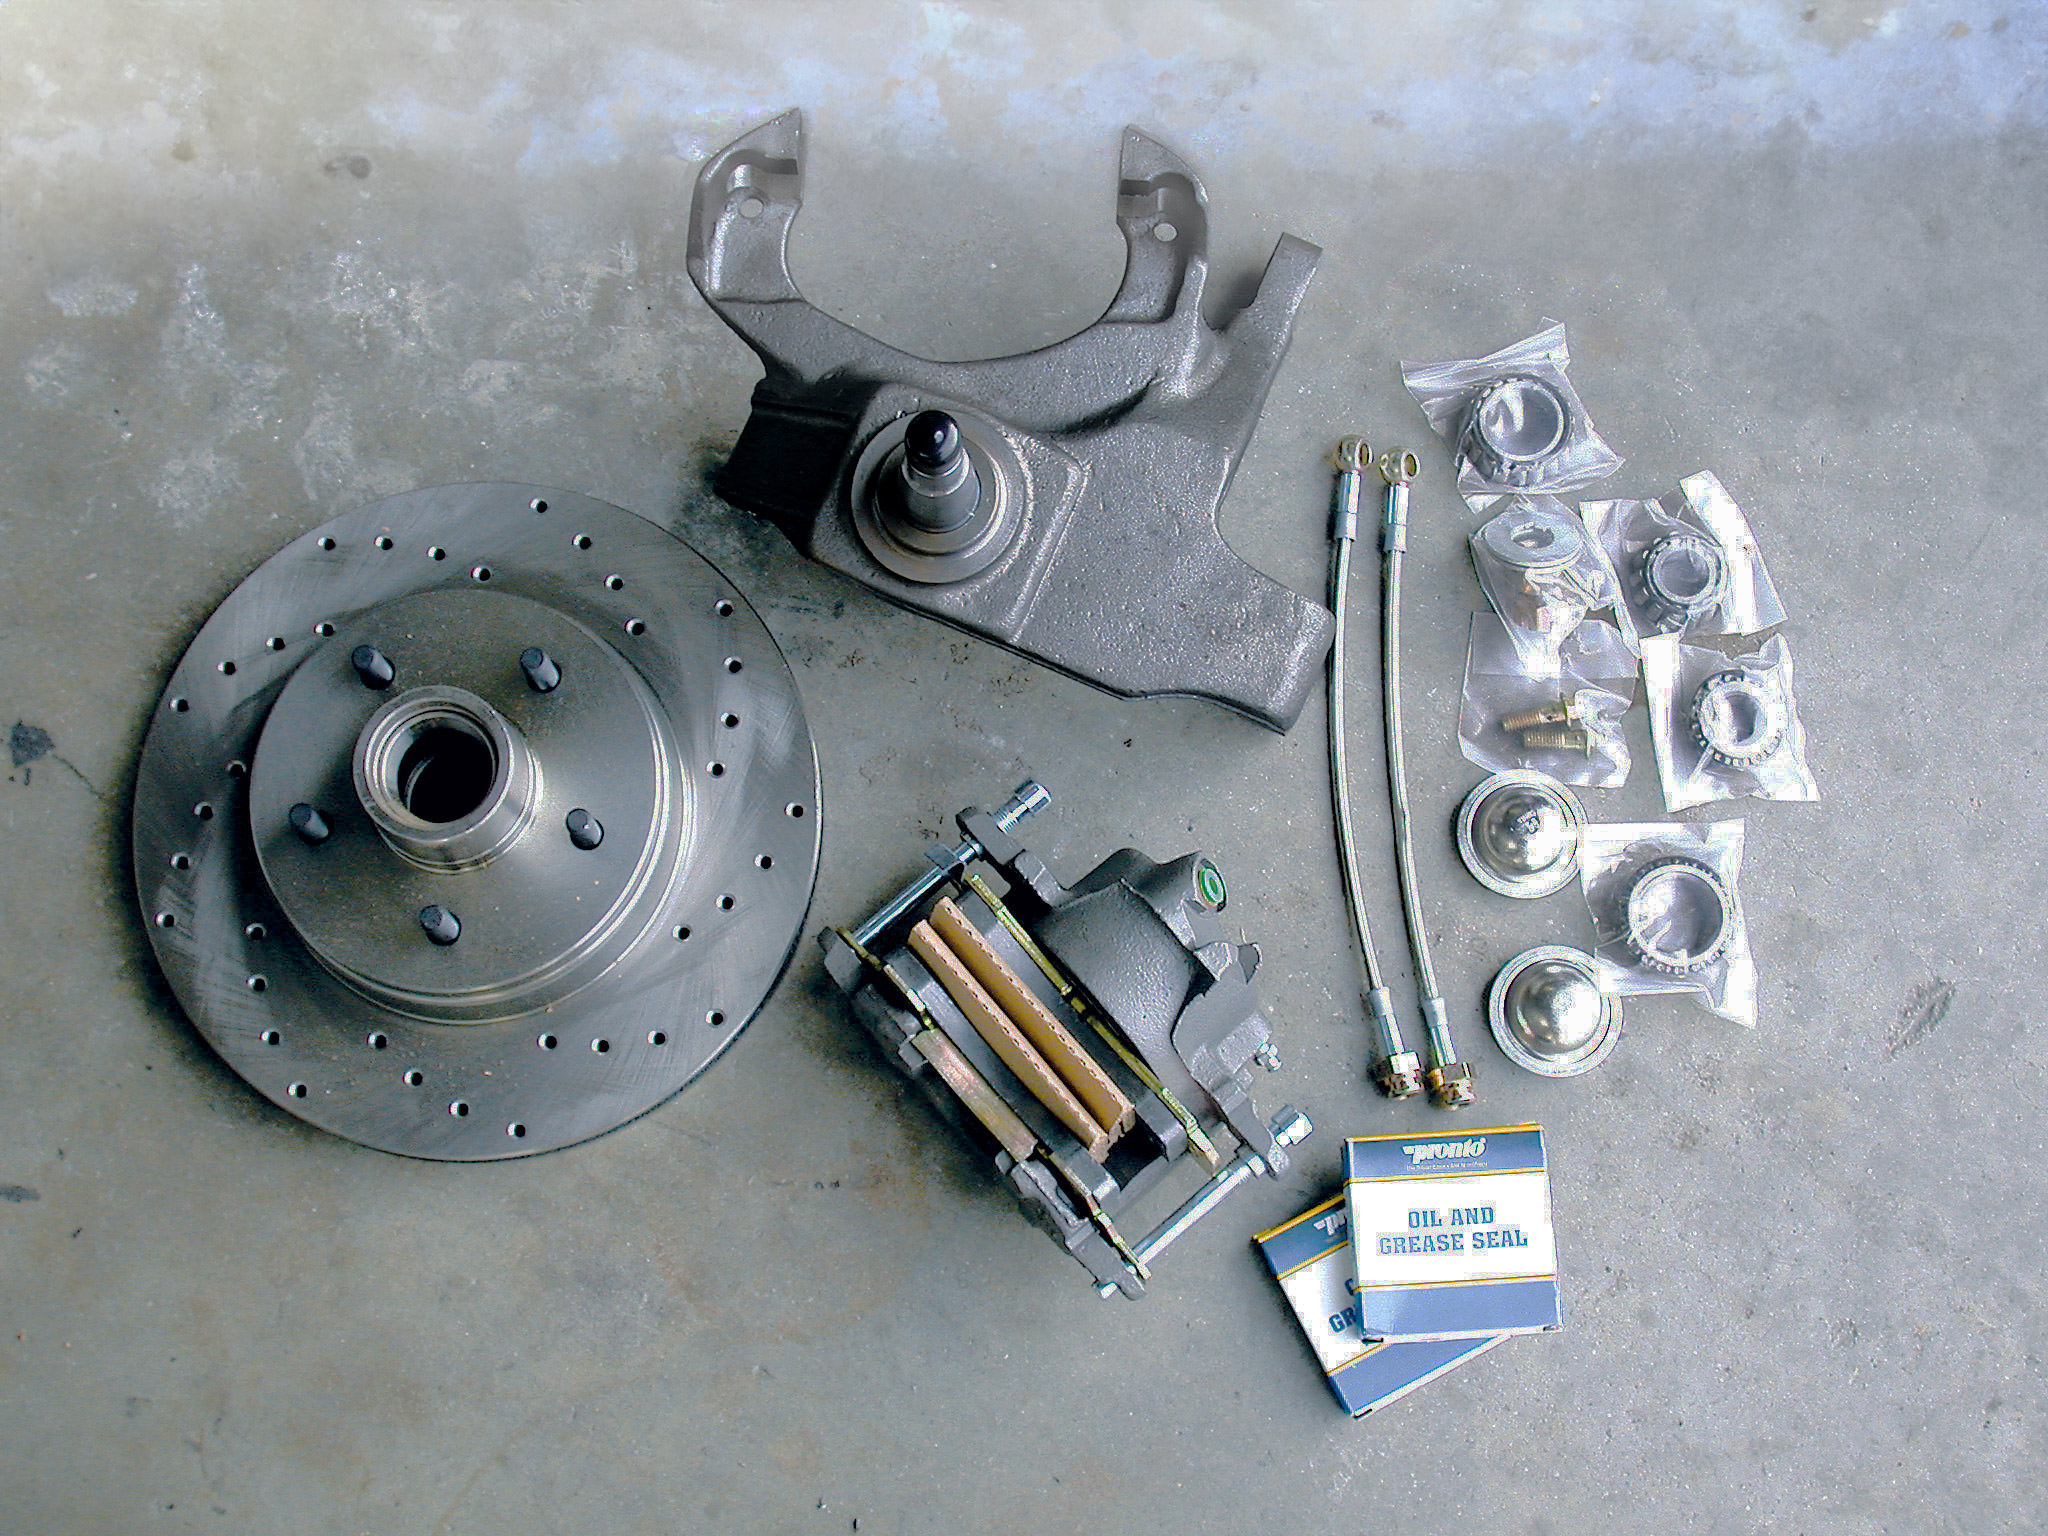
The Wilwood bracket has several holes that will line up with those on the standard drum brake spindles and on the disc brake spindles. Here the bracket is held up against the spindle to determine the holes that apply.
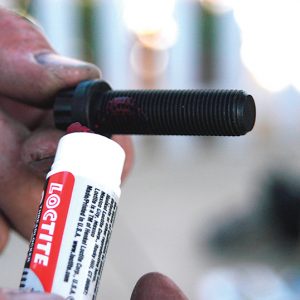
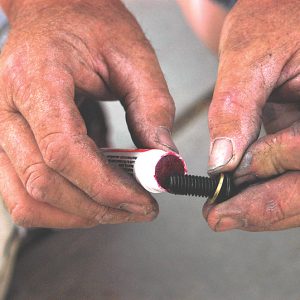
After determining the holes that apply, the flat-head Allen bolts were coated with Loctite and were installed in the spindles. A thread sealer should always be used on all suspension components to make sure they don’t loosen while driving the vehicle.
Most of the disc-brake-optioned Mustangs were the sporty GT models with the higher-horsepower engines, and most of those were not as equipped. Car enthusiasts purchased the sporty Mustangs, and many of them were turned into sports cars that did considerable racing. These people were also the enthusiasts who were reading the car magazines, so they were aware of the benefits of disc brakes. The first disc brakes offered on the Mustang worked well, but the caliper was changed to an even better and less expensive design the following year.
Over the first few years of production, the majority of Mustangs produced were equipped with drum brakes. The disc brake models were a rarity, but the concept worked so well that they ultimately became standard equipment for street rods in the late ’70s and early ’80s as older Mustangs were scrapped. Today, it is difficult to find a Mustang in the wrecking yards, much less one with a disc brake package. This opened the door for the aftermarket to improve upon the original Mustang brakes.
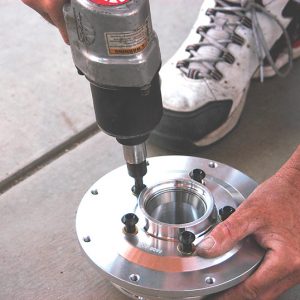
The hubs supplied in the kit have two bolt patterns, 5 on 4-1/2 inches (Ford and Chrysler), and 5 on 4-3/4 inches(General Motors). This means you must install the lug bolts into the hubs accordingly. We decided to install a liberal amount of Loctite to keep them in place once tightened.
It is also advisable to install some anti-seize on the other end of the threads to make it easy to remove the lug nuts when they are installed. This can also be done after the lug bolts are installed.
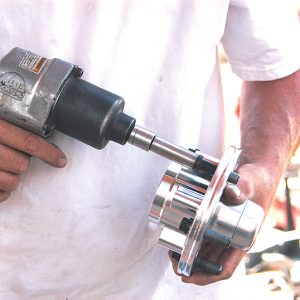
The lug bolts were installed by hand in the aluminum spindle to get them started. Make sure that the lug bolts don’t cross-thread into the aluminum hub.
After the lug bolts are threaded into the hub, they can be securely installed with an impact gun. Threading can also be done with a socket or standard wrench, but it takes a little longer.
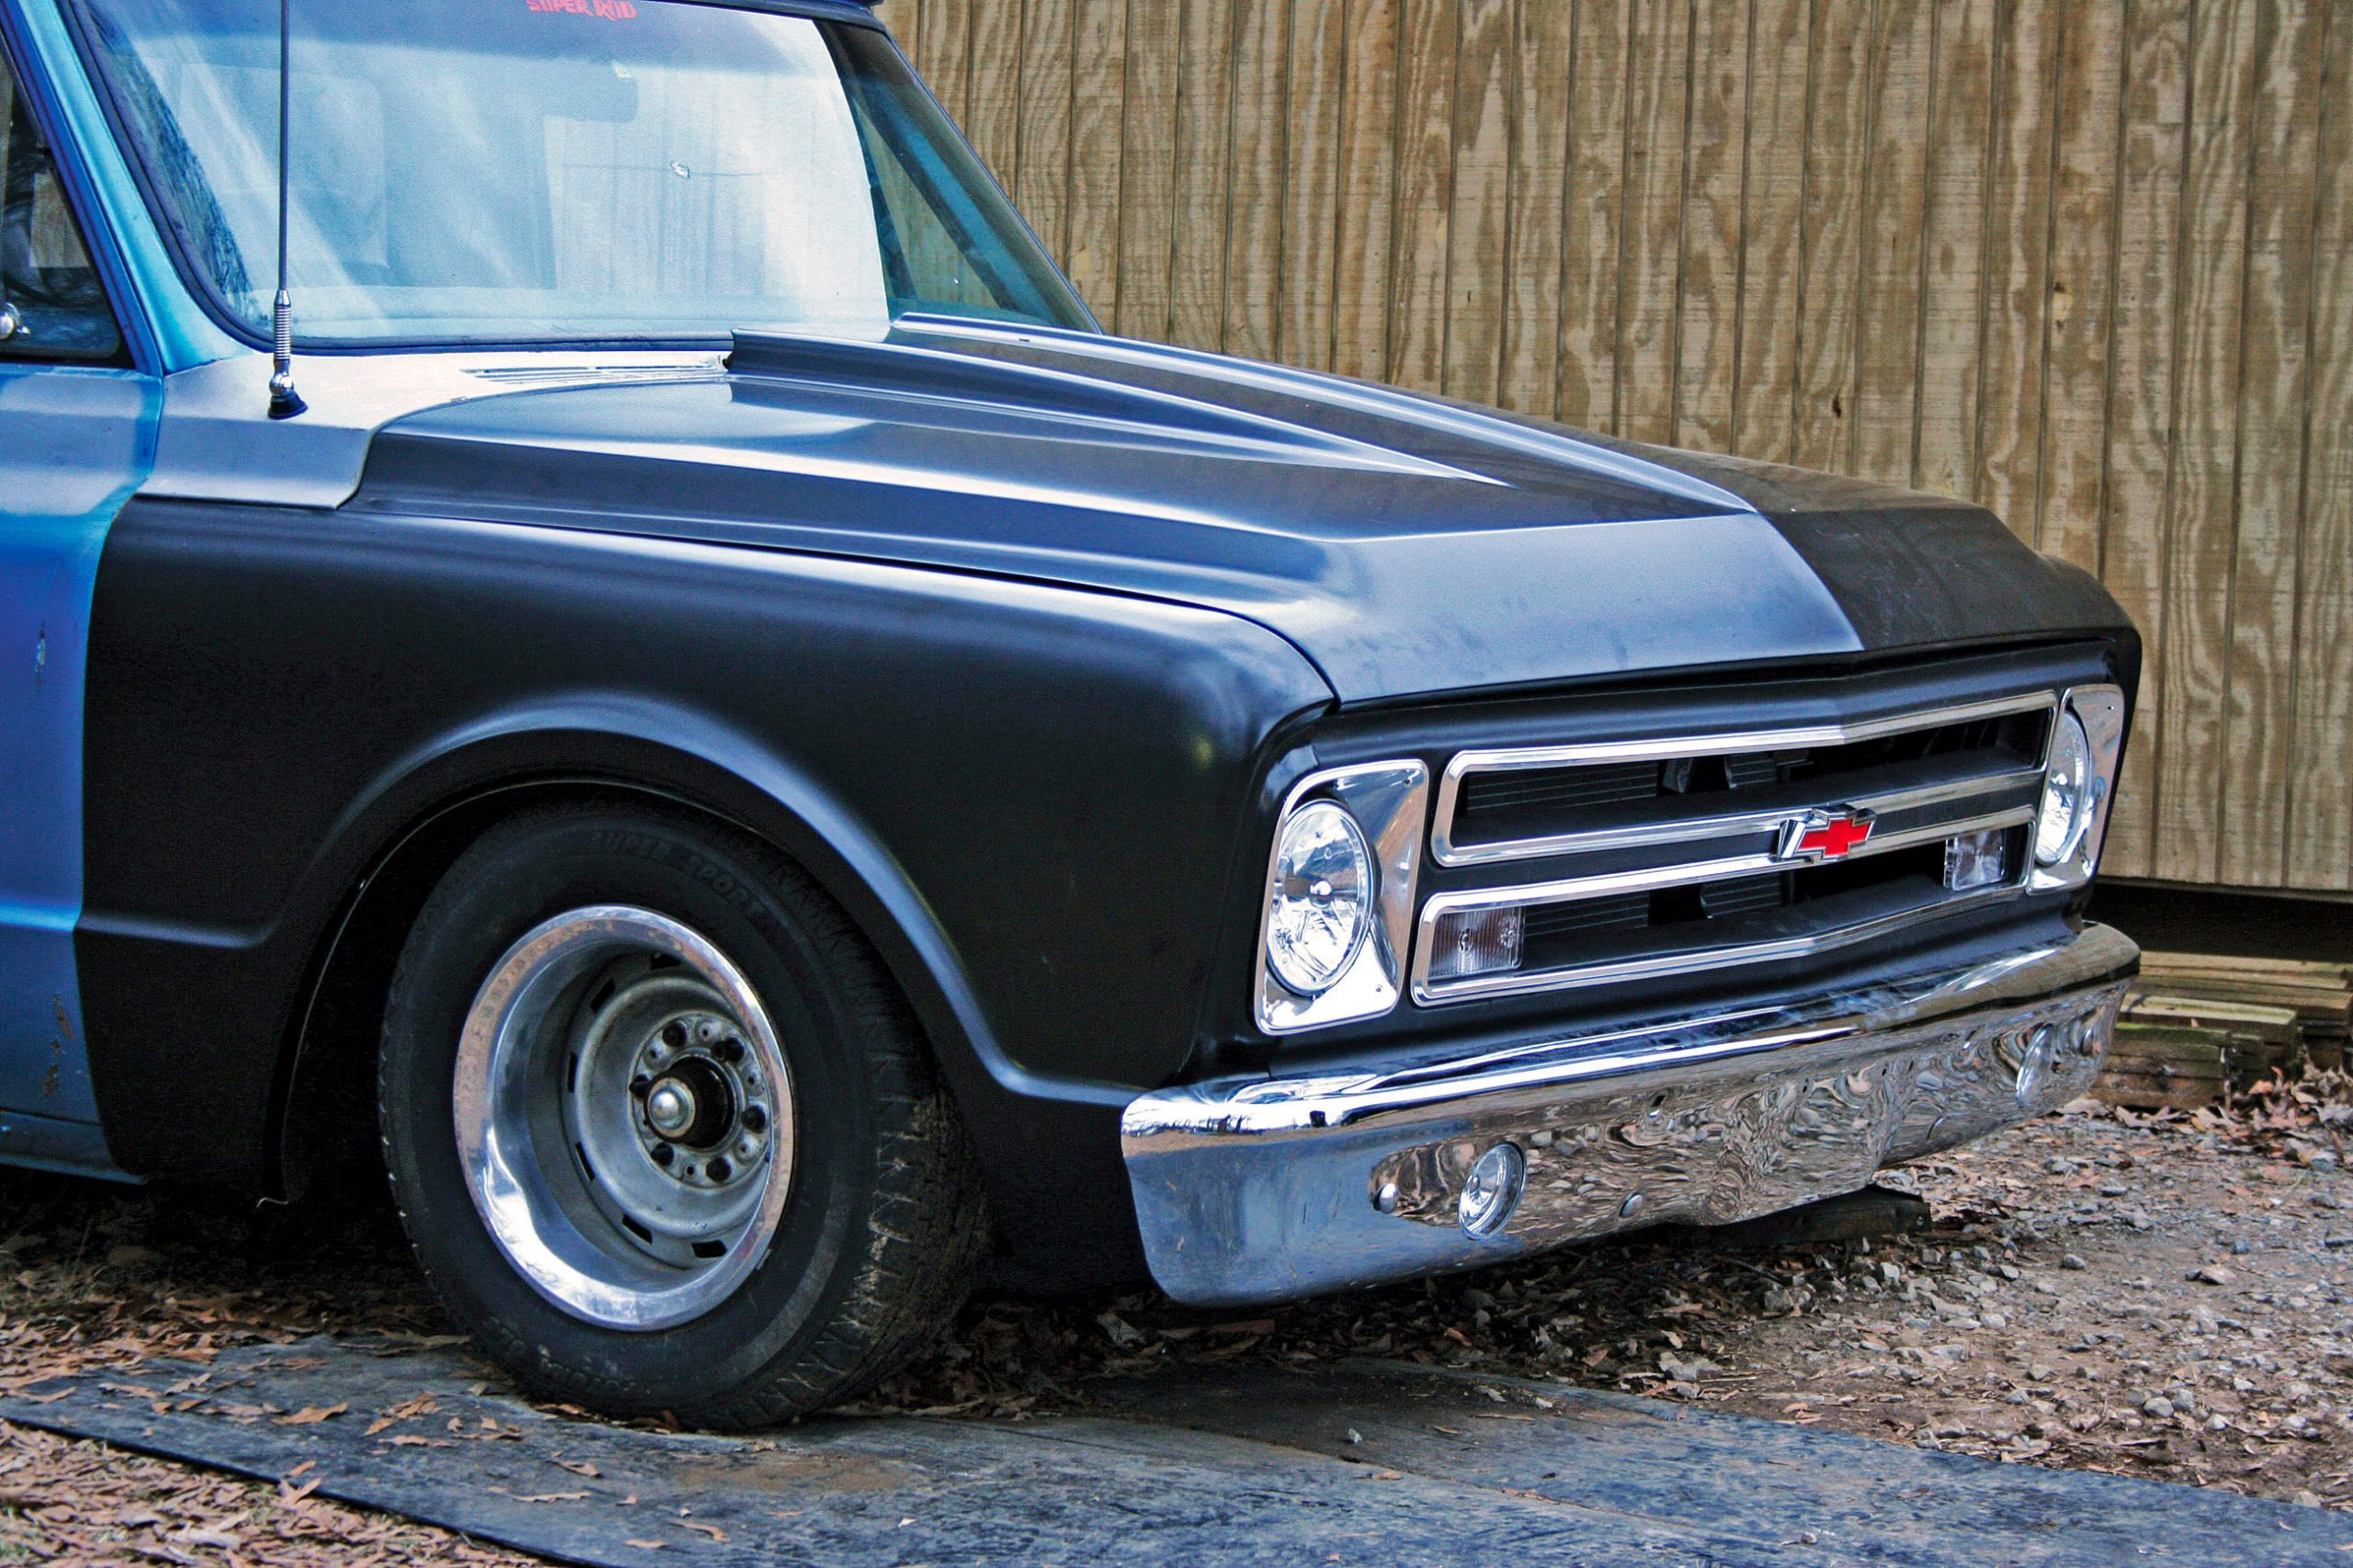
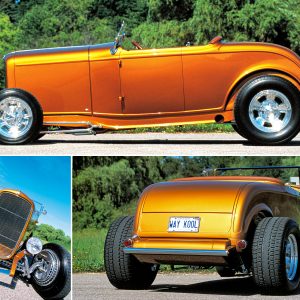
The fellow who owns the ’67 Mustang pictured here is making a number of improvements for power and handling, and one of the first things he chose to upgrade was the standard drum brake system. This is an issue of safety and stopping power because non-power drum brakes are not considered safe when placed on the road with cars equipped with disc brakes. The variance in stopping distances between the two can cause problems in real-world situations for cars not equipped with the more efficient disc brakes. At least by 1967, all of the American cars were equipped with dual master cylinders. However, if you are upgrading a ’66 or older Mustang, they were equipped with the old “fruit jar”-style single master cylinder, which is also a safety concern and must be replaced.
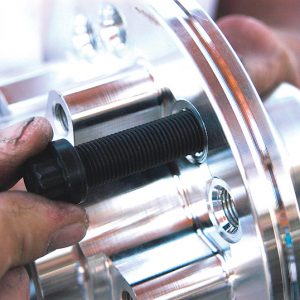
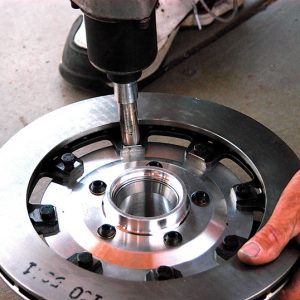
The next step is to install the rotor adapter to the hub. We started by coating the small button-head Allen bolts with Loctite.
We mentioned earlier that things can be installed backward, and here’s what we mean. The rotor adapter is dished and should face the hub dish-down. It is possible to install it in the opposite direction, but once installed, the caliper will not line up with the rotor.
Now the rotor can be installed, and it can be installed backward as well. Make sure the step down is facing inward. The bolts used to secure the rotor to the aluminum adapter should be coated with Loctite.
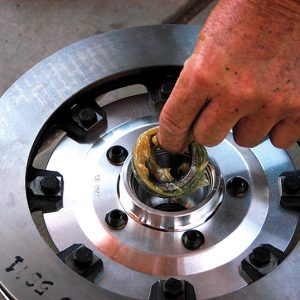
The hub inner-bearing was coated in high-temperature disc brake bearing grease before it was installed.
After the bearings are seated into the hub, the grease seal can be installed. Remember to use a heavy application of grease to both bearings. Here, the seal is being tapped into place.
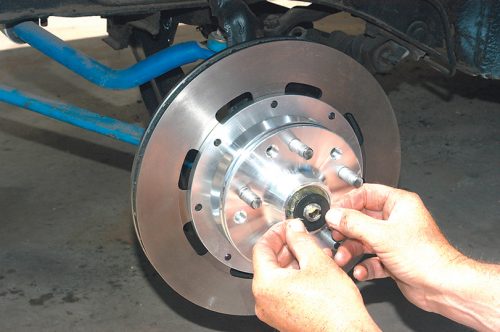
The rotor was installed on the spindle, and then the large washer was installed. Make sure the rotor is fully seated at this time.
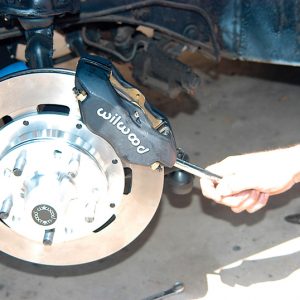
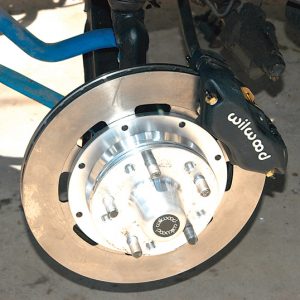
Our Mustang owner researched several brake manufacturers and made the decision to run Wilwood four-piston disc brakes, operated by a Master Power pedal assembly and an MP dual master cylinder with a power booster. The Wilwood brakes come with a bracket adapter for the calipers and are designed for use on either the V-8 drum or disc brake spindles. There are bolt holes for both because they are different. If the car is equipped with a six-cylinder engine, you will have to upgrade to the heavy-duty V-8 spindles.
The rotor was installed on the spindle, and then the large washer was installed. Make sure the rotor is fully seated at this time.
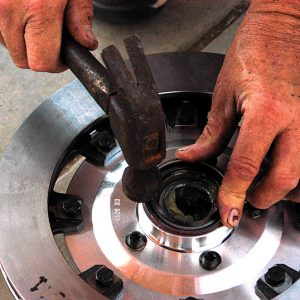
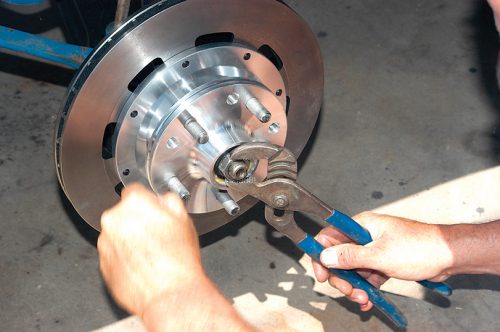
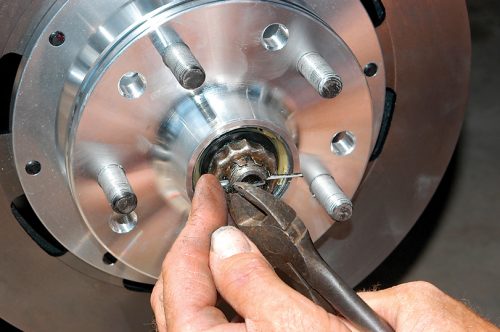
The spindle nut was installed and tightened with large channellock pliers. It can also be done with a large hand wrench if you have one. The nut should be snug, but it shouldn’t be too tight. If you really torque the nut down, it will eliminate any free play in the bearings (and races), and they will wear out prematurely.
The castle nut cover was installed on the spindle nut, and then it was secured with a cotter key. This will keep the spindle nut from backing off and will maintain the proper tolerance for free rotation.
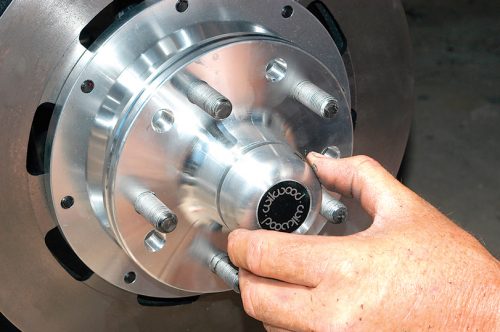
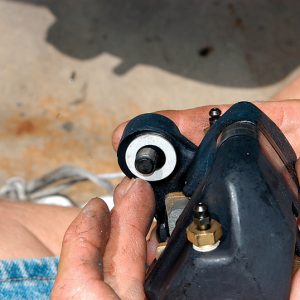
One of the nice features about this brake kit is that the dust cover screws on for convenience. Installing the standard stamped-steel dust covers is difficult if you don’t have (or make) a special tool.
The nice thing about this upgrade is that no special tools are needed. It can be done with normal hand tools—a standard drill motor with a few sharp bits. An impact gun will make the job go quicker, but standard wrenches will work fine if that’s all you have. We also recommend buying a tube of Loctite to keep the bolts tight following installation and proper tightening.
If you want to improve the stopping power of your Mustang, check out this simple installation. After you see how easy it is, we’re sure you will be making a phone call to the companies listed at the beginning of this story.
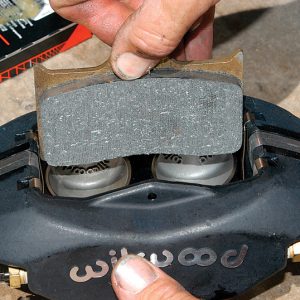
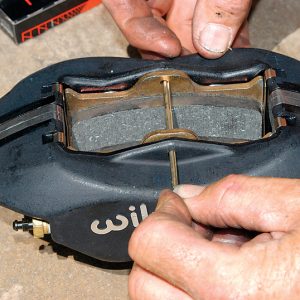
The Wilwood calipers are delivered without the pads installed because several types of pads are offered for different driving conditions. The pads for normal driving are included, so they should be installed at this time.
The pads were installed in the calipers, and then they were secured with a large cotter key. The end was bent slightly outward because it will have to be removed every time the pads are changed.
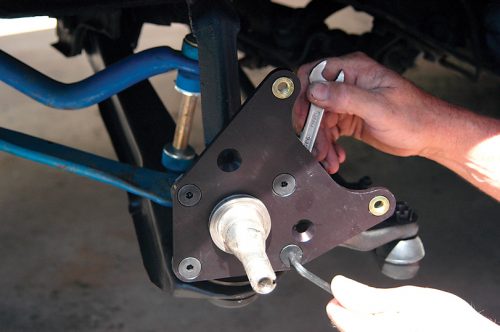
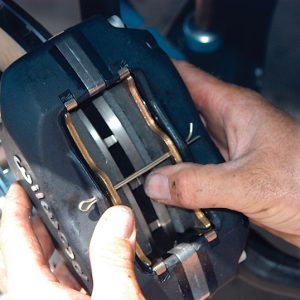
The caliper was slipped over the rotor and bracket to see how it lines up. This will provide the information you will need to shim the caliper properly.
The caliper lined up so well that only one shim will be needed for a perfect fit. The shims needed are included in the kit.
The caliper was reinstalled on the bracket and was tightened with an end wrench. The mounting bolts should be coated with Loctite.
The standard master cylinder connected to the firewall with two bolts. This car didn’t have power brakes, but it was equipped with a dual master cylinder, which will make the brake line installation easier.
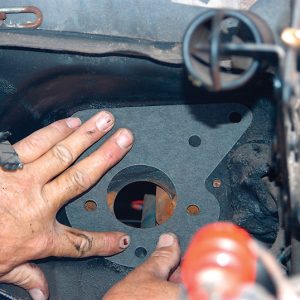
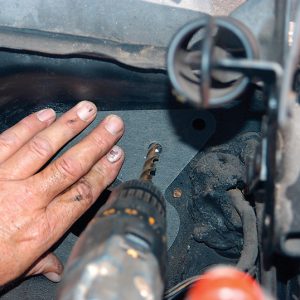
The kit comes with a firewall adapter plate and gasket, so the gasket can be used as a template for drilling the required holes.
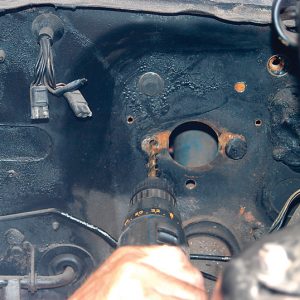
After the nut plates were drilled out, the firewall gasket was installed and the other necessary holes were drilled.
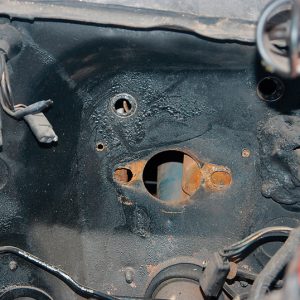
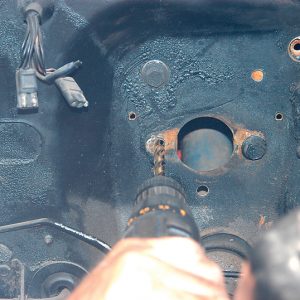
The original master cylinder was hooked to the firewall with nut plates. The new bracket and master cylinder use bolts, so the nut plates must be drilled out.
The original master cylinder was hooked to the firewall with nut plates. The new bracket and master cylinder use bolts, so the nut plates must be drilled out.
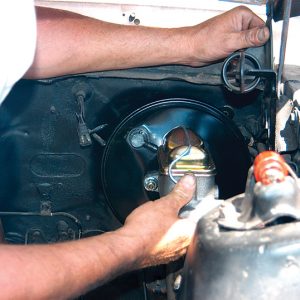
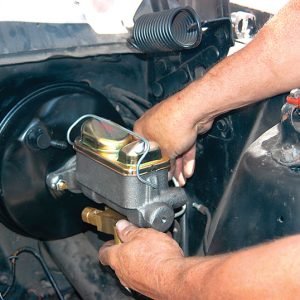
Using the drilled holes, the bracket and master cylinder were bolted to the firewall. This requires two people, one to secure the master cylinder and power booster and another to tighten the bolts from the inside of the car.
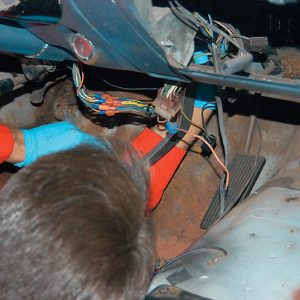
The kit comes with a new pedal assembly; the original pedal is removed, and the new one replaces it. Getting it in is a little tricky, but with a little patience it will work.
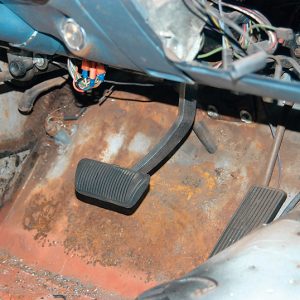
The new pedal assembly is very strong and provides the required leverage needed to allow the new unit to work perfectly. The pedal looks as if it came directly from the factory.
The four-piston Wilwood brakes are excellent and will be a major improvement over the OEM drum brakes. The brakes look and work equally great.
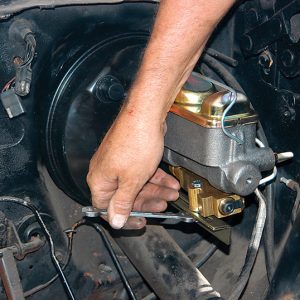
Disc front and drum rear brakes will require a proportioning valve to balance the stopping power. Ensure that the proportioning valve is installed in the proper direction. This unit is supplied in the kit, and it works great.
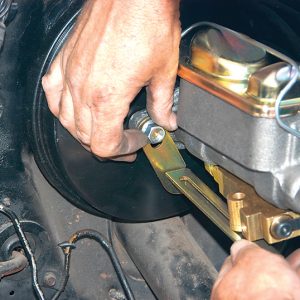
The lines supplied with the kit were installed in the proportioning valve and the master cylinder. This temporarily held the unit in place while the bracket was being installed.
The proportioning valve bracket was secured to the bolt that holds the master cylinder to the power booster.
Here, the proportioning valve is being secured to the bracket with a long 5/16-inch bolt.
The power booster and master cylinder look like a factory installation. This kit comes with a large vacuum canister that will provide plenty of power to stop this Mustang in a hurry.