TheAutoBuilder.com

VIDEO MADE EASY!

Author

Picture of Chris Tobin

Chris Tobin

Photography by Chris Tobin and Kyle Tobin

How You Can Install a Headrest Video System


In spite of rising fuel costs and a recent 21 percent downturn in new big truck sales, modern SUVs and crew cab pickups have proven excellent people carriers, especially for larger families, but keeping the kids entertained on long road trips can be difficult at times. 

To help this situation and keep peace in the family, you can install a rear seat entertainment system for the kids, and then watch the miles fly by. We have actually heard of cases of the kids wanting to stay in the truck to finish a movie rather than getting out when they reach their destination.

Fortunately, the mobile electronics industry has offered us with many solutions to add video to your truck or SUV, and all are relatively painlessly. These options run from video-in-a-bag solutions to custom headrest fabrication, replacement headrest systems and overhead systems of all sizes.

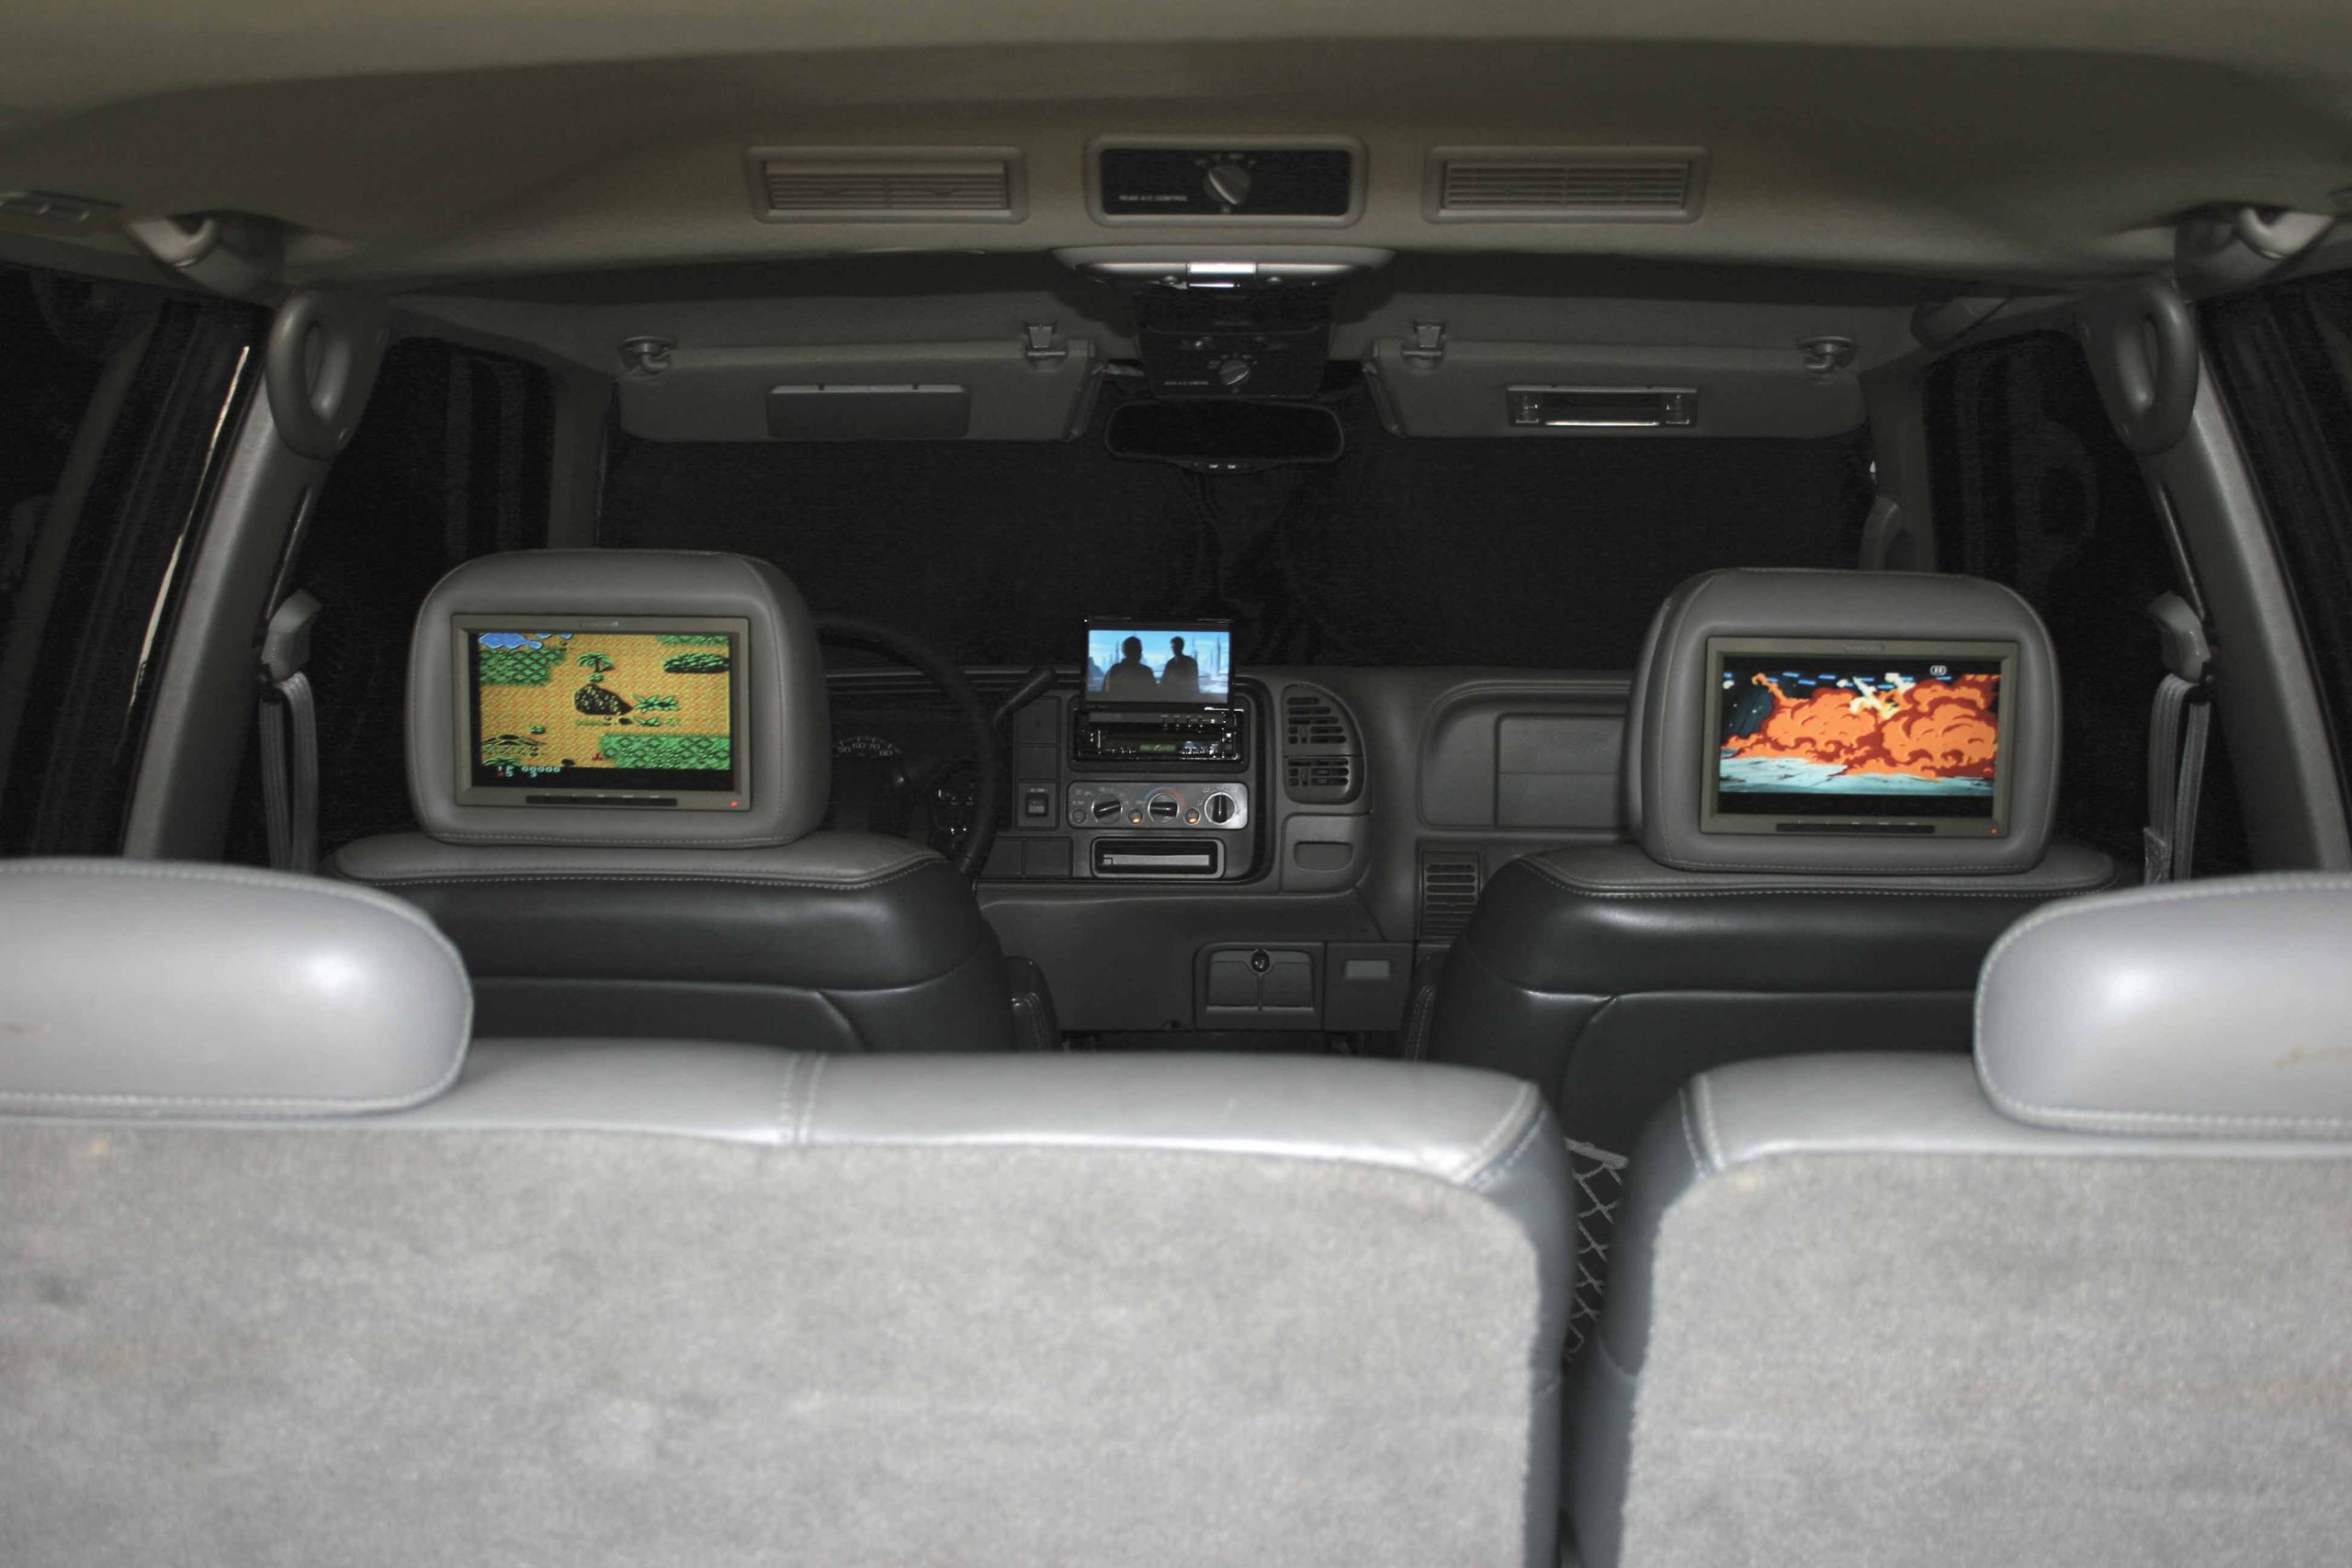
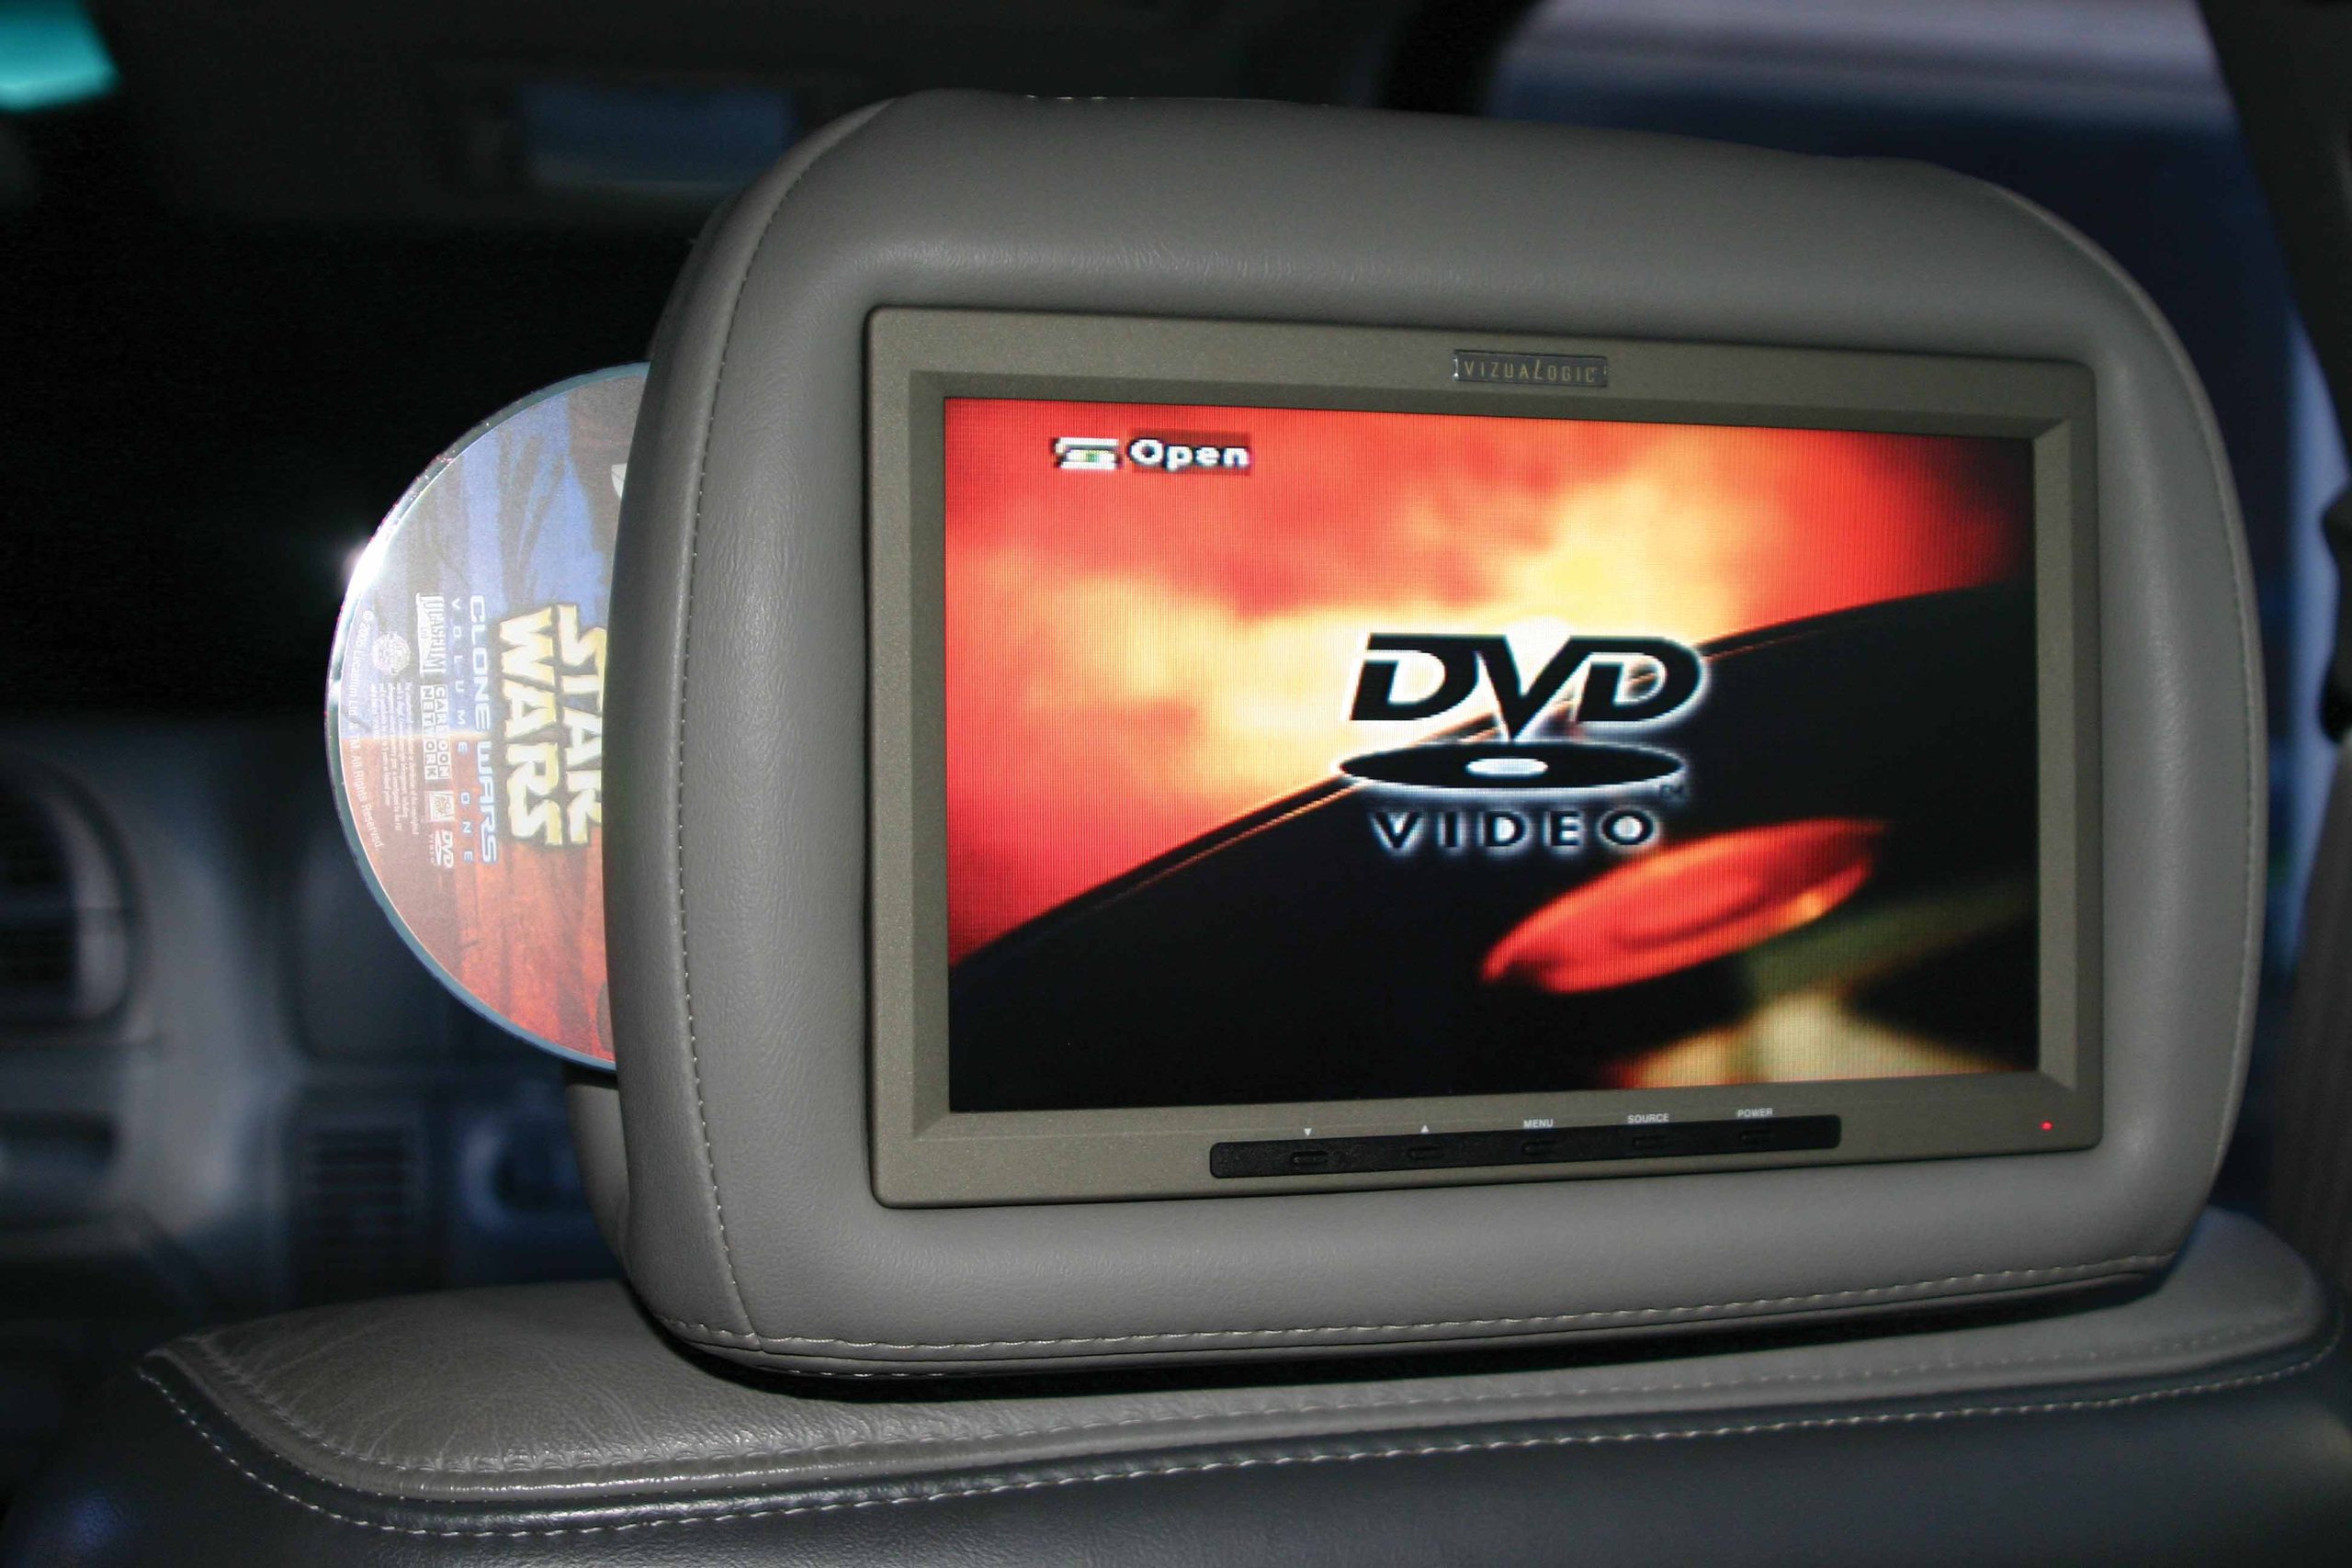
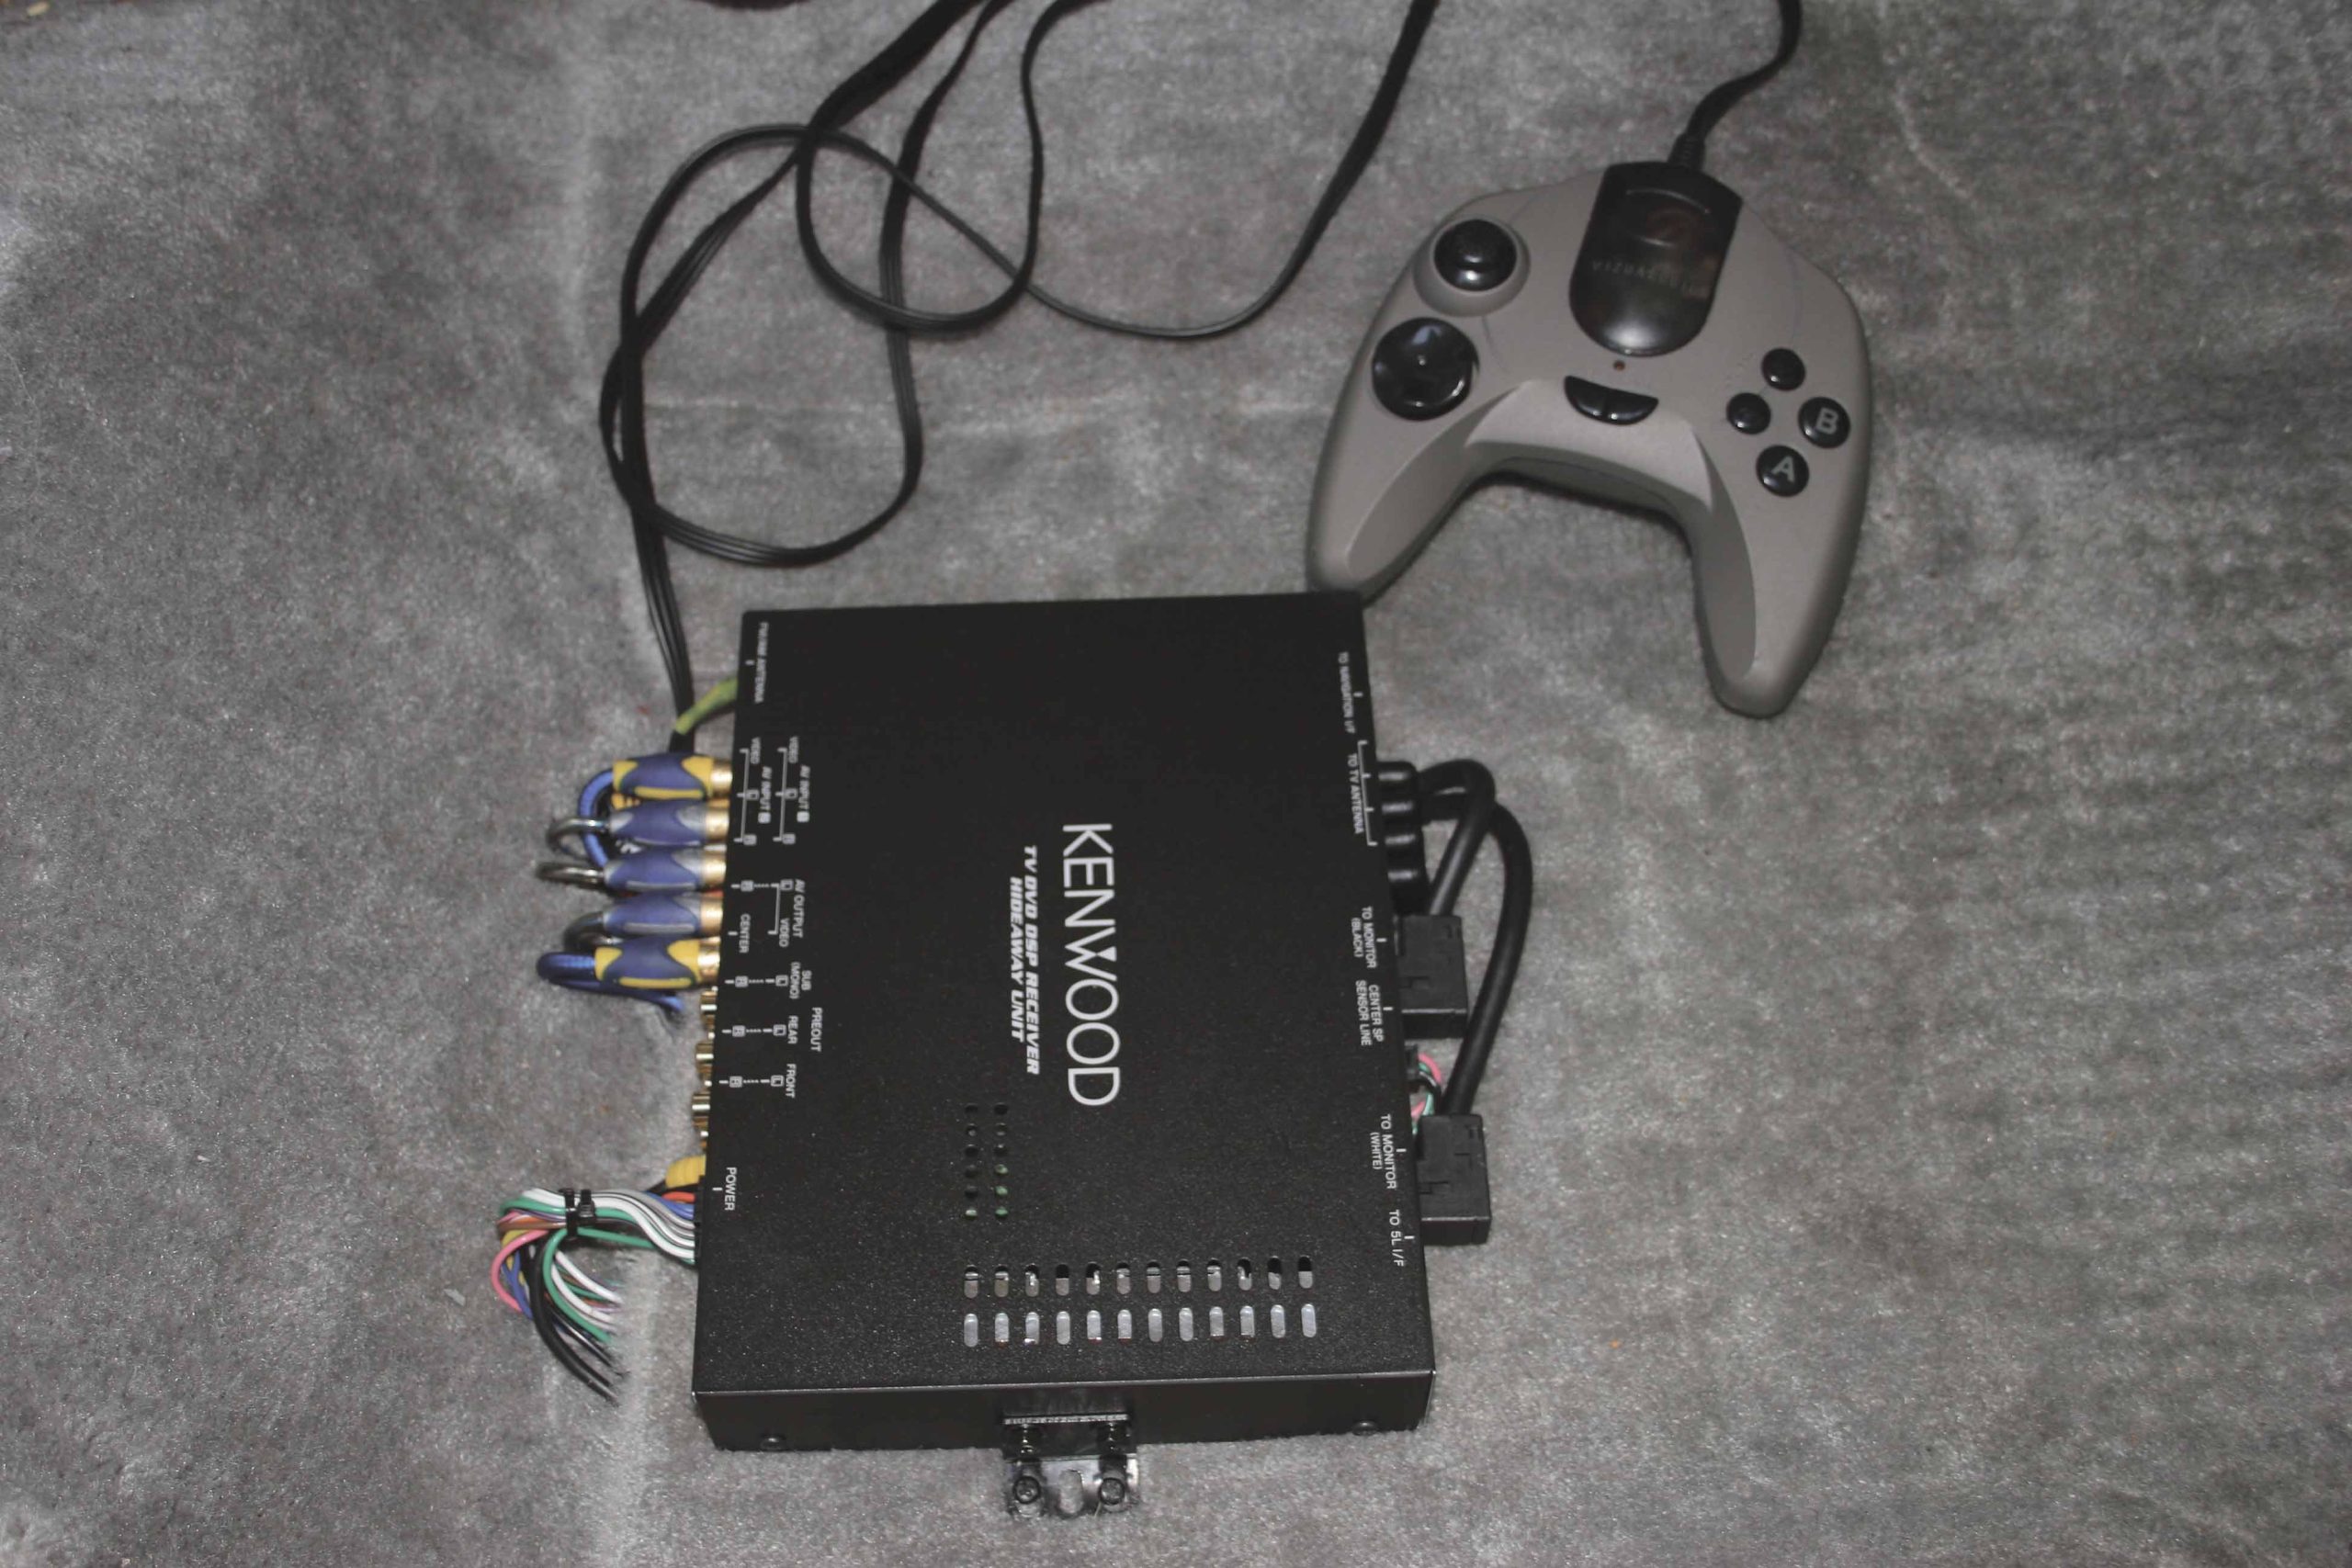
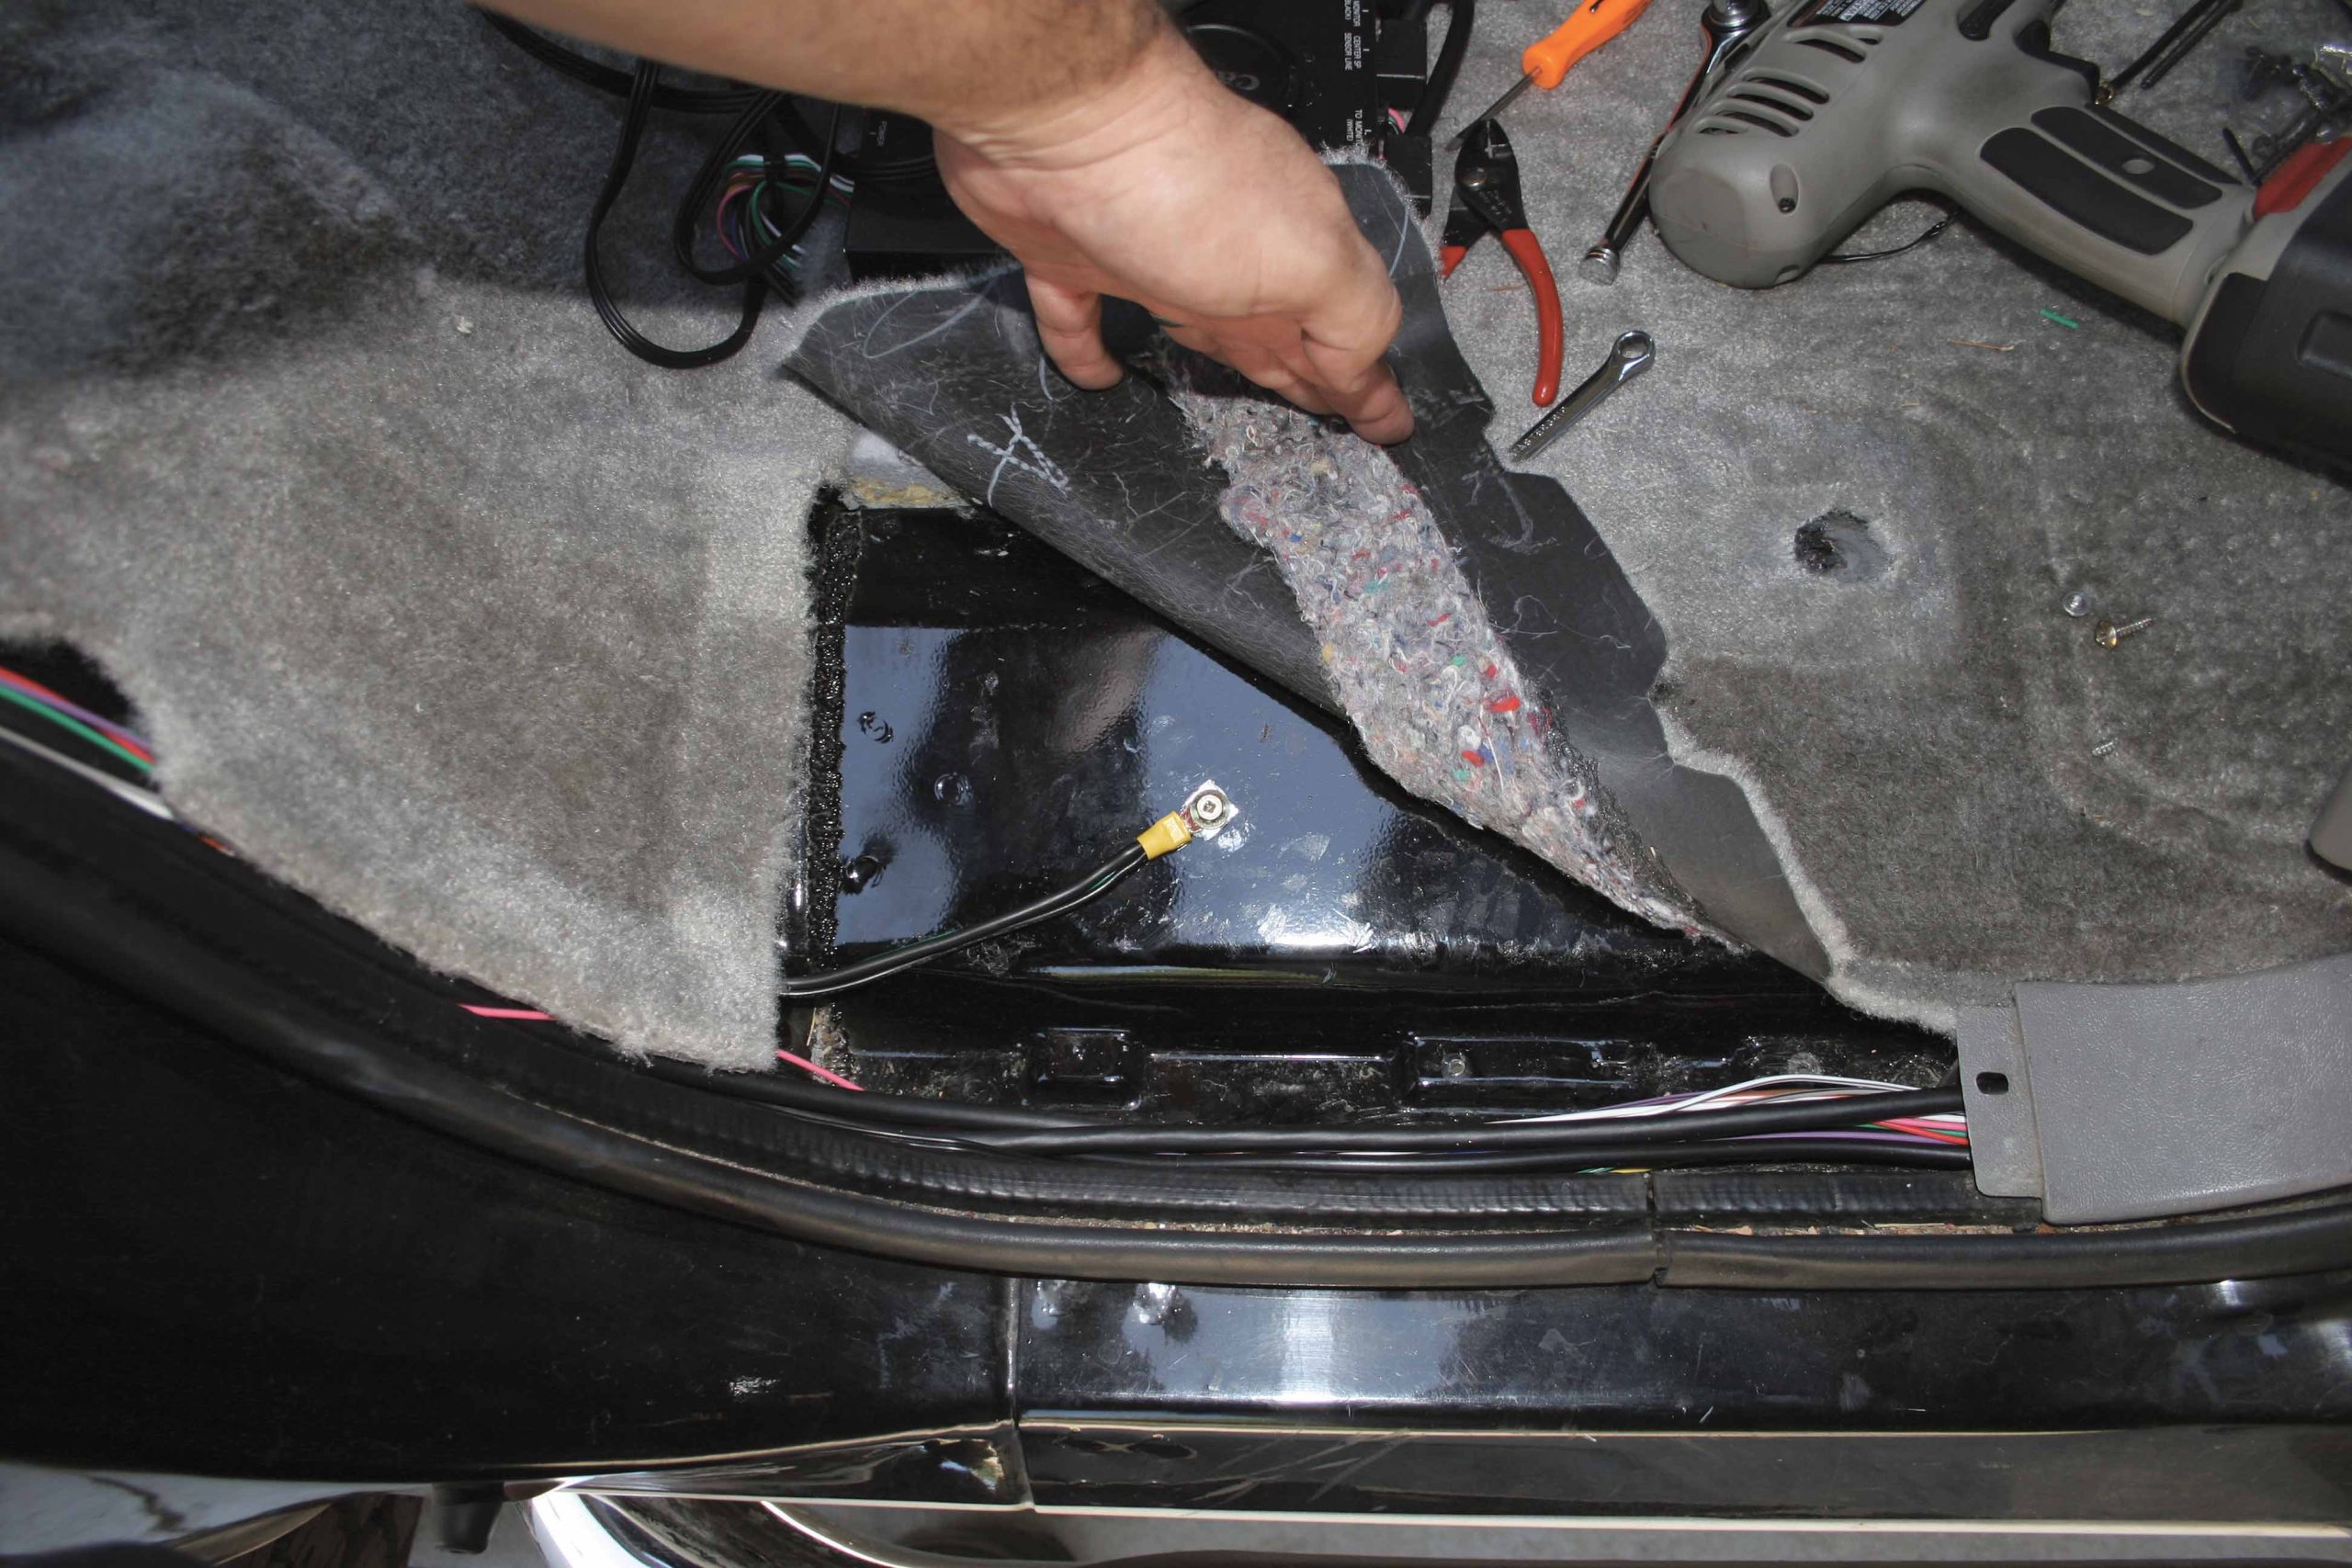
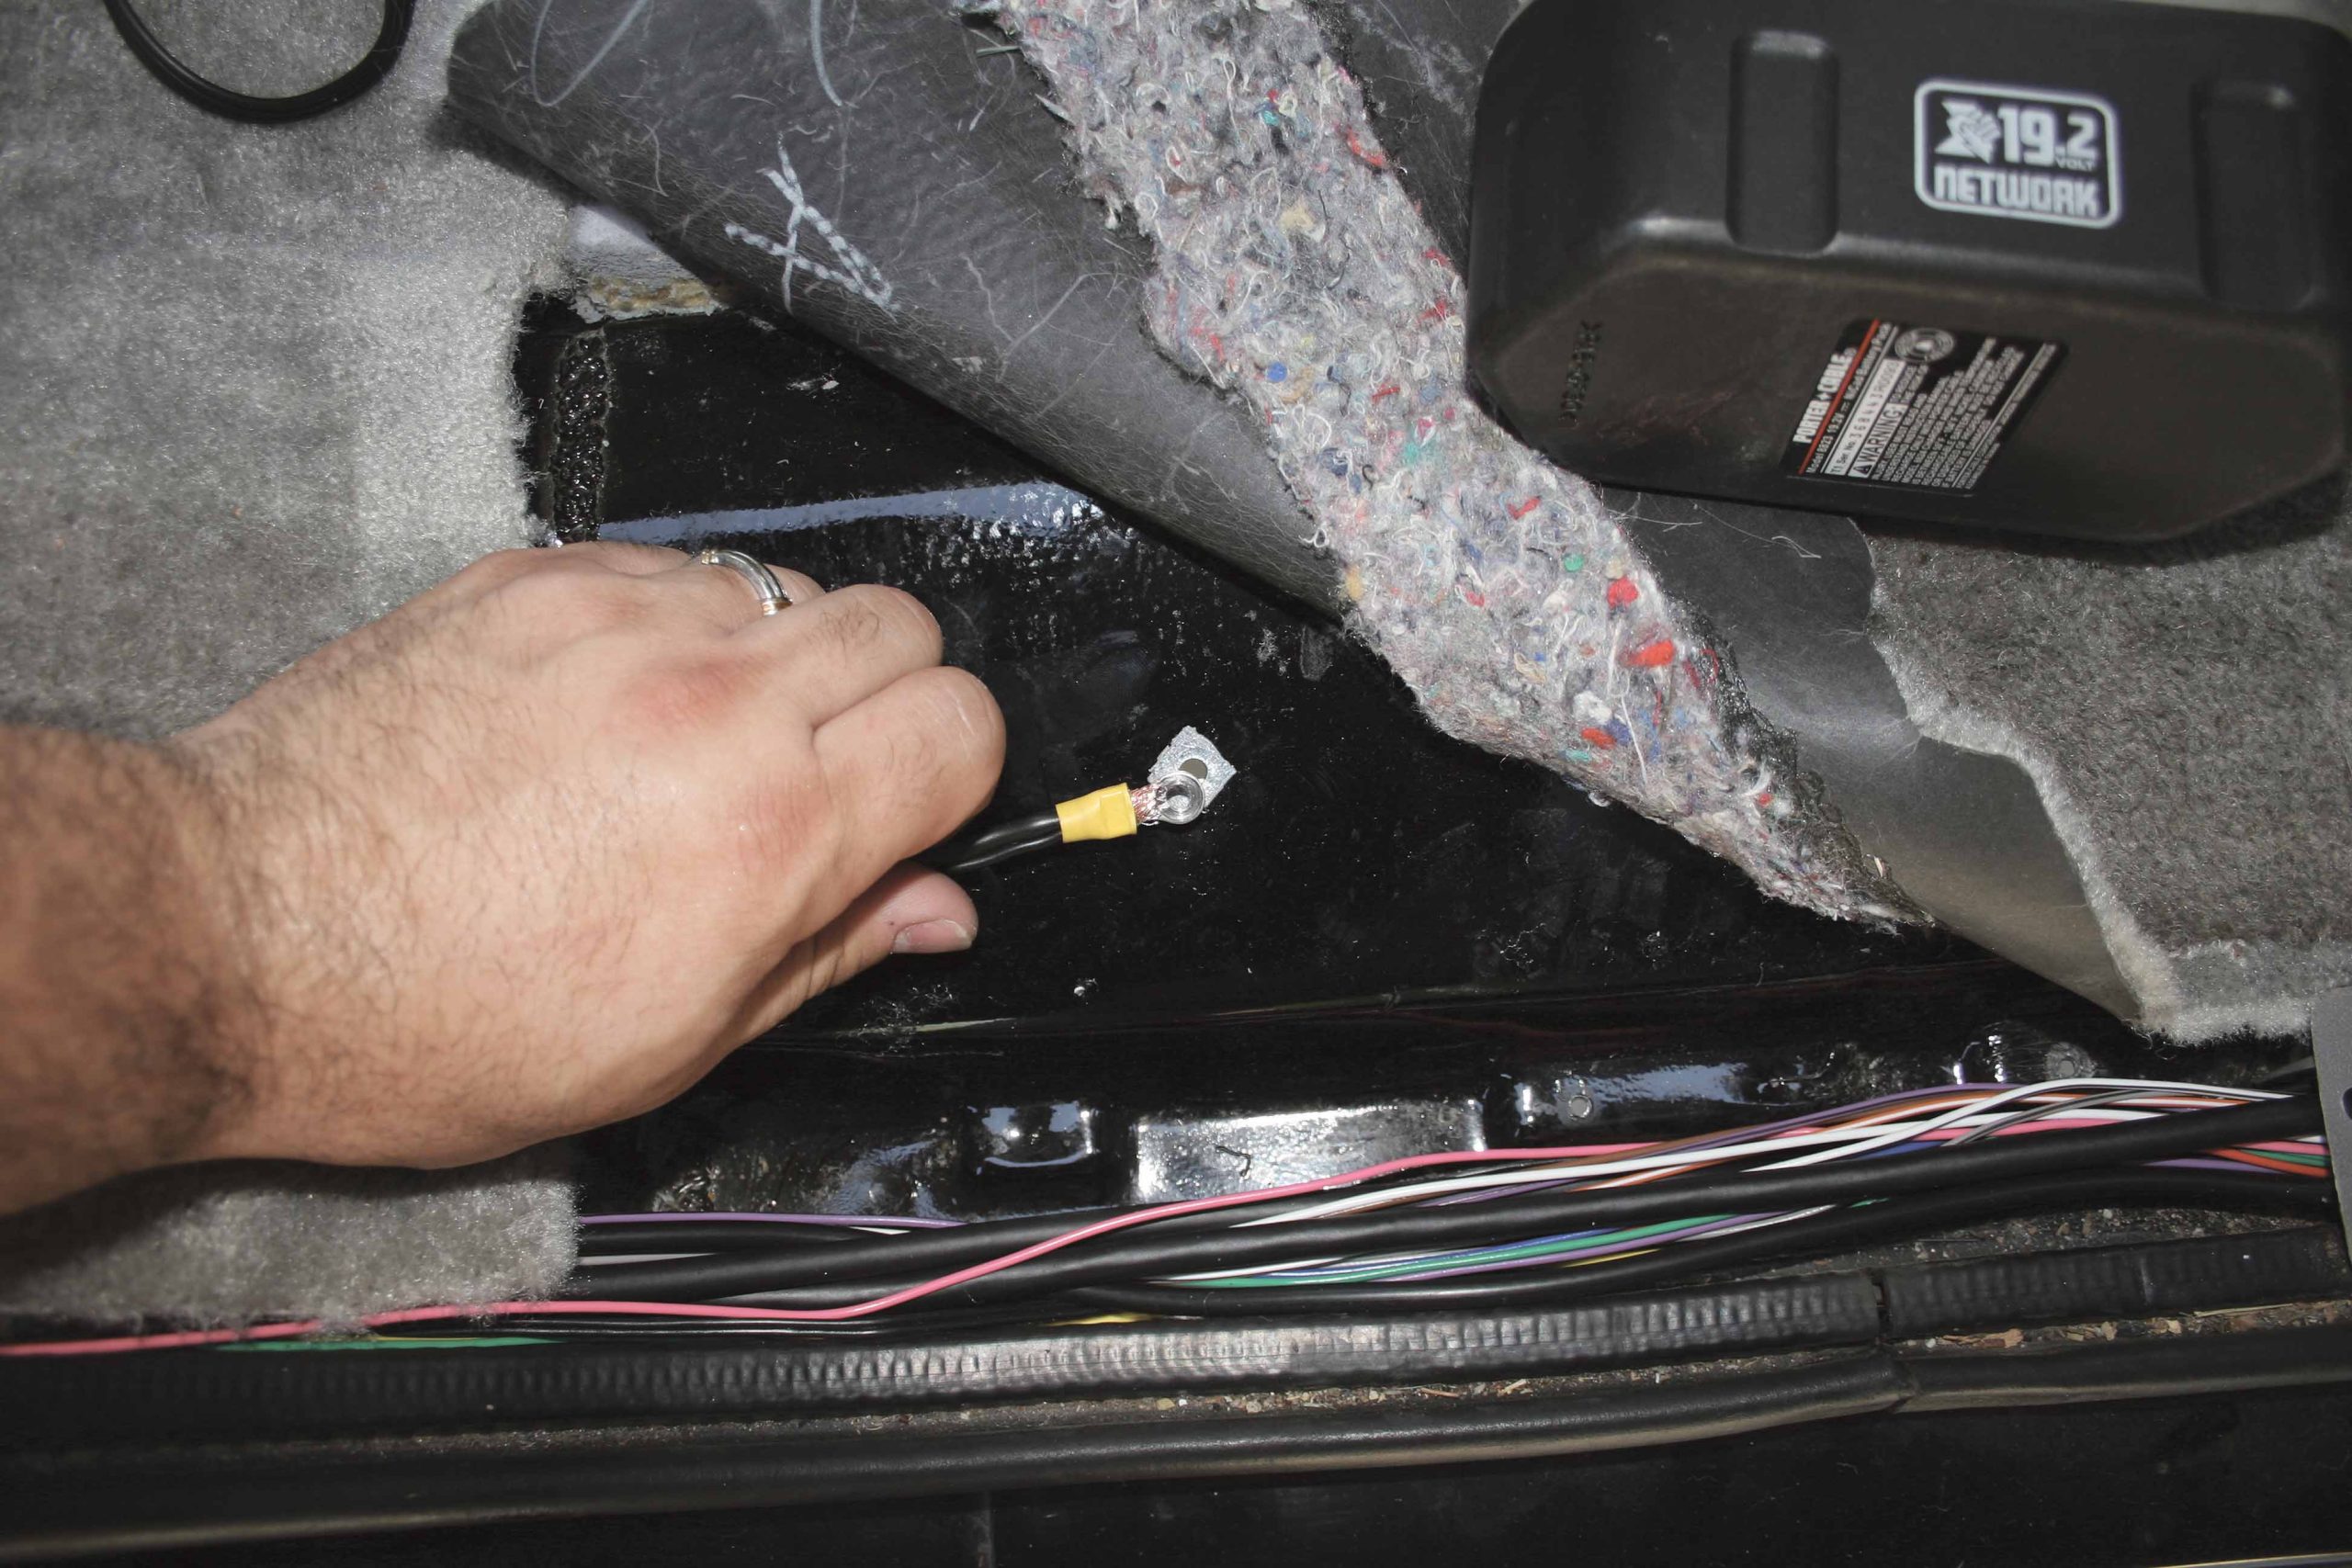
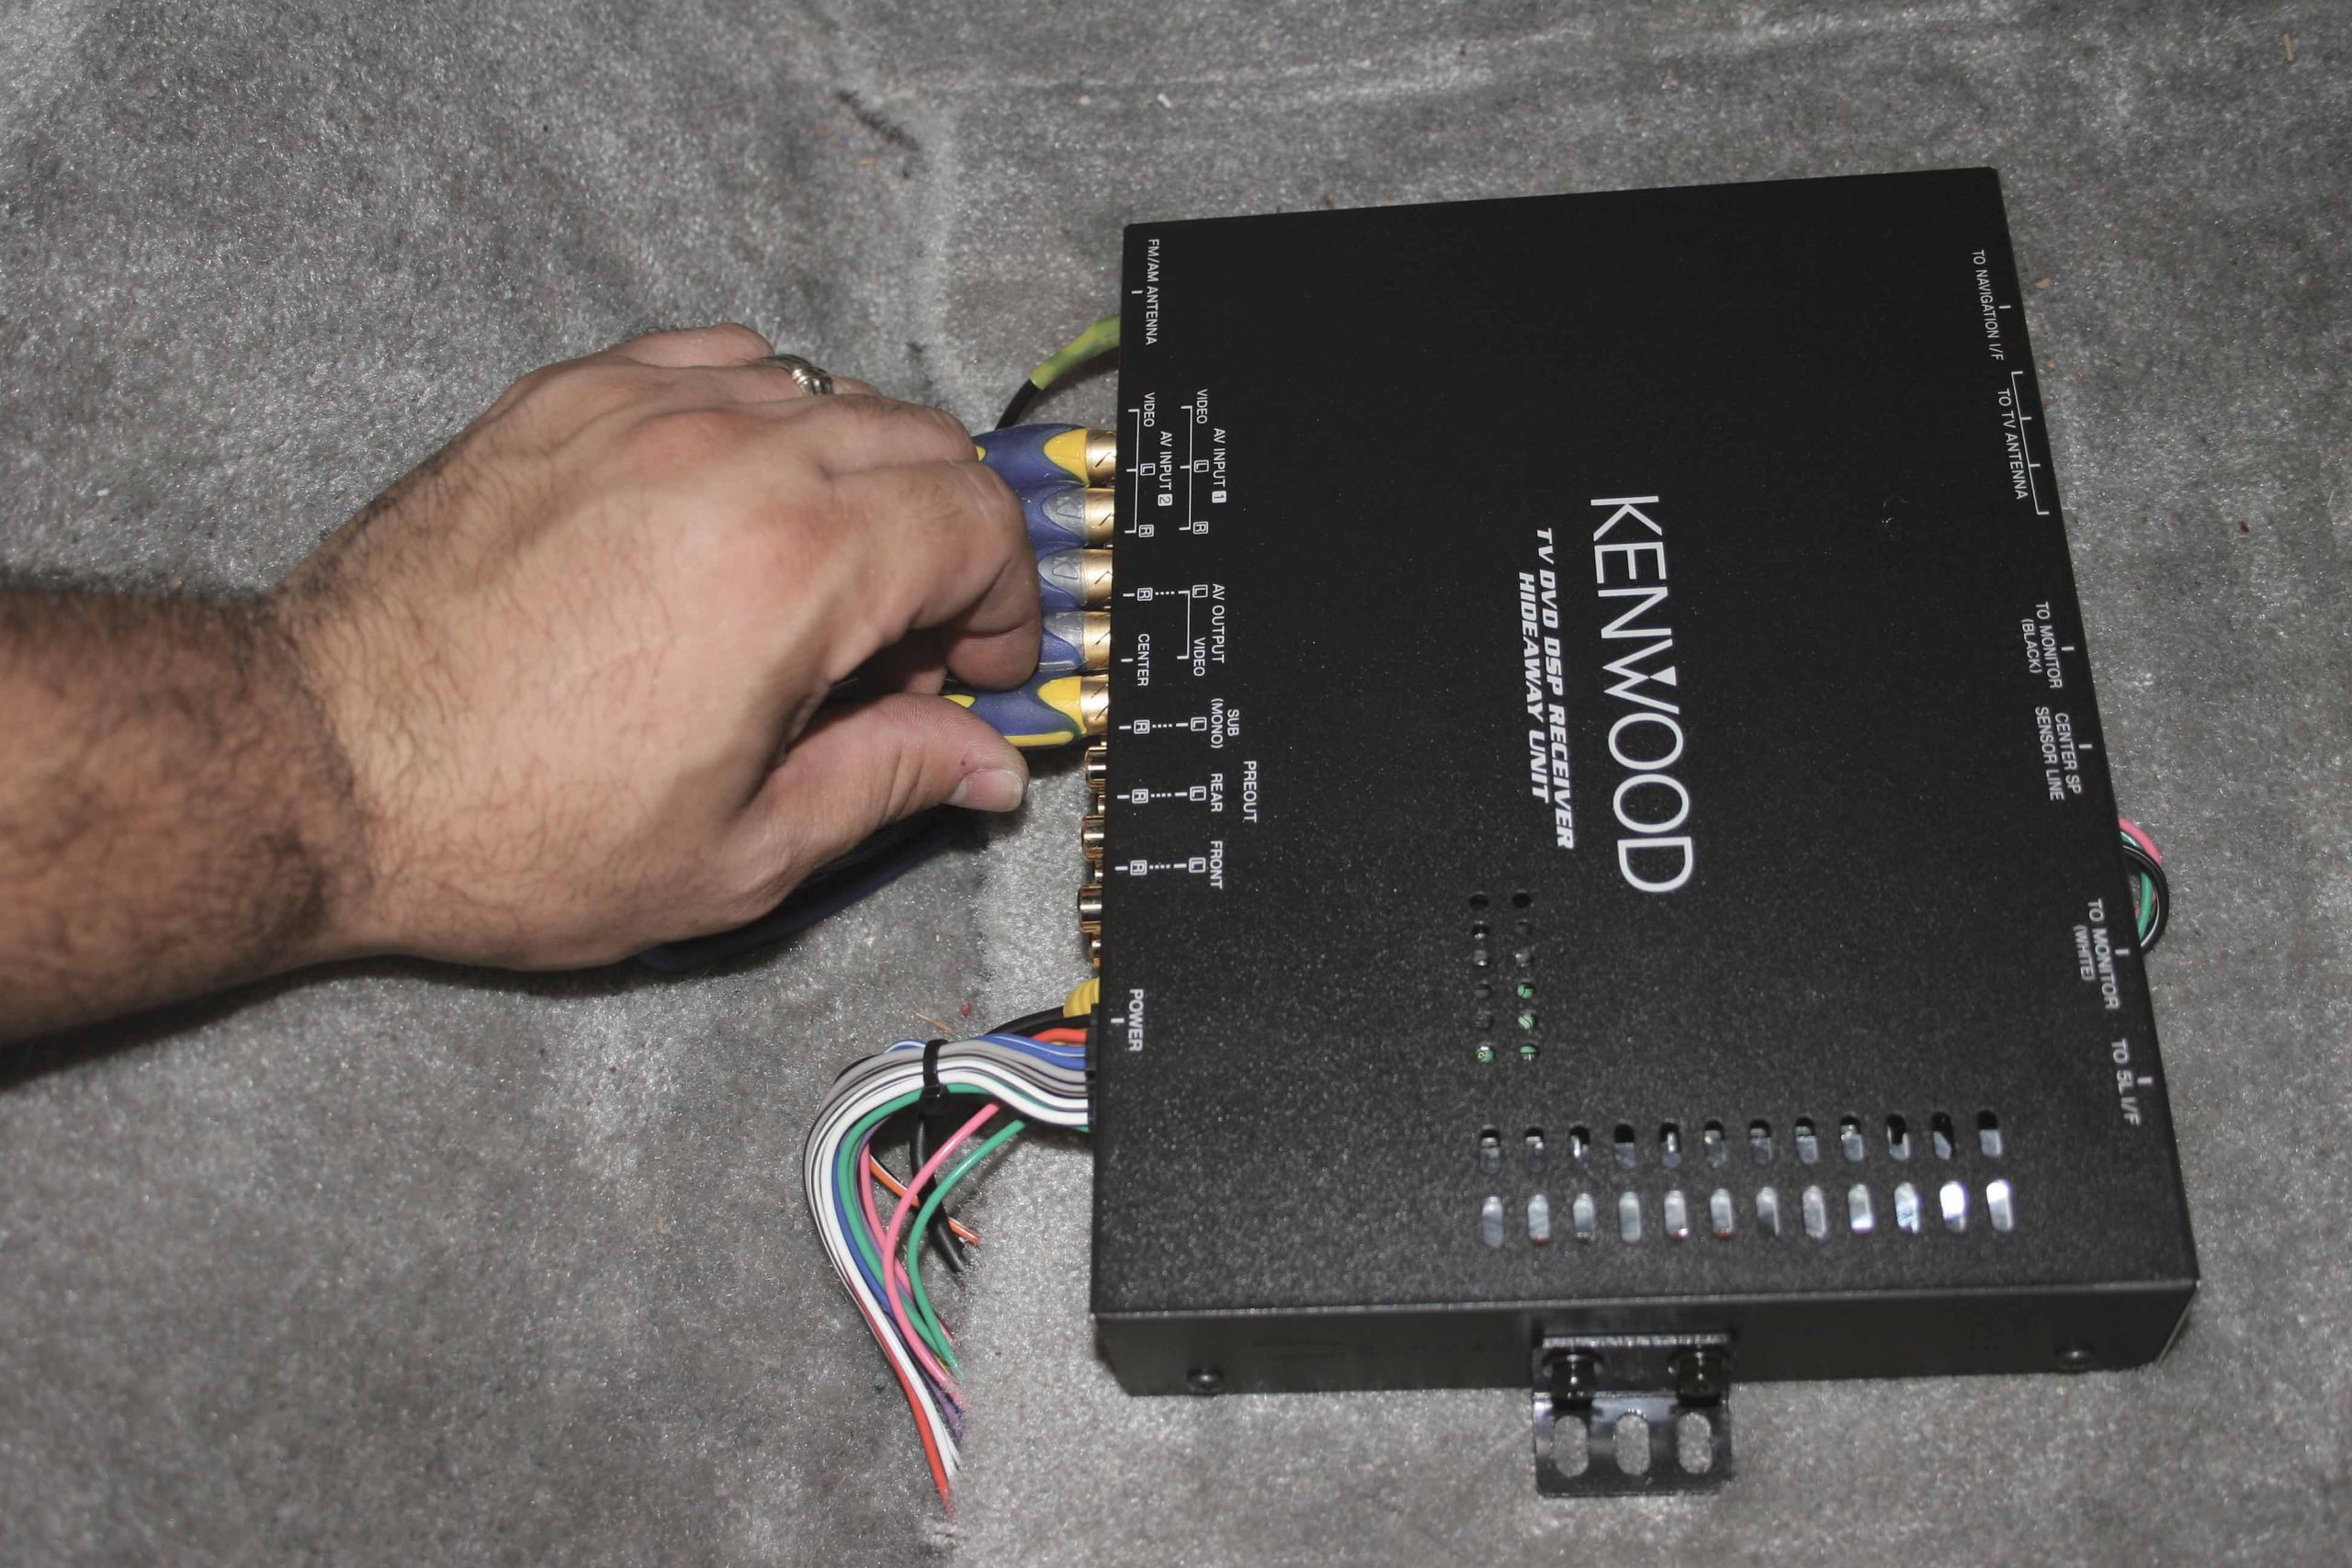
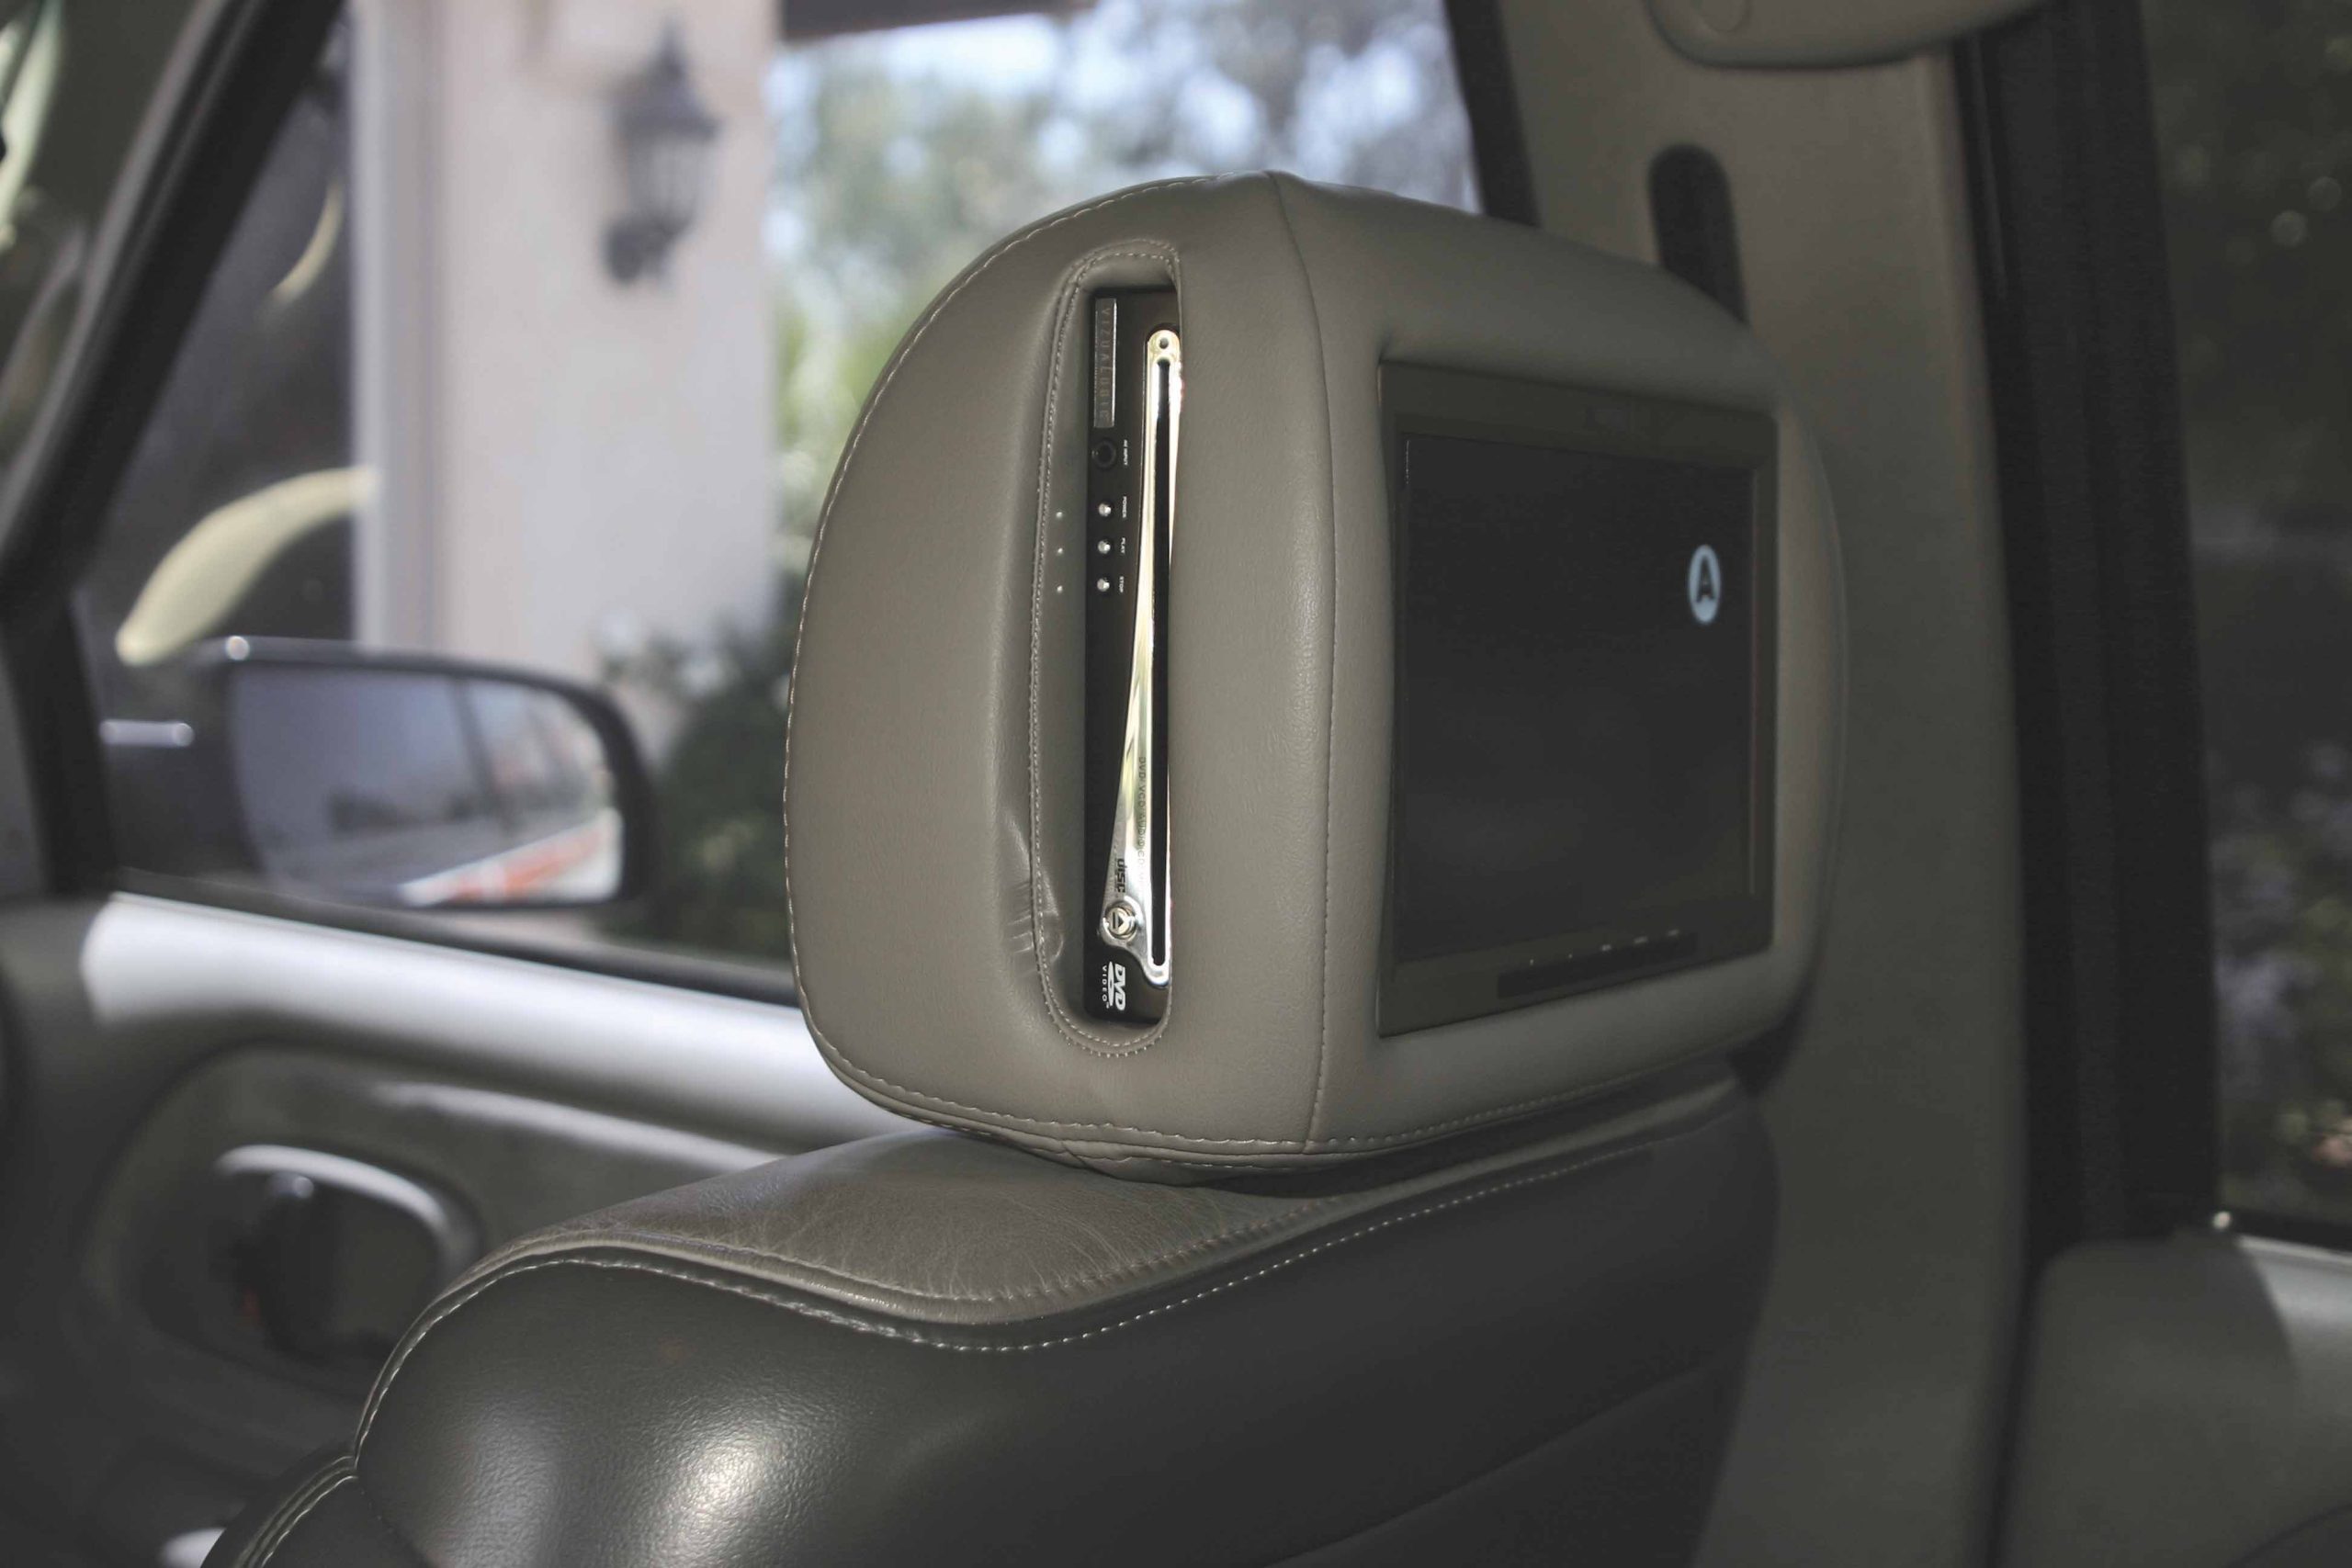
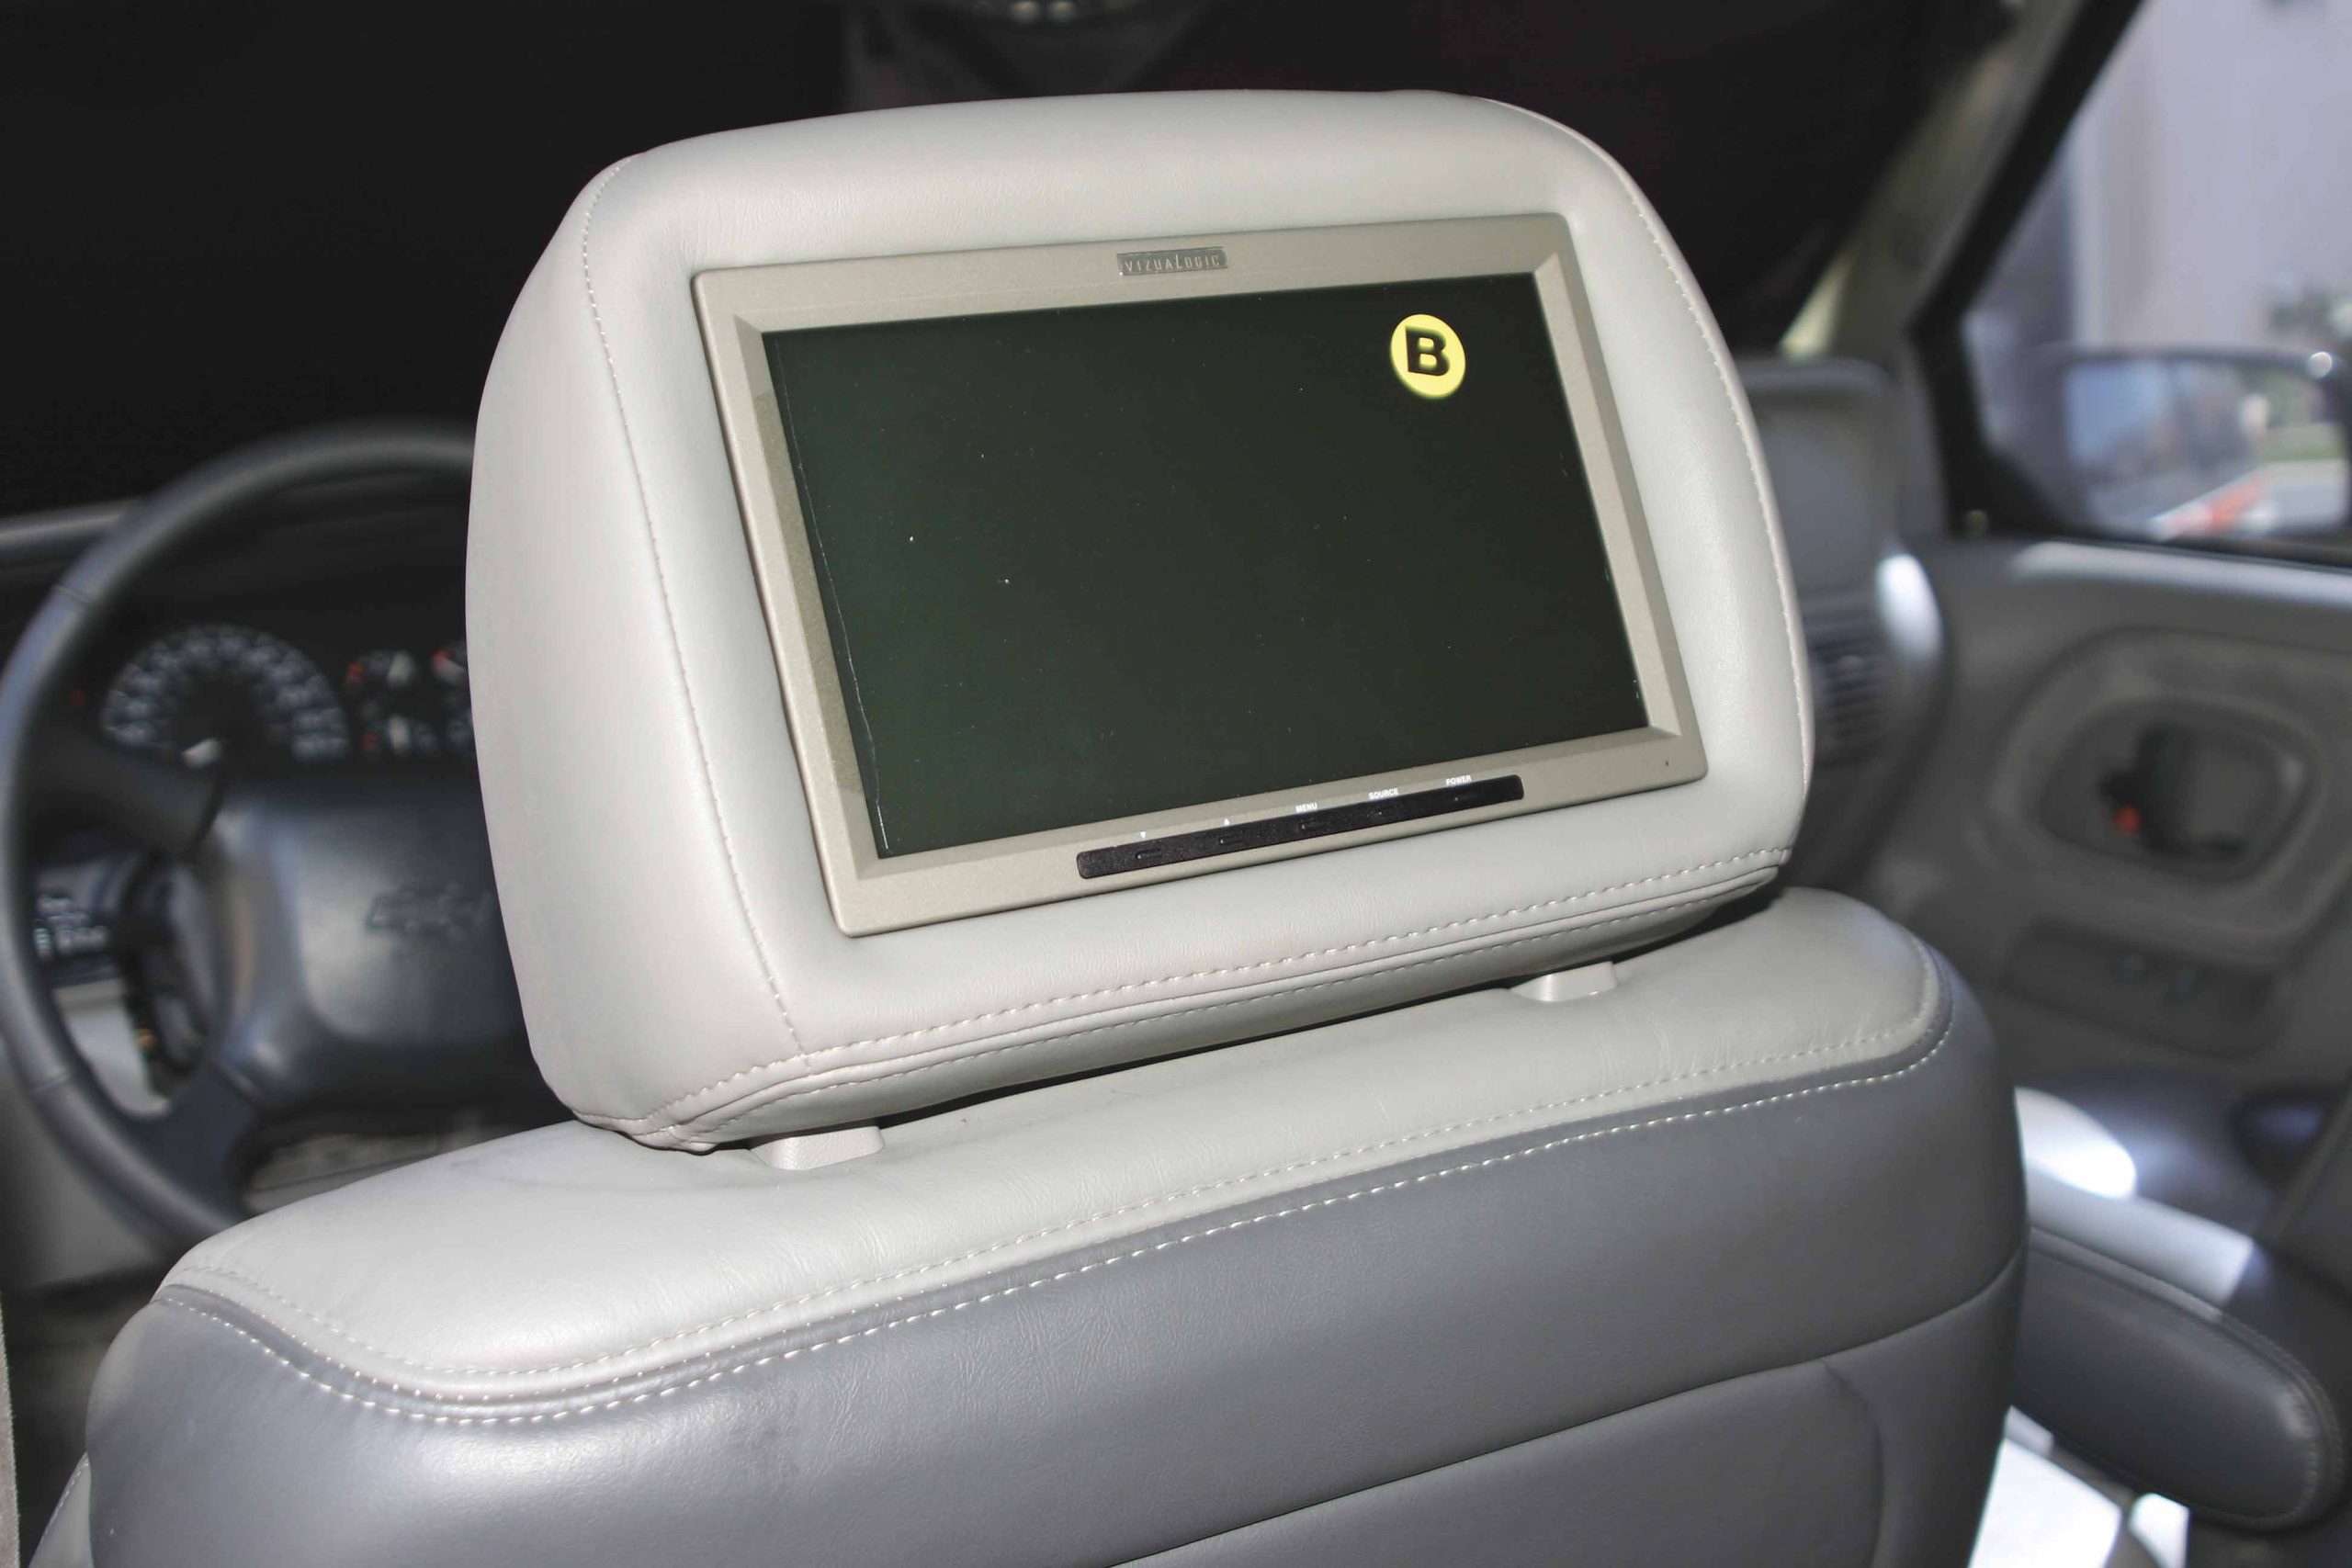
In this article, we are covering the installation of the Vizualogic A-2000 9-inch LCD system with a built in DVD player for the passenger-side headrest. We are installing the system in a Õ00 Chevy Tahoe Limited, replacing the factory headrests on the front seats, but the method is very similar for most popular trucks and SUVs. It will be integrated with a Kenwood Excelon XXV-05V TV/DVD head unit. Installing the Vizualogic system is straightforward and relatively easy for most truck enthusiasts with basic mechanical and electrical skills, but if you feel that this type of installation is beyond your capabilities, your local mobile electronics specialty retailer will be glad to do it for you.

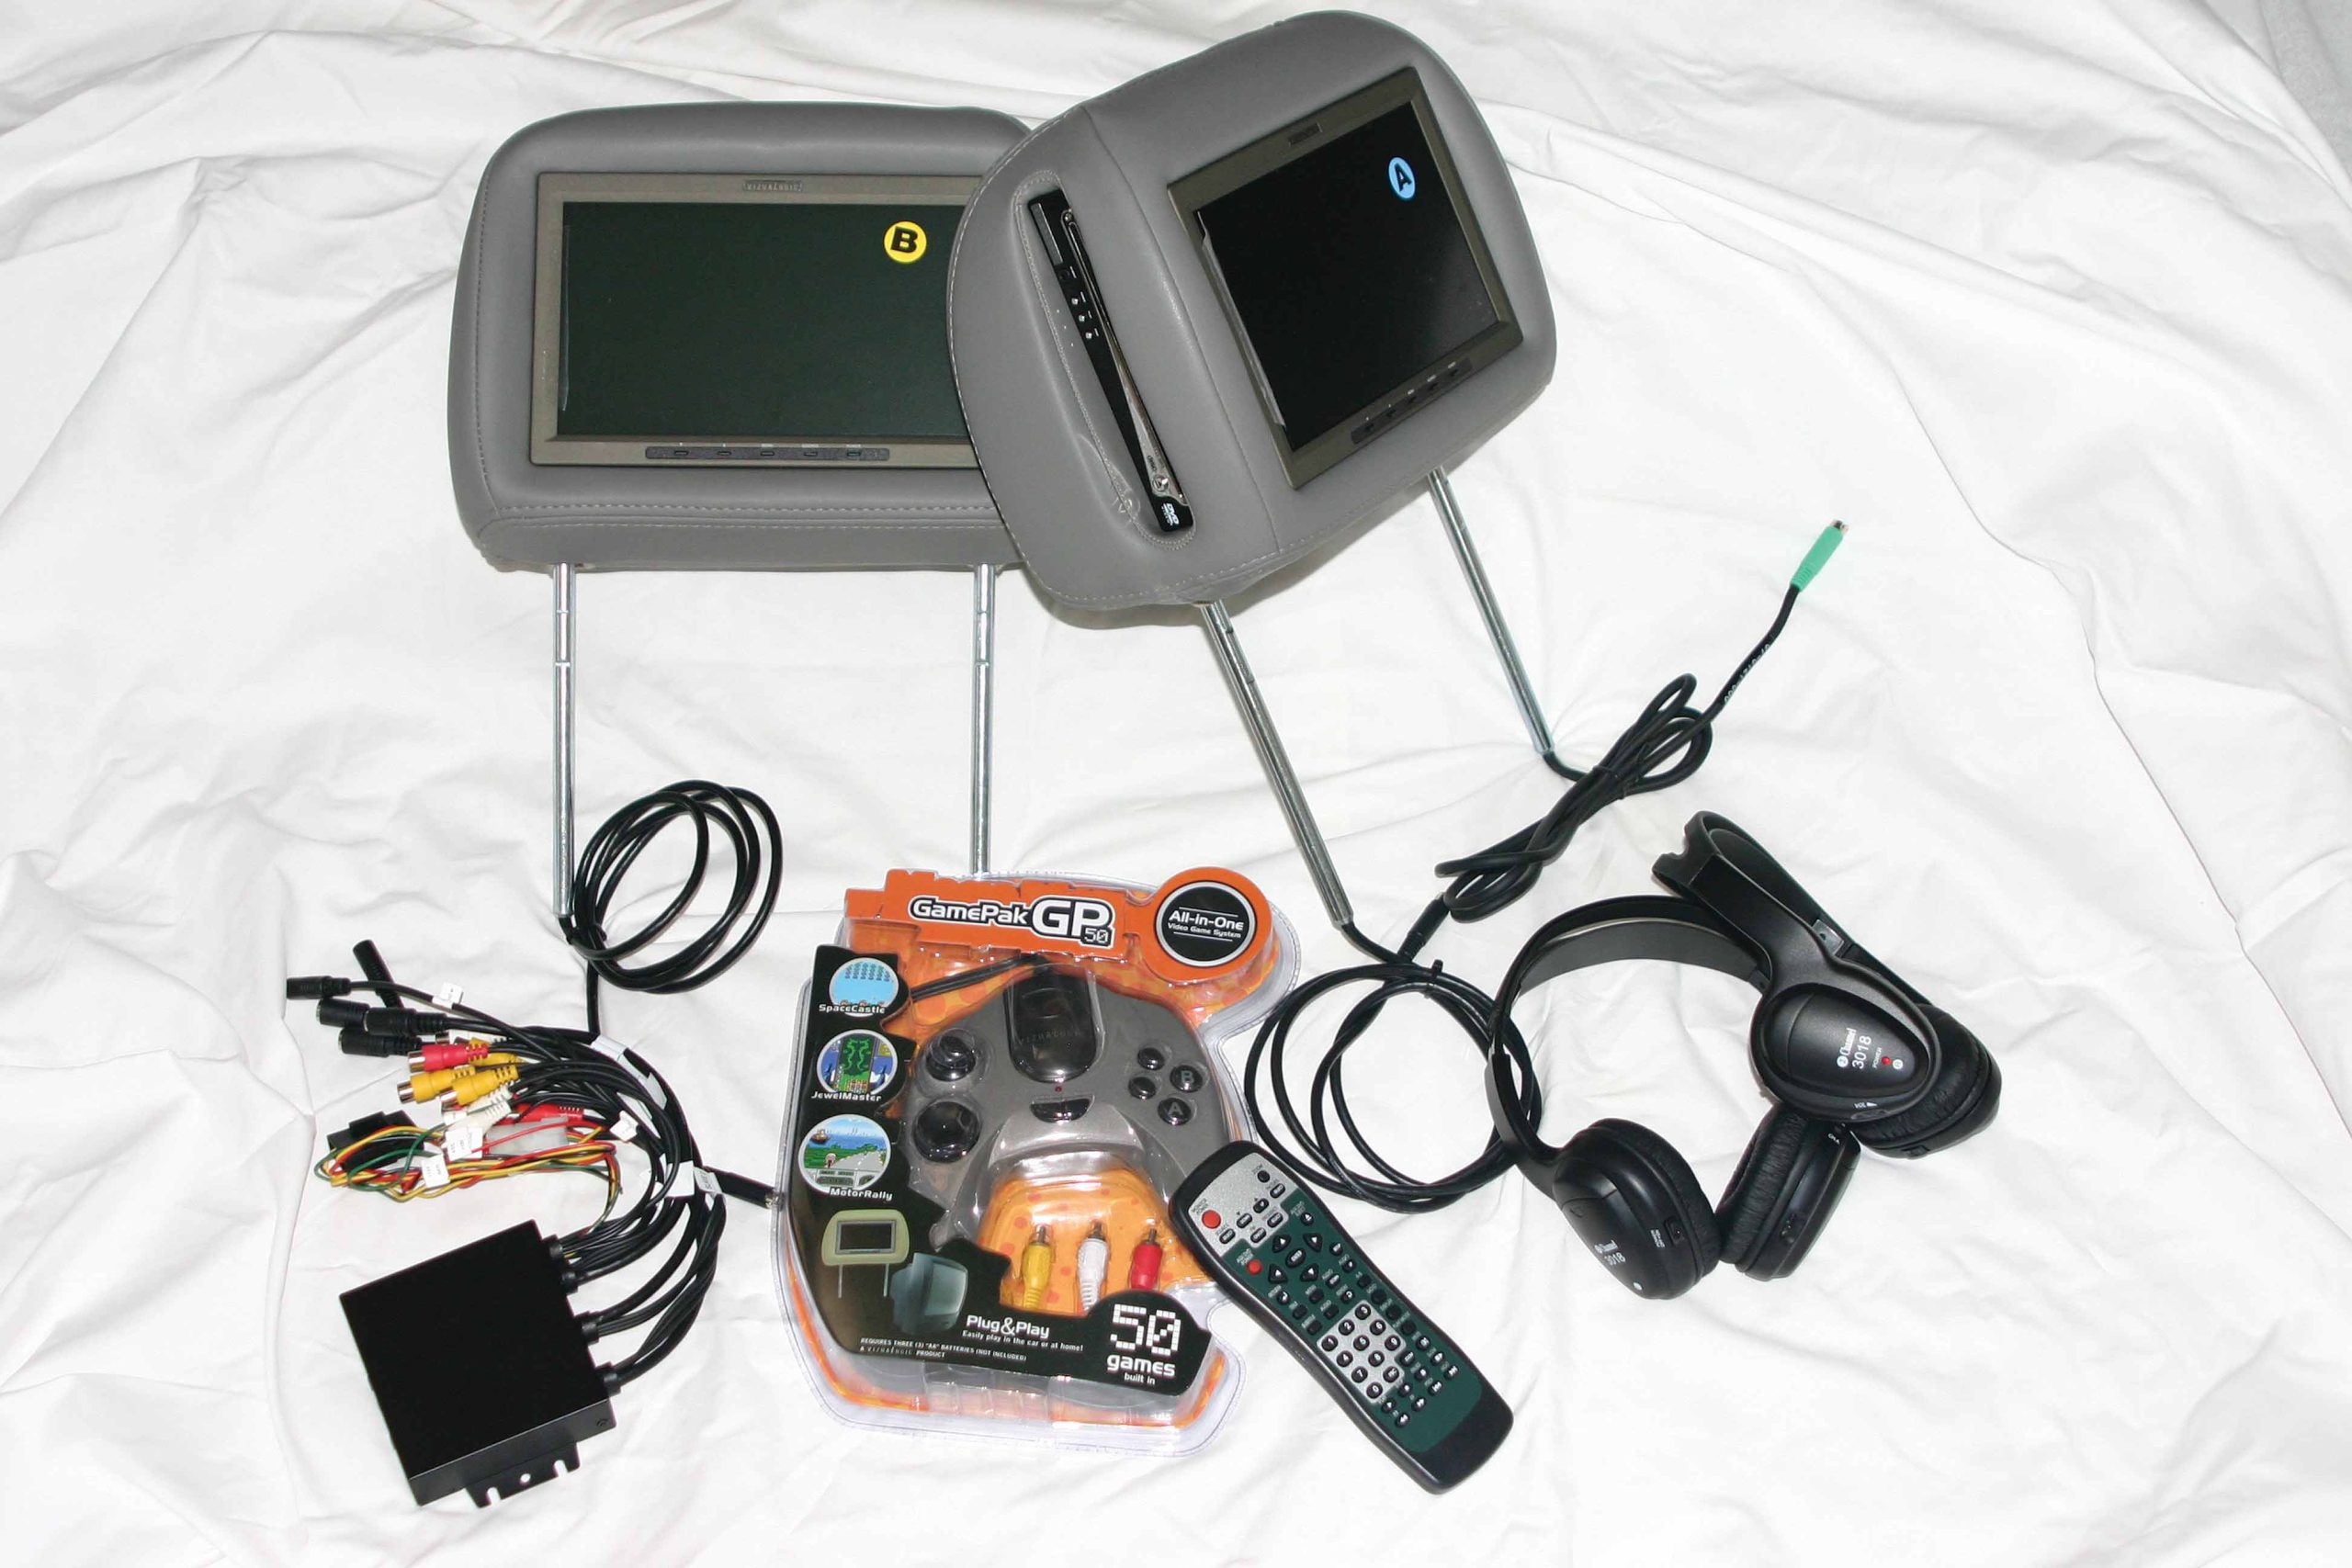
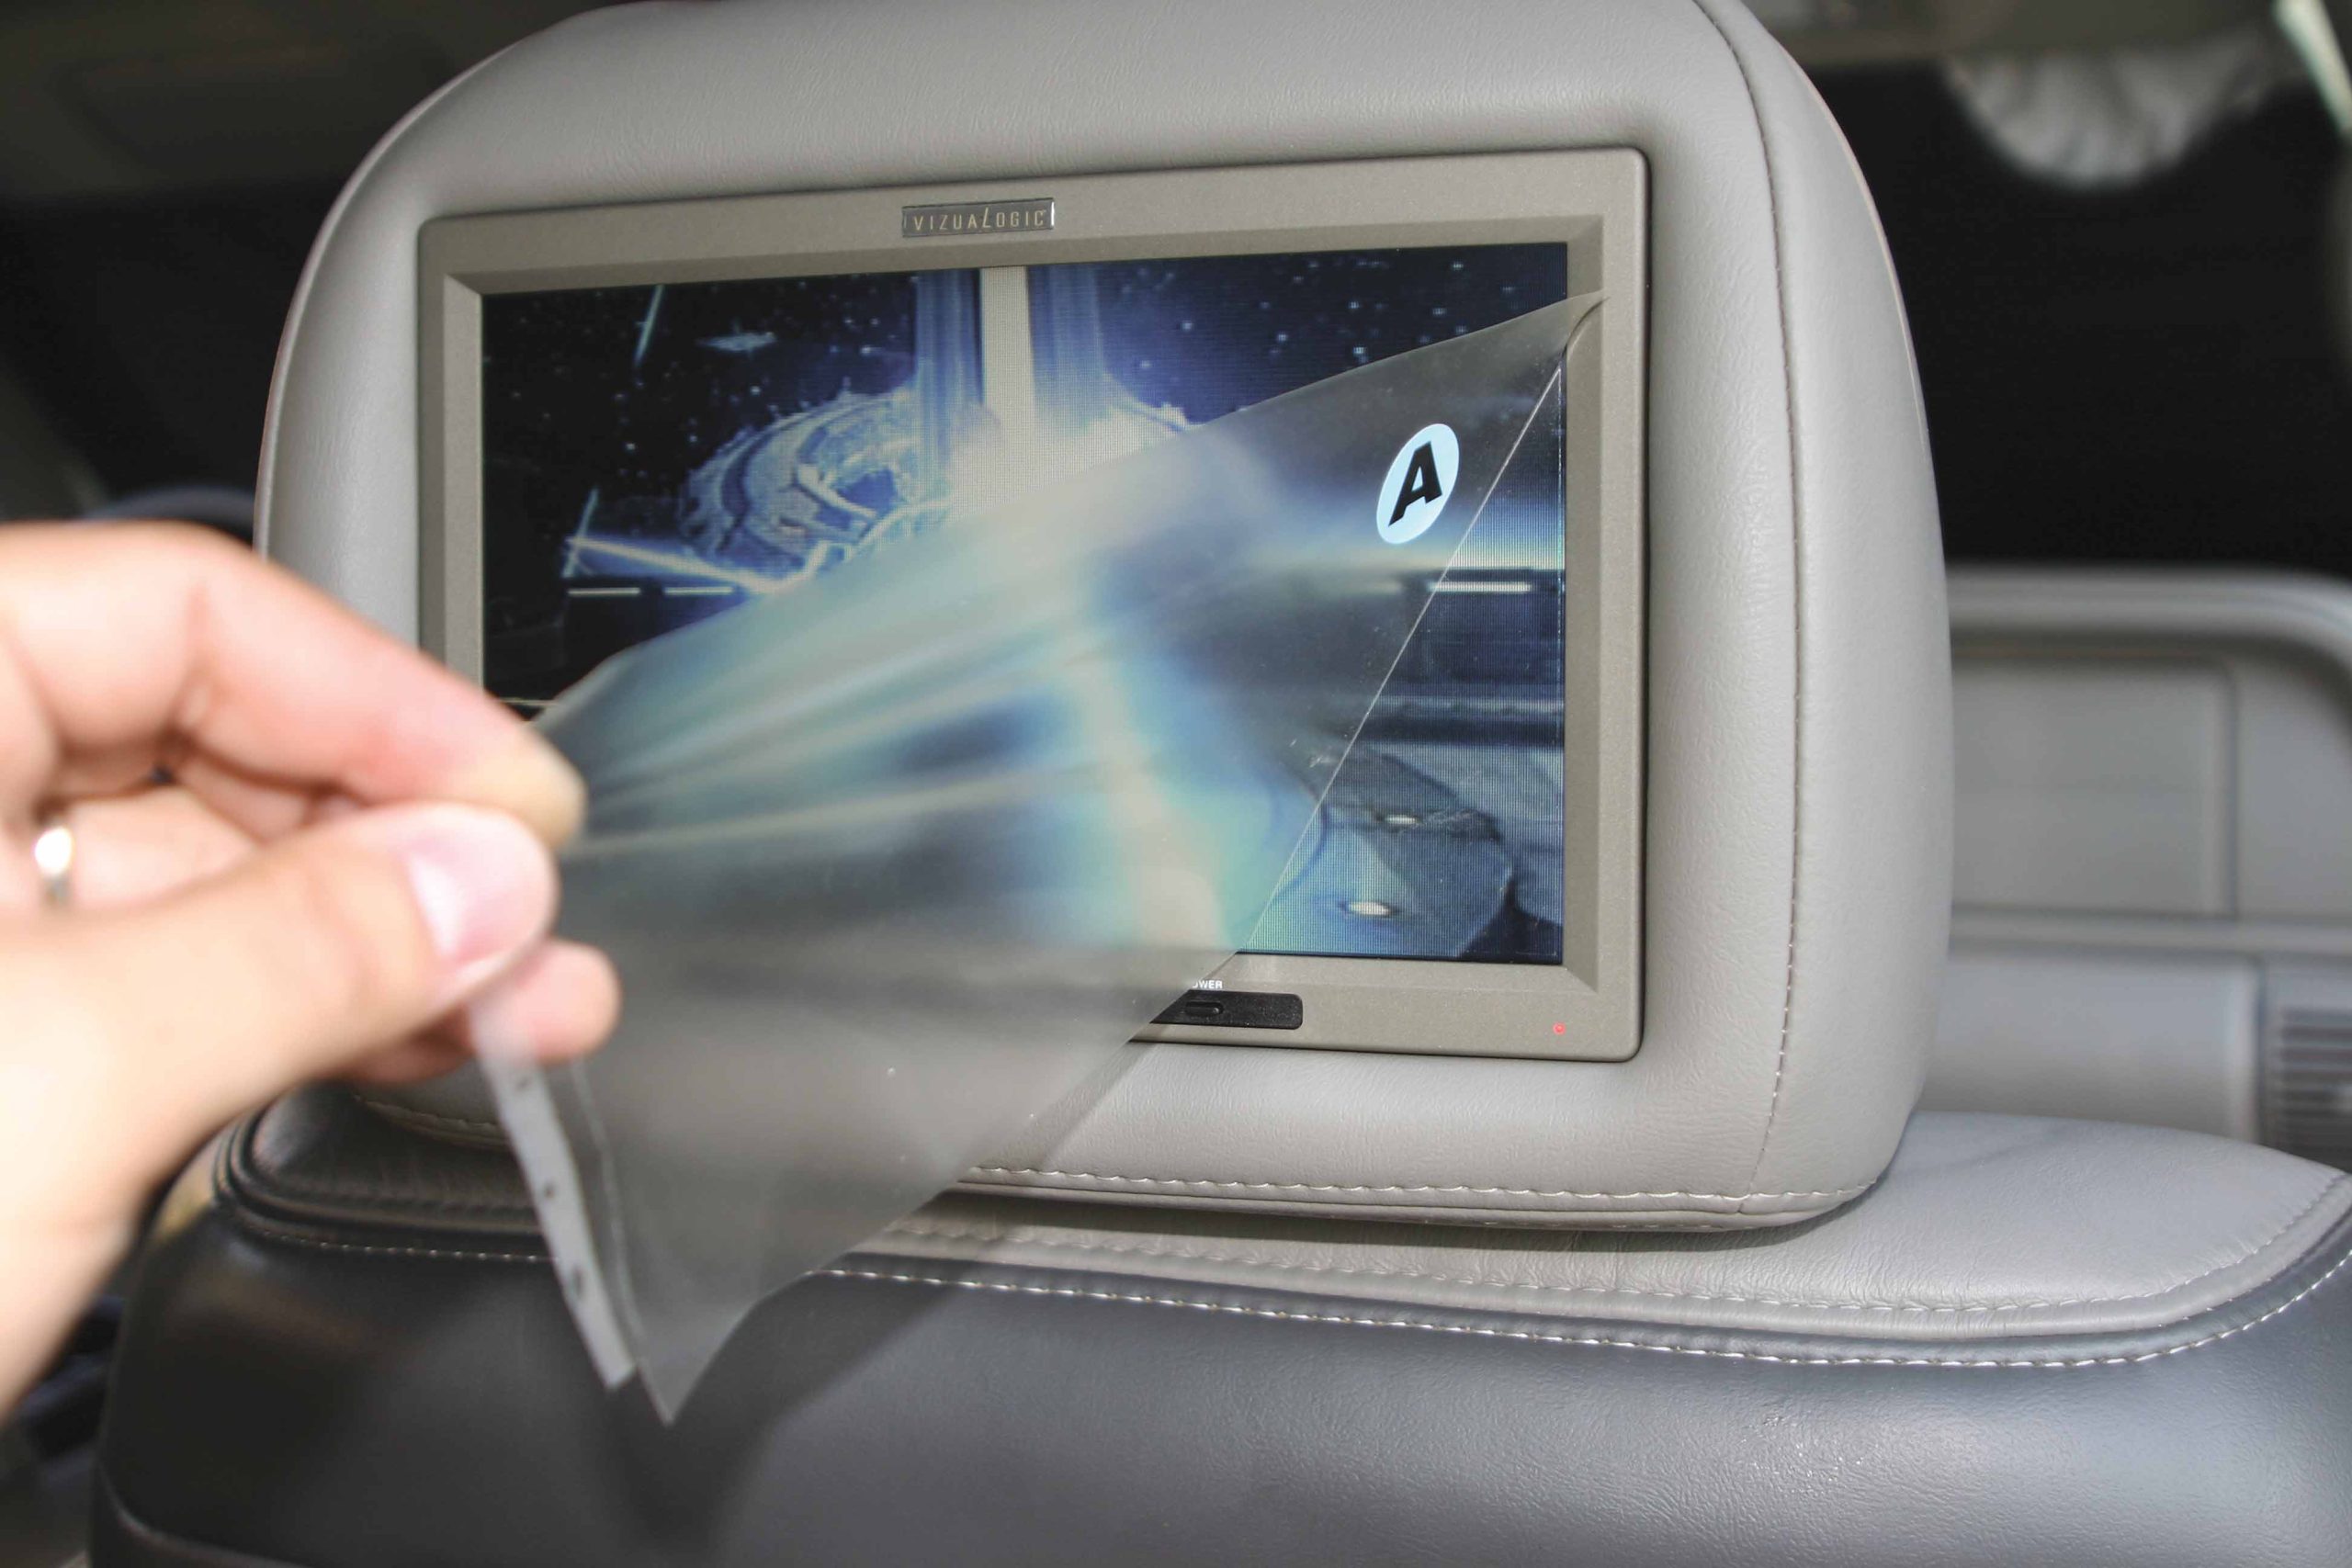
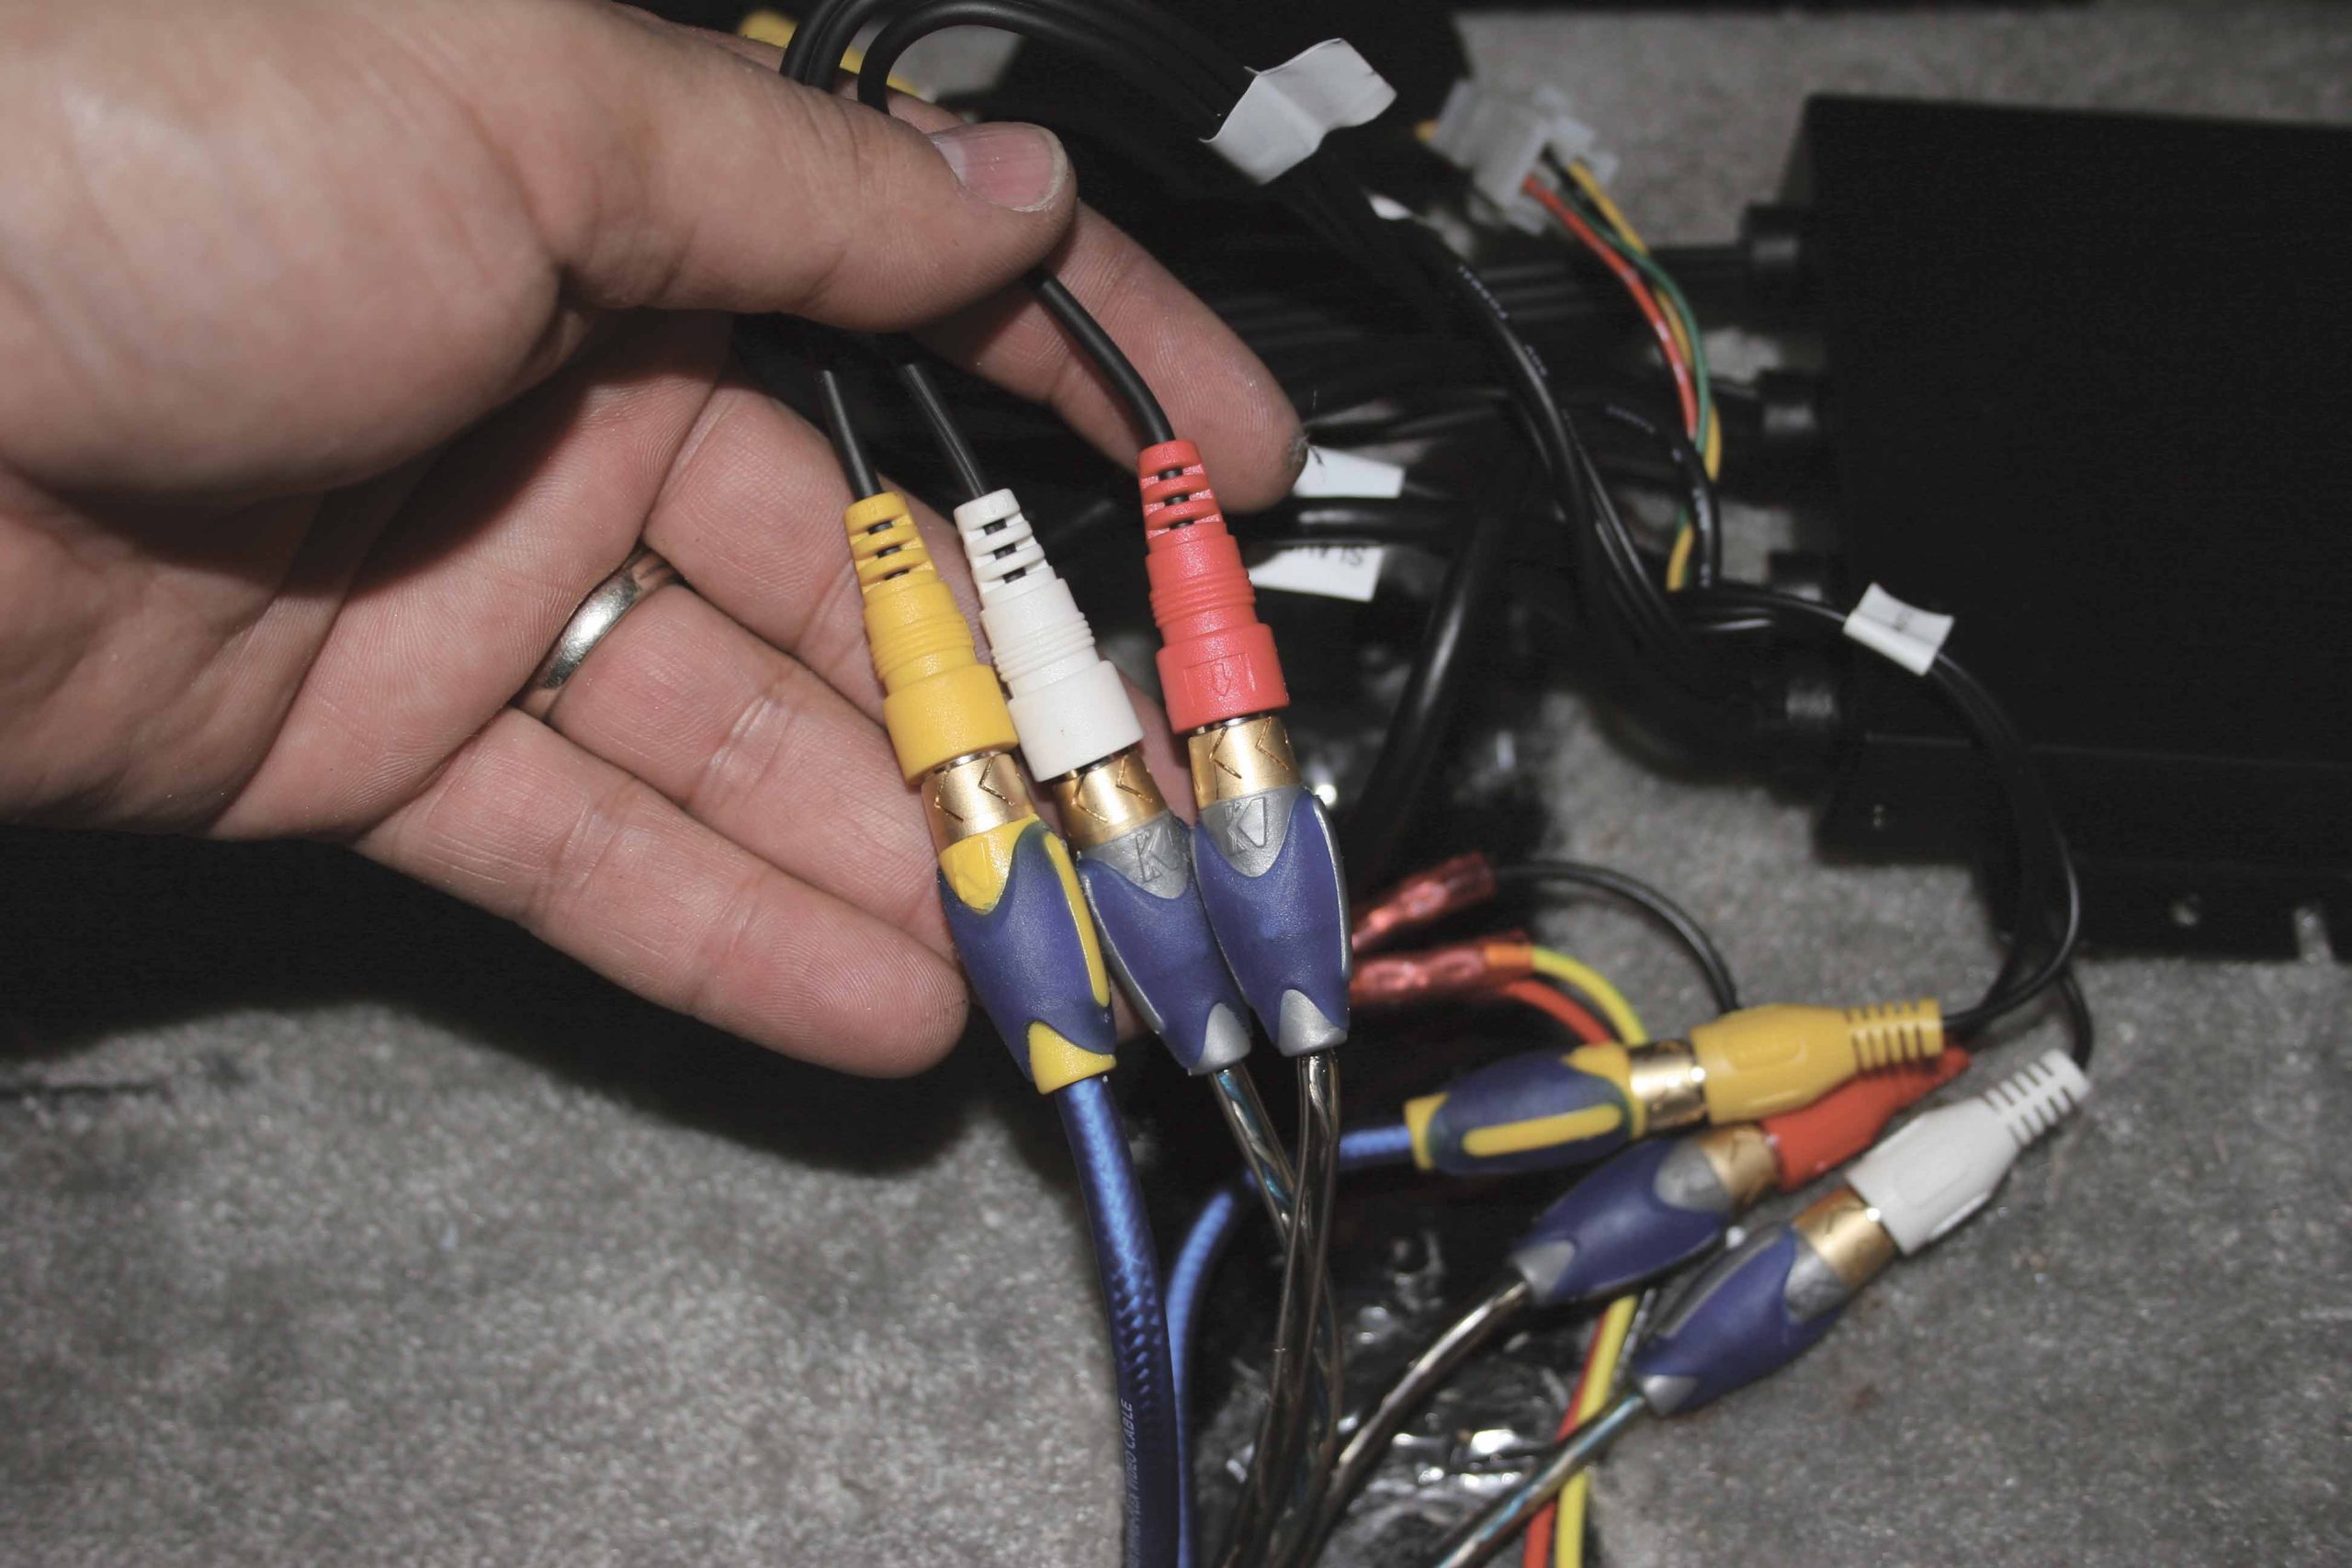
This Vizualogic system comes complete with two replacement factory-matching leather headrests, wireless remote control, two pair of wireless headphones, plug-in all-in-one game system, control module, FM modulator and all the necessary wiring to complete the installation. We even picked up a couple of the optional slip-on security covers to conceal the monitors when not in use. The FM modulator can be used to send the audio portion of the signal to your factory stereo or an aftermarket stereo that does not have an auxiliary input. In the installation shown here, we use one of the auxiliary inputs on the Kenwood unit instead of the FM modulator for improved sound quality.

For convenient viewing, the Vizualogic headrest monitors use a three-position ratcheting mechanism to allow the viewer to position the monitor for optimum viewing with various seat angles. The passenger-side headrest features an easy-to-load DVD player built into the side of the headrest that is easy to load and eject DVDs or CDs.

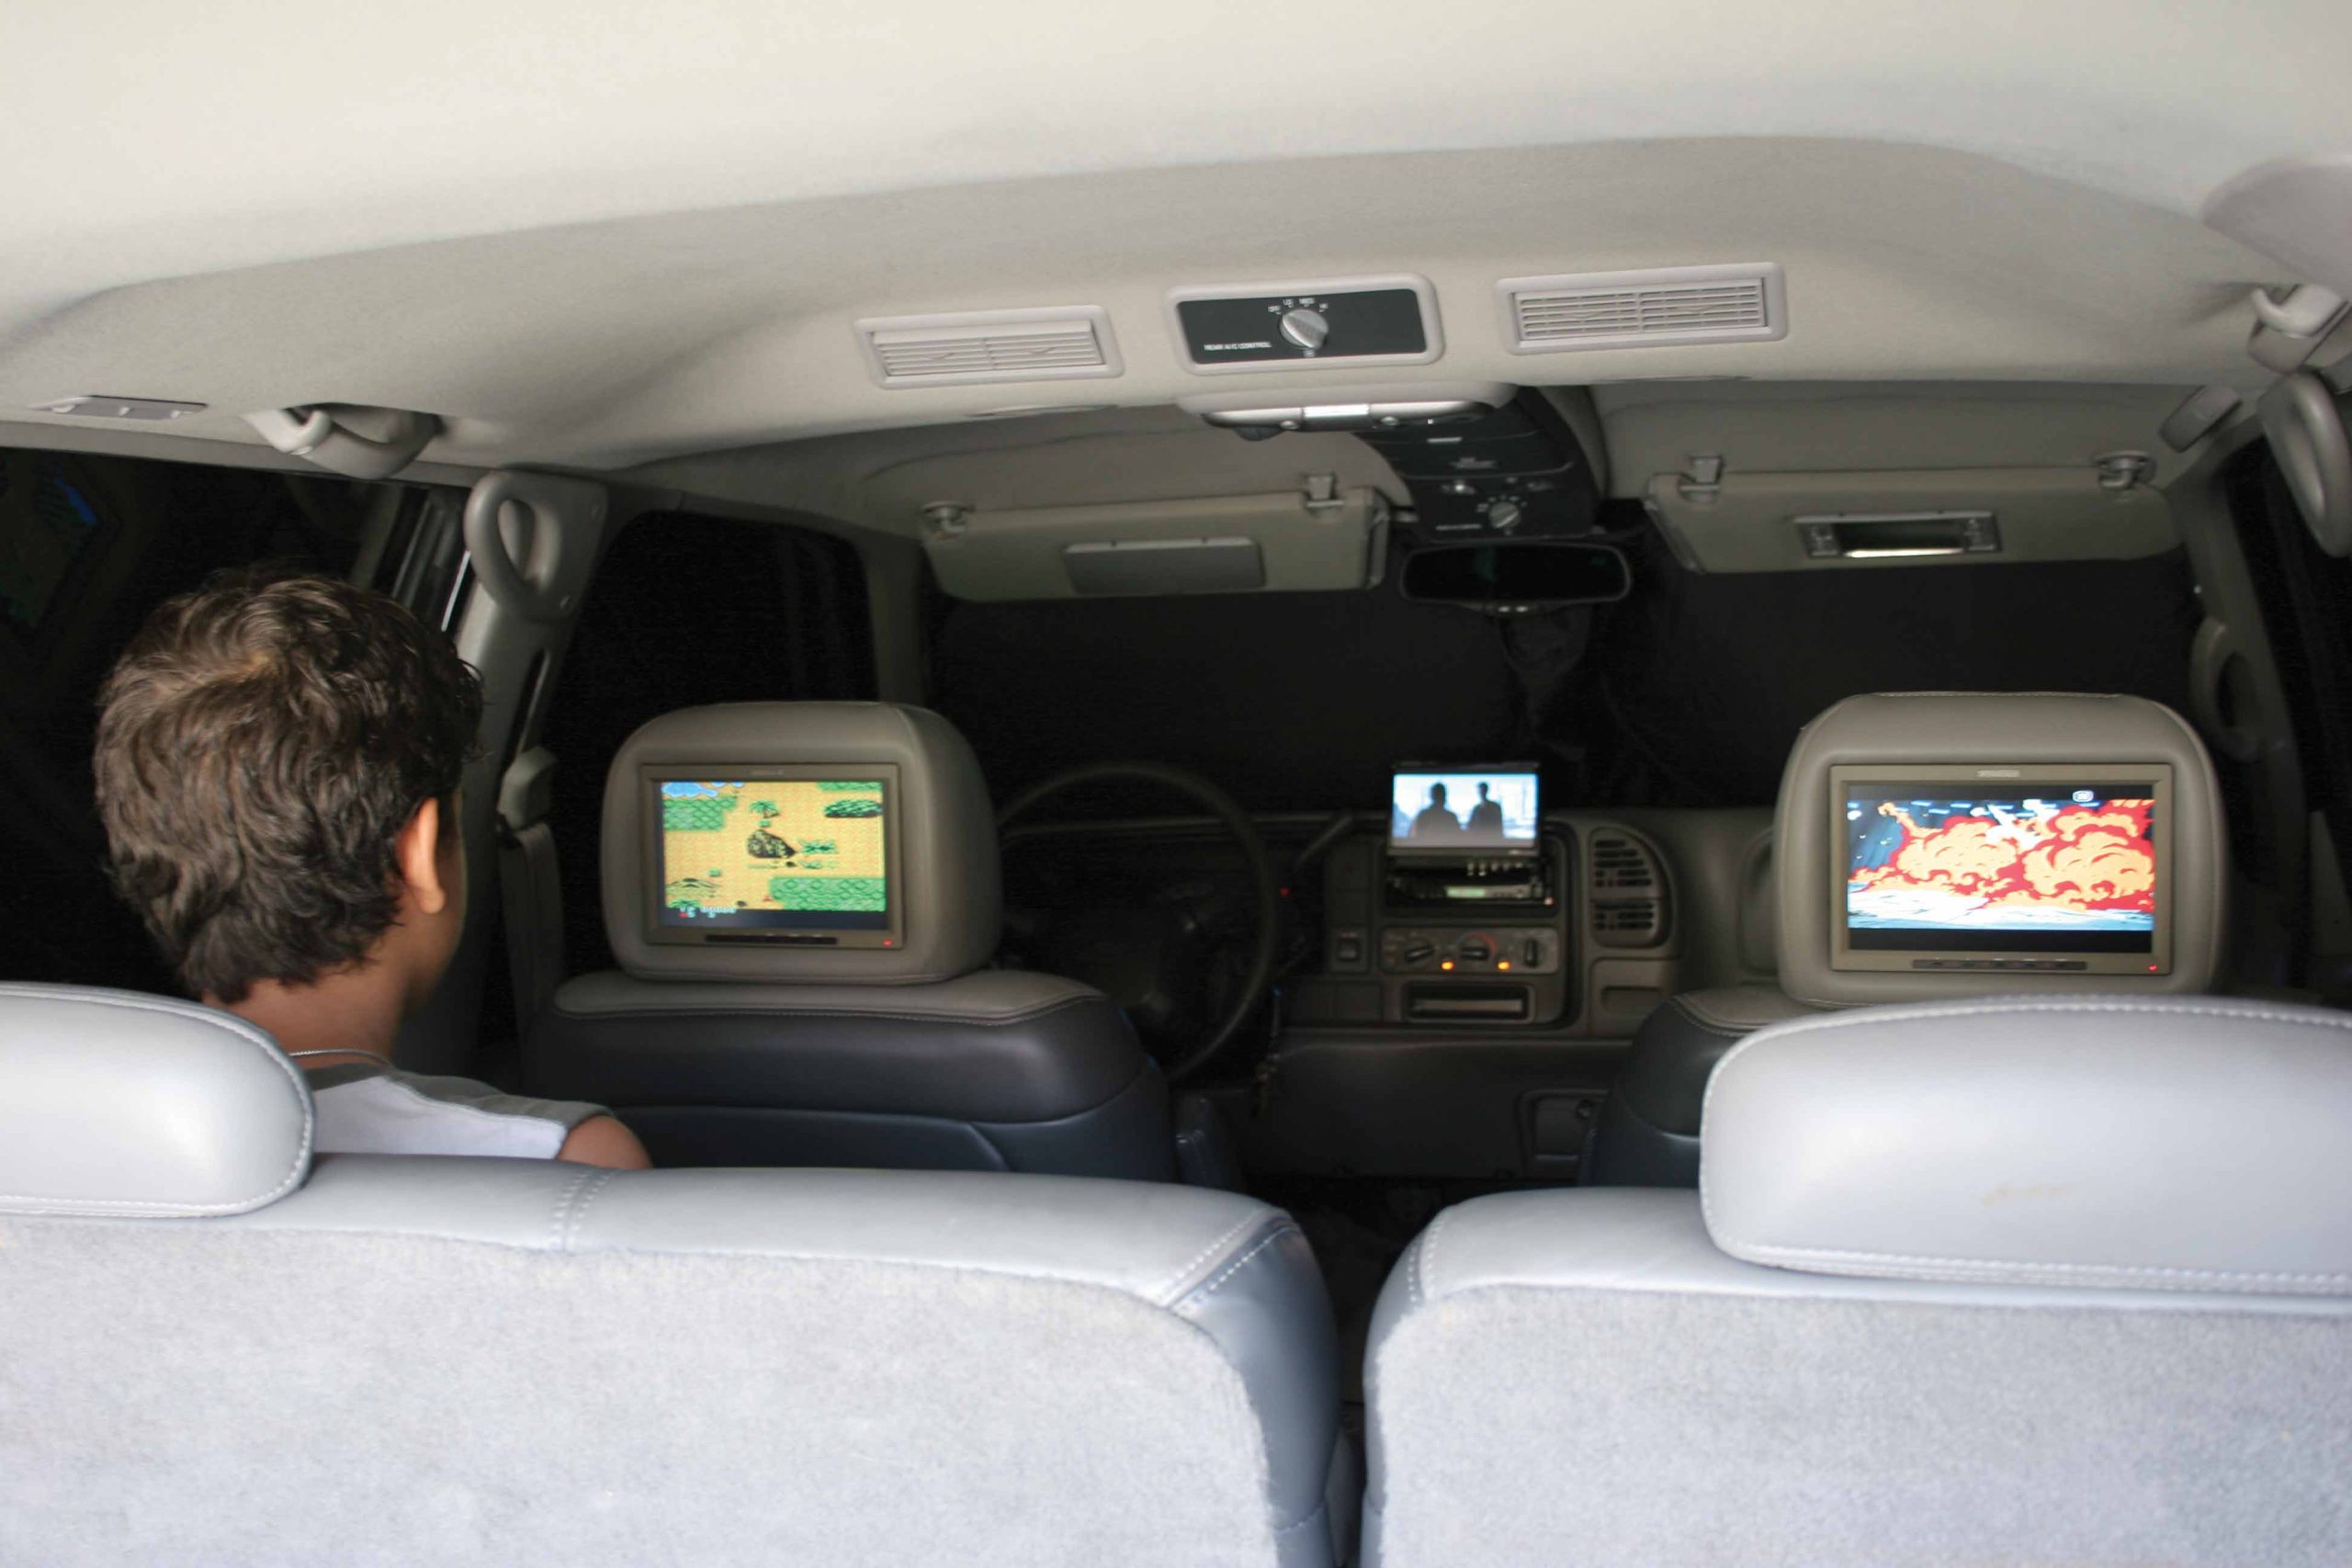
After the Vizualogic system is installed, it is easy to operate and enjoy, and you may find yourself wanting to take the back seat on trips, too. Each monitor can be operated independently of the other and the system has two sets of audio/video inputs allowing each monitor to independently display content from the DVD player built into the passenger headrest, the video game system or some other source that you connect to the second input. This allows each rear seat passenger to watch and listen to different content than the other passenger such as one watching a movie while the other plays a video game. The infrared wireless headphones have independent volume control and a switch to select A or B audio source so the kids can watch and play in the back while you drive and enjoy the ride.

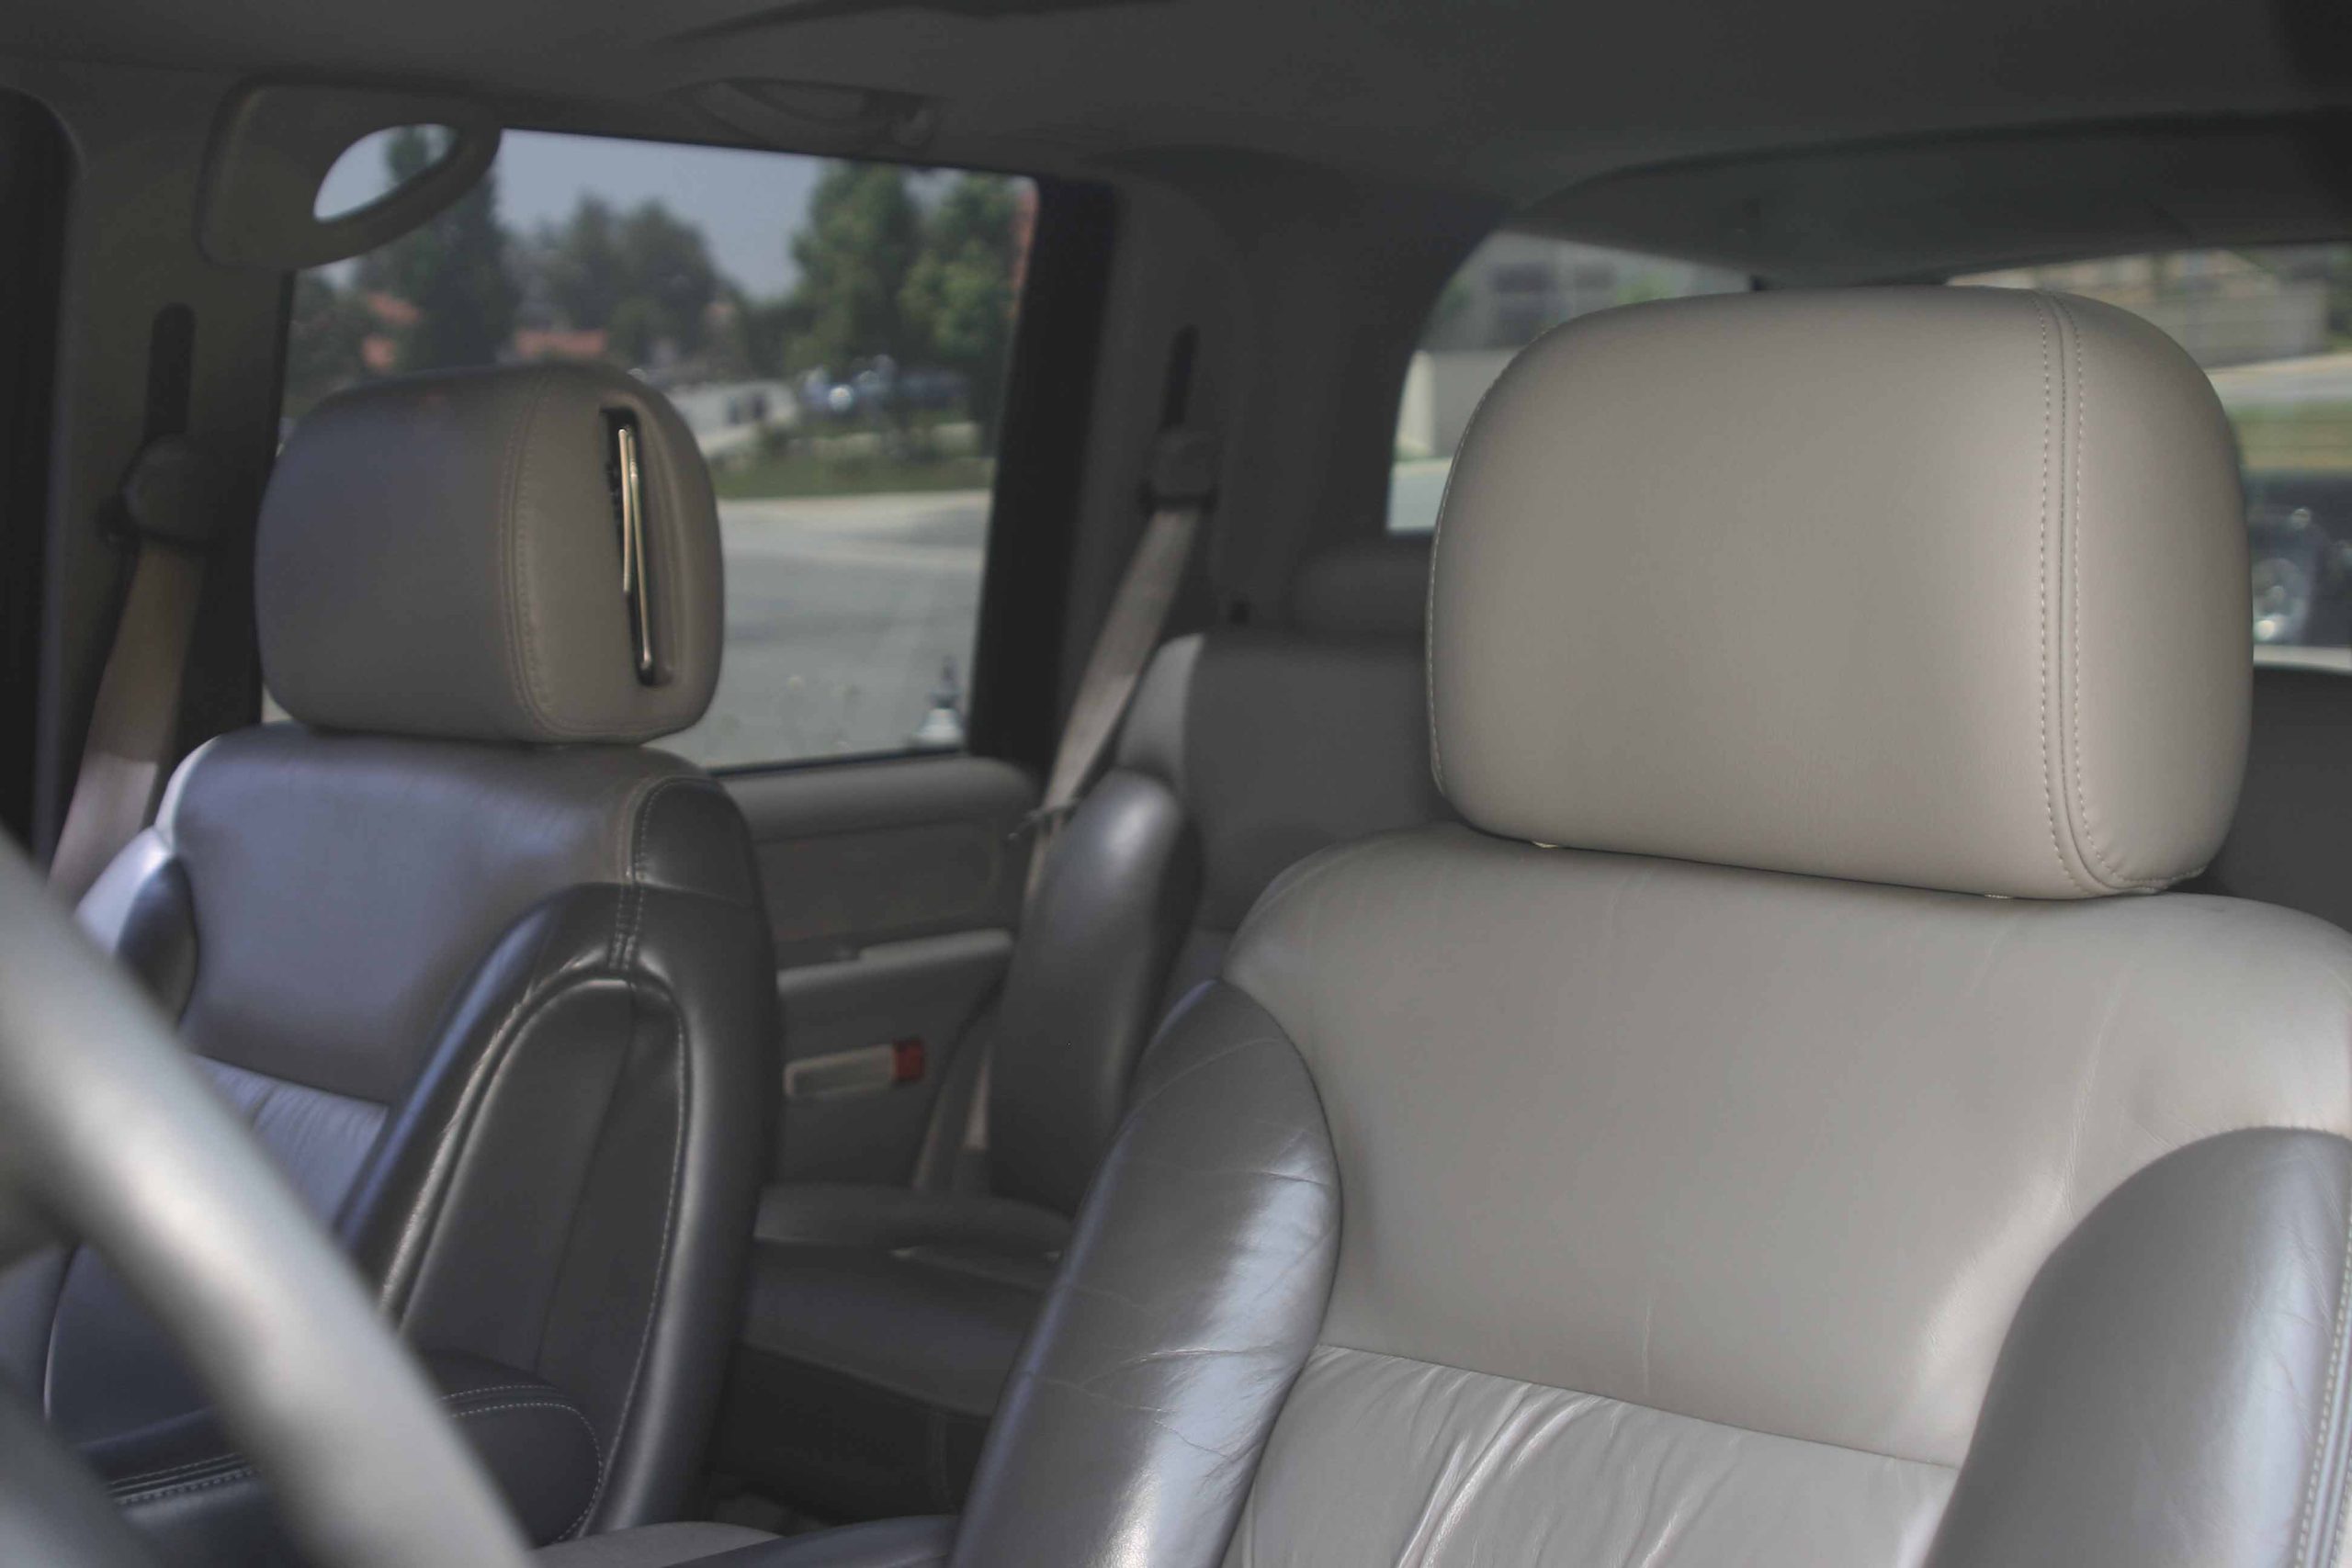
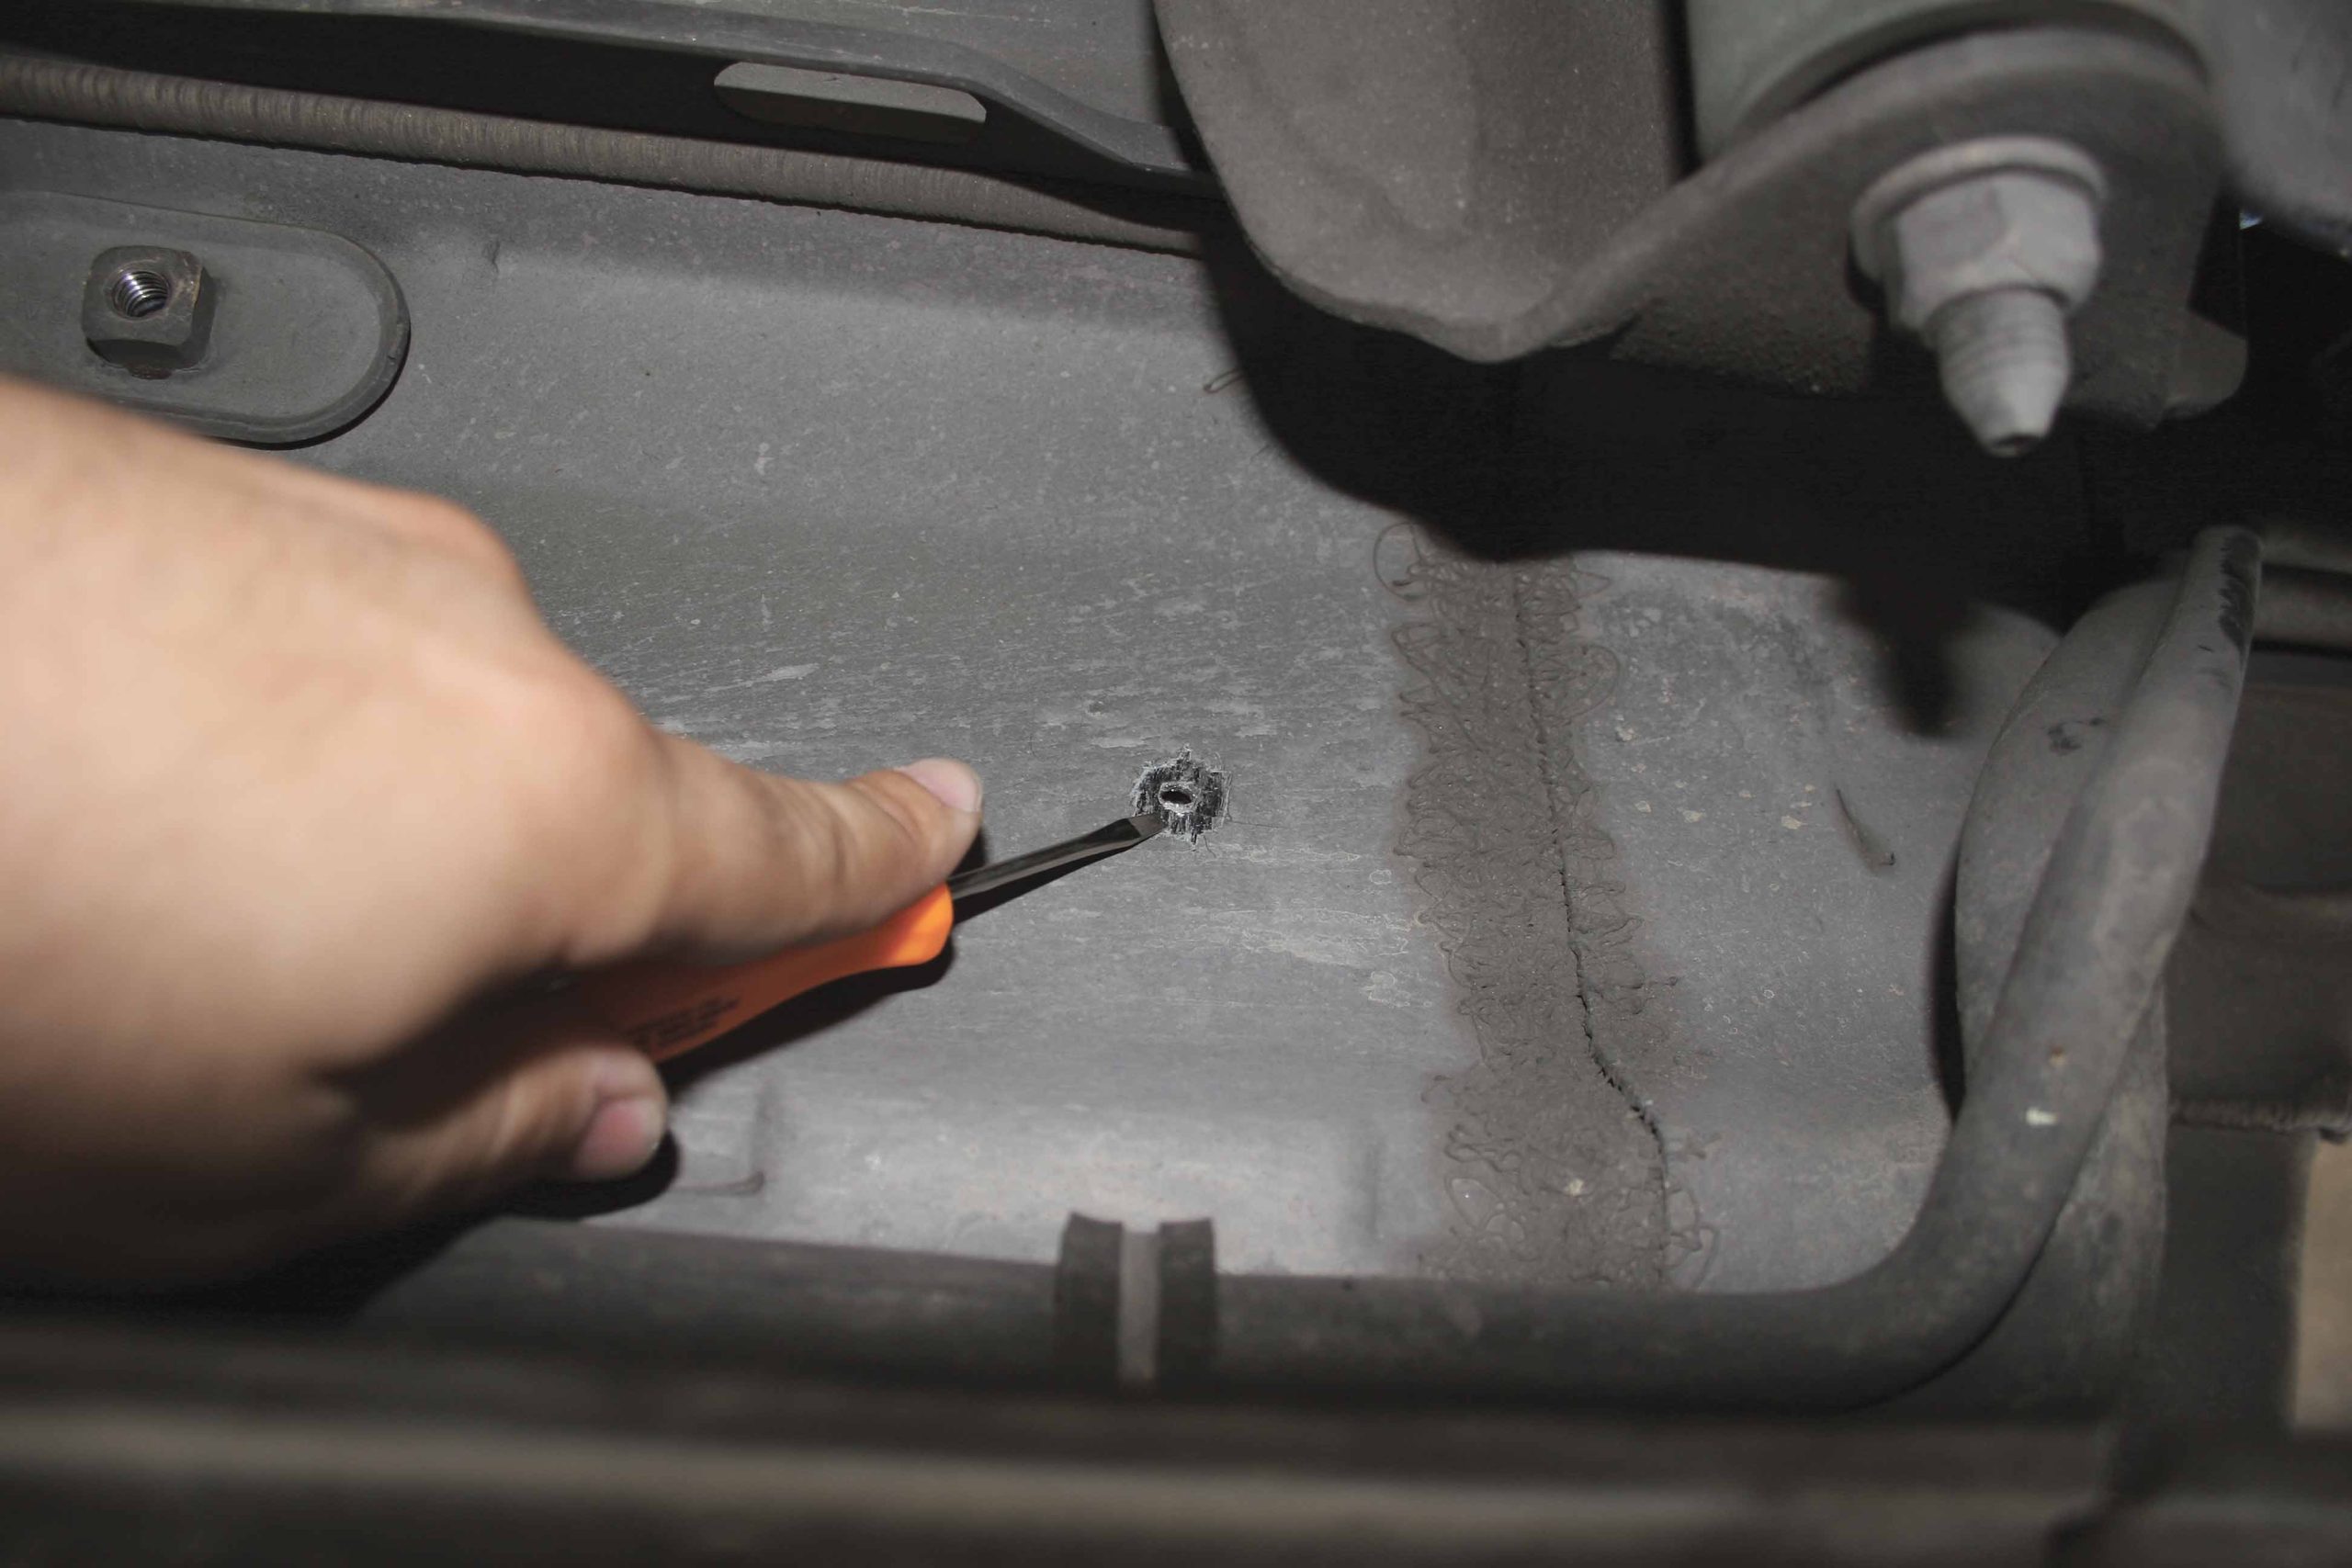
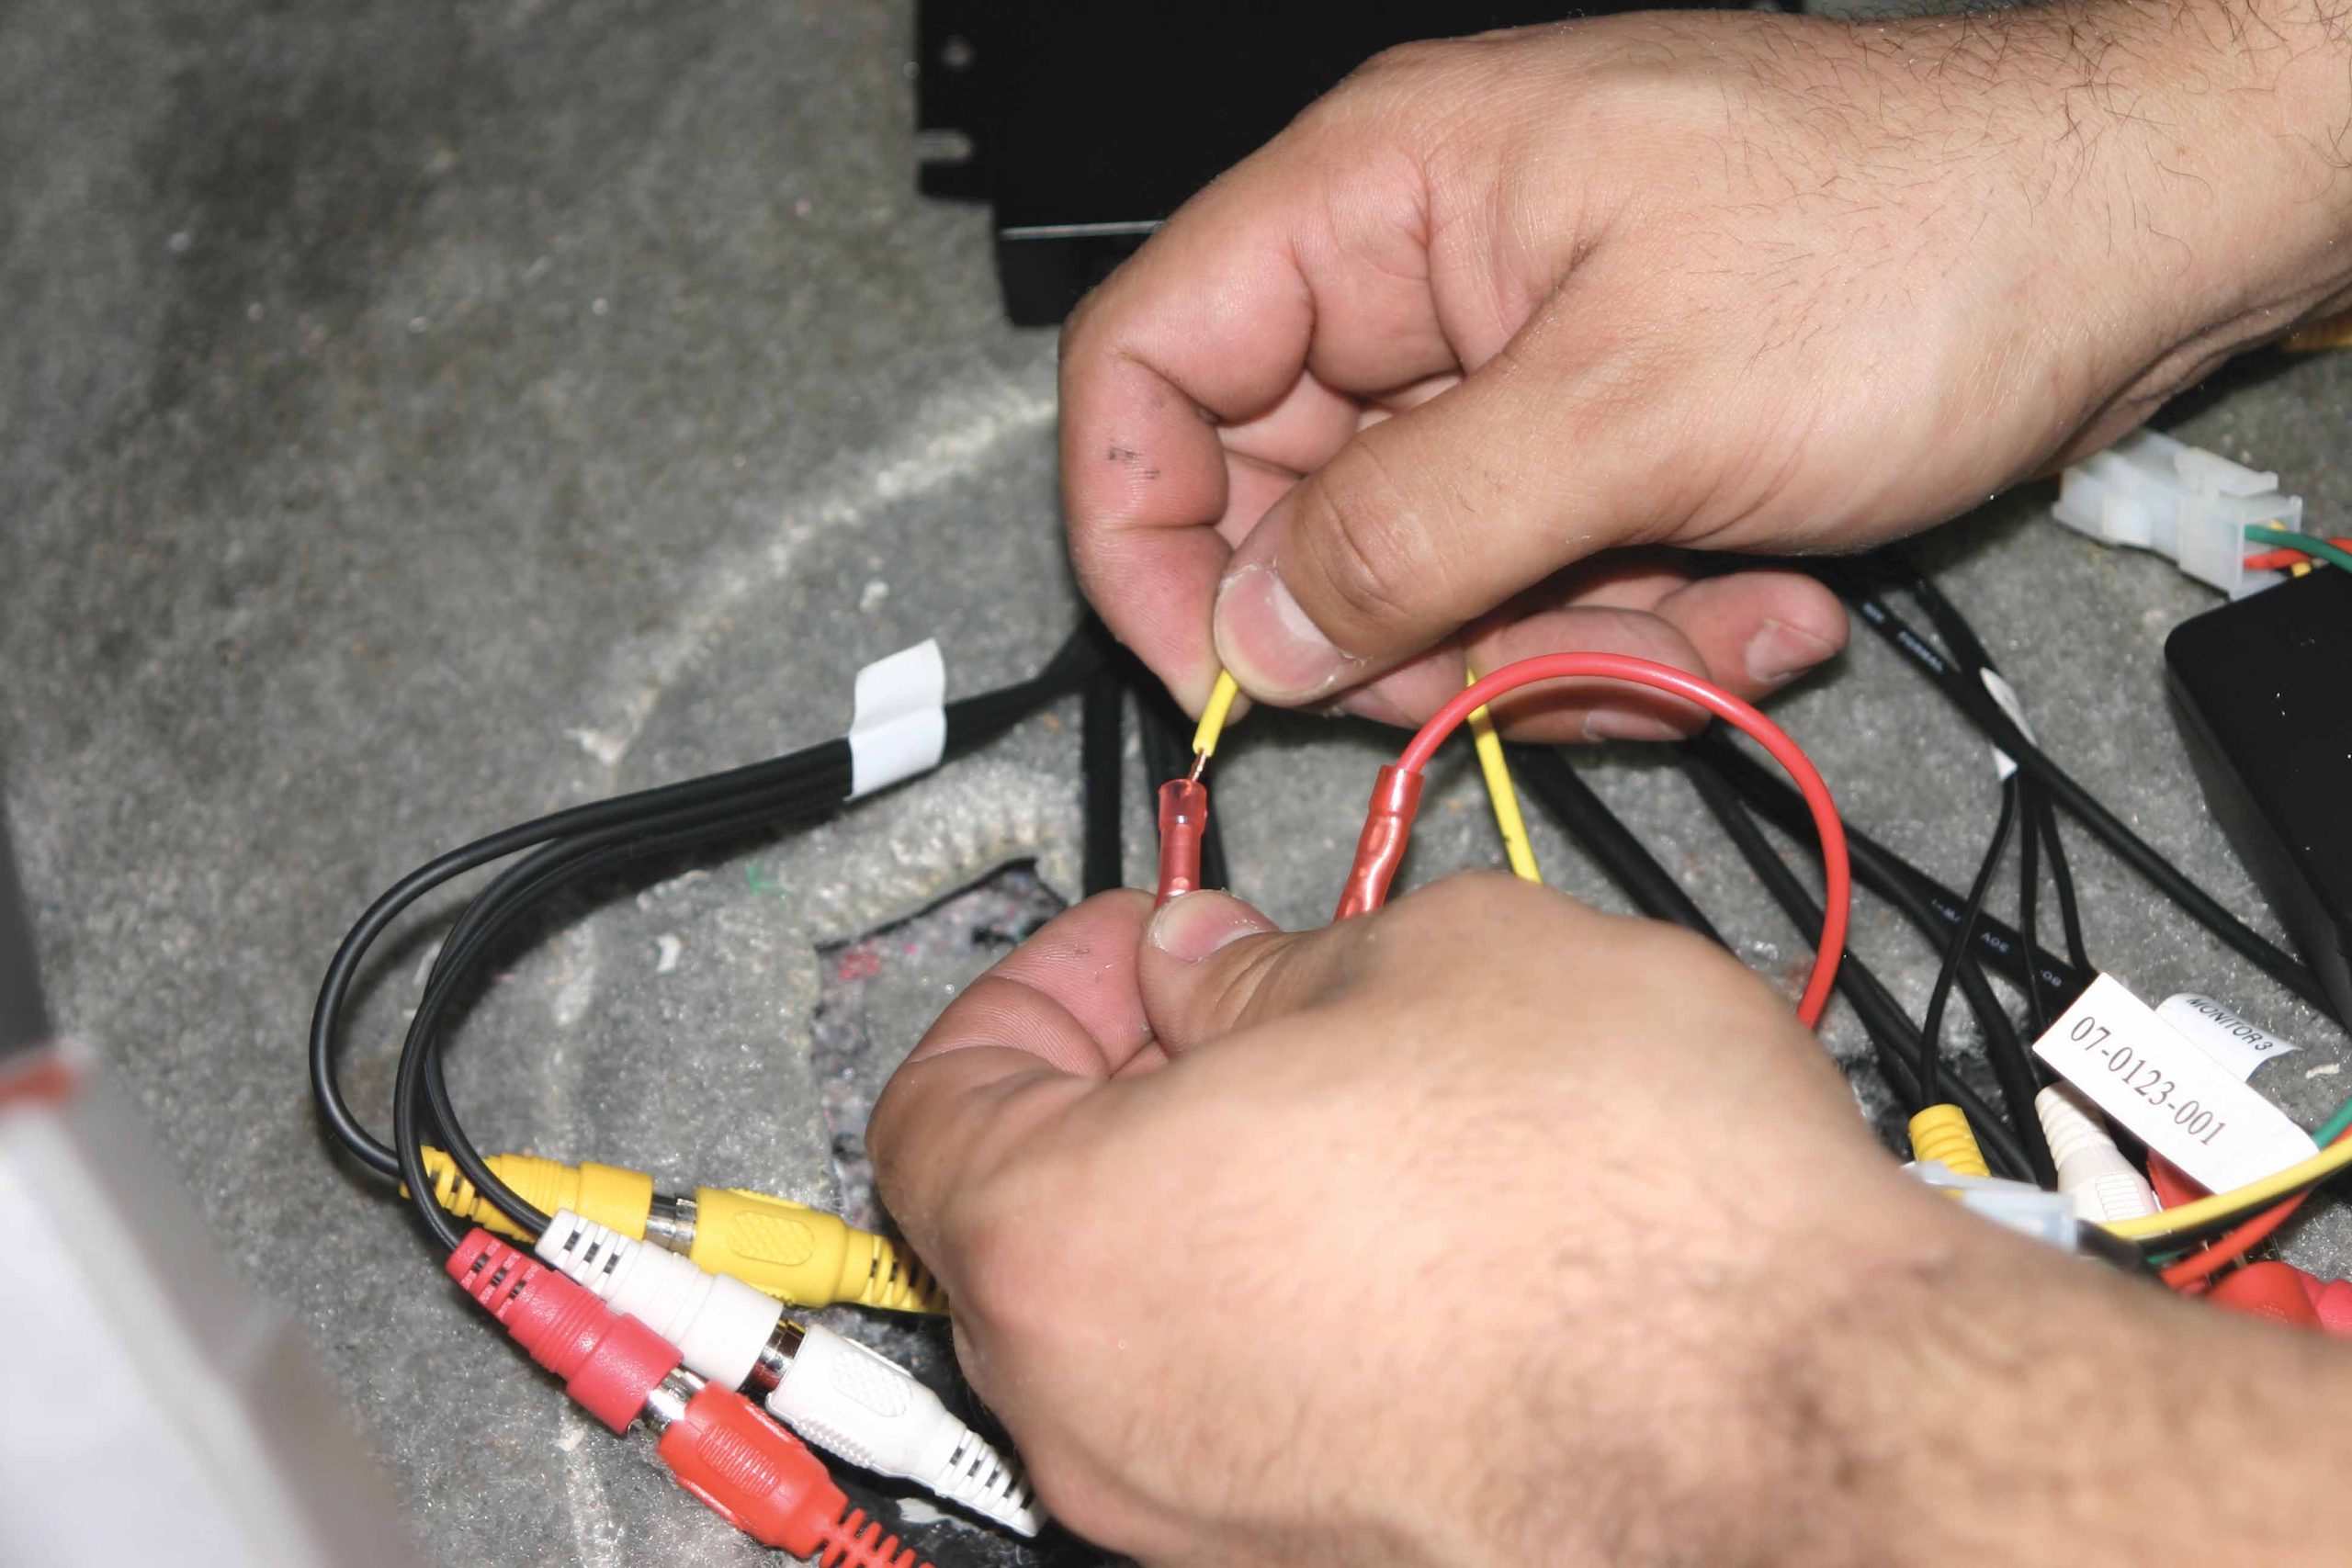
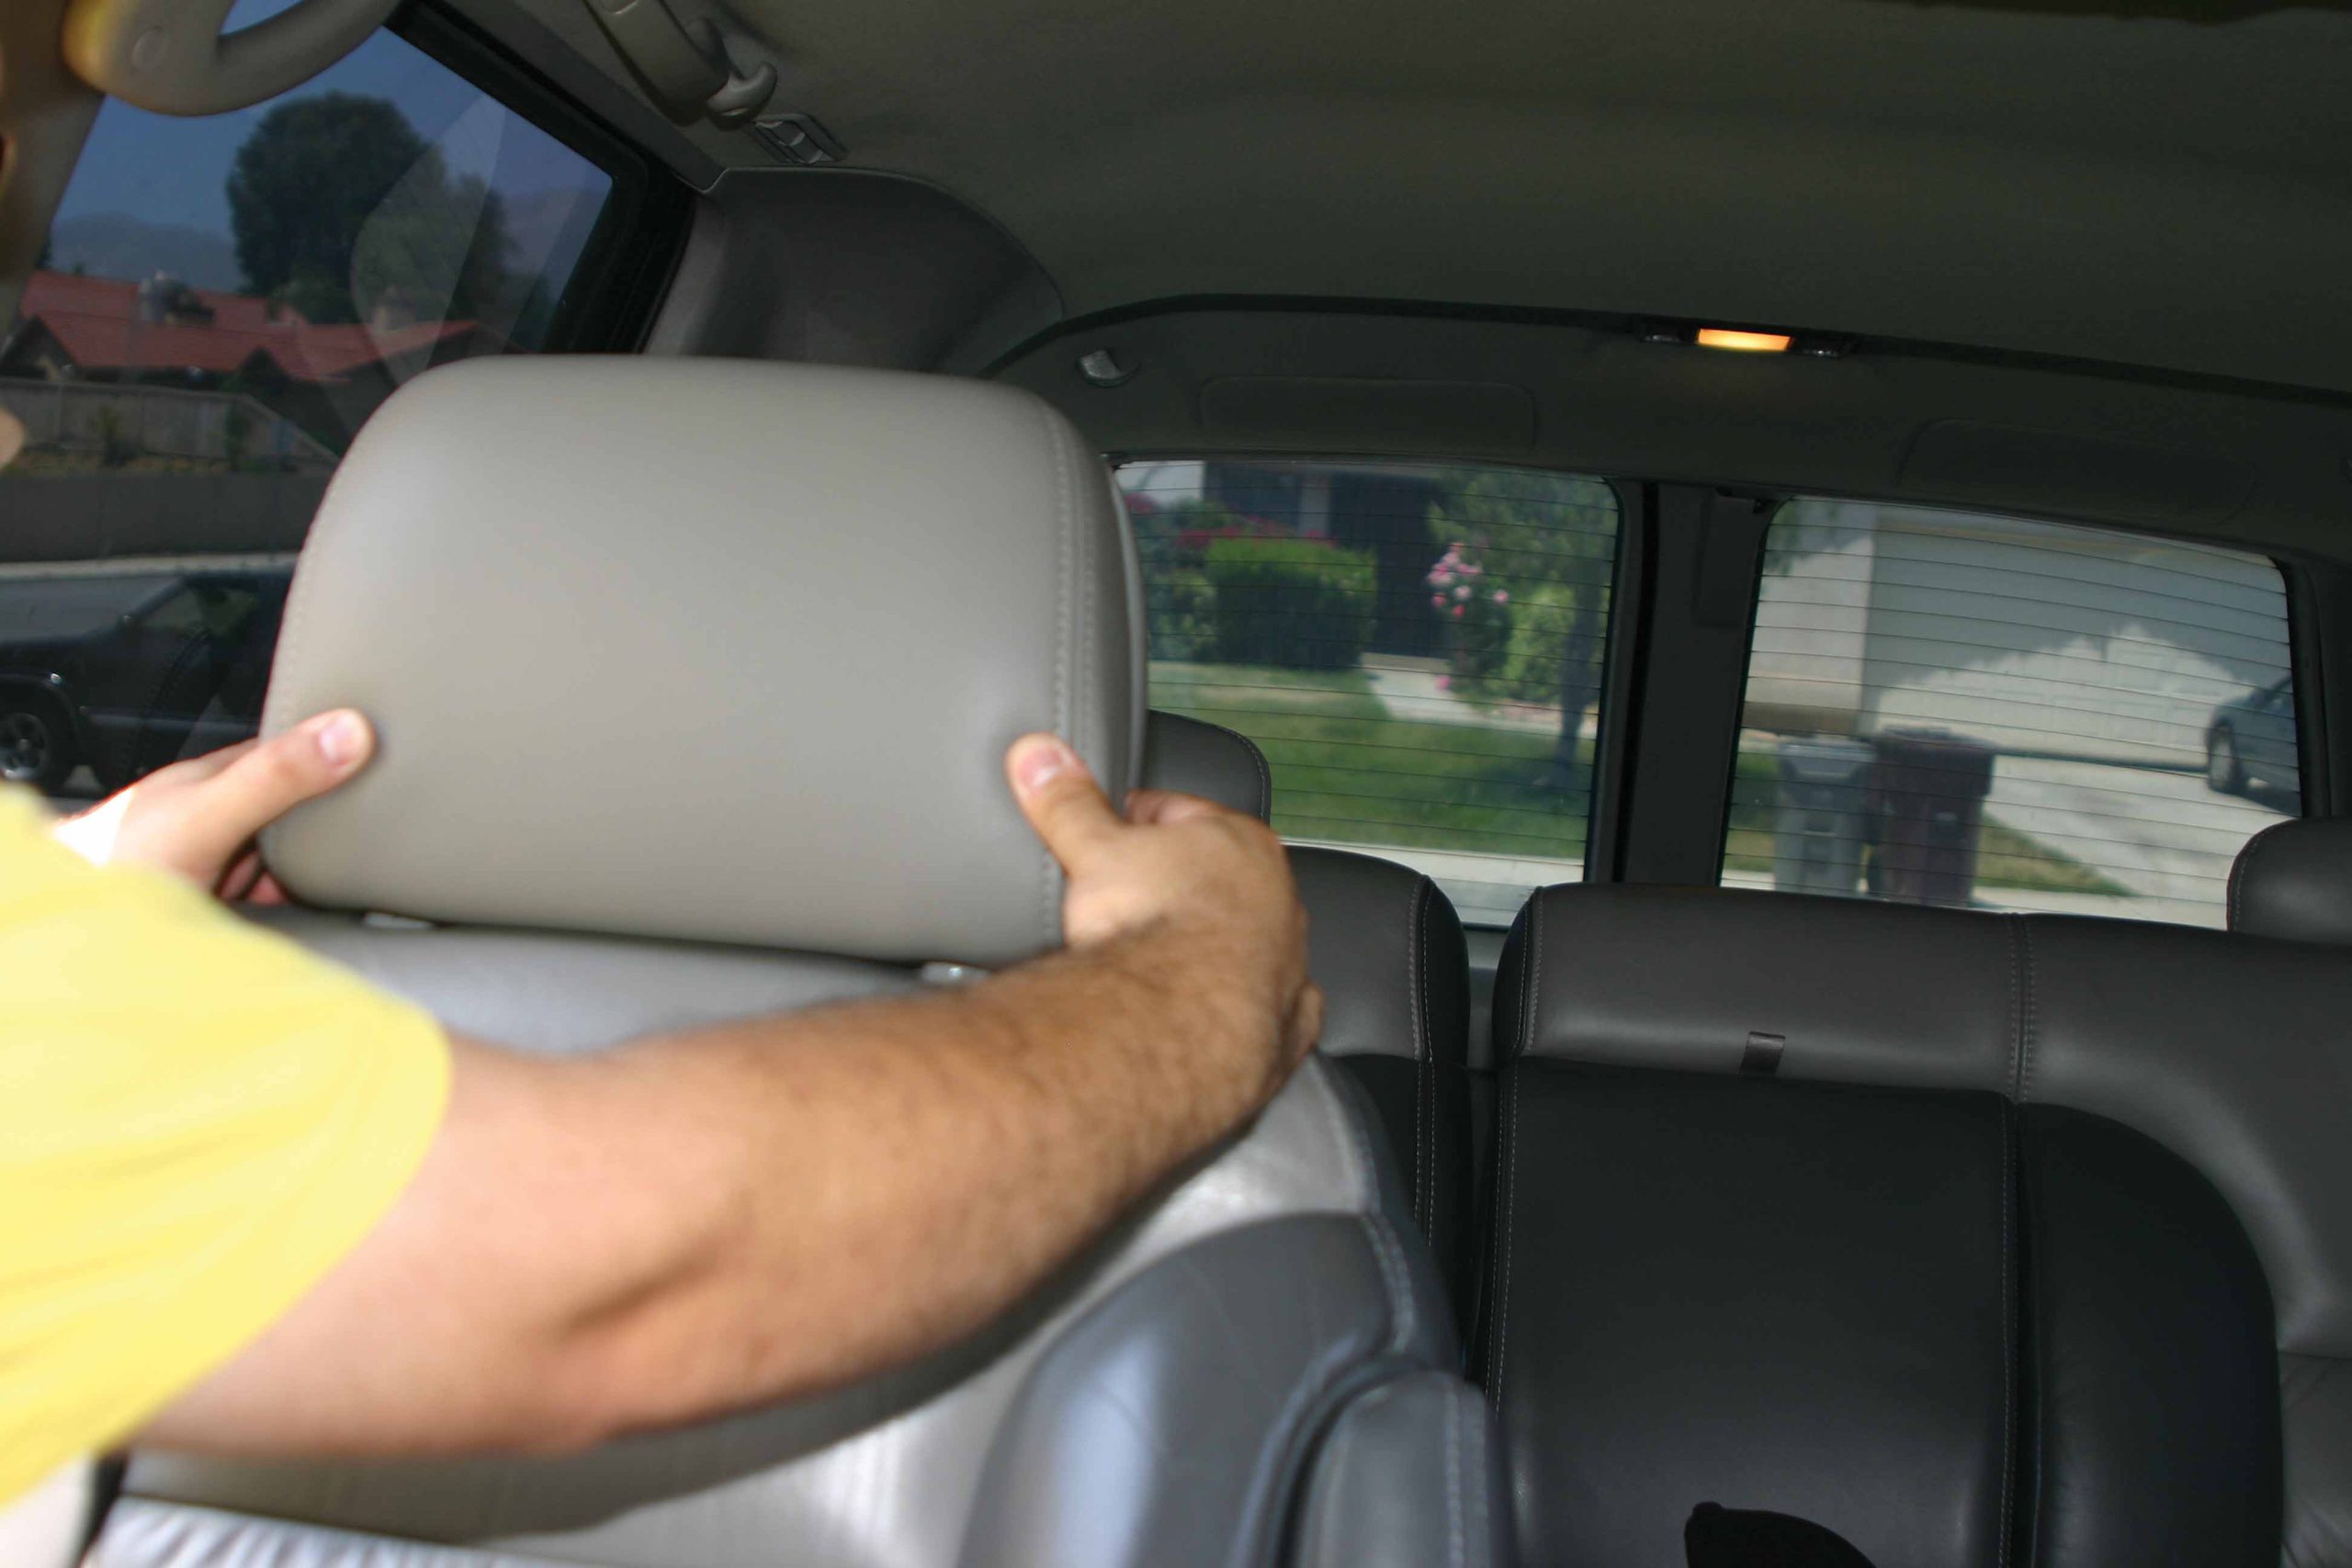
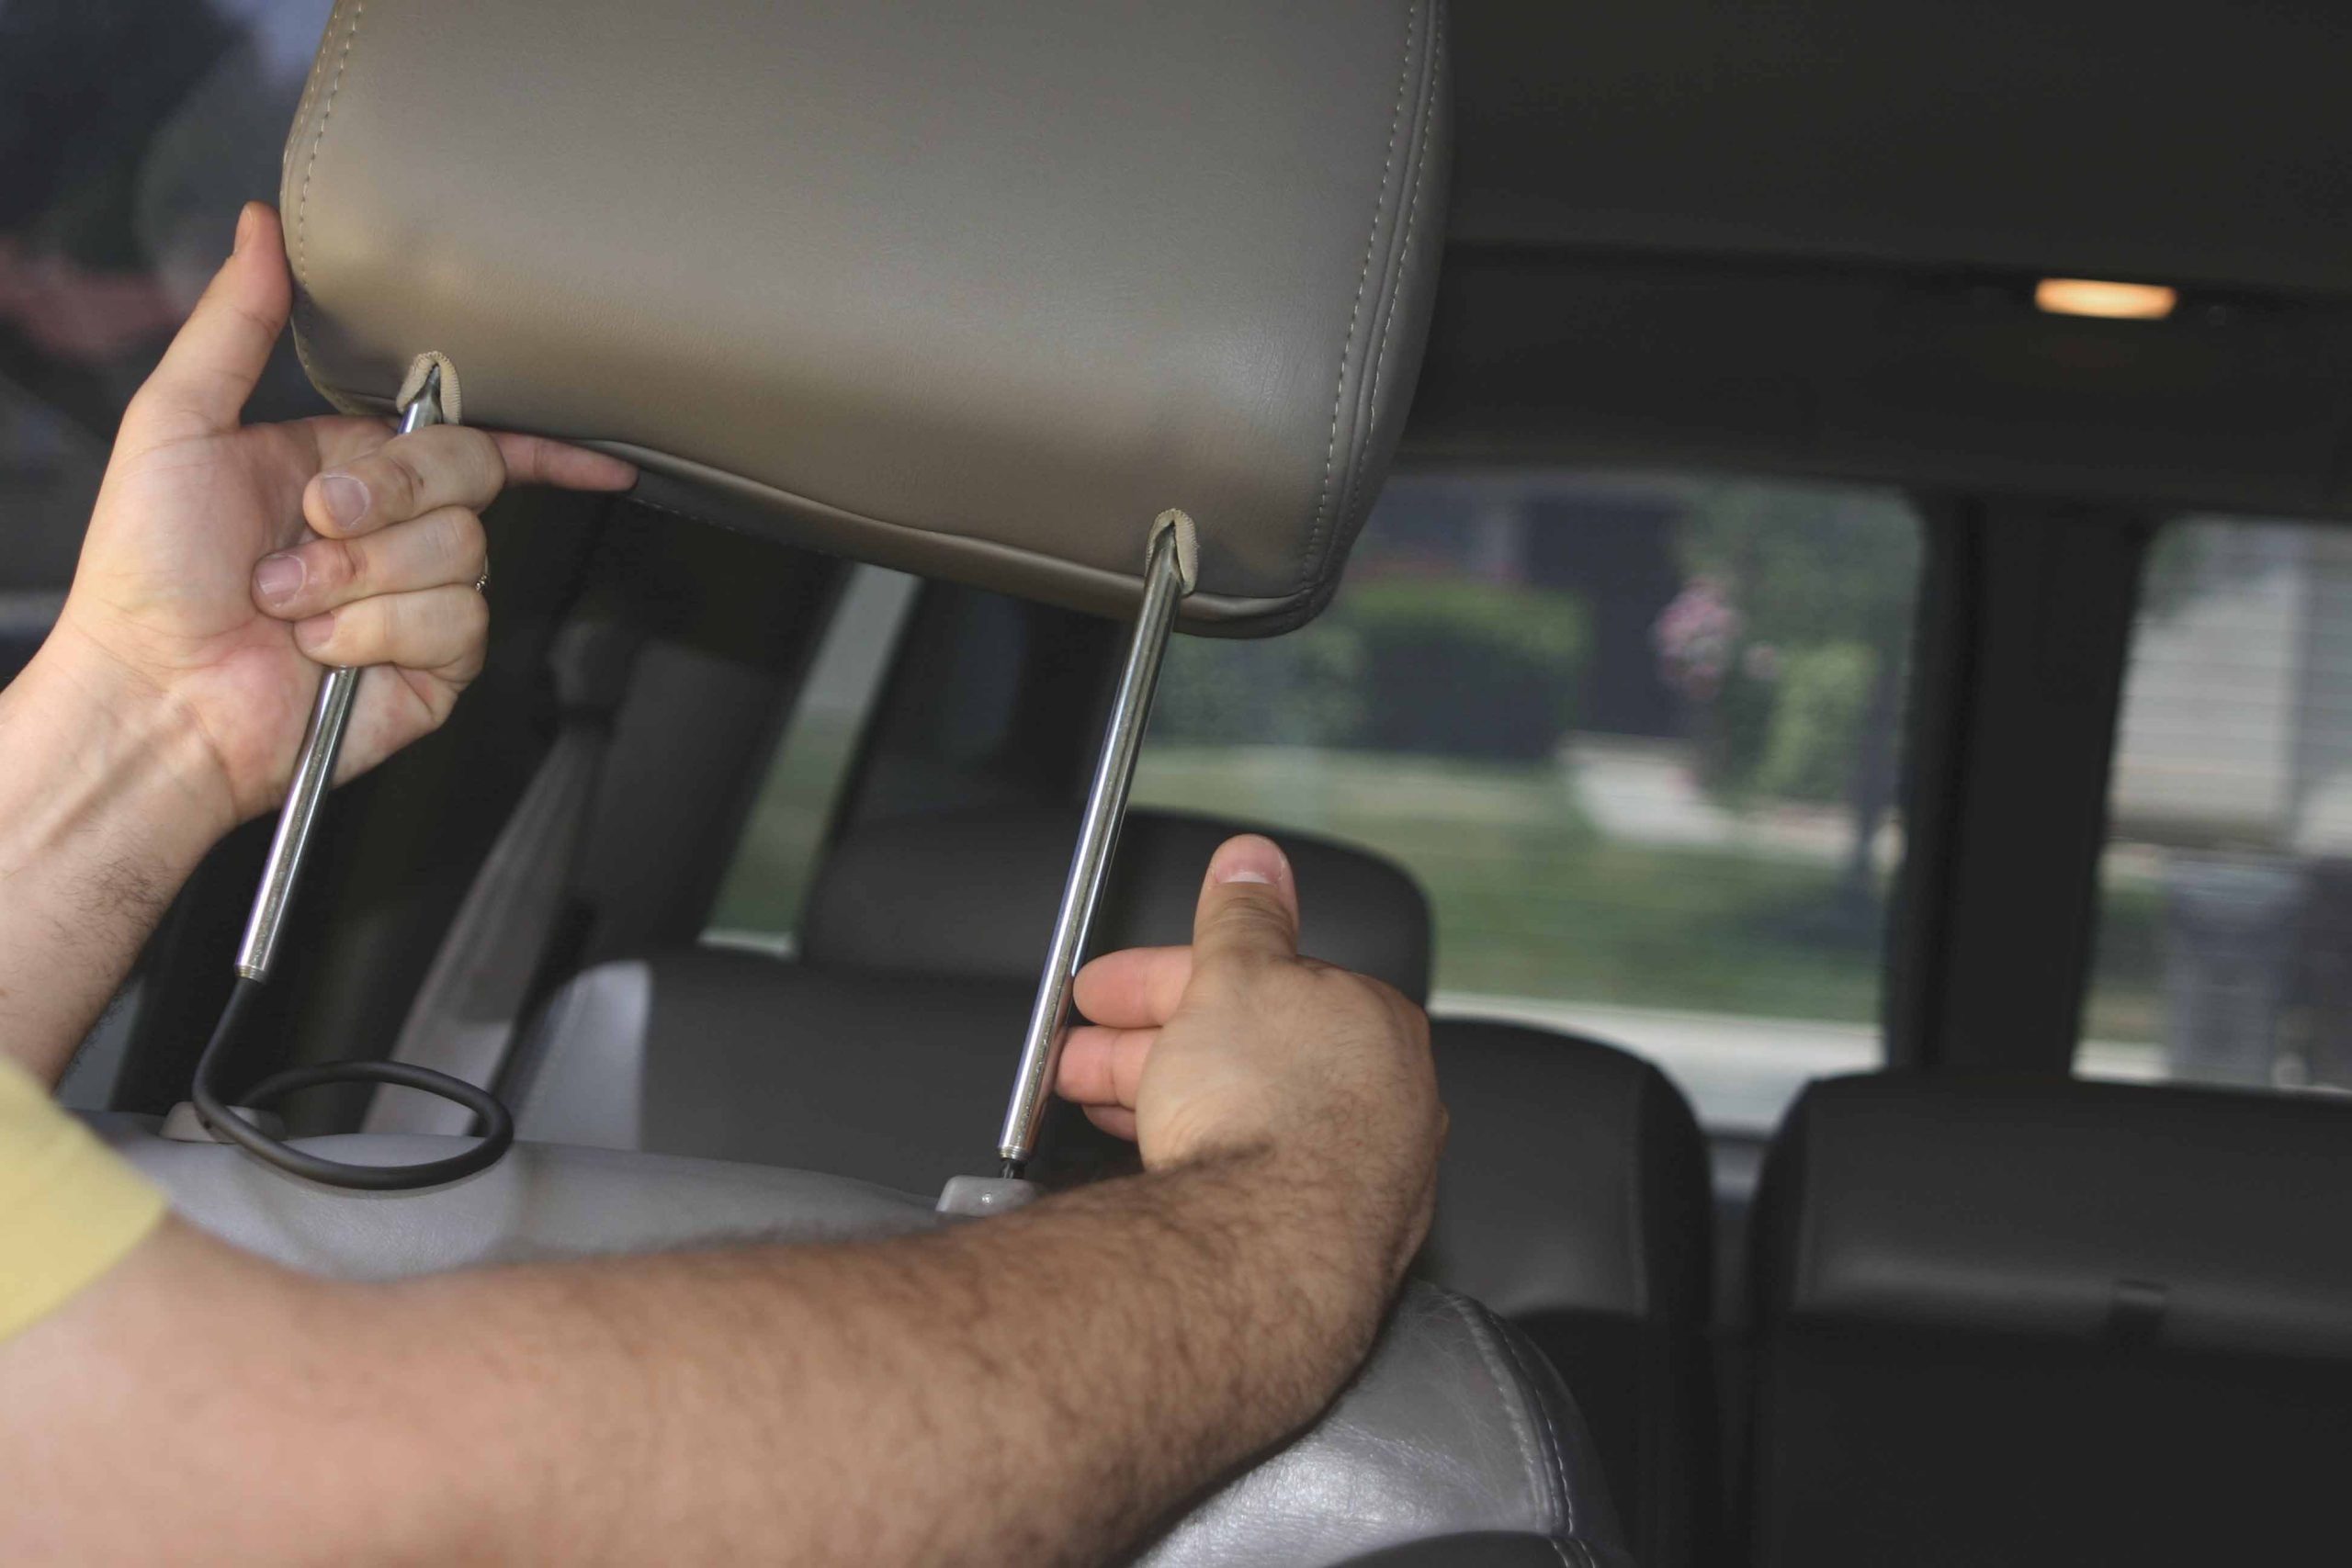
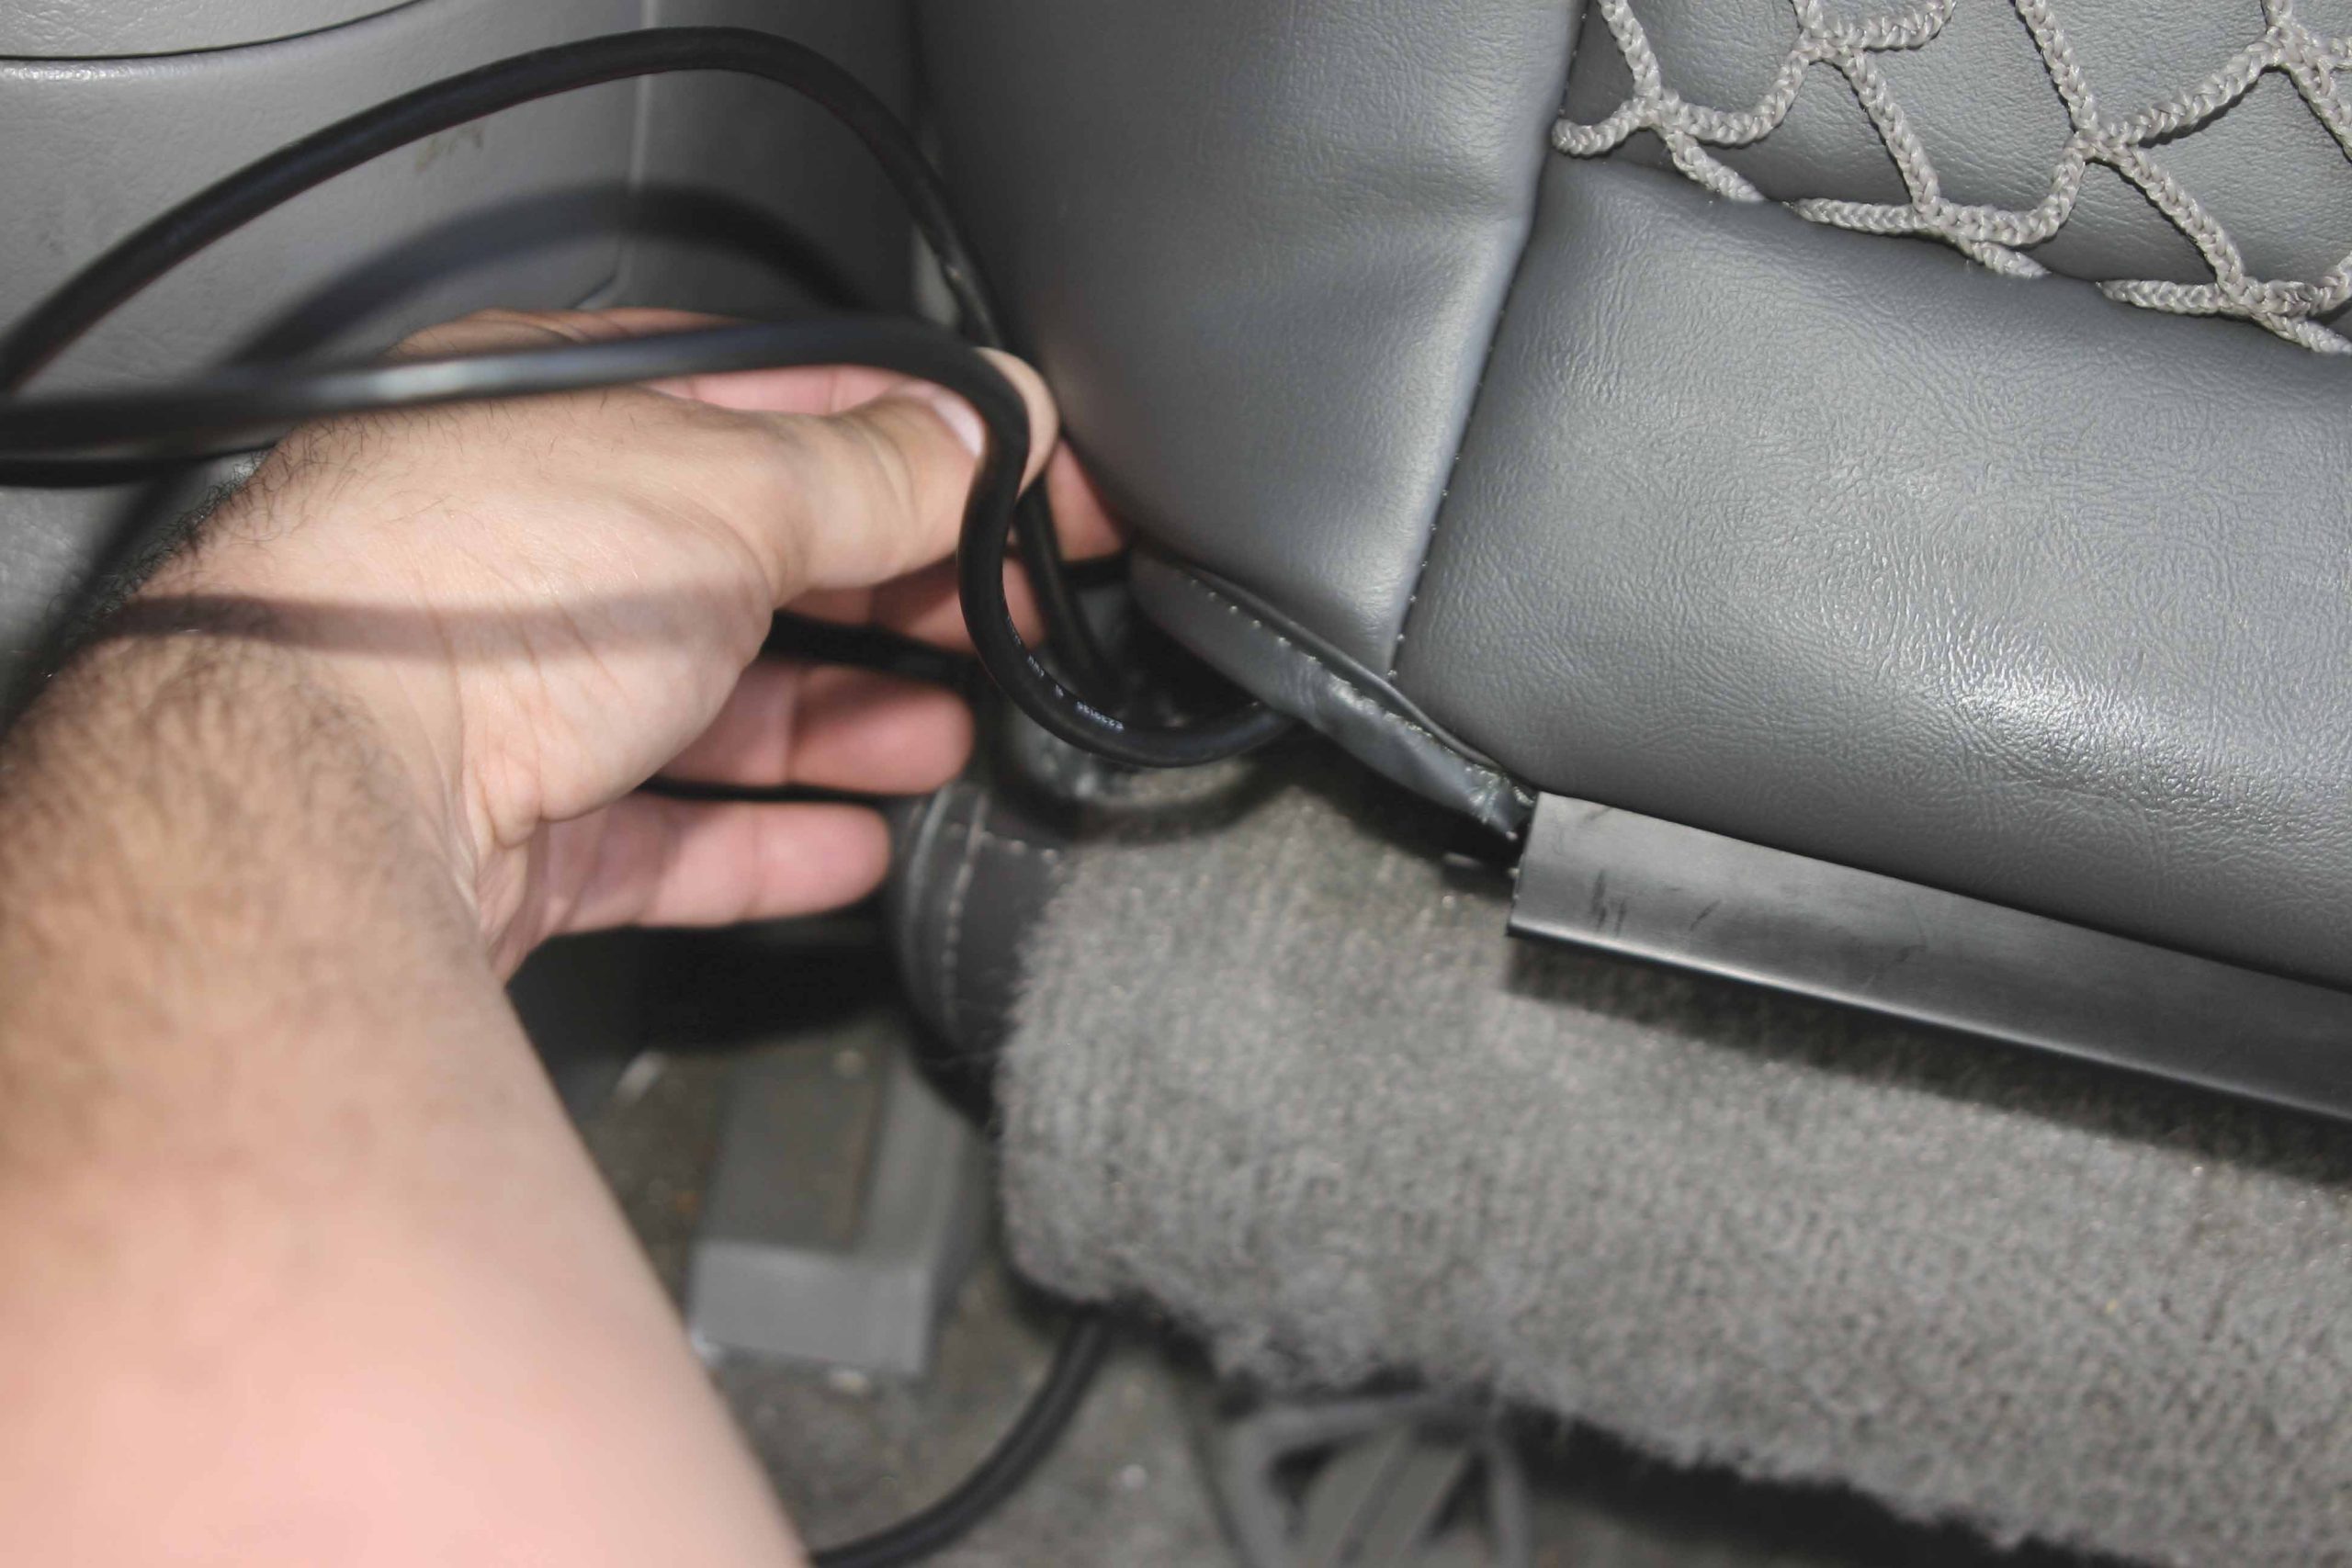
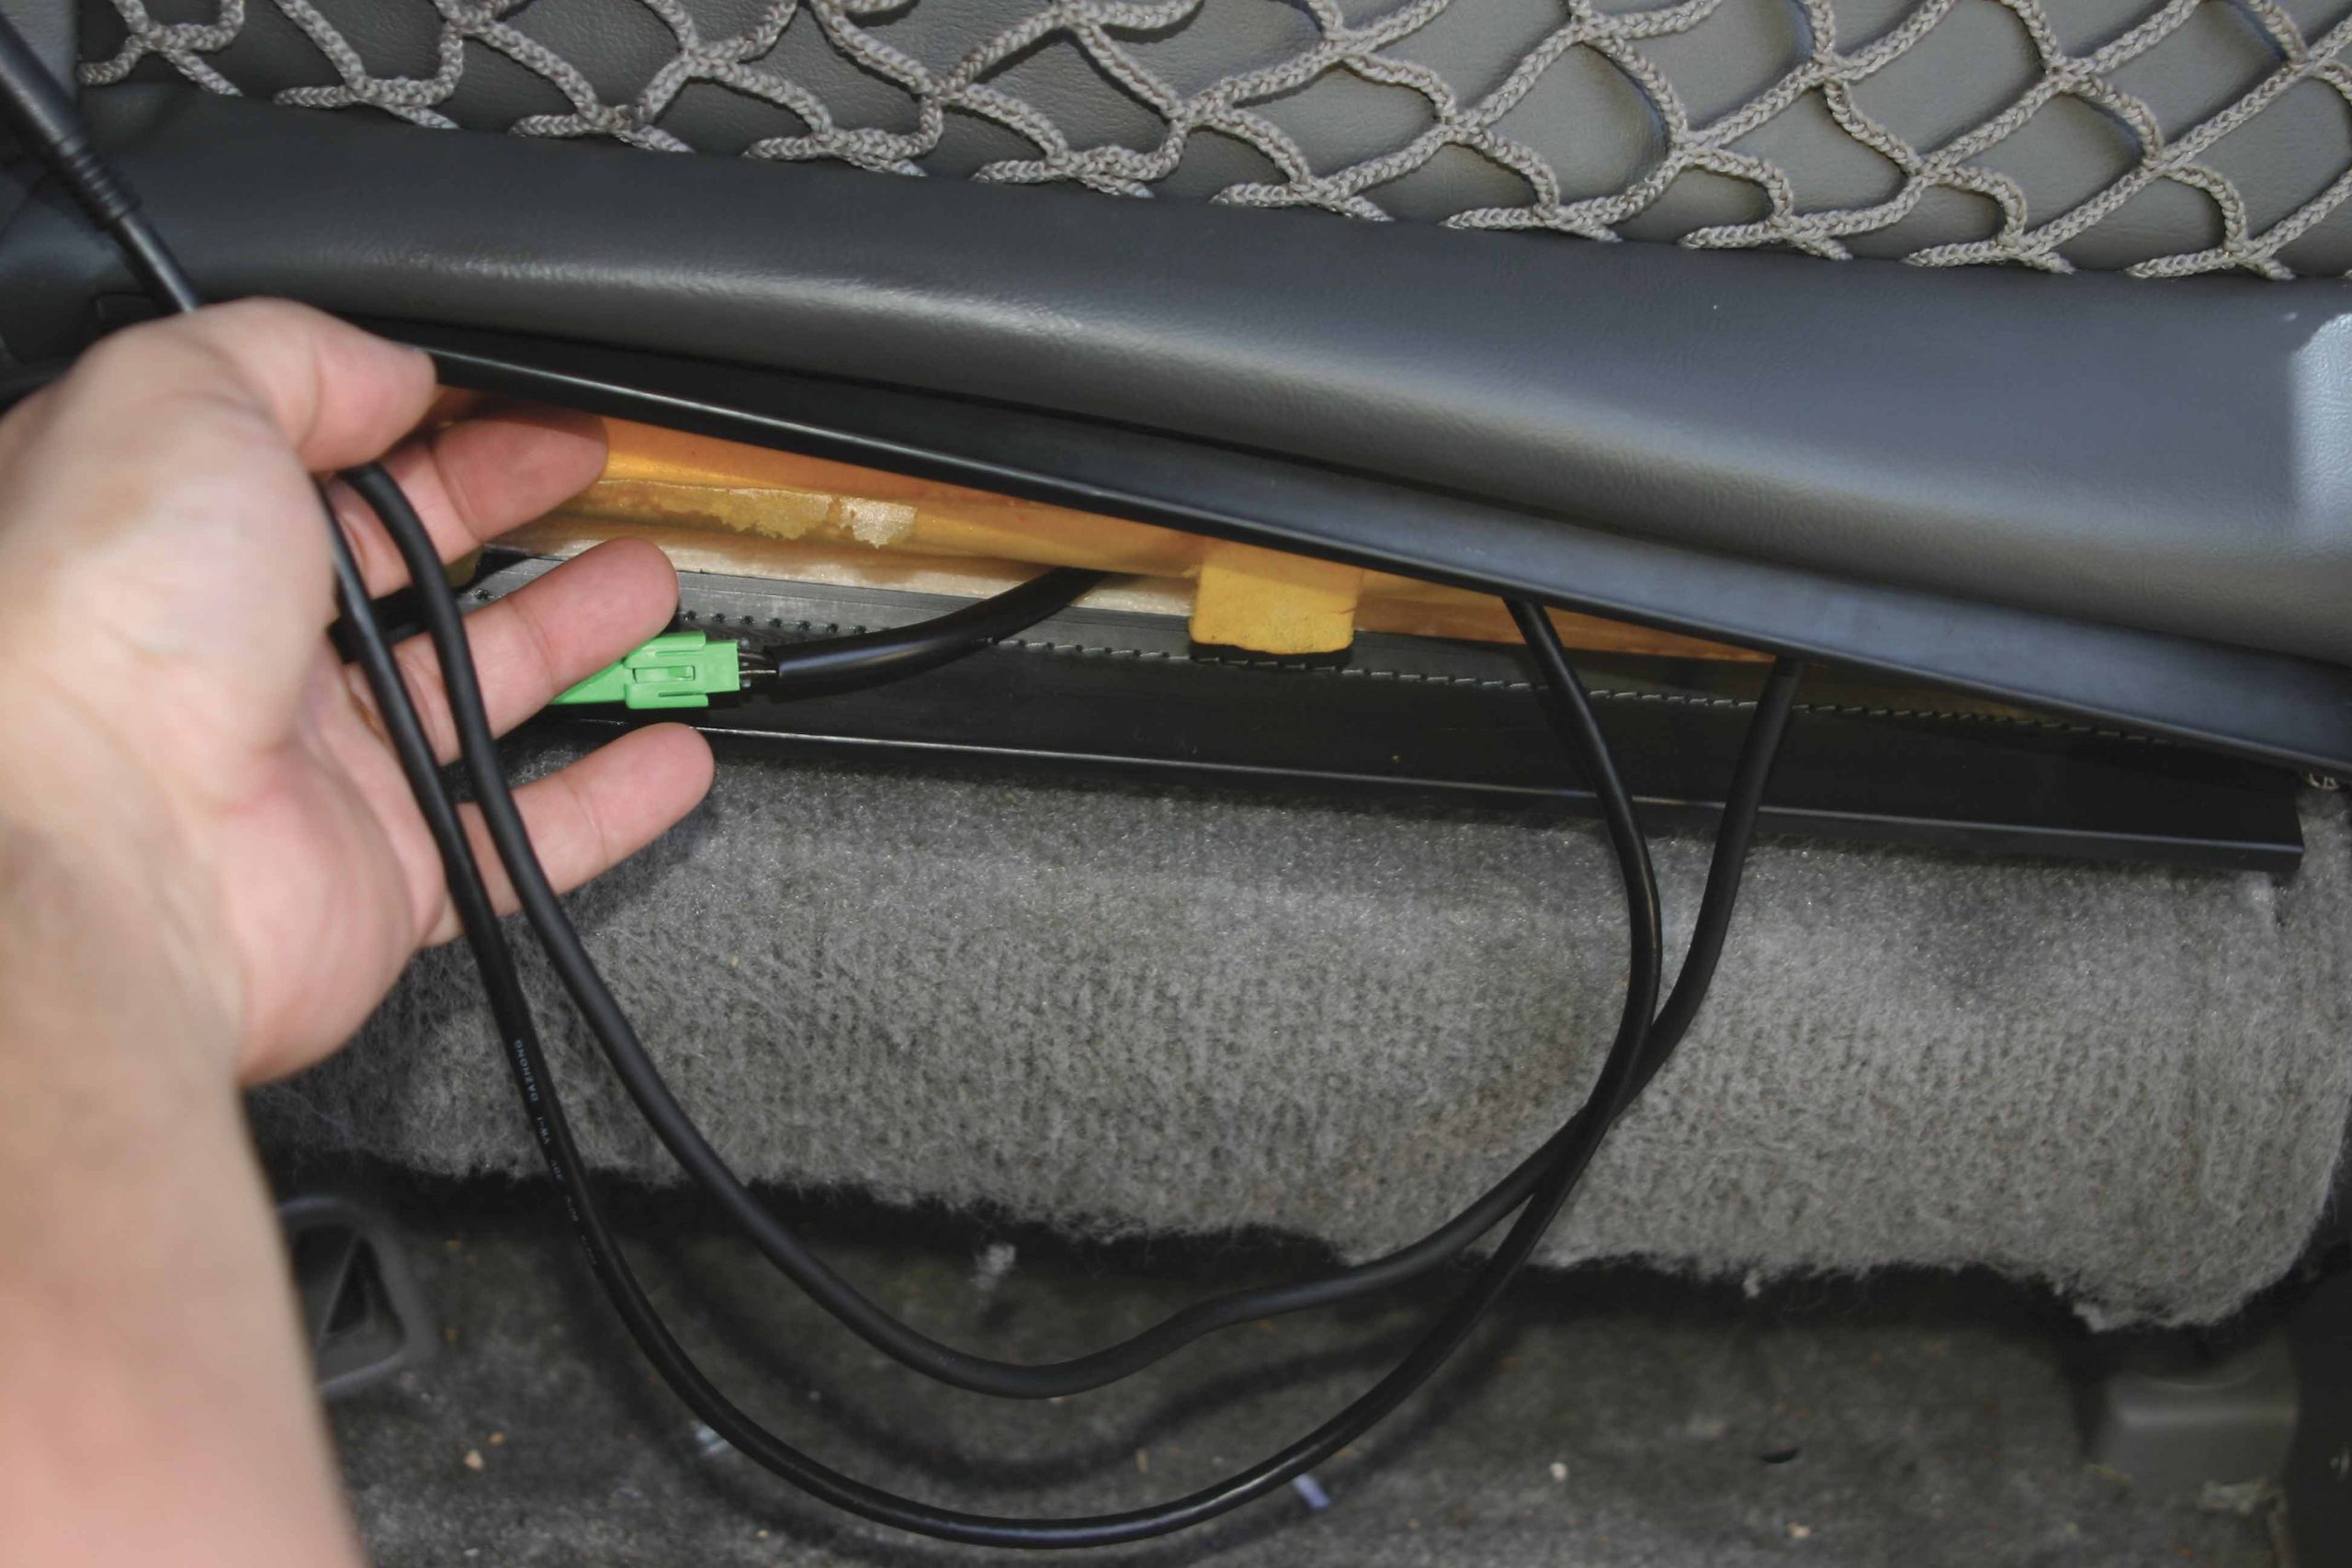
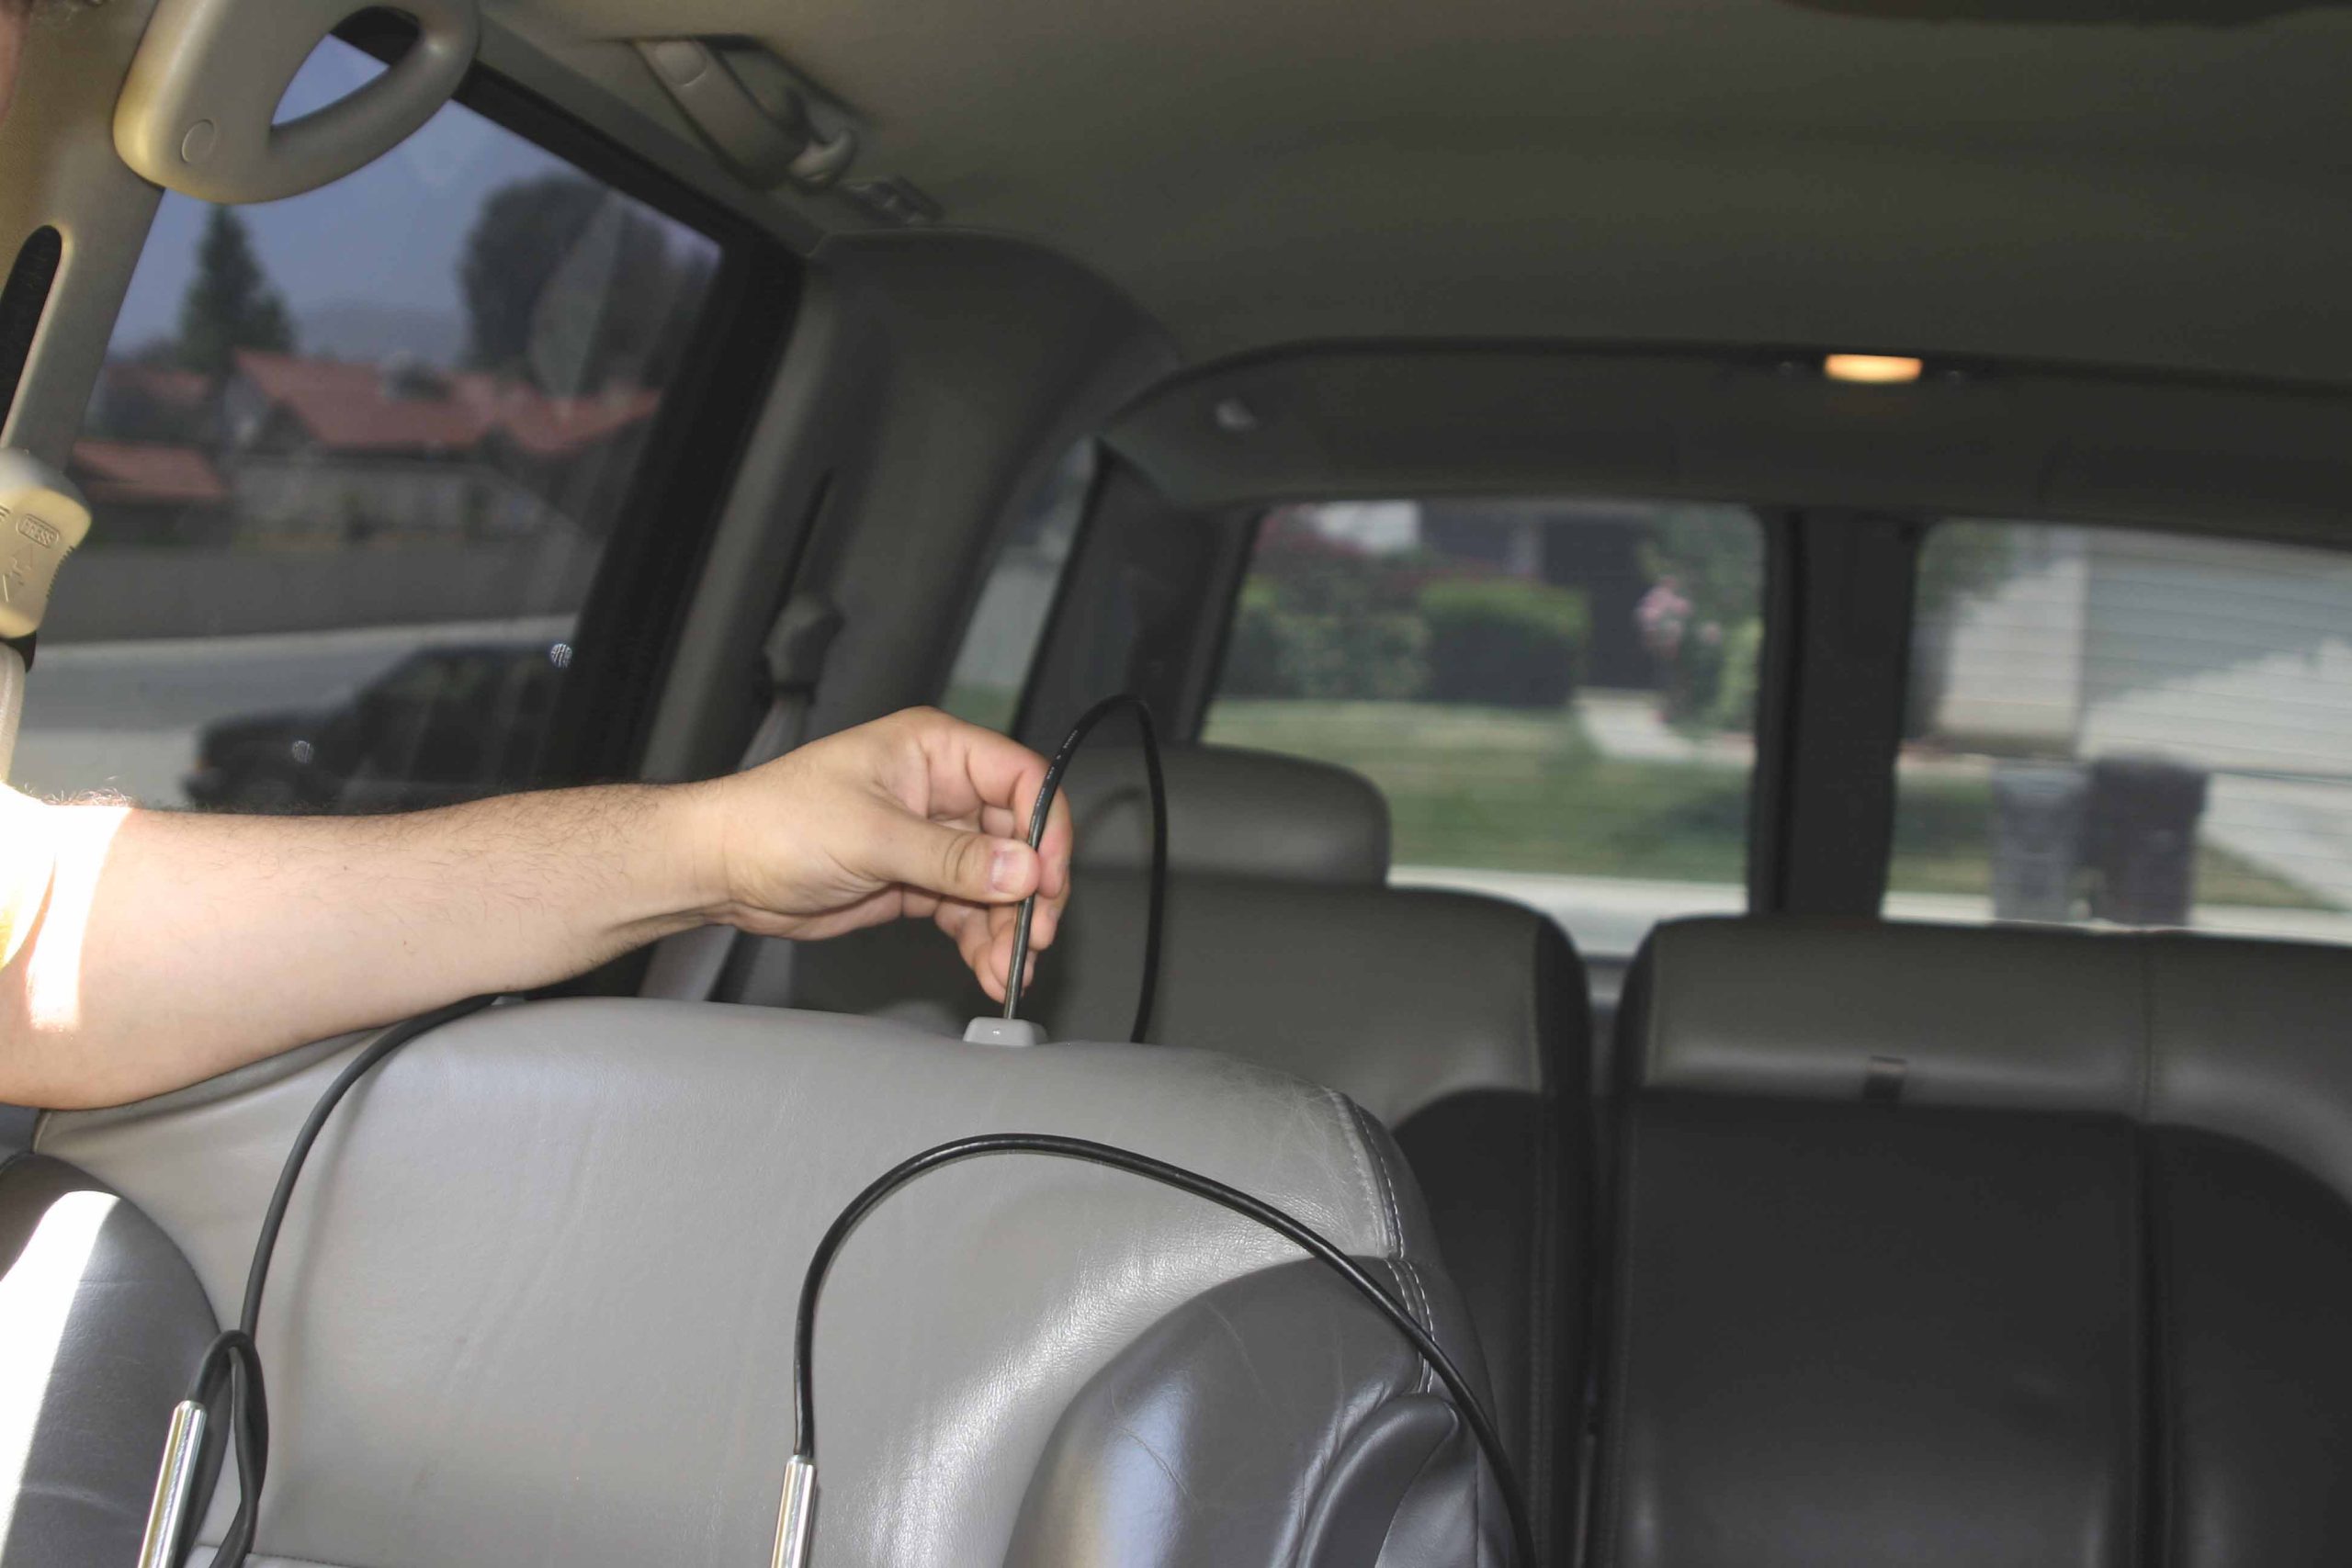
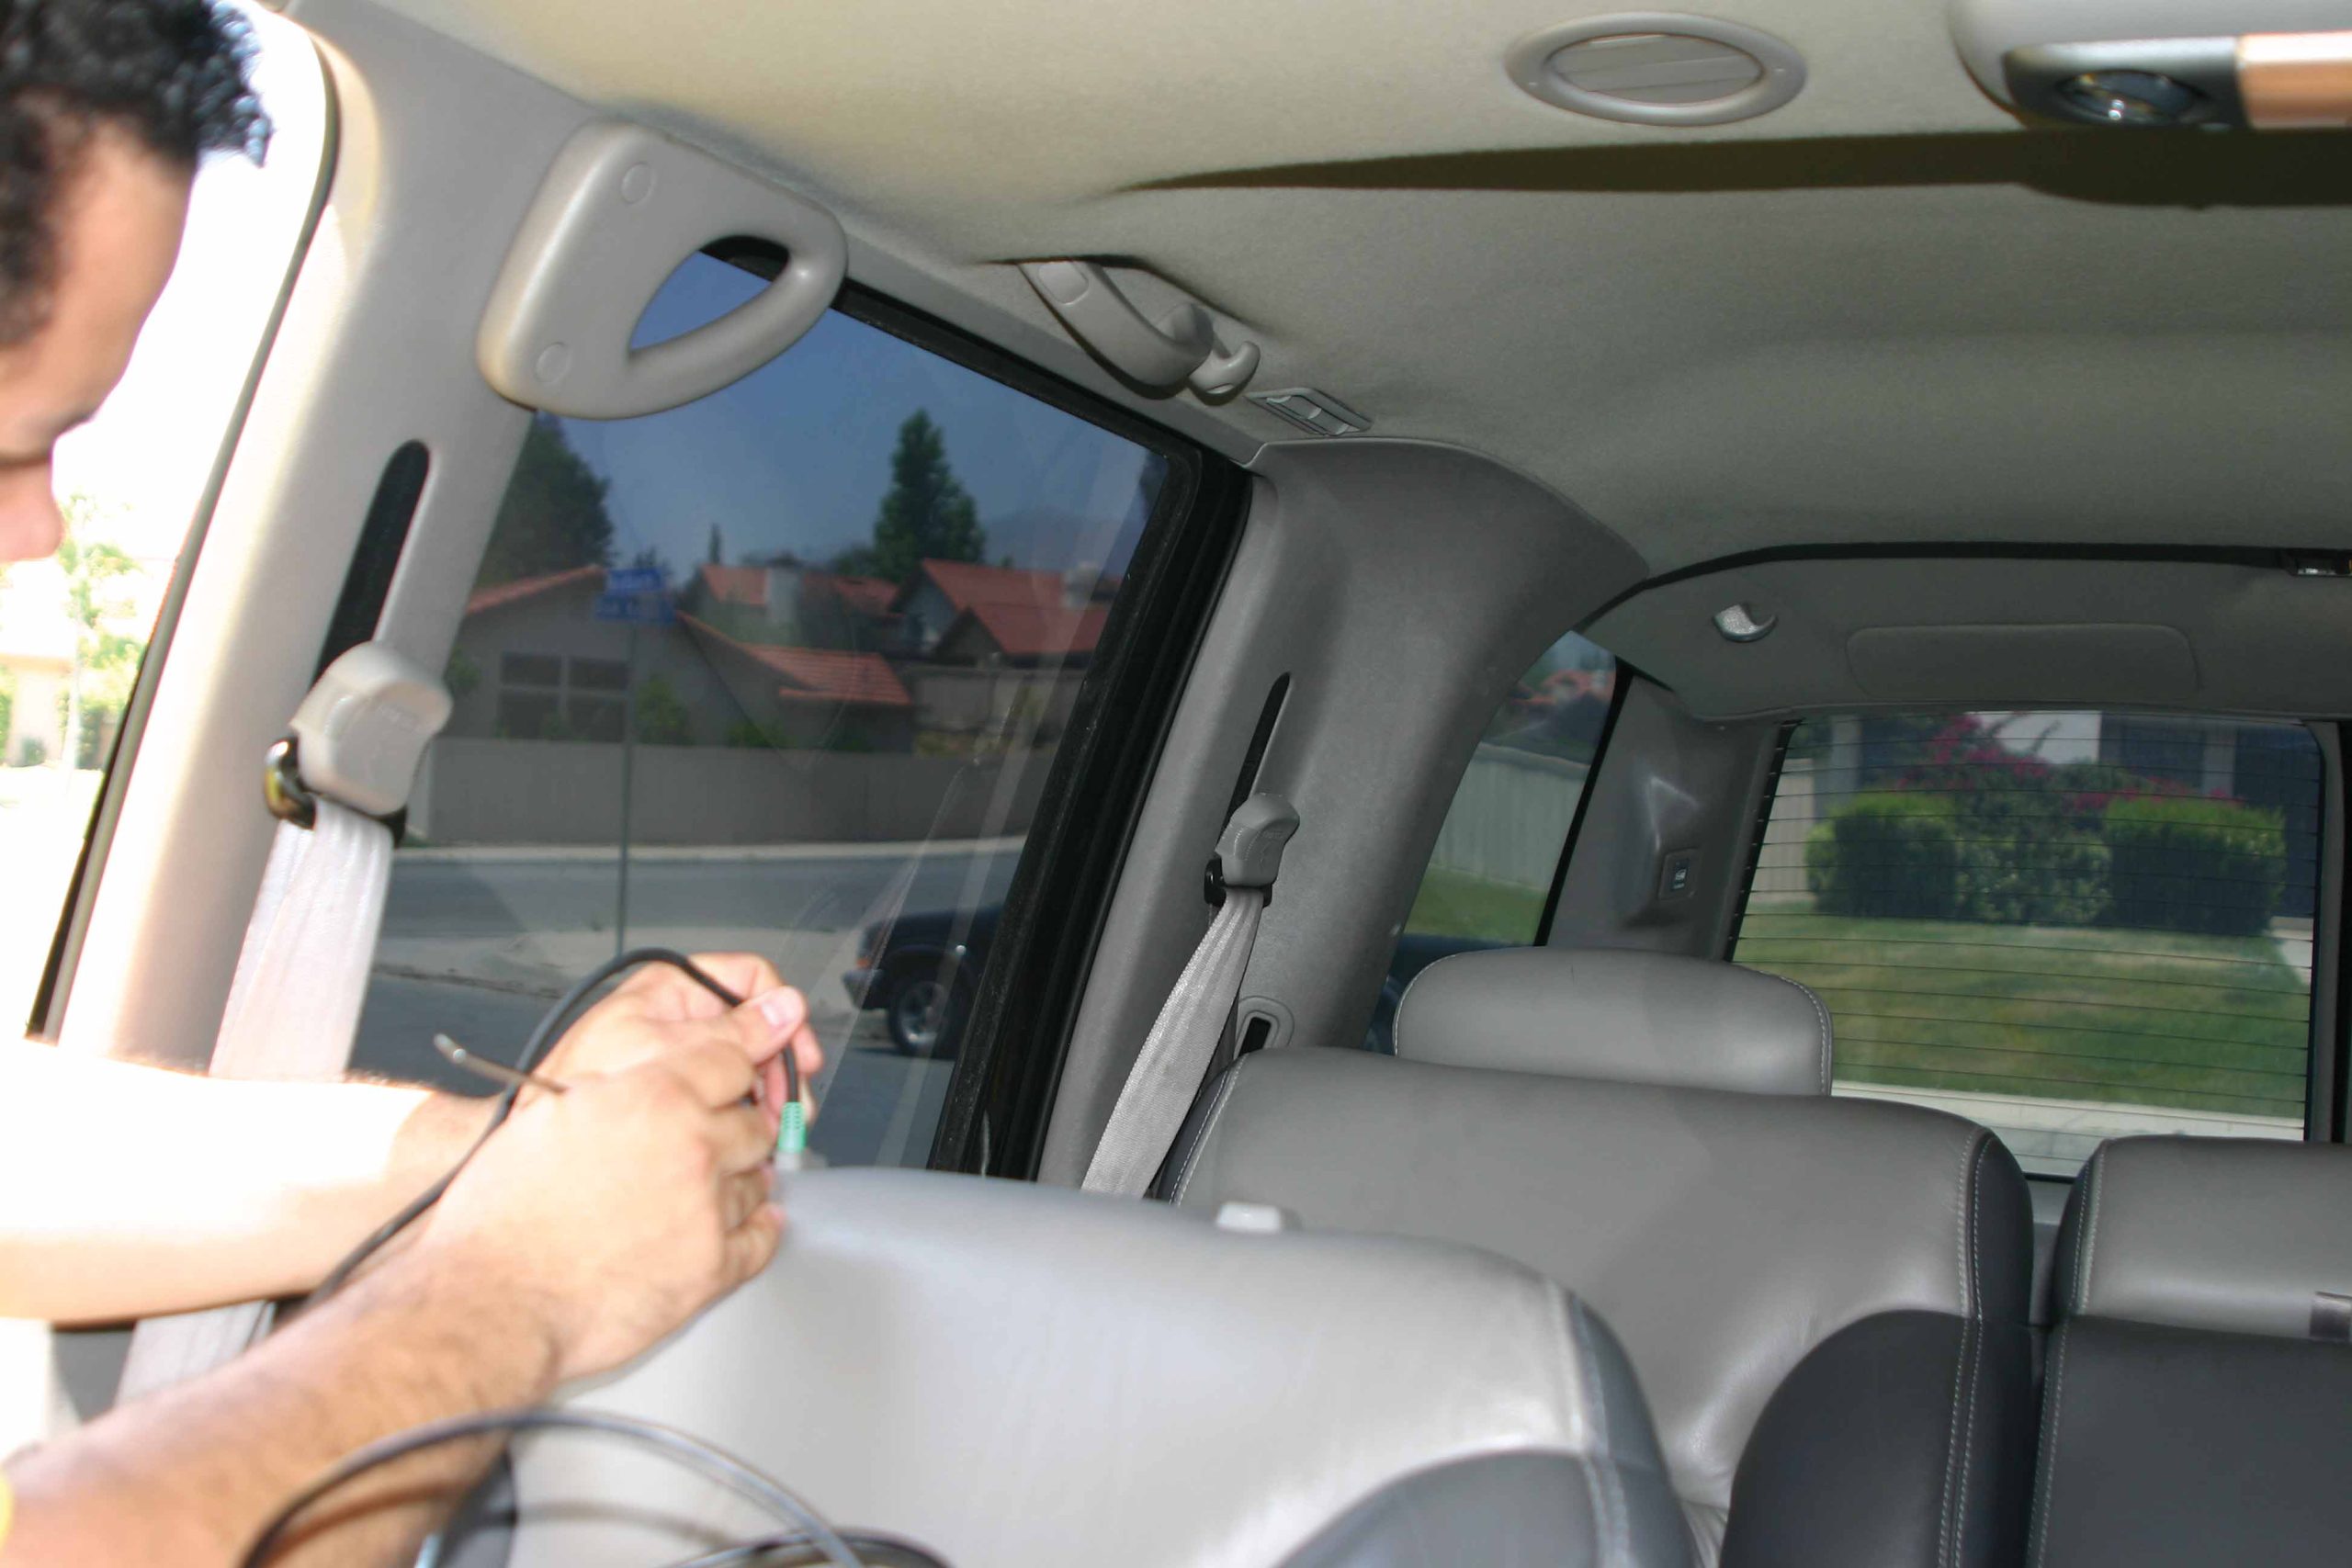
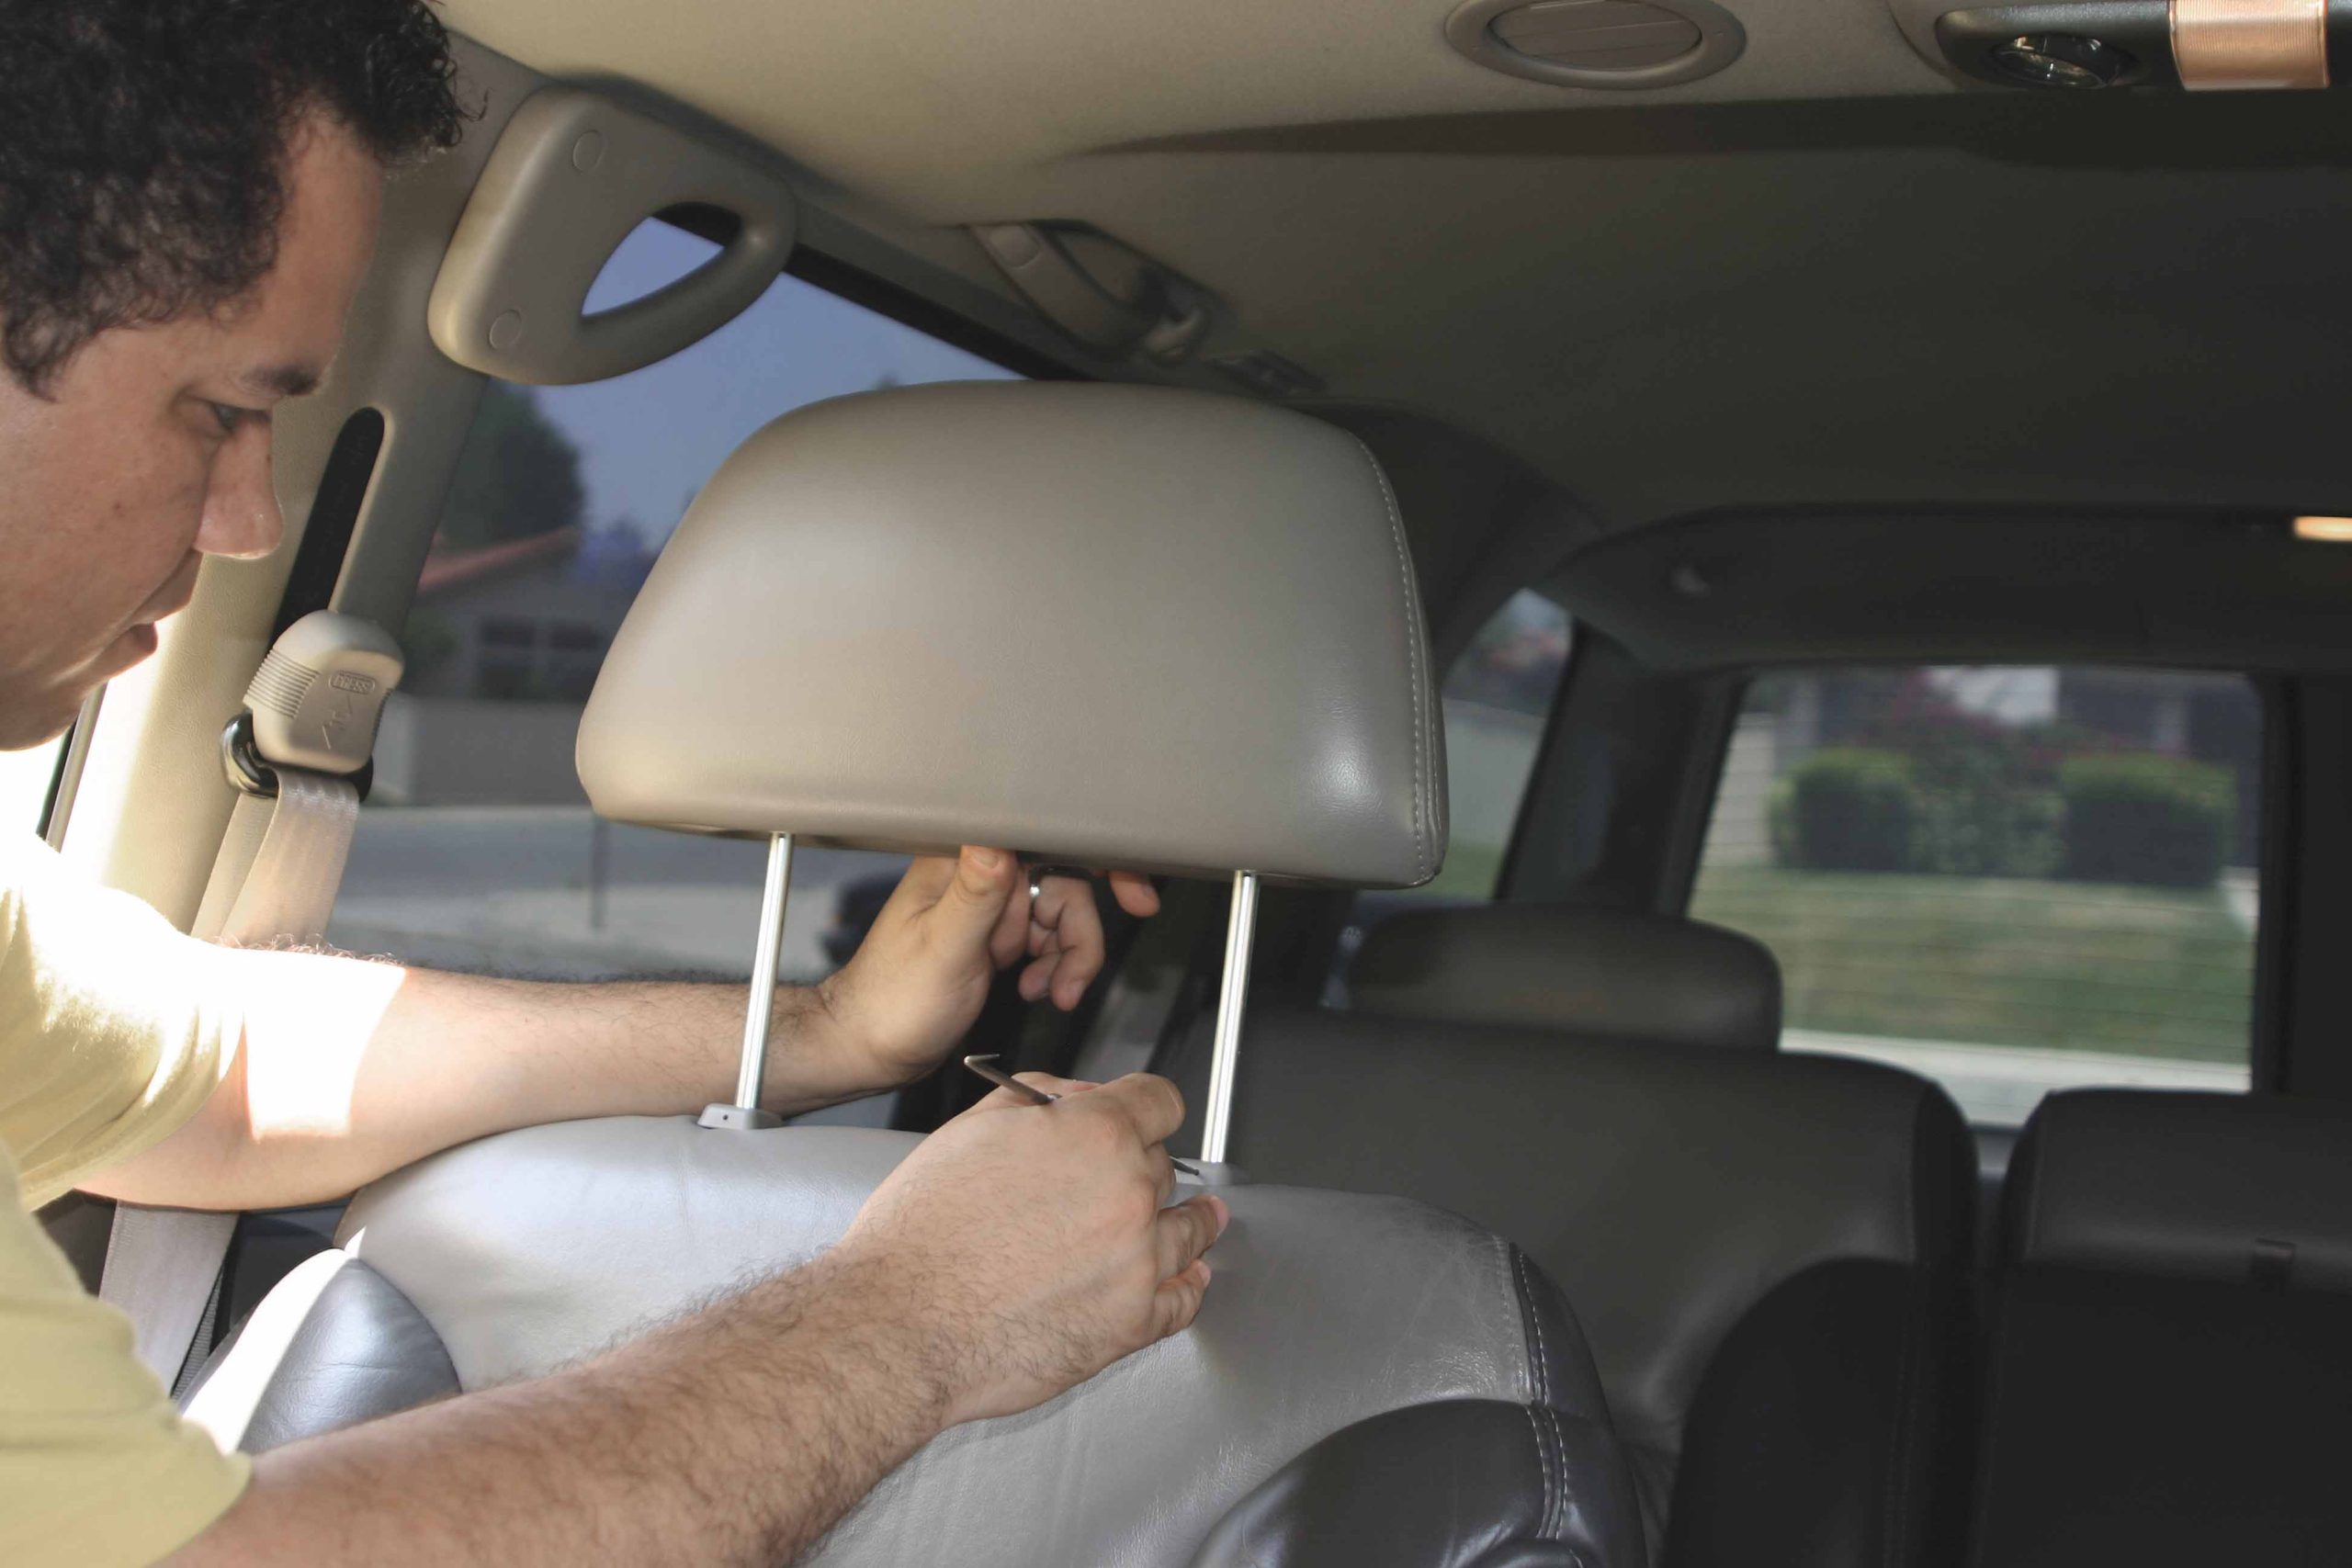
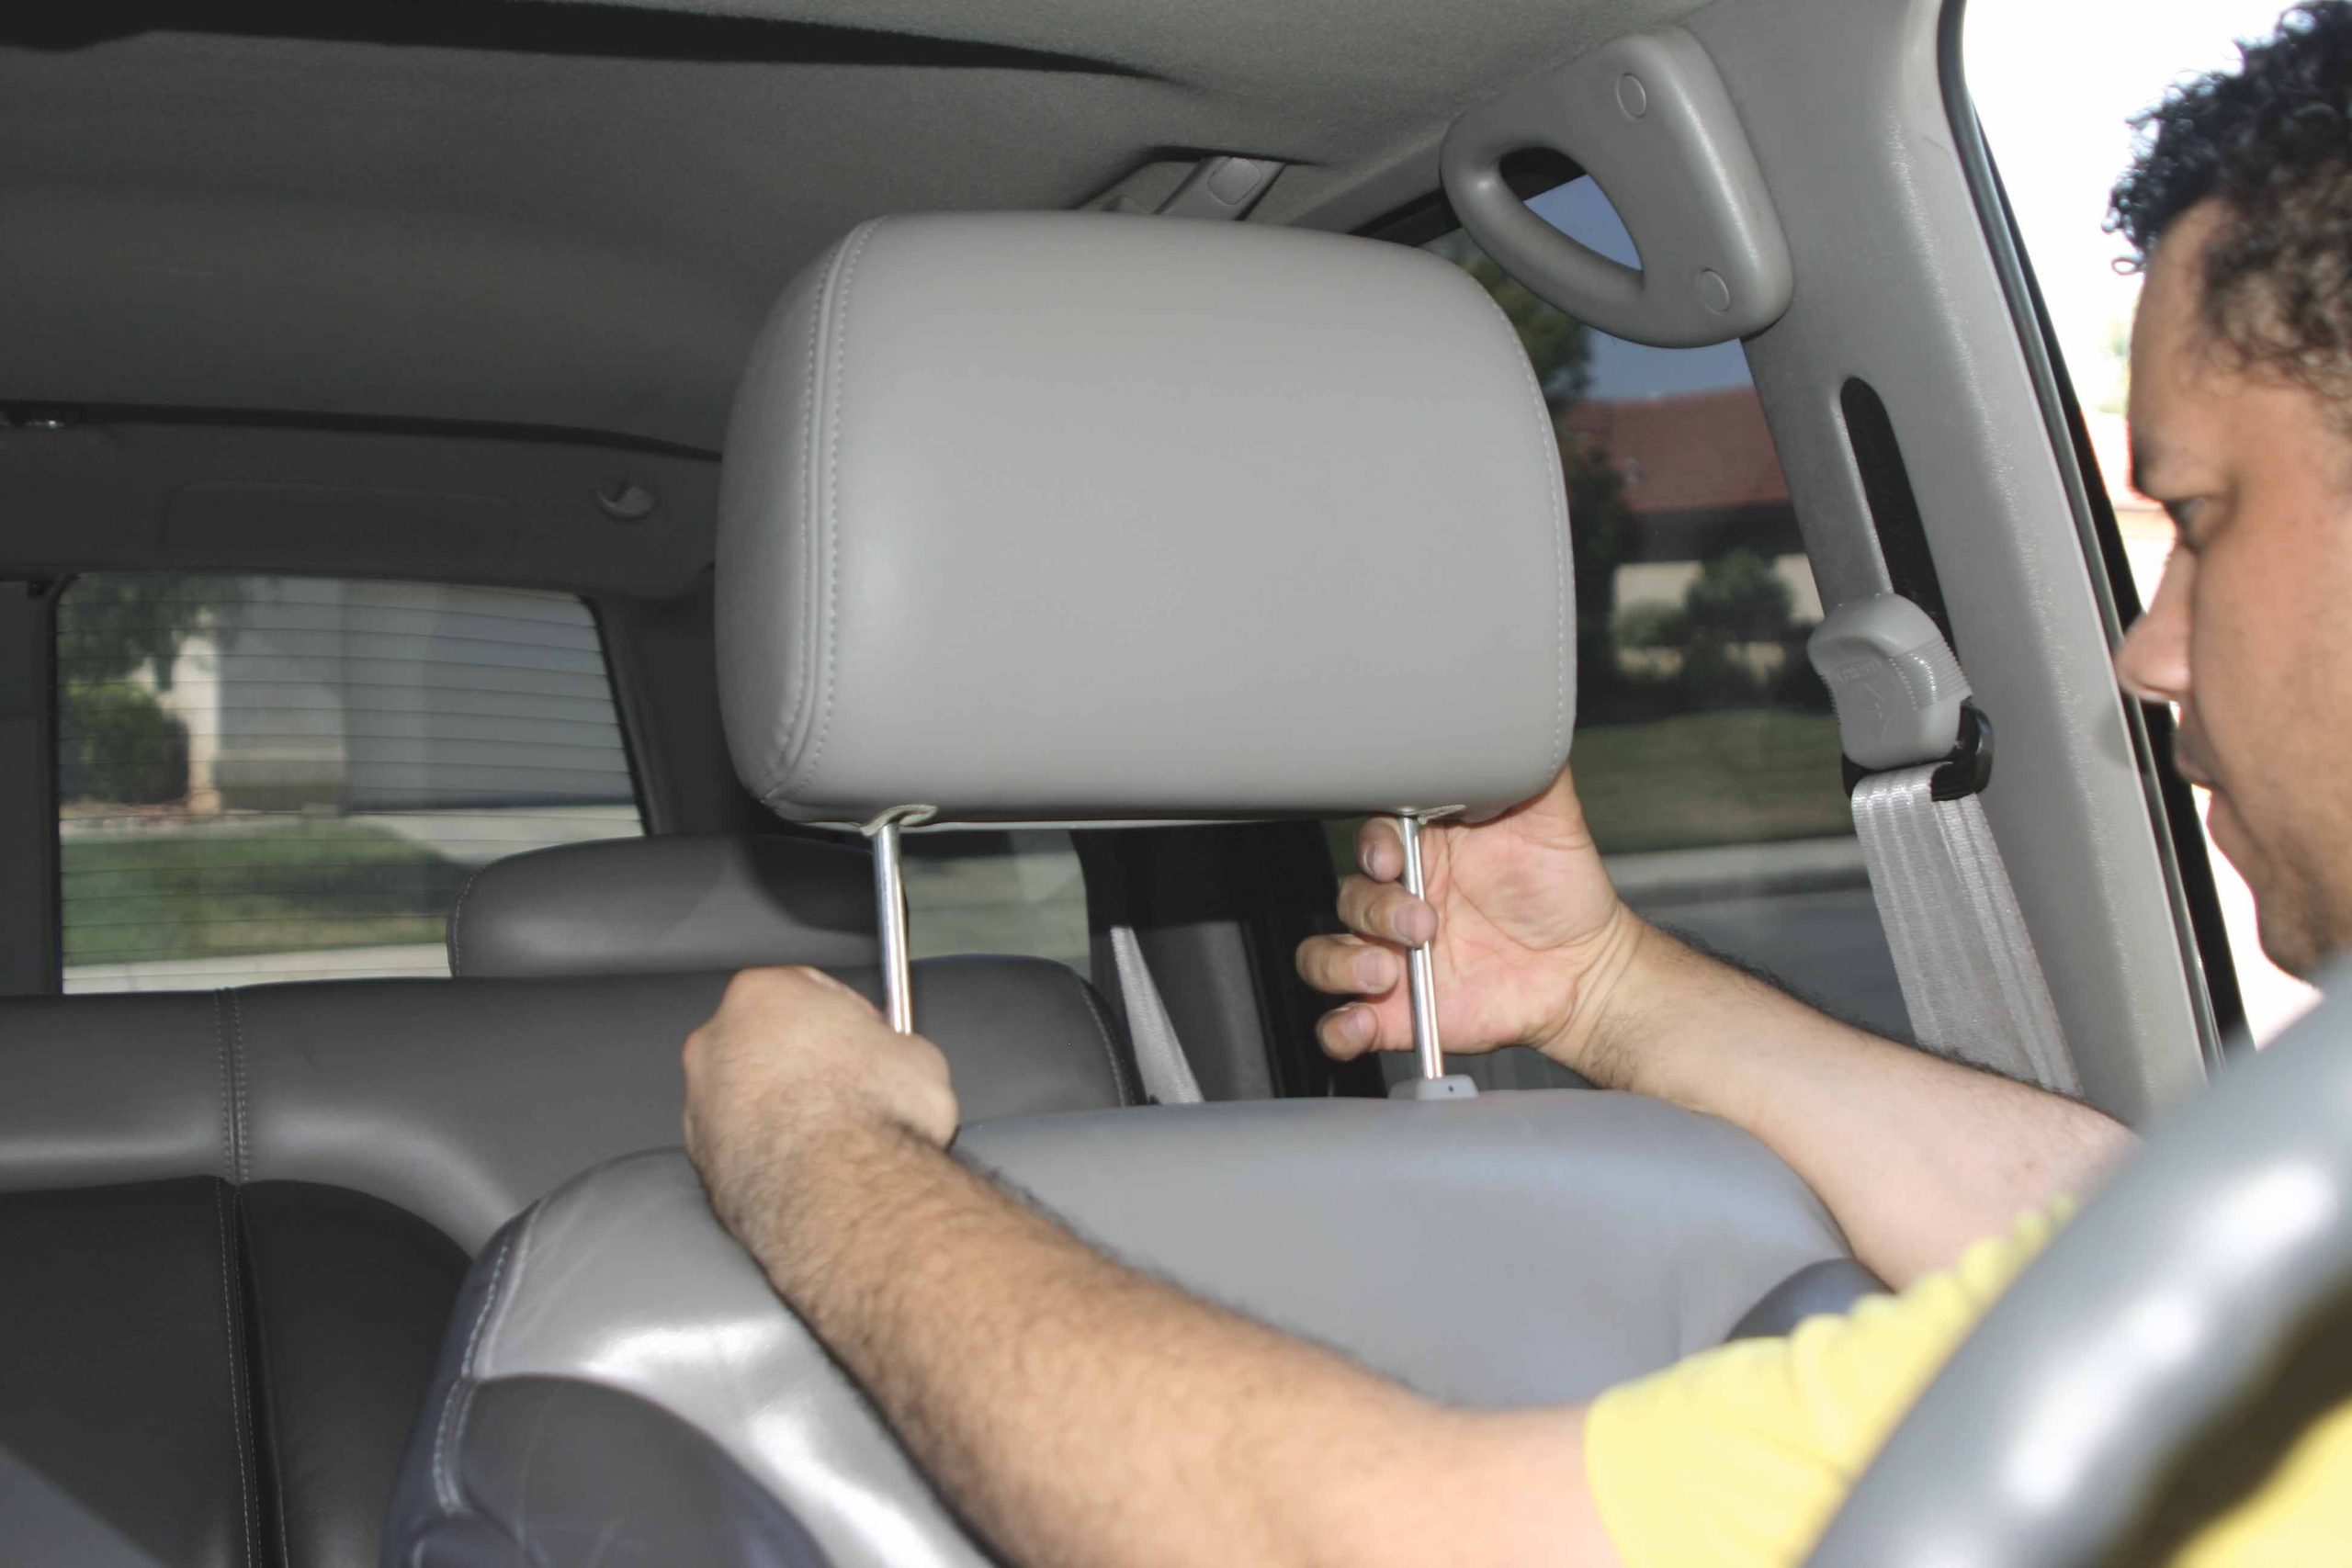
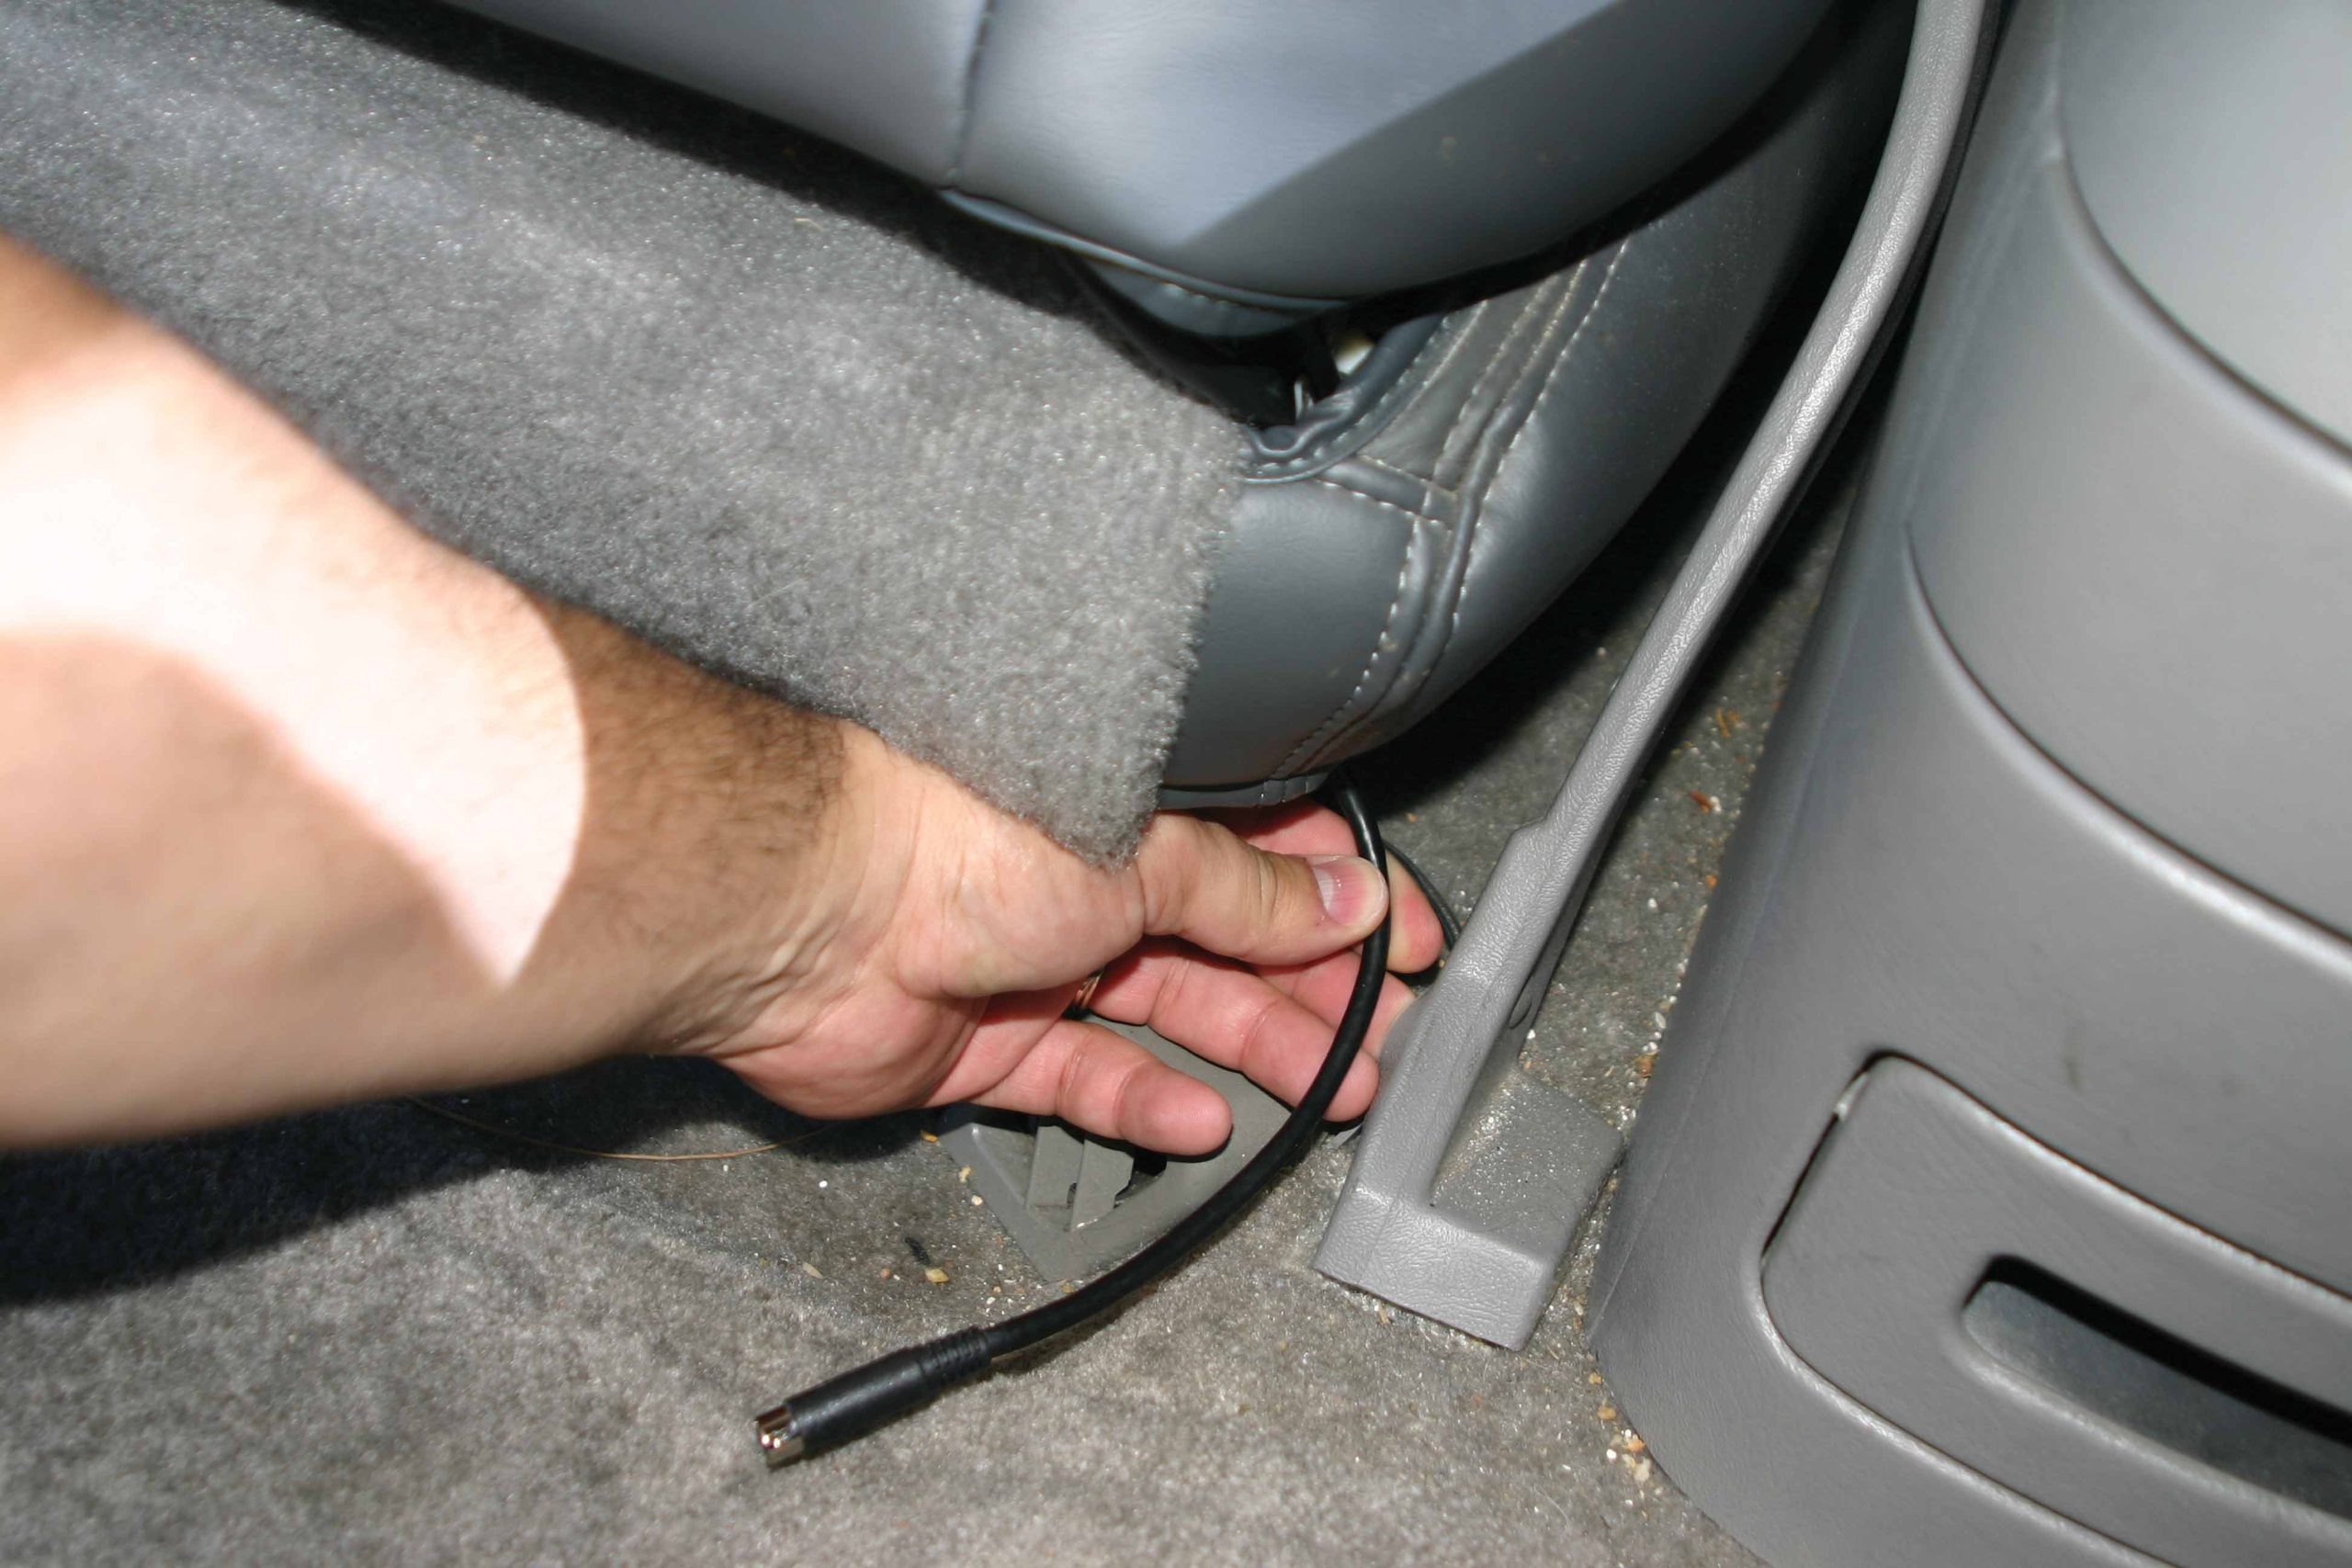
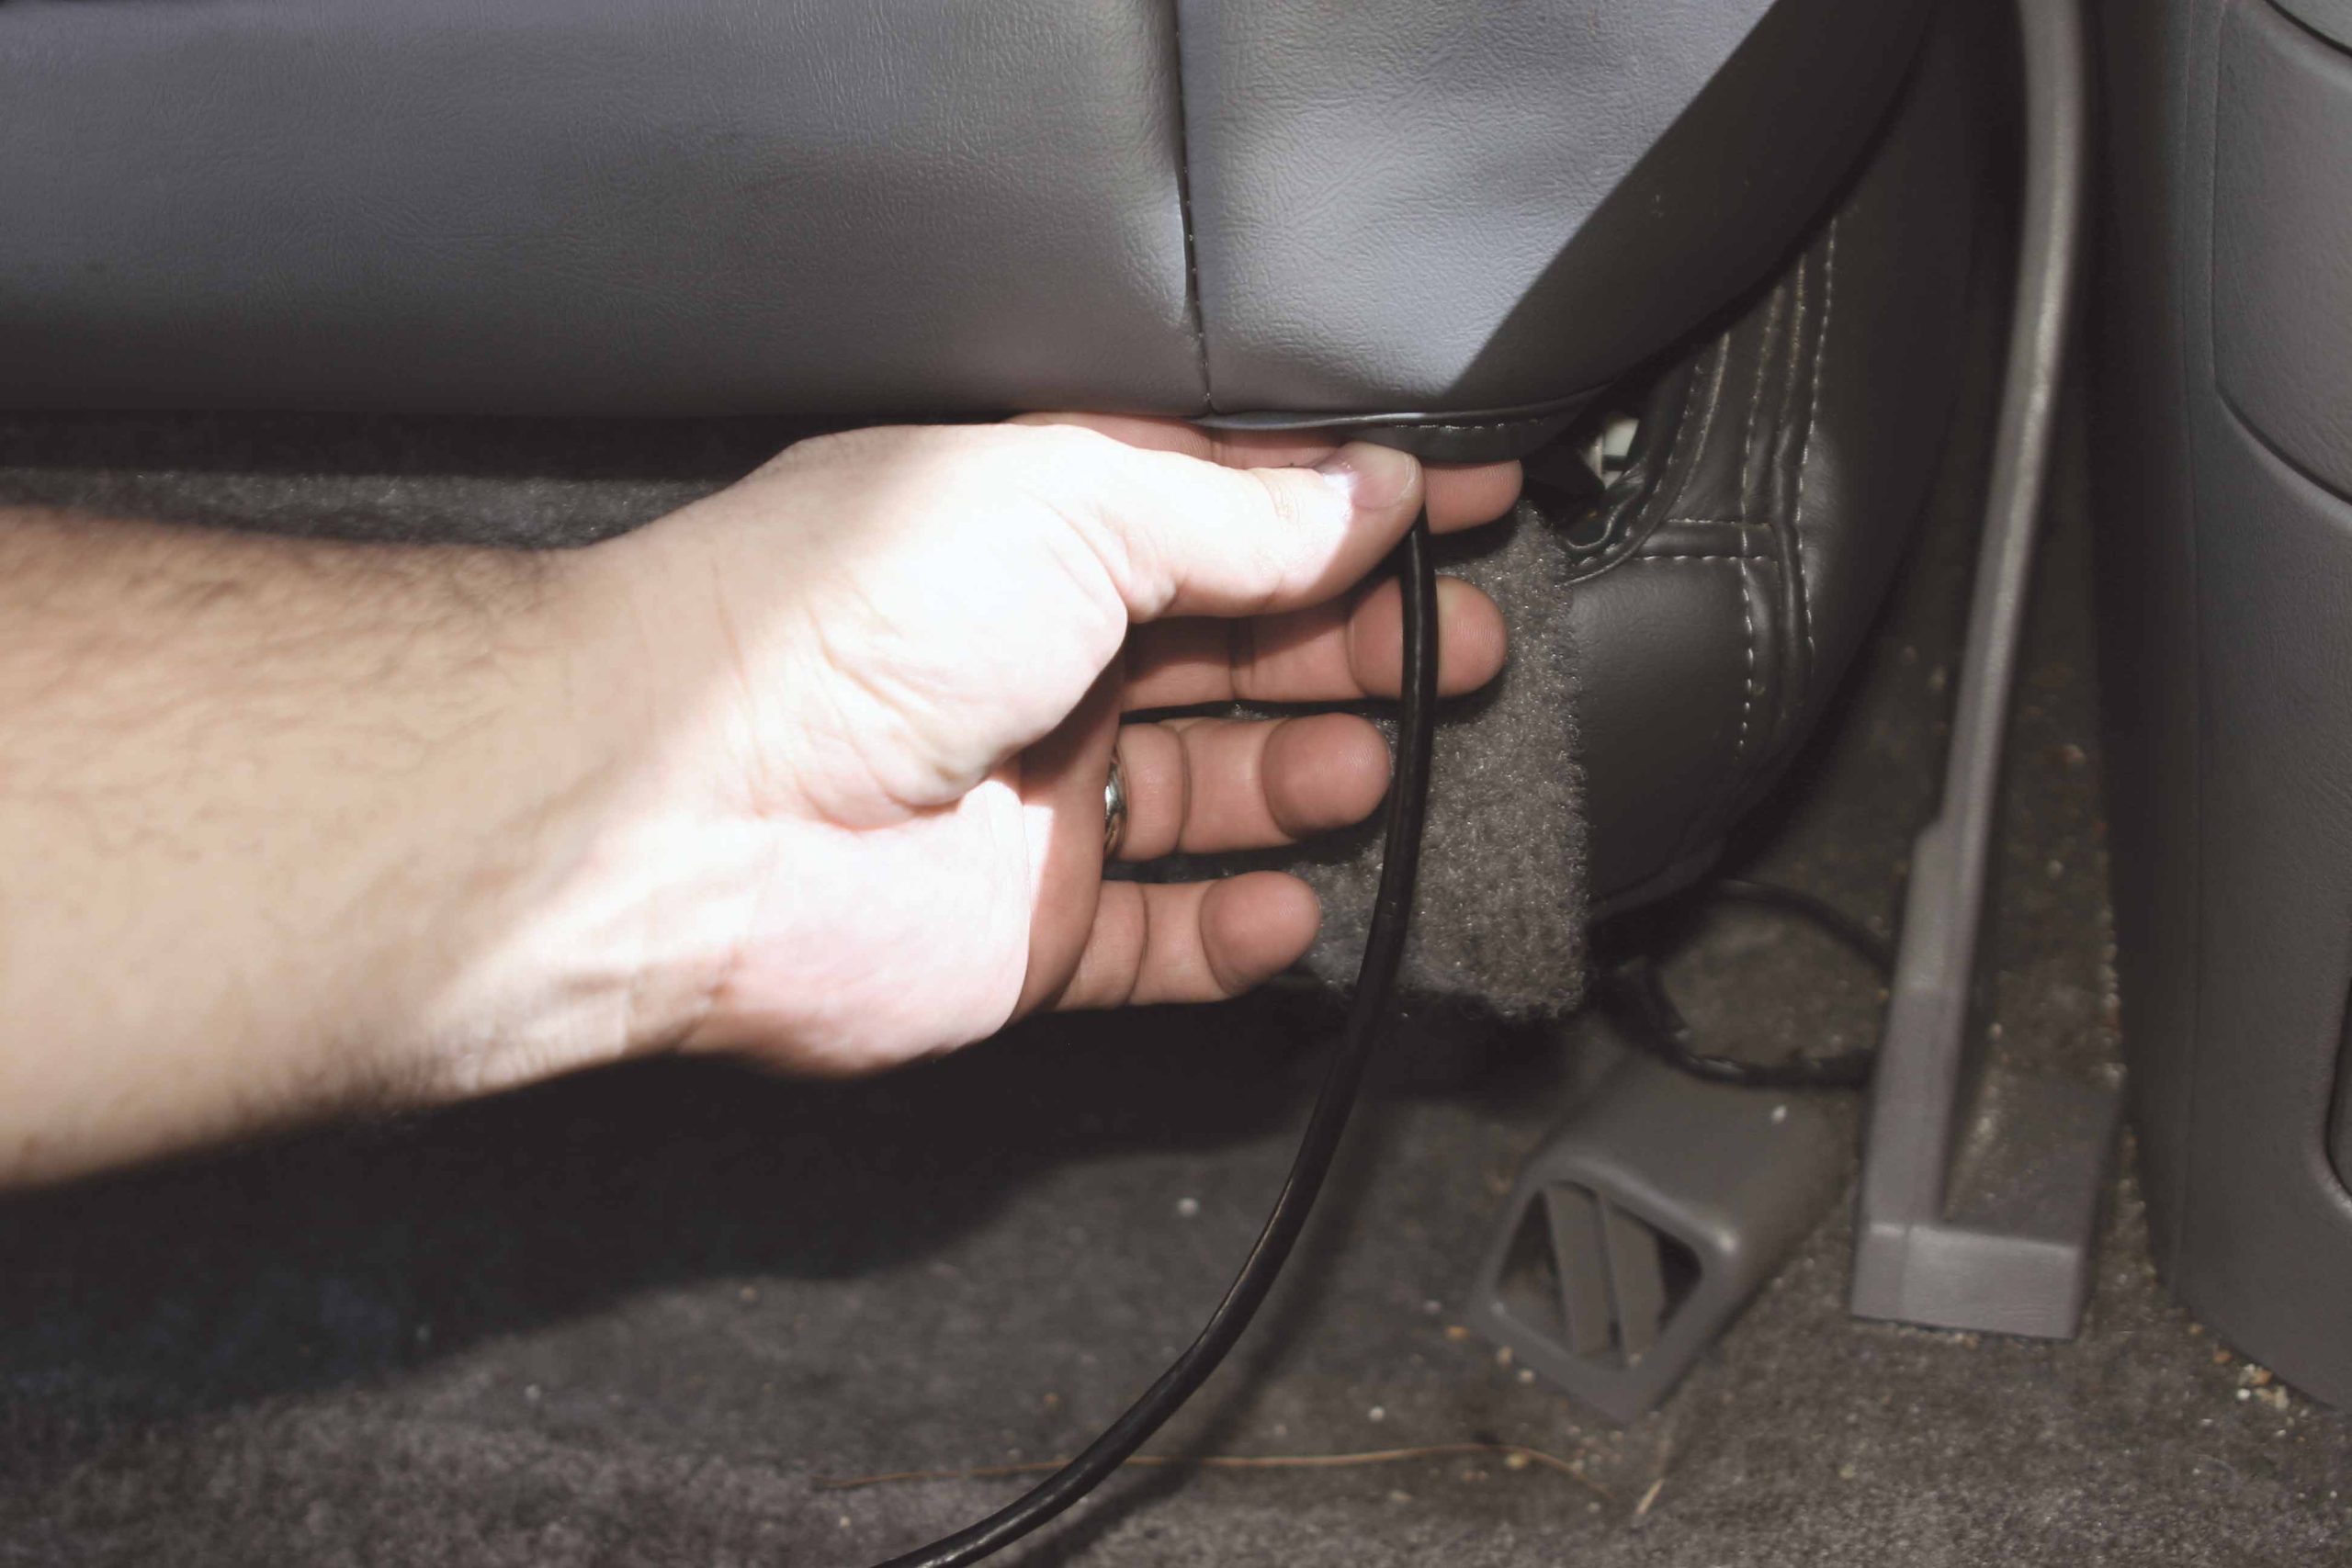
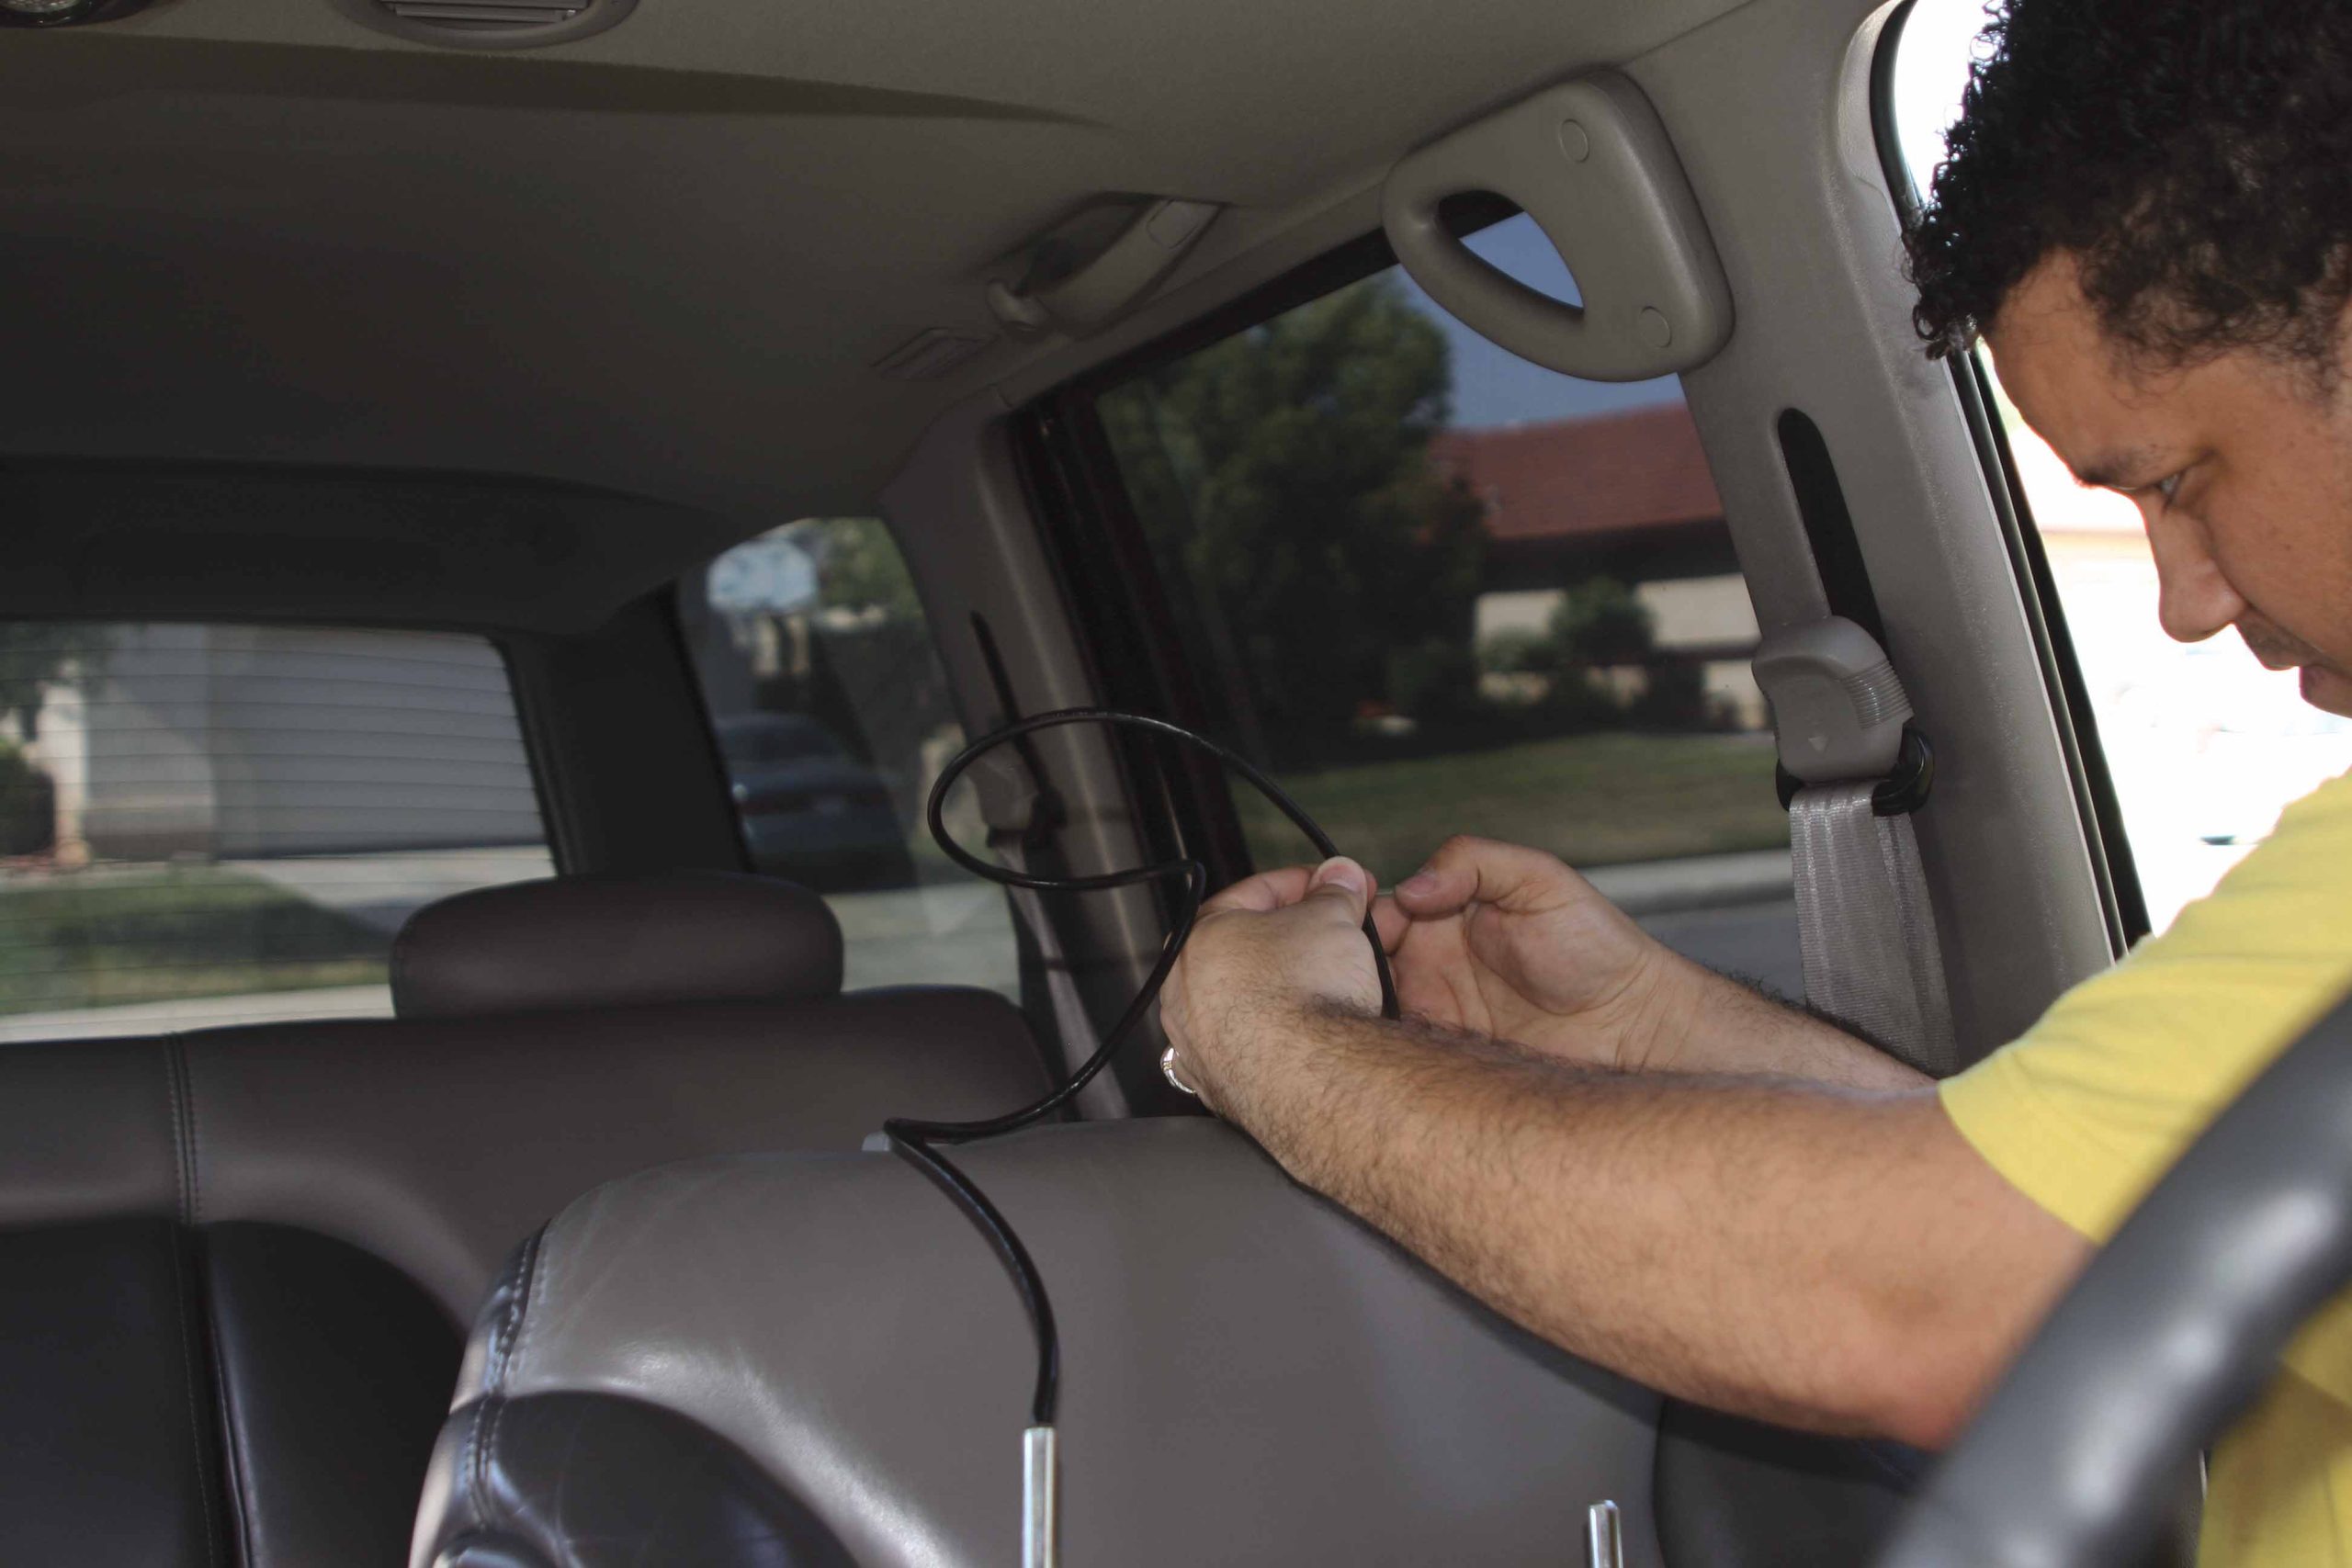
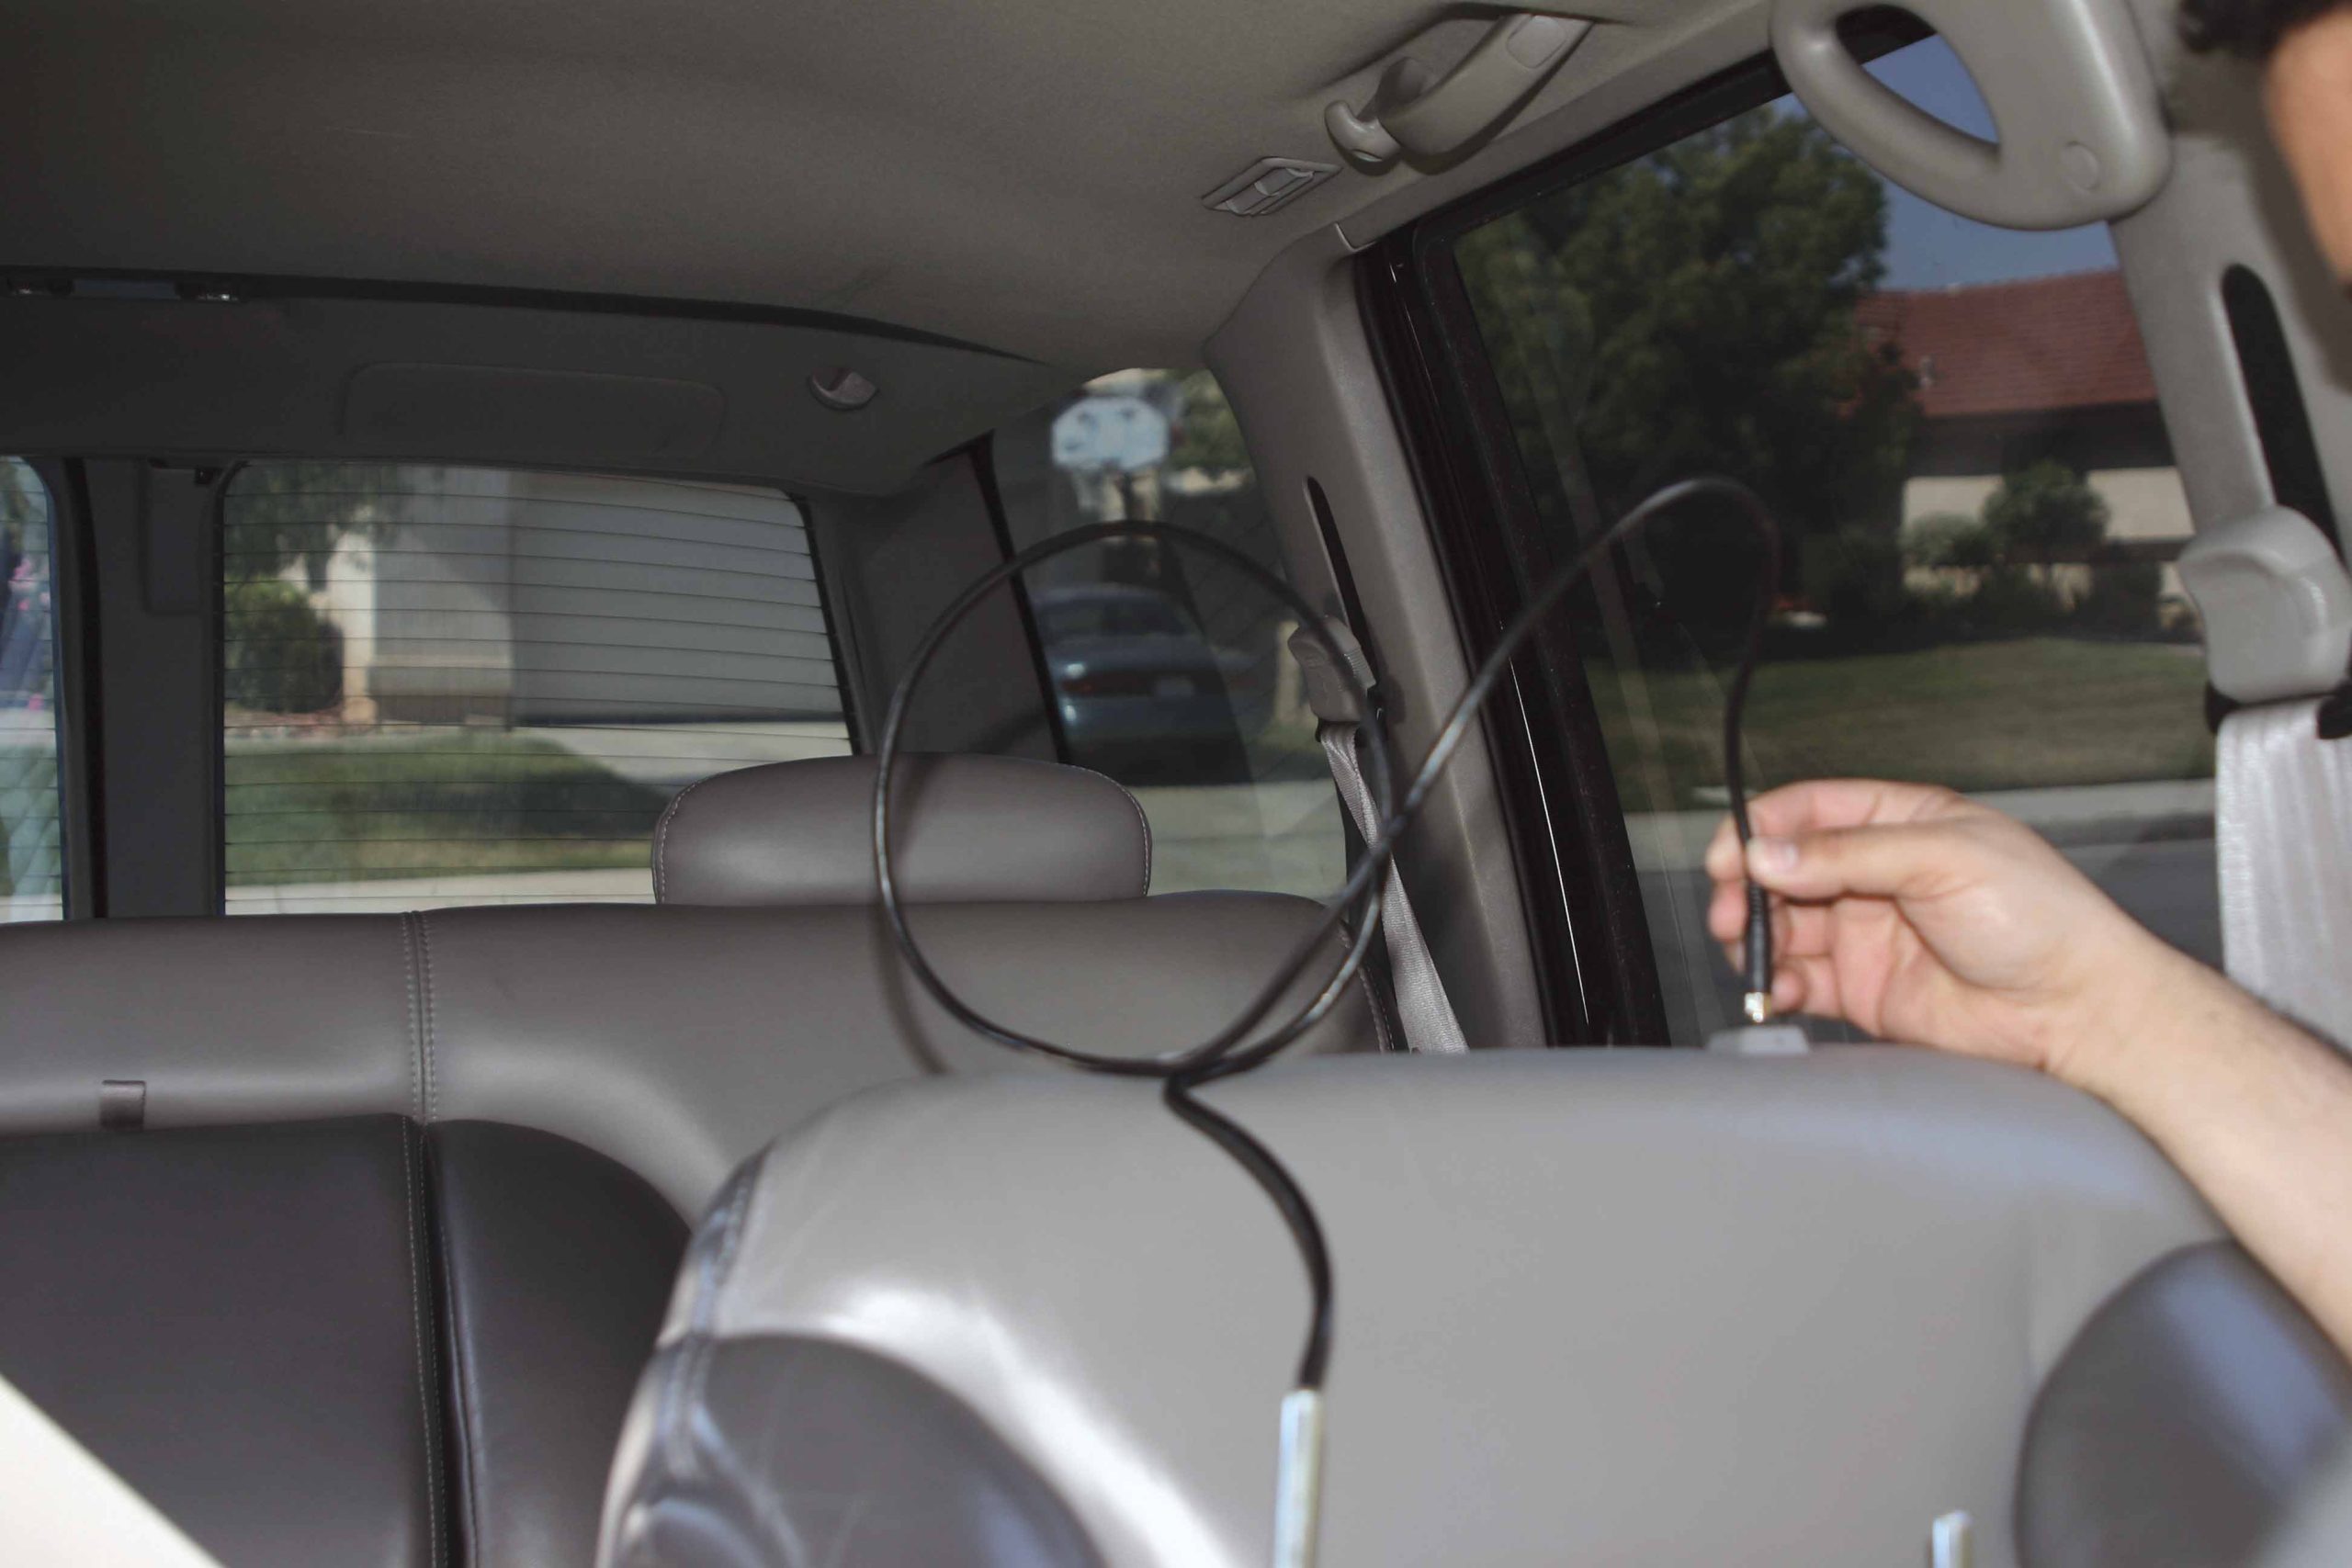
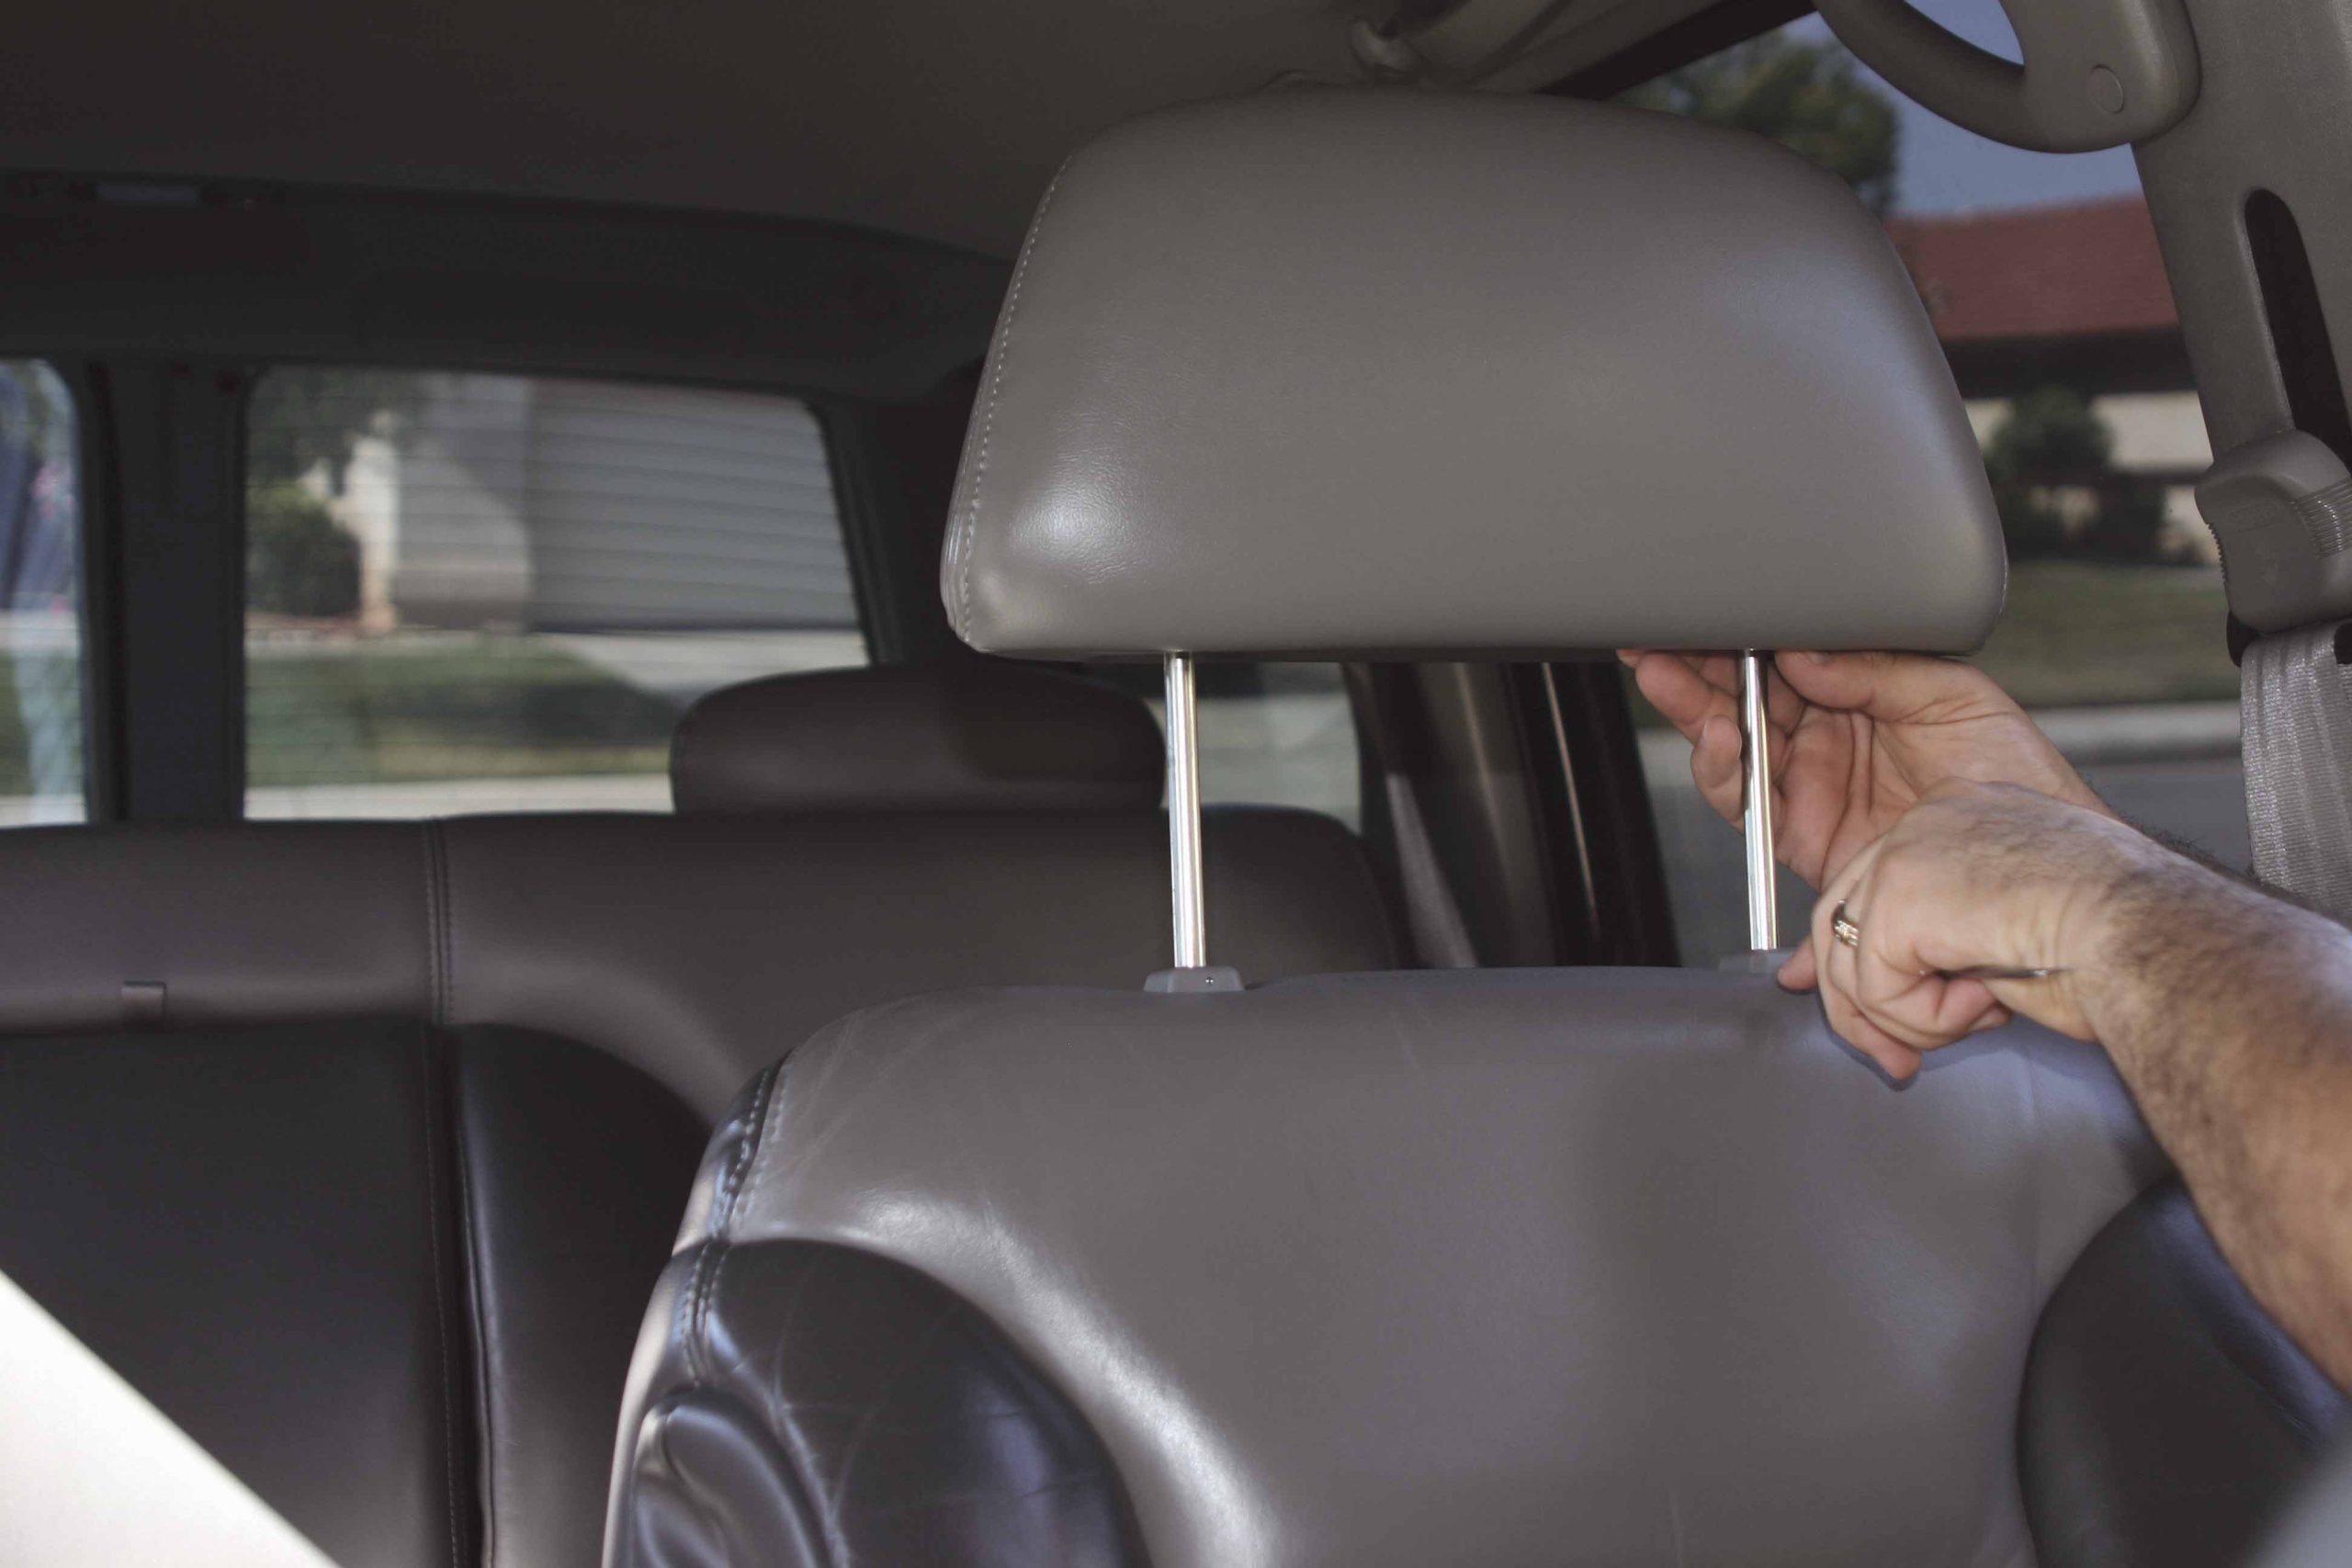
The first step in the installation is to remove the factory headrests. With our Tahoe, this is accomplished by using a pick tool to release the retaining pin on each shaft then simply lifting the headrest out of the seat back. Then you can insert the cables and replacement headrests into the seat and fish the cables to your chosen mounting location for the control module. Finally, after making all the required electrical connections, the system will be ready to go. Follow along with us as we show you how it is done. TB

Captions:

1 To remove the factory headrest, extend them fully, then using a pick tool, alternately depress the retaining pin and slide the post upward on each side until each post is fully removed from the seat. We started with the driverÕs-side headrest. 2-3 Once the factory headrest is removed, insert the Vizualogic cable into the headrest post hole in the seat, and carefully feed the cable into the seat back. Be sure to feed the cable into the proper hole so that the monitor will face rearward. 4 Fish the cable out of the seat back and route it toward the corner of the seat. We were able to easily locate and route the cable inside the driverÕs-side seat. 5 Next, pass the cable from the seat back through the seat base so that it can be routed to the Vizualogic controller box. 6-7 With the cable routed, the new Vizualogic headrest can be carefully installed in the seat. 8-9 The new headrest matches the seat color perfectly, but it is not the same size or shape, it bothered us only until we turned the system on and realized how truly awesome it is to have mobile video. A plastic film protects the 9-inch LCD monitor, and this should be removed following installation. 10 The passenger-side headrest is removed in the same way as the driverÕs side; depress the retaining pins and lift the headrest until it is free. 11-12 Since the passenger-side Vizualogic headrest includes the DVD player, it has two cables that run down each of the headrest shafts. Be sure to install them in the proper position so that the monitor will face rearward when the headrest is installed. You may need to depress the retaining pin to make the connector fit through the post hole. 13 The cables did not cooperate in the passenger seat as well as the driver seat, requiring us open the plastic channel on the bottom of the seat to fish the cables to the correct position. 14 Like the driverÕs side, we routed the cables to the corner of the seat back then through the seat base to route them to the control module. 15-16 Install the headrest by gently pushing the slack cable into the seat and then inserting the headrest posts into the mounting holes. 17 The passenger-side headrest includes a monitor as well as the DVD player that is mounted on the left side of the headrest to allow easy access to the loading slot. 18-19 We determined the best place for the module would be below the factory center console, which was removed before running wires and cables. Electrical connections were made using insulated crimp-type butt connectors and high-end 3M ratcheting crimpers to ensure solid connections. You could solder and use heat-shrink tubing, but do not use the old twist-and-tape wiring method. 20 We used high-quality Kicker audio and video cables to ensure that we have the best picture and sound quality possible. Be sure the cables are plugged into the proper connector and are fully seated. 21 The mini-DIN headrest cables are plugged into their respective harnesses by following the installation instructions. 22 Input and output audio and video cables are then plugged into the proper ports on our Kenwood hideaway unit to fully integrate our audio/video system. 23-24 After determining that our ground location is free of any possible obstructions such as brake lines, we drill a mounting hole for the ground and scrape away the paint on both sides of the floorboard. 25 Next, we ground both the Vizualogic controller and the Kenwood hideaway unit with a nut and bolt. After the ground is tightened, we painted the bottom side to resist rust and corrosion. 26 As shown, the Kenwood hideaway unit is located below the passenger-side rear seat. The wiring is completed and the installation looks clean and simple. The Vizualogic game system plugs directly into the Kenwood unit to allow the video game to be played on any of the three monitors. 27 Gently remove the protective plastic film from each TV after you have verified that the complete system is properly functioning. 28 While the shape and size of the replacement headrests does not match the factory units, the color and texture matches perfectly. But after a little time passes, you overlook that the shape is different. 29 It is easy to insert and eject DVDs and CDs from the slot-load DVD player on the left side of the passenger-side headrest. 30 When the system is done you can watch different video sources on each screen, making for the nearly perfect family road trip.

ARTICLE SOURCES

Kenwood USA Corporation

Dept. TB
P.O. Box 22745
Long Beach, CA 90801
800/536-9663

Kenwood USA Corporation

Dept. TB
P.O. Box 22745
Long Beach, CA 90801
800/536-9663

Vizualogic

Dept. TB
1493 Bentley Dr.
Corona, CA 92879
800/624-7960

Download WordPress Themes
Download Nulled WordPress Themes
Download Premium WordPress Themes Free
Download WordPress Themes Free
download udemy paid course for free
download mobile firmware
Free Download WordPress Themes
udemy paid course free download
Scroll to Top